Root Vegetable Soup


Root Vegetable Soup
When the air is chilly, I am always in the mood for a nice hot bowl of homemade soup. This soup came about as I rummaged through the veggie bin. I had a number of root vegetables, so I decided to make them the focal point. I happened to have homemade chicken stock, but you could easily swap it out for beef, turkey or vegetable stock.
Root vegetables are often associated with fall and winter cooking. Before produce came from around the world, people lived off what they grew locally. In cold climates, that meant in the winter you ate the veggies that you preserved, or that stored well. Root vegetables store well, so they would be a staple.
Most root vegetables take a fair amount of cooking to get tender and add flavor and richness to soups, stews, chowders and more. That is kind of a bonus on a chilly day, when a long cooking dish warms the house, as well.
So here it it- the recipe that was created based on what I happened to have on hand. The end result was really good.
Root Vegetable Soup
3 T. oil
1 onion, chopped
2 large carrots, peeled and sliced
2 small parsnips, peeled and sliced
6 c. stock, I used chicken
2 c. peeled and diced turnips, about 2 medium
2 c. diced potatoes, about 2 medium
1 pint home canned tomatoes, or a (14 oz.) can of diced tomatoes, un-drained
1 medium sweet potato, diced
1/4 c. chopped parsley
2 T. apple cider vinegar
1 T. hot sauce, or to taste
salt and pepper to taste
In soup pot heat the oil and cook the onion until light golden. Add the carrots and parsnips and cook until they are light golden, too. Add the stock, turnips, potatoes and tomatoes and bring to a boil. reduce heat and simmer, covered, until veggies are tender, about 20-30 minutes. Add sweet potatoes and remaining ingredients and cook until sweet potatoes are tender, about 10-15 minutes. Adjust seasonings and serve. Serves 6-8.
Sweet Potato Pound Cake

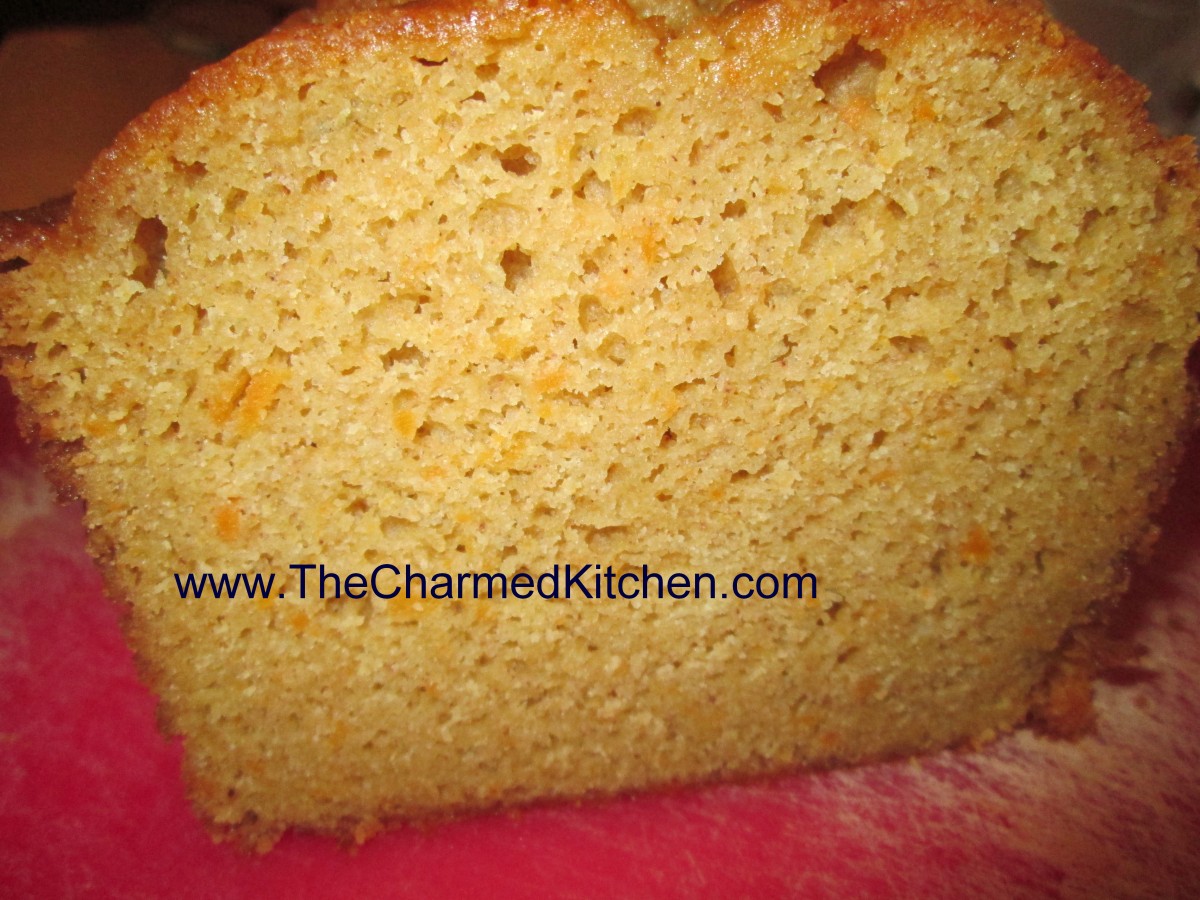
Sweet Potato Pound Cake
I made this cake for a cooking class yesterday. Everyone loved it. No surprises there, it is a wonderful cake. A nice dessert for fall, too.
If the only way you enjoy sweet potatoes is as a side at the holidays, or in pie, it is time to expand your thinking about them. In this recipe, the mashed sweet potatoes add both sweetness and moistness to the finished cake. Great plain, or with a dollop of whipped cream and some fresh berries.
This cake makes a lovely dessert or a nice addition to a brunch menu. Also a nice way to use up leftover mashed sweet potatoes, if you find yourself with leftovers.
I mentioned this recipe to a friend and she was very interested. I will be seeing her over the weekend and think I will make this for our dinner together.
Sweet Potato Pound Cake
1 1/2 c. cake flour*
1/2 t. each baking soda, salt, cinnamon and nutmeg
1/2 c. unsalted butter, room temperature
1/2 c. sour cream, room temperature
1 1/3 c. sugar
3 eggs, room temperature
1/2 c. mashed sweet potato
1 t. vanilla
Preheat oven to 300 degrees. Lightly oil an 8×4-inch loaf pan. Mix flour with next 4 ingredients and set aside. In large mixing bowl beat together butter and sour cream. Beat in sugar and then beat in eggs 1 at a time, beating well after each addition. Stir in mashed sweet potato and vanilla. Stir in dry ingredients and pour batter into prepared pan. Bake until tester comes out clean, about 1 hour and 15 minutes. Cool in pan 30 minutes before loosening cake sides from pan and removing. After cake has cooled wrap in foil and store at room temperature. Serves 8.
* If you don’t have cake flour you can make your own. Simply measure out a cup of all purpose flour and remove 2 tablespoons of the flour. That is now the same as a cup of cake flour OR remove the 2 tablespoons of flour and replace them with 2 tablespoons of cornstarch and sift together to combine. I do the flour/cornstarch mix and keep a batch on hand for when I need it in baking.
Cleaning Leeks


Fresh Leeks
I love to cook with leeks. They have an onion flavor, but with lovely sweetness. Leeks are a wonderful addition to soups, chowders and stews. They also can be fried for a crunchy garnish.
I get asked all the time about how to prep them. Leeks are full of sand and have to be prepped properly, so you don’t get any grit in your food. The edible part is the white and light green parts. The dark green leaves are tasty, but tough. They can be used for making stock.
To get started, peel off the first layer of leaves. There is often a lot of sand there. Cut off the bottom about 1/2 -inch from the root. You should be able to see the rings, or layers, of the leek when you do this. Trim off any dark green parts at the top. You’ll have a trimmed leek at this point.
Now you have to clean it. Cut the leek lengthwise in half. Hold one half at a time under running water while fanning the leaves to dislodge any dirt. Take the rinsed halves and cut them into 1/2-inch slices. You could also cut them into thin strips, if you like.
Place the slices in a large pan or bowl, filled with cold water, and agitate them to loosen any remaining sand. Use your fingers to separate the layers. Make sure the bowl is deep enough for the leeks to float, several inches from the bottom. The leeks will float and the sand and dirt will sink. Let them stand a few minutes and then lift them out of the water to drain. Any grit will be at the bottom of the bowl.
If there is a lot of grit in the bottom of the bowl, you might want to repeat the rinsing process one more time. It might sound like a lot of work, but it really doesn’t take that much time and the leeks will be completely clean. I often buy a lot of leeks when they are on sale, and clean them all at once.Then I saute the cleaned leeks in oil, and freeze for later use.
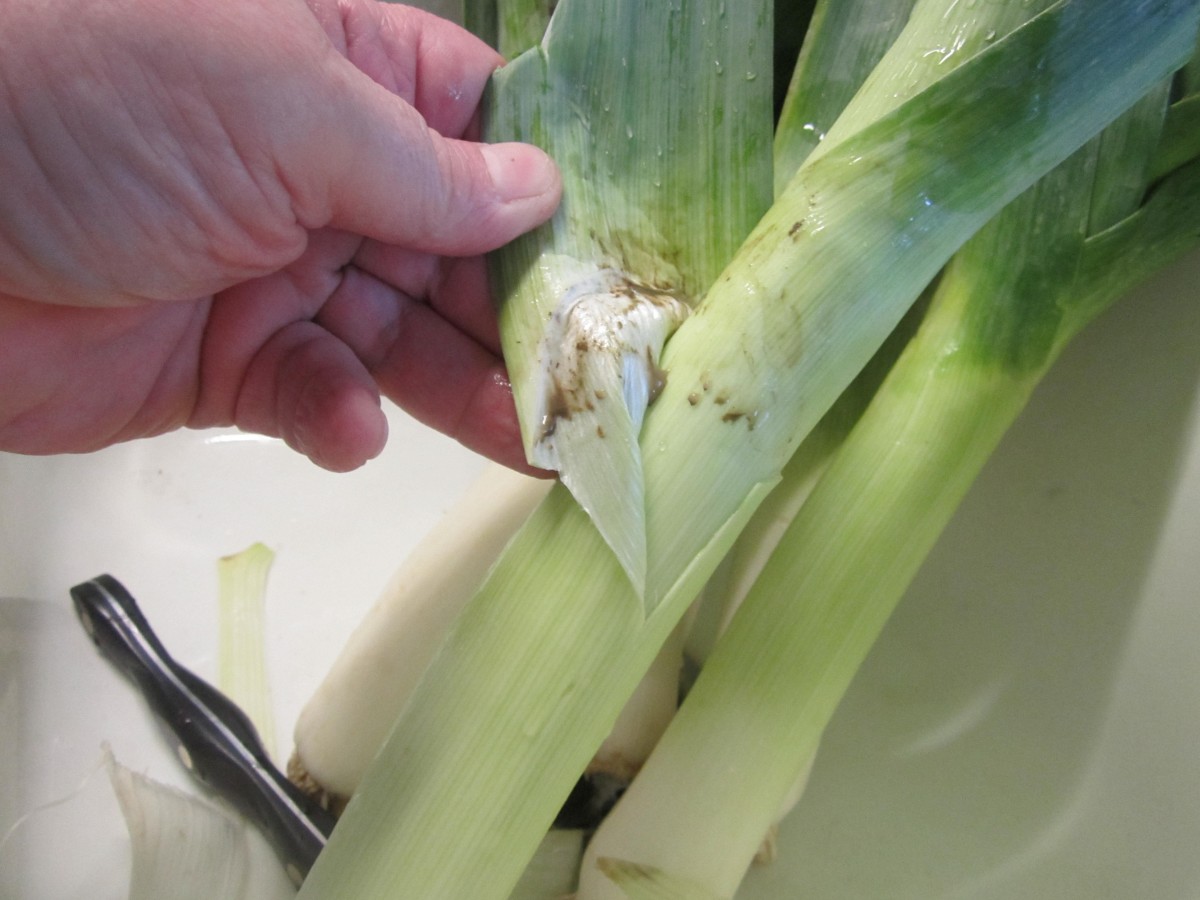
Remove one or 2 outer layer of leaves

Trim off bottom 1/2-inch above the root

Layers should be visible
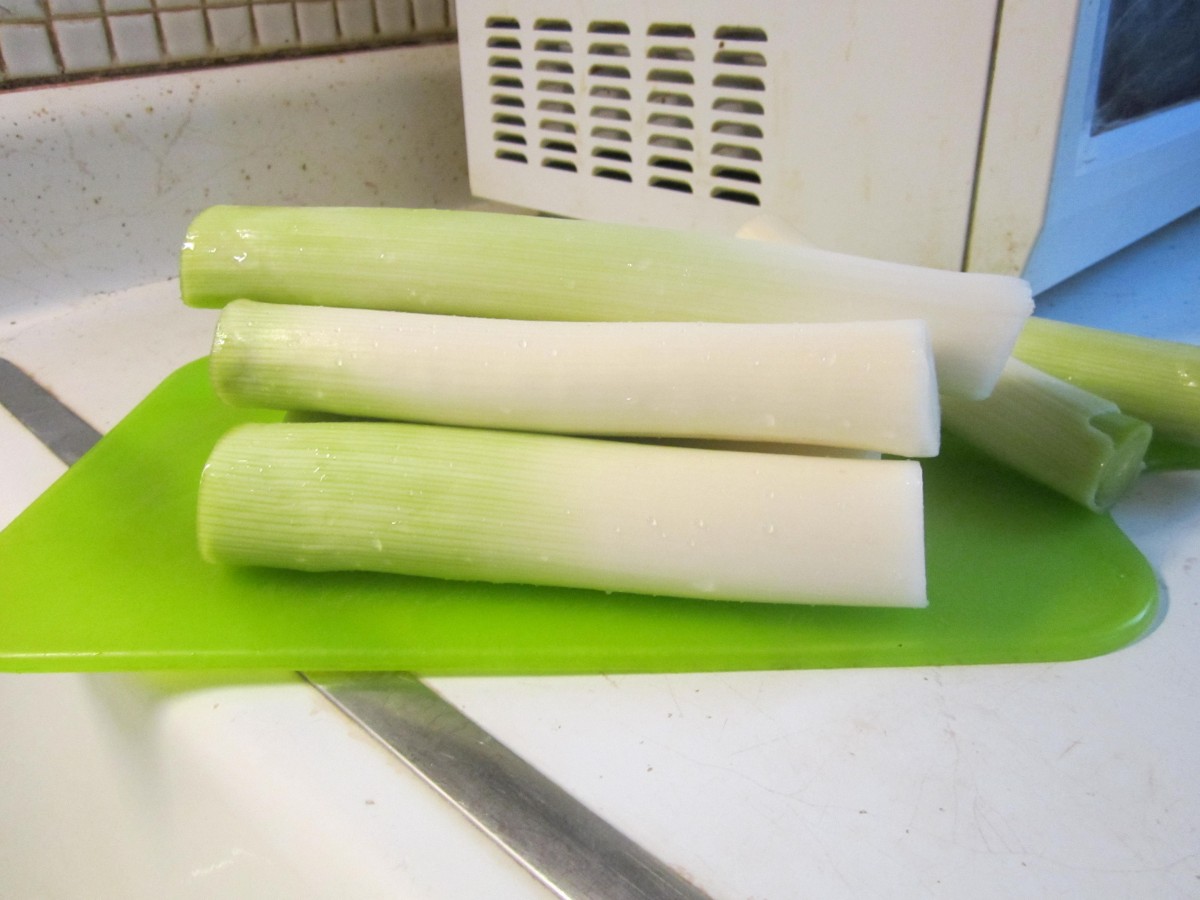
Properly trimmed leeks
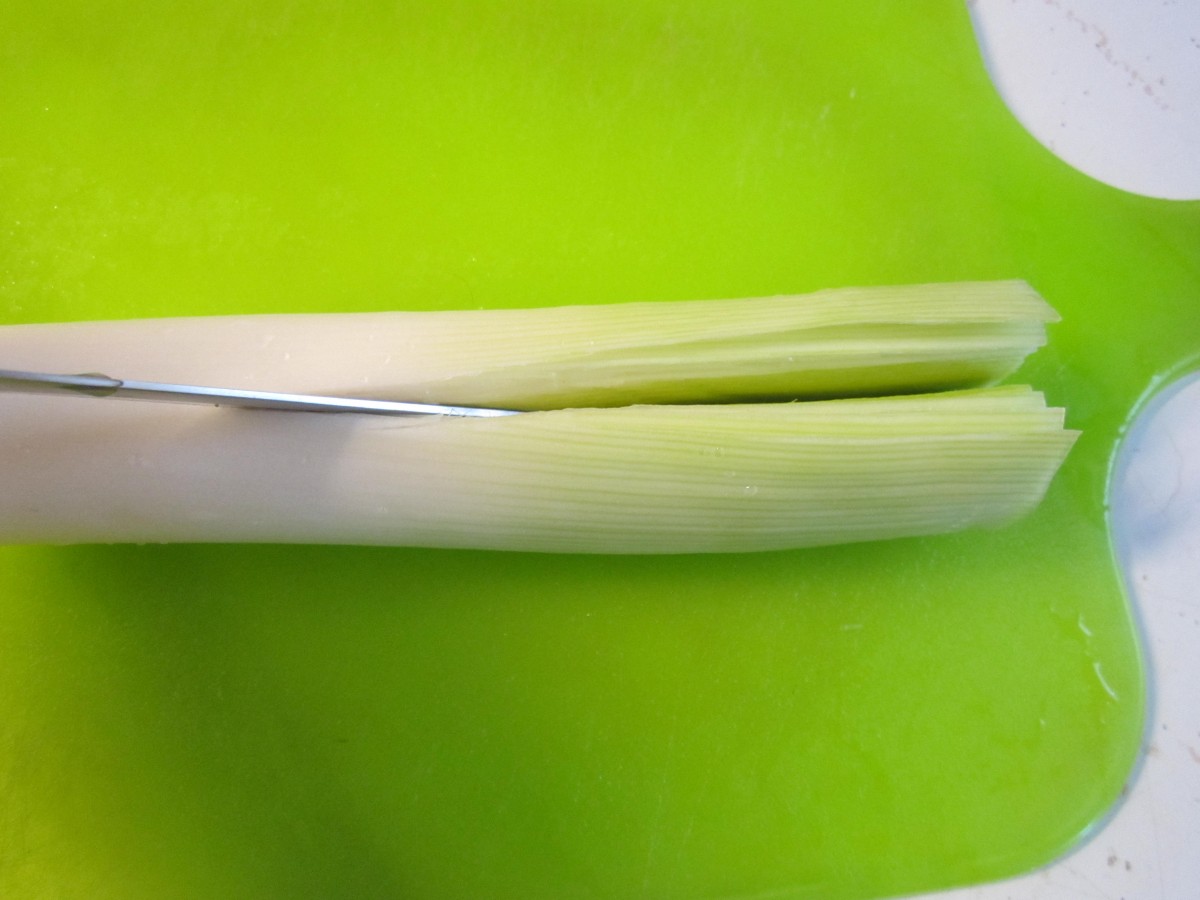
Split leek lengthwise

Rinse under running water while fanning layers
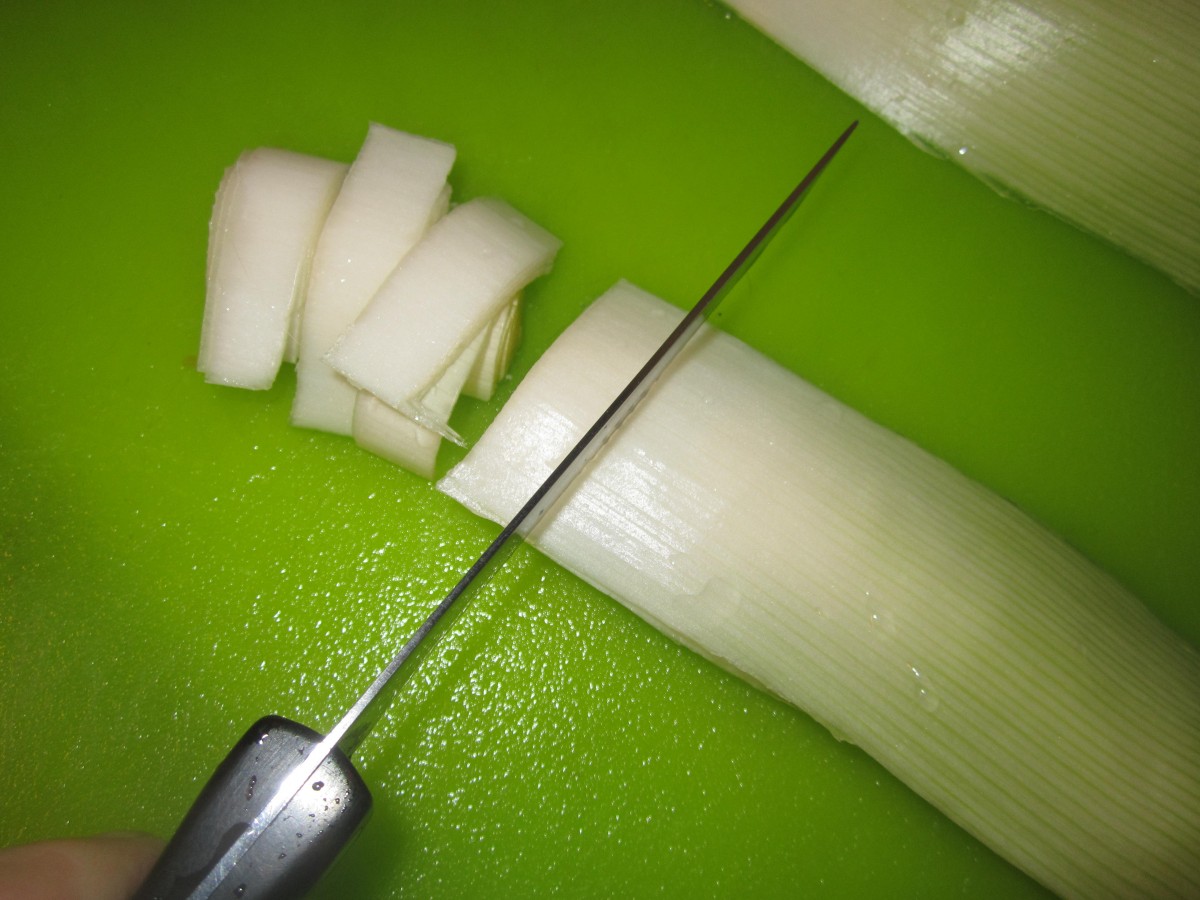
Cut into 1/2-inch slices
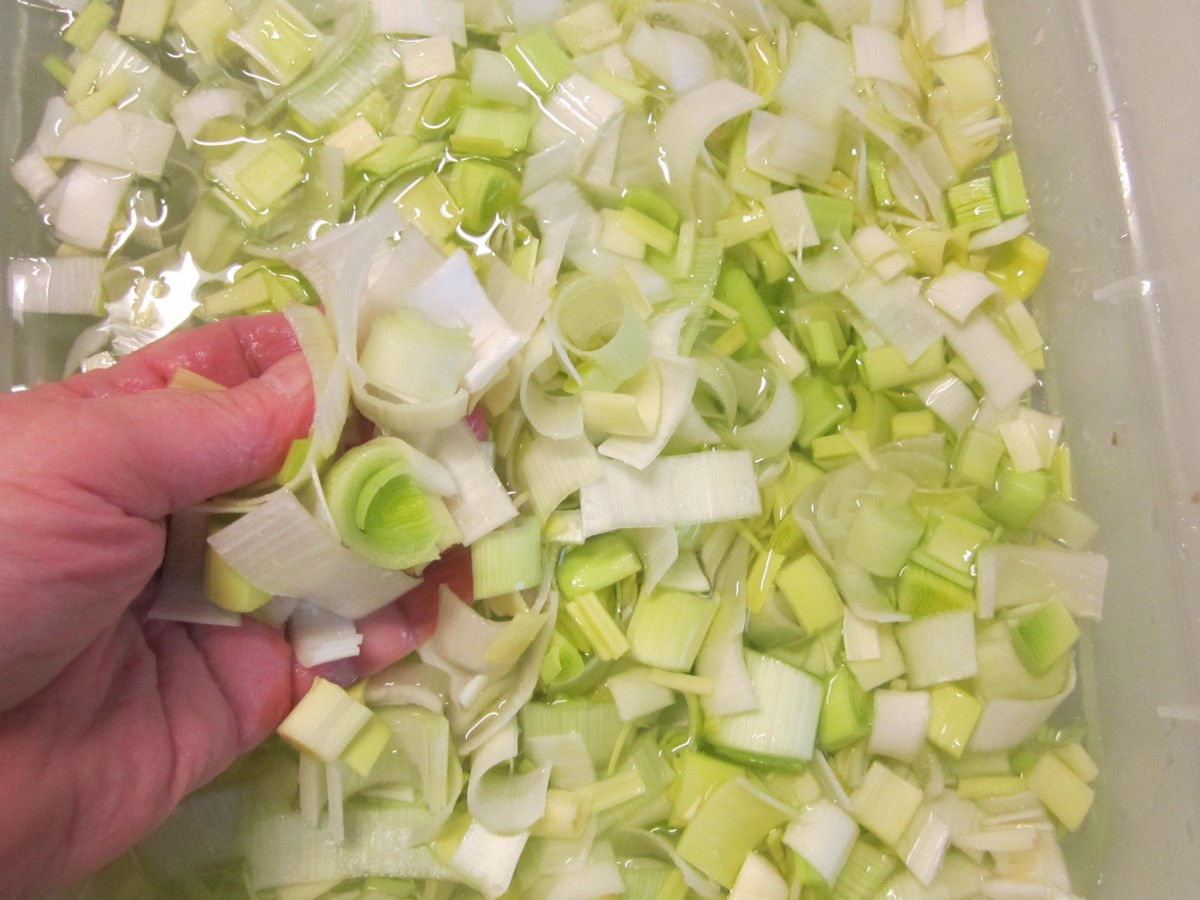
Place in large container of cold water and separate the layers
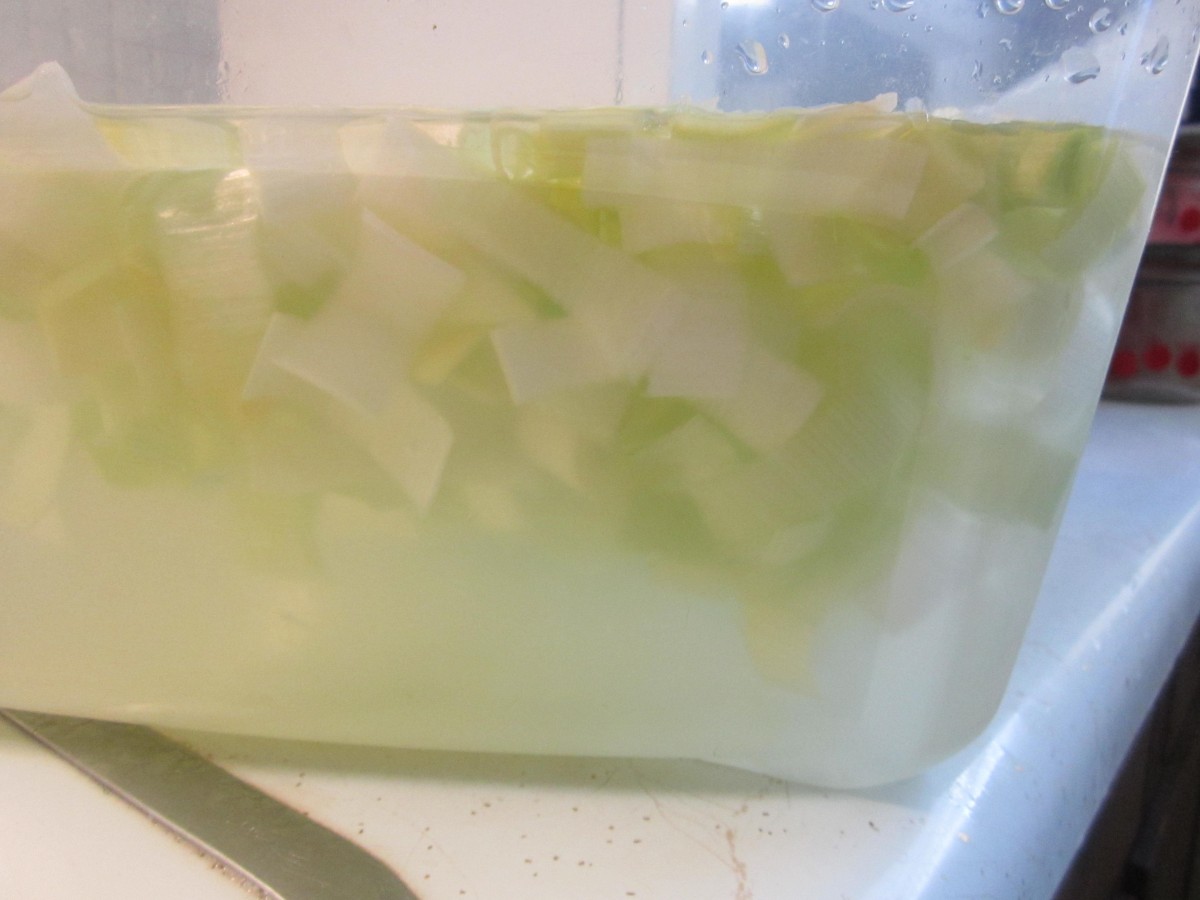
Leeks float- dirt sinks
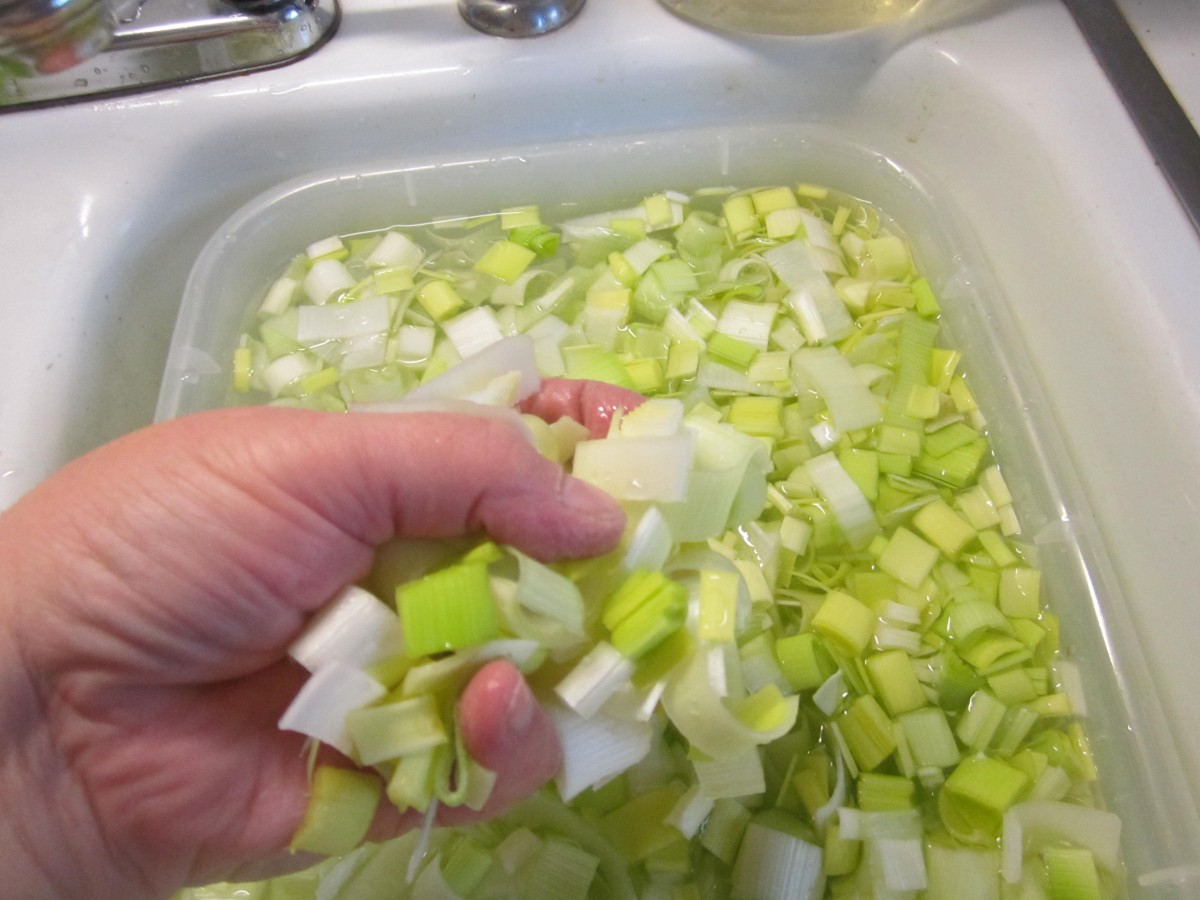
Lift clean leeks out of the water

Clean and ready for cooking
Cinnamon Pear Coffee Cake


Cinnamon Pear Coffee Cake
This pear-studded cake is perfect to have with that morning cup of coffee- or for dessert. The tender cake is topped with chopped pears, cubes of cream cheese, cinnamon sugar and a vanilla glaze. The taste is amazing.
I used Bartlett pears, but any ripe pear would work.
Why should apples get all the attention- right? Don’t get me wrong, I love apples. It’s just that I love pears, too. I think they don’t get used in baking as much as they should.
I will say up front, that this is not the prettiest cake out there. It comes out of the oven kind of lumpy, from all those pears and the tiny cubes of cream cheese. Once you top it with the cinnamon sugar, and later the glaze, it looks a lot better. It is one of the tastiest cakes, though, and isn’t that what’s important?
So if you want to enjoy one of my favorite Autumn fruits in a new way- try making this simple, tasty pear coffee cake. I don’t think you will be disappointed.
Cinnamon Pear Coffee Cake
1 stick (½ cup) butter
1 egg, lightly beaten
1 c. half and half
1 c. all-purpose flour
1 c. sugar
2 t. baking powder
2 t. cinnamon
1 t. vanilla
½ t. salt
2 lbs. pears, about 4 large, cored, peeled and sliced *
8 oz. cream cheese, cut in small pieces
Topping
3 T. cinnamon sugar
Glaze:
½ c. powdered sugar
1-2 T. milk
½ t. vanilla
Preheat oven to 350 degrees. Melt butter and pour into a 9-by-13-inch glass baking dish. In a small bowl, mix together the egg, half and half, flour, sugar, baking powder, cinnamon, vanilla and salt. Pour directly over the butter in the baking dish, but do not stir. Drain pears well. Add the pears, arranging in a single layer as much as possible. Sprinkle cream cheese pieces over fruit. Place in preheated oven and bake for 45 minutes, or until top is golden brown and edges are bubbling. When you remove the cake from the oven, sprinkle with the cinnamon sugar. Set cake aside to cool. Make glaze by combining glaze ingredients. Add just enough milk for a nice consistency for drizzling. Drizzle over cooled cake. Store leftovers in fridge. Serves 12.
* To keep pears from discoloring place in a bowl with 2 cups of water and 2 tablespoons lemon juice
“Pumpkin” Ravioli Soup


“Pumpkin” Ravioli Soup
Fall is the time for cooking with pumpkin and other winter squash. I make plenty of pumpkin bread, pumpkin cake, pumpkin soup, and so on. I often am actually using butternut or Hubbard squash in place of the pumpkin.
This was the case with this soup. I have made it with pumpkin before, but this time I had a butternut squash, so that is what I used. Many winter squash can be used in place of pumpkin in cooking.
After cooking up one of my butternut squash, I was looking for a way to use some of it in a soup. I decided to use the squash as a filling for ravioli, then just put the ravioli in the soup.
I played with the spices and added some butter to the filling, too. It needed that extra bit of fat for flavor. It worked well. I just cooked the ravioli right in the soup, but you could cook and eat the ravioli without soup at all.
You would cook the ravioli in water. Once they are tender, drain and top with the sauce of your choice. I like brown butter with a little sage, but even a red sauce would be nice with these ravioli. Here is the recipe- for both the ravioli and the soup.
“Pumpkin” Ravioli Soup
Ravioli:
24 round won ton/dumpling wrappers
Filling:
1 cup cooked pumpkin or winter squash
2 T. softened butter
1 T. chopped parsley
1 t. paprika
1 t. nutmeg
½ t. garlic powder
Salt and pepper to taste
Pinch of cayenne
Soup:
2 T. oil or butter
2 onions, peeled and sliced
6 c. stock- chicken or veggie
3-4 carrots, peeled and sliced
2-3 c. thinly sliced collard greens
Salt and pepper
Dash of hot sauce
Fresh chopped parsley
Combine ravioli filling. Adjust seasonings. Place a rounded tablespoonful of filling on one of the wrappers. Dampen edges with water and place another wrapper on top. Seal, pressing out as much air as possible. Continue with remaining filling and wrappers- you should have 12 raviolis in all. Set aside while making the soup.
Heat oil or butter in a pot and add the onions. Cook until onions are tender. Add stock and bring to a boil. Add carrots and collards and cook until veggies are tender. Add seasonings and bring soup to a boil. Add the raviolis and let the soup simmer gently until they are cooked- about 4 minutes. Stir a little to keep them from sticking, but gently. They get a lot bigger and are sort of delicate. Transfer gently with a large spoon to soup bowls and ladle over the soup. Serves 4- 6.
Coconut Cracker Snacks


Coconut Cracker Snacks
If you are craving something sweet and pressed for time these are really a fun snack to make. Super easy, they are also a great recipe for kids to make.
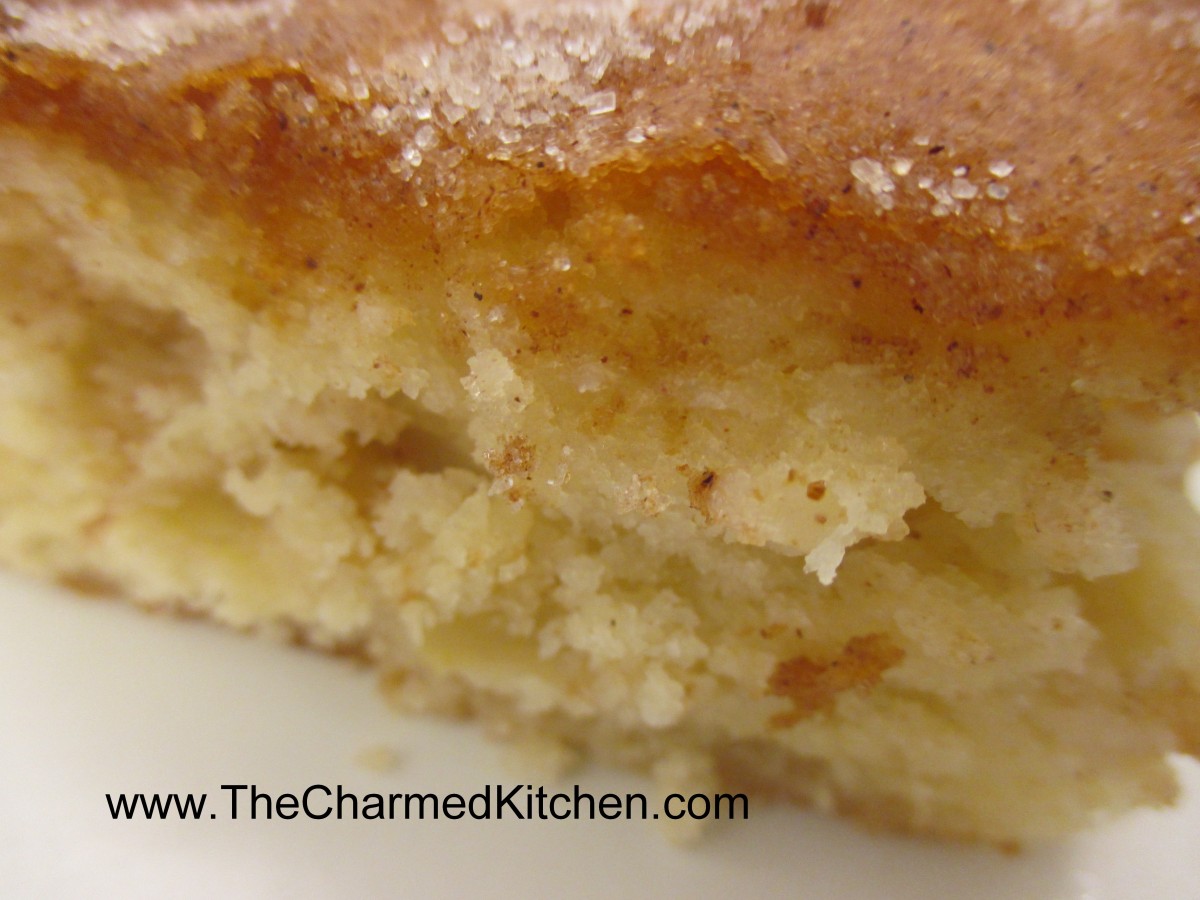
The base is saltine crackers topped with butter, brown sugar, coconut and cinnamon. They are ready in just a few minutes. Sweet and just a little salty, too. You could use chopped nuts in place of the coconut if you prefer.
They are super crunchy, too.
They are great served alone, or with ice cream.
Store in a cool, dry place to keep them crunchy.
Coconut Cracker Snacks
36 saltine crackers
1/3 c. butter
1/3 c. brown sugar
1 c. coconut
1 t. cinnamon
Cover a baking sheet with foil. Place the crackers, touching, side by side in a single layer. Melt butter in microwave, then add sugar and heat together 1 minute on high. Stir butter and sugar mixture together until smooth and drizzle this over the crackers. Combine coconut and cinnamon and then sprinkle the coconut over the crackers. Bake in a 350 degree oven for 8-10 minutes, or until coconut is toasted. Cool on baking sheet on a cooling rack. Crackers will easily break apart from each other. Makes 36.
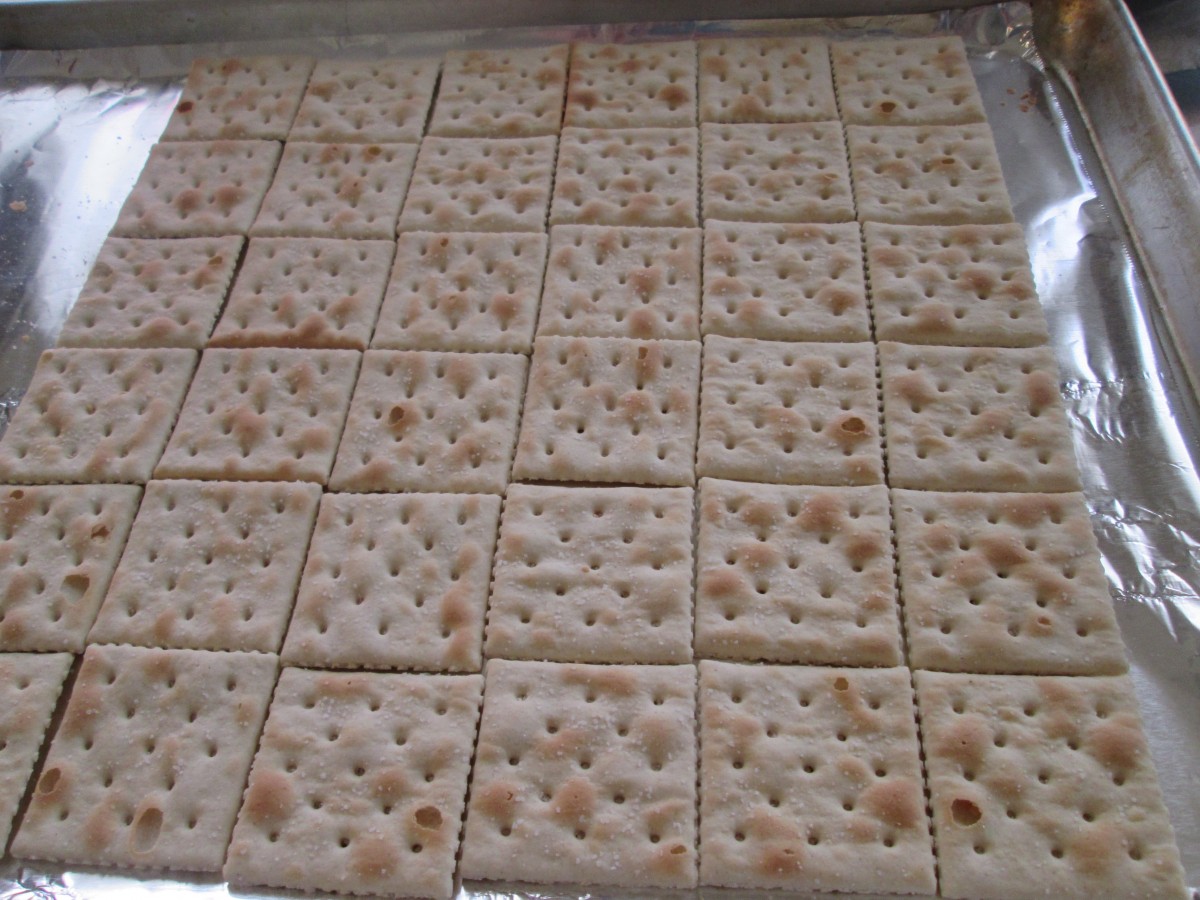
Arrange crackers on a baking sheet
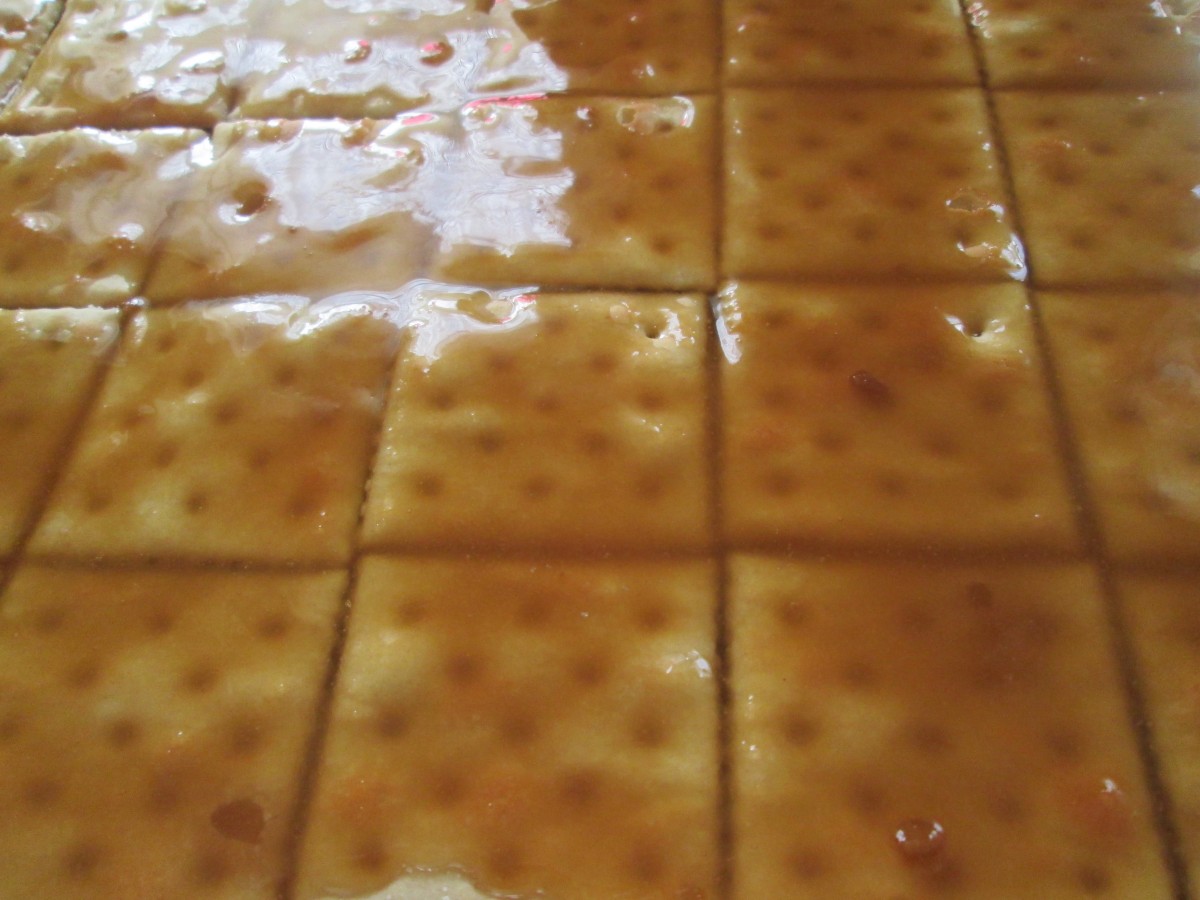
Drizzle crackers with the butter/brown sugar mixture
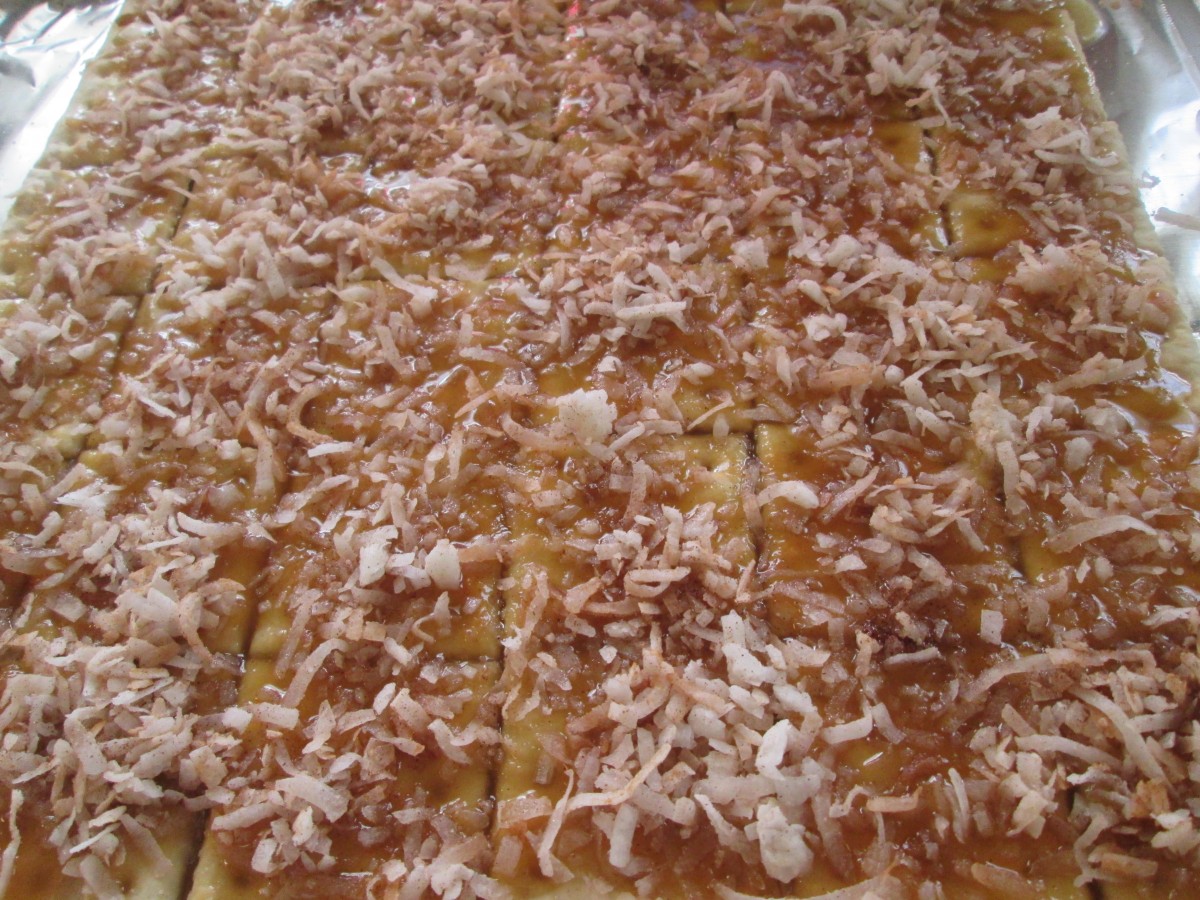
Sprinkle on the coconut and bake until coconut is toasted
My Favorite Apple Cake

My Favorite Apple Cake
I have posted this cake recipe in the past. It truly is my favorite apple cake ever. I had a request for this recipe yesterday, so here it is. Seemed like a nice recipe to publish on the first day of Autumn.
I’ve had this recipe since I was a kid. My Aunt Josie gave it to my mom. Not sure where she got, it but it has been a family favorite since we first made it. She called it Jewish Apple Cake. Not sure why. It’s just what we all called it.
It’s a simple recipe that comes out moist and flavorful. I normally bake it in a 13×9- inch pan but it can be baked in a Bundt pan. While the recipe calls for cinnamon sugar- I sometimes add a little fresh ground nutmeg, too. I also like to use olive oil or even avocado oil in this cake. It gives it a really nice flavor.
Almost any apple works in this recipe- except maybe Red Delicious. Perfect for dessert or even served with brunch. Who am I kidding? I would eat this cake for breakfast.
Note: The batter is really thick. Don’t think you’ve done something wrong.
Jewish Apple Cake
1 c. oil, I use olive oil or avocado oil
4 eggs
1 t. vanilla
1/3 c. orange or lemon juice
Combine above ingredients and set aside.
Mix together the following dry ingredients. Make a well and stir in egg mixture to make a stiff batter.
3 c. flour
2 c. sugar
3 t. baking powder
¼ t. salt
Mix ½ c. sugar and 2 t. cinnamon and set aside
Peel, core and slice 4 medium apples.
Grease a 9×13 inch pan or a Bundt pan. Preheat oven to 350-degrees. Place ½ of batter in prepared pan. Arrange apple slices on batter and sprinkle on ½ of the cinnamon mixture. Pour on remaining batter and sprinkle with remaining sugar mixture.
Bake 1-1 ½ hours. One hour for 13×9-inch pan and 1 1/2 hours for Bundt. I find that sometimes it takes less than an hour- check at 50 minutes.
Broccoli and Cauliflower Salad


Broccoli and Cauliflower Salad
I make broccoli salad pretty often. It is one of my favorites. Sometimes, I like to switch it up a little by adding cauliflower. The result is a salad that has a great mixed of flavors, colors and textures.
The addition of bacon also adds a wonderful smoky flavor. Certainly, feel free to omit the bacon for a vegetarian salad. With or without the bacon, this is a great salad.
Unseasonably warm weather put me in the mood for a salad, over perhaps soup, for dinner last night.
Broccoli and Cauliflower Salad
1 small head cauliflower, trimmed and broken into bite- sized pieces
2 broccoli crowns, cut into bite- sized pieces
1 sweet pepper, seeded and chopped
1 c. shredded cheese- I used a sharp cheddar
8- 10 slices of bacon, cooked and chopped
1/2 cup of mayo – or more according to your taste
salt and pepper to taste
Steam the cauliflower and broccoli until just tender/crisp. About 5 minutes in a microwave steamer, 6 minutes in a conventional steamer. Place in a bowl to cool down then combine with remaining ingredients and stir to combine well. Adjust seasonings, if needed. Serves 6-8.
Classic Apple Galette

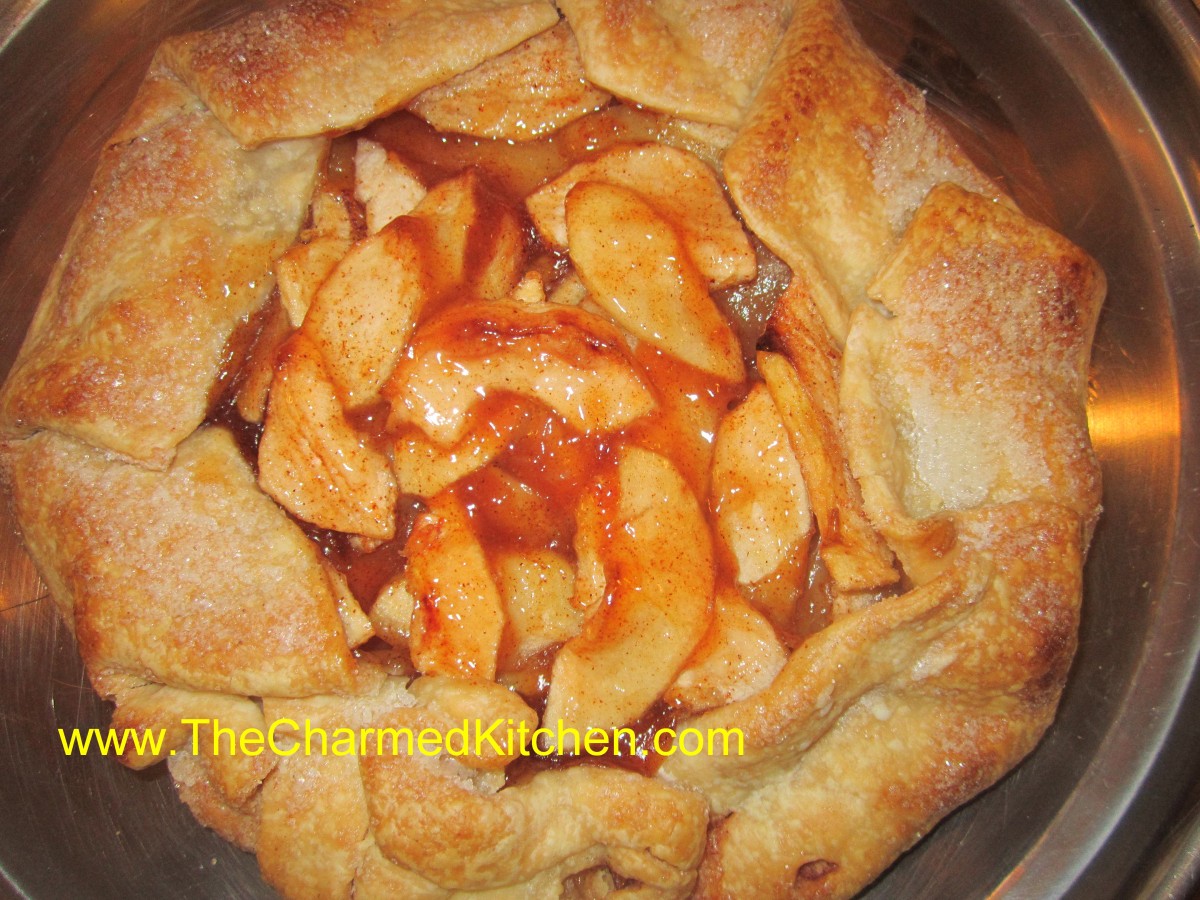
Apple Galette
If you like apple pie, you should like apple galette. A galette is made by rolling out your crust, adding filling and folding up the edges. No pie pan involved.
I actually find a galette easier to make than pie. You don’t have to try to roll out your dough to fit into the pie pan. Nor does you dough have to be rolled into a perfect circle.
That takes a lot of pressure off, if rolling a perfect circle of dough is not your best talent. I must confess to liking its rustic charm. I make my own crust, but you can used purchased crusts, if you prefer.
You can serve your galette with ice cream, whipped cream or dusted with powdered sugar. You can make it with other fruits, as well. Any fruit pie can become a galette.
Apple Galette
Flaky Pie Crust
2 c. flour
1 t. salt
3/4 c. butter, chilled
1 T. cider vinegar
4-5 T. cold water
Combine flour and salt and cut in butter. Toss in vinegar and water 1 tablespoon at a time until dough holds together. Use a fork to toss the ingredients together and as soon as the mixture holds together stop adding water. Makes 2. Chill well before using.
Filling:
5-6 medium apples- I used Jonathan, Gala and Macintosh
2/3 c. sugar- plus extra for sprinkling
3 T. cornstarch
1 T. cinnamon
1 T. Lemon juice, plus extra for treating the apples
1 t. nutmeg
1 t. vanilla
1/2 t. salt
Prepare dough. Roll half the dough into a 10-inch circle- repeat with remaining dough. Keep covered with plastic wrap until ready to use. Peel and core apples and slice thin. Place apples in water with lemon juice added to prevent browning. Drain apple slices well and place in a bowl. Toss with the sugar, cornstarch, lemon juice and seasonings. Place one of the crusts on a baking sheet. Pile half of the prepared apples on the center of the crust. You should have about a 2-inch circle of dough around the edges that is uncovered. Fold edges of the crust up over the apples pressing lightly to hold in place. Sprinkle with a little extra sugar. Repeat with the remaining crust and apples. You will have a little liquid in the bowl from the apple mixture- save that for now. Place the galettes in a preheated 425 degree oven and bake for 15 minutes. Turn down heat to 350 and bake for another 40 minutes or until crust is golden brown. While galettes are baking take the liquid left from the apples and cook in a small saucepan until thickened- it will take a minute or two. This will be used to glaze the galettes. When galettes come out of the oven brush the apples with the thickened glaze. Cool on wire rack. Makes 2.
Fruit Tarts in Hudson


Fruit Tarts
I started teaching after school cooking classes in Hudson. I’ll be working with the same 20 kids for the next month, or so. They are great. This is going to be a lot of fun.
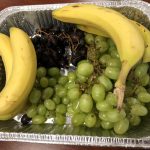
Since it was warm yesterday, I thought it would be fun to cook with fruit.
The kids made fruit smoothies, fruit fondue- with yogurt- and fruit kebobs. BTW, kids really like putting fruit on sticks.
The highlight was when I let them know we were making miniature fruit tarts. We don’t have an oven in the room we use for class, so I baked the tarts shells at home. The kids filled them with pudding and then assorted fruits. They really enjoyed making them. Some didn’t want to eat them, so they could show their families what they had made.
Here are some of the pictures. The fruit tart recipe follows.


Eva’s Fruit Tarts
3 c. flour
1 t. baking powder
½ t. salt
1 c. butter
3 eggs
2 pkts. Yeast
½ c. warm milk
Filling:
Pudding or lemon curd plus assorted fruits for topping the tarts.
In mixing bowl, combine flour with baking powder and salt. Cut butter into flour until mixture looks like coarse crumbs. Set aside. Place eggs in a small bowl and beat until smooth. In small bowl, dissolve yeast in warm milk. Add to egg mixture and stir to combine. Add egg mixture to flour mixture and stir until combined. If mixture is sticky, add a small amount of flour. Roll dough out on floured board. Thinner the better, as this dough will puff some when baked. Cut into circles to fit small tart pans. Press into tart pans. Bake tart shells at 350 for 12-15 minutes, or until light golden brown. Thinner crusts and smaller tarts shells will bake quicker. Remove tart shells from the oven and cool before filling. Spoon a little pudding or lemon curd in each tart, then top with assorted fresh fruits. I like berries and grapes. Makes about 4-5 dozen tiny tart shells.


