Homemade Marshmallows

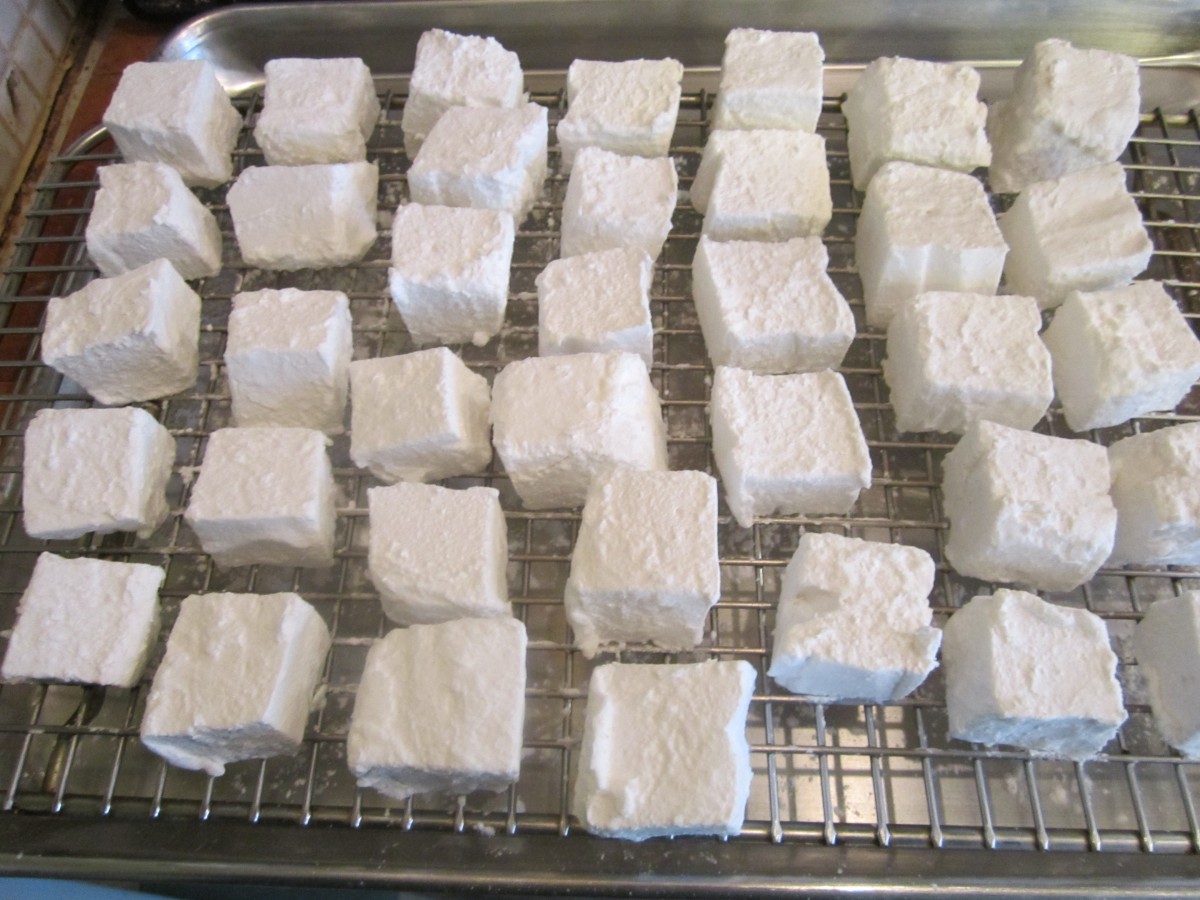
Freshly rolled marshmallows
Since I shared a recipe for homemade hot cocoa yesterday, I thought I would share my recipe for homemade marshmallows today. They are very easy to make, and so much better than store bought.
The recipe is for classic vanilla marshmallows, but you can add different flavors and even colors, if you like. How fun to enjoy a mug of hot cocoa topped with homemade marshmallows. Maybe even make a mint version for your cocoa.
I’ve used this recipe for ages. I like that it is super easy, and still gives you quality marshmallows. I’ve seen more complicated versions- but why make life harder than it already is?
Marshmallows
1/2 c. cornstarch
1/2 c. powdered sugar
small amount of butter
2 envelopes unflavored gelatin, or 6 sheets of gelatin*
1/2 c. granulated sugar
1/3 c. water
2/3 c. corn syrup
1/2 t. vanilla
Combine cornstarch and powdered sugar in a small bowl. Butter an 8x8x2 inch-baking pan. Sprinkle with some of the cornstarch mixture. Reserve the rest of the mixture for use later on. Combine the gelatin, granulated sugar and water in a small saucepan and cook over low heat, stirring constantly until gelatin is dissolved.** Pour gelatin mixture into a large bowl, adding the corn syrup and vanilla. Beat with an electric mixer on high speed for 15 minutes. Be precise on the timing. The mixture will be thick and fluffy, marshmallow cream, actually. Pour mixture into the prepared pan, spread evenly and refrigerate overnight. The next day, sift some of the reserved cornstarch mixture over the marshmallows. Sprinkle some more of the coating mixture on a work surface and turn the marshmallow out onto the prepared surface. Cut the marshmallows into 1-inch squares, coating as you go. The marshmallows are very sticky until completely coated. Allow to dry on a rack. Store in an airtight container for up to 3 weeks. Makes about 4 dozen candies.
You can swap out flavorings- using maybe mint or lemon in place of the vanilla. You can also add a few drops of food coloring, if you like. Oh, and when you are at the rolling the pieces around in the cornstarch and powdered sugar stage of the process- don’t wear black. You’ll thank me later for that.
* Note: 3 sheets of sheet gelatin= one packet (1 tablespoon) of powdered gelatin.
** Note: If you are using sheet gelatin place it in the pan with COLD water and stir until dissolved. Then add the sugar and just cook, over medium-low heat until just warm, stirring often. Don’t let the mixture get too hot or the gelatin will not work.
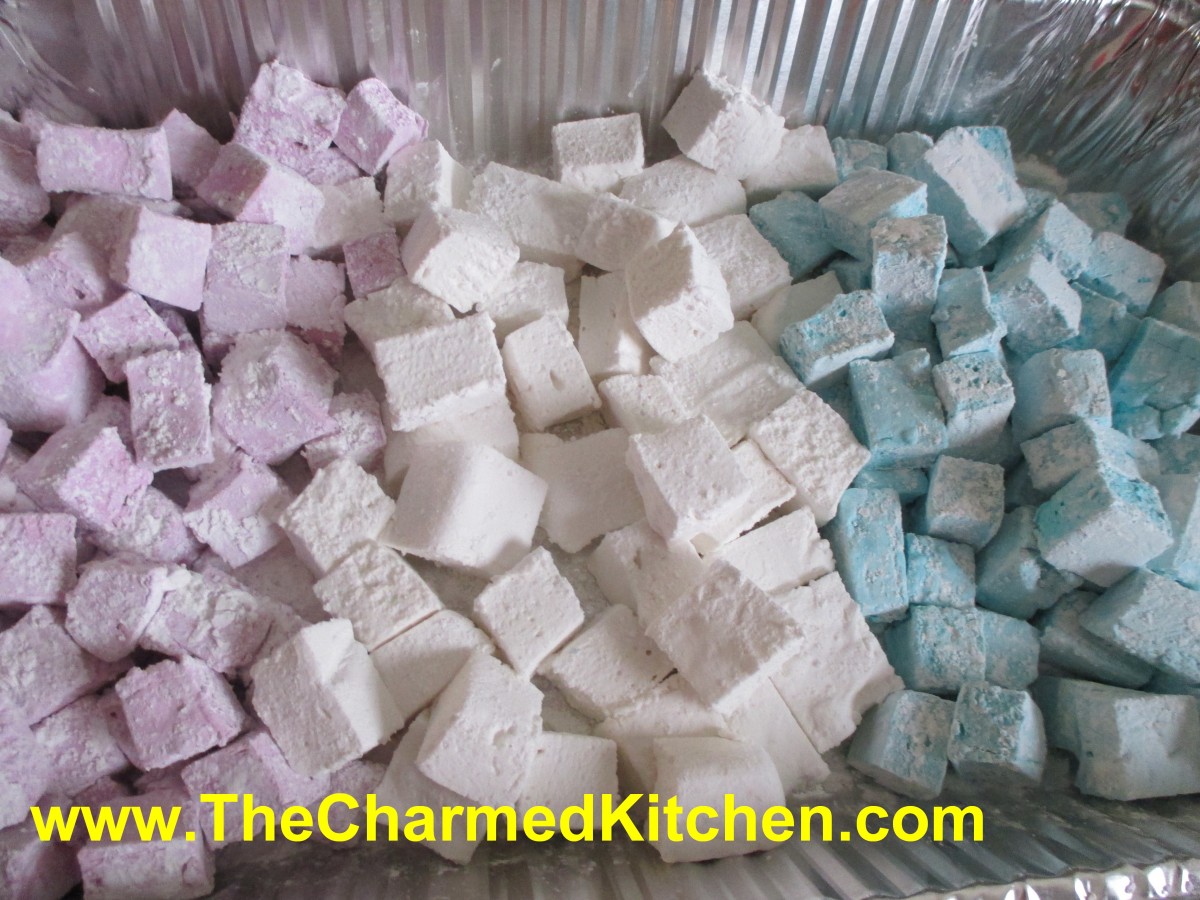
Rainbow Marshmallows
Homemade Hot Cocoa Mix

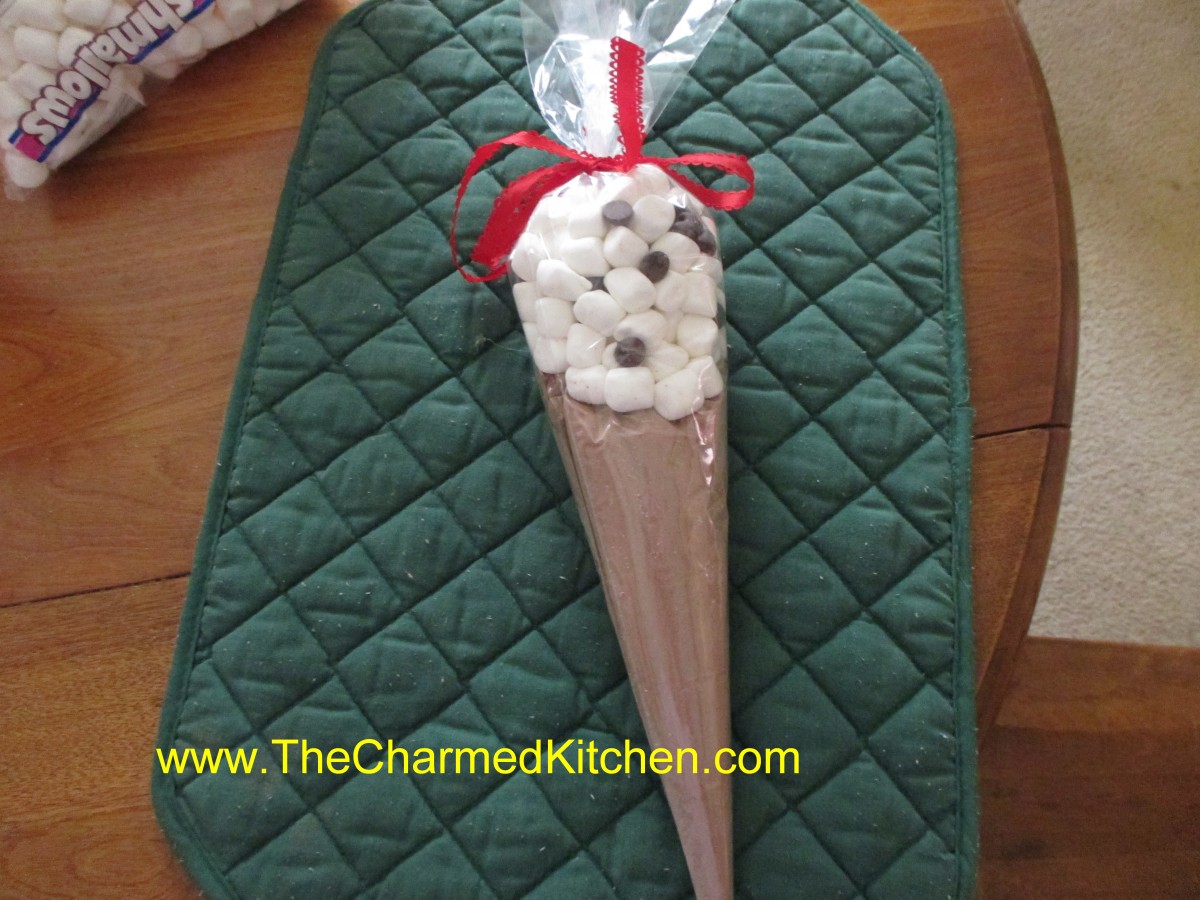
Hot Cocoa Ice Cream Cone
I am always looking for homemade gift ideas for the holidays. I really like gifts that both adults and kids can make. This one is just a simple way to package homemade hot cocoa mix to make it special. We made these in a holiday gift class the other night. People really enjoyed making them.
You start with hot cocoa mix- recipe follows. Then you get these cone shaped bags. I use a 12-inch size and a 17-inch size. I buy my online but they are available in some craft and candy making stores. Just put about 1 cup of the hot cocoa mix in the smaller cone shaped bag. Fold the top down and tape it shut. Now place the smaller bag inside the larger bag. Add about a cup of mini marshmallows mixed with some chocolate chips. The chips are optional. Tie shut with a ribbon. It ends up looking (sort of) like an ice cream cone. I add a label that says “Hot Cocoa for Two” with directions that say, “Divide hot cocoa mix between two large mugs. Fill with a cup of boiling water in each. Stir and top with the marshmallows”. You can make whatever label you like. A quick and simple gift. You could also include mugs with the gift. This is a great idea for kids to make for grandparents, teachers, etc.
Here is the recipe for the hot cocoa mix.
Hot Cocoa Mix
3 c. nonfat dry milk
1 c. cocoa
1 c. sugar
1/4 t. salt
1 c. mini marshmallows (optional)
In large bowl, mix all ingredients well. I like to sift the ingredients in because it powders the milk even finer than the way it comes. Store in an airtight jar and use within 6 months. To use add 5 tablespoonfuls to 8 ounces boiling water. Variation, flavor with cinnamon, instant coffee, cayenne pepper or even dried orange peel.
Cinnamon Ornaments

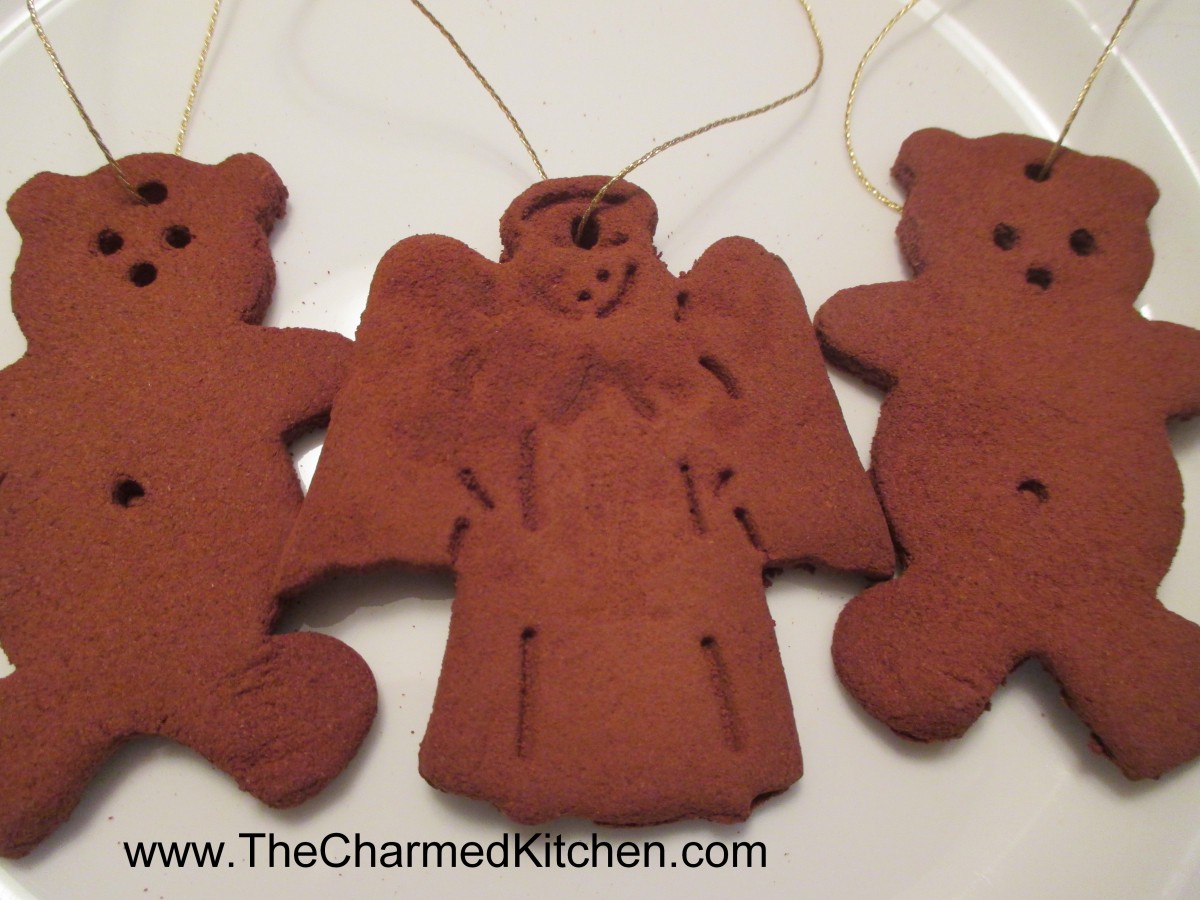
Cinnamon Ornaments
If you want a simple gift/craft for the holidays, it does not get much easier than cinnamon ornaments. All you need are cinnamon, applesauce, a rolling pin and cookie cutters. There is no cooking involved, or special equipment.
You combine the cinnamon and applesauce to make a sort of dough. You roll out the dough and cut it into shapes. Then, you just need to let the ornaments dry and harden. Allow a few days for drying. If you put them in a dehydrator, they are dry in a few hours. The house smells really good while they are drying. Even after they are dried, they continue to have that wonderful cinnamon fragrance. They can be used as ornaments on a tree or simply hung to freshen a room. This is a fun gift for kids to make, too. Here are the directions.
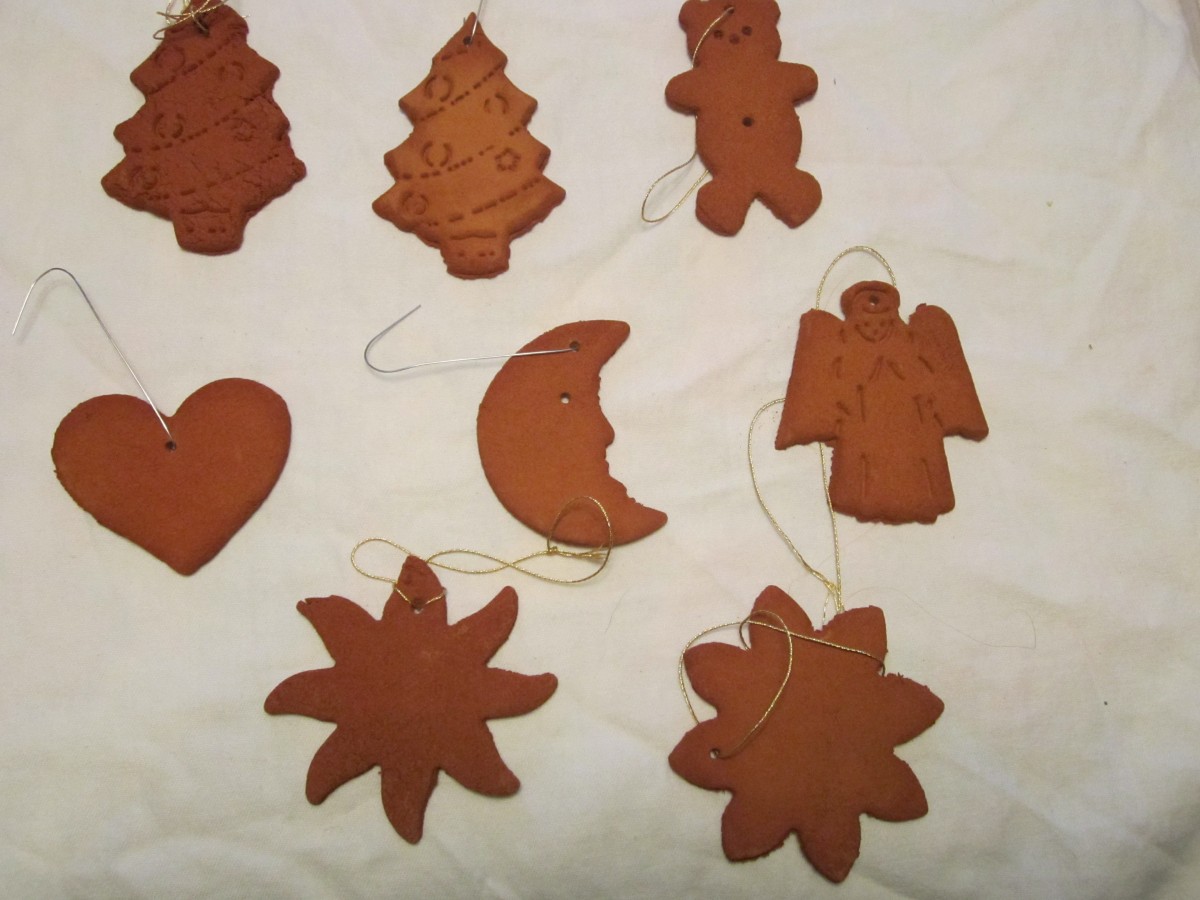
Ornament assortment
Cinnamon Ornaments
These are for decorating, not for eating!
3/4 c. applesauce
1 bottle (4.12 oz.) cinnamon
Mix applesauce and cinnamon and knead to form a stiff dough. Roll out to 1/4-inch thickness and cut out with cookie cutters. Make hole in top of ornament with skewer or straw and carefully transfer to rack to dry. Let dry a couple of days, turning occasionally. Hang dried ornaments with decorative thread or ribbon. Makes about 12-15.
Two Trees and a Roll of Duct Tape

 I have some really fun childhood holiday memories. Perhaps the most fun was getting our own Christmas tree. What really made the trip fun was going with Uncle Frank.
Uncle Frank was my dad’s baby brother. He was always so much fun. He had a great sense of humor, too.
The one thing Uncle Frank never seemed to have- at least at tree cutting time- was a car with a working heater. I am not sure if he and my dad thought it was more of an adventure that way. I mean, we could have gone in my family’s car- but we never did.
One year in particular, will always stand out for me. There were 7 of us in a Volkswagen beetle. Two adults, my Dad and Uncle Frank, three of my cousins, my brother and me. Of course, no heater in the car. It was also a very snowy December, so the car was cold.
We were all bundled up as we headed out to get a couple of Christmas trees. There is a small space behind the back seat in an old Beetle. That is where my cousin Laurie and I sat. My brother and two cousins shared the back seat. Dad and Uncle Frank sat in front.
When we got to the tree farm, the dads pretty much left us kids on our own. There was a lot of snow on the ground and I remember sliding down a snowy hill, over and over. When we were called back to the car- we were all pretty cold- and our boots were full of snow.
I don’t want you to think that my Dad and Uncle Frank were not good parents or reckless. They were the best- and so much fun. They insisted we all take off out wet boots when we got in the car. Everyone tossed them in the area in back were Laurie and I had been sitting. We joined the others in the back seat. My cousin Gary sat on my Dad’s lap. Well, that was after my Dad and Uncle Frank got in the car.
See, there was this problem with the trees. For some reason they didn’t have enough rope- or any rope. I don’t really remember that part.
I just know, that at some point, with the kids shivering in the car- we were now wet and had removed our boots- My Uncle Frank and my father started taping two pine trees to a VW Bug. I remember them passing the tape over and under the car, making sure the trees were not going anywhere.
I feel the need to point out, that the rounded top of the beetle was not an easy place to secure a tree- or two. So the trees ended up more on the sides of the car, taped securely into place. I learned at a very early age, the value of duct tape. The guys had to come in through open windows, since the trees were pretty much blocking the doors.
When my Uncle started up the car- the windows were all frosted up. The heater did not work, so no defroster for the windows. He used his thumbnail to scratch off an area of ice about the size of a silver dollar. He closed one eye, put the open eye up to the little circle he had cleared on the windshield and declared – it was fine- he could see just fine.
We all laughed. He was laughing, so was my Dad. We took our cues from the adults and joined in the merriment. It was a cold, but laughter- filled ride home. When we got back, my uncle crawled out the window and un-taped the trees so we could all get out of the car.
My Mom and Aunt quickly got us into dry clothes and I am guessing they were not as amused by our condition as we were. The point is, no one got hurt and it probably toughened us up a little.
I am glad there are car seats and seat belts and air bags in cars today. I think kids and adults should be safely secured in all moving vehicles. But way back when- we didn’t have those safety features. It isn’t like they decided not to strap us in- they couldn’t.
While my Uncle Frank was laughing and joking around that day, he was also a police officer. I am sure he knew how to drive in snowy conditions. Maybe he was nervous. Maybe my dad was, too. But if they were, they didn’t show it.
I know there was a lot of love and laughter in the Beetle that day. I can only imagine the looks we got from other drivers on our way home. I couldn’t actually see other cars, however, as the view was blocked by the tree branches and frosty windows.
If there is any lesson- perhaps it is to be brave enough to be silly sometimes. While I don’t want anyone to put a child in harm’s way- don’t be so careful that your kid’s miss out on adventures, too.
Be the person that gives a kid a really good memory this holiday season. Perhaps, using duct tape and a couple of trees.
Homemade Bath Salts

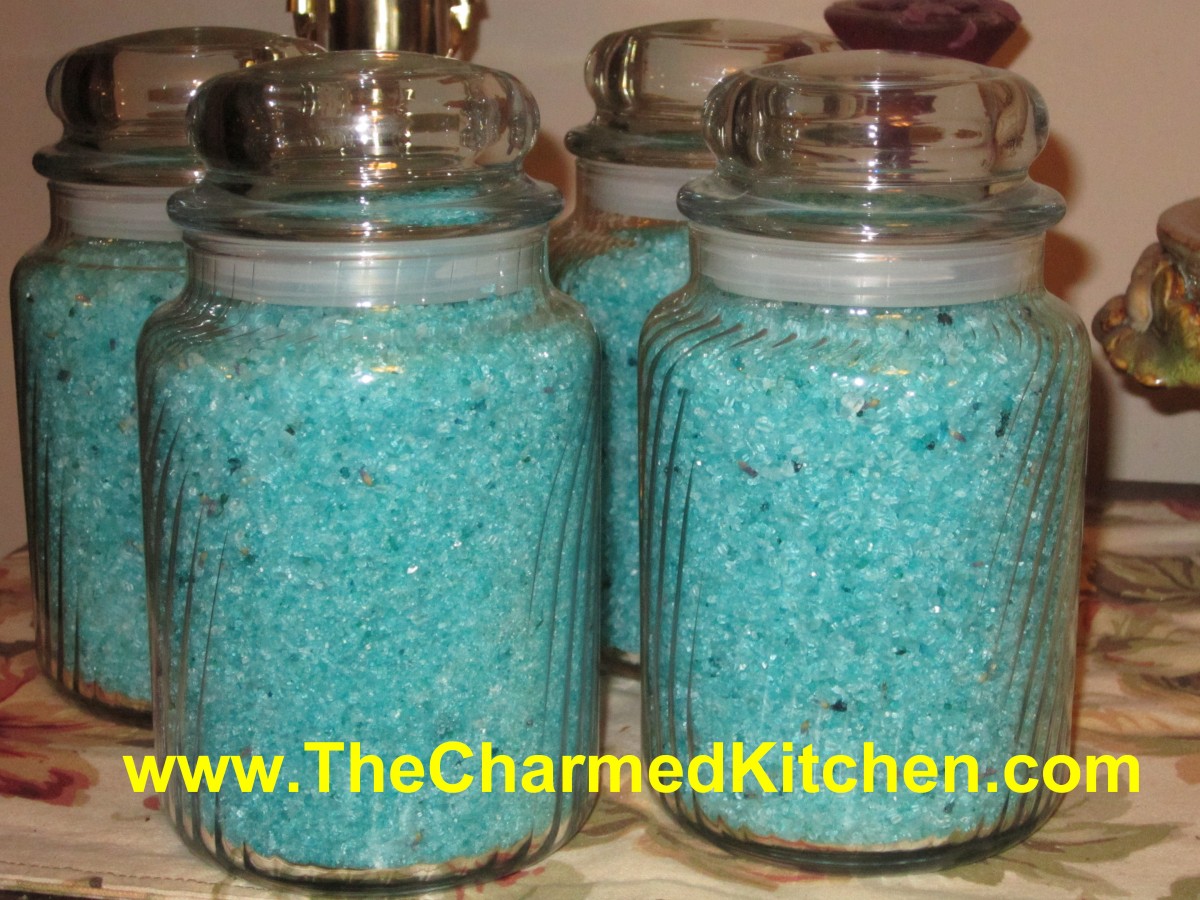
Homemade Bath Salts
One of my favorite gifts to make is bath salts. Everyone seems to like them. I actually get requests for more!!
The ingredients are fairly easy to find. Epsom salts can be found at any drug store.
Essential oils can be found at most craft stores. Food coloring- grocery stores. Try to find pretty jars to put them and finish with a pretty label.
This is a fun craft for kids to make for Mom, teachers etc. I like using essential oils, but you can use perfume, too.
Sometimes I add small amount of dried flower petals. If you do that- just small amounts and crumbled pretty fine, so there won’t be issues with clogging drains. Here are the directions.
Homemade Bath Salts
Epsom Salts
Fragrant oils
Food coloring- optional
Flower petals
Place 2 cups Epsom salts in a non-reactive bowl and add a few drops of scented oils and a few drops of food coloring, if desired. Toss to distribute, or place in a jar with a tight fitting lid or even in a plastic bag and shake mixture well. Take a whiff. If you can’t smell them, add more. You can add more coloring, too if needed. Add a few petals, broken up, for additional fragrance and for color. Place salts in a glass jar with a lid or in a plastic bag and let stand 1 week. Smell again and adjust fragrance as needed. Fragrances mature and you may find them too weak or strong. Add more oil or cologne to heighten aroma or add more salts to cut down on intensity. Keep in mind that the bath salts will be diluted a lot in a bath, so a little strong is good.
The oils are available at many craft stores and by mail. See the section on mail order in the back of the book. Choosing the fragrance you want to use can be a little trickier. Most of the florals are a safe bet, but you may want to get more creative. Citrus, herb, spice and woody fragrant oils can add a dimension to your bath salts that make them really outstanding.
To present them as a gift salts can be put in a wide-mouth jar, with a lid. Decorate with ribbon and attach a small scoop, if you like. Discount and dollar stores are a good place to find attractive jars at a reasonable price as well as garage sales and resale shops. You can also package them for individual use in lollipop bags with a card board header, like the herb packets. I like to make different fragrances and label them (relaxing bath, earthly delights, sweet dreams, etc. I then package them in the bags and add a few to a gift basket.
Homemade Chocolate Truffles

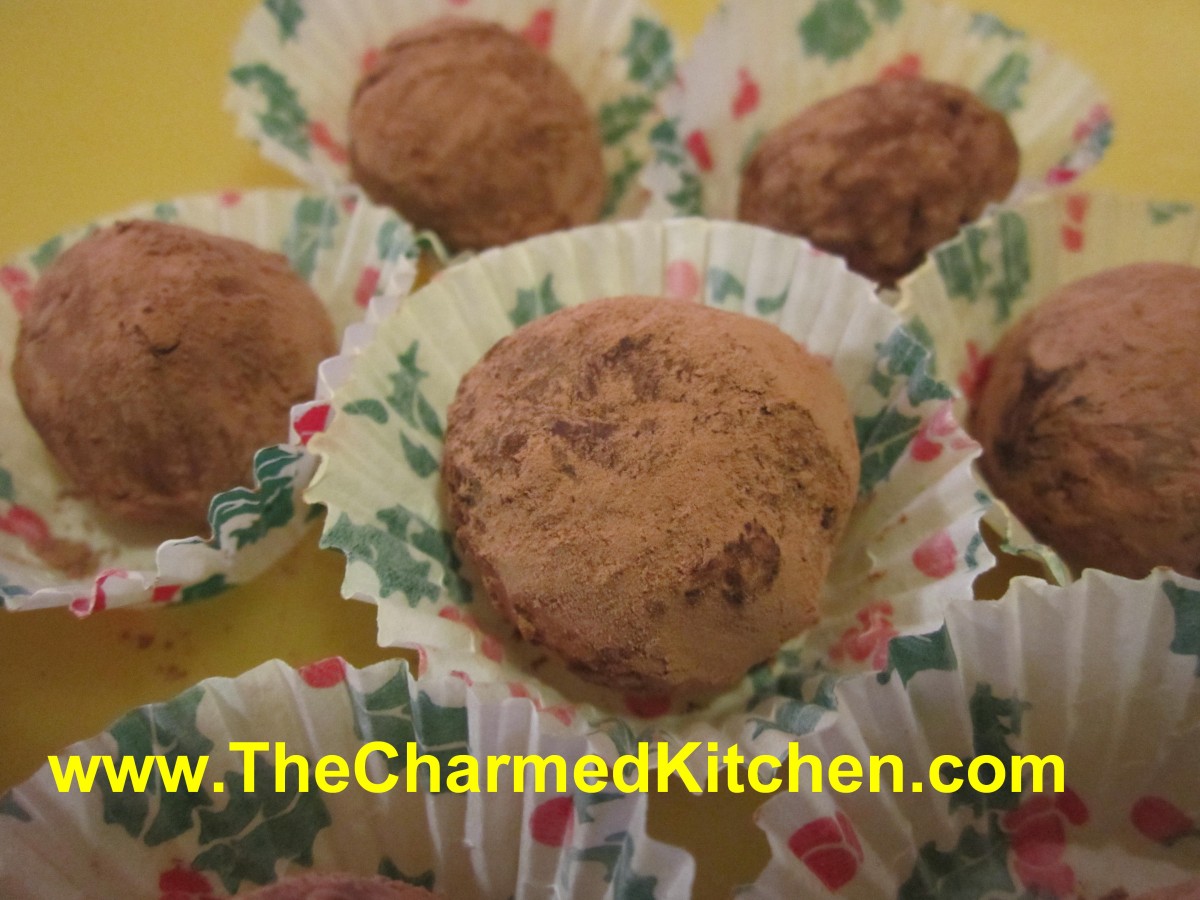
Chocolate Truffles
In keeping with my homemade gift theme this week, I wanted to share this simple, yet very tasty recipe, for Homemade Chocolate Truffles. These melt in your mouth, with a smooth, creamy texture and rich, chocolate flavor.
They can be a lovely hostess gift. Kids can make them, too.
The secret for making really good truffles is using the best quality chocolate you can. You can use chocolate chips, but get good ones.
They are very soft, and melt quickly when handled. When rolling them out, I prefer to wear plastic gloves. Make them without gloves, and you will understand why.
At candy making stores, get small papers cups and small boxes or tins for wrapping up your truffles.
Chocolate Truffles
1/3 c. Whipping cream
6 T. butter, cut into small pieces
2 c. chocolate chips- or 12 oz. dark chocolate, grated or chopped coarsely
Unsweetened cocoa
Heat cream to boiling in small saucepan. Stir in butter and cook until melted. Remove from heat and stir in chocolate until melted. Place in shallow bowl and chill until firm, at least a couple of hours. Roll mixture into 1-inch balls and roll in cocoa. Sometimes the mixture is quite firm and hard to roll into perfectly smooth balls. You can roll them out as smooth as you can, roll in cocoa and then roll again to smooth out. You might want to give them another roll in the cocoa after that. Makes about 30.
Six Quick Breads for Gift Giving

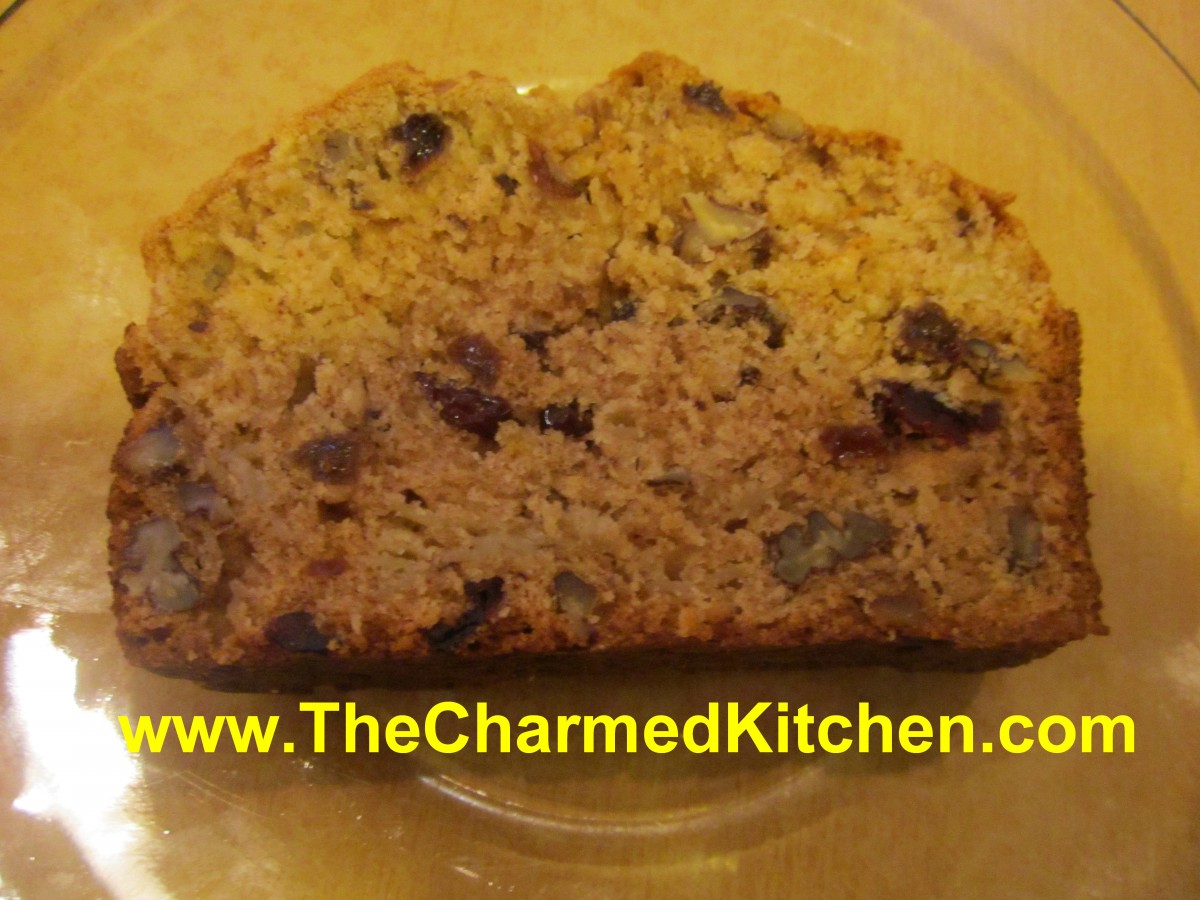
Cinnamon Apple Bread
Quick breads are a great food gift for the holidays. I have collected six of my favorite quick bread recipes. There is something to suit any taste. Rather than giving one large bread, I often divide the batter into smaller pans, and give a few different breads as a gift.
When making the bread in smaller pans, bake at the same temperature as you would normally, but reduce baking time. Depending on the size of the small pans, baking time can be cut in half. Check the breads after thirty minutes of baking. If not done, check at five minute intervals after that.
For gift giving, I often bake them in foil pans. I leave the breads in the pans, then slip into a bag and tie shut with a pretty ribbon.
They also freeze well. You can bake them ahead of time, then you have gifts at the ready, as needed.
Cinnamon Apple Bread
This bread is one of my favorite recipes. Not too sweet, it is moist from the shredded apples, flavored with cinnamon and studded with raisins and nuts. This apple bread makes a great breakfast or snack. I have been known to top a slice with cinnamon ice cream and a little caramel sauce for a simple dessert. This recipe makes one loaf, but I often double it- so I can freeze the second loaf for later. Enjoy!!
1/3 c. butter, softened
2/3 c. sugar
2 t. grated lemon or orange peel
1 t. cinnamon
2 eggs
3 T. milk
1 t. lemon juice
1 t. each baking powder and salt
1/2 t. baking soda
2 c. flour
1 1/2 c. peeled shredded apples, about 2 large apples
1 c. raisins*
1/2 c. chopped nuts
Topping:
3 T. sugar
1 t. cinnamon
Cream together butter, sugar, peel and cinnamon. Beat in eggs until light and fluffy. Stir in milk and lemon juice. Stir in dry ingredients then fold in apples, raisins and nuts. Pour batter into greased 9×5 – inch loaf pan. Combine topping and sprinkle over the top of the batter. Bake in a preheated 350 -degree oven for 1 hour. Use a toothpick to test for doneness. Cool 15-20 minutes before removing from pan. Yield: 1 loaf.
*You can use other dried fruits. I sometimes use dried cranberries or cherries.
Pumpkin Bread
While the recipe calls for cooked pumpkin, other winter squash can also be used. I like butternut and Hubbard squash, but feel free to use what you like.
1 ¾ c. flour
1 ½ c. sugar
1 t. baking soda
¾ t. salt
1 t. each cinnamon and nutmeg
½ c. butter, softened
2 eggs, beaten
1 c. pumpkin
1/3 c. water
Mix dry ingredients and set aside. Beat together butter and eggs until fluffy. Beat in pumpkin and water until smooth. Stir in dry ingredients until smooth. Pour into a greased 9×5-inch loaf pan. Bake in a preheated 350-degree oven for 60-65 minutes. Cool in pan 10 minutes before removing from pan and placing on cooling rack. Wrap in plastic, best served the next day. Freezes well. Makes 1 loaf.
Zucchini Bread
This recipe makes two loaves. When divided into smaller pans, you can get quite a few loaves baked up in no time at all.
3 c. flour
3 eggs
2 c. sugar
2 c. shredded zucchini
1 c. oil
1 c. chopped nuts or raisins
½ c. sour cream or strained yogurt
1 t. each vanilla, cinnamon, baking powder, salt and baking soda
Preheat oven to 350 degrees and grease 2 (9×5 inch) loaf pans. Set aside. Place flour in large bowl. Beat eggs and add with remaining ingredients to flour, mixing well and scraping bowl. Pour batter into prepared pans and bake 1 hour and 20 minutes, or until browned and toothpick in center emerges clean. Cool in pans on wire rack. Freezes well. Makes 2.
This bread is a favorite of mine. It is not too sweet and pairs nicely with coffee or tea, so it can be a breakfast or brunch dish. It makes a nice dessert, too. The bread is studded with raspberries with hints of cinnamon and vanilla. It can be eaten plain or served up with fruit topping or maybe some whipped cream. I have used it as the base for a pretty good shortcake. I topped slices of the raspberry bread with ice cream, more berries and a dollop of whipped cream. Like most quick breads, it is better if you wrap it up in plastic or foil, once cooled, and eat it the next day, if you can wait that long!!
Raspberry Bread
The raspberries make this a special bread, for sure. I normally use fresh raspberries, but frozen work fine, too.
1 ¾ c. flour
½ t. baking powder
½ t. baking soda
½ t. salt
½ t. cinnamon
½ c. butter, at room temperature
¾ c. sugar
2 eggs, room temperature
½ c. sour cream, room temperature
1 t. vanilla
1 c. raspberries, fresh or frozen
¾ c. chopped nuts, optional
Grease an 8×4 inch loaf pan and preheat oven to 350 degrees. In a large bowl combine dry ingredients. Set aside. In small bowl beat butter until creamy. Add sugar and beat 1 minute. Beat in eggs one at a time. Beat in sour cream and vanilla. Stir in flour mixture until just moistened. Fold in berries and nuts and place batter in prepared pan. Bake 60-65 minutes, or until toothpick inserted in center comes out clean. Let stand in pan 10 minutes. Remove from pan and cool on wire rack. Makes 1 loaf. Freezes well.
Banana Bread
You can use fresh or frozen bananas in this bread. When my local store has bananas marked down because they are getting brown, I buy them, then freeze until I am ready to bake with them. Bananas can be frozen right in their peels, but I peel and mash them, to save freezer space. I freeze them in one cup amounts.
1 ¾ c. flour
1½ t. baking powder
¾ t. salt
½ t. baking soda
2/3 c. sugar
1/3 c. butter, softened
2 eggs
2 T. milk
1 c. mashed ripe banana
¼ c. chopped nuts, optional
Combine dry ingredients and set aside. Combine sugar with butter and beat until fluffy. Beat in eggs. Beat in eggs until mixture is smooth. Beat in flour mixture alternately with bananas. Fold in nuts, if desired. Pour batter into greased 9×5 -inch loaf pan. Bake in a preheated 350-degree oven for 60-65 minutes. Use toothpick to test for doneness. Cool in pan 10 minutes before placing on rack to cool. Store in plastic wrap to preserve moisture. Makes 1 loaf.
Strawberries and Cream Bread
This bread requires fresh berries. I make it when local berries are in season. It always reminds me of a warm summer day. Luckily, even in colder months, I can often find nice fresh berries at the store.
1 ¾ c. flour
½ t. baking powder
½ t. baking soda
½ t. salt
½ t. each cinnamon and nutmeg
½ c. butter, at room temperature
¾ c. sugar
2 eggs, room temperature
½ c. sour cream, room temperature
1 t. vanilla
1 c. fresh strawberries, coarsely chopped*
¾ c. chopped nuts, optional
Grease an 8×4 inch loaf pan and preheat oven to 350 degrees. In a large bowl combine dry ingredients. Set aside. In small bowl beat butter until creamy. Add sugar and beat 1 minute. Beat in eggs one at a time. Beat in sour cream and vanilla. Stir in flour mixture until just moistened. Fold in strawberries and nuts and place batter in prepared pan. Bake 60-65 minutes, or until toothpick inserted in center comes out clean. Let stand in pan 10 minutes. Remove from pan and cool on wire rack. Makes 1 loaf. Freezes well.
* frozen berries are not recommended in this bread.
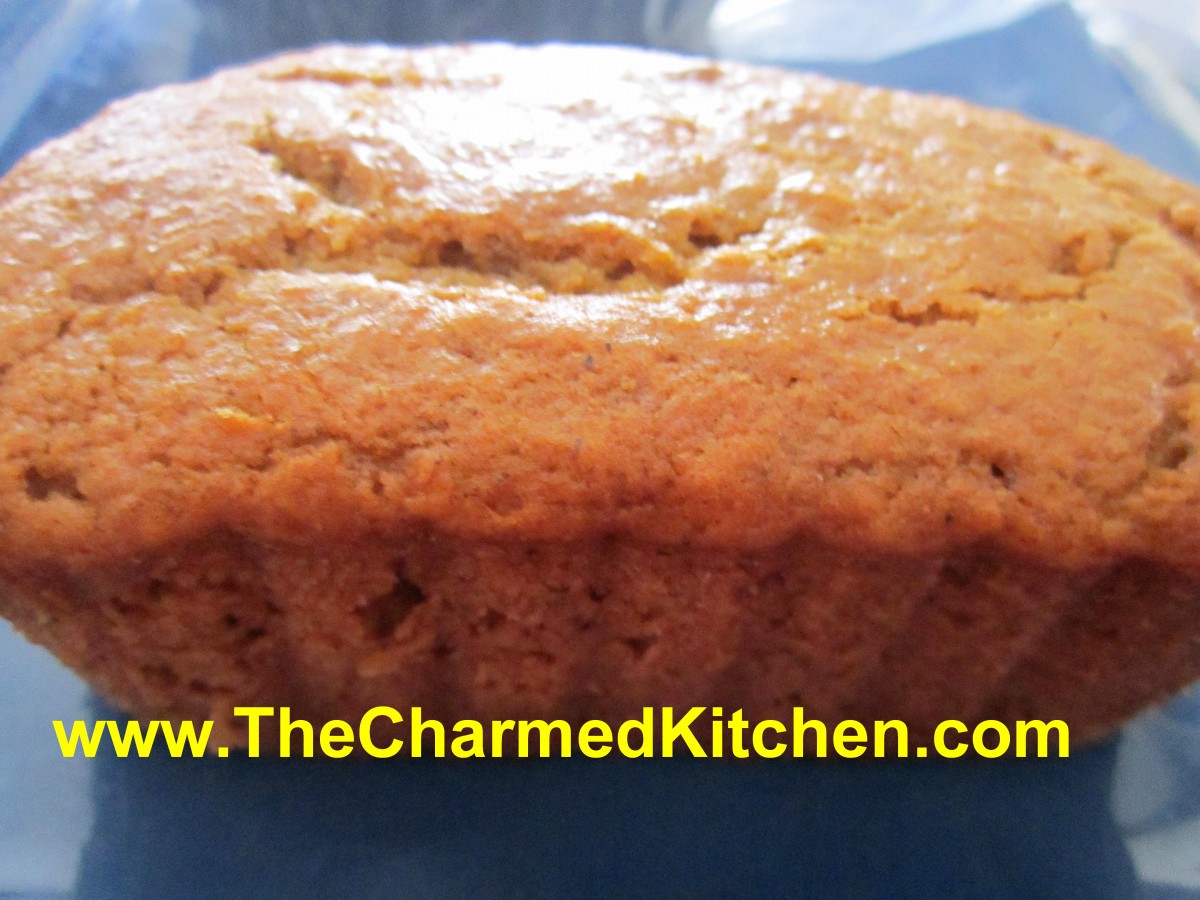
Pumpkin Bread
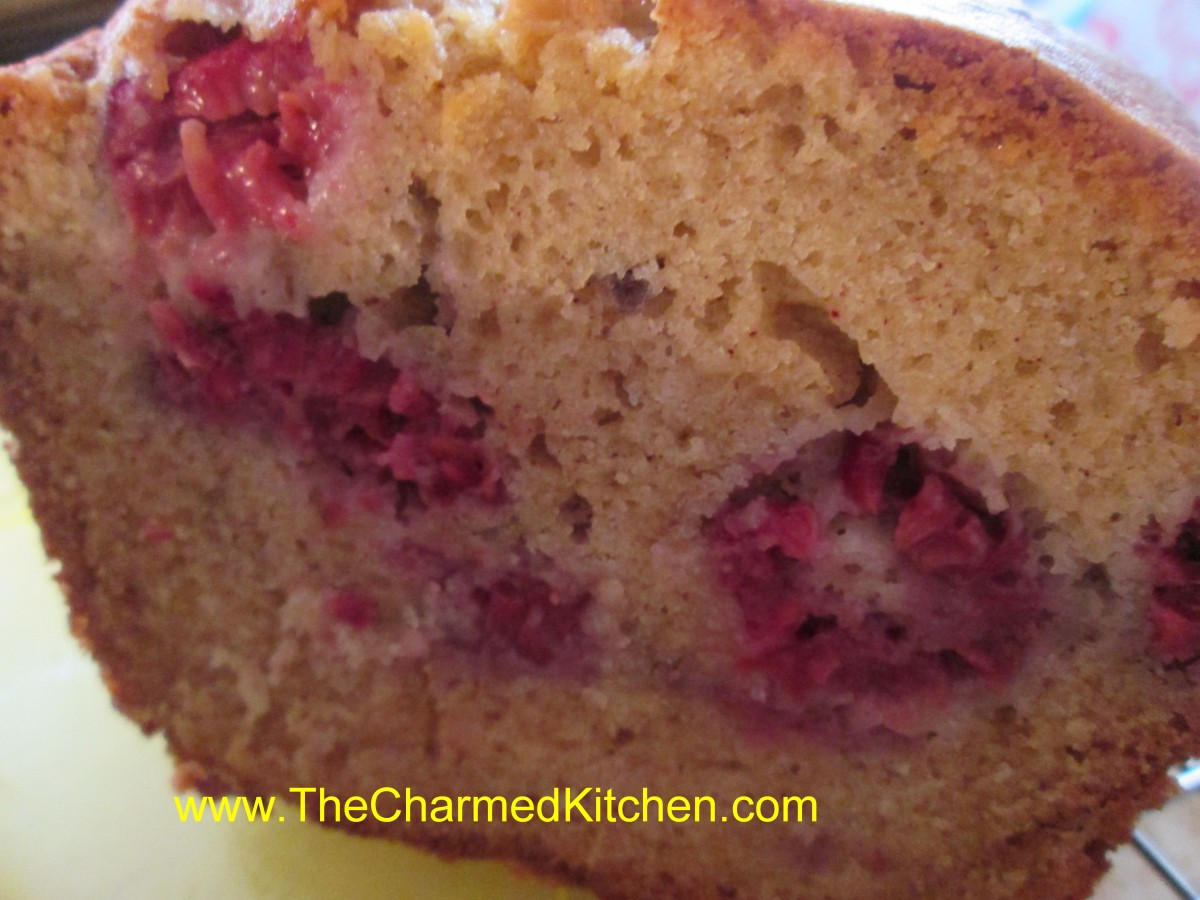
Raspberry Bread

Zucchini Bread

Banana Bread
Cranberry Liqueur


Cranberry Liqueur or Cranberry Bounce
You can do more with cranberries than make sauce. Not that I don’t like cranberry sauce, I do. I love cranberry season and find myself using them in all sorts of recipes. This is one of my favorites.
I got the recipe from my sister Cindy, many years ago. It is also called Cranberry Bounce. It tastes amazing and makes a great gift, too.
Cranberries, sugar and vodka. What a great combination. It’s simple to make and it makes a nice gift, too. The color is absolutely beautiful. The sweet/tart finished product can be enjoyed by just sipping, on the rocks, or mixed with club soda.
Often after Thanksgiving, the price of cranberries goes down. I stock up on them, freeze some and make a batch, or two of cranberry liqueur.
I hope you give it a try. I am sure you will be pleased with the results.
Homemade Cranberry Liqueur – Cranberry Bounce
1 lb. fresh cranberries (most bags are 12 oz.)
2 c. sugar
4 c. vodka- at least 80 proof
Grind berries fine in food mill or food processor. Place in large jar and combine with the sugar. Let stand, covered until sugar is dissolved completely, several hours or overnight. Add vodka and let steep 1-3 weeks, stirring occasionally. Strain and filter. Makes 5 cups.
Note: Fruit can be saved in fridge and used, sparingly, in desserts, fruit salads and on cake or ice cream.
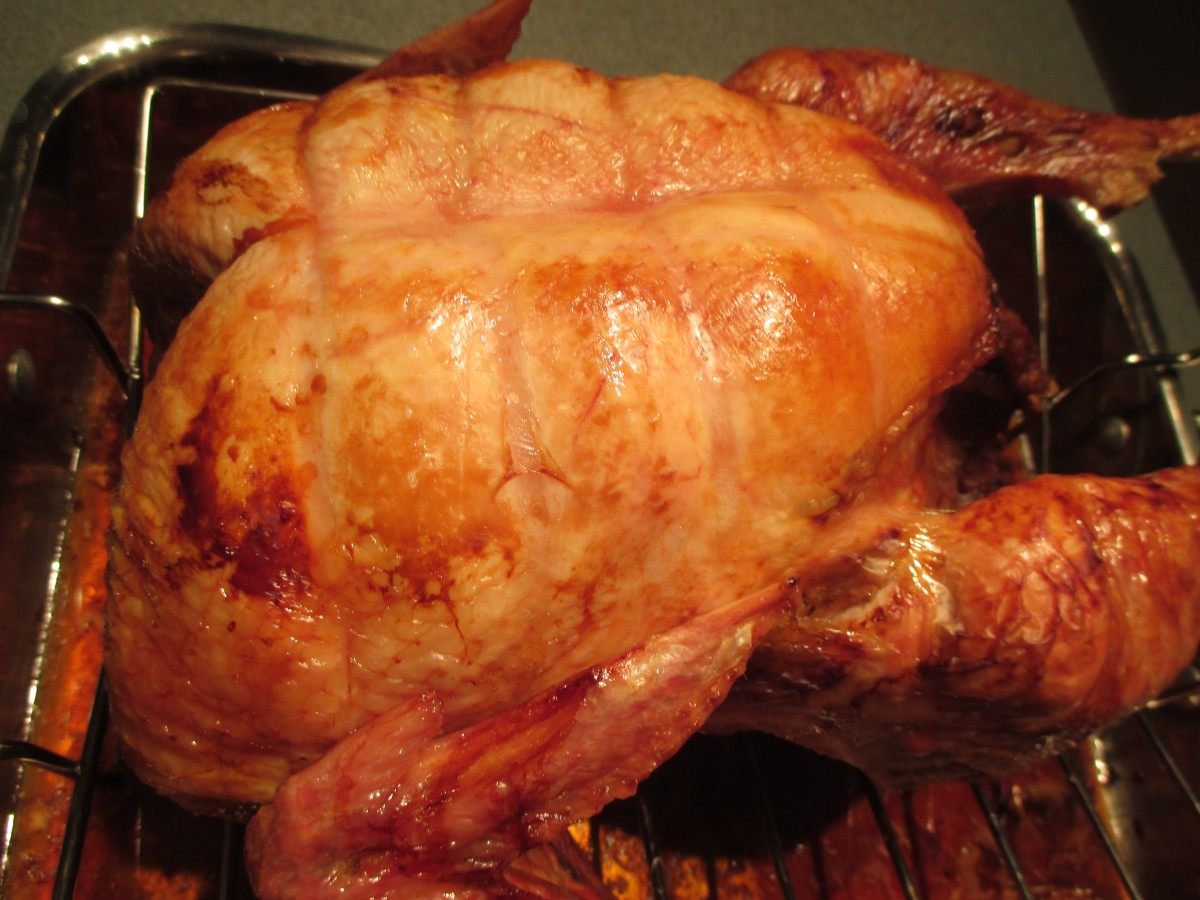
Ten Tasty Recipes for Leftover Turkey


Turkey Reuben
It is that time of year, when we find ourselves waking up to leftover turkey. Sometimes quite a lot of leftover turkey.
Of course, be sure to make stock from the carcass. Turkey sandwiches are always a favorite in my family. There is a lot more you can make with the rest of the bird, though. Here are 10 fun and tasty ways to make the most of all that turkey.
I never get tired of turkey, but if your family does not feel the same way, these recipes could come in handy. Enjoy!!
Turkey Reuben Loaf
3 ¼ c. flour
1 T. sugar
1 t. salt
1 package quick-rising yeast
1 c. hot water
1 T. oil
¼ c. thousand island dressing*
8-10 oz. thin sliced turkey
4 oz. sliced Swiss cheese
1 c. sauerkraut, rinsed and squeezed dry
1 egg white, beaten
Caraway seeds
Set aside 1 cup of the flour. Combine remaining flour with the other dry ingredients in a medium bowl. Stir in water and oil and gradually stir in enough flour to make a soft dough. Turn onto lightly floured surface and knead until dough is smooth and elastic, about 5 minutes. Roll dough into a rectangle about 16 x 8. Spread dressing down center middle of dough. Top with meat slices, cheese and sauerkraut. Cut one-inch wide strips of dough from filling to edge on both sides. It will sort of look like fringe. Alternating sides, fold strips up and over the filling at an angle. Carefully lift loaf onto greased baking sheet and place at an angle. Cover with a towel and place sheet on top of a roasting pan half-filled with simmering water for 15 minutes. Brush with egg white and top with seeds. Bake in a preheated 400-degree for 20-25 minutes or until golden brown. Cool slightly before slicing. Serve warm and refrigerate leftovers.
* You can make your own Thousand Island Dressing by combining equal parts of ketchup, mayo and sweet pickle relish.
Note: The variations for this bread are almost endless. Some favorite combinations are ham and Swiss with mustard, roast beef and cheddar, chicken, broccoli and cheese, Spinach with ricotta or feta and onions, pizza, assorted fillings. You get the idea. Use your imagination and have fun. Just be careful not to overfill, or the bread will be hard to move, use fillings that aren’t too runny and always use cold fillings.
If you want to use regular yeast use warm, rather than hot water. Also, don’t let dough rise over boiling water. After kneading cover dough and let rise 45 minutes. Punch down and assemble as in original recipe. Cover with a towel and let rise until dough looks puffy, about 40 minutes. Bake as directed above. These breads can also be frozen.
Turkey Tetrazzini
2 T. butter or oil
1 c. chopped celery
4 oz. sliced mushrooms
4 T. flour
1 1/2 c. chicken or turkey stock
1 c. half and half or milk
1/4 c. sherry
2 c. cooked turkey, cubed
4-6 oz. broken spaghetti, cooked
salt and pepper to taste
bread crumbs
butter
Parmesan cheese- optional
Heat butter or oil in pot and add celery and cook 3 minutes. Add mushrooms and cook 3 minutes more. Stir in flour and mix well. Add stock, half and half and sherry bring to a simmer- stirring often. Stir in turkey and pasta. Adjust seasonings. Place mixture in oiled casserole and sprinkle the top with bread crumbs and drizzle a little melted butter over the top. Add Parmesan cheese, if you like. Place in a 350 degree oven and bake until bubbly- about 25 minutes. Serves 4.
Turkey Noodle Soup
Oil*
2 onions, sliced
4 carrots, peeled and sliced
4 ribs celery, sliced
4 qts. Turkey stock
4-5 c. turkey meat, cubed
1 c. chopped fresh parsley
Salt and pepper to taste
Hot pepper sauce to taste
1 lb. wide egg noodles, cooked
Heat oil in soup pot and cook onions until starting to brown. Add carrots and celery and cook a few minutes more. Add stock and meat and simmer, covered, until veggies are tender. Add parsley and simmer 15 minutes longer. Adjust seasonings. Warm noodles and serve on the side so everyone can add as many noodles to their soup as they like. Serves 8.
* Since I had freshly made stock I used a little fat from the stock to cook the onions.
Turkey Won Ton Soup
1½ lbs. cooked turkey, about
1 head bok choy
3 T. hoisin sauce
1 clove garlic, minced
24 won ton wrappers
2 qts. Turkey stock
1 t. ginger
1 t. hot pepper sauce
Chopped green onions
Sesame oil
I used dark meat from the turkey, mostly. I minced enough to give me a cup of meat. The rest I cut into thin strips. I then took stems from the bok choy and minced enough of them to make 1 cup. Combine the minced turkey with minced bok choy, the hoisin and the garlic. This is the filling for your won tons. Slice more of the bok choy- using mainly the leaves, into thin shreds. This will go into the soup later, along with the strips of turkey. You should have at least a couple of cups of the shredded bok choy, but more is OK, too. To make the won tons place one on your work surface and spoon a rounded teaspoon of the filling into the middle of it. Moisten edge with water, fold in half and press to seal. I used round wrappers, but square wrappers are fine, too. I like the round ones, labelled for dumplings, because they are a little thicker. I get them at a local Asian grocery store. Repeat with remaining won tons and fillings until done. Bring stock to a boil and add the ginger and hot sauce. Add the won tons to the simmering stock. Simmer gently for 3-4 minutes, stirring occasionally, then add the strips of turkey and the shredded bok choy greens. Cook about 5-6 minutes longer. Finish soup with chopped green onions and a drizzle of sesame oil. Serves 6-8.
Turkey Chili
1 large onion, chopped
2 T. oil
2 ribs celery, sliced
1 sweet pepper, seeded and chopped
2 cans cannellini beans, drained and rinsed
2 cans lima beans, drained and rinsed
1 can ( 4 oz.) chopped green chilies
3-4 c. cubed turkey
2-3 c. stock- turkey or chicken
3 T. chili powder, or to taste
1 T. cumin, or to taste
Generous dash of hot sauce
Salt and pepper to taste
Fresh chopped cilantro
Toppings: Pick what you like. Some good toppers are shredded cheese, chopped green onions, salsa, sour cream or tortilla chips
.
In soup pot cook onion in oil until golden brown. Add the celery, peppers and chilies and cook 5 more minutes. Add the rest of the ingredients, except cilantro and bring to a boil. Turn heat down to medium and simmer until flavors blend, about 30 minutes but longer is fine. I usually cook it covered for 15 to 20 minutes and then remove the lid so it can thicken. Add the cilantro right before serving. Ladle into soup bowls add add toppings of your choice. Serves 6.
Turkey Florentine
2 T. oil or butter
1 large leek, cleaned, trimmed and chopped
4 T. flour
1½ c. stock – turkey or chicken
24 oz. fresh spinach, washed
¾ c. half and half- you could use milk instead
3 c. cubed cooked turkey
Salt and pepper to taste
2 t. hot sauce- or to taste
1 c. shredded Pecorino/ Romano cheese, plus extra for sprinkling on top
Hot cooked pasta
In large skillet cook leeks in oil or butter over medium heat until tender. Stir in flour and cook until smooth, but not brown. Add the stock and cook until mixture starts to thicken. Add the spinach and continue cooking, stirring often until the spinach is wilted. The spinach cooks down a lot- you might have to add it a little at a time to have room in the pan for all of it. As soon as the spinach is wilted add the half and half and the turkey and cook until heated through and bubbly. You might need a little more stock or half and half if the sauce is too thick for your taste. Season with the salt and pepper and the hot sauce. Stir in the cheese. Serve over hot pasta. Serves 4-6.
Turkey with Herb Dumplings
1 turkey thigh, cut off the bone and cubed
1 large onion, chopped
2 ribs celery, chopped
4 carrots, peeled and chopped
3 potatoes, peeled and cut into chunks
4 c. turkey stock
4 T. flour
salt and pepper to taste
1 c. baking mix- like Bisquick- I make my own
1/2 c. milk
2 T. chopped green onion
1 T. chopped parsley
1 t. dried basil
In Dutch oven or large pot, brown turkey thigh. Add the vegetables and brown them, too, turning to prevent burning. Add stock, cover pot, and simmer until veggies are tender, about 20 minutes. Season with salt and pepper to taste. Combine flour with some cold water or more stock until smooth. Add to the pot and stir well. Mixture will thicken. Meanwhile combine baking mix with milk and herbs. Drop dumpling batter by tablespoonfuls over the turkey mixture in pot. Reduce heat to low, cover pot and cook until dumplings are cooked, about 20 minutes. To serve place some of the turkey and vegetables with sauce in serving bowls and top with dumplings. Serves 6.
Turkey Vegetable Soup
1 onion, chopped
oil
3 carrots, peeled and sliced
3 small potatoes. peeled and cubed
1 c. corn- cut from 1-2 ears
1 medium tomato, peeled and chopped
2 c. shredded cooked turkey *
3-4 cups turkey stock- or whatever you have and like
Fresh parsley and basil
salt and pepper to taste
dash of hot sauce
Heat oil in pot and cook onion until golden. Add carrots and cook a few more minutes. Add remaining vegetables, turkey and stock and simmer, covered, for 10 minutes- or until veggies are tender. Add herbs and simmer a few more minutes. Adjust seasoning and add hot sauce. Serves 2-3 for dinner.
*If you want to turn this into a vegetarian soup add vegetable stock and add a couple of cups of cooked beans. Kidney beans would work well.
Turkey Lo Mein
1 onion, chopped
2 T. oil
1 can sliced water chestnuts, drained
1/2 c. green peas- you could also use green beans
2 c. diced cooked turkey
8 oz. angel hair pasta -I use a very fine noodle I get at the Asian market
soy sauce to taste
Hoisen sauce or oyster sauce to taste- you could also use stir-fry sauce
sesame oil
chopped green onions
Heat water for pasta. Heat oil in skillet and cook onion until browned. Add water chestnuts and cook 1 minute longer. While onion is cooking cook pasta. Add peas to onion mixture and stir to combine. Add the turkey and heat through. Drain pasta and toss into turkey mixture. Season with soy sauce and what ever Asian sauce you have on hand. Drizzle with sesame oil and top with green onions. Serves 4.
Turkey With Tortellini
1 lb. cheese tortellini, cooked and drained
2-3 c. cubed cooked turkey
2-3 c. cooked broccoli, chopped
2 T. butter or oil
2 T. flour
1 c. half and half or milk, warmed
2 c. stewed tomatoes- I used my canned tomatoes- you could substitute a 14 oz. can of tomatoes
salt and pepper to taste
fresh chopped parsley
In bowl combine tortellini with turkey and broccoli and place and a lightly greased casserole. In saucepan melt butter and add flour whisking until smooth. If using oil just combine oil and flour in pan and whisk until smooth. Add half and half and cook, stirring often until thickened and bubbly. Add tomatoes and heat through. Season to taste. Puree sauce and pour over the turkey mixture. Sprinkle with the parsley. Bake in a 350 degree oven until heated through and lightly browned around the edges- about 40 minutes.
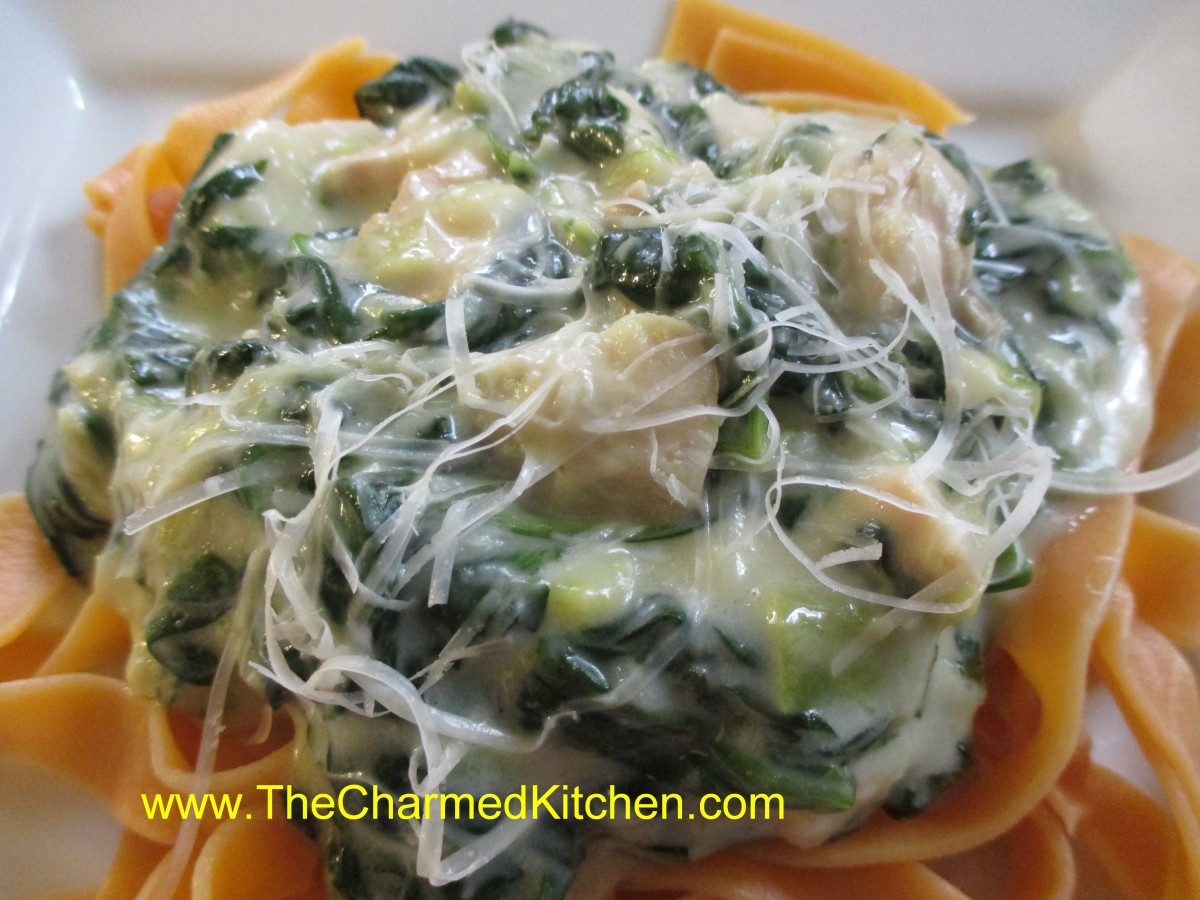
Turkey Florentine

Turkey with Herb Dumplings

Turkey Lo Mein

Turkey with Tortellini
Uncle Art and the Giant Turkey

 I posted this story last year and had a request to post it again….so here it is….
Rather than posting a recipe today, I wanted to share a fun Thanksgiving memory with you. Through most of my younger life, Thanksgiving was spent with my family and my Aunt Tillie and Uncle Art’s family. My mother and my Aunt Tillie were sisters. They were as close and loving as sisters could be. We took turns at each others homes, and shared the cooking duties.
There was a friendly rivalry every year to come up with a special dessert or to have a new side dish. The biggest part of this challenge though, was to get a really big turkey. My mother was convinced that a big bird was tastier than two small ones. Aunt Tillie agreed. So every year it was the quest of the host family to score a really large turkey.
My mom and dad would go to the local butcher to order the bird weeks in advance. I am sure Tillie and Art did the same. They always seemed to end up around 25 pounds, give or take. My dad and uncle kept track. Last year was 26 pounds and 4 ounces, but two years before, closer to 27 pounds. I swear, these birds had to be part ostrich.
The ultimate goal was to get a 30 pounder. It had eluded them all, until one year. Uncle Art had found a new guy. A turkey guy, who promised him the 30 pound bird of his dreams. We knew days before the big day, that the really big bird dream was going to happen. Then my mom got a phone call from Aunt Tillie.
My uncle had picked up the beast. He proudly brought it home. He looked at it, lovingly at first. Then he looked again. This was not Uncle Art’s first turkey. He felt something was wrong. Remember, this was something they had all dreamed about finding. Finding it first was cause for bragging rights, for sure. He was convinced that he had been duped, that the bird fell short of its promised weight. He told my aunt about his suspicions and they weighed the bird. It was too big for their kitchen scale, so my uncle weighed himself on the bathroom scale and then weighed himself again, this time holding the turkey.
Uncle Art had been right. He was short at least a couple of pounds of the promised 30 pounds. He went back to the turkey guy, irate. The man was defensive at first, but weighed the bird again. It weighed in somewhere in the area of 28 pounds. The man gave him some money back and lacking a bigger bird, Uncle Art brought it back home.
As I recall it was a perfectly lovely bird, cooked to juicy perfection. To my Uncle Art it was both a failure and a success. On one hand, he had not gotten the 30 pound bird he was hoping for. He did, however, take pride in the fact that he spotted it. That in the world of turkeys, he could see the difference between a 28 pound and a 30 pound bird.
I believe, some years later, a 30 pound bird was found. The story that year, around the Thanksgiving dinner table, was not so much about the 30 pound bird before us, but about the one that nearly was.
I hope you all have a great day, spent with those you love. I also hope you make memories to make you smile, when some of those we love are no longer here. Love and best wishes to all.
Happy Thanksgiving.


