My Mom, Dinah Shore and the Upside Down Turkey

Turkey time
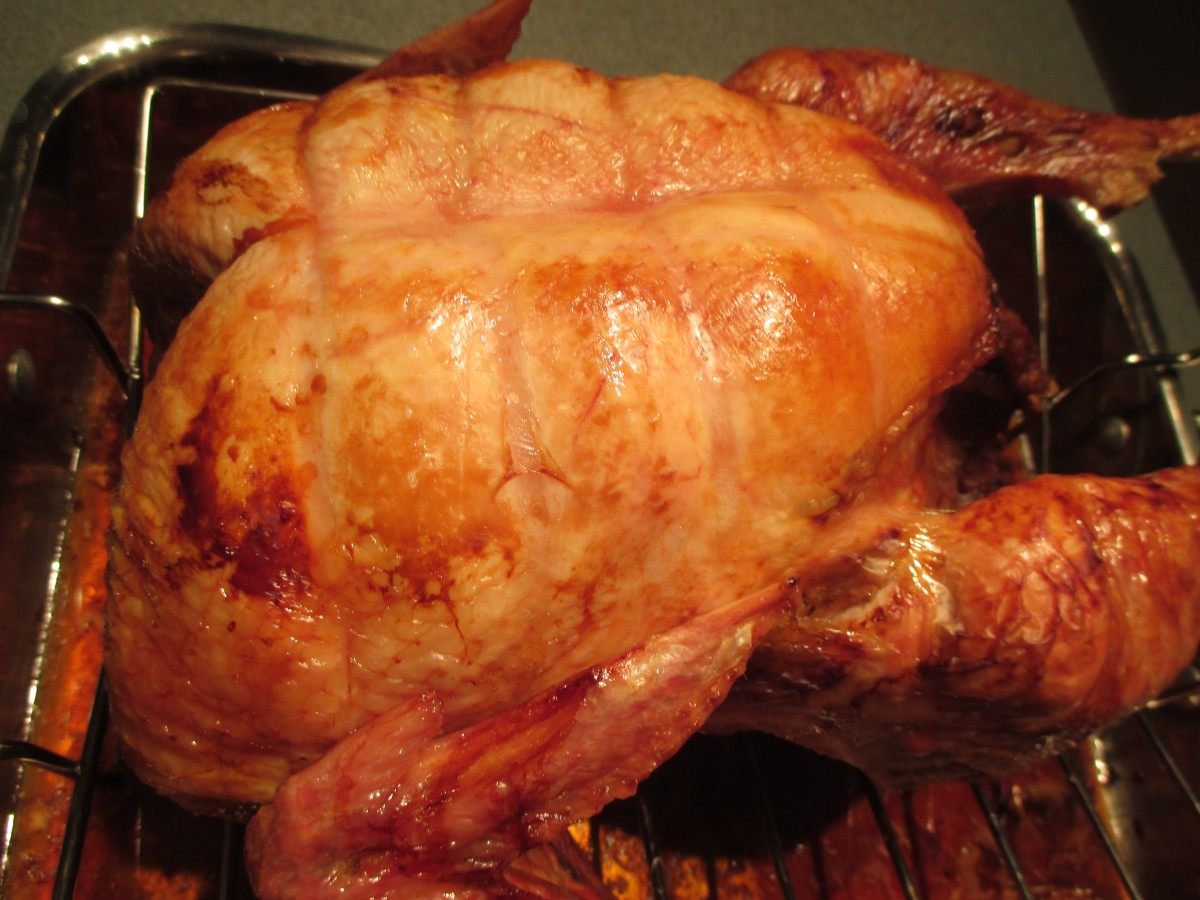
With Thanksgiving right around the corner, I thought I’d share how I came to roast my turkey breast side down. I must say, there are a number of ways to roast a turkey and have it come out nice and juicy.
I have no objection to any way you like to cook your bird including, but not limited to: frying, wrapped in bacon, cheesecloth wrapped, spatchcocked, sous vide etc. Stuffed, un-stuffed, brined are all OK by me, if that works for you. I have found over the years that cooking a turkey is a very personal decision, and folks get pretty passionate about how they cook their bird.
Many years ago a singer named Dinah Shore had a TV show, which my Mother really liked. Dinah, besides being a singer, liked to cook. She gave her turkey cooking tip one time on her show. She said she roasted her turkey breast side down for most of the time. The theory is that if the bird is breast side down the juices will flow into the breast- which eliminates the need to baste. It also slows down the cooking time for the breast- so it comes out cooked at the same time as the dark meat.
My Mother was intrigued, to say the least. She talked about it, a lot, leading up to Thanksgiving. We used to get a really big turkey and my Dad has his doubts about how easy turning over a hot, partially cooked turkey, would be. Mom was adamant. So it was that that Thanksgiving my Mom put her bird in the pan, on the rack, breast side down. She was excited and nervous at the same time.
Let’s face it- the turkey is the star of the meal and if it didn’t work it would be a disaster. But Mom trusted Dinah and they went ahead with this radical new plan. After about 3 hours of cooking, maybe a bit less, they managed to get the turkey turned over and returned it to the oven. Mom would look pensively through he oven window. I think giving birth was easier on her.
Well, in the end it worked out great. The bird was juicy and evenly cooked. No basting, so less work. She was delighted that she had held to her plan and had not been persuaded to cook it like before.
So every time I cook a turkey I cook it breast side down. How long I roast it that way depends on the size of the bird. Normally about 2 hours- because I am roasting a smaller turkey. I always remember my Mother when I cook it that way. I remember that first breast side down Thanksgiving and every one after that. Mom always was delighted- like the first time- and she always mentioned Dinah Shore.
Happy Thanksgiving to you all. May your turkey be juicy and most importantly, may you get to spend time with the people you love. I’ll be with family and I’ll think about my Mother and Father – and Dinah.
Honey and Orange Glazed Sweet Potatoes


Honey Orange Glazed Sweet Potatoes
I will admit it – I am not a fan of really sweet, sweet potato dishes. Not unless it is a dessert. My Mom never served sweet potatoes with marshmallows, but they were still served “candied”. Sweet potatoes, sometimes canned, cooked in a glaze of brown sugar and butter. It was just what we did.
Then, one year, I grew my own sweet potatoes. Everything changed after that. I can still remember the joy of digging that first plant up. There they were, a cluster of beautiful sweet potatoes. I grew a lot of them that first year. I steamed them, baked them, made soup with them. Even had them for breakfast a few times.
My Mom was so pleased when I told her I was supplying them for her Thanksgiving dinner that year. I suggested we just cook them with a little butter, salt and pepper. They were so naturally sweet, that they surely, did not need to be candied.
Not everyone was so pleased with that choice. Clearly, how to prepare sweet potatoes evokes some of the same passion as how to cook the turkey. So for awhile, there were two competing dishes of sweet potatoes on the Thanksgiving table. As if there weren’t enough dishes to worry about- we now had to have 2 types of sweet potatoes.
I hope this dish might just bridge the gap between the two camps. A little sweet, but not overly sweet. The orange juice and honey enhance the sweet potatoes nicely. The sugared nuts are a fun addition, too.
Honey Orange Glazed Sweet Potatoes
4 T. butter
4-5 c. peeled and sliced sweet potatoes
1 c. fresh orange juice
Zest of 2 oranges
¼ c. honey
2 t. hot sauce, or to taste
Salt and pepper to taste
Fresh grated nutmeg
Sugared nuts- optional* recipe follows
Melt butter in large skillet. Add sweet potatoes and cook over medium heat, for 5- 8 minutes. Potatoes should start to turn a little golden. Add orange juice, honey and seasonings and turn heat down to low. Cook, uncovered, until potatoes are tender and liquid is evaporated, about 10 minutes. If you want more color on the sweet potatoes, turn the heat up a little once they are tender, and liquid is mostly gone. Serve with sugared nuts sprinkled on top, if you like. These can be made a day ahead and reheated.
*Sugared Nuts
4-5 c. nuts, I like walnuts or pecans
2 c. sugar
1 c. water
1 t. cinnamon
1 t. orange peel
1 t. salt, optional
Place all ingredients in heavy skillet and cook over medium heat, stirring often, until all the water disappears. Whatever liquid in the pan will be clinging to the nuts and syrupy. Dump nuts onto a large cookie sheet and break apart with a wooden spoon to prevent clumping. As nuts cool, stir once or twice to remove any remaining clumps, and to cool faster. Nuts will lose their glossy appearance and attain a sugary crust. If it looks like nut soup, you didn’t cook them long enough, and you must return all to the skillet and cook longer. As the nuts start to get drier during cooking, you can turn down the heat a little to prevent burning. Once you’ve made a few batches, though, you will get good at judging when to stop cooking. You can also make a spicy version by adding a teaspoon of cayenne pepper along with the other ingredients. Store in cool, dry place to keep nuts fresh longer.
Mashed Potatoes- Three Ways


A trio of mashed potatoes
I am perfectly happy just mashing up potatoes and adding milk and butter to them along with salt and pepper. Still, sometimes it is nice to switch things up a little. There are certainly countless variations for what you could add to mashed potatoes. If you are making mashed potatoes for Thanksgiving, and want to try something new, you might consider one of these recipes.
They are three of my favorites.
I can remember the first time my Mother added roasted garlic to mashed potatoes. They were so good. I think she added roasted garlic to them all the time after that.
Roasted Garlic Smashed Potatoes
6 cloves garlic, peeled
1/4 cup olive oil
3 lbs. potatoes, peeled and cubed
½ c. milk, warmed
¼ c. grated Parmesan cheese
2 tablespoons butter
½ t. salt
¼ t. ground black pepper
Preheat oven to 350 degrees. Place garlic cloves in a small baking dish. Drizzle with olive oil, cover, and bake 45 minutes, or until golden brown. Bring a large pot of lightly salted water to boil. Add potatoes, and cook until tender but firm. Drain, and transfer to a large mixing bowl. Place roasted garlic, milk, Parmesan cheese, and butter into the bowl with the potatoes. Season with salt and pepper. Mash to desired consistency.
Cheesy Bacon Smashed Potatoes
3 lbs. potatoes, peeled and cubed
½ c. milk or half and half, warmed
2 c. shredded cheese- I like cheddar
3 T. butter
12 oz. bacon, cooked, drained and crumbled
Salt and pepper to taste
Bring a large pot of lightly salted water to boil. Add potatoes, and cook until tender but firm. Drain, and transfer to a large mixing bowl. Place milk, cheese, and butter into the bowl with the potatoes. Season with salt and pepper. Mash to desired consistency. Stir in bacon, reserving some for the top.
Sour Cream and Green Onion Smashed Potatoes
3 lbs. potatoes, peeled and cubed
1 c. sour cream
3 T. butter
½ c. chopped green onions or chives
Salt and pepper to taste
Bring a large pot of lightly salted water to boil. Add potatoes, and cook until tender but firm. Drain, and transfer to a large mixing bowl. Place sour cream and butter into the bowl with the potatoes. Season with salt and pepper. Mash to desired consistency. Stir in green onions, reserving some for the top.
Cranberry and Raspberry Sauce

Cranberry-Raspberry Sauce
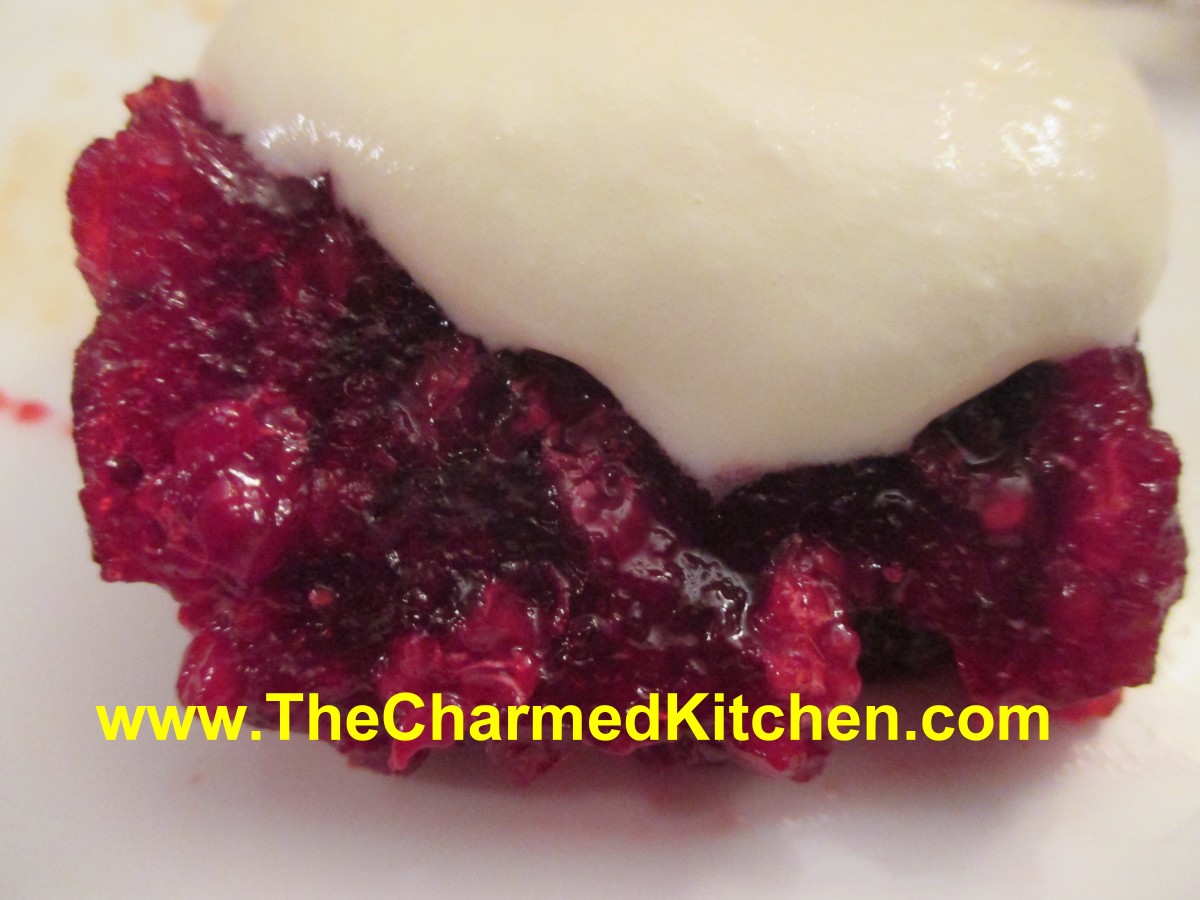
If you are looking for a fun and tasty variation for the usual cranberry sauce this Thanksgiving, I might suggest this cranberry and raspberry version.
The raspberries add a great flavor to the dish along with the cranberries and orange juice.My family has enjoyed versions of this sauce every Thanksgiving for as long as I can remember.
The real secret however, is the dressing. It is a creamy, slightly sweet topping, made with a fruit juice custard and whipped cream. It really changes the whole dish into something special.
This might be the first time people ask for seconds on cranberry sauce.
Cranberry-Raspberry Sauce
12 oz. cranberries, rinsed and picked over
1 c. orange juice
1 T. grated orange peel
½ c. sugar, or to taste
12 oz. raspberries, fresh or frozen ( thawed, if frozen)
Combine all ingredients, (except the raspberries) in a saucepan and cook, stirring often, over medium heat. Cook until then cranberries burst and mixture thickens, about 25 minutes, stirring more often as mixture thickens. Stir in the raspberries. Cool and chill. Makes about 3 cups. Serve with the dressing on the side.
Dressing
2 eggs
½ c. sugar
½ c orange juice
½ c. pineapple juice
2 T. flour
juice of half a lemon
1 c. whipping cream, whipped
Combine all ingredients, except whipped cream, in a saucepan and cook, stirring constantly, until thickened. Mixture should coat a spoon. Cool and chill. Fold cooled mixture into whipped cream. Serves 6-8.
Pumpkin Pancakes

“Pumpkin” Pancakes
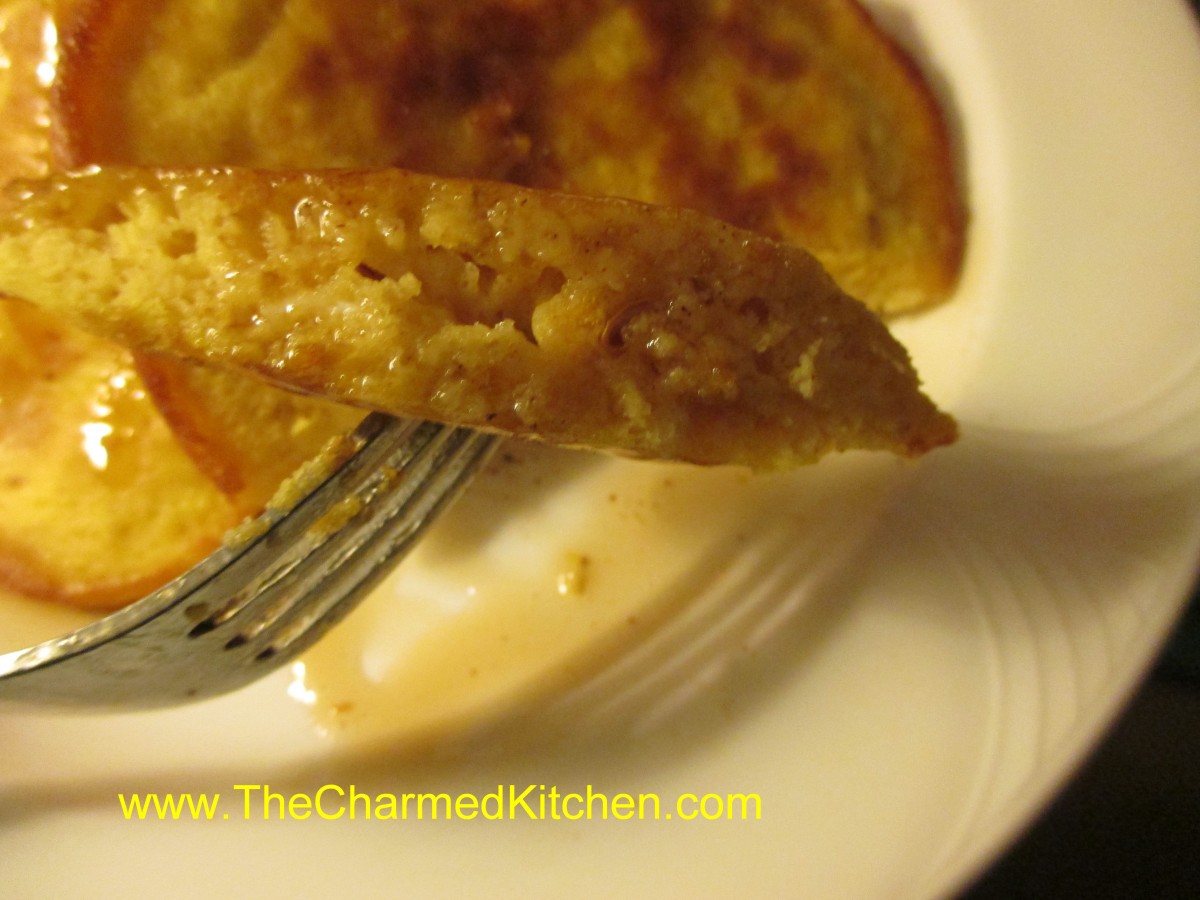
I want to be honest with you from the start. I made these pancakes with cooked butternut squash and not pumpkin. They were terrific.
Many winter squash can be used just like pumpkin in cooking. The problem is that when I post a recipe as “squash” instead of pumpkin, people get confused. Perhaps they are thinking summer squash, like zucchini. Maybe the word pumpkin just conjures up a clearer image.
The pancakes were really good, and isn’t that what matters?
I make my own baking mix, and that is what I used as the base for the pancakes. You can just buy a mix, like Jiffy or Bisquick, if you prefer. The pancakes are light and fluffy, with a nice “pumpkin” flavor. We had them with warmed maple syrup, but they would also be nice served with powdered sugar or perhaps a fresh berry syrup. They would make a nice Thanksgiving Day breakfast, too.
“Pumpkin” Pancakes
2 c. baking mix – like Bisquick or Jiffy Mix – I make my own*
3 T. brown sugar
2 t. cinnamon
1 t. nutmeg
1 1/2 c. evaporated milk
1 c. pureed pumpkin or winter squash
2 eggs, beaten
2 t. vanilla
Combine dry ingredients in mixing bowl and set aside. Whisk together wet ingredients and stir into dry ingredients. Lightly grease a skillet and cook over moderate heat. Use about 1/3 c. of batter per pancake. Turn when edges appear dry. Makes 16.
*Chef Pastry Mix/ Biscuit Mix
8 cups sifted, all-purpose flour
1 c. powdered milk
1 c. powdered buttermilk
¼ c. baking powder
1 T. salt
2 c. shortening, butter or coconut oil*
Sift dry ingredients together 3 times. Cut in shortening, butter or coconut oil to resemble cornmeal. Keep in an airtight container. Store in a cool dry place and use within six months.
* I use coconut oil and store in the fridge. If you use butter or coconut oil- you have to keep in the fridge.
Mom’s Sweet and Sour Cabbage

Sweet and Sour Cabbage
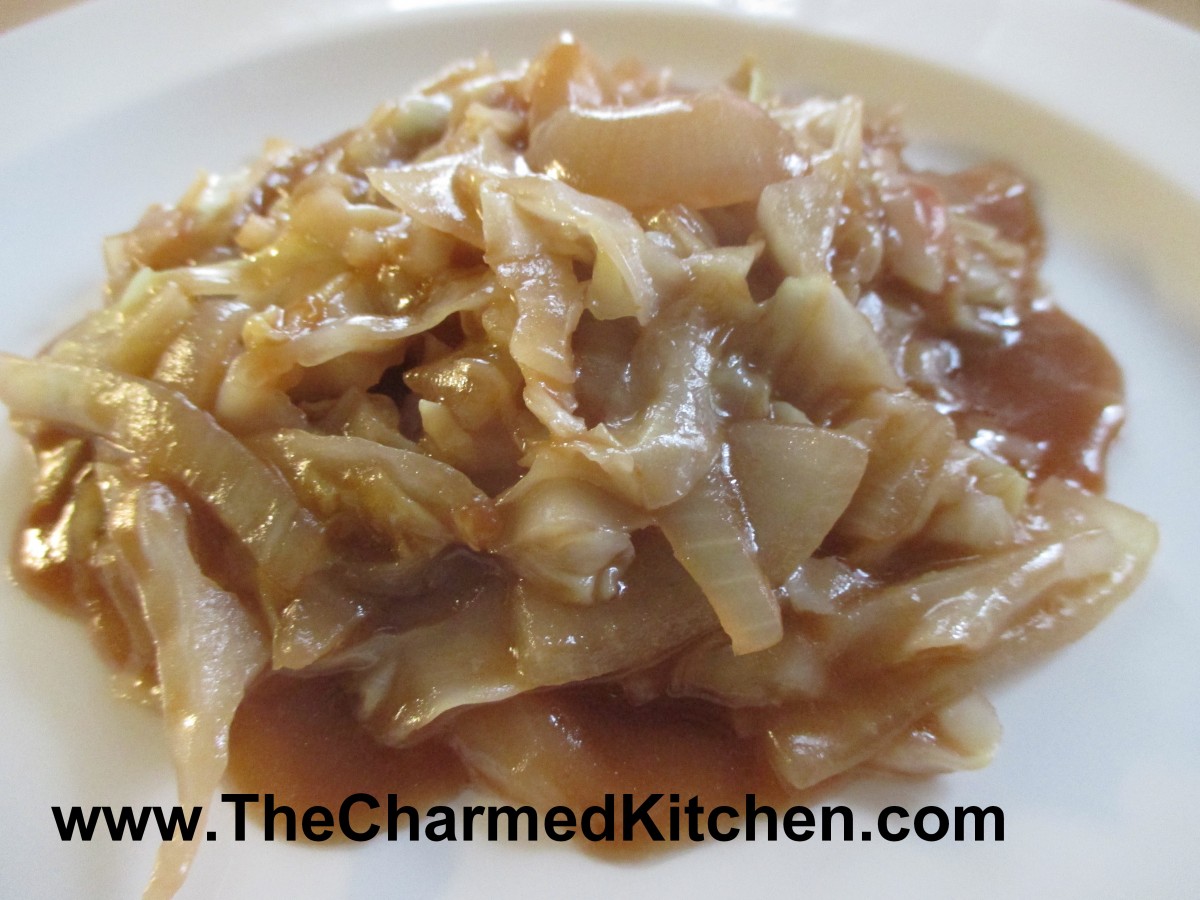
Since I posted Mom’s Pierogi recipe, I thought I had better share her recipe for sweet and sour cabbage, too. This cabbage dish was a favorite of hers. Some years ago, I had gotten after her to get her recipes down, so they would not be lost. Eventually we put together a cookbook of her recipes to share with family and friends. I encourage all of you to do the same. Get those family recipes together.
This cabbage dish is great served with pierogi, or a roast chicken or pork chops. If you cut the cabbage into small pieces, you can also use it as a filling for pierogi. The recipe calls for using a paste-type soup base for flavoring. This was a little change from how my Mom made it, but it was hard to explain what she really did. Using the soup base, was a way anyone could make this cabbage dish. Every time my mom roasted a chicken or maybe a pork roast, she would save all the drippings from the pan. She’d strain them and chill it to remove the fat. She would take the drippings and pop them in a container in the freezer. Once she had a “nice amount”, she would use it to flavor the cabbage. You can see why we used the alternative soup base directions. You could also use chicken or vegetable stock, in place of the water for more flavor.
Here is the recipe. Hope you enjoy it as much as I do.
Sweet and Sour Cabbage
3 lbs. sliced cabbage, about a 3 ½ lb. head or 3 lbs. Cole slaw mix
1 onion, sliced
1 T. oil, butter, margarine or even bacon fat
3 c. water
1 T. paste type soup base or to taste
½ t. thyme
1 t. dillweed
1 t. marjoram
1 T. soy sauce
1 T. Worcestershire sauce
¼ c. balsamic vinegar
2 T. sugar
½ c. catsup
1 c. water
¼ c. flour
Sauté onion in oil until wilted. Bring water to boil in large pot. Add soup base and add cabbage. Stir in onions and remaining ingredients, except for the 1 cup of water and flour and cook, uncovered until cabbage is tender. This can take from 15-25 minutes, depending on the age of the cabbage and the size of the pieces. In jar with a tight- fitting lid combine remaining water and flour and shake until smooth. Add to cabbage mixture and cook, stirring until thickened, about 2 minutes. Adjust seasonings. This dish is great served alone, or with pork or chicken dishes or with potatoes.
Mom’s Pierogi


Pierogi
My mother taught me how to make pierogi, the way her mother taught her. They are part of my family’s food traditions.
Pierogi, if you didn’t know, are pasta, filled with different fillings, often potato based. They are also sometimes stuffed with prune filling or sauerkraut. Today you can find pierogi filled with all sorts of fillings.
There are variations in the dough, too. Some use just eggs, flour, water and salt. Others add some dairy in the form of milk or sour cream.
Once the pierogi are made, you can boil them and just serve them up, or brown the boiled pierogi in butter and serve with caramelized onions and sour cream. My mother used to make sweet and sour cabbage and serve it with the pierogi, or sometimes even use it as a filling. I can’t make them without remembering her.
Pierogi
Dough:
2 c. flour
1 t. salt
½ c. water (you can also use half milk and half water)
1 egg
Mix all ingredients together and knead on floured surface until smooth. Cover and let rest at least 15 minutes. Roll out thin and cut into circles. Re-roll scraps. You should get between 20-30. Spoon filling of your choice on center of dough circle. Fold dough in half over filling and press edge with fork to seal. Wetting the edge of the dough will help the dough to stick. Don’t overfill or the pierogi will split. Test a couple first to get the hang of it. Place a few at a time into salted boiling water and cook until they float. You can eat them as is or brown cooked pierogi in butter in a skillet. Serve with grilled onions and/or sour cream. We would often make a larger batch and then freeze them, uncooked on wax paper-lined baking sheets. When frozen they would be transferred to a freezer bag or container. Place right from the freezer into boiling water when ready to use.
Potato filling:
2 lbs. Potatoes, peeled and boiled
½ onion, minced
2-3 T. cottage cheese or farmer’s cheese, optional
salt and pepper to taste
Mash potatoes with other ingredients and season to taste.
Note: you can also add cheddar cheese if you like. In class we had some with cheddar cheese and added ham, too.
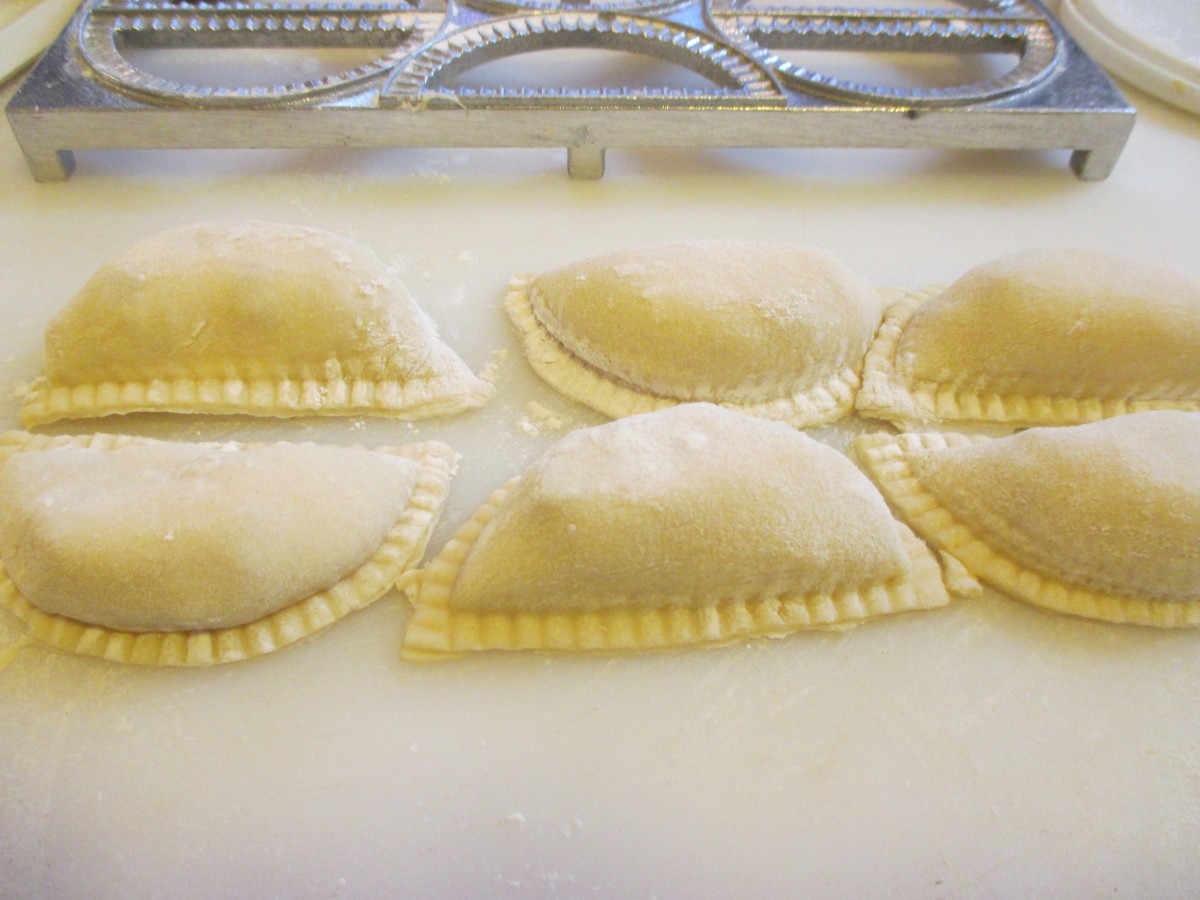
Fresh made pierogi
Mom’s Secret Ingredient Clam Chowder


Clam and Tripe Chowder
My Mother’s clam chowder had an odd ingredient in it. The ingredient made it very special, but yes, I will admit a little strange. In keeping with sharing mom’s recipes this week, I thought I would share the clam chowder story with you.
The mystery ingredient is in there because of my Uncle John. He was my Mother’s older brother and a real smart guy. One day he and my Mom were talking about clam chowder. My Mom had made a big pot of it. She was on a tight budget and was saying that she wished she could afford to put in a lot more clams. She didn’t use canned clams- she bought fresh ones and they cost a lot of money. She made a really good clam chowder.
My uncle wondered if she could add tripe to her chowder. He said that the texture was sort of like clams. Tripe didn’t have a strong flavor on its own and surely it would absorb the flavor of the clams. He said he thought they could put them in and no one would ever know. My mother thought about it and agreed, but said the tripe, normally cut in strips, would not look like clams.
She then figured out that if she put the tripe through her meat grinder on coarse, the tripe would look a lot more like clams and might just work.
She was pretty smart, too.
So the plan was hatched. The next time my Mom made clam chowder she got tripe, ground it and cooked it until tender. She then added it to her clam chowder and invited family over to try it. Everybody loved the chowder and a couple of people even commented on how many clams were in it. So there it is – the story of why I put tripe in my clam chowder. Unlike my Mother I use canned clams. And unlike her and my uncle, I do tell people what is in it, before they eat it.
Clam and Tripe Chowder
1 lb. tripe
oil
2 large onions, chopped
8 cups water or stock
2-3 cans clams, undrained
2-3 c. peeled and cubed potatoes – about 3-4 potatoes
1 (12 oz.) can evaporated milk- or 1 1/2 cups half and half or heavy cream
2 T. flour, optional
1/2 c. chopped fresh parsley
salt, pepper and hot pepper sauce to taste
When I bought the tripe at the store the package said it had been scalded. Not sure that matters but I figured I’d mention it. I took the tripe and ground it in my meat grinder. If you don’t have a meat grinder, you can cut the tripe up a bit and chop it up in a food processor. Pulse on and off until it is chopped up to the size you want. In soup pot heat the oil and cook the onion until tender. Add the tripe and the water or stock. Simmer, covered, until the tripe is tender, about 90 minutes. Some of the water cooked off, but that was fine with me. Add the clams and their liquid, season to taste and allow to simmer another 30 minutes or so. Add the potatoes and cook, covered, until the potatoes are tender, about 15 minutes. At this point you can add just the milk or you can add the milk and the flour- depending on how thick you like your chowder. If you are thickening it- place some of the milk in a jar with a tight fitting lid along with the flour. Put the lid on and shake well until flour is mixed into the milk and there are no lumps. Add to the chowder with the rest of the milk and the parsley. Bring to a gentle simmer and cook about 5-10 minutes longer. Stir from time to time so the chowder won’t burn. Adjust seasonings and serve. Serves 6-8.
Busha’s Mushroom Soup

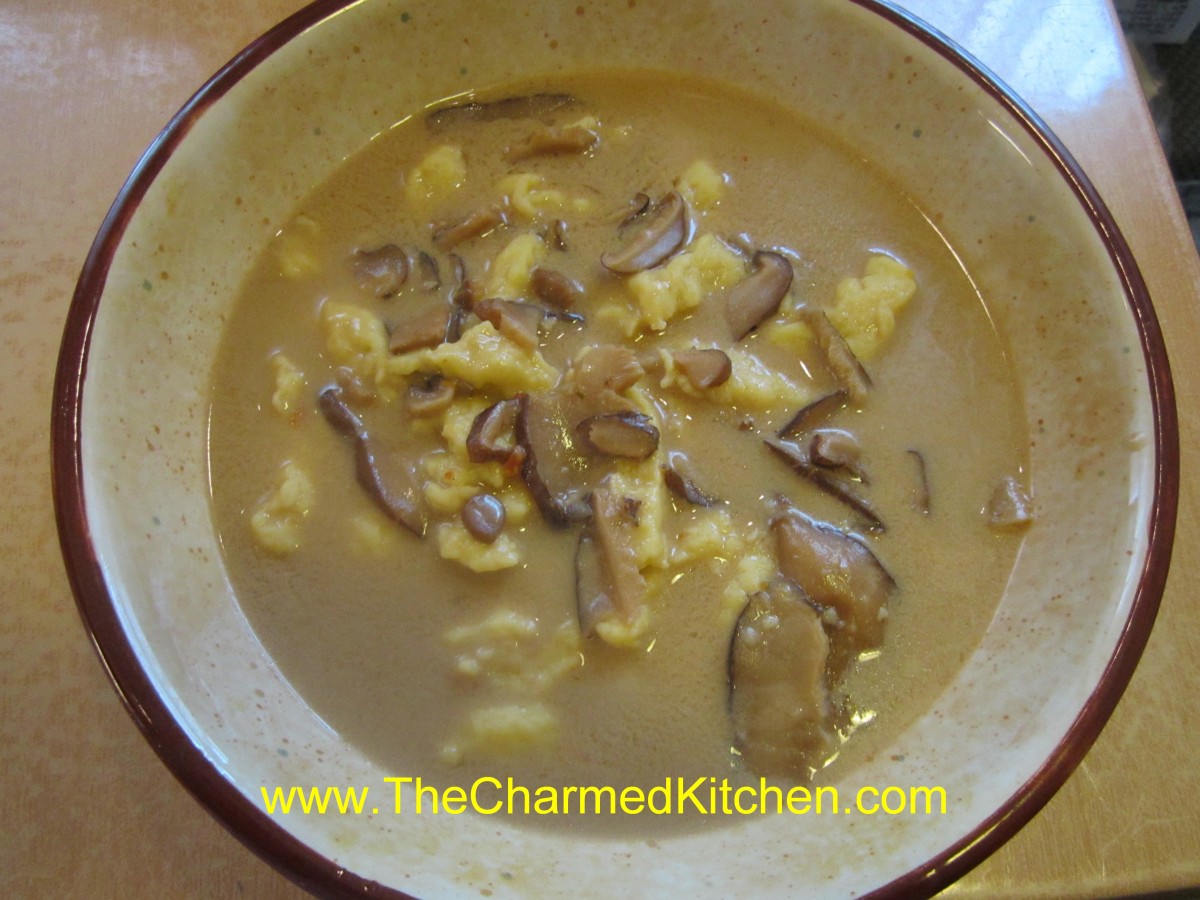
Busha’s Mushroom Soup
Since I decided to share some of my Mother’s favorite recipes this week, I had to include this soup. Sharing this family recipe with other people makes me happy. My Busha (Polish Grandmother) and my Mother both made this soup. They would be pleased to know that someone is still making it.
There are many variations of mushroom soup in Eastern European culture. Some have barley, others add sauerkraut. This is my family’s version. Plenty of mushrooms in rich stock, slightly thickened, and made creamy with the addition of sour cream. Ours is served with kluski noodles.
This soup is a tradition in my family. When I was a kid, my Busha would make it every Easter. My Mom made it for Christmas Eve. Now my niece makes it, and we have it the day before Thanksgiving.
It is one of those dishes that brings back so many wonderful childhood memories. I love the rich, earthy flavor of the mushrooms, and the slightly sweet/sour flavor of the broth. It is made with dried mushrooms, usually. I can remember watching my mom get out a big bowl and soaking the mushrooms to get them clean, and to soften them, before starting the soup.
I use dried shiitake mushrooms, but often add fresh mushrooms as well. Sometimes I use other dried mushrooms, too. I like to have a variety of mushrooms in the soup. I use chicken stock. If made with vegetable stock, it could make a great meatless meal.
Busha’s Mushroom Soup
4 qt. Chicken, beef or vegetable stock
5 c. dried mushrooms, about 4 0z. I use Shiitake.*
Water for soaking
½ c. flour
1 pint sour cream
¼ c. balsamic vinegar
2 T. sugar
1 Lb. Kluski-style noodles, cooked and drained
Soak mushrooms in water for 1-2 hours. Lift mushrooms carefully out to leave any sand in the bowl of water. Rinse and drain. Set aside. Bring stock to a boil and add the mushrooms. Simmer, covered for about 1½ hours, or until mushrooms reach desired tenderness. Mushrooms will retain some “chewiness”. In medium bowl whisk sour cream into flour gradually until smooth. Stir in vinegar and sugar until smooth. Add a small amount of the hot soup to the sour cream mixture, whisking until smooth. Continue adding hot soup to the sour cream mixture until sour cream mixture is warm. Add the warm mixture to the pot of soup and stir to combine. Return to simmer and simmer 1 minute, stirring continuously. Place desired amount of kluski into bowls and ladle over the hot soup. Serves12.
Note: You can add a variety of fresh mushrooms to the soup to make it even more special. You might use portabellas; crimini, button or whatever mushrooms are at the store that day. Add in addition to the dry mushrooms; don’t reduce the amount of shiitakes.
You can use other cooked pasta. Mom said you might want to try spaetzels or even gnocchi. You might also need more than one pound of kluski, depending on how much pasta your family likes in their soup.
*The dried shiitake mushrooms can be found at specialty grocery stores, some larger grocery stores and at Asian markets.
Mom’s Duck Fat Bread


Mom’s Duck Fat Bread
Today would be my Mom’s birthday. I still miss her. I thought I would share some of her favorite recipes this week. She was a wonderful cook and I learned a lot from her. Here is a bread she was famous for in our family.
My Mom used to make this wonderful sweet bread. Made it for every family occasion. The recipe uses butter. She was a very frugal person. One day, she decided to render the skin from a duck she was using in soup. She didn’t want to just toss it. Too wasteful. Once it was cooled, the duck fat looked like butter. She was making her sweet bread and substituted the duck fat for the butter in the recipe. When my brother-in-law, Bob, tasted it he declared it was the best bread yet. My Mom told him what the secret ingredient was, and from that day on, we always called it duck fat bread, even when it was made with butter. Here is the recipe- wonderful even if made with plain old butter.
Mom’s Butter Coffeecake Braids aka Duck Fat Bread
4 1/2 c. flour
2 T. sugar
1 t. salt
½ c. butter or 1/2 c. cooled rendered duck fat
1 packet yeast
¼ c. warm water
2 t. sugar
1 c. evaporated milk
2 eggs, beaten
Combine flour with sugar and salt. Cut in butter or duck fat and set aside. Dissolve 2 teaspoons sugar in warm water. Dissolve yeast in warm water mixture and set aside. Allow to become bubbly, about 5 minutes. Combine milk with eggs. Stir in yeast mixture and add to flour mixture stirring well. Knead dough in bowl until smooth, about 10 minutes. Place on lightly floured surface and knead until smooth. Cover and let rise until doubled, about 1½ hours. Divide dough in half and then each half into thirds. Roll dough into ropes and braid three ropes together. Repeat with remaining 3 ropes. Place braids in 9×5 inch greased bread pans and cover with a towel. Place in a warm, draft-free place and allow to rise until doubled, about 1½ hours. Bake in a preheated 350 degree oven for 25 minutes. If you like glaze loaves while warm with a mix of powdered sugar, a little milk, butter, and vanilla. Toasted almonds or walnuts can be added, if desired. Makes 2 loaves.
Note: You can also refrigerate the dough after kneading it if you would prefer. Just place dough in an oiled bowl, cover with plastic wrap and chill overnight. Roll and shape dough into braids when cold from the fridge. Rise, covered, until doubled in bulk, about 2-3 hours. Bake as directed.
Note: You can also place loaves on a greased baking sheet for a longer, flatter bread rather than in loaf pan.


