Martha’s Beets
Martha’s Beets
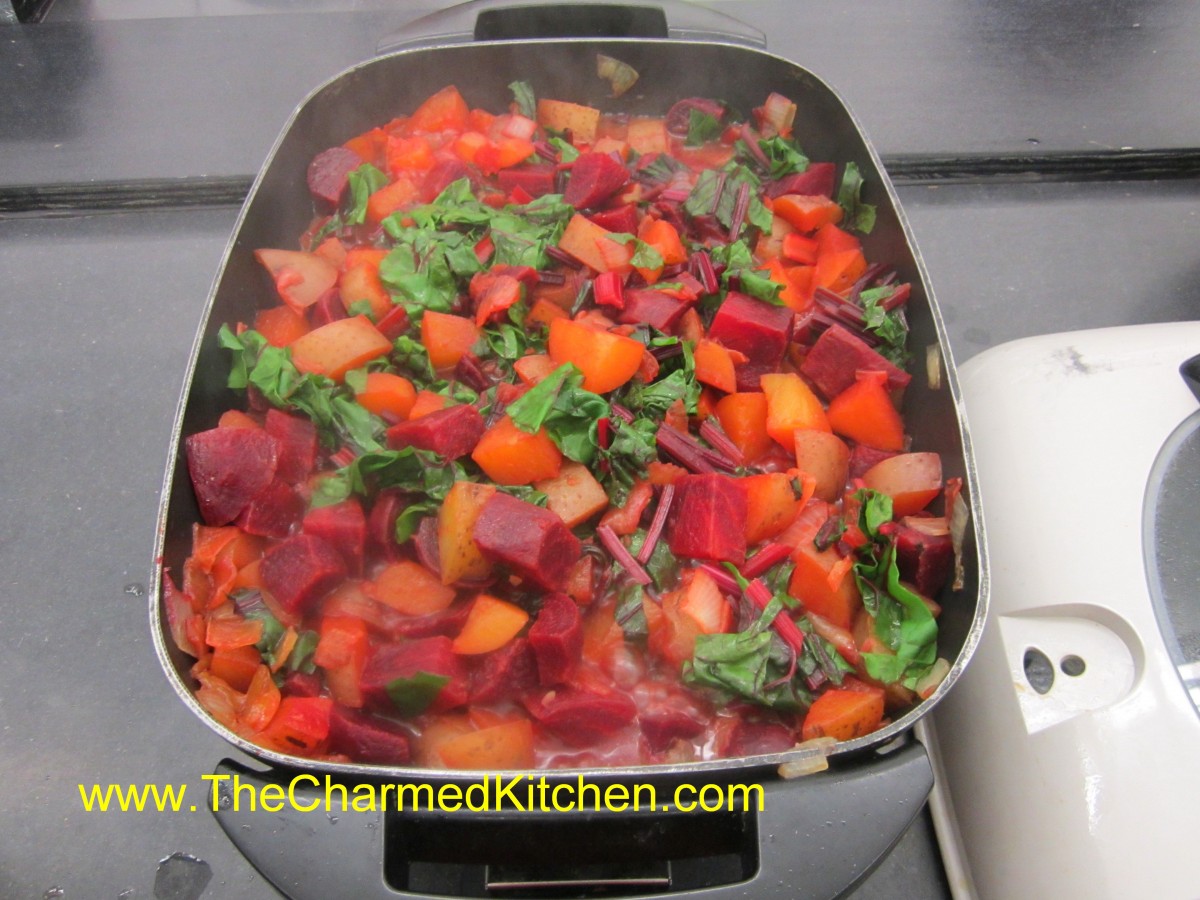
I had picked up some beets from a local farmer the other day. I have made this dish many times and it seemed like a good time to make it again.
This is a recipe that my friend, Martha, made for us one chilly autumn afternoon. The amounts are random for a reason. Just use what you have- more or less – and let the flavors blend together gently.
I have been lucky enough to spend some time with Martha this week . She has been my best friend forever. She is one of the best people I have ever known. I feel truly blessed to have her in my life.
Full of earthiness and great fresh flavors it is always a favorite of mine. I always think of her, with great affection, when I make it. Love you, Martha. So glad we got together.
Martha’s Beets
Oil
2 Onions, chopped
Potatoes, cut in big chunks, peeled, if desired
1 bunch beets, with greens*
Chicken or vegetable stock
Parsley
Salt and pepper
Cook beets in boiling water for 20 minutes. Cool and slip off skins. Cut up larger beets, if desired. In large pot cook onions in oil until tender. Add potatoes and prepared beets with just enough stock to keep them from sticking. Cover and cook over medium-low heat until vegetables are tender. Meanwhile chop up the beet greens. Add them to the pot and stir in. Cover and continue cooking until greens are tender. Toss in fresh parsley and cook 5 minutes longer.
* If you can’t find beets with greens, or if you like more greens, you can also add red Swiss chard in place of the beet greens.
Summer Tomato Salads

Marinated Tomato Salad
Tomato season is too short around here. I can never get enough of what my mom called “real tomatoes”. The first few tomatoes never make it in the house. Warm from the sun, they are too tempting. I just pick them right off the plant and eat them.
Then, I start to think about preserving some for after the season is over. So I start drying and canning tomatoes.
Sometimes, in the excitement of canning and dehydrating tomatoes, I find I haven’t remembered to eat enough of them fresh. So anxious to get as many as possible put away for winter, I have denied myself the pleasure of fresh, juicy, vine-ripened tomatoes.
Well, not this year. I have been having tomatoes with my eggs for breakfast, creamy tomato soup for lunch and plenty of tomato sandwiches and salads. I thought I would share a few of my favorite tomato salad recipes with you.
They are pretty simple. I think that is how it should be. When you have something as close to perfection as a ripe tomato, little more is needed.
Marinated Tomato Salad
3 large tomatoes, cut in wedges, or 2 pints cherry tomatoes, halved
1 T. olive oil
1 clove garlic, minced
2-3 basil leaves, cut into thin strips
2 T. balsamic vinegar
salt and pepper to taste
Combine ingredients and serve at room temperature. Serves 4-6.
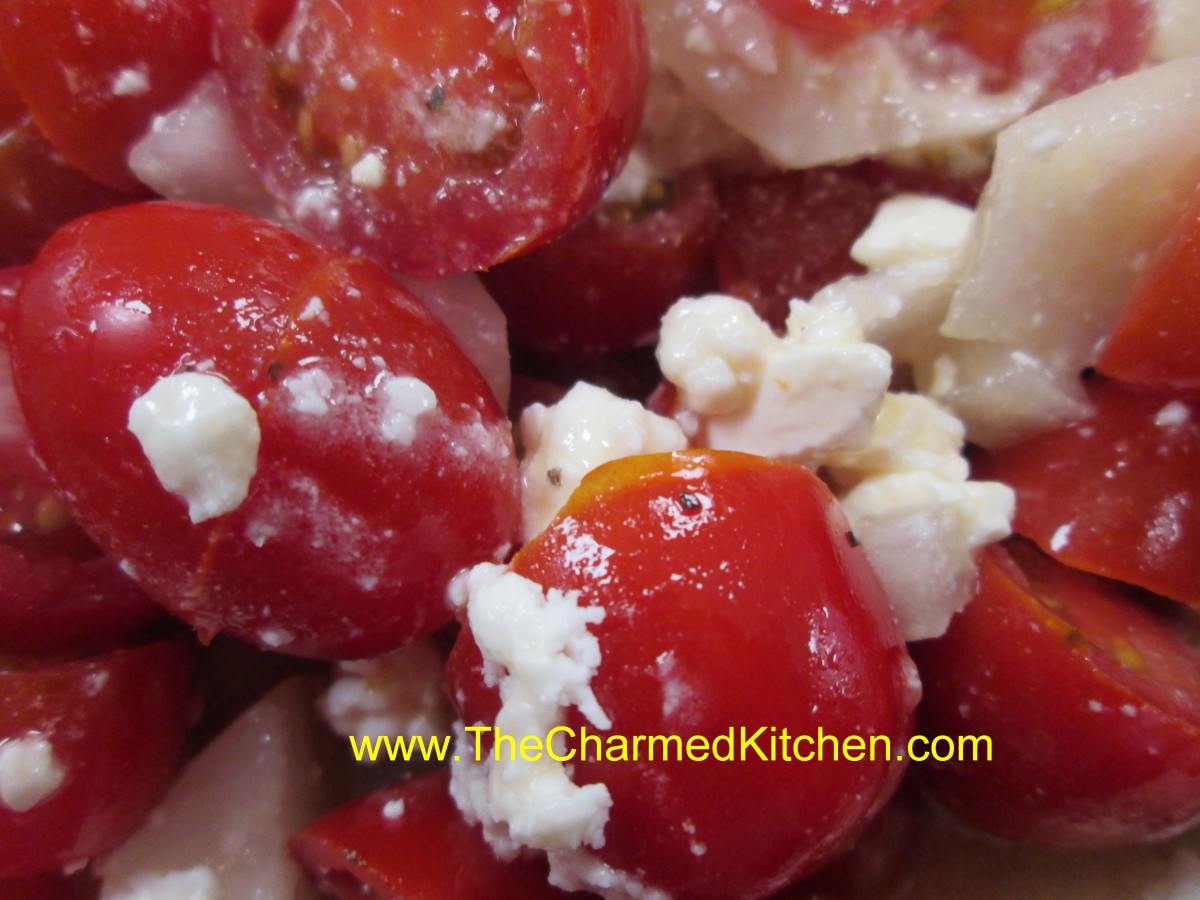
Tomato and Feta Salad
3 tablespoons crumbled feta cheese
12 cherry tomatoes, thinly sliced
1/2 sweet onion, diced
1 tablespoon olive oil -I used a lemon infused olive oil
1 tablespoon lemon juice
Salt and pepper to taste
In a bowl, mix the feta cheese, cherry tomatoes, onion, olive oil, and lemon juice. Add salt and pepper to taste. Serve immediately. Serves 2.
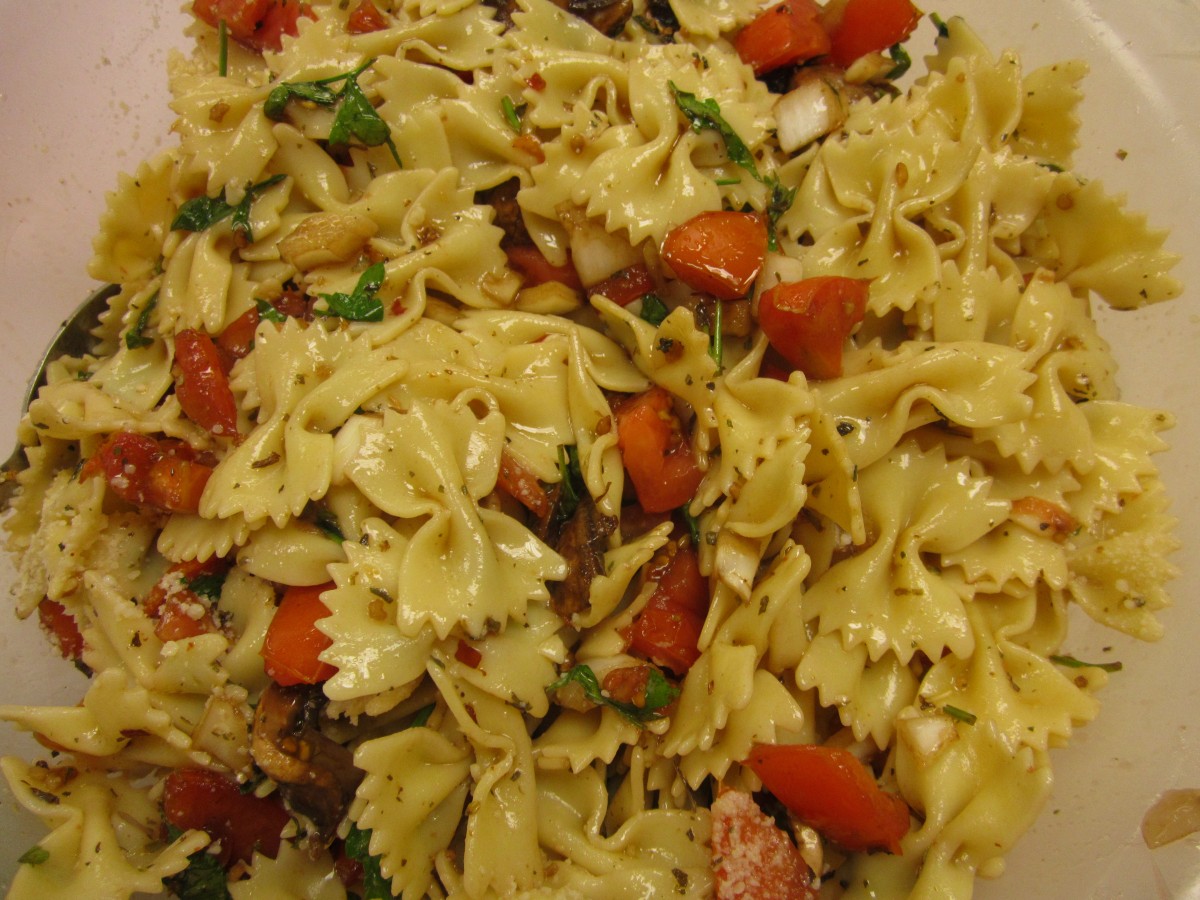
Warm Pasta Salad
1 lb. Plum tomatoes, chopped
1 medium sweet onion, chopped
4 oz. Fresh mushrooms, sliced
2 cloves garlic, minced
¼ c. fresh parsley, chopped
1 T. dried basil or 1/4 c. chopped fresh basil
1 T. capers, optional
1 t. dried oregano
½ c. olive oil
¼ c. red wine vinegar
3 T. balsamic vinegar
Dash of hot red pepper flakes
Salt to taste
1 lb. Uncooked pasta
Combine all ingredients, except pasta and chill overnight. Cook pasta, drain and toss with tomato mixture. Mixture should be served right away . Serves 6.
BLT Salad
6-8 slices bacon
2 slices rye bread
2 slices Swiss cheese
5 c. torn up lettuce or mixed greens
3 T. olive oil
2 T. apple cider vinegar
1 T. balsamic vinegar
Salt and fresh ground pepper
2-3 tomatoes, diced
Cook bacon until crisp. Remove from pan, drain and crumble. Remove most of the bacon grease from the pan. Make a sandwich with the rye bread and the Swiss cheese. Toast in the skillet over medium heat until golden brown and cheese is melted. Set aside. Place lettuce in bowl and toss with the oil to coat the leaves. Toss with the vinegars and season with salt and pepper to taste. Add the tomatoes and the bacon and toss. Cut the sandwich into cubes and place on the top of the salad. Serves 2.
Note: you can make two sandwiches if you want more bread and cheese in the salad.
Tomato Feta Salad
Warm Pasta Salad

BLT Salad
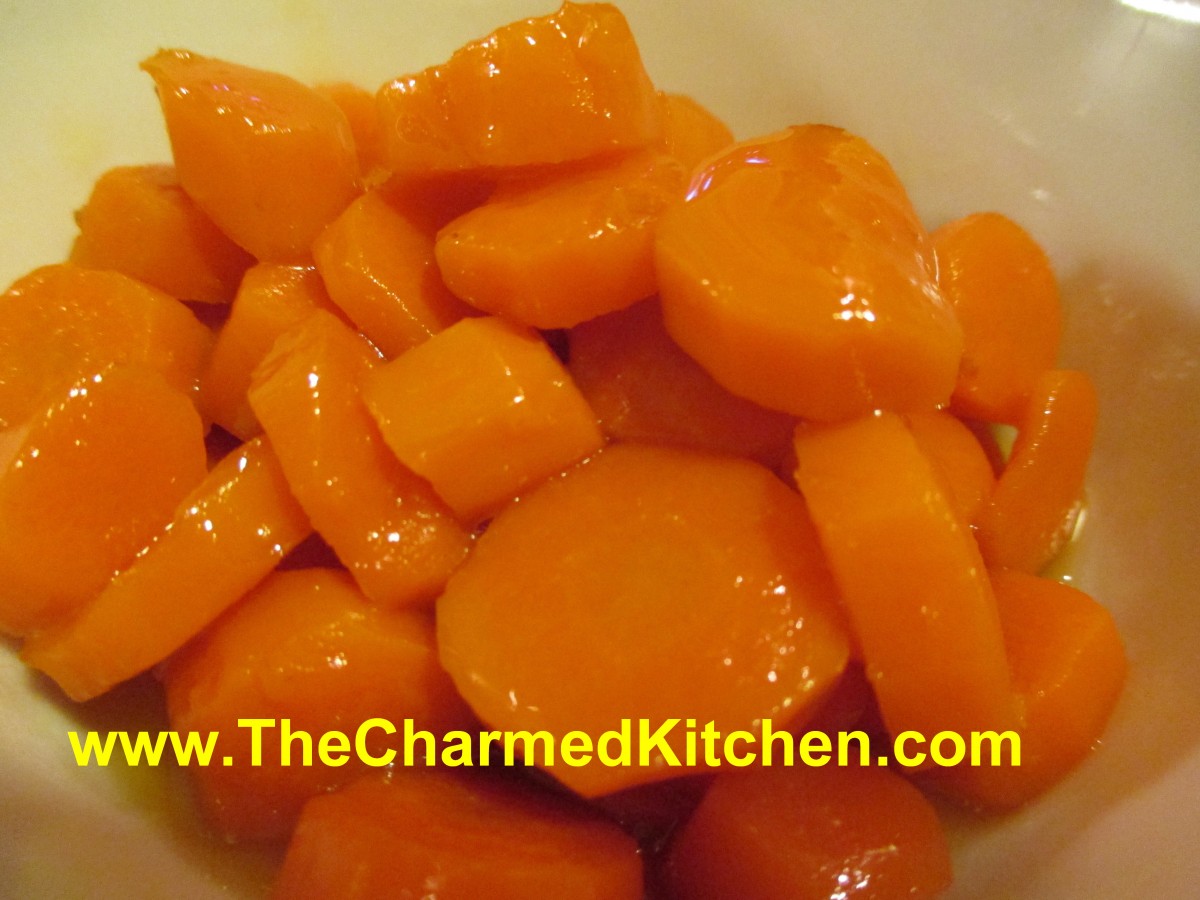
Maple Ginger Carrots
Maple Ginger Carrots
Later today, I am teaching a class on cooking with maple syrup. One of the dishes I am making are these carrots, glazed with maple syrup. Maple syrup adds natural sweetness and a unique flavor to foods. “Maple flavored” syrup just isn’t the same. You need the real thing.
Sometimes simple just works. These carrots are super simple – and the flavors work together well. I combined them with maple syrup, butter, ginger and some salt and pepper. I have made them for family and friends before and everyone loved them. It had become one of my “go to” recipes.
Maple Ginger Carrots
1 lb. carrots, peeled and sliced
1/4 c. water
4 T. butter
1/2 c. maple syrup
1 t. grated ginger
salt and pepper to taste
Place carrots in a pan with the water. Cover and cook over medium heat until carrots are almost tender. Add the butter and cook a few minutes more. Add remaining ingredients and cook, covered, until carrots are tender. Remove lid and cook until most of the liquid evaporates. Adjust seasonings and serve. Serves 4-6.
“Fond” of This Cauliflower
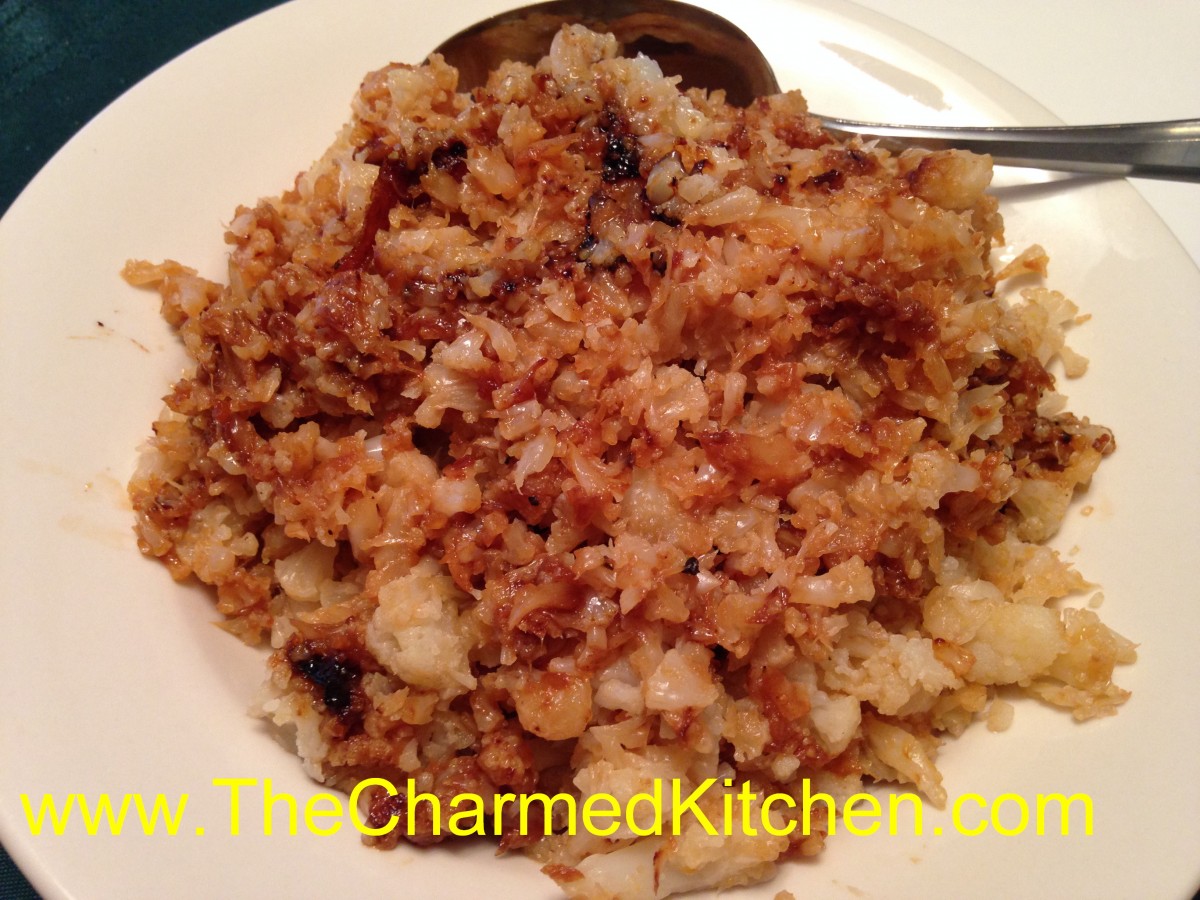
Fond Cauliflower
Did you know that those little brown bits in the bottom of your roasting pan have a name? Well, a name other than drippings or little brown bits.
They are sometimes called fond, or the fond. It is from the French word for base- also referring to the base of a sauce. I used the fond from a roasted turkey breast when making my cauliflower.
The picture of this cauliflower does not do it justice. It was so tasty. It was one of those dishes that happened by accident. Now, it is one of my favorite ways to make cauliflower.
Here is how the whole thing happened. I was roasting a turkey breast for dinner. I also was serving cauliflower, but had not yet decided just what to do with the cauliflower. I had cooked the cauliflower until tender, and then mashed it. But I wasn’t using dairy with dinner- so no added butter or milk to my mashed cauliflower.
I had just taken the turkey breast out to rest when I looked at the bottom of the roasting pan. I hadn’t planned on making gravy, but did not want to waste all the flavor in that roasting pan. It suddenly occurred to me to just use the cauliflower to get out that flavor.
The turkey breast was lean, so there wasn’t too much fat in the bottom of the roasting pan. I would have removed some, if there was a lot of fat. I had also seasoned the turkey, so some of the herbs were also in the fond. I just dumped the hot, mashed cauliflower into the pan, I tossed it around, to get as much of the flavors from the fond as possible. Since the pan was on top of the stove, I turned the heat on under it for a few minutes, as I tossed the cauliflower around. Then I removed the cauliflower and plated it for dinner. It didn’t need any other seasoning. It had a rich, roasted flavor.
I wish I could say there was an exact recipe for this dish. There isn’t. Just be sure to have a cup or two of cauliflower for each serving. It will cook down a lot. I cooked the cauliflower ahead of time and just tossed it into the pan. You could cook the cauliflower right in the roasting pan, if you prefer. I would chop it up pretty fine, if you are going to do that. It will shorten the cook time considerably.
It was just one of those moments when, afterwards, I wondered why I had never thought to do this before. The cauliflower tasted like it had roasted for a long time. Better still, none of the lovely flavors of the fond were lost.
I can certainly see doing this with other veggies like Brussels sprouts, cabbage, carrots or mushrooms.
Mom’s Sweet and Sour Cabbage
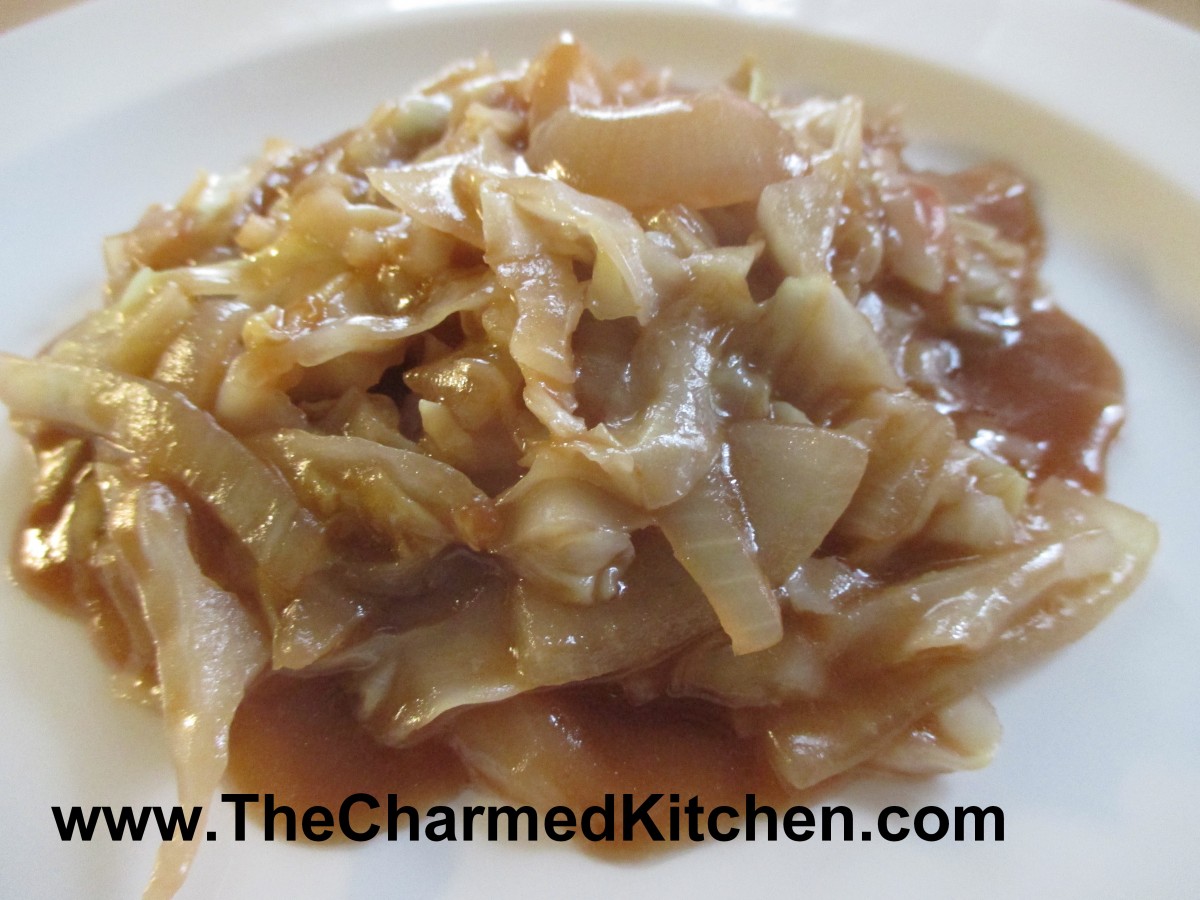
Sweet and Sour Cabbage
Since I posted Mom’s Pierogi recipe, I thought I had better share her recipe for sweet and sour cabbage, too. This cabbage dish was a favorite of hers. Some years ago, I had gotten after her to get her recipes down, so they would not be lost. Eventually we put together a cookbook of her recipes to share with family and friends. I encourage all of you to do the same. Get those family recipes together.
This cabbage dish is great served with pierogi, or a roast chicken or pork chops. If you cut the cabbage into small pieces, you can also use it as a filling for pierogi. The recipe calls for using a paste-type soup base for flavoring. This was a little change from how my Mom made it, but it was hard to explain what she really did. Using the soup base, was a way anyone could make this cabbage dish. Every time my mom roasted a chicken or maybe a pork roast, she would save all the drippings from the pan. She’d strain them and chill it to remove the fat. She would take the drippings and pop them in a container in the freezer. Once she had a “nice amount”, she would use it to flavor the cabbage. You can see why we used the alternative soup base directions. You could also use chicken or vegetable stock, in place of the water for more flavor.
Here is the recipe. Hope you enjoy it as much as I do.
Sweet and Sour Cabbage
3 lbs. sliced cabbage, about a 3 ½ lb. head or 3 lbs. Cole slaw mix
1 onion, sliced
1 T. oil, butter, margarine or even bacon fat
3 c. water
1 T. paste type soup base or to taste
½ t. thyme
1 t. dillweed
1 t. marjoram
1 T. soy sauce
1 T. Worcestershire sauce
¼ c. balsamic vinegar
2 T. sugar
½ c. catsup
1 c. water
¼ c. flour
Sauté onion in oil until wilted. Bring water to boil in large pot. Add soup base and add cabbage. Stir in onions and remaining ingredients, except for the 1 cup of water and flour and cook, uncovered until cabbage is tender. This can take from 15-25 minutes, depending on the age of the cabbage and the size of the pieces. In jar with a tight- fitting lid combine remaining water and flour and shake until smooth. Add to cabbage mixture and cook, stirring until thickened, about 2 minutes. Adjust seasonings. This dish is great served alone, or with pork or chicken dishes or with potatoes.
Cauliflower and Grilled Corn Gratin

Cauliflower and Grilled Corn Gratin
I made this dish for a dinner with friends this weekend. It was a big hit. The cauliflower, corn and carrots worked perfectly together. Of course, the bechamel sauce, cheese and bread crumbs didn’t hurt, either.
This dish came about because I needed a side dish and wanted to use what I had on hand. I had recently purchased a rather large head of cauliflower. I was thinking gratin, but wanted more than cauliflower so I looked to see what else I had around. Carrots seemed like a natural addition. I like their sweetness with cauliflower, plus they would add a pop of color. A trip to the freezer for something else was a lucky break.
I saw a package of corn I had recently frozen. I had been to a clambake the weekend before. They had grilled corn on the cob and had extras. I was given some to take home. Thanks, Arlene!!!
I cut the corn off the cob and used some of them in a chowder. I froze the rest, about two cups worth. I just knew that was what I need to round out the flavors in the gratin.
I was right. It was a wonderful combination. If you don’t feel like grilling corn, you can cook it under the broiler.
So here is the recipe. Hope you give it a try.
Cauliflower and Grilled Corn Gratin
6 c. cauliflower- broken into bite sized pieces
4 ears corn, grilled, cooled, kernels cut off the cobs- about 2 cups
3 medium carrots, peeled and sliced thin
4 T. butter
4 T. flour
2 ½ c. half and half, warmed
Salt and pepper to taste
4 oz. sharp cheddar cheese, shredded
¼ bread crumbs
Prepare cauliflower by steaming until just tender. Steam the carrots until just tender, too. I was lucky enough to have corn that had been grilled, minus the husks, so it had a nice char on it. The smoky flavor really added to the dish. You can cook the corn under the broiler, too, to get that char. Combine the vegetables in a lightly buttered casserole dish. I used a 9×9-inch square pan. Then make the white sauce (bechamel) by melting the butter together in a pan with the flour, whisking until smooth. Stir in the half and half and cook over medium heat, stirring constantly, until sauce is thickened and bubbly. Season with salt and pepper- use enough- the veggies don’t have any salt on them. Pour the sauce over the veggies in the casserole dish and stir a little to coat evenly. Sprinkle with the cheese and then the bread crumbs. Bake in a 350 degree oven until the mixture is bubbly and the top is golden brown, about 30 minutes. Serves 6.
Butternut Squash Saute

Butternut Squash Saute
Winter squash season is here, and I could not be happier. I love the variety of squash (and pumpkin) at the markets this time of year. They are both beautiful and tasty.
This dish is a saute of butternut squash with onions, garlic, carrots and finished off with black sesame seeds.It makes a great, seasonal side dish.
I used butternut squash, but you could use any number of hard squashes, or even pumpkin. If you are looking for a different way to cook some of those squash- try this dish. I think you might be surprised at just how good it is.
When cutting up hard squashes, you have to be careful not to cut yourself. A round, hard squash, with a tough outer skin can be a recipe for disaster. I trim a small slice off one end of my squash, creating a flat side. Then I lay it down on that side, to make it more stable for cutting. With the butternut, once it was sliced on one side, I was able to cut in in half pretty easily.
Butternut Squash Sauté
3 tablespoons olive oil
1/2 cup chopped onion
1 teaspoon minced garlic
4 cups cubed fresh butternut, acorn or Hubbard squash or pumpkin
1/2 cup grated carrot
2 tablespoons soy sauce
1 teaspoon salt
1 teaspoon ground black pepper
2 teaspoons black sesame seeds
Heat the oil in a large skillet. Add the onion and garlic; cook and stir until the onions begin to brown. Stir in the squash, carrot, soy sauce, salt, and pepper; cook, covered, another 5 to 7 minutes, until squash is tender. Sprinkle with sesame seeds before serving.
Mom’s Cabbage and Noodles
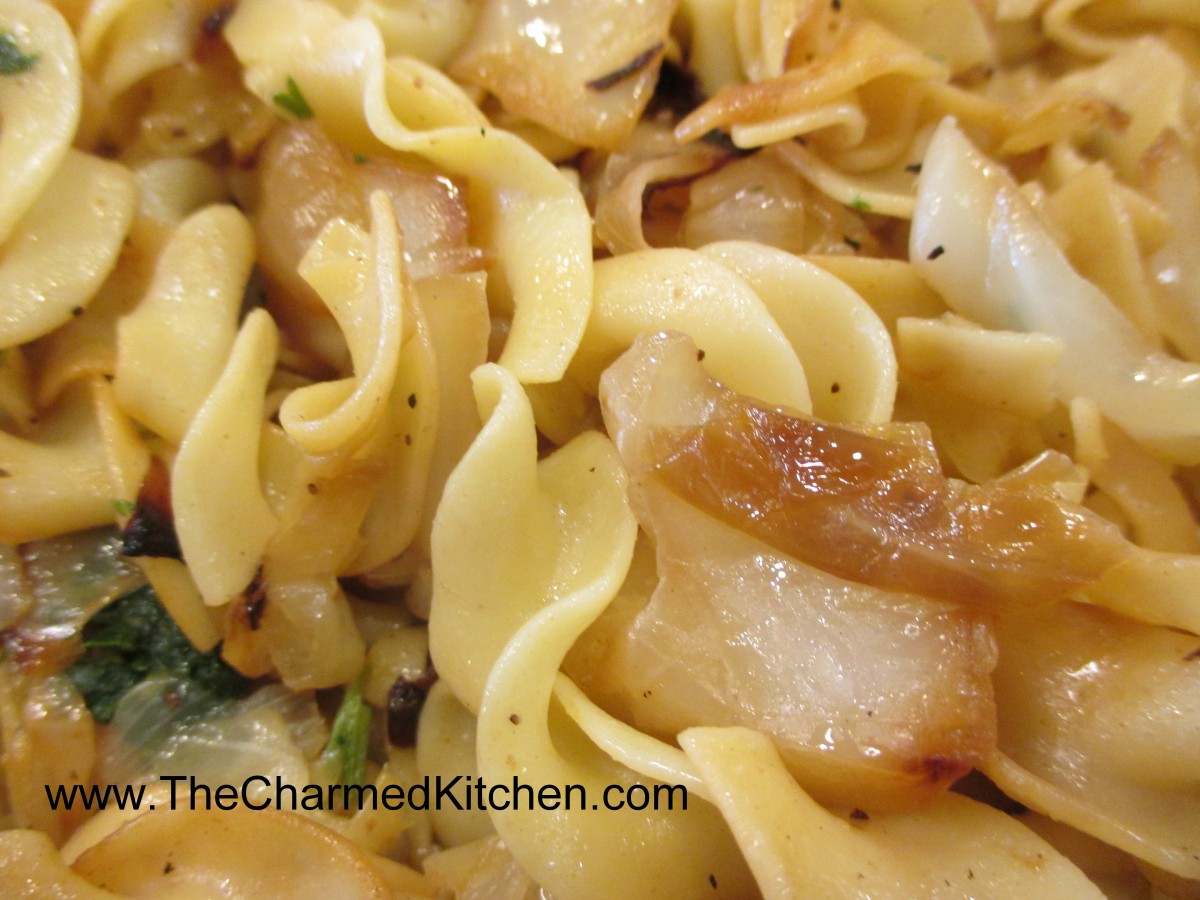
Cabbage and Noodles
Cabbage and noodles is not a glamorous dish and it never will be. That’s fine with me. It is a dish that will always remind me of my childhood. My Mother would make cabbage and noodles as a side dish, at least a couple of times a month. I loved it. I think of her every time I make it. It is, for me, a favorite comfort food.
I was making this dish for a class this morning. One of the ladies said I must be of Eastern European descent. She was right. This dish is definitely the food of my people.
One reason it tasted so good, is that Mom took the time to caramelize the onions and to let the cabbage brown some, too. That added another layer of flavor to the dish. Simple and very tasty.
I used green cabbage this time, but you can use red cabbage, or a combination. Cabbage and noodles can be a side dish or even a main dish. You can play around with adding other ingredients. Sometimes I add cooked bacon, or leftover ham.
Cabbage and Noodles
1 onion, chopped
Oil
4-6 cups chopped cabbage
4 c. cooked noodles
Salt and pepper to taste
Fresh or frozen chopped parsley
Heat oil in skillet and cook onion until wilted and a little brown. Add cabbage and stir fry until cabbage in tender and starts to turn a little brown. Stir in noodles and cook until heated through. Season to taste and toss in parsley. Serves 4.
Beet Dumplings

Beet Dumplings
These dumplings were inspired by gnocchi. Gnocchi are wonderful little dumplings made with potatoes in the dough. I love them and make them often.
Since I had a lot of beets, I wanted to use some, to shake things up a little. I made a version with cooked beets. The color came out so vibrant.
The flavor of the beet is somewhat muted in this little dumpling. For serving, I combined the beet version with traditional gnocchi and some made from sweet potatoes. These would be a nice side dish for all sorts of dishes. I will make more and serve them with a roast chicken this weekend.
I do a very rustic version- just slice dough off into 1/2 -inch thick pieces and boil them up. These could be made ahead and frozen, too.
Beet Dumplings
2 small russet potatoes, 11-12 oz. total, peeled, diced into 1/2-inch cubes
2 medium/small beets, roasted, skin on, cooled
1 egg
1/4 c. whipping cream
1 1/4 t. salt
¼ t. dill weed
1 1/2 c. (about) flour
Steam potatoes over boiling water until tender, about 12 minutes. Place in bowl and mash or put potatoes through a ricer. Place in bowl and cool about 10 minutes. Remove skins from cooled beets and dice. Place beets in a food processor or blender. Add the cream and process until smooth. Combine with potatoes, egg, salt and dill and mix well. Stir in flour and combine until slightly sticky dough forms. Add more flour a tablespoon at a time if the mixture is too moist. Turn dough onto lightly floured work surface and divide into 6 equal portions. Roll out 1 piece into a rope about 20-inches long by 3/4 inch. Cut dough into 3/4 -inch pieces and arrange finished dumplings in a single layer on a floured baking sheet and repeat the process with the remaining dough. Boil the dumplings in well-salted boiling water, about 1/3 at a time. Boil for 4-5 minutes. They will come to the surface and be tender. Check after 4 minutes. Serve with butter and Parmesan cheese or with your favorite sauce. Serves 6.

A Trio of “Gnocchi”
Roasted Beet Salad
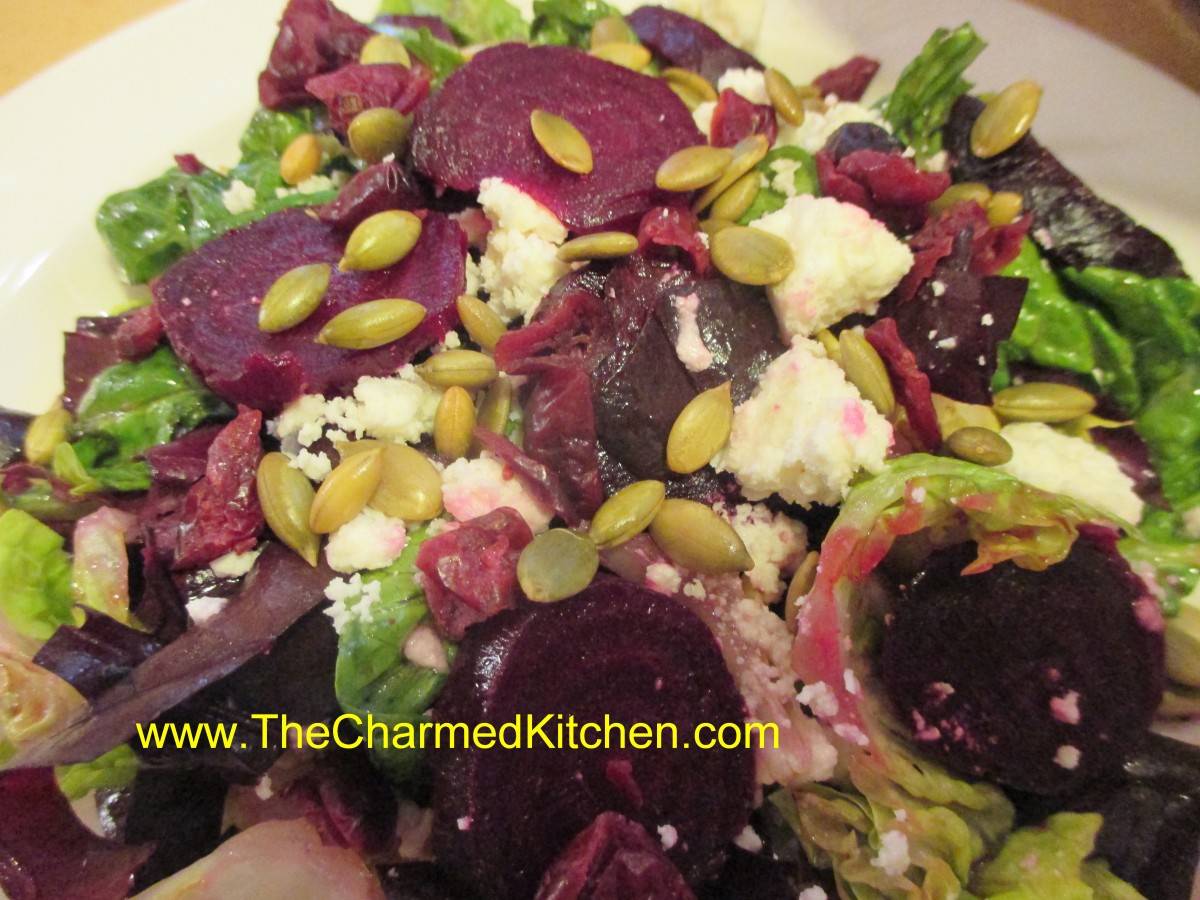
Roasted Beet Salad
I got a great number of beets a couple of days ago. I will be canning many over the weekend, but I also want to enjoy them fresh. Decided to roast some beets and then go from there. To roast beets: just wash them and trim off the greens- leaving about an inch of the stems to reduce bleeding.
My beets don’t have their greens, but trim off, if they do. The beet greens could be added to the salad.
Place beets in a roasting pan and drizzle with a little oil. I used avocado oil. Cover pan and place in a 350 degree oven for about 45 minutes. Smaller beets will be cooked in less time- about 35 minutes. Really large beets could take up to an hour. I always check by poking one of the beets with a fork. Let the beets cool a little and then remove the peels. I use a knife to do this. They come off quite easily.
I used three small beets to make this salad for lunch. I shared it with a neighbor.
Roasted Beet Salad
1 small head Bibb lettuce, washed and sliced into thin slices
2 c. spinach, torn into bite sized pieces
1/4 c. olive oil
3 T. red wine vinegar
2 t. sugar, optional
3 small roasted beets, peeled
1/2 c. crumbled feta cheese
1/4 c. hulled pumpkin seeds, toasted
1/4 c. dried cherries
coarse sea salt- I used pink salt
Place lettuce in a mixing bowl. Combine olive oil with vinegar and sugar, if using. Add salt and pepper to taste and toss over the greens. Slice beets. Divide greens on 2 salad plates. Arrange half of the beets on each salad and top with the rest of the ingredients. Sprinkle with a few grains of the sea salt and serve. Makes 2 luncheon salads.


