Spinach and Mushroom Quesadillas

Spinach and Mushroom Quesadillas
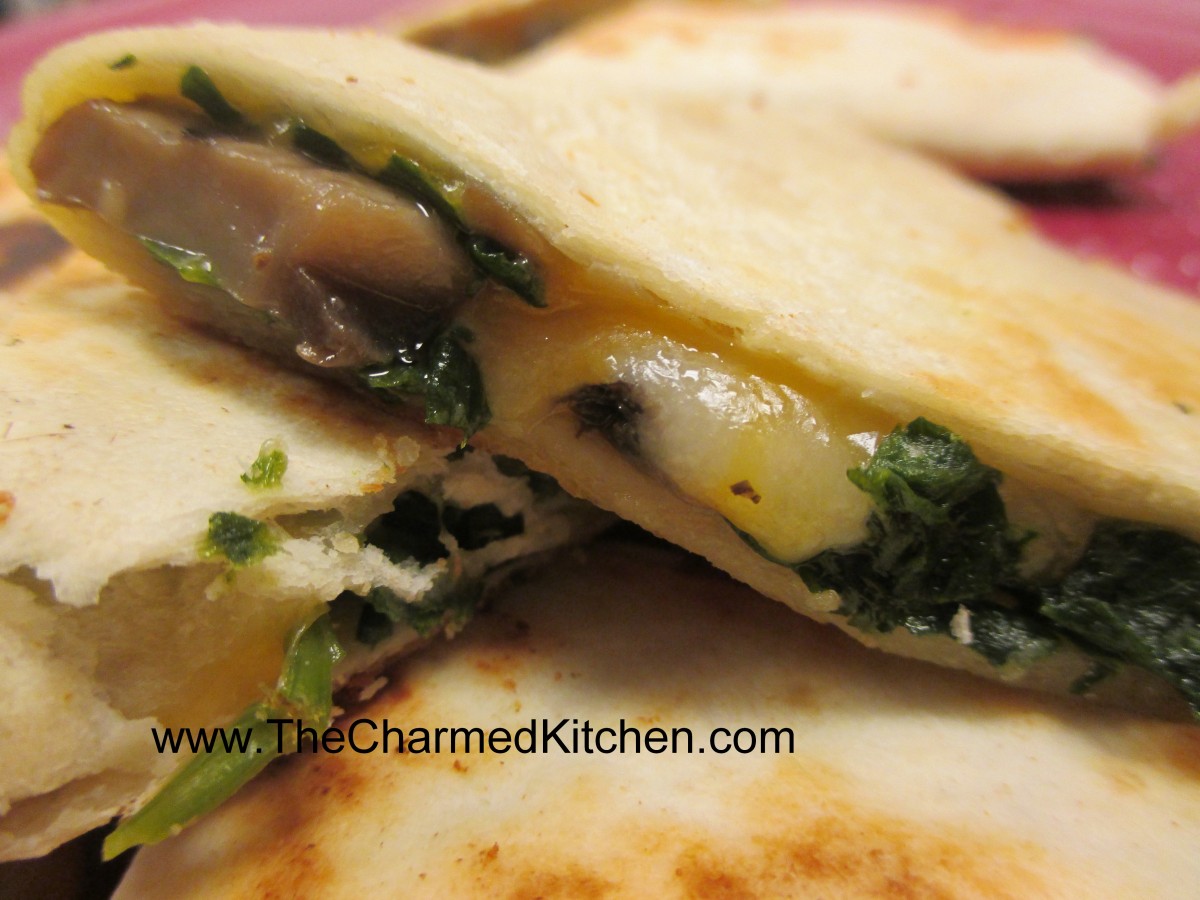
I had some spinach and wanted a quick meal. Its been hot, but I wasn’t in the mood for a salad. I had some tortillas and a few Portobello mushrooms. Throw in a little cheese- and I had a pretty nice dinner. The spinach and mushrooms worked really nicely together. I had Swiss cheese, so that is what I used, but I could see using a smoked Gouda instead, or maybe a sharp cheddar. I just cooked the quesadillas in a skillet, but you could also bake them in the oven, or brush with oil and cook them on the grill. You can serve them as is- or maybe top with some salsa or sour cream. I had mine with some fresh, sliced tomatoes.
Spinach and Mushroom Quesadillas
1 (10 ounce) package fresh spinach
2 cups shredded cheese, I used Swiss
2-3 tablespoons butter
2 cloves garlic, sliced
2 portobello mushroom caps, sliced
Salt and pepper to taste
Hot sauce to taste
A few sprigs of fresh thyme
4 (10 inch) flour tortillas
1 tablespoon oil
Saute spinach in a little butter until wilted. Cool and chop. Set aside. Melt the remaining butter in a skillet over medium heat. Stir in garlic and mushrooms, and cook about 5 minutes. Mix in spinach, and continue cooking 5 minutes. Add seasonings to suit your taste. Place a quarter of the mixture on one side of each tortilla. Top with a quarter of cheese. Fold tortillas in half over the filling. Heat oil in a separate skillet over medium heat. Place quesadillas in the skillet, and cook 3 minutes on each side, until golden brown. Cut each quesadilla into 4 wedges to serve.
Just Peachy Chef Salad


Peachy Chef Salad
I was asked to do a cooking demo using local, seasonal produce. I made several dishes that night, including a salad made with fresh peaches. It’s a simple recipe, that is a great meal for a hot day. Homemade Honey-French dressing is combined with fresh, diced peaches then served over a bed of greens. You can top the salad with cheese, meats or both. I like to add some nuts, too. I made it for lunch today and topped the salad with sharp cheddar cheese and bacon. I really liked the combination of the sweet fruit with the smoky bacon.
Peachy Chef Salad
Honey French Dressing:
1/3 c. honey
1/4 c. white wine vinegar or cider vinegar
1 t. paprika
1 t. dry mustard
1/4 t. salt
1/2 c. olive oil
3 cups chopped peaches
Salad:
6 c. torn salad greens
12 oz. cooked chicken, turkey, ham etc, cut into strips
1 c. cubed cheese
1/2 c. cashews, optional
In blender, combine first five ingredients and start running machine on high. Add oil in a slow stream until mixture becomes thickened. Pour into bowl and stir in peaches and chill, several hours if you can. When ready to serve arrange greens on one large platter or on smaller salad plates. Arrange meat and cheese on platter or plates. Spoon over the dressing, add cashews, then serve. Serves 4-6.

Peachy Chef Salad with Cheese and Bacon
Homemade Peach Brandy


Homemade Peach Brandy
I like to think of making flavored brandy, and other liqueurs, as just one more type of food preservation. I make jams and jelly with seasonal fruit, so why not preserve some of Summer’s bounty in alcohol? Peach brandy is one of my favorites. Pretty simple, really. Just combine peaches with brandy and allow the mixture to steep. Once enough time had passed, drain out the fruit. After straining out the fruit I also filter the brandy through either coffee filters or cheesecloth to get it nice and clear. Sweetening is optional. Poured into pretty bottles, they can make fun gifts, too.
Peach Brandy
10 medium sized ripe peaches
3 c. brandy
1 c. sugar syrup – optional – recipe follows*
Peel and pit peaches reserving only the fruit. Place in jar with brandy and steep at least a week, shaking several times. You can leave the fruit in for up to two weeks. Strain, squeezing out as much juice from the fruit as possible. Filter through cheesecloth, fine mesh strainer or coffee filters for a clearer product. Add sugar syrup, if desired, and mature 4-6 weeks. Makes 4 cups.
*Sweetening– Simple syrup is made from 1 cup of sugar and ½ cup of water. Bring to a boil, then cool. You will have 1 cup of syrup. Some recipes call for plain sugar and others for honey. Watch when you substitute honey for sugar, as it is sweeter and stronger flavored. Better to use orange or clover honey.
Streusel Peach Muffins


Streusel Peach Muffins
I can’t get enough of peaches these days. I have been eating them fresh, making preserves, freezing peaches and cooking with them. This recipe is one of my favorites. I hadn’t made them in a long time, so I decided today was the day. Now I remember why I liked them so much. Perfect crumbly texture, not too sweet, and that streusel topping. While they are really great warm from the oven, these muffins are still fine the next day, or even the day after that, assuming they last that long. They freeze, well, too.
Streusel Peach Muffins
Streusel topping:
1/3 c. flour
1/3 c. brown sugar
½ t. nutmeg
4 T. cold butter
Batter:
2 c. flour
½ c. sugar
¼ c. brown sugar
1 T. baking powder
1 t. cinnamon
½ t. nutmeg
½ t. salt
½ c. cold butter- 1 stick
2 eggs
¾ c. half and half or buttermilk
1 t. vanilla
1 c. finely chopped fresh peaches, about 1 large
½ c. finely chopped pecans, optional
Heat oven to 375. Line 15 muffin tins with paper liners or grease them. Set aside. Make streusel by mixing together flour, sugar and nutmeg in a small bowl. Use your fingers, or a pastry blender, to cut the butter into the flour mixture until it resembles coarse crumbs. Set aside. Make batter: In medium bowl combine flour with sugars and other dry ingredients. Mix well. Cut in butter until mixture resembles coarse crumbs. In small bowl beat eggs and add half and half and vanilla. Stir into flour mixture and fold in until just mixed. Mixture will look lumpy. Fold in peaches and nuts, if using. Scoop batter into prepared tins, filling about ¾ full. I get more than 12 from this recipe- normally about15, but it depends on how full you fill them. Sprinkle the tops with streusel. Place muffin tins on a baking sheet and bake for 20 or until golden brown. Cool a little before serving, if you can wait.
Canning Yellow and Orange Tomatoes


Crushed Tomatoes
I was asked several times in recent canning classes, if it is safe to can yellow or orange tomatoes. We have all heard that yellow and orange tomatoes are lower in acid, so are they still safe to can?
Truth is, that yellow and orange tomatoes have just as much acid as red tomatoes.
Well, for the most part at least. In terms of acidity or Ph, yellow and orange tomatoes are about average. Some cultivars have more, some less. Bottom line is that all tomatoes are safe to can- as long as you acidify them.
Adding salt is optional and is for flavor only. Use canning/pickling salt or non-iodized salt when canning.
Here are some popular canning recipes to get you started. All follow the NCHFP (National Center for Home Food Preservation) recommended procedures.
Crushed Tomatoes
Peel and core tomatoes , trim off any bad spots and quarter. Place about 1/4 of your prepared tomatoes in the kettle and cook, stirring constantly over high heat. Use a potato masher to crush tomatoes and extract juices. Once they are boiling add remaining tomatoes, stirring constantly. You don’t need to crush these tomatoes. Bring to a boil and boil for 5 minutes. In clean, hot jars add needed acidity listed below. You can also add 1 teaspoon of canning salt per quart if desired. Ladle in hot tomatoes, leaving 1/2-inch headspace. Wipe jar rims clean and adjust lids. Process in boiling water bath. Pints 35 minutes, quarts, 45 minutes. 1,000-3000 ft over sea level add 5 minutes. Twenty-two pounds of tomatoes will yield about 7 quarts of tomatoes.
Whole Tomatoes in Juice
Use any extra tomatoes to make juice. I use tomatoes that are too big to can whole, or those that have blemishes that need to be trimmed. Cut up clean, unpeeled tomatoes in a kettle and cook, stirring often until tomatoes are mushy. Strain mixture, pressing on solids or run through a food mill or tomato juice extractor. Set aside,. Place peeled, whole tomatoes in kettle and add enough tomato juice to cover them. Heat to a simmer and simmer gently 5 minutes. Add lemon juice or citric acid to jars, using amounts listed below. Add salt, if desired. Add tomatoes and cover with hot juice, leaving 1/2 -inch headspace. Wipe rims and adjust lids. Process both pints and quarts 85 minutes in a boiling water bath.
Tomato Juice
Wash, stem and trim bruises off tomatoes. Cut into chunks. Add about 1 pound of tomatoes to kettle and bring to a boil while crushing. Continue to add additional cut up tomatoes slowly, keeping mixture boiling. This will keep the juice from separating later. Simmer an additional 5 minutes once the tomatoes have all been added. Press mixture through a strainer , sieve or food mill to remove seeds and skins. Add lemon juice or citric acid to jars according to directions listed below. Add salt if desired. Return juice to boil and add to prepared jars leaving 1/2-inch headspace. Wipe rims and adjust lids. Process n a boiling water bath pints 35 minutes and quarts 40 minutes. Add 5 minutes processing time at elevations between 1,001 and 3,000 ft.
Tomato Sauce
Prepare as for juice. After juice is made return to pot and start cooking down to desired thickness. You’ll lose about 1/3 of the volume for thin sauce and 1/2 of the volume for thick. Add lemon juice or citric acid to prepared jars as described below. Add salt if desired. Add boiling sauce leaving 1/4 -inch headspace. Wipe rims and adjust lids. Process in a boiling water bath 35 minutes for pints and 40 minutes for quarts. Add five minutes at 1,001-3,000 ft. elevation.
Acidity and Tomatoes
Tomatoes must be acidified before canning. When canning either whole, crushed or juiced tomatoes you must add either 2 T. bottled lemon juice per quart or 1/2 t. citric acid . For pint use 1 T. lemon juice or 1/4 t. citric acid. You can also use 4 T. (5%) vinegar per quart, but it will alter the flavor and is not recommended. You can add a little sugar to offset the flavor, if you like.
Ricotta and Sausage Pie


Ricotta and Sausage Pie
The plan was to make quiche for brunch for a recent weekend away with friends. Plans change sometimes. As I assembled the ingredients, I decided to go in a different direction. Something denser, without the custard-like filling of a quiche. It was all about the ricotta at that point. So I put this together and served it for brunch. Everyone loved it and I was so happy with it I thought I would share the recipe with you. We didn’t have fresh herbs with us- I had forgotten to pick some before leaving- so I used dried, but I could see using fresh herbs instead. I know I will be making this again- perhaps with spinach and artichokes as the base next time.
Ricotta Sausage Pie
2 pie crusts, home made or store bought, recipe follows
2 c. shredded mozzarella cheese
1 lb. bulk breakfast sausage, cooked and crumbled
½ c. diced fresh tomatoes
½ c. diced sweet peppers
1 (15oz.) carton ricotta cheese
8 eggs
½ c. grated Asiago cheese
¾ c. half and half
Salt and pepper to taste
2 t. dried parsley or 2 T. fresh
1 t. dried basil or 1 T. fresh
Roll out crusts and fit into 9-inch deep dish pie pans. Divide mozzarella cheese, sausage and veggies between the two pans, sprinkling them evenly over the bottom. Combine remaining ingredients, beating until well mixed. Pour egg mixture over the sausage mixture in each pie pan, dividing evenly. Place pans on a baking sheet and bake in a 375 degree oven for 45 minutes, or until knife inserted off center comes out clean. Cool 10 minutes before serving. Makes 2.
Flaky Pie Crust
2 c. flour
1 t. salt
3/4 c. shortening, lard or coconut oil, chilled
1 T. cider vinegar
4-5 T. cold water
Combine flour and salt and cut in shortening, lard or coconut oil. Toss in vinegar and water 1 tablespoon at a time until dough holds together. Use a fork to toss the ingredients together and as soon as the mixture holds together stop adding water. Makes 2. Chill well before using.

Fresh from the oven
Lentil and Brown Rice Stuffed Peppers

Lentil and Brown Rice Stuffed Peppers
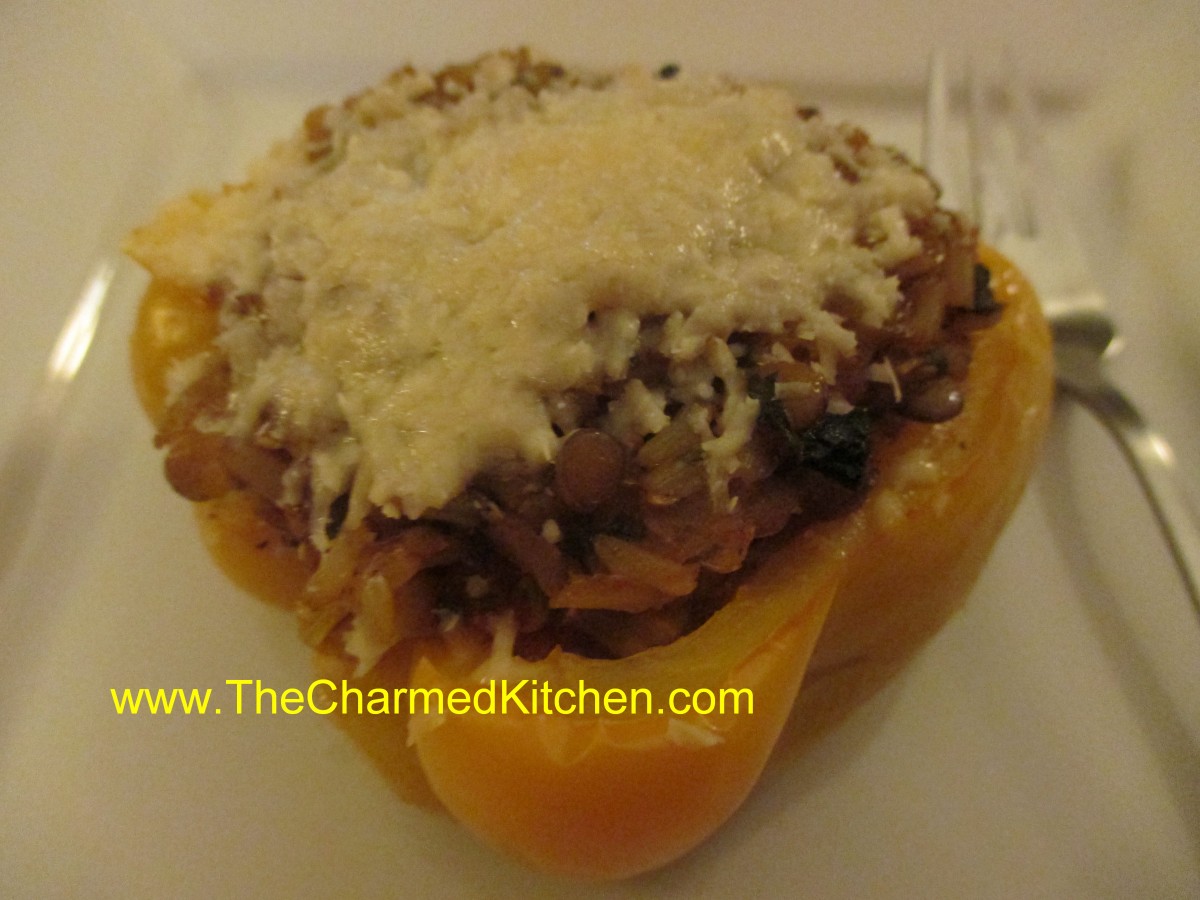
A friend was in town and stopping by. I wanted to offer her dinner. Since I know she doesn’t eat meat- I knew we’d be going vegetarian. While I do eat meat- I sometimes forgo it for meatless options. I had just picked up some beautiful sweet peppers at the local produce market. I knew I would use them in the dish. Stuffed peppers seemed like a fun way to go. I precooked most of the ingredients so I wouldn’t have to watch them too carefully once in the oven. That way, we were free to visit. I did top them with cheese- but you could omit it, if you prefer.
Lentil and Brown Rice Stuffed Peppers
1 onion, chopped
Oil
¾ c. uncooked brown rice- I used brown jasmine rice
Water or vegetable stock – probably around 3 cups or a bit more
¾ c. lentils, rinsed and drained
2 c. peeled and chopped fresh tomatoes- or 2 c. canned tomatoes
2 – 3 sweet peppers, cut in half and seeded
3 garlic cloves, peeled and chopped
¼ c. Marsala wine
2 T. apple cider vinegar
¼ c. chopped parsley
2 T. fresh chopped basil
1 T. fresh oregano or 1 t. dried
1 t. chopped rosemary
Hot sauce to taste
Salt and pepper to taste
Romano or Parmesan cheese- optional
In soup pot, heat oil and cook onion until it gets tender and a little golden. Add the rice and stir to coat the rice in the oil. Toast the rice a couple of minutes. Add 2 cups stock or water to cover the rice, and then bring up to a simmer. Reduce heat and cook, covered, for about 20 minutes. While rice is cooking, place the peppers in a pot of boiling water and cook for 3-4 minutes. Remove from heat and drain peppers. After the rice has been cooking for 20 minutes, add the lentils, garlic and tomatoes, wine, vinegar and seasonings and continue cooking, covered, until the rice and lentils are tender, about 25 more minutes Add more stock, if needed. Rice mixture should be a little runny. Place peppers, cut side up in a shallow baking dish. Spoon in the lentil mixture, dividing it among the 4 pepper halves. Cover dish with foil and bake in a 350 degree oven for 30-40 minutes. Mixture will be heated through and peppers will be tender. Serve as is – or top with some cheese and return to the oven until cheese melts- about 5 minutes. Makes 4 pepper halves.
Cherry Vanilla Liqueur

Cherry Vanilla Liqueur
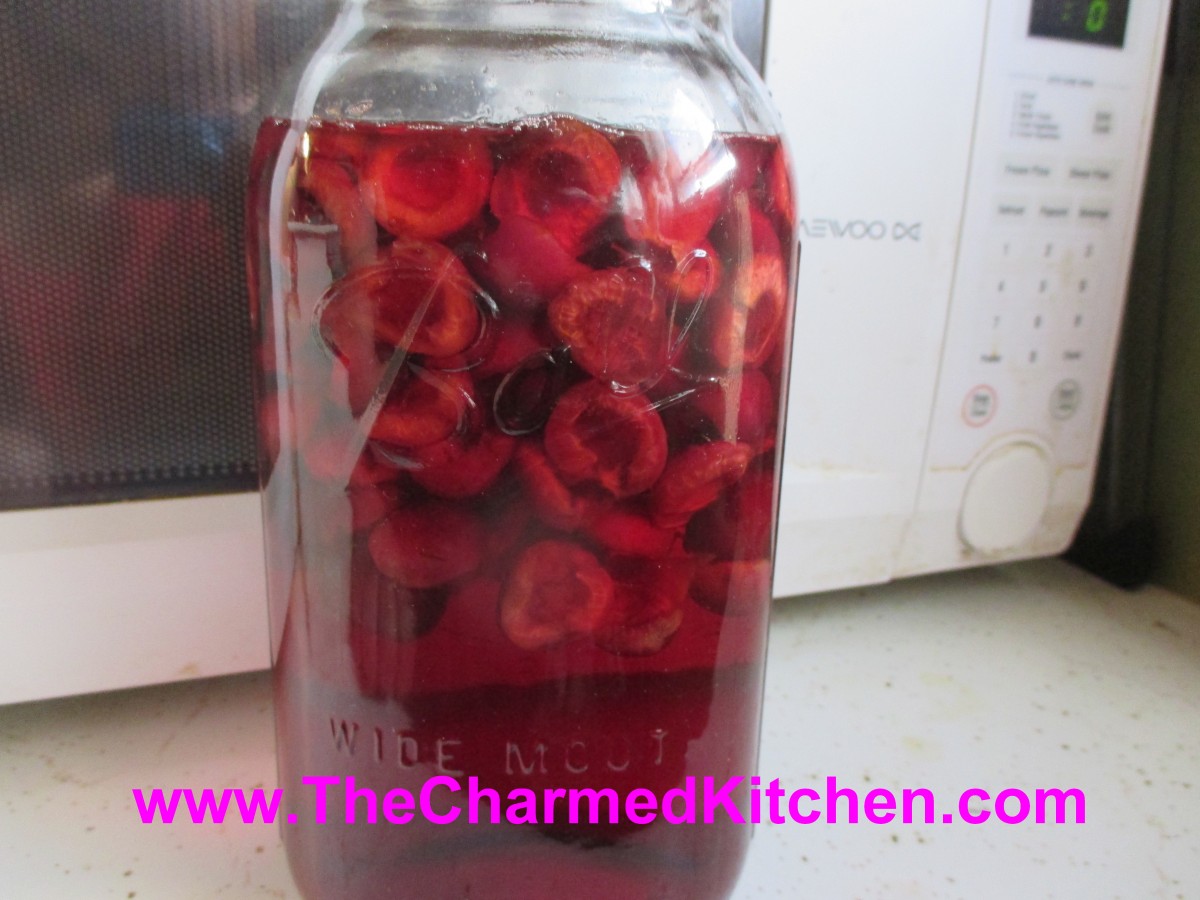
I bought a lot of cherries, with plans to make jam and to dehydrate some. Maybe even make pie filling. But it is really hot here today, so I decided to use some of the cherries to make cherry liqueur, instead. It is easy, and the reward is having this lovely liqueur to enjoy even when cherries aren’t in season. I added a couple of vanilla beans to mine, but you can leave them out, if you prefer. You could also add 1-2 tablespoons of vanilla extract.
Cherry Vanilla Liqueur
2 c. granulated sugar
4 c. vodka or brandy
1 lb. large, washed, stemmed and pitted sweet cherries
2 (6-7 inch) vanilla beans, broken into several pieces
Place sugar and vodka or brandy in a large jar- I used a half gallon canning jar. Stir until sugar is mostly dissolved. Add cherries and vanilla and cover jar. Do not stir. Place in a cool, dark place for 3 months, without stirring or shaking. Strain and filter. Divine! Makes 4-6 cups.
Chicken with Tomatoes and Fresh Herbs

Skillet Chicken with Tomatoes and Fresh Herbs
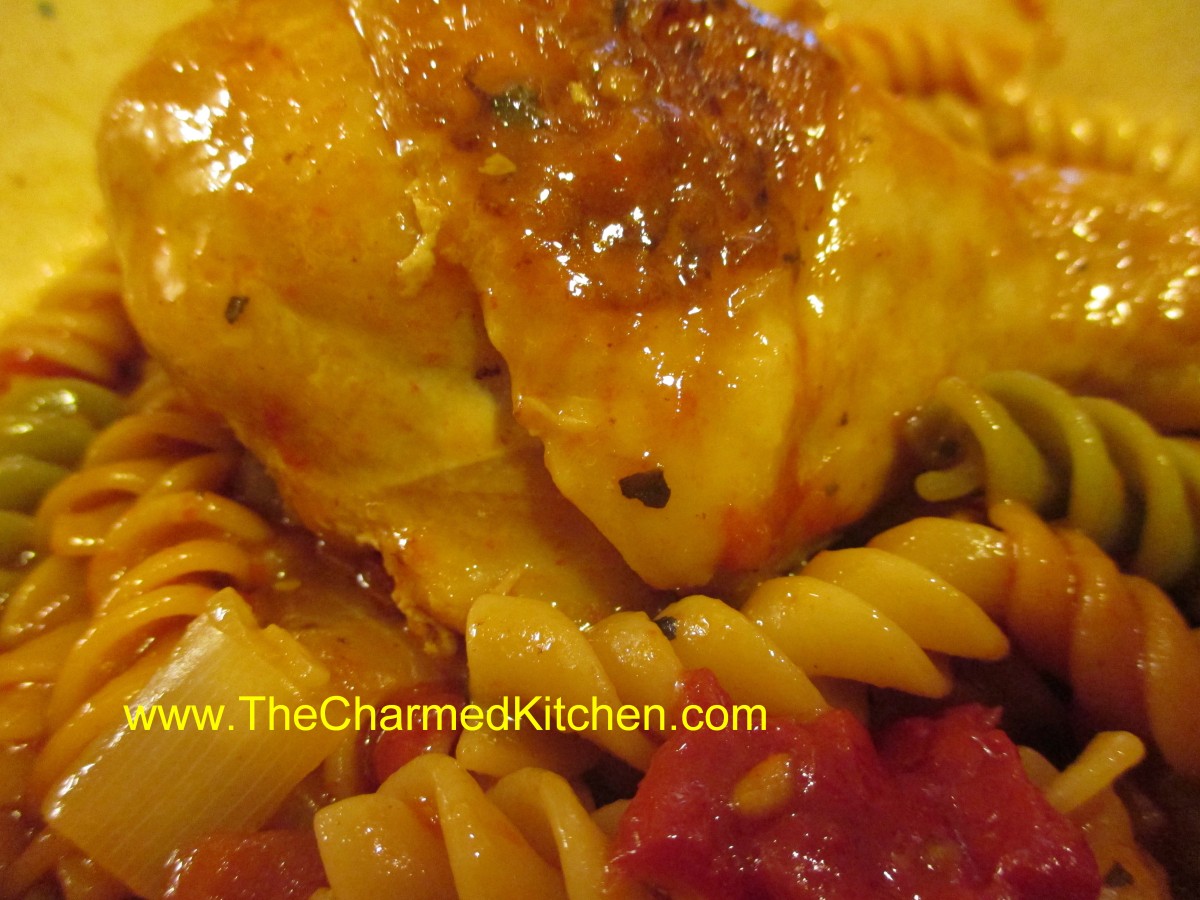
I had a busy day and needed something fast for dinner. I had a whole chicken, but I didn’t feel like roasting it. I decided to cut it up and cook it on top of the stove, in a large skillet. I had some fresh tomatoes, so I knew I would use them in my dish, too. I started by browning onion and chicken in a skillet. I also had some fresh peppers and fresh herbs so it all came together quite nicely. By adding some chicken stock and pasta I was able to cook it all together in the same pan. It was wonderful just the way it was- but you could top it with shredded cheese, if you like.
Skillet Chicken with Tomatoes and Herbs
1 T. oil
1 large onion, chopped
1 chicken, cut up
4 c. chopped fresh tomatoes
1 sweet pepper, seeded and diced
3 c. chicken stock- you might need a little more*
8 oz. uncooked pasta- I used rotini**
1/2 c. of fresh herbs, chopped- I used parsley, basil, thyme and lovage
salt and pepper to taste
In large skillet, brown onion in oil. Add chicken pieces and brown on both sides. Add tomatoes to skillet and cook a few minutes more. Add remaining ingredients, except pasta, and bring to a simmer. Place lid on skillet and cook over medium low heat for about 20 minutes, or until chicken is almost cooked. Add pasta and cook, covered, about 12 minutes longer, or until pasta is cooked. Stir from time to time to prevent sticking and to see if you need more stock. Time will vary depending on which pasta you choose. Stir in the herbs when pasta is nearly done. finish cooking until pasta is tender. Adjust seasonings. Serve as is, or with cheese on top. Serves 4.
* Depending on how juicy your tomatoes are, you might need a little more stock. I wanted to have some sauce with the dish so I liked the amount of stock I used.
** You could use more pasta just add more stock.
Blackberry Jelly


Blackberry Jelly
I was lucky enough to get some beautiful local blackberries recently. I was busy , so I popped most of them in the freezer. Today, I decided to use some of them to make blackberry jelly. It came out perfect. Sweet and tart, and full of the flavor of summer. Jelly was a little more work than jam, but I wanted to have a product without seeds in it. I first cooked the berries to extract the juice, then used that juice to make the jelly. While it was a hot day to be making jelly- the aroma in the house made it all worth it. I also saved the seeds and solids. I placed them in a jar and covered them with vodka. I can strain it in a few weeks, sweeten it a little, and I’ll have some blackberry liqueur as a bonus.
Blackberry Jelly
3 quarts blackberries*
1/2 c. water
1 box powdered pectin
5 c. sugar
Place the berries in a pot and use a potato masher to crush the berries. Add the water and simmer until the berries are soft. Strain out the solids and then pour the juice through several layers of cheesecloth to clarify. You should end up with about 4-5 cups of juice. Place juice in a pot and add the pectin. Bring mixture to a boil stirring constantly. Add the sugar and return mixture to the boil, again stirring constantly. Boil for 1 minute. Remove from heat and skim off any foam. Ladle mixture into clean, hot jelly jars and fill to 1/4 inch from the top. Seal and repeat with remaining jelly. Place in a boiling water bath and process 10 minutes. Makes 6-7 half pints.
* Best if some of the berries are a little under ripe. Higher in natural pectin.


