Multi-Grain English Muffins


Multi-Grain English Muffins
A friend has been talking about Eggs Benedict for some days now. We decided to make them this weekend. The base is an English muffin, so I decided to make the muffins myself. If you haven’t made them before, English muffins are pretty simple to make. They are not baked in the oven, like most other breads. Rather, they are “baked” in a skillet over medium heat. It is the same way crumpets are cooked. I really like the flavor of a freshly made English muffin. I used spelt flour, but you could use whole wheat flour instead. Here is the recipe.
Multi-Grain English Muffins
2 packages yeast
2 ½ -3 cups bread flour
1 ½ c. spelt flour
½ c. oat bran
¼ c. wheat germ
2 T. sugar
2 t. salt
2 c. milk
¼ c. oil
Cornmeal
In large bowl combine yeast, 1 cup of the bread flour and remaining dry ingredients. Warm milk and oil and add to flour mixture and beat 3-4 minutes. By hand, stir in enough flour to make a moderately stiff dough. Turn onto floured surface and knead until dough is smooth and elastic, about 8-10 minutes.
Place dough in greased bowl and turn to grease top. Cover and allow to rise until doubled, about 1 ¼ hour. Punch dough down and allow to rest 10 minutes. On lightly floured surface roll dough to just under ½ inch thick. With 4 inch biscuit cutter cut out rounds of dough, re-rolling and cutting scraps. Dip both sides in cornmeal and cover, allowing to rise about 30 minutes. In ungreased griddle pan or skillet cook muffins over medium heat, turning frequently, until they are golden on both sides and cooked through. This will take about 20-25 minutes. To serve, split and toast. Makes 12-15.
Note: I used a 3-inch biscuit cutter and ended up with over 20 muffins.
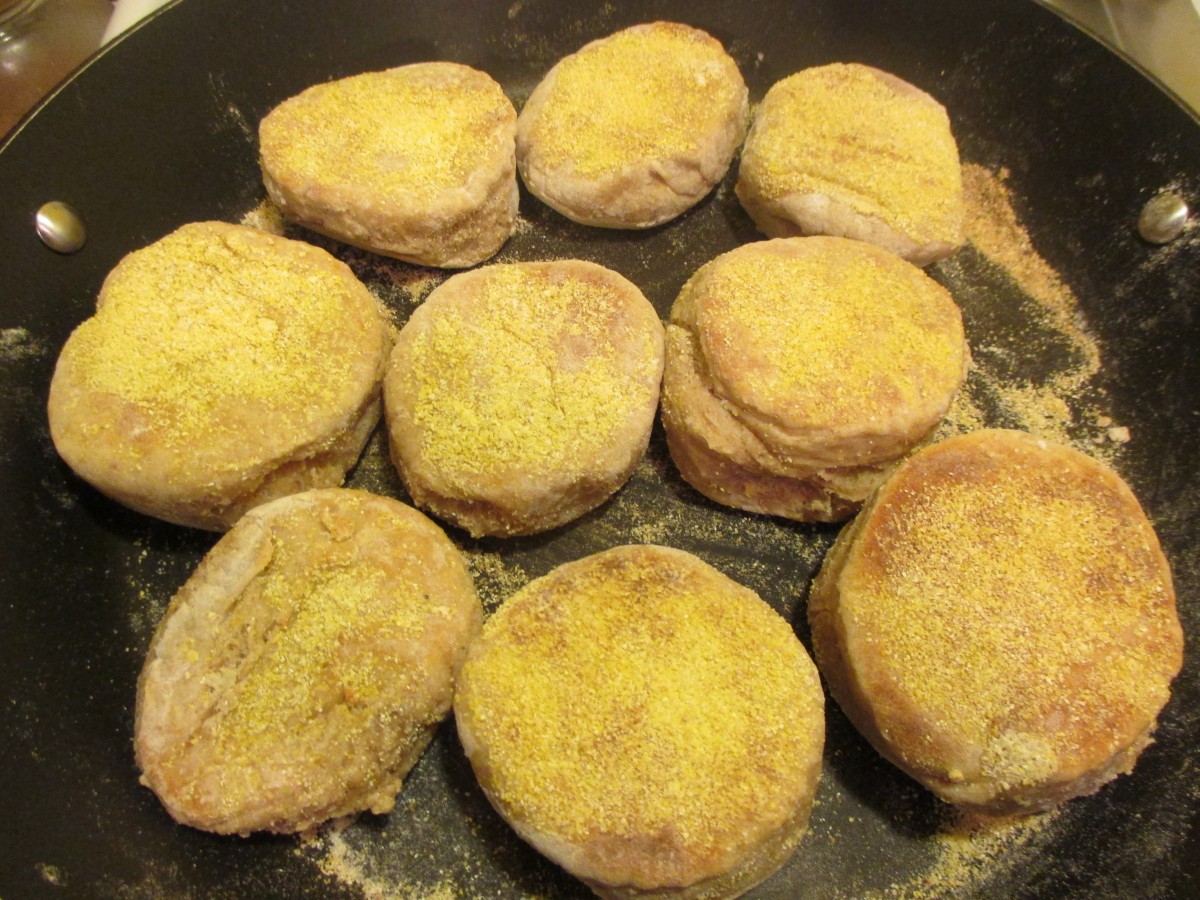
“Baking” the muffins
Squash “Noodle” Salad


Squash “Noodle” Salad
I posted a recipe for Red Onion Relish yesterday. I got a lot of nice response to it. A number of people asked what they could use it for, so I decided to share this recipe with you. It’s pretty simple, actually. I got a spiralizer for Christmas (Thanks, Sarah). It’s a fun gadget that lets you make long thin shreds out of all sorts of veggies. If you don’t have one, you can just shred the squash with a grater or food processor. Once the squash are shredded, just add some of the red onion relish and a few other ingredients and you are done. Very simple and pretty darn tasty.
Squash “Noodle” Salad
1 zucchini
1 yellow summer squash
1 c. red onion relish
3-4 T. oil
1 t. hot sauce, or a little more
Salt to taste
Use a spiralizer to make “noodles” out of the squash or shred them finely, lengthwise. Place in a bowl with the rest of the ingredients. When you go to use the onion relish, make the mix about half solids and half liquid. You want the liquid from the relish to be the dressing in the salad. Toss to blend, adjust seasonings. Serves 4.
Red Onion Relish

Red Onion Relish
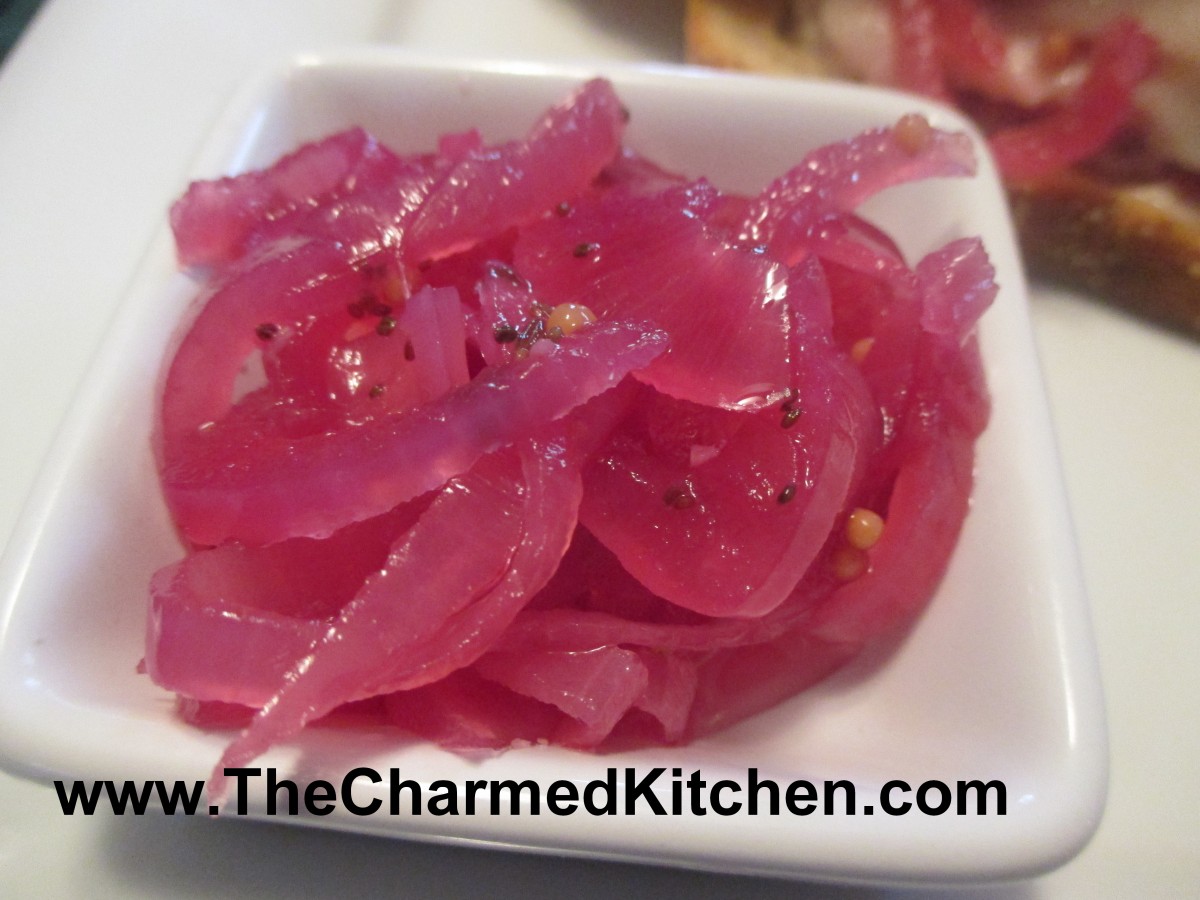
I had some red onions and turned them into this zesty relish. I love the tart flavor and bright color it adds to my food. This relish is a great topper for sandwiches, but can be used for a whole lot more. The onions can be served with cheese and crackers for an easy appetizer. You can add some to salads, and the liquid can be combined with a little oil for a simple salad dressing. I even had some with my scrambled eggs for breakfast. After you cook it , you just ladled into jars, cool it down and store it the fridge. It will keep for weeks and weeks.
Red Onion Relish
4-5 medium red onions, peeled and sliced thin
2 c. red wine vinegar
1½ water
1 c. sugar- or to taste
2 T. salt
1 T. mustard seed
1 T. celery seed
1 t. fennel seeds, optional
2 cloves garlic, minced
1 cinnamon stick- 4 inch
4 whole cloves
Place all ingredients in a pot and bring to a boil. Turn down to a simmer and cook, uncovered for 10-15 minutes. Cool and place in jars, then store in the fridge. Use as a sandwich topper, salad addition, appetizer with cheese and crackers. You can also use the liquid as the base for a salad dressings, with the addition of some oil. Keeps for weeks in the fridge. Makes 5 cups.
Curry Cauliflower Salad


Curry Cauliflower Salad
I heard there was a cauliflower shortage. A couple of friend’s had commented that they could not find cauliflower, or that it was really expensive. I hate to hear that. Long before cauliflower became trendy, I was a fan. I love it steamed, served with a little butter and salt. Or pan fried and mixed with garlic and a bit of Parmesan cheese. I have enjoyed it in any number of salads. I found some at the local store- and it wasn’t even expensive. Hope that is a sign that the shortage is over and the cauliflower will again be plentiful. It does make me think though, and I will be planting some for my garden this year, just to be safe.
Here is a salad I made with a head of cauliflower last night. I used curry powder- I make my own- but you can use a store bought one. I also added some green onions and peanuts for crunch. It came out quite nice. I have used curry powder in hot cauliflower dishes before, but the salad was a pleasant change of pace.
Curry Cauliflower Salad
1 head cauliflower, cooked
½ c. chopped green onions
¾ c. mayo – or less or more depending in the size of the head of cauliflower
1 T. curry powder- or to taste
1 t. hot sauce, or to taste
Salt and pepper to taste
1 c. peanuts
First break the cauliflower into florets. Cook the cauliflower any way you like. I steamed mine for about 5 minutes. You could roast it, or sauté it in a little oil. You want it tender, but still a little crisp. Don’t cook it to mush. I would also advise against boiling it, as it gets too wet. Once the cauliflower is cooked, let it cool down before proceeding. Combine the cauliflower with the green onions, the mayo and seasonings. It was hard to be exact because your head of cauliflower might be bigger or smaller than mine. I could have said 5 cups of cooked cauliflower- but would that really help? Then you’d have leftover cooked cauliflower. Or perhaps not enough. So add a little more mayo, if needed, and adjust the seasonings to suit your taste and the amount of cauliflower you have. Chill and toss the peanuts in closer to serving time. They are fine, even when in the salad for a while, but the peanuts crunchier when first put in.
Busha’s Mushroom Soup


Busha’s Mushroom Soup
It is blustery and cold today and I thought I might make soup. I spotted a carton of sour cream in the fridge, so I was inspired to make Polish Mushroom Soup. This soup is a tradition in my family. When I was a kid my Busha, (Polish grandmother) would make it every Easter. My Mom made it for Christmas Eve. Now we have it the day before Thanksgiving. It is one of those dishes that brings back so many wonderful childhood memories. I love the rich, earthy flavor of the mushrooms, and the slightly sweet/sour flavor of the broth. It is made with dried mushrooms, usually. I can remember watching my mom get out a big bowl and soaking the mushrooms to get them clean, and to soften them, before starting the soup. I use dried shiitake mushrooms, but often add fresh mushrooms as well. Sometimes I use other dried mushrooms, too. I like to have a variety of mushrooms in the soup. I used home canned chicken stock. If made with vegetable stock it could make a great meatless meal.
Polish Mushroom Soup
4 qt. Chicken, beef or vegetable stock
5 c. dried mushrooms, about 4 0z. I use Shiitake.*
Water for soaking
½ c. flour
1 pint sour cream
¼ c. balsamic vinegar
2 T. sugar
1 Lb. Kluski-style noodles, cooked and drained
Soak mushrooms in water for 1-2 hours. Lift mushrooms carefully out to leave any sand in the bowl of water. Rinse and drain. Set aside. Bring stock to a boil and add the mushrooms. Simmer, covered for about 1½ hours, or until mushrooms reach desired tenderness. Mushrooms will retain some “chewiness”. In medium bowl whisk sour cream into flour gradually until smooth. Stir in vinegar and sugar until smooth. Add a small amount of the hot soup to the sour cream mixture, whisking until smooth. Continue adding hot soup to the sour cream mixture until sour cream mixture is warm. Add the warm mixture to the pot of soup and stir to combine. Return to simmer and simmer 1 minute, stirring continuously. Place desired amount of kluski into bowls and ladle over the hot soup. Serves12.
Note: You can add a variety of fresh mushrooms to the soup to make it even more special. You might use portabellas; crimini, button or whatever mushrooms are at the store that day. Add in addition to the dry mushrooms; don’t reduce the amount of shiitakes.
You can use other cooked pasta. Mom said you might want to try spaetzels or even gnocchi. You might also need more than one pound of kluski, depending on how much pasta your family likes in their soup.
*The dried shiitake mushrooms can be found at specialty grocery stores, some larger grocery stores and at Asian markets.
Corned Beef On Rye Salad


Corned Beef on Rye Salad
I had a corned beef and cooked it up in the crock pot. My original plan was to make a Reuben sandwich with it for dinner. By the time it was done, and I was ready to have dinner, I realized I was more in the mood for a salad. I decided to use the corned beef with Swiss cheese and some rye bread to make this dish. It really did remind me of a Reuben sandwich.
Corned Beef on Rye Salad
4 c. mixed salad greens, washed and dried off
3 oz. corned beef, cut in bite sized pieces
2 oz. cubed Swiss cheese
1 slice rye bread, toasted and cubed
2 T. Thousand island dressing- recipe follows
Place greens in a bowl. Top with the meat, cheese, rye bread and drizzle with the dressing. Serves 1.
Homemade Thousand Island Dressing
Combine equal amounts of mayo, ketchup and sweet pickle relish. Stir to combine. I like to add capers sometimes, too. Store unused portion in the fridge.
Potato and Kale Salad


Potato and Kale Salad
I was inspired to make this salad because of a soup. It’s a Portuguese soup make with kale, potatoes and sausage. It can be made with chorizo, linguica (Portuguese sausage), or even kielbasa. I opted to make a salad, using many of the same ingredients. I had a bunch of kale and thought it would make a tasty and healthy addition to my potato salad. For the dressing, I used many of the same seasonings I use to make chorizo. You can add the sausage to the salad, or leave it on the side and let people add their own. That way, the salad works for vegetarians, too. I had a friend over last night to try it. She really liked it. I hope you do, too.
Potato and Kale Salad
2 lbs. potatoes
1 lb. kale
6 oz. cooked chorizo, or other sausage, optional
Dressing:
½ c. red wine vinegar
1 T. parsley
2 cloves minced garlic
1½ t. salt, or a little more to taste
2 t. paprika
1 t. oregano
½ t. cumin
¼ t. cinnamon
Pinch of allspice
Pinch of cayenne, or to taste
½ c. oil
1 T. sugar, optional
Cook potatoes, peel and cube. I like to cook potatoes in the microwave or bake them in the oven. If I cube them up and then boil them, I always find the potatoes get overcooked. Cook them any way you like. Place cubed potatoes in a bowl and set aside to cool down. Remove the stems from the kale and discard. Wash kale and chop coarsely. Bring a pot of salted water to a boil. Place kale in water for 1 minute. Remove kale and drain well. Place kale in cold water to stop the cooking. The idea is to wilt the kale but not to cook it much. Once the kale is cooled down, drain it well, squeeze dry and chop into smaller pieces. Place in bowl with the potatoes. If adding chorizo, place in bowl with the potatoes, too. Place vinegar, garlic, salt and spices in a blender. Blend until smooth. Add the oil in a slow stream to make a creamy dressing. I thought it tasted fine the way it was, but you might like the added sugar. You can also make the dressing using an immersion blender. Pour as much of the dressing as you like, over the potatoes and kale and toss to blend. I had a little leftover. Chill until ready to use. You might need a little more salt. I like a slightly spicier salad and would also serve hot sauce with the salad so folks can add their own.
Easy as Key Lime Pie


Key Lime Pie
I picked up a bag of key limes, knowing I’d be making a pie with at least some of them. It is, after all, citrus season. I figure any way I can get more Vitamin C is a good thing, right? I had decided to go with a classic version: graham crust, creamy filling and a little meringue to top it off. The pie itself is simple and fast to make, although it does need time to chill. I think it took more time to juice all those tiny limes than it did to make the actual pie. One of the traditional ingredients in key lime pie is sweetened condensed milk. You can, if interested, make your own sweetened condensed milk, instead of using store bought. I’ve included the recipe at the bottom of this post.
Key Lime Pie
Crust:
1 ¼ c. graham cracker crumbs
⅓ c. melted butter
¼ c. brown sugar
Filling:
2 cans sweetened condensed milk*
1 c. key lime juice
Topping:
2 eggs whites
½ t. cream of tartar
2 T. sugar
In medium bowl, combine crust ingredients and toss until mixed well. Press crust into the bottom and sides of a pie pan. I use a 9-inch deep dish pan. Bake crust in a preheated 375 degree oven for 10 minutes. Cool. Reduce oven to 325 degrees. Combine filling ingredients in a medium bowl. Stir until well mixed. It will look sort of soupy, but as you stir, the filling becomes pretty thick- like pudding. Pour into crust. Prepare topping. Beat egg whites with cream of tartar until foamy. Slowly add the sugar, while still beating the eggs whites, until stiff peaks form. Spread or pipe the egg whites over the filling. Bake pie 25-28 minutes- or until meringue topping is golden brown. Chill at least 6 hours before serving. Serves 6-8.
* You can make your own sweetened condensed milk, if you prefer. Here is the recipe.
Homemade Sweetened Condensed Milk
1 c. dry non-fat milk
2/3 c. sugar
1/2 c. boiling water
3 T. butter, melted and hot
Combine all ingredients in a blender until smooth. Can be stored in the fridge and used within 3 days. This is the same as 1 (14 oz.) can.
Warm Shrimp and Soba Noodle Salad

Warm Shrimp and Soba Noodle Salad
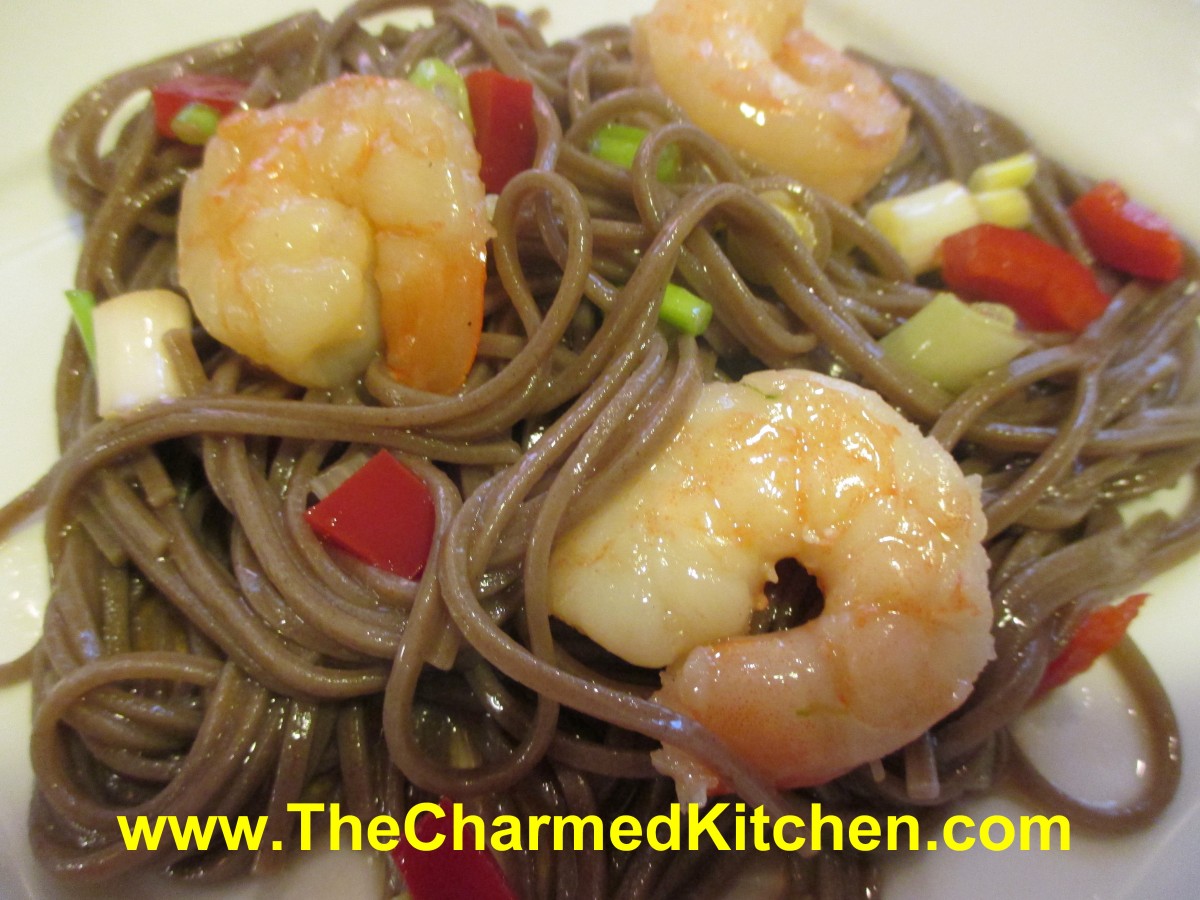
Whenever I make soba noodles, I wonder why I don’t eat them more often. I have made my own, but these I picked up at a recent visit to the Asian market. Soba noodles are made from buckwheat flour. They have a wonderful, almost nutty flavor. I have enjoyed them in cold salads, hot soups and stir fries. This time, I decided to use them in a salad that fell somewhere between hot and cold. It made a great meal for a chilly evening.
Warm Shrimp and Soba Noodle Salad
12 oz. soba (buckwheat) noodles
1 lb. raw shrimp, shelled and deveined
2 T. oil
2 cloves minced garlic
½ c. chopped sweet peppers
½ c. chopped green onions
Dressing:
¼ c. oil
2 T. Rice wine vinegar
1 t. sesame oil
1 t. soy sauce, or more to taste
1 t. hot sauce, or more to taste
1 t. ginger
In pot of boiling, salted water, cook noodles according to package directions. They only take a few minutes. Be careful not to overcook them. Drain and set aside. Heat a skillet and add the oil. Add the shrimp and garlic and stir fry until shrimp are just cooked through. Time will vary based on the size of the shrimp you are cooking. Place soba noodles in a bowl. Add the cooked shrimp and veggies. Make dressing by placing all dressing ingredients in a jar with a tight fitting lid. Shake until mixed well. Pour dressing over the noodle mixture and toss to coat evenly. Serve while still warm. Serves 4-5.
Homemade Liqueurs Using Extracts


Homemade Almond Liqueur
I enjoy making liqueurs with seasonal fruits, but when fruit is in short supply, you can also use extracts. Pure extracts will give your liqueur a nice, true flavor, but no color. I have made almond, hazelnut, walnut and peppermint. You can use whatever flavors you think you might like. One advantage is that liqueurs made from extracts are ready to drink in less than a week. Fruit based liqueurs often take weeks and weeks to fully develop. So if you like a little almond flavor in your coffee- you can make your own liqueur with almost no effort. Another advantage is that you can adjust the sweetness to your own taste as well. I have included the recipes for almond and peppermint, but the recipe is the same for any extract flavor you might want to make.
Almond Liqueur
1 t. pure almond extract
3 c. vodka
1 c. simple syrup
Combine all ingredients and let mature several days. Makes 4 cups.
Peppermint Liqueur
1 t. pure peppermint extract
3 c. vodka
1 c. simple syrup
Combine all ingredients and let mature several days. Makes 4 cups.
Sweetening- Simple syrup is made from 1 cup of sugar and ½ cup of water. Bring to a boil, then cool. You will have 1 cup of syrup. You can sweeten your liqueur with honey, if you prefer. Watch when you substitute honey for sugar, as it is sweeter and stronger flavored. Better to use orange or clover honey. Add to suit your taste.


