Sunshine Fruit Salad with Ginger-Lime Dressing


Sunshine Fruit Salad with Ginger-Lime Dressing
Winter time is all about citrus. Oranges, grapefruit, lemons, limes, I can’t get enough of them. I also feel like I need all the extra Vitamin C they provide. With a batch of snow looming, I decided to make a salad to brighten things up around here. Winter days are short, and this salad makes me think of warmer, sunnier days. I added a pineapple to the grapefruit and oranges and finished it with a ginger-lime dressing, sweetened with a little honey. I had a big bowl for breakfast, but I could see this salad making a nice, light dessert, too.
Sunshine Fruit Salad with Ginger-Lime Dressing
1 pineapple, peeled, cored and diced
4 or 5 grapefruit, peeled
4 or 5 oranges, peeled
Dressing:
½ c. lime juice
¼ c. honey
1 t. grated ginger
Place pineapple in a medium bowl. Once the grapefruit are peeled, break into segments and peel off any white membrane. Place segments in bowl with the pineapple. After orange are peeled, cut in half and remove the white pith in the middle. Cut into bite-sized pieces and place in bowl with the other fruit. Drain off any juice- I drink the juice. Make the dressing by combining the lime juice, honey and ginger and whisking until smooth. Toss with the fruit and chill until ready to serve.
Waldorf Fennel Salad


Waldorf Fennel Salad
I have always loved Waldorf Salad. It was a salad my mother would make in the Fall and Winter. Traditionally, Waldorf Salad is made with apples, celery, raisins or grapes, and walnuts, dressed in mayo and seasoned with salt and pepper. I have added chicken, on occasion, and often used pecans or pumpkin seeds. For this version, I left out the celery, and added fresh chopped fennel instead. I also added some fresh fennel leaves. It was a nice change, without straying too far from the classic.
Waldorf Fennel Salad
3-4 apples, cored and chopped- I leave the peels on, but peel , if you prefer
3/4 c. finely chopped fennel bulb
3/4 c. toasted walnuts, coarsely chopped*
2/3 c. raisins
2/3 c. mayo, or to your taste
salt and pepper to taste
fresh chopped fennel leaves for garnish, optional
Combine apples with fennel, nuts and raisins and toss with the mayo. Season to taste. Add a little more mayo, if you like. Top with a few fennel leaves and chill before serving. Serves 4.
*To toast the walnuts, you can bake them in a 300 degree oven for about 15 minutes, or place nuts in a skillet and cook over medium heat until lightly toasted, stirring often.

Fresh fennel. While called a bulb, it is actually a swollen stem.
Whole Wheat Swiss Cheese Bread

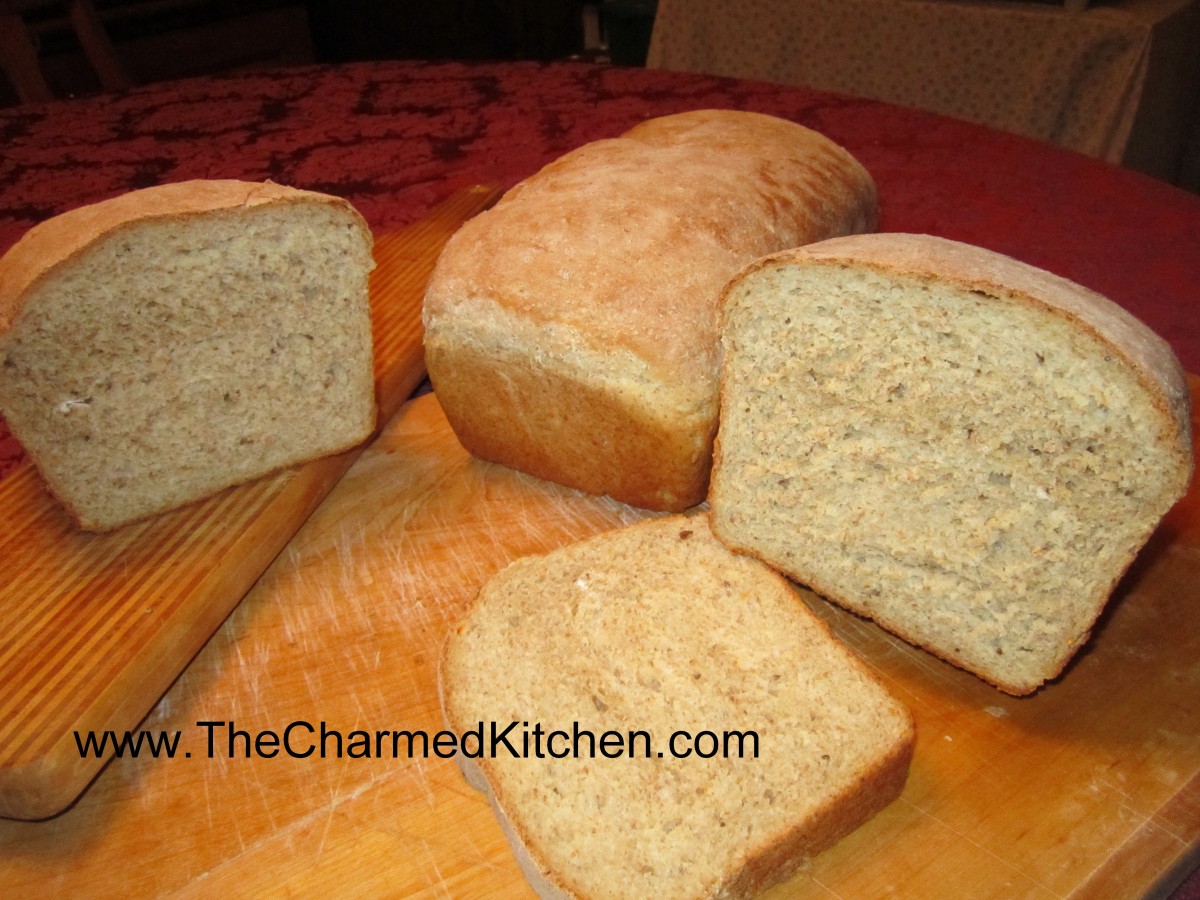
Whole Wheat Swiss Cheese Bread
This bread is a little different than most of the breads I make. For starters, the dough has Swiss cheese melted into it- giving it great texture and flavor. It is also a cool- rise recipe. That means the dough is prepared, rested for a bit, shaped and then popped in the fridge to rise. It can be baked several hours later or even the next day. You can prep it in the evening- let it rise in the fridge overnight- and bake it in the morning. Great for when you want homemade bread- but don’t have a long block of time to make it. As to the cheese in the dough- it kind of disappears. You aren’t going to find a gooey, cheesy middle. The cheese is melted and kneaded into the dough. It adds great flavor and texture. You can also experiment with other cheeses, if you like.
Whole Wheat Swiss Bread
3 c. flour
2 ½ -3 c. whole wheat flour
2 packages active dry yeast
2 T. sugar
2 t. salt
1 c. each milk and water
4 oz. diced Swiss cheese
3 T. butter
Oil
Combine 2 cups of the flour with the yeast, sugar and salt in a mixing bowl. Heat together water and milk with cheese and butter until warm, cheese does not have to melt. Add to flour mixture and beat 3 minutes. Stir in remaining white flour and beat 2 minutes. Stir in enough whole wheat flour to make a soft dough. Knead on floured surface until smooth and elastic. Cover with bowl and let rest 20 minutes. Divide dough in half and shape into loaves by rolling out and then rolling into a loaf and sealing seams. Place in greased 8×4 inch loaf pans and brush with oil. Cover with plastic wrap and place in fridge. Chill 2 –24 hours. Remove from fridge and remove plastic wrap allowing to stand while oven preheats. Bake at 375 for 35-40 minutes. Remove from pans and brush with butter. Cool. Makes 2 loaves.
Swedish Limpa Bread


Swedish Limpa Bread
This rye bread is a favorite of mine. It has a soft texture and makes great sandwiches. The flavor in enhanced by a combination of caraway seeds and a little orange zest. It even makes wonderful French toast. My brother-in-law says it is just like the bread his Swedish mother made. It is not like rye breads you might traditionally think of. It is lighter in color and texture. I baked mine in two round loaves, but you can also bake this bread in loaf pans, if you prefer.
Swedish Limpa
6 ½ c. flour
2 c. rye flour
¼ c. brown sugar
2 t. salt
2-t. caraway seeds
2 t. grated orange peel
2 pkt. Active dry yeast
2 T. butter, softened
2 2/3 c. hot water (125-130 degrees)
Set aside 1-cup flour. Mix remaining flours and other dry ingredients in a large bowl. Add butter and water to flour mixture and stir to blend. Mix in enough additional flour to make a soft dough. Knead on a floured surface until smooth about 8-10 minutes. Place dough in oiled bowl turning to oil top. Cover and let rest in a draft free area until doubled, about 30 –40 minutes. Punch down. Divide dough in half and form into 2 balls. Place on greased baking sheet and cover until doubled in bulk, about 30 –40 minutes. Bake in a preheated 400-degree oven for 30 minutes or until bread sounds hollow when tapped lightly. Makes 2 loaves.
Note: you can also divide the dough and place in 2 (9×5-inch) greased loaf pans.
Spelt and Walnut Biscotti


Spelt and Walnut Biscotti
Biscotti are so easy to make. I don’t know why more people don’t bake their own. They are always nice to have with coffee, tea or a cold glass of milk. Biscotti are twice baked. First in a loaf shape, then they are sliced and baked again. Most recipes will tell you to bake the slices half way, then turn them over to finish baking. A little time saving trick- just place a cooling rack on the baking sheet, then place the sliced biscotti on the rack. That way, they get crisp on both sides at once and there is no need to turn them. These biscotti are made with spelt flour. Spelt is an ancient grain that is very closely related to wheat. It does contain gluten, so not an option for people with wheat allergies or Celiac but a nice way to add a whole grain to your menu if you do eat wheat. Unlike whole wheat flour, which tends to be heavy in baking, spelt has a lighter texture and acts more like white flour. I used it to make these biscotti and they are crisp, light and very tasty.
Spelt Biscotti – with Walnuts
1 ¼ c. spelt flour*
⅓ c. sugar
1 t. baking powder
¼ t. salt
½ c. walnuts
¼ c. golden raisins- I often use dried cranberries or other dried fruit
2 eggs
1 t. vanilla
Combine dry ingredients with nuts and raisins in medium mixing bowl. In small bowl combine eggs and vanilla and add to dry ingredients. Stir together to make a slightly sticky dough. With oiled hands shape into loaf (2”x11”) on oiled sheet. Bake at 350-degrees for 20 minutes. Remove from oven. Slice the loaf thin using a serrated knife and place slices on a rack on a baking sheet then return to oven, reduce heat to 300-degrees bake 25 minutes. Remove from oven and allow to cool. Store in an airtight container to retain crunch. Makes about 16.
* If you can’t find spelt flour you can use 3/4 c. all purpose flour and 1/2 c. whole wheat flour instead or substitute the entire amount of flour with whole wheat pastry flour.
Purple and Pink Salad


Purple and Pink Potato Salad
Sometimes we just need a little extra color in our day. My pop of color came in the form of a potato salad. Yes, a potato salad. I had picked up some purple potatoes at a local produce market. I’ve had them before. Normally, they lose a little color once cooked. For whatever reason, these potatoes retained all of that purple color. I cooked them in the microwave, and maybe that is why. Maybe they were just a brighter color to begin with. All I know, is that when I started cutting them up for my salad, I was amazed at how purple they were. Since I had some red onions, I decided to use some with the potatoes for my salad. I ended up with a purple and pink salad. Pretty and quite tasty. I do think, a salad made with less colorful veggies, would still taste as good, but it would not be nearly as much fun to eat.
Purple and Pink Salad
1 lb. purple potatoes
1 lb. red onions
1 c. apple cider vinegar
1/2 c. sugar
1/4 c. water
salt and pepper to taste
1 t. celery seed
1/4 c. oil
Bake potatoes until tender. I used the microwave and it took about 7 minutes, but you can bake in a conventional oven, too. While potatoes are baking, peel, then slice onions thin and place in a saucepan with the rest of the ingredients, except the oil. Bring to a boil, then simmer for about 5-8 minutes until onions are just tender. Some of the liquid will cook off. Peel and cube potatoes and place in a bowl. Drizzle with the oil. Add the onion mixture and stir gently. Adjust seasonings, if needed. Chill. Serves 4.
Winter Class Schedule


Challah
I just updated my website with the Winter and early Spring class dates. Some fun new classes, including one on Winter Salads and another on Baking with Whole Grains, among others.
Bok Choy and Leftover Rice Salad


Bok Choy and Leftover Rice Salad
This salad came about by accident. We had gone out for Chinese food on New Year’s Day. There were leftovers to take home, including some white rice. Once I got home and looked at the leftovers, turned out there was a lot more rice than I thought. I decided to use some of it in a salad. I had some bok choy, which seemed like a natural ingredient to add. I thought about using the bok choy raw, but decided to saute it just a little. It was still crisp, and the greens had just wilted a bit. Played around with what I had on hand and ended up with a pretty good salad. I left it vegetarian, but could easily have added chicken or shrimp and made it more of a main dish, rather than a side.
Bok Choy and Leftover Rice Salad
4 T. oil
2 cloves garlic, peeled and chopped
2-3 c. sliced bok choy- I used baby bok choy, but use what you like
2 c. cold cooked rice
1 carrot, peeled and shredded
½ of a sweet pepper, seeded and chopped
1 green onion, sliced
Dressing:
1/3 c. rice wine vinegar, or white wine vinegar
2 T. oil
2 T. chopped parsley or cilantro
1 T. sugar
1 t. soy sauce
1 t. sesame oil
1 t. fresh grated ginger
Salt and hot sauce to taste
In skillet, sauté garlic for a couple of minutes, being careful not to burn it. Add bok choy and stir fry a few more minutes, just until bok choy wilts a little, but is still crisp. In medium bowl place the bok choy/garlic mixture, being sure to include the oil used in cooking. Add rice and veggies to boy choy mix. In small jar, with a tight fitting lid, place the dressing ingredients. Secure lid and shake until well mixed. Pour over the rice mixture and stir until well mixed. Chill a few hours or overnight before serving. Serves 4-6.
Note: You can make this a main dish salad by adding a little protein. Cooked chicken or shrimp are great. For a vegetarian version- scrambled eggs or edamame work well, too.
Beet, Carrot and Red Onion Salad


Beet, Carrot and Red Onion Salad
This recipe was inspired by pickled beets. I love that sweet/sour flavor combination and wanted to make it into a salad. Not too many generations ago, if you lived in a cold climate, produce selections were pretty limited in the Winter. This is the sort of dish I could see a relative of mine making in January or February.
I chose to roast my beets, but you could also boil or steam them. Once cooked, the carrots and beets are combined with the onions in a dressing that is similar to what you would use to pickle beets, or other veggies. Then, just place in the fridge and let the flavors blend. The veggies almost become “pickled” in a day or so. I made this for a party and people seemed to really like the salad.
Beet, Carrot and Red Onion Salad
1½ lbs. beets
1 lb. carrots
2 red onions
Dressing:
1½ c. apple cider vinegar
½ c. oil- I used olive oil
½ c. sugar
¼ c. lime juice
2-3 T. chopped parsley
1 T. mustard seed
1 T. salt, or to taste
2 t. dill weed
1 t. celery seed
½ t. ginger
Hot sauce to taste
You’ll have to cook the beets. You can roast them or boil or even steam them. To roast the beets- Place beets in a roasting pan and drizzle with a little oil. Cover pan and place in a 350 degree oven for about 45 minutes. Smaller beets will be cooked in less time- about 35 minutes. Really large beets could take up to an hour. I always check by poking one of the beets with a fork. If boiling, just place beets in a pot with enough water to cover them and bring to a boil. Reduce to a simmer and cook, covered, until the beets are tender, about 30-45 minutes, depending on the size of the beets. When beets are cool enough to handle, removed the skins and cut into bite sizes cubes. Place in mixing bowl. To cook the carrots, just peel, slice and steam or boil until just tender. Combine with beets in mixing bowl. Peel and slice the red onions. Place in a saucepan with the dressing ingredients and bring to a boil. Simmer, covered, for about 10 minutes, or until onions are wilted and tender. Pour onion and dressing mixture over beets and carrots and stir to combine. Chill overnight. Serves 6-8.
Cabbage and Noodles

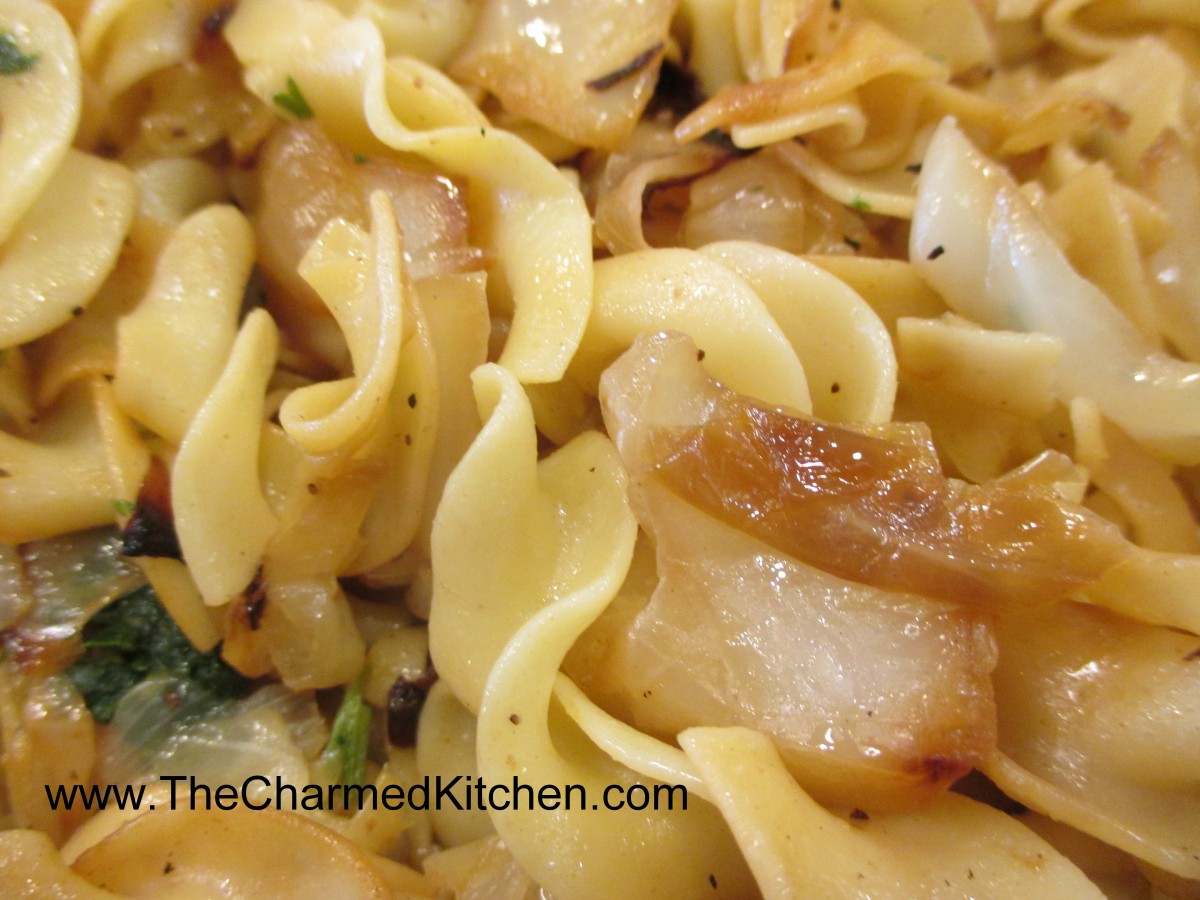
Cabbage and Noodles
Cabbage and noodles is not a glamorous dish and it never will be. That’s fine with me. It is a dish that will always remind me of my childhood. My Mother would make cabbage and noodles as a side dish, at least a couple of times a month. I loved it. I think of her every time I make it.
The reason it tasted so good is that she took the time to caramelize the onions and to let the cabbage brown some, too. That added another layer of flavor to the dish. Simple and very tasty. I used green cabbage this time, but you can use red cabbage, or a combination. You can play around with adding other ingredients. Sometimes I add cooked bacon, or leftover ham.
Cabbage and Noodles
1 onion, chopped
Oil
4-6 cups chopped cabbage
4 c. cooked noodles
Salt and pepper to taste
Fresh or frozen chopped parsley
Heat oil in skillet and cook onion until wilted and a little brown. Add cabbage and stir fry until cabbage in tender and starts to turn a little brown. Stir in noodles and cook until heated through. Season to taste and toss in parsley. Serves 4.


