Mom’s Breaded Chicken
With picnic season here, I thought I would share this recipe again. It always brings back great memories of childhood picnics/cookouts with my family. I love this recipe and I hope you do, too.
I looked forward to the big family picnics we had when I was a kid. My Dad and I would go early in the morning to pick out our favorite location, and get tables arranged. Then he would start a fire in the grill and make us bacon and eggs in the cast iron skillet.
Everyone started arriving soon after that. Well, not everyone. My Mom, and one of my aunts, would always come a little later. That is because they were finishing up the breaded chicken that was always a part of these picnics. She wanted it to be served nice and warm.
It would have been breaded the day before. My mom felt that when you breaded the chicken ahead of time, it seemed to help the breading to stick better. I do it the same way today.
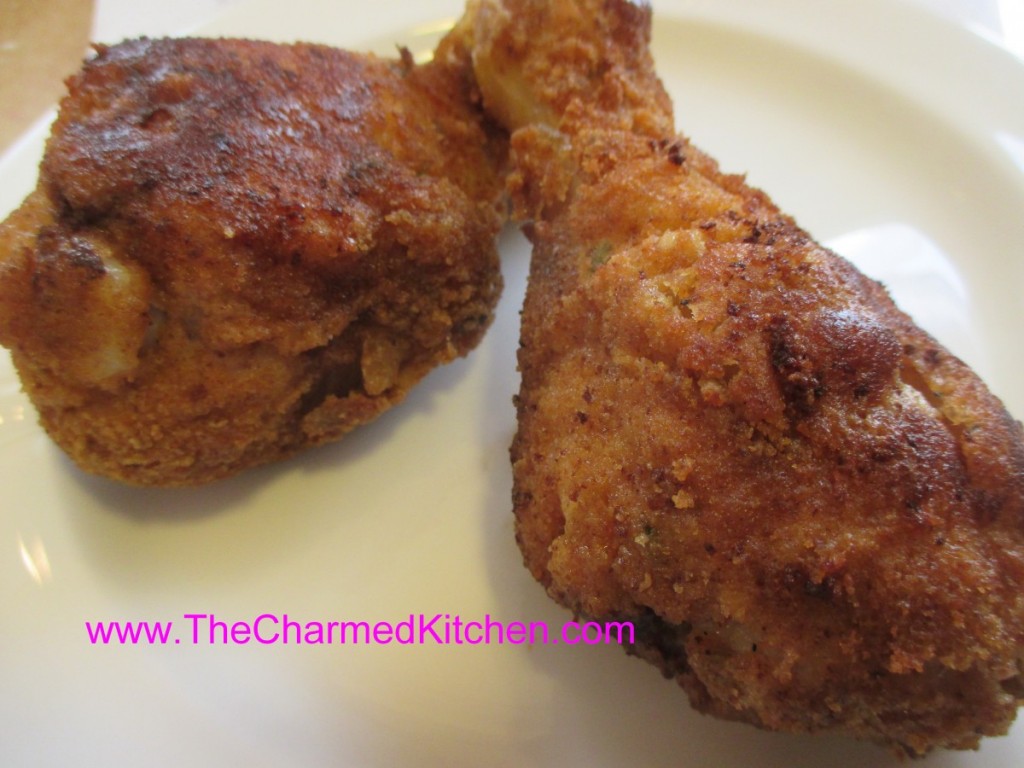
This isn’t fried chicken. The breaded chicken is lightly browned in a skillet, then finished off in the oven. It is crispy on the outside and nice and juicy inside. It is also a lovely memory for me of time spent with family. Here are the directions for how she made it.
Mom’s Breaded Chicken
Chicken pieces, I often use a whole bird, cut into pieces, or just thighs and drumsticks.
salt and pepper to taste
flour
Parsley
Paprika
Garlic powder
eggs
Milk
Bread crumbs
oil
Pat chicken pieces dry. Season with salt and pepper. In a bag, combine flour- about ½ c. per 8 pieces of chicken should be about right. Season flour with a little salt and pepper. In bowl combine milk and eggs with the rest of the seasonings, including more salt and pepper. I use 1 egg with enough milk to make a thin batter for every 4-5 pieces of chicken. Keep in mind that the size of the pieces matters. Wings will need less batter than legs or breasts. Place bread crumbs in a shallow dish or in a plastic bag. Place a few pieces of chicken in bag with the flour and shake to coat, dipping off the excess. Then dip chicken pieces (1-2 at a time) in egg mixture, turning to moisten completely. Then place chicken in crumbs and turn or shake to coat evenly. Repeat with remaining chicken until all of it is breaded.
At this time you can cover and refrigerate the chicken for several hours or overnight if desired. You can also go ahead and cook it right away. Mom suggests you bread the chicken the night before so it will stick better, but hey, you’re an adult, do what you want.
To cook the chicken, heat ½- inch of oil in a heavy skillet and preheat the oven to 400 degrees. Foil a roasting pan and then place a rack inside. Once the oil is hot, brown the chicken pieces several at a time, turning to brown evenly. Place the browned chicken on the rack in the baking dish and continue to brown remaining chicken. Place chicken in oven and bake until chicken is cooked and juices run clear when chicken is poked. Cooking time will vary depending on the size of the pieces, how much you browned them and how many you are cramming in one pan. Baking time will be about 45 minutes. Check a large piece of chicken, near the middle of the pan to be sure.
This is a real summer favorite and the baking on the rack helps fat to drip off, giving you fried chicken flavor with fewer calories. This chicken can be served hot, warm or cold.
Mom’s Breaded Chicken
With picnic season here, I thought I would share this recipe again. It always brings back great memories of childhood picnics/cookouts with my family. I love this recipe and I hope you do, too.
I looked forward to the big family picnics we had when I was a kid. My Dad and I would go early in the morning to pick out our favorite location, and get tables arranged. Then he would start a fire in the grill and make us bacon and eggs in the cast iron skillet.
Everyone started arriving soon after that. Well, not everyone. My Mom, and one of my aunts, would always come a little later. That is because they were finishing up the breaded chicken that was always a part of these picnics. She wanted it to be served nice and warm.
It would have been breaded the day before. My mom felt that when you breaded the chicken ahead of time, it seemed to help the breading to stick better. I do it the same way today.
This isn’t fried chicken. The breaded chicken is lightly browned in a skillet, then finished off in the oven. It is crispy on the outside and nice and juicy inside. It is also a lovely memory for me of time spent with family. Here are the directions for how she made it.
Mom’s Breaded Chicken
Chicken pieces, I often use a whole bird, cut into pieces, or just thighs and drumsticks.
salt and pepper to taste
flour
Parsley
Paprika
Garlic powder
eggs
Milk
Bread crumbs
oil
Pat chicken pieces dry. Season with salt and pepper. In a bag, combine flour- about ½ c. per 8 pieces of chicken should be about right. Season flour with a little salt and pepper. In bowl combine milk and eggs with the rest of the seasonings, including more salt and pepper. I use 1 egg with enough milk to make a thin batter for every 4-5 pieces of chicken. Keep in mind that the size of the pieces matters. Wings will need less batter than legs or breasts. Place bread crumbs in a shallow dish or in a plastic bag. Place a few pieces of chicken in bag with the flour and shake to coat, dipping off the excess. Then dip chicken pieces (1-2 at a time) in egg mixture, turning to moisten completely. Then place chicken in crumbs and turn or shake to coat evenly. Repeat with remaining chicken until all of it is breaded.
At this time you can cover and refrigerate the chicken for several hours or overnight if desired. You can also go ahead and cook it right away. Mom suggests you bread the chicken the night before so it will stick better, but hey, you’re an adult, do what you want.
To cook the chicken, heat ½- inch of oil in a heavy skillet and preheat the oven to 400 degrees. Foil a roasting pan and then place a rack inside. Once the oil is hot, brown the chicken pieces several at a time, turning to brown evenly. Place the browned chicken on the rack in the baking dish and continue to brown remaining chicken. Place chicken in oven and bake until chicken is cooked and juices run clear when chicken is poked. Cooking time will vary depending on the size of the pieces, how much you browned them and how many you are cramming in one pan. Baking time will be about 45 minutes. Check a large piece of chicken, near the middle of the pan to be sure.
This is a real summer favorite and the baking on the rack helps fat to drip off, giving you fried chicken flavor with fewer calories. This chicken can be served hot, warm or cold.
Potato “Breaded” Chicken- Gluten Free
I love my Mom’s breaded chicken. It was a staple at summer outings. I still make it. Pretty classic, with a flour dredge, egg dip and bread crumbs.
Sometimes, bread crumbs are not an option. If you, or someone you love, can’t have gluten, this recipe for “breaded” chicken really works. It is also very simple to make. Perfect for a weeknight, when you might not have a lot of time to cook.
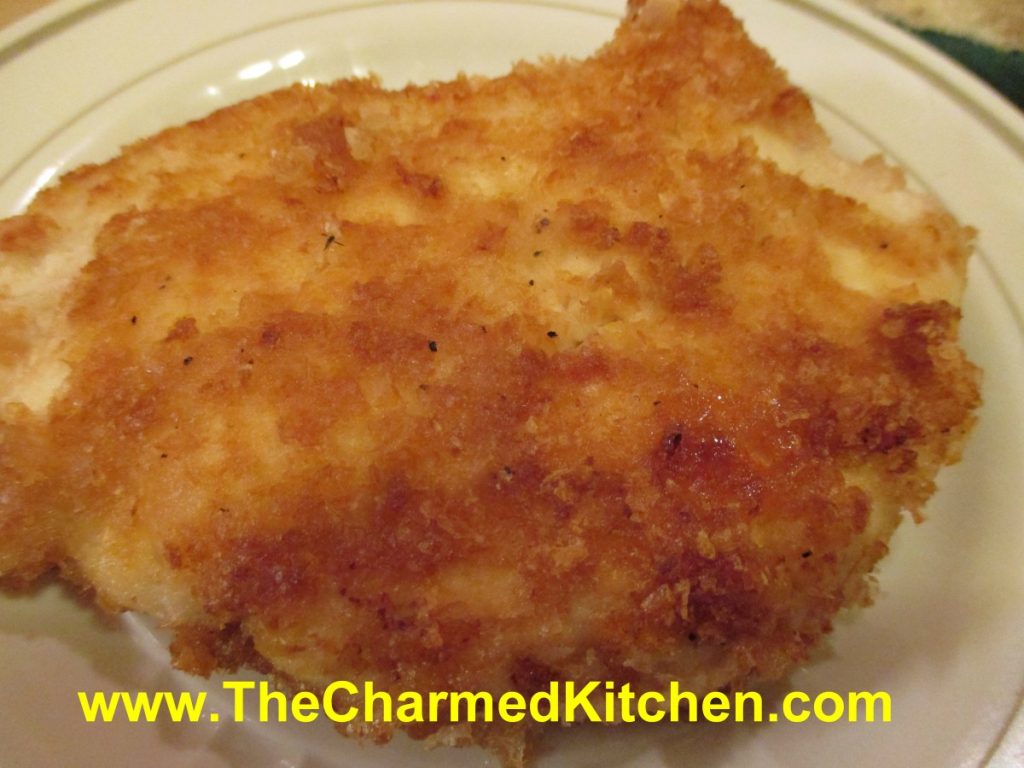
I just “breaded” the chicken with potato flakes. Yes, the same potato flakes used to make instant mashed potatoes. First, I spread some mayo on the chicken, then a quick coating of the potato flakes. I pan fried the chicken, but you could bake them or even use an air fryer.
I sometimes use potato flakes as a gluten-free thickener for veggie soups and the like. I have also used them as a coating for fish.
Even if you can have bread crumbs, the potato flakes are a fun way to coat chicken, fish or pork. They give you a nice, crispy crust.
The chicken breasts I had were pretty thick, so I cut them into thinner pieces to help them cook faster, and more evenly. You could also cut them into nuggets, if you prefer. I pan fried, but you can also brown them a little, and finish in the oven. If using bone-in chicken, increase baking times.
Potato “Breaded” Chicken
½ mayo
1 c. potato flakes
Salt and pepper
4 chicken breasts, boneless or 6 boneless chicken thighs
Oil
Spread chicken pieces with the mayo. Season the potato flakes with a little salt and pepper. Place potato flakes on a plate or in a shallow dish. Coat the chicken pieces with the potato flakes, pressing a little to cover well. Heat oil in skillet until really hot. Cook chicken pieces in skillet, on both sides, until golden brown. Turn heat down to medium and continue cooking until chicken is cooked. Serves 3-4.
Mom’s Breaded Chicken
With the holiday weekend upon us, I thought I would share this recipe again. It always brings back great memories of childhood picnics/cookouts with my family. I love this recipe and I hope you do, too.
I looked forward to the big family picnics we had when I was a kid. My Dad and I would go early in the morning to pick out our favorite location, and get tables arranged. Then he would start a fire in the grill and make us bacon and eggs in the cast iron skillet.
Everyone started arriving soon after that. Well, not everyone. My Mom, and one of my aunts, would always come a little later. That is because they were finishing up the breaded chicken that was always a part of these picnics. She wanted it to be served nice and warm.
It would have been breaded the day before. My mom felt that when you breaded the chicken ahead of time, it seemed to help the breading to stick better. I do it the same way today.
This isn’t fried chicken. The breaded chicken is lightly browned in a skillet, then finished off in the oven. It is crispy on the outside and nice and juicy inside. It is also a lovely memory for me of time spent with family. Here are the directions for how she made it.
Mom’s Breaded Chicken
Chicken pieces, I often use a whole bird, cut into pieces, or just thighs and drumsticks.
salt and pepper to taste
flour
Parsley
Paprika
Garlic powder
eggs
Milk
Bread crumbs
oil
Pat chicken pieces dry. Season with salt and pepper. In a bag, combine flour- about ½ c. per 8 pieces of chicken should be about right. Season flour with a little salt and pepper. In bowl combine milk and eggs with the rest of the seasonings, including more salt and pepper. I use 1 egg with enough milk to make a thin batter for every 4-5 pieces of chicken. Keep in mind that the size of the pieces matters. Wings will need less batter than legs. Place bread crumbs in a shallow dish or in a plastic bag. Place a few pieces of chicken in bah with the flour and shake to coat, dipping off the excess. Then dip chicken pieces (1-2 at a time) in egg mixture, turning to moisten completely. Then place in crumbs and turn or shake to coat evenly. Repeat with remaining chicken until all of it is breaded.
At this time you can cover and refrigerate the chicken for several hours or overnight if desired. You can also go ahead and cook it right away. Mom suggests you bread the chicken the night before so it will stick better, but hey, you’re an adult, do what you want.
To cook the chicken, heat ½- inch of oil in a heavy skillet and preheat the oven to 400 degrees. Foil a roasting pan and then place a rack inside. Once the oil is hot, brown the chicken pieces several at a time, turning to brown evenly. Place the browned chicken on the rack in the baking dish and continue to brown remaining chicken. Place chicken in oven and bake until chicken is cooked and juices run clear when chicken is poked. Cooking time will vary depending on the size of the pieces, how much you browned them and how many you are cramming in one pan. Baking time will be about 45 minutes. Check a large piece of chicken, near the middle of the pan to be sure.
This is a real summer favorite and the baking on the rack helps fat to drip off, giving you fried chicken flavor with fewer calories. This chicken can be served hot, warm or cold.


