Are You Eating Sweet Potatoes or Yams?

Sweet Potatoes

Sweet Potatoes

I just wanted to clear something up. With all the sweet potato and “yam” recipes circulating, it seemed like a good time for this post. Are you eating sweet potatoes or yams?

Well, if you live in North America, you are having sweet potatoes. No matter what the produce department labels them, everything in the store is, botanically speaking, a sweet potato. Red, orange and yellow, big and small – all are sweet potatoes.

So where did the yam thing start? Well, many years ago the state of Louisiana had an abundant crop of sweet potatoes. They wanted to sell them in a competitive marketplace, so they decided to call them yams. Just a name change in an effort to give their product an edge over the competition. You’ll often still see them sold as Louisiana Yams. They aren’t yams, though. Louisiana Yams are, in fact, just sweet potatoes with a name change.

There are real yams- they are larger than sweet potatoes and quite starchy. They might be found at South American restaurants, or in specialty markets in the States, but they are NOT in your local grocery store.


A sweet potato by other name will taste as sweet.

Posted in Cooking |

Mom’s Cornbread

Mom's Cornbread

Mom’s Cornbread

I have made a lot of versions in cornbread in my life, but this one might just be my favorite. Perhaps because it is my Mother’s recipe.

The secret? She put a layer of shredded cheese between layers of batter. She also added cream style corn to some of the batter. You get a cornbread that is full of flavor. It is very tender and crumbly, but not dry. I baked mine in a cake pan, but there is no reason you could not bake this recipe in cast iron, if you prefer.


I served this version of cornbread with chili the other night. Everyone loved it. One friend even asked me to make a batch for her Thanksgiving dinner. I was so pleased. I hadn’t made Mom’s version of cornbread in awhile. I will definitely be making it more often from now on.


Mom’s Cornbread

1 c. cornmeal

1 c. flour

2 T. sugar

4 t. baking powder

¾ t. salt

2 eggs

1 c. half and half

¼ c. oil- or melted butter or bacon fat

4 oz. pepper Jack cheese, shredded

1 c. cream style corn


Grease a 9-inch square pan and set aside. Preheat oven to 425 degrees. Combine dry ingredients in medium bowl, and set aside. In small bowl, combine eggs, half and half and oil and beat until smooth.  Stir egg mixture into dry ingredients, stirring until combined. Don’t overmix. Pour half of the batter into prepared pan.  Sprinkle shredded cheese over the batter in the pan. Combine remaining batter with the cream style corn. Pour this mixture over the cheese in the pan. Bake 20-25 minutes. Serves 8-9.

Chili – My Mom’s Version

Mom's Chili

Mom’s Chili

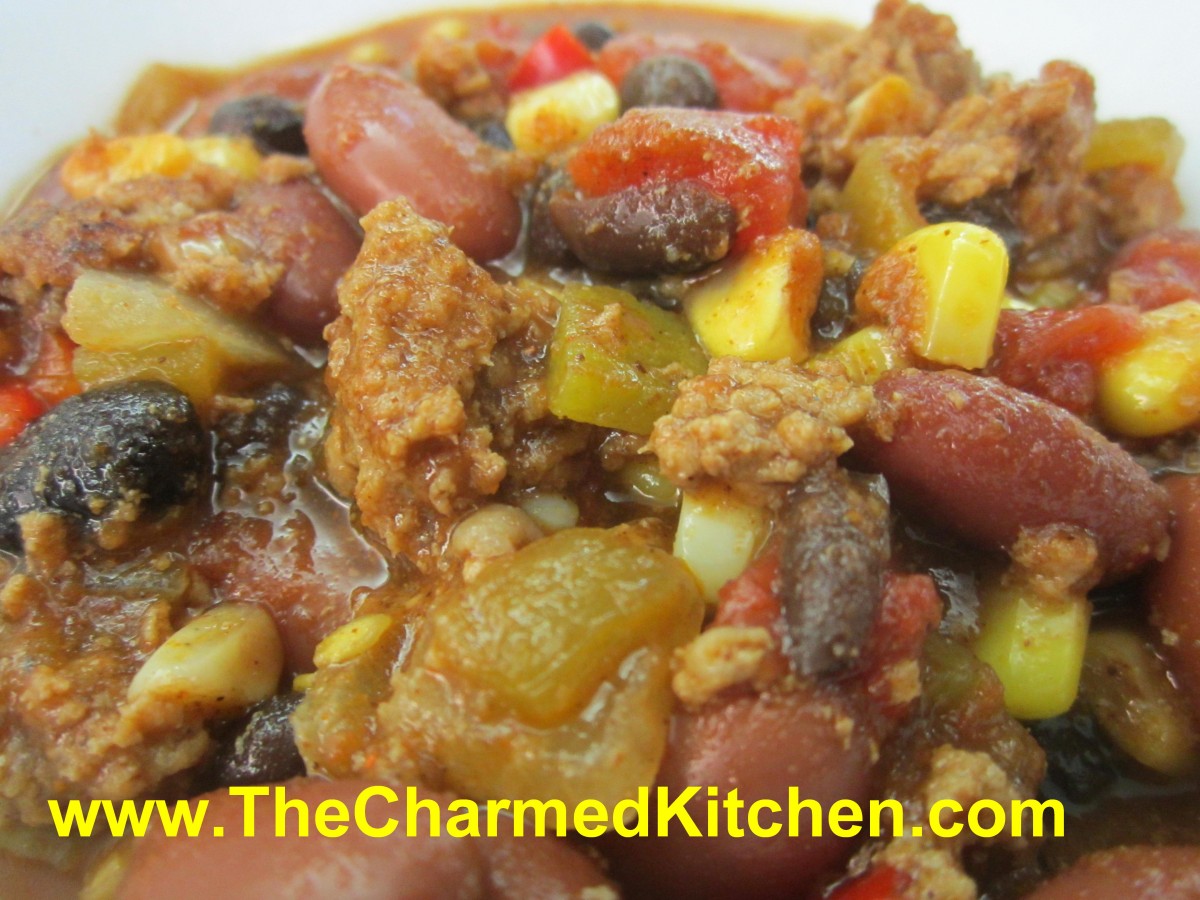
Today would be my Mother’s birthday. Every time I prepare something she used to make, I feel like I am honoring her a little. I had friends over for dinner the other night for chili and cornbread. Everybody loved it. One of my friends said it tasted like her Mother’s chili, too.

I love chili and make all sorts of variations, but I crave this simple version my Mother used to make. It was one of my favorite dishes when I was a kid. She’d often make cornbread to have with it.  I admit to spicing it up more now, often adding a good shot of hot sauce, but it is still the same dish I remember so fondly.

I always think about the book Rebecca by Daphne Du Maurier when I think about Mom’s chili. It was a really cold, rainy day, and I was stuck inside. I’d lost myself in the book and was totally engrossed when she called me to dinner. I think chili was about the only thing that would have pulled me away from that book.

Miss you Mom. Love you.

Mom’s Chili

1 large onion, chopped

Oil

3 lbs. coarsely ground beef

3 (28 oz.) cans crushed tomatoes – I used 3 quarts of home canned tomatoes

2 cans (about 15 oz.) kidney beans, rinsed and drained

1 T. minced garlic

¼- ½ c. chili powder, or more to suit your taste

2 t. cumin

½ t. cinnamon

Salt and pepper to taste

Hot pepper sauce to taste

In Dutch oven or soup pot sauté onion in oil until tender. Add meat and cook until no pink is visible. Drain off excess fat. Add tomatoes, beans, garlic and chili powder to taste, cumin and cinnamon. Cover and simmer over low heat until flavors blend, at least 30 minutes. Longer cooking is even better. I often transfer the chili to the crock pot for a couple of hours. Adjust seasonings and serve. Serves 4-6.

Can be eaten as is- or top with shredded cheese or a dollop of sour cream.

Posted in Cooking |

Brussels Sprouts Salad

Brussels Sprouts Salad

Brussels Sprouts Salad

I have always been a fan of Brussels sprouts. Even as a kid, I loved the “baby” cabbages. I usually eat them steamed or roasted, but I also enjoy eating them raw. We eat cabbage in cole slaw, so why not eat Brussels sprouts raw?

This salad is a great way to enjoy their crunchiness in raw form. I made this salad for a dinner with friends last night. It was a big hit. There was none left, which is always a good sign. The dressing, sweetened with a little maple syrup, really makes the dish work.

The nice thing about this salad, is that it tastes good even the next day. The sprouts are like little cabbages. Unlike leaf lettuce, which wilts quickly once dressed, the sprouts soften some, but retain most of their crunch. This would be a nice salad to serve for Thanksgiving, too. Lighten up the meal a little.


Brussels Sprouts Salad

8- 10 oz. Brussels sprouts

2 large oranges, peeled and cubed

¾ c. raisins

½ c. peanuts

Dressing:
¼ c. olive oil
¼ c. apple cider vinegar
2 T. maple syrup
1 T. fresh chopped parsley- or 1 t. dried
2 t. hot sauce, or to taste
½ t. dried thyme
½ t. dried basil
Salt and pepper to taste

Trim bottoms off the sprouts, cut in half and slice thin. You should end up with about 4 cups of sliced sprouts. Place in large bowl with the remaining salad ingredients. Place dressing ingredients in a jar with a tight fitting lid and shake well to combine. Toss over Brussels sprout mixture. Serves 6.
Note: The salad ingredients can all be assembled a day ahead, then just dressed when ready to serve. I actually like it dressed an hour or so before serving, but I do toss in the peanuts right at the end. This salad is also good the next day.

Posted in Cooking |

Swedish Limpa Bread

Swedish Limpa Bread

Swedish Limpa Bread

This rye bread is a favorite of mine. It has a soft texture and makes great sandwiches. The flavor in enhanced by a combination of caraway seeds and a little orange zest. It even makes wonderful French toast. My brother-in-law says it is just like the bread his Swedish mother made.


It is not like rye breads you might traditionally think of. Limpa is lighter in color and texture.  I baked mine in two round loaves, but you can also bake this bread in loaf pans, if you prefer. You can also shape the dough into dinner rolls, if you like.


Swedish Limpa

 6 ½ c. flour

2 c. rye flour

¼ c. brown sugar

2 t. salt

2-t. caraway seeds

2 t. grated orange peel

2 pkt. Active dry yeast

2 T. butter, softened

2 2/3 c. hot water (125-130 degrees)


Set aside 1-cup flour. Mix remaining flours and other dry ingredients in a large bowl. Add butter and water to flour mixture and stir to blend. Mix in enough additional flour to make a soft dough. Knead on a floured surface until smooth about 8-10 minutes. Place dough in oiled bowl turning to oil top. Cover and let rest in a draft free area until doubled, about 30 –40 minutes. Punch down. Divide dough in half and form into 2 balls. Place on greased baking sheet and cover until doubled in bulk, about 30 –40 minutes. Bake in a preheated 400-degree oven for 30 minutes or until bread sounds hollow when tapped lightly. Makes 2 loaves.

Note: you can also divide the dough and place in 2 (9×5-inch) greased loaf pans.

Turkey Cookies

Cookie Turkey

Cookie Turkey

Every year, I spend the day before Thanksgiving making some special treat or craft with my niece, Elia. Last year we made these cookie “turkeys”. She liked making them so much we are making them again this year. They are really easy to make, and since there is no baking involved, you don’t tie up the oven if you need it for other things, like maybe a real turkey. Here are the ingredients you will need.  We did them sort of assembly line fashion, because Elia wanted one for each person’s place at the table.


Turkey Cookies

chocolate sandwich cookies

candy corn

mini peanut butter cup

malted milk balls

candy pumpkins

melted chocolate

To start, place a cookie on your work surface. Affix a peanut butter cup, for the body. with a little melted chocolate. Place a malted milk ball on top of the peanut butter cup, using a little more melted chocolate to make the head. Once the chocolate hardens a little break off the tip of a candy corn and affix with chocolate to make the beak. Stick a few candy corn between the cookies- into the frosting layer- for the tail. Open up a cookie and use a little more chocolate to stand up your turkey on the frosting surface- Elia wanted them to be standing on snow. Or you can use a whole cookie, if you prefer. Place it off center, so you have room for your pumpkin. Let it harden for a minute, then add a candy pumpkin, using another drop of melted chocolate.

Sweet Potato and Herb Biscuits

Sweet Potato and Herb Biscuits

Sweet Potato and Herb Biscuits

These biscuits are a favorite of mine. They also make a nice dish to serve at Thanksgiving. I like sweet potatoes cooked any number of ways. Steamed, roasted, mashed. In this biscuit recipe, raw sweet potatoes are grated and added to the dough, along with some herbs. The biscuits come out tender, with great flavor and texture. They go well with any number of dishes. I enjoy them with a bit of butter, warm from the oven.  When you mix the dough, don’t be worried if it seems too dry. It takes a little bit of kneading to get the moisture out of the potatoes. The extra effort is worth it.

I cut them into triangles, but you can also just form the dough into a log shape. Then, slice the dough for round biscuits. They taste wonderful, no matter the shape.

 Sweet Potato and Herb Biscuits

2 1/4 c. flour

1 T. baking powder

1/2 t. grated lemon peel

1/4 t. each baking soda, dried basil and dried thyme

1 egg, beaten

1 1/2 c. shredded sweet potato, about 1 large

1/2 c. fine chopped green onions

1/2 c. sour cream

2T. butter, melted or olive oil


Stir together dry ingredients in large bowl and set aside. Combine remaining ingredients and add to flour mixture mixing until just blended. Turn onto lightly floured surface and knead a few times until dough just stays together. Dough will look too dry- but it will come together after you knead it. Press into an 8-inch square and cut into four squares.* Cross cut each square into four triangles. Place on greased baking sheet and bake in a preheated 425 degree oven for 20 minutes. Makes 16.

* I press the dough into a lightly floured 8×8-inch baking pan and then flip it out onto the work surface, before cutting. That way you’ll get nice, even edges.

Posted in Cooking |

Hot and Sour Soup

Hot and Sour Soup

Hot and Sour Soup

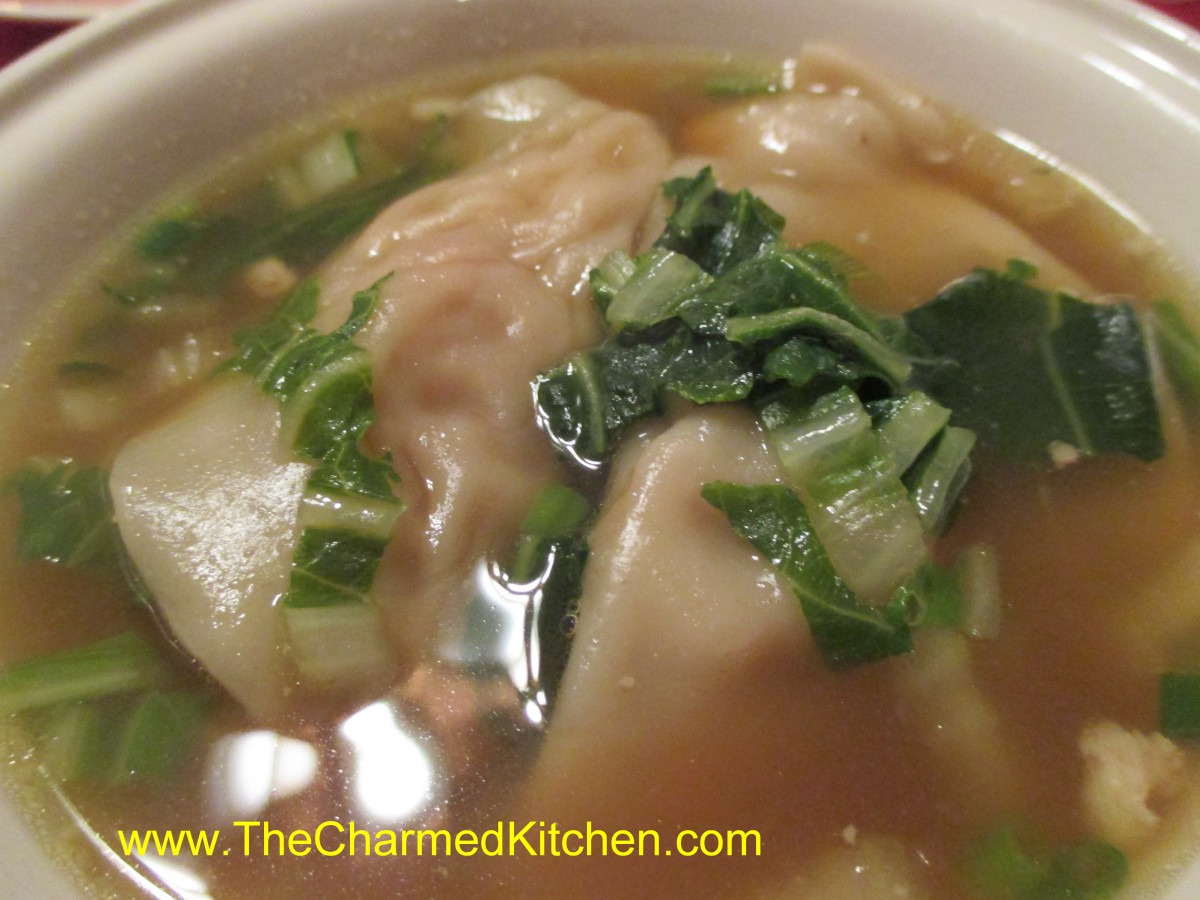
Many years ago, my dear friend, Martha, got me to try Hot and Sour Soup. I have been in love with it ever since. I stock up on the ingredients when I am shopping at my local Asian grocery store. Since many of the ingredients are canned or dried, it is easy to keep them on hand. The soup itself does not take that long to make. You do need to soak the black mushrooms for a little while, but once they are ready, the soup comes together pretty quickly. The black mushrooms are available already sliced in thin strips. That is what I use. You can also find them dried whole. In that case, you would soak the mushrooms first, then slice them.

Feel free to play around with the additions. Sometimes I’ll add some shredded nappa cabbage. I have also made a vegetarian version by using vegetable stock and omitting the sliced meat. It was still a very tasty bowl of soup.

You get plenty of heat from the white pepper, but you can add some hot sauce, if you like it hotter.


Hot and Sour Soup

5 c. chicken broth- or vegetable broth

2 c. pork, sliced in thin strips or you can use chicken or omit

1 T. soy sauce

¾ c. dried sliced Chinese black mushrooms, soaked 30 minutes in water and drained

1 can straw mushrooms, drained

1 c. sliced bamboo shoots – I use the braised ones in a can- nice flavor

1 can sliced water chestnuts, drained

10 oz. tofu, cubed

½ -1 t. white pepper

¼ c. cider vinegar

4 T. cornstarch mixed with 1/4 c. water*

2 beaten eggs

Sesame oil

1 green onion, sliced thin, or chives


Combine broth with pork, soy sauce, mushrooms, bamboo shoots and water chestnuts in pot and simmer 10 minutes. Add tofu, pepper, vinegar and cornstarch mixture and bring to a boil. As soup thickens and clears pour egg in slowly. Remove from heat; stir in a little oil and onions and serve.

Serves 4.

Note: For extra heat you can add hot sauce to taste.

* I use a type of cornstarch called Clear Gel. It remains thick, even after reheating. You can find it in Amish stores and on line.


Posted in Cooking | Tagged |

Sweet Potato Pound Cake

Sweet Potato Pound Cake

Sweet Potato Pound Cake

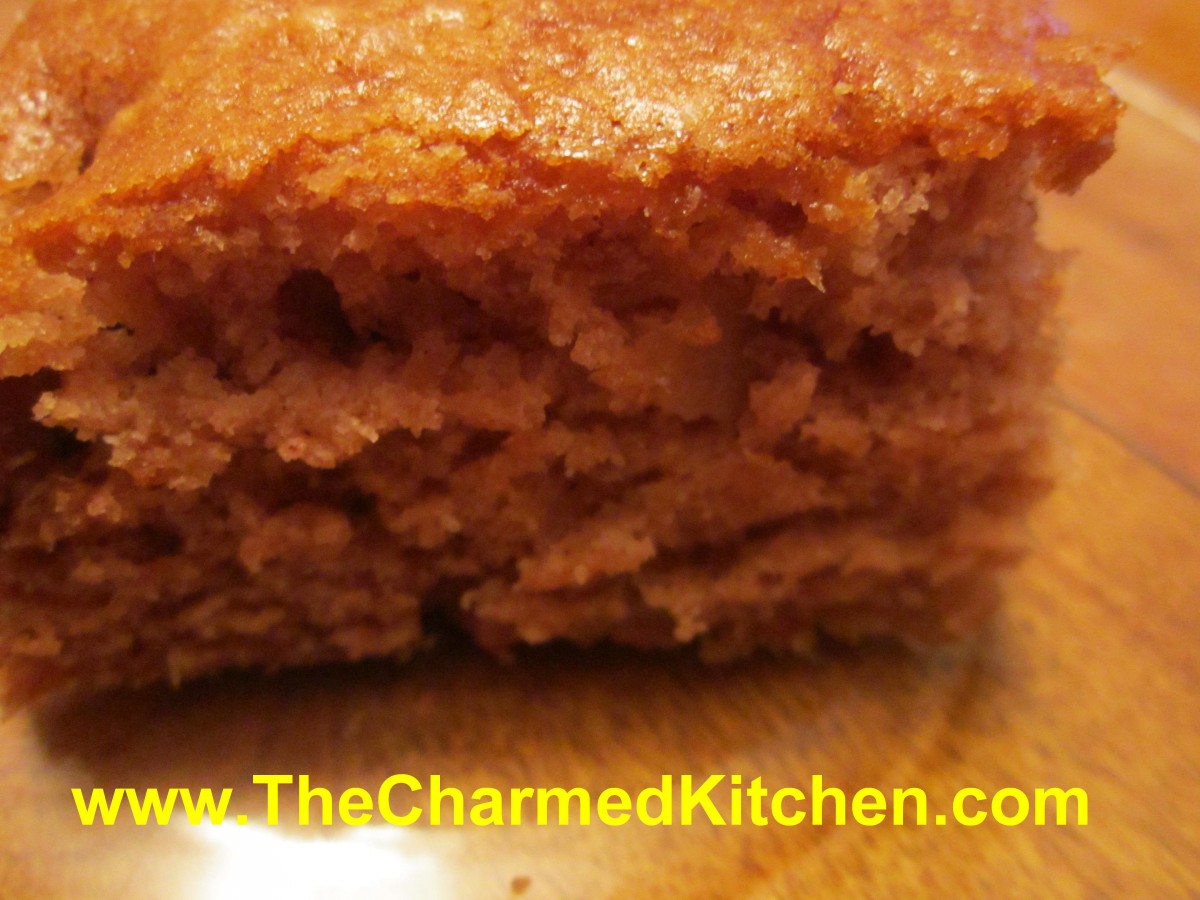
I have posted this recipe before, but I think it is worth posting again. If the only way you enjoy sweet potatoes is as a side at the holidays, or in pie, it is time to expand your thinking about them. In this recipe, the mashed sweet potatoes add both sweetness and moistness to the finished cake. Great plain, or with a dollop of whipped cream and some fresh berries. This cake makes a great dessert or a nice addition to a brunch menu. Also a nice way to use up leftover mashed sweet potatoes, if you find yourself with leftovers.


Sweet Potato Pound Cake

1 1/2 c. cake flour*

1/2 t. each baking soda, salt, cinnamon and nutmeg

1/2 c. unsalted butter, room temperature

1/2 c. sour cream, room temperature

1 1/3 c. sugar

3 eggs, room temperature

1/2 c. mashed sweet potato

1 t. vanilla

Preheat oven to 300 degrees. Lightly oil an 8×4-inch loaf pan. Mix flour with next 4 ingredients and set aside. In large mixing bowl beat together butter and sour cream. Beat in sugar and then beat in eggs 1 at a time, beating well after each addition. Stir in mashed sweet potato and vanilla. Stir in dry ingredients and pour batter into prepared pan. Bake until tester comes out clean, about 1 hour and 15 minutes. Cool in pan 30 minutes before loosening cake sides from pan and removing. After cake has cooled wrap in foil and store at room temperature. Serves 8.

* If you don’t have cake flour you can make your own. Simply measure out a cup of all purpose flour and remove 2 tablespoons of the flour. That is now the same as a cup of cake flour OR remove the 2 tablespoons of flour and replace them with 2 tablespoons of cornstarch and sift together to combine. I do the flour/cornstarch mix and keep a batch on hand for when I need it in baking.

Hawaiian Wedding Cake

Hawaiian Wedding Cake

Hawaiian Wedding Cake

I get a little nostalgic when I make Hawaiian Wedding Cake. This recipe was very popular when I was a kid. I don’t know a lot of people making it anymore- and that is a shame. The cake is very tasty and quite easy to make.

This recipe proves that you don’t always need a lot of time, to bake a homemade dessert. You can make this moist and tasty cake in less time than it takes to make a box mix cake. Really. The ingredients are all combined at once in a mixing bowl, and stirred by hand until mixed.

Of course, time saving means nothing if the dessert doesn’t taste good. The cake is really good. It is studded with nuts, coconut and has plenty of pineapple in it, too. Once baked and cooled, it can be topped with cream cheese frosting, powdered sugar or cinnamon sugar. You can even leave it plain.

The cake can make a nice gift, too. Use small foil loaf pans- and divide the batter among them, filling half way. Bake at the same temperature, but for a shorter time.

The mix of tropical ingredients certainly inspired the name of this cake. I don’t really know if people in Hawaii actually ever serve this cake at weddings. I like to think that they did. I do know how much I like it. I think you will, too.


Hawaiian Wedding Cake

2 c. flour

2 eggs

1 (20oz.) can crushed pineapple in its own juice, undrained

1 c. shredded coconut

1 c. sugar

1 c. chopped walnuts

2 t. baking soda


Preheat oven to 350 degrees. Grease a 9×13 inch pan. Combine all ingredients in a bowl and mix well. Pour into prepared pan and bake 35 minutes or until golden brown on top. Cool and dust with cinnamon sugar, powdered sugar, or frost. Serves 12.

Frosting recipe:

8 oz. Cream cheese, softened

3/4 c. powdered sugar

1 stick butter, room temperature

Beat all together until fluffy. Frost cake and refrigerate until ready to eat.

Cake should be golden brown on top when baked

Cake should be golden brown on top when baked