Homemade Bagels
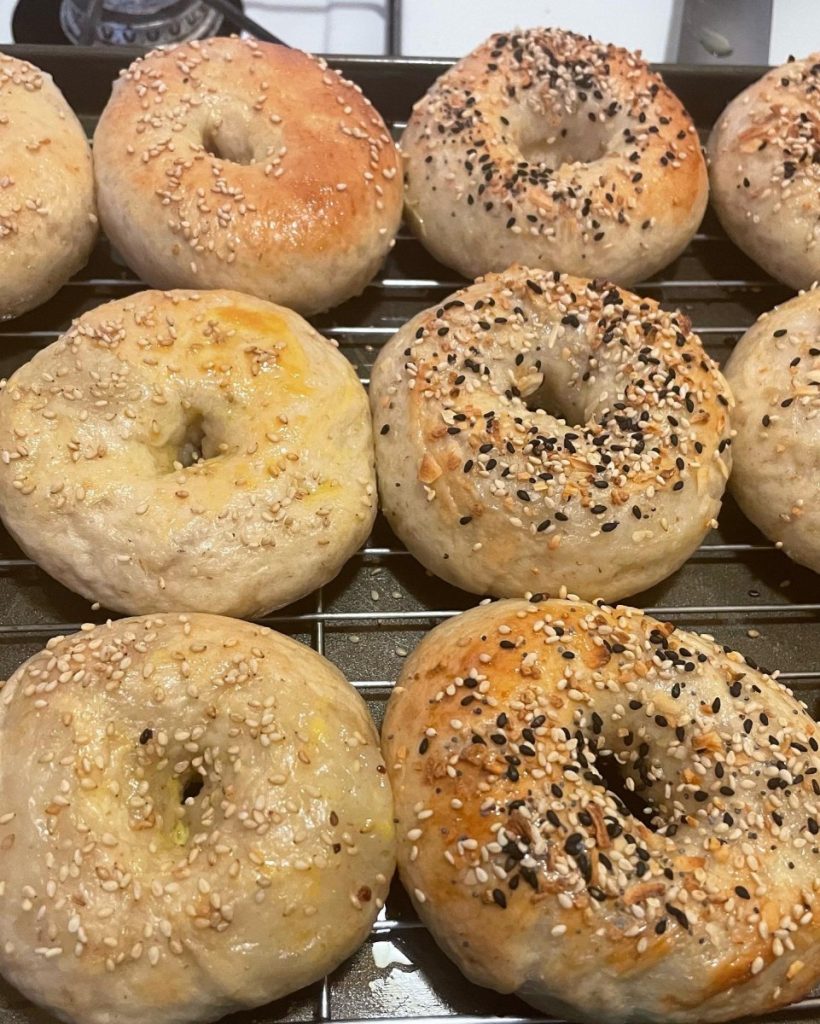
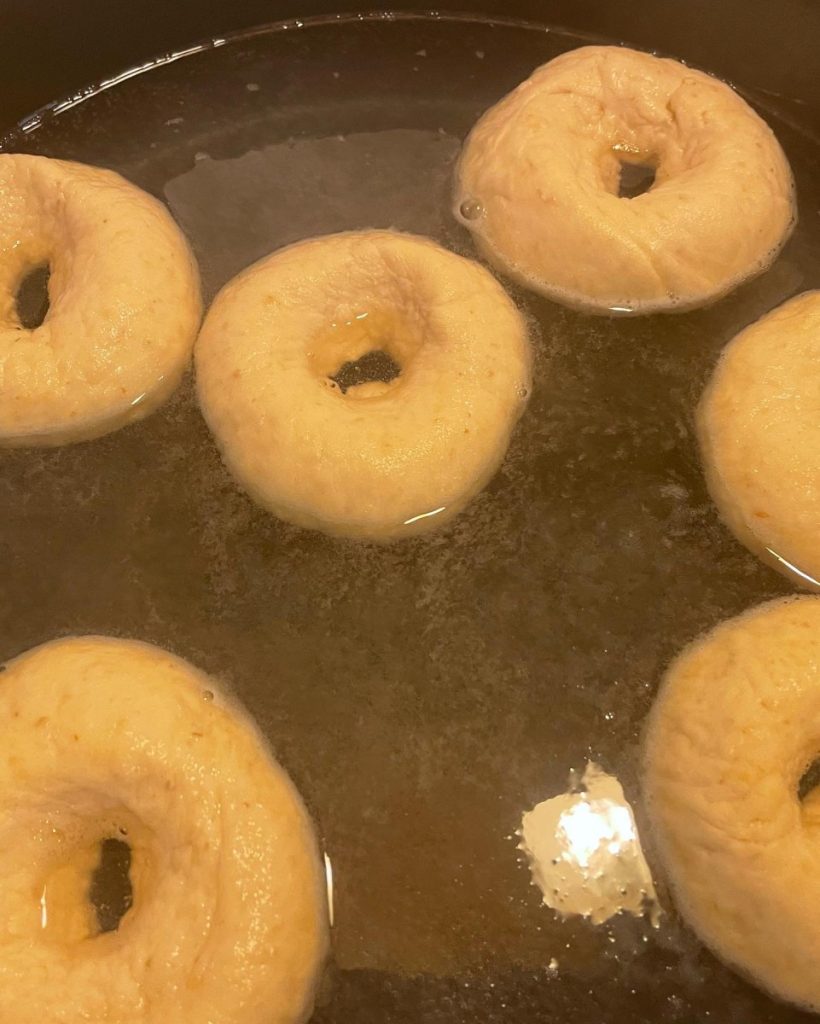
I taught a class last week on making bagels. It was a lot of fun. I think people were surprised on how easy the are to make. The chewy texture in bagels comes from boiling the bagels before baking them.
Bagel History
Bagels began in Austria when a baker in Vienna in 1683 wanted to honor the visiting president of Poland. He created a roll that was round, or shaped like the stirrup on the King’s saddle. The new creation was called beugel, which was a variation of the German word for stirrup. Over time the word evolved into bagel. Because they were made with white flour, everyone, other than the rich considered bagels a special treat for special occasions. Today bagels are found in almost every grocery store throughout the country.
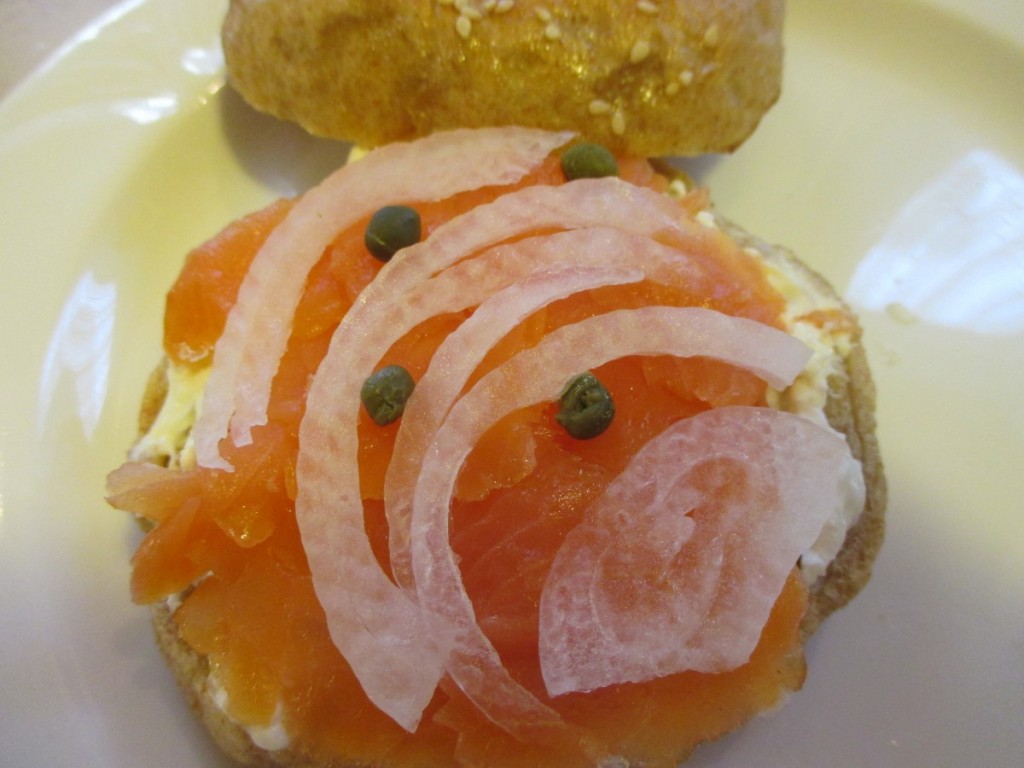
Lox and Cream Cheese
Probably the most traditional way to top a bagel. A toasted bagel is spread with cream cheese and then a few thin slices of lox (salt cured salmon). Some people like to also add thin slices of sweet onion. I do. I also like to add a few capers. Years ago this became a tradition in my family. My niece and I always have bagels with lox on Thanksgiving morning.
Bagels
4 ½ -5 c. flour, bread flour preferred
3 T. sugar
1 T. salt
2 pkgs. Yeast
Water
2 t. butter
1 T. sugar
2 t. salt
1 egg white
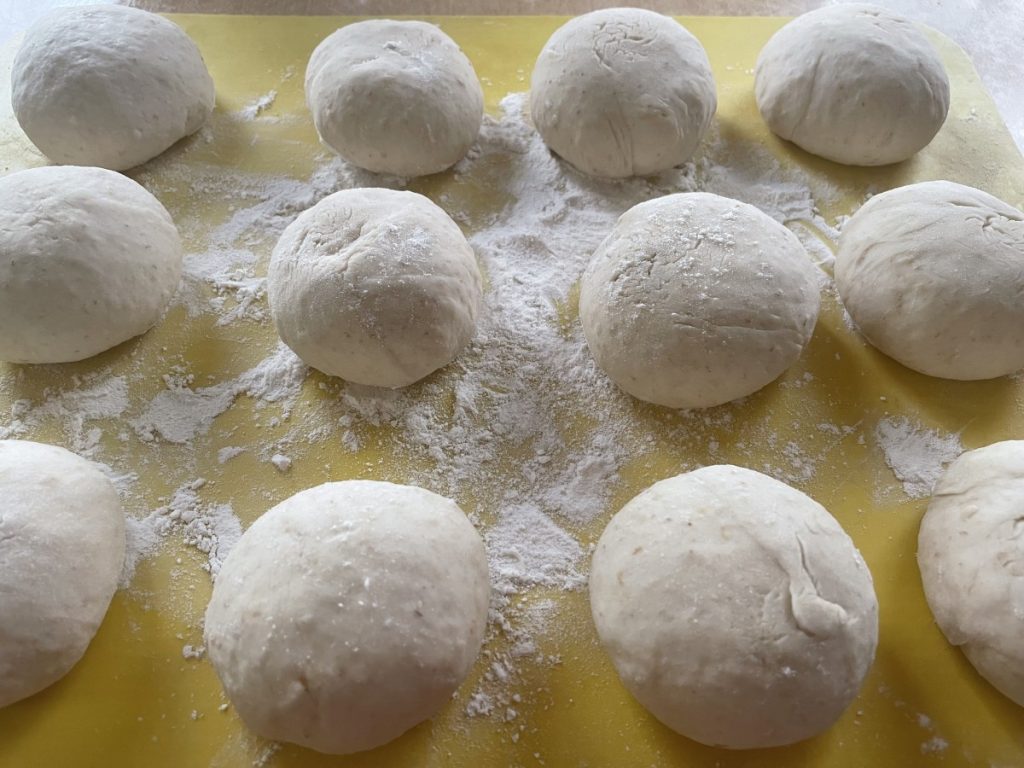
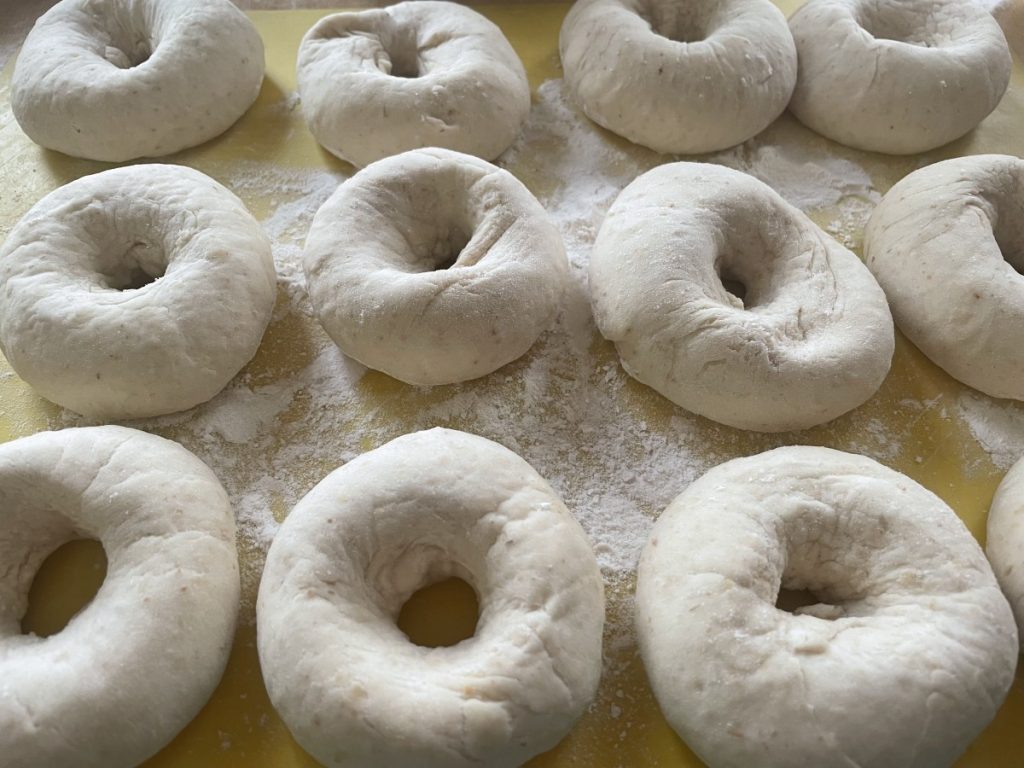
Mix 1½ cups flour, 3 tablespoons sugar, 1-tablespoon salt and yeast in a medium bowl. Heat 1½-cup water with butter and add to flour mixture. Beat 2 minutes at medium speed. Add ½ c. flour and beat 1 minute. Stir in enough flour to make a soft dough. Turn onto a floured surface and knead until smooth and elastic, about 8-10 minutes. Set in greased bowl and turn to grease top. Cover and allow to rise in a warm place 1 hour. Punch dough down cover and let rest 15 minutes. Divide dough into 12 pieces and form into smooth balls. Cover with towel and let rest 10 minutes. In large skillet heat 1 inch of water to a simmer. Add remaining sugar and salt to water. With floured finger poke a hole in the center of three of the dough balls. Drop into simmering water cooking 3 minutes. Turn over and cook 2 minutes. Turn to first side and simmer 1 more minute. Remove to greased baking sheet and repeat with remaining dough. Mix egg white with 1 tablespoon of water and brush tops of bagels. Sprinkle with seeds if desired. Bake in a 375 –degree oven for 20 –25 minutes. Makes 12.
Note: if you want a chewier bagel, you can boil them an extra minute per side.
Cinnamon-Raisin: Add 1-2 T. cinnamon to flour/yeast mixture. Add ½ cup raisins when you start to knead dough.
Everything Bagel Seasoning
Poppy Seeds
White Sesame Seeds
Black Sesame Seeds
Minced Dried Garlic
Minced Dried Onion
Kosher Salt or Coarse Sea Salt
Combine equal amounts of each ingredient.
Toasted Pecan and Orange Waffles
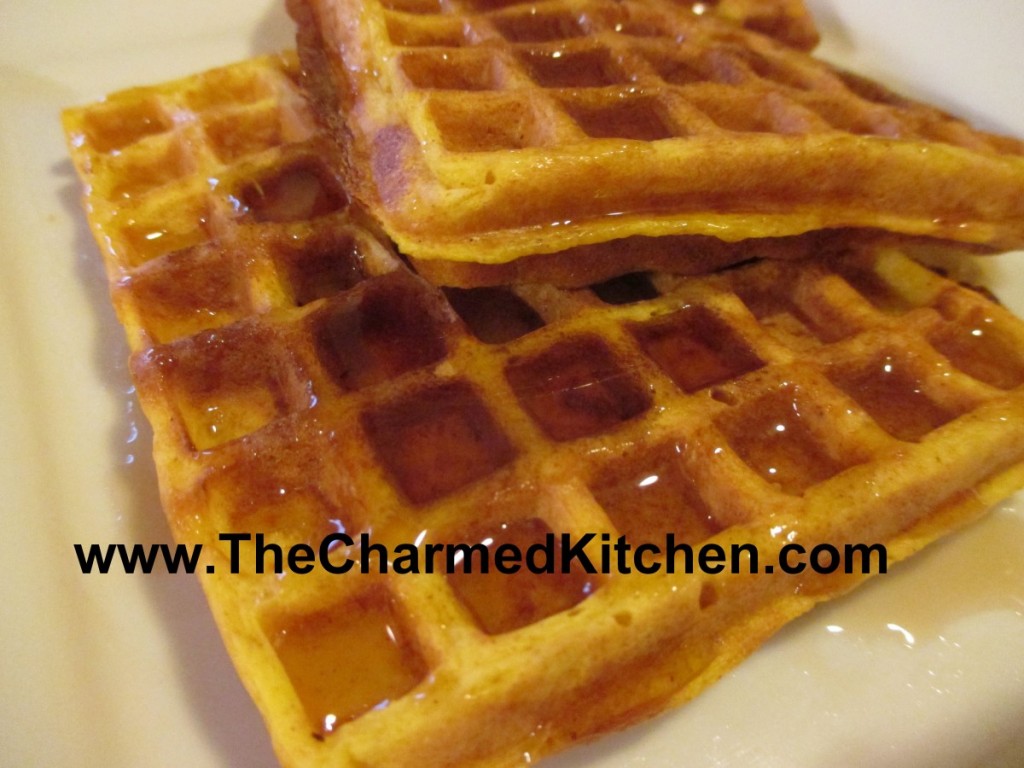
These orange- pecan waffles are sure to make anyone smile. They are really tasty. They aren’t hard to make, either.
You can serve them just on their own, or perhaps with a side of crispy bacon or some breakfast sausage and some fresh fruit.
I started with my basic vanilla waffle recipe and had some fun with it. I enjoyed the combination of pecans with orange juice. Serve them with warm maple syrup, powdered sugar or perhaps orange marmalade..
Here is the recipe.
Toasted Pecan and Orange Waffles
2 cups flour
4 teaspoons baking powder
2 tablespoons sugar
1 teaspoon salt
1 t. orange zest
2 eggs
1 cup orange juice
½ c. milk
½ c. melted butter
1 T. vanilla
¾ c. toasted pecans, chopped*
Whisk together dry ingredients and set aside. Beat together remaining ingredients and add to dry ingredients mixing until smooth. Cook in a waffle iron until crisp.
* To toast the pecans, place on a baking sheet and bake in a 350-degree oven for about 10 minutes. Toast them before you chop them- smaller pieces can burn easily.
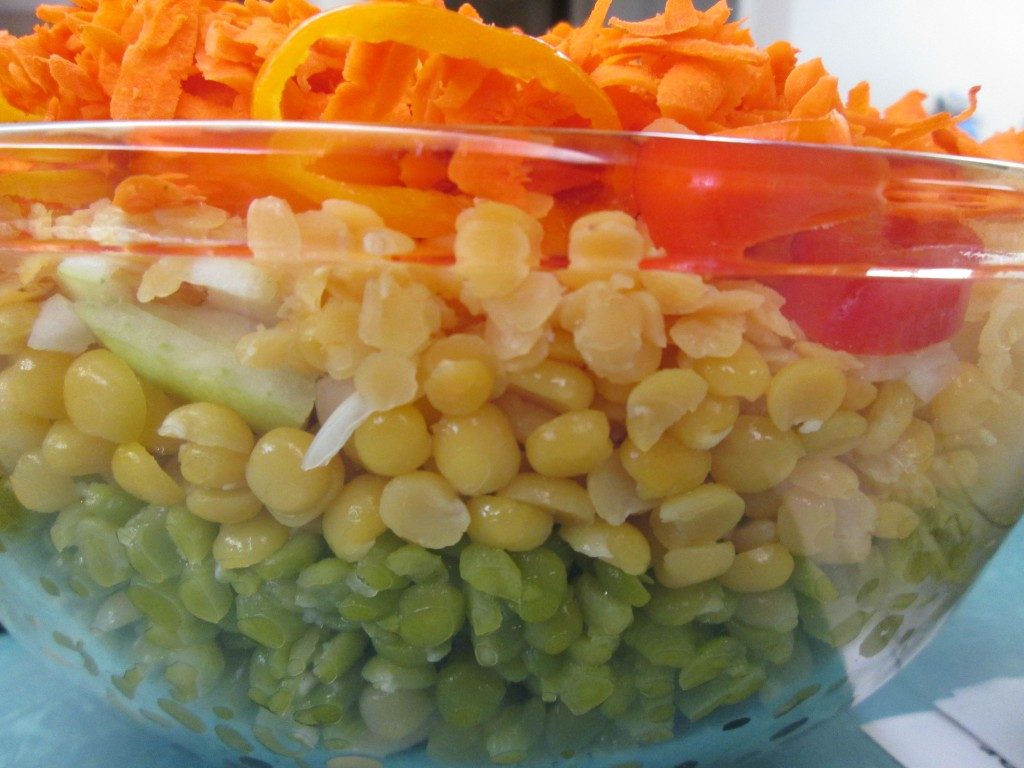
Rainbow Salad
When you hear green or yellow split peas- do you think of soup? You probably do. But when cooked until just tender, split peas make a great salad ingredient. I often just add some cooked split peas to a tossed salad. They add flavor, protein and a nice texture to salads. An added bonus is that split peas can be cooked from dry to tender in about 20 minutes. That makes them a great choice when time is tight.
This is one of my favorite salads using both green and yellow split peas. Fresh and colorful, it is a big hit with vegetarian and non-vegetarian friends. If some of you are looking for new meatless meals ideas, this one is a winner.
The salad uses both green and yellow split peas, along with black beans, butter beans, red lentils and assorted veggies. It is a great combination of colors and textures. It does make a lot, but you can easily cut the recipe in half.
The dish was inspired by my nephew Danny’s love of sand art when he was a kid. The ingredients are layered in the bowl for a pretty presentation. It is also an homage to the layered salads I remember from my youth. I like this one a whole lot more.
Rainbow Salad
1 c. each green split peas, yellow split peas and red lentils
1 can black beans, rinsed and drained
1 can butter beans, rinsed and drained
1 c. diced sweet onion
1 c. diced sweet pepper
1 c. grated carrot
Cook split peas and lentils separately just until tender. Split peas, both green and yellow will take 20 minutes. Red lentils will take about 8-10 minutes. Drain and rinse each under cold water when done and set aside until ready to use, or you can cook them a day ahead and keep chilled. Each will yield about 2 1/2 c. cooked.
In large glass bowl, place the following ingredients in this order.
Black beans, butter beans, green split peas. yellow split peas. onion, red lentils. carrots and peppers. Pour over dressing and chill several hours or overnight. Serve on a bed of greens. You can also leave the salad plain and serve dressing on the side.
Dressing *
1/2 c. oil
1/2 c. vinegar, I like apple cider vinegar or red wine vinegar
1 (14 oz.) can diced tomatoes, undrained
2-3 T. sugar
1/2 c. parsley or cilantro
1 t. each chili powder, cumin and salt
dash hot sauce
Combine in a blender or food processor until smooth.
*Note: Any fresh or bottled dressing you like can be used. Balsamic works very well. I often serve it with homemade Italian dressing.
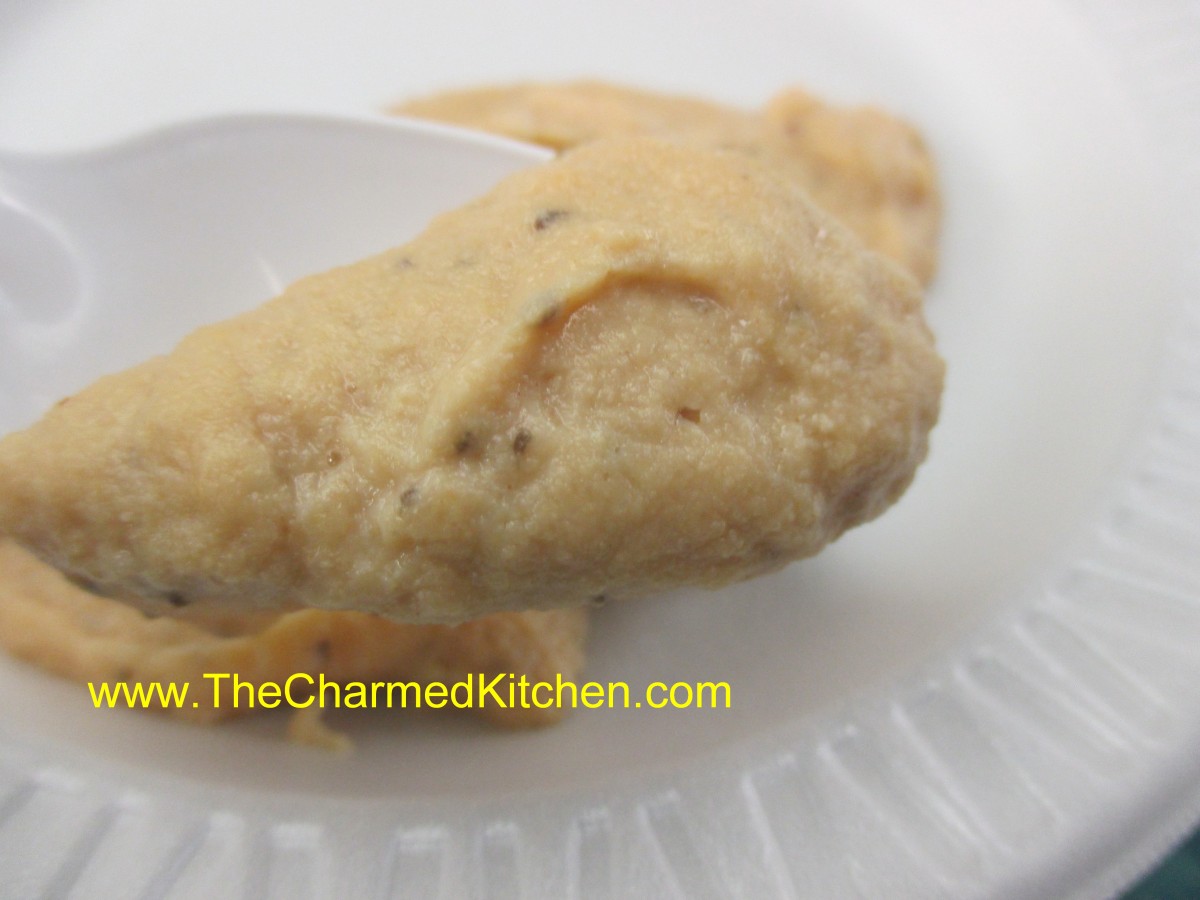
Peanut Butter and Jelly Hand Pies
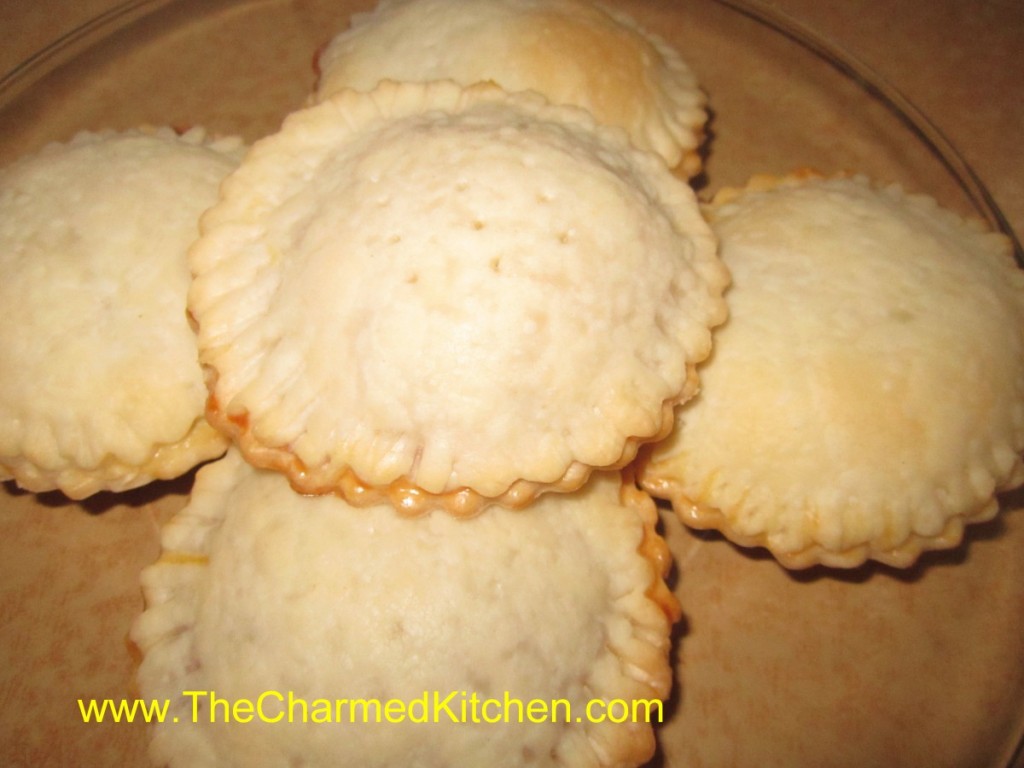
These little pies are a fun way to take peanut butter and jelly on the road. They are just cut out circles of pie crust, filled with peanut butter and jelly, sealed, then baked. Very easy to make, and a fun cooking project for kids as well as adults.
I prefer home made pie crust, but use store bought, if you like.
A nice treat, these little pies can be a snack, breakfast, lunch or even a dessert.
They are also great to take along for picnics and road trips. You can fill them with just jelly, if you like. I have filled them with peanut butter and a few chocolate chips for a fun dessert. You can use almond or cashew butter, if you prefer.
Get creative and have fun.
Peanut Butter & Jelly Mini Pies
1 (15 oz.) package pie crusts or homemade crust for 2 pies*
1 egg
1 T. water
½ c. peanut butter
½ c. preserves, any flavor
Powdered sugar, optional
Preheat oven to 400-degrees. On lightly floured surface roll out one of the crusts into a 12-inch circle. Using a 2½-inch round cookie cutter cut out about 12-14 circles, re-rolling scraps and set aside. Roll out second piece of dough so you will have about 24-28 circles altogether. Beat together water and egg and set aside. Place a circle on work surface and place 1 teaspoon each of peanut butter and preserves in the center. Brush edges of the circle with egg wash. Place second circle on top and press edges together to seal. Prick crust with a fork a few times. Repeat with remaining circles. Place “pies” on lightly greased baking sheets and bake for 12-15 minutes or until golden brown. Cool on wire rack and dust with powdered sugar, if desired.
Martha Stewart’s Pie Crust Recipe
2½ c. flour
1 t. salt
1 t. sugar
2 sticks (1 cup) butter, very cold
About 6 T. ice water
Combine dry ingredients and cut in butter to resemble coarse crumbs. Using a fork to mix the dough start to add the ice water a tablespoon or 2 at a time until mixture just holds together. Wrap and chill until ready to use. Makes 2.
Lemon Cheesecake with Lemon Curd
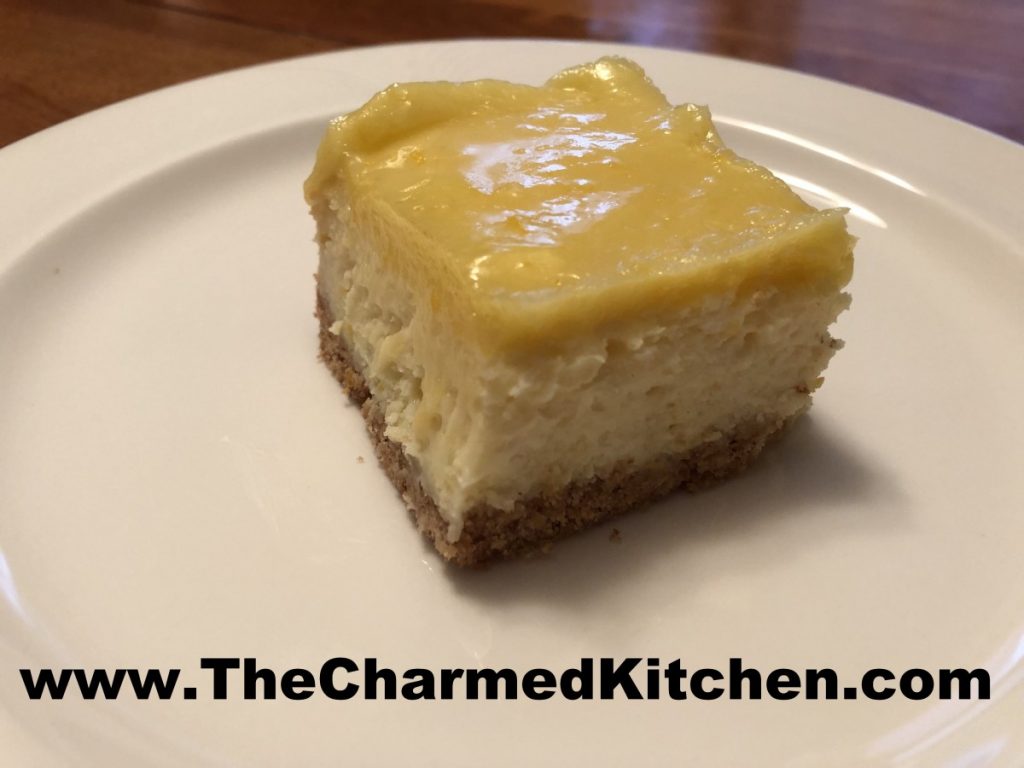
This dessert was inspired by a bag of lemons. I had picked them up with no real plan. I wanted a dessert for a dinner and decided to use them to make a cheesecake. I wanted to really amp up the lemon flavor, so besides the lemon juice and zest in the cheesecake, I added a layer of lemon curd on the top.
It worked out even better than I thought. Lots of lemon flavor in a creamy cheesecake. The lemon curd brought even more lemon to the party. Just wonderful.
We made this cheesecake in a Spring Baking class last night. Everyone loved it.
So here is the recipe. I used a 9×9 inch glass pan to bake the cheesecake- rather than the normal spring form pan. It worked out really nicely. Kind of made me think about lemon bars, too.
Lemon Cheesecake with Lemon Curd
Crust:
1½ c. graham cracker crumbs
3 T. sugar
4 T. melted butter
Filling:
2 (8oz.) packages cream cheese, softened
¾ c. sugar
2 T. flour
2 eggs
3 T. lemon juice
2 t. grated lemon peel
Lemon Curd: recipe below
Heat oven to 350-degrees. Grease a 9×9-inch baking pan- I used a glass pan. In medium bowl, combine crumbs and sugar, then add melted butter. Toss to distribute butter evenly. Press into bottom of prepared pan and bake 10 minutes. Beat cream cheese, sugar and flour until fluffy. Beat in eggs one at a time. Stir in juice and peel. Pour over crust and bake for 30 minutes, or until set. Cool then top with lemon curd. Chill well before cutting. Store covered in fridge. Serves 8-10.
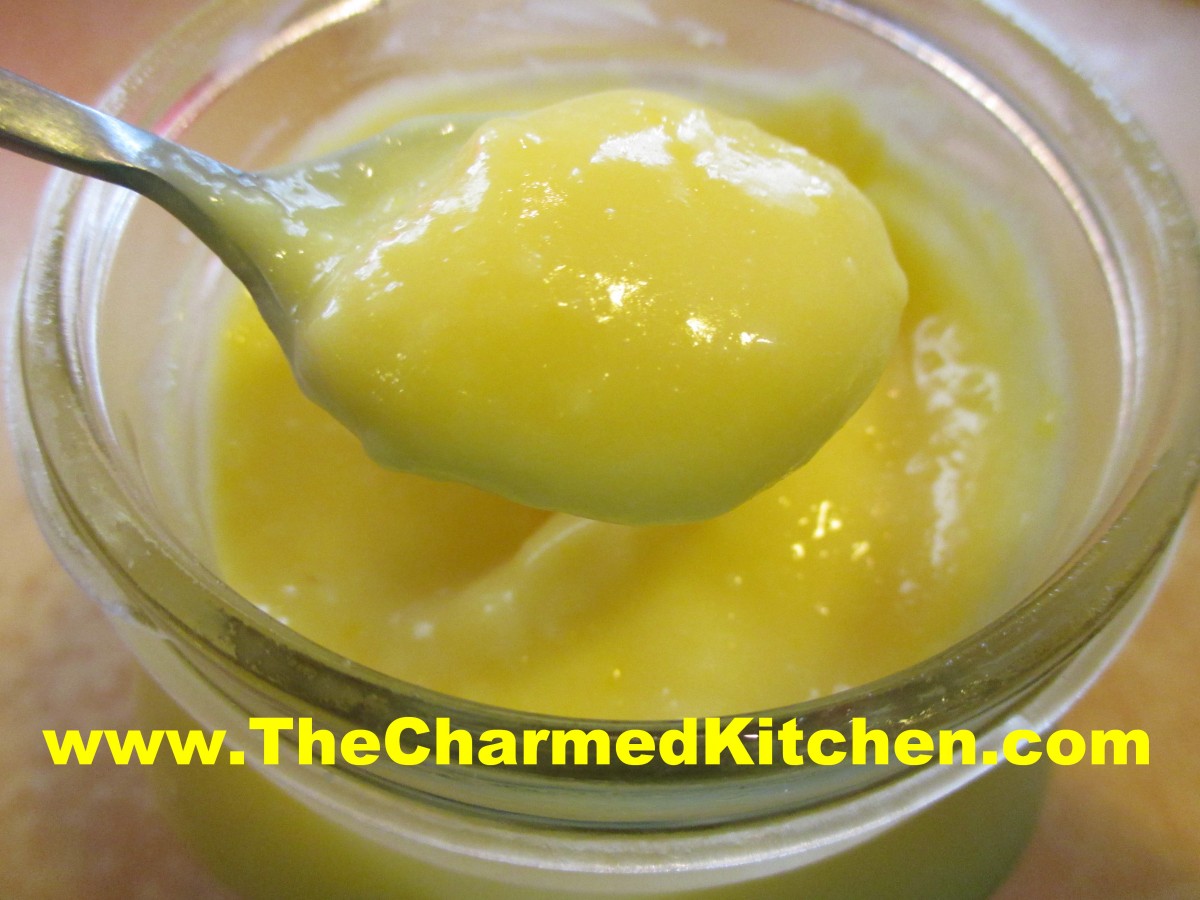
Lemon Curd
Lemon Curd
1/2 c. lemon juice
zest from one good sized lemon- you should have 2-3 teaspoons
1/2 c. sugar
3 eggs
6 T. unsalted butter- cut into little cubes
In medium saucepan, combine all ingredients. Whisk the mixture until the eggs are well blended. Cook over medium low heat, whisking often, until the mixture thickens. This will take 5-7 minutes. Whisk more often as mixtures warms and starts to thicken. Better to heat over lower heat and take longer than cook over too high a heat. You don’t want the eggs to scramble. Once the mixture is thickened , transfer to a bowl or jar. Cover the surface with a piece of plastic wrap to keep the surface from developing a skin- like any pudding will do. Chill until ready to use. Makes about 2 cups. Will keep in fridge a week or two.
Note: For using with this cheesecake, just make the lemon curd while the cheesecake is baking. Pour over the cheesecake while the curd is still a little warm, to make it easier to spread.
Ricotta and Sausage Pie

The plan was to make quiche but plans change sometimes. As I assembled the ingredients, I decided to go in a different direction. Something denser, without the custard-like filling of a quiche. It was all about the ricotta at that point. So I put this together and served it for brunch. Everyone loved it and I was so happy with it I thought I would share the recipe with you. I used dried herbs, but I could see using fresh herbs instead. I know I will be making this again- perhaps with spinach and artichokes as the base next time.
Ricotta Sausage Pie
2 pie crusts, home made or store bought, recipe follows
2 c. shredded mozzarella cheese
1 lb. bulk breakfast sausage, cooked and crumbled
½ c. diced fresh tomatoes
½ c. diced sweet peppers
1 (15oz.) carton ricotta cheese
8 eggs
½ c. grated Asiago cheese
¾ c. half and half
Salt and pepper to taste
2 t. dried parsley or 2 T. fresh
1 t. dried basil or 1 T. fresh
Roll out crusts and fit into 9-inch deep dish pie pans. Divide mozzarella cheese, sausage and veggies between the two pans, sprinkling them evenly over the bottom. Combine remaining ingredients, beating until well mixed. Pour egg mixture over the sausage mixture in each pie pan, dividing evenly. Place pans on a baking sheet and bake in a 375 degree oven for 45 minutes, or until knife inserted off center comes out clean. Cool 10 minutes before serving. Makes 2.
Flaky Pie Crust
2 c. flour
1 t. salt
3/4 c. shortening, lard or coconut oil, chilled
1 T. cider vinegar
4-5 T. cold water
Combine flour and salt and cut in shortening, lard or coconut oil. Toss in vinegar and water 1 tablespoon at a time until dough holds together. Use a fork to toss the ingredients together and as soon as the mixture holds together stop adding water. Makes 2. Chill well before using.

Homemade Granola
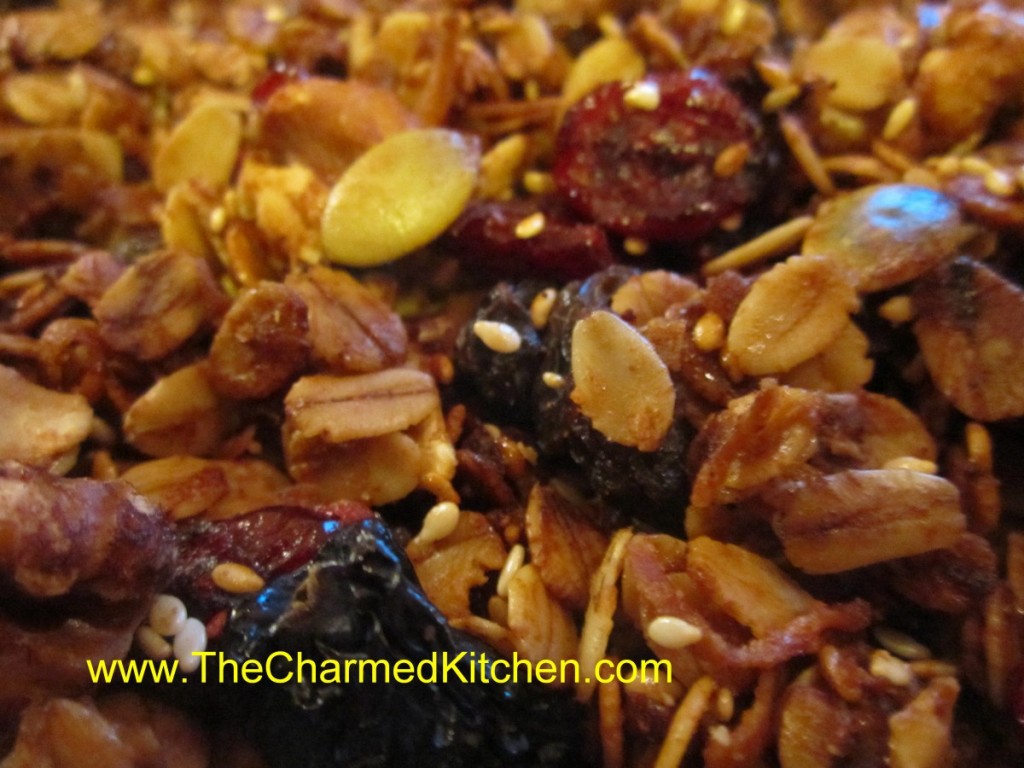
One of the advantages of making stuff from scratch, is that you get to control what goes in it. This is really true for granola. The boxed stuff in the store is often full of way too much sugar for my taste. The base for granola is toasted oats, but after that you can get creative. I use plenty of nuts and seeds, sometimes coconut, and finish it off with an assortment of dried fruits. This is a great recipes when you are eating out of your pantry. You can use what ever nuts, seeds and dried fruits you have around.
I prefer my granola less sweet than most commercial brands. By making my own, I get to control what, and how much, sweeteners to add. For my granola, I use honey to sweeten it. You can more or less, to suit your taste.
I know granola is most often thought of as a breakfast food, but it makes a great snack, and sprinkled on yogurt it can also be a tasty choice for lunch. Great to take along when hiking or going to the park. I actually like to sprinkle granola on ice cream, too.
Homemade Granola
3 c. rolled oats
1/4 -1/2 c. each of any of the following to equal 1-2 c. total
Sesame seeds, sunflower seeds, chia seeds, wheat germ, peanuts, pecans, almonds, hazel nuts, pumpkin seeds, walnuts, coconut… you get the idea. Don’t forget to chop up any big pieces.
1 t. cinnamon
1 t. orange peel
1/2 t. nutmeg
pinch of salt, optional
1/4 c. oil
1/4 c. honey- or add a little more if you like a sweeter granola
2 t. vanilla
Dried fruit to equal 1 -1 1/2 cups. Some choices could include: raisins, dried cranberries, cherries, pineapple, dates, figs, apricots, bananas, strawberries, blueberries etc. Cut up larger pieces.
In large bowl combine oats with seeds and nuts and toss well with seasonings. Heat together oil, honey and vanilla and pour over oat mixture, tossing to coat evenly. Spread on a cookie sheet and bake in a 300 degree oven for 30 minutes. Halfway through the baking time stir mixture so the edges won’t burn. Remove from oven and return to large bowl. Toss with the dried fruit and allow to cool before storing in an airtight container in a cool, dry place. Use in 1 month or store in freezer or fridge to keep longer. Makes 5-7 cups.
Edible Flowers
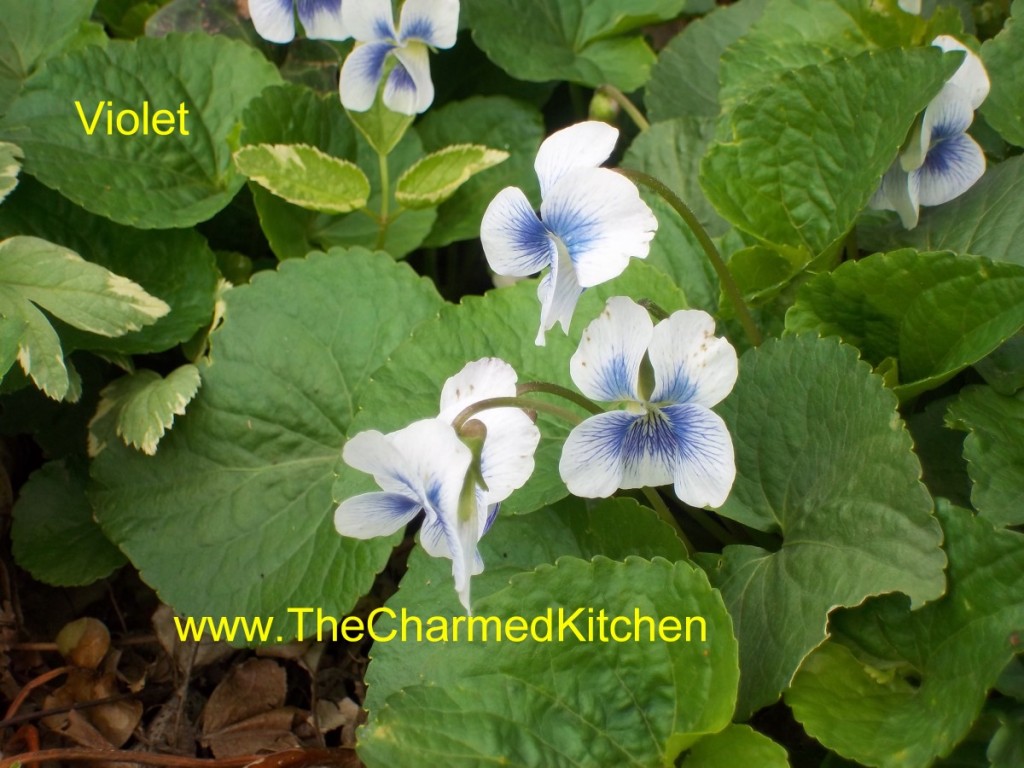
When deciding which flowers to plant in your yard- why not plant flowers that are also edible? That way they do double duty. They make your yard look beautiful and they can make your food look beautiful, too.
I cook a lot with flowers. I often add them to salads, infuse vinegar and make jelly with them. You can also use them to decorate cakes or other desserts, in salad dressings and marinades, floating in tropical cocktails, in punch bowls and in ice cubes.
Flowers can also top off dips, cheese, fruit trays and other appetizers, be used to make teas, infused in honey or mixed with soft cheese and spread on crackers or toast. I candy violets every year.
Add some to baked goods like quick breads, cookies and muffins or in yogurt, cottage cheese or sorbet. Wherever your food needs a little color or flavor, flowers make it special.
Below are 2 lists- one of edible flowers- the other a list of flowers that are poisonous. I would be remiss if I didn’t caution you about flowers that are not edible. Be sure to get a positive identification of any flower before you eat it. Only eat flowers that have been grown pesticide free.
Some Edible Flowers
Calendula, Chives, Daylily, Mint, Nasturtium, Pansy, Rose, Sage, Signet Marigold, Squash Blossoms, Anise Hyssop, Apple, Arugula, Basil, Bee Balm, Borage, Broccoli, Chamomile, Chicory, Chrysanthemum, Coriander, Dandelion, Dianthus, Dill, Elderberry, English Daisy, Evening Primrose, Fennel, Garlic Chives, Hibiscus, Honeysuckle, Hyssop, Jasmine, Johnny-Jump-Up, Lavender, Lemon, Lilac, Linden, Magnolia, Marjoram, Mustard, Nasturtiums, Nodding Onion, Okra, Orange, Oregano, Pea, Pineapple Guava, Pineapple Sage, Radish, Red Clover, Redbud, Rose of Sharon, Roselle, Rosemary, Runner Beans, Sage, Safflower, Scented Geraniums, Shungiku, Society Garlic, Sunflower, Sweet Woodruff, Thyme, Tuberous Begonia, Tulip, Violet, Winter Savory, Yucca
Some Poisonous Flowers
Aconite, Anemone, Anthurium, Atamasco Lily, Autumn Crocus, Azalea, Baneberry, Black Locust, Bloodroot, Boxwood, Burning Bush, Buttercup, Butterfly Weed, Caladium, Call, Carolina Jasmine, Castor Bean, Cherry Laurel, Chinaberry, Christmas Rose, Clematis, Daffodil, Deadly Nightshade, Death Camas, Delphinium, Dogbane, Dumbcane, Elephant Ears, False Hellebore, Four O’clock, Foxglove, Gloriosa Lily, Golden Chain Tree, Goldenseal, Heavenly Bamboo, Henbane, Horse Chestnut, Horse Nettle, Hyacinth, Hyacinth Bean, Hydrangea, Iris, Ivy, Jack-in-the-Pulpit, Jerusalem Cherry, Jessamine, Jetbead, Jimsonweed, Jonquil, Kentucky Coffee Tree, Lantana, Larkspur, Leopard’s Bane, Lily of the Valley, Lobelia, Marsh Marigold, May Apple, Mescal Bean, Mistletoe, Morning Glory, Mountain Laurel, Nightshade, Oleander, Periwinkle, Philodendron, Pittosporum, Poison Hemlock, Potato, Privet, Rhododendron, Rock Poppy, Schefflera, Spring Adonis, Spurge, Star of Bethlehem, Sweet Pea, Tobacco, Trumpet Flower, Water Hemlock, Wild Cherry, Wisteria, Yellow Allamanda, Yellow Oleander, Yesterday, Today and Tomorrow.
Neither of these lists in meant to be complete. Most important of all is to be sure you can identify these plants. If you are unsure plant identifications can be done at your local Extension office, garden center, nursery, arboretum and botanical garden. When in doubt, err on the side of caution. There are more than enough easy to identify flowers out there to enjoy without taking chances.
Homemade Food Gifts for Mom
Homemade gifts are always special. For Mother’s Day, I think homemade is even more appreciated. I’ve assembled some of my favorite food gift recipes. While some will require adult hands, there are a few kid- friendly options, too. Some are sweet, others savory or even spicy. For all the moms out there- Happy Mother’s Day.
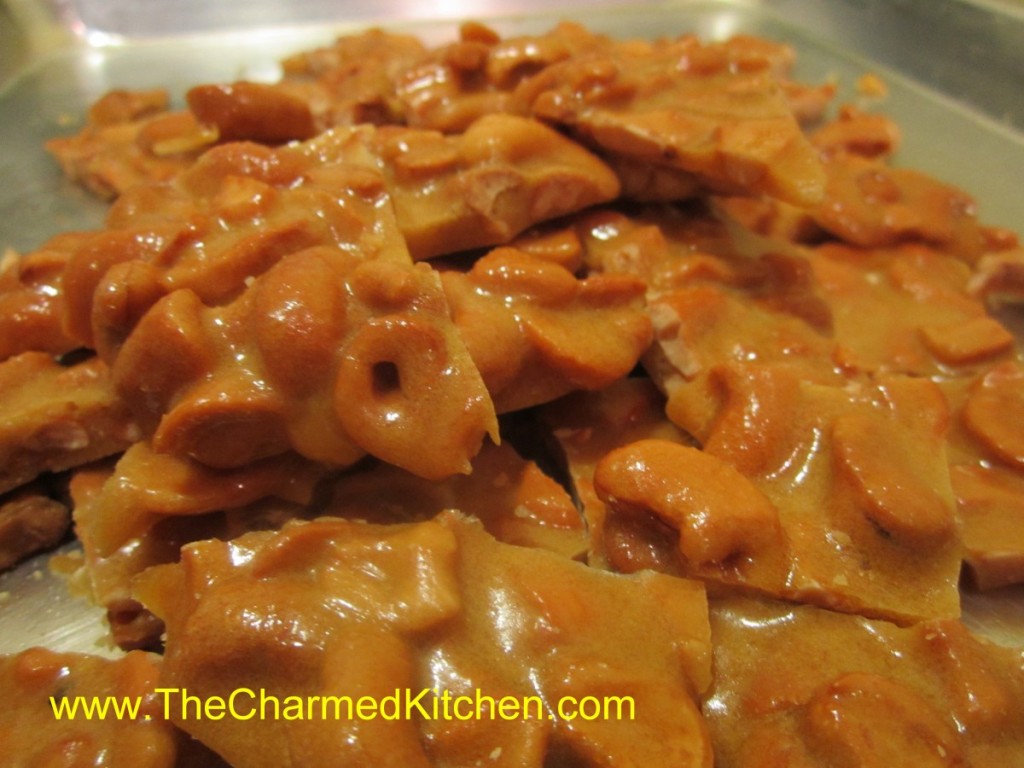
We will start with this cashew brittle recipe. Brittle was a special favorite of my own mother. I always think of her when I make it. This recipe is a breeze. Cooked in the microwave, this recipe is ready before you know it. You can, of course, use different nuts.
Homemade Cashew Brittle
2 c. cashews*
1 c. sugar
1/2 c. corn syrup
1/8 t. salt
1 t. butter
1 t. vanilla
1 t. baking soda
Butter or oil a large baking sheet and set aside. In a 3-4 quart glass bowl combine the nuts, sugar, corn syrup and salt. Microwave on high for 3 minutes. Remove from microwave, stir well and return to microwave. Cook 3 more minutes in microwave. Remove and stir in butter and vanilla, stirring until butter has melted. Return to microwave and cook for 2 more minutes. Remove from microwave and stir in baking soda. Stir until well blended and pour mixture onto prepared baking sheet. Spread out quickly, then allow to cool. Once cool, break into pieces. Store in a cool, dry place. I normally store it in a tin or plastic container with a tight-fitting lid.
* I used salted cashews but feel free to experiment with other nuts
Note: Use high power setting on microwave.
Truffles
1/3 c. Whipping cream
6 T. butter, cut into small pieces
2 c. chocolate chips- or 12 oz. dark chocolate, grated or chopped coarsely
Unsweetened cocoa
Heat cream to boiling in small saucepan. Stir in butter and cook until melted. Remove from heat and stir in chocolate until melted. Place in shallow bowl and chill until firm, at least a couple of hours. Roll mixture into 1-inch balls and roll in cocoa. Sometimes the mixture is quite firm and hard to roll into perfectly smooth balls. You can roll them out as smooth as you can, roll in cocoa and then roll again to smooth out. You might want to give them another roll in the cocoa after that. Makes about 30.
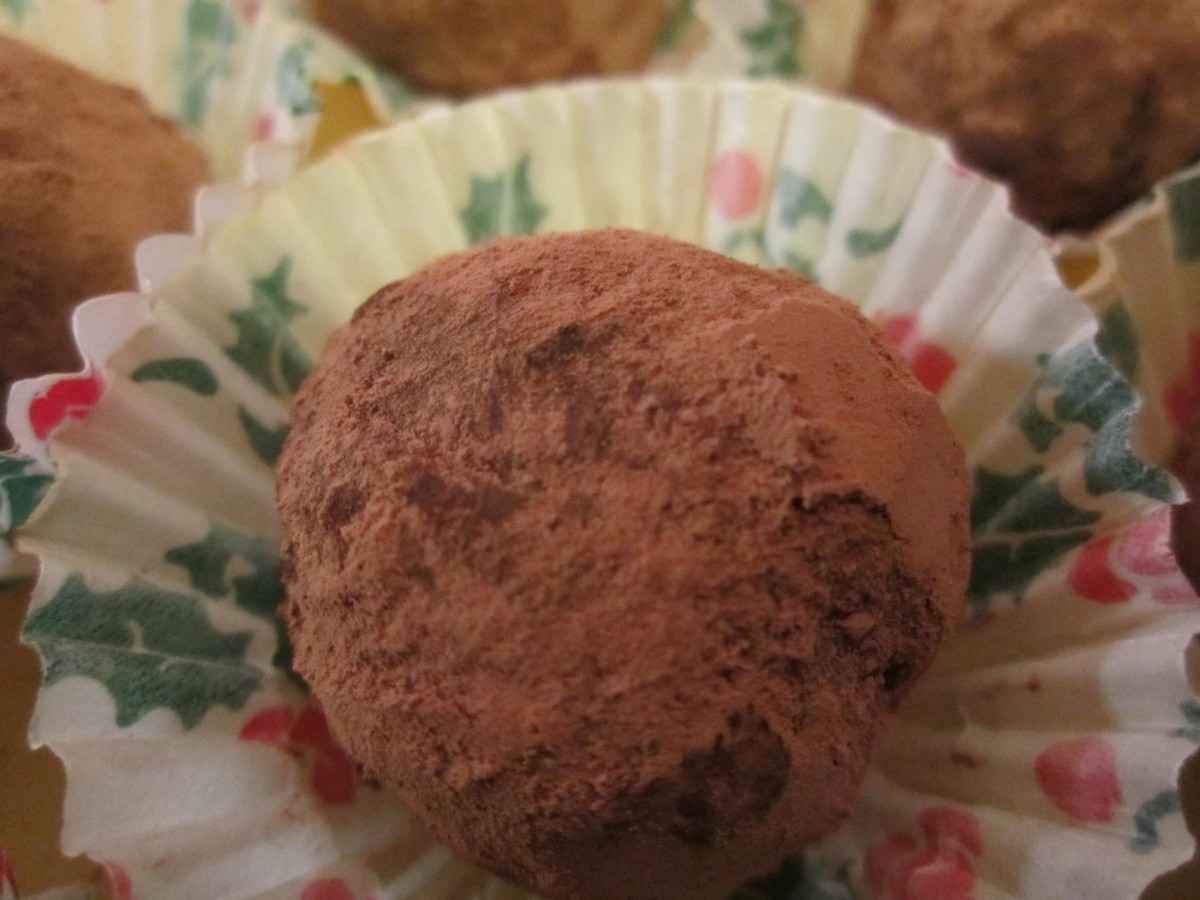
Chocolate Truffles

Minty Cocoa Hearts
Sugared Nuts
Homemade Bavarian Mustard
Minty Cocoa Hearts
If you are looking for a simple chocolate treat- that requires no cooking – try Minty Cocoa Hearts. This easy to make candy is made with just a few ingredients. The “dough” is mixed and rolled out. Then you just cut them out into little hearts. They taste great and they are also a nice project for kids. There is no special equipment needed other than a tiny heart-shaped cookie cutter. So if time is short and you really want to make something homemade this Mother’s Day- these could be the answer.
9 c. powdered sugar
1 c. cocoa
1/2 c. butter, softened
1/2 c. water
2 t. peppermint extract
In large bowl combine ingredients until well blended. You can add more water, if needed, 1 teaspoon at a time. Divide mixture into 2 pieces and shape in balls. Place each between sheets of wax paper and roll out to 1/4 -inch thickness. Cut out with tiny cutters and place on foil-lined tray. Chill several hours, then wrap up in colored foil or place in tiny candy bags. Makes 80 (1-inch) candies.
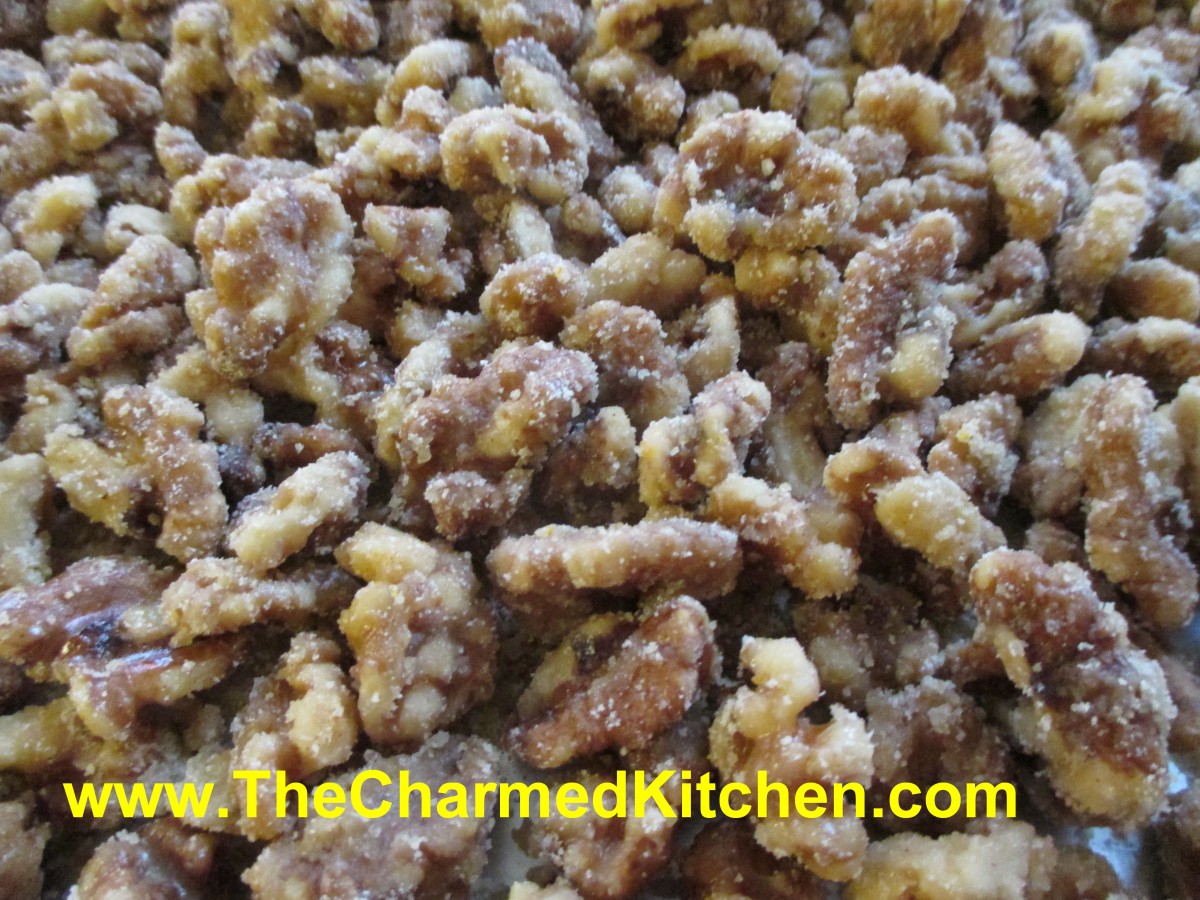
Sugared Nuts
Many years ago, my sister Cindy gave me the recipe for making these nuts. I make at least a few batches every year, and they are always a big hit. I will admit to tweaking the recipe a little over time, but the basics are still the same. Nuts are placed in a heavy skillet with sugar, water and seasonings. The mixture is then brought to a boil and cooked until most of the liquid cooks off. This takes about 10 minutes, give or take. You dump the nuts onto a cookie sheet, and start stirring immediately. If you don’t stir them, they will stick together. This is where the magic happens. The nuts look wet when you pour them out and start stirring, but in a few minutes, they cool and dry, and the sugar crystallizes on the nuts. Once cooled, the nuts are crunchy and sweet and very tasty. You can use them as a snack, or in all sorts of recipes. This is a really fast confection to make, and is a nice gift, too.
4-5 c. nuts, I like walnuts or pecans
2 c. sugar
1 c. water
1 t. cinnamon
1 t. orange peel
1 t. salt, optional
Place all ingredients in heavy skillet and cook over medium heat, stirring often, until all the water disappears. Whatever liquid in the pan will be clinging to the nuts and syrupy. Dump nuts onto a large cookie sheet and break apart with a wooden spoon to prevent clumping. As nuts cool, stir once or twice to remove any remaining clumps, and to cool faster. Nuts will lose their glossy appearance and attain a sugary crust. If it looks like nut soup, you didn’t cook them long enough, and you must return all to the skillet and cook longer. As the nuts start to get drier during cooking, you can turn down the heat a little to prevent burning. Once you’ve made a few batches, though, you will get good at judging when to stop cooking. You can also make a spicy version by adding a teaspoon of cayenne pepper along with the other ingredients. Store in cool, dry place to keep nuts fresh longer.
Horseradish Mustard
1 c. dry mustard
3/4 c. white wine vinegar
1/3 c. dry white wine or dry sherry
1/4 c. brown sugar
1/4 c. granulated sugar
1 T. dried minced onion
2 t. caraway seeds
1 1/2 t. salt
1/4 t. coarse ground mustard
2 eggs, slightly beaten
1 T. prepared horseradish
Combine all ingredients, except eggs and horseradish in top of double boiler and let stand at room temperature for 2 hours. Whisk in eggs and cook over simmering water until mixture has thickened and eggs are cooked, about 10 minutes. Remove from heat and stir in horseradish. Pour into sterilized jar, cool and cover. Store in fridge for up to 3 months. Makes 2 cups.
Bavarian Mustard
3/4 c. beer
2/3 c. dry mustard
2 T. sugar
2 T. cider vinegar
2 t. salt
1-t. celery seeds
1/2 t. fresh grated ginger or 1/4 t. dry
1 egg, beaten
Combine all but the egg in the top of a double boiler and let stand 2 hours at room temperature. Stir in egg and cook over simmering water. stirring constantly until mixture thickens and egg is cooked, about 10 minutes. Pour into sterilized jars and cool before covering. Store in fridge for up to 2 months. Makes 2 cups.
Spicy Mustard
1 c. dry mustard
2/3 c. dry white wine
1/2 c. vinegar, flavored with herbs or garlic
1/2 c. sugar
2 t. salt
1 t. basil
1 t. chili powder
1 t. dried minced garlic
1 t. oregano
1/2 t. cracked pepper
2 eggs, slightly beaten
Mix all ingredients, except eggs, in top of double boiler and let stand 2 hours at room temperature. Add eggs and cook over simmering water, stirring constantly until mixture thickens and eggs are cooked, about 10 minutes. Pour into sterilized jars and cool down before covering and refrigerating. Keeps in fridge for up to 2-3 months. Makes 2 cups.
French Herb Mustard
1/4 c. dry mustard
1/4 c. white wine vinegar
1/4 c. white wine or dry sherry
1/4 c. brown sugar
1/2 t. salt
1/2 t. tarragon
1/4 t. dill seed
1/4 t. celery seed
1/4 t. ground cloves
3 egg yolks or 1 whole egg
Combine all ingredients, except eggs, in top of double boiler and let stand at room temperature 2 hours. Whisk in eggs and cook over simmering water, stirring constantly, until mustard thickens and eggs are cooked, about 5 minutes. Store in crock or jar in fridge for up to 1 month. Makes 1 cup, recipe can be doubled.
Cookie Pops
These are a fun and easy gift to make with kids. I used white “chocolate” discs, but you can use real chocolate, too. Kids can make Mom an edible “bouquet”.
All you need are vanilla wafers, peanut butter or frosting to stick the cookies together, Popsicle sticks, some sort of chocolate you can melt and candies to decorate. After that it’s pretty easy. Dip the end of a stick into the peanut butter. Press 2 cookies together on the end of the stick. Press firmly. Melt the chocolate- I used a glass bowl in the microwave,but be careful not to burn the chocolate. Dip the cookies into the melted chocolate until covered. Allow excess to drip off. Place cookies on wax paper. Decorate your “pops” to look like flowers- I used M&M’s. Allow them to dry/cool then you can just peel them off the wax paper.
You can get M&M’s in so many colors, the “chocolate” discs, too, that color combinations are pretty limitless. If there are nut allergies to consider use frosting to stick the cookies together.

Cookie Pops
Hot Fudge Sauce
If Mom is a chocolate lover, this sauce makes a great gift. Don’t forget the ice cream!
1 c. unsweetened cocoa powder
¾ c. sugar
½ c. brown sugar
1/8 t. salt
1-c. heavy or whipping cream
½ c. butter, cut into pieces
1 t. vanilla extract
In saucepan , stir together dry ingredients then stir in cream and butter. Heat to boiling and boil 1 minute. Remove from heat, cool 5 minutes and stir in vanilla. Store leftovers in fridge. Rewarm before using. Makes 2 ½ cups.
English Toffee Crunch
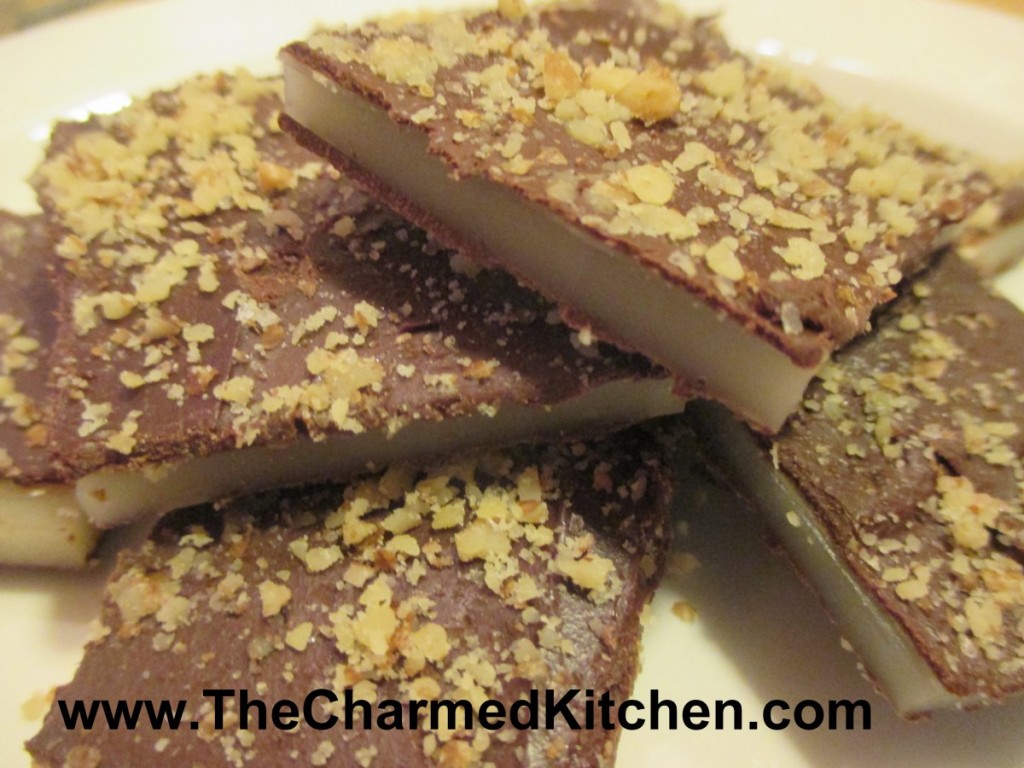
If you are looking to make a special sweet treat, English Toffee Crunch is always a good choice. The crunchy, sweet toffee is coated with chocolate on the top and bottom, along with a sprinkling of fine chopped nuts. A classic, for sure.
I know people are sometimes a little scared about making candy, but this is pretty easy to make, and well worth the effort. The only special piece of equipment you will need is a candy thermometer. Just be careful when handling the hot ingredients. The end result is a special treat. Nice gift for Mother’s Day.
English Toffee Crunch
1 1/2 c. sugar
2 sticks butter
3 T. water
1 T. light corn syrup – recipe follows for a substitute
3/4 lb. milk or dark chocolate, or chocolate chips
1/2 c. very finely chopped walnuts
Over low heat, stirring constantly, cook sugar, butter, water and corn syrup until mixture reaches hard crack stage (300-310 degrees). You will want to attach a candy thermometer to the pan to monitor the temperature. Pour onto ungreased jellyroll pan tilting quickly in all directions to get toffee as thin as possible. It hardens up unbelievably quickly so work fast. I like to warm the cookie sheet a little in the oven so it buys me a few extra seconds to thin out the toffee. Harden in fridge about five minutes or let stand at room temperature until cooled down. Melt chocolate in double boiler and spread half of it over toffee, spreading to edges. Sprinkle with half the nuts and return to fridge it harden chocolate. Turn toffee carefully onto another sheet and coat the bottom with the remaining chocolate and nuts. Chill until chocolate hardens then break up into bite sized pieces. Note: you can use even more chocolate if you like a thicker coating. Store in a cool, dry place in an airtight container. Makes 1 1/2 lbs.
Homemade Corn Syrup Substitute
2 cups granulated sugar
3/4 cup Water
1/4 tsp. Cream of Tartar
dash of salt
Combine all in a large, heavy stainless steel pot. Stir and bring to a boil. Reduce heat to a simmer and cover with lid for 3 to 4 minutes to get the sugar crystals off the sides of the pan. Uncover and cook to softball stage, 238 to 240 degree’s F. or when a small amount is dropped into cold water and does not hold its shape; stir constantly. Cook for another minute. Cool and store in covered jar at room temperature, will keep well for 2 months at room temperature.
For dark corn syrup add 1/4 cup molasses


