Creamy Zucchini Soup – Hot or Cold


You can never have enough recipes for zucchini. If you have ever planted zucchini, you know what I mean.
This is a recipe I’ve had for ages, but had not made in a while. I forgot how much I liked it. As an added bonus, it can be served hot or cold.
I leave the skins on my zucchini, I like the way the little green flecks look in the soup, but you can peel, if you prefer. You can also use a combo of green and yellow summer squash.
Here is the recipe.
Creamy Zucchini Soup
1 medium onion, chopped
2 T. butter
4-6 medium zucchini, sliced
1 large potato, peeled and diced
1 T. chopped parsley
½ t. each basil, marjoram and thyme
1 t. hot sauce, or to taste
salt and pepper to taste
6 c. chicken or veggie broth
1 c. milk or half and half- I prefer the half and half
In Dutch oven cook onions in butter until tender. Add vegetables and seasonings and cook until hot. Add broth, heat to a simmer and cook 15 minutes. Puree mixture in blender in batches and return to pot. Add milk and heat through. Adjust seasonings. Serve hot or cold. I topped mine with some fresh chopped parsley and a little hot sauce. Serves 6-8.
Classic Crab Cakes


Crab cakes are one of those foods I save for special occasions. I had a good friend over for dinner last night. I wanted to make something special- so I made him crab cakes. He loved them.
The secret to crab cakes it adding just enough ingredients to hold the crab meat together, without losing the beautiful texture of the crab in the process. These crab cakes did all that.
I used a little sour cream to help hold them together and to add moisture. I know many who prefer mayo as a binder. Either works, I just like sour cream.
I have pan-fried them in the past, but decided to bake these in the oven. Either method works. It just comes down to what you prefer. By baking them, I had more time to get the rest of the dinner together. We had them with a veggie frittata , coleslaw and watermelon. I was making the frittata on top of the stove. It was a truly special meal.
Classic Crab Cakes
2 eggs
2 T. sour cream or Greek yogurt
1 t. thyme
1 t. lemon juice
½ t. cayenne pepper
½ t. dry mustard
Salt to taste
¼ c. fresh chopped parsley
¼ c. fresh chopped green onions or chives
About ½ c. breadcrumbs
1 lb. lump crab meat
Olive oil
Mix all the ingredients together, except oil. Start with about ¼ cup of the breadcrumbs and add just enough to hold the mixture together. Mixture will be crumbly. Form into patties- you can make 4 large or 8 small.
You can cook them one of two ways.
To bake: Place the crab cakes on a lightly oiled baking sheet and brush the cakes with a little more oil. Bake in a preheated 450- degree oven for 15 – 18 minutes, for small cakes. Bake 20-24 minutes for large cakes. Turn them once during baking to brown both sides.
To pan fry: Heat skillet to medium hot. Add oil and gently add the cakes. Cook for 4-5 minutes per side, or until golden brown and crispy. Turn once, carefully, to brown on both sides.
Fresh Peach Cake

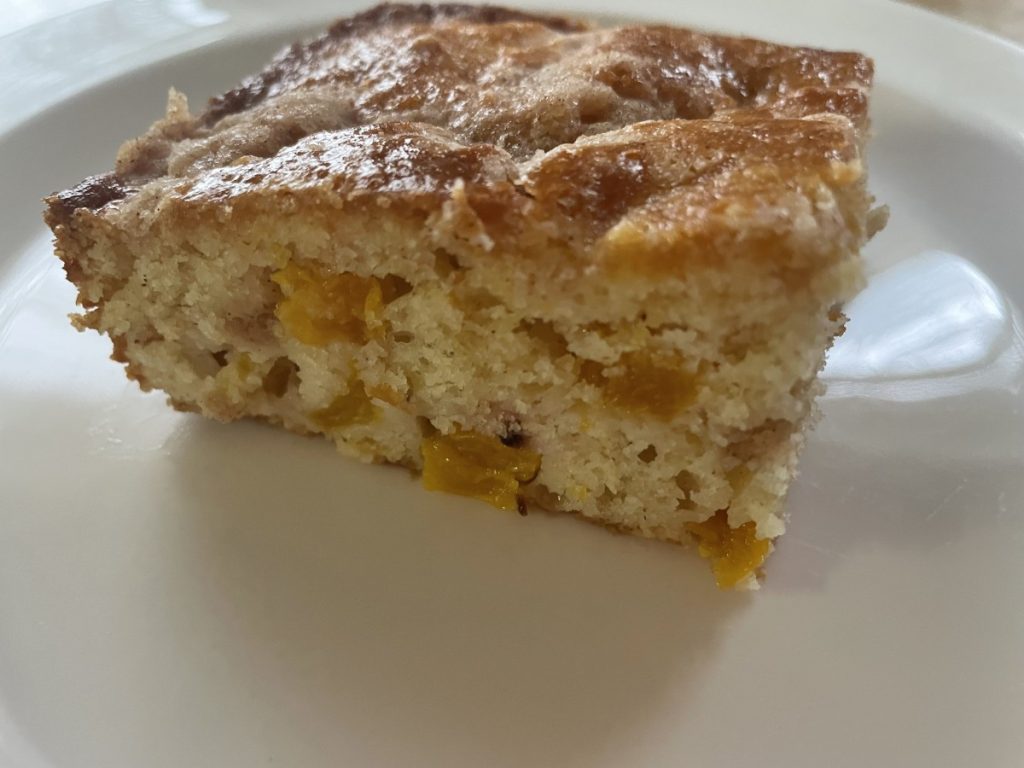
Fresh Peach Cake
If you need a quick dessert or even a nice addition for a brunch this cake is a great choice. It really is so easy to make. It can be served warm, but it’s good at room temp, too. It’s not too sweet, which I like.
This was a new recipe for me. I had tweaked an old recipe that used blueberries. I was very happy with how this worked out. I wanted about 1 1/2 cups of chopped fruit. I had 2 very large peaches and that worked out great. You might need a third or even fourth peach if yours are smaller.
Next, I want to try this recipe with plums!!
Fresh Peach Cake
Batter:
2 c. biscuit mix*
1/2 c. sugar
1/3 c. milk
2 T. oil
1 egg
1 1/2 c. chopped fresh pitted and peeled peaches
Topping:
1/2 stick ( 1/4 cup) cold butter, cut in small cubes
1/4 c. flour
1/4 c. sugar
2 t. cinnamon
Preheat oven to 350. Grease and flour a 9×9-inch pan. Beat all batter ingredients together, except peaches, for about 30 seconds. Fold in fruit and pour into prepared pan. Place topping ingredients in a bowl and mix together with your fingers or a fork until mixture looks like coarse crumbs. Sprinkle on the cake batter in the pan. Bake for about 35 minutes. Cake should be golden brown on top and test clean with a toothpick. Serve warm or at room temp. Great with ice cream or whipped cream.
*Like Bisquick or Jiffy mix. I make my own. Recipe follows.
Biscuit Mix
8 c. flour
1 c. powdered milk
1 c. powdered buttermilk (or 1 more cup powdered milk)
1/4 c. baking powder
1 T. salt
1 1/2 c. shortening*
Combine dry ingredients and cut in shortening until well mixed. Store in tightly covered container. Makes 10 cups.
* You can use butter instead, but keep mix in fridge and use in a couple of months. You can also use coconut oil- also best to keep this version in the fridge.
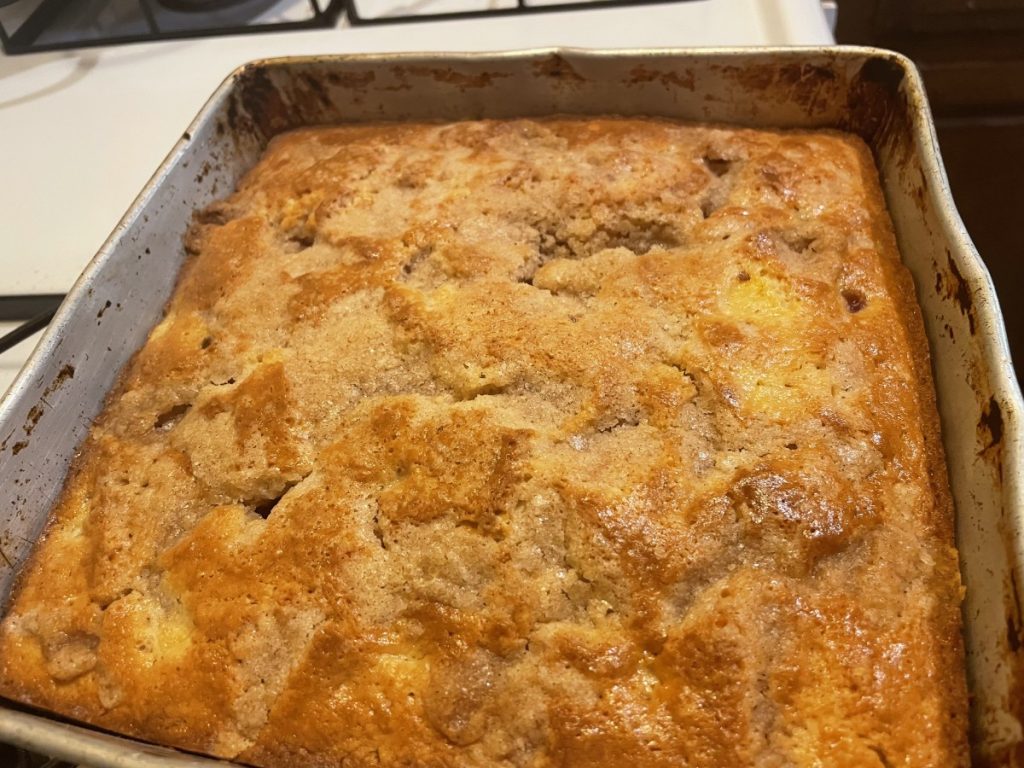
Right out of the oven.
Strawberry Waffles


These waffles would make a great breakfast or brunch dish. I have even served them for dessert. That’s the thing about waffles. They can be eaten any time of the day.
This waffle recipe came about because I needed a dessert for dinner with a friend. It was a last minute dinner, so I didn’t have a lot of time. Waffles seemed like a great idea. They don’t take a lot of time to make, and they highlighted the berries. My friend really liked them. I did, too.
I made the waffles with fresh strawberries in the batter. Then, the waffles are served topped with more fresh berries and a dusting of powdered sugar.
They were a perfect dessert. I could see topping them with ice cream or whipped cream, too. Any leftover waffles can be frozen.
For the fresh strawberry topping, you just combine fresh, sliced berries with some sugar. If you can make it ahead of time, the sugar draws juice out of the strawberries, kind of making its own sauce. I made the topping first, then popped in the fridge.
So here is my recipe. Enjoy!!
Strawberry Waffles
1 1/3 c. flour
2 T. sugar
4 teaspoons baking powder
2 t. cinnamon
½ t. salt
2 eggs, separated
½ c. butter, melted
1¾ c. milk
2 t. vanilla
1 c. chopped fresh strawberries
Powdered sugar for topping waffles
Strawberry topping- recipe follows
In a large mixing bowl, whisk together all dry ingredients. Set aside. Separate the eggs. Set aside the yolks. Place the whites in a small mixing bowl. Beat whites until moderately stiff; set aside. Combine milk, melted butter, egg yolks and vanilla in small bowl. Add to dry ingredient mixture and blend. Stir in berries. Fold stiff egg whites into mixture. Ladle mixture into hot waffle iron and bake. To serve, top with powdered sugar and strawberry topping. Makes 10-12 (4-inch) waffles.
Topping
1 qt. strawberries
½ c. sugar- or to taste
Wash and stem berries. Slice berries. Place in bowl and sprinkle on the sugar. Stir to combine and place in fridge until ready to use. Try to do this at least 30 minutes before using. That will give the mixture time for juice to be released from the berries.
Homemade Raspberry Liqueur

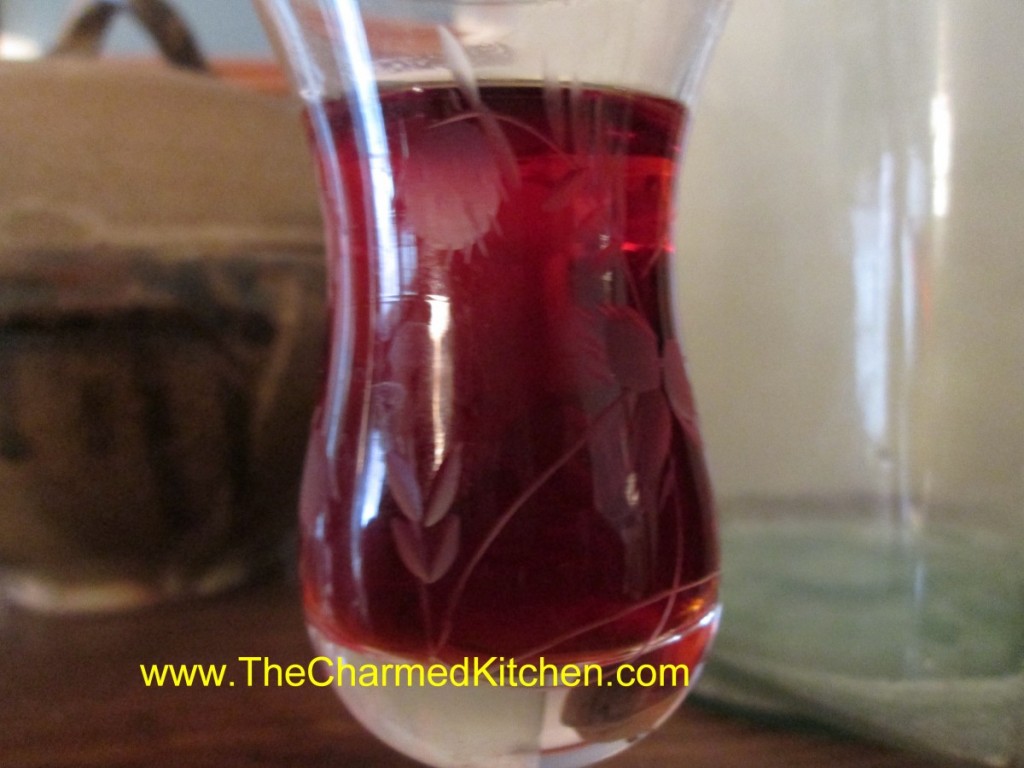
I make a lot of different liqueurs. Raspberry liqueur is probably one of my favorites. It reminds me of a warm summer afternoon.
I love raspberries. My parents had a row of raspberry bushes at the back of the yard, so I grew up enjoying them fresh. I preserve raspberries to enjoy all year long. I freeze berries, make jams and jellies and dehydrate some.
I also enjoy using some to make homemade raspberry liqueur. You just start with alcohol – I most often use vodka – then you add raspberries. I sweeten it later on, but you can leave it unsweetened, if you prefer.
Its beautiful color and great flavor make it nice for sipping, or used in mixed drinks. Think of it as just another food preservation method. Here is the recipe, in case you want to make it. Makes a great gift, too.
You can use fresh or frozen berries. You can also use black , purple or golden raspberries in this recipe.
Homemade Raspberry Liqueur
1 lb. raspberries*
3 c. vodka, you could use brandy
1 ¼ c. sugar
Combine fruit and vodka and let stand 2 -4 weeks. Stir in sugar and age 3 months. Strain and filter. Makes 3-4 cups.
*You can use frozen berries, too.
Plum and Pomegranate Sauce


I had plums and wanted to use them with some pork I was cooking. I like pairing fruits with meats and other savory ingredients. I pureed the plums, then used them as the base for a sauce I needed for pulled pork. One of my dinner guests was not a big fan of more tomato based barbecue sauces, so I figured plum sauce might be a better option. I added pomegranate syrup for more tang- and for its pretty color, along with a handful of other ingredients. I let it simmer down until nice and thick, then stirred it into my pulled pork. Even the guest who said she is not normally a fan of pulled pork liked it with this sauce. It would also go well with poultry and lamb.
Plum and Pomegranate Sauce
3 T. oil- you could use butter or bacon fat, if you like
1 medium onion, minced
2 gloves garlic, minced
2 c. plum puree*
½ c. pomegranate molasses**
½ c. apple cider vinegar
2 T. honey- or a little more to taste
2 t. hot sauce- or to taste
1 t. grated ginger
Salt and pepper to taste
Heat oil in pan and cook onions until very tender. Add the garlic and cook another minute or two, being careful not to burn the garlic. Add remaining ingredients and cook until sauce is thickened, about 30 minutes. I simmer the sauce and stir more often as it reduces to avoid scorching. You should cook it down to around 2 cups. Adjust seasonings once it is cooked down. Use with pulled pork, on chicken or as a glaze for duck or even lamb.
* To make the plum puree- dip plums in boiling water for 30 -60 seconds. Remove them to a bowl with ice water to cool. Slip off skins and discard. Remove pits and discard them, too. Place plums in a blender or food processor and puree until smooth. You’ll need about 1½ pounds of plums for 2 cups of puree.
** Pomegranate molasses can be found in some grocery stores and in specialty stores. It is pomegranate juice that is boiled down until it becomes thick and syrupy.
Creamy Fresh Tomato Soup


Tomatoes are in season and I am loving it. I have been enjoying tomato sandwiches, tomato salad and fresh tomato sauce.
This is a great recipe for some of those tomatoes. A simple soup, with lots of flavor, it is a favorite of mine. So much better than the canned tomato soup of my childhood.
I enjoy it served hot, but this soup can also be served cold. On a hot day, this soup, served chilled, is a wonderful change from a salad with dinner.
I prefer to use fresh tomatoes, but I have used my home canned tomatoes, in a pinch.
If you want a stronger tomato flavor- use a couple extra tomatoes.
Creamy Fresh Tomato Soup
3 medium-sized ripe tomatoes
1 small onion, chopped fine
1 rib celery, chopped fine
1/4 t. ground cloves
1 small bay leaf
3 T. butter
3 T. flour
1 t. salt
3 c. milk or half and half
Peel and chop tomatoes. Place tomatoes in saucepan with onion, celery, cloves and bay leaf. Bring mixture to a boil; reduce heat and cover, simmering 15 minutes. Melt butter in a large saucepan then stir in flour and salt. Cook mixture until bubbly. Add milk and cook until thickened, stirring constantly. Remove bay leaf. Puree tomato mixture through a strainer, food mill or in a blender or processor. Add to milk mixture and heat through. Serves 6.
Zucchini and Cheese Tartlets


Since zucchini are so prolific, there never seem to be enough recipes for them. I like this one as an appetizer. You can make up a big batch, bake and then freeze some for whenever you need them. Served with a salad they make a nice lunch or light dinner.
Zucchini and Cheese Tartlets
1 recipe of pie crust dough, enough for 2 pies, home made or store bought
1 medium zucchini shredded, about 1 1/2 cups
1 T. flour
1 c. shredded cheese- any kind you like. I like cheddar.
2 eggs, beaten
1/2 c. minced onion
1 t. Italian seasoning
salt and pepper to taste
hot pepper sauce to taste
Preheat oven to 375 degrees. Roll out dough to 1/8-inch thick. Use a 2 1/2-inch biscuit cutter to cut out circles of dough. Place dough circles in mini muffin pans. Press them in gently being careful not to tear them. Repeat with remaining dough and re-roll scraps. You’ll end up with about 3 dozen in all. If you don’t have enough pans, keep the extra dough circles under a towel or plastic wrap so they don’t dry out until you are ready to use them. In mixing bowl combine zucchini and toss in the flour. Add remaining ingredients and mix well. Adjust seasonings to your taste. Place a rounded teaspoonful of zucchini mixture into each of the tartlet shells in the prepared pans. Don’t over fill. Bake for 12-15 minutes or until golden brown on top. They will puff up while baking but flatten when cooling. Can be served hot, warm or at room temperature. Makes about 3 dozen.
Can be frozen. To reheat take straight from the freezer and place on a baking sheet. Bake in a preheated 325 degree oven and bake for about 20 minutes, but check after 15 minutes.
Peachy Chef Salad


When you think about cooking with peaches, don’t limit yourself to desserts and jam. Peaches can pair well with savory dishes, too. I often use peaches for glazes and sauces for meats.
In this dish, I paired peaches with traditional chef salad ingredients. I tossed the peaches in a homemade honey French dressing, then spooned them over the salad. The result was wonderful- and a great lunch or dinner option for hot weather.
You can top the salad with cheese, meats or both. I like to add some nuts, too. I topped the salad with sharp cheddar cheese and bacon. I really liked the combination of the sweet fruit with the smoky bacon. Use what you like- and what you have on hand.
A chef salad is a great way to use up leftover grilled chicken or that open package of cheese. Add extra veggies, too, if you like. It also makes a wonderful meal when you don’t want to cook. Lovely, cool meal for a hot day.
Peach Chef Salad
Honey French Dressing:
1/3 c. honey
1/4 c. white wine vinegar or cider vinegar
1 t. paprika
1 t. dry mustard
1/4 t. salt
1/2 c. olive oil
3 cups chopped peaches
Salad:
6 c. torn salad greens
12 oz. cooked chicken, turkey, ham etc, cut into strips
1 c. cubed cheese
1/2 c. cashews, optional
To make the dressing, in blender, combine first five ingredients and start running machine on high. Add oil in a slow stream until mixture becomes thickened. Pour into bowl and stir in peaches and chill, several hours if you can. When ready to serve arrange greens on one large platter or on smaller salad plates. Arrange meat and cheese on platter or plates. Spoon over the peach/dressing mixture, add cashews, then serve. Serves 4-6.
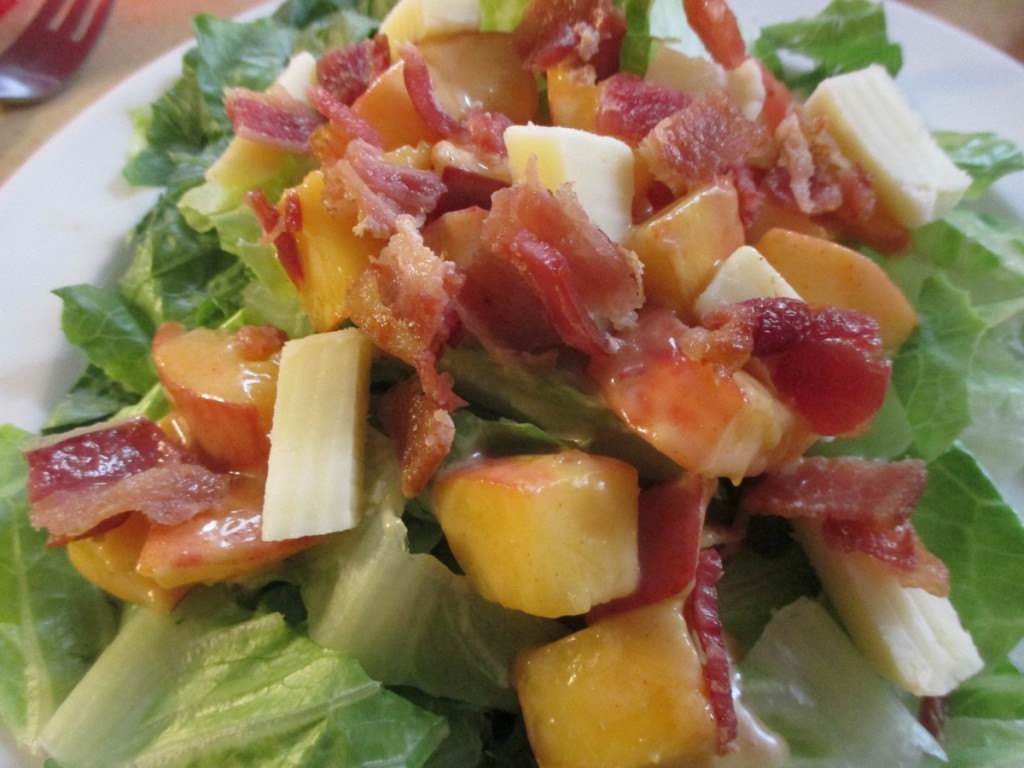
Salad topped with bacon and cheese
Spiced Chocolate Zucchini Cupcakes


It’s that time of year. Zucchini time. Maybe I should call it, “What do I do with all my zucchini time?” Zucchini and other summer squash are in abundance right now. This recipe is another, tasty way, to use them.
These are wonderfully spiced, moist cupcakes. Instead of frosting them, I decided to top them with melted butter and cinnamon sugar. It’s something I’ve done with muffins, in the past. I didn’t see why I couldn’t do the same thing with cupcakes.
It was a really good idea. The cupcakes stand up well in summer heat. Besides, not everyone likes frosting.
As an added bonus- it is a another recipe using zucchini, and that is never a bad thing.
Spiced Chocolate Zucchini Cupcakes
2 cups all-purpose flour
1 t. baking soda
½ t. salt
1 t. cinnamon
½ t. nutmeg
Pinch of cloves
¼ c. unsweetened cocoa
½ cup butter, softened
½ cup olive oil
1½ c. sugar
2 eggs
½ c. buttermilk
1½ t. vanilla
2½ c. grated zucchini
1 cup chocolate chips
Topping:
½ c. butter, melted
½ c. sugar
2 t. cinnamon
Preheat oven to 325 degrees. Grease and flour 24 muffin cups or use paper liners. Mix together the dry ingredients. Set aside. In a large bowl, cream together the butter, olive oil and sugar until light and fluffy. Beat in the eggs one at a time, then stir in the buttermilk and vanilla. Beat in the flour mixture, just until incorporated. Stir in the grated zucchini and chocolate chips. Pour batter into prepared pans. Bake for 25 to 30 minutes, or until the top of the cupcakes spring back when lightly pressed. Cool in pans over a wire rack for at least 10 minutes or until cool enough to handle. Dip top of cupcakes in melted butter, then dip in the cinnamon sugar. Place on rack to finish cooling off. Makes 24.


