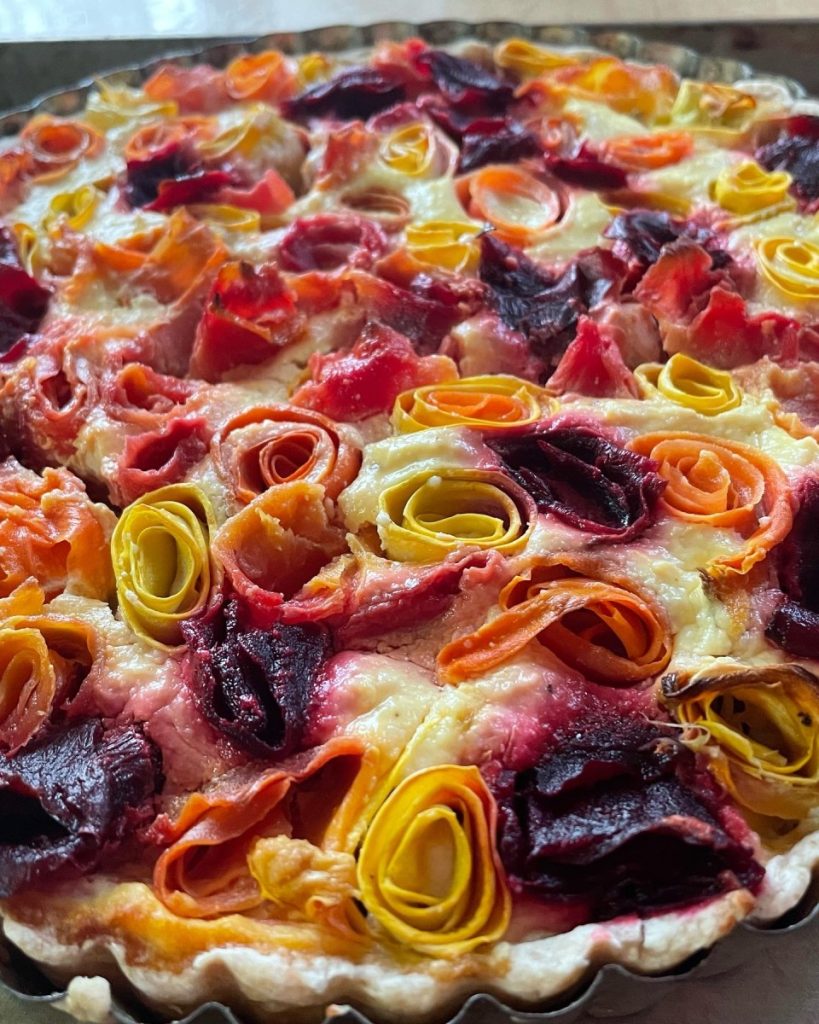
Vegetable “Roses” Tart


This tart is sure to get some attention at your next party. A flaky crust and cheese filling are topped with veggies. The special part, is that the vegetables are rolled up to resemble roses. Simple and elegant. Plus it is a nice way to use up some of those zucchini.
It really is easy to make, although a bit time-consuming. It can be made a day or two ahead, baked, and then just reheated when you want to serve it. There are three parts to it. The crust- which I made using a favorite pie crust recipe. You could use a store-bought crust, if you prefer. That will save some time. The filling- a mix of cheeses, eggs and some herbs. Finally the topping. Various veggies, peeled into thin ribbons, wound into little “roses”, and placed on the cheese layer.
The crust:
This is an old family recipe. Simple and flaky. It makes 2 crusts- so I used the other one for another dish. You could make two tarts or freeze the rest for another time.
Flaky Pie Crust
2 c. flour
1 t. salt
3/4 c. shortening, chilled, or use lard or coconut oil, I used coconut oil
1 T. cider vinegar
4-5 T. cold water
Combine flour and salt and cut in shortening. Toss in vinegar and water, 1 tablespoon at a time, until dough holds together. Use a fork to toss the ingredients together and as soon as the mixture holds together stop adding water. Makes 2. Chill well before using.
The crust was rolled out, using half the dough, and fitted into a 9-inch tart pan. I blind baked it- to insure it would be cooked through- because the tart doesn’t cook that long. I poked the crust all over with a fork, then I topped the crust with a sheet of foil and then a pound of dry pinto beans. You can use pie weights, if you have them or uncooked rice. I have a jar of pinto beans that I keep just for blind baking. The crust is placed in a 425 degree oven and baked for 15- 20 minutes. It should be taken out of the oven before the edges get too brown. Set aside until you are ready to fill it.
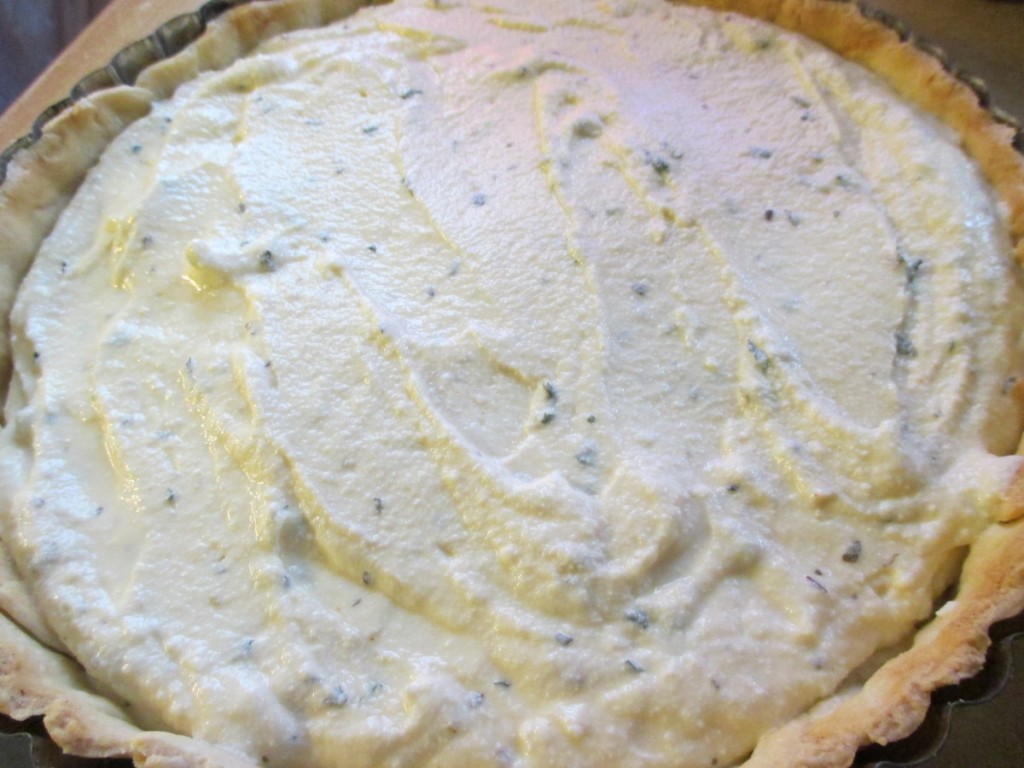
The Filling
I used a combination of cheeses and eggs, with some seasonings. I am not sure I needed the eggs- but I wanted the cheese to set up.
1 (15 oz.) container ricotta cheese
1/2 c. Parmesan cheese
2 eggs
1 t. salt- or to taste
1 t. dried oregano
1 t. dried basil- or 1 T. fresh basil
healthy dash of hot sauce
Combine all ingredients and spread over the crust.
The Veggies
Even though these are listed last, you might want to get them ready ahead of time. I used a vegetable peeler to make “ribbons” out of the veggies I used. You could also use a mandolin, if you have one. Some were going to be hard to roll- so I steamed them in the microwave, in batches, for several minutes. That softened them up and partially cooked them. They should be tender- they don’t get much softer in the baking process. Dry them off on paper towels. When I was ready to use them- I grabbed a “ribbon” and rolled it up, adding more ribbons until I had a little “blossom”. As I made them I stuck them in the cheese mixture- already spread over the crust. Sometimes I used 2 veggies in one flower to make it look more interesting. Once the surface was covered, I pressed them down a little so they would all be the same height, roughly. Season with some salt.
2 zucchini
2 yellow summer squash
2 really big carrots – made for wider ribbons
1 really big beet*
I had some pieces left over and just made a stir fry with them.
Baking the tart:
Place the tart on a baking sheet and bake in a 350 degree oven for about an hour. Crust should be nice and golden around the edges and the veggies should be tender.
* The beet was the trickiest- but I wanted that pop of red. I peeled the skin off first, then tried to peel the longest pieces I could. Some were a little short, but once steamed, they still worked pretty well. sometimes I’d finish a beet center off with a longer zucchini ribbon to hold it together.


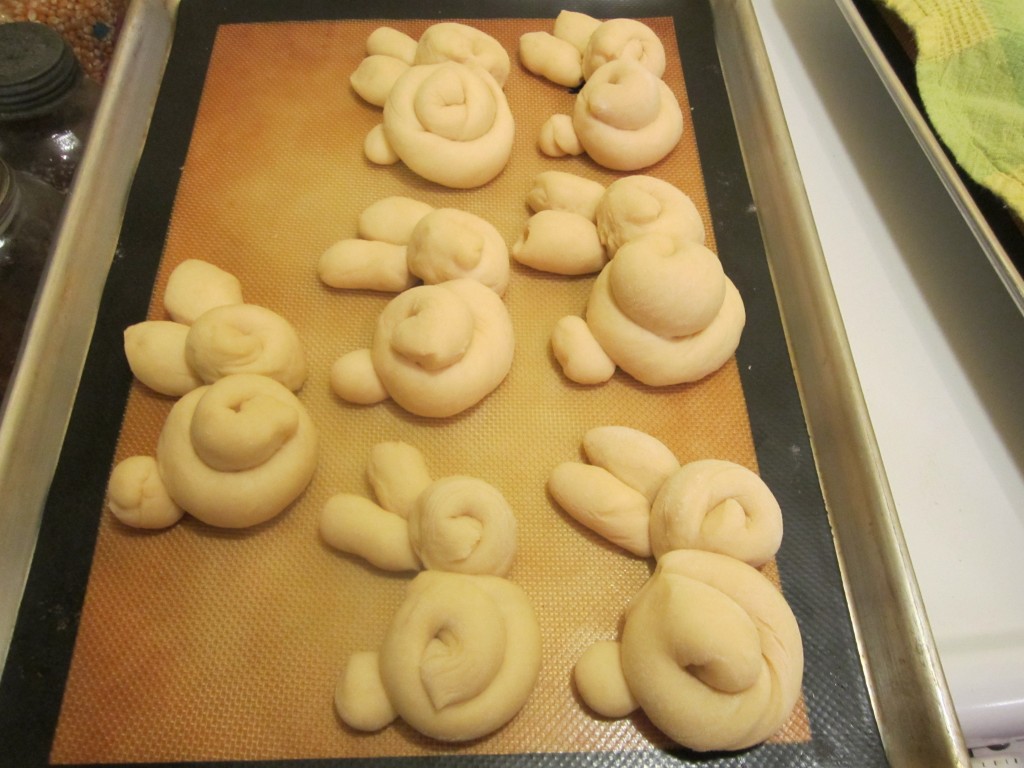
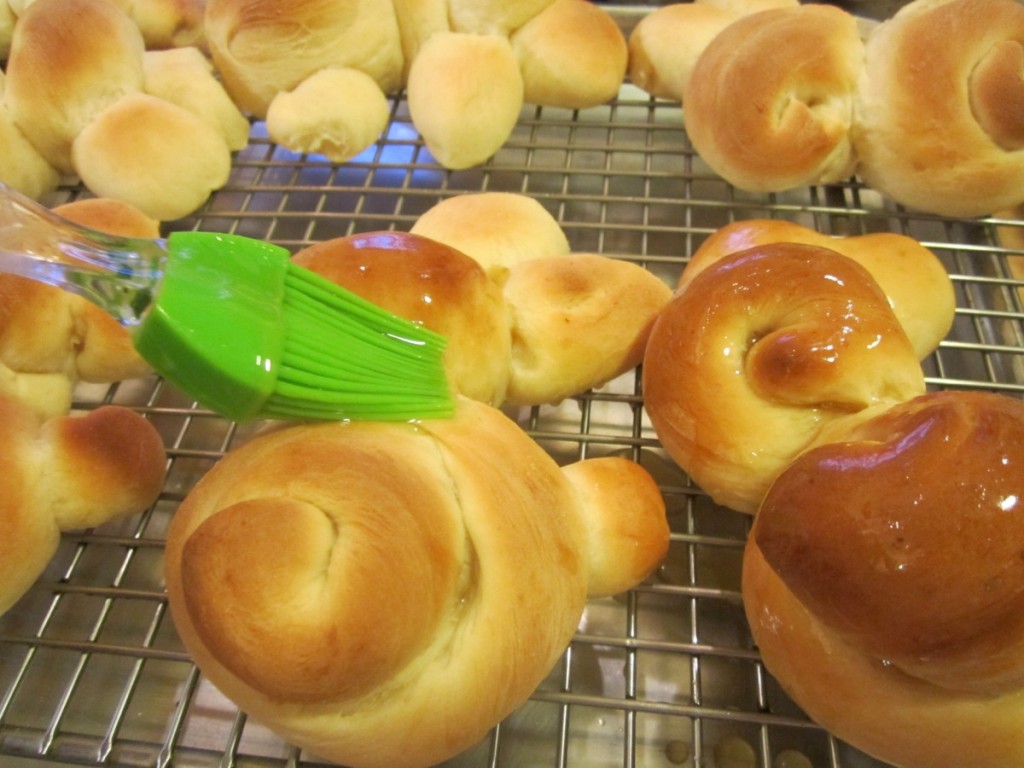
Honey Bunnies


If you are looking for a fun dish to serve for Easter, you might want to bake a batch of bunnies. These rolls can be served with Easter dinner, or with breakfast or brunch.
The honey-sweetened yeast dough is rolled into ropes, and then the ropes are formed into these bunny shapes. Once the rolls are baked, they are brushed with a mixture of warm honey and melted butter. This is a fun recipe to make with kids.
I make them every Easter. Sweet and so cute, they are sure to be a hit when you make them.
The dough is chilled before rolling, so you can mix up a batch in the evening- put in the fridge- then roll them out the next day. They are actually pretty easy to make.
You can add raisin “eyes”, if you like. It is an option.
Honey Bunnies
4-5 c. flour
2 packages yeast
1 t. salt
2/3 c. evaporated milk
½ c. each water, honey and butter
2 eggs
Raisins, optional
Honey glaze
1/2 c. honey and 1/4 c. butter heated together until warm.
In bowl combine 1 c. flour, yeast and salt. Heat together milk, water, honey and butter until very warm and beat into the flour mixture. Beat 2 minutes on high speed. Beat in 1 cup flour and eggs. Beat 2 more minutes, until batter thickens. Stir in enough flour to make a stiff batter and chill, covered with plastic wrap for 2-24 hours.
Place dough on lightly floured surface and divide into 15 equal pieces. Roll one piece of dough into a 20- inch rope. Cut rope into a 12- inch piece, a 5-inch piece and 3 one-inch pieces. Coil 12- inch piece to form body, five inch piece to form head and one inch pieces to form ears and tail. Place the body on greased cookie sheet and then place the head next to the body, making sure they are touching. Place ears and tail on the bunny, making sure they make good contact with the rest of the “bunny”. I tuck them under a little. Repeat with the remaining dough. Let rise, covered until doubled, about 25 minutes. Bake in a 375-degree oven for 12-15 minutes. Remove to cooling rack and brush with honey glaze. Place raisins on each to make eyes, if you like. Brush with additional glaze before serving, if desired. Makes 15 bunnies.
Sunny Spring Salad


Today’s recipe is a tasty vegetarian salad that is as satisfying as it is pretty. The color is bright, just perfect after several days of chilly weather. If it doesn’t feel like Spring outside, it can feel like Spring inside.
When I say split peas, what comes to mind? Split pea soup? GREEN split pea soup? Years ago my dear friend, Dale Gallis, turned me on to yellow split peas. I started making soup from them, but also use them in salads.
The yellow split peas are combined with carrots, sweet onion, sweet peppers and fresh herbs, then tossed with a simple combination of apple cider vinegar and olive oil. You can serve it right away, or let the flavors blend in the fridge for a bit. I served my salad over a mix of Spring greens.
Yellow (or green) split peas cook to al dente in about 20 minutes, so they are a quick option, too. Much shorter cooking times than other legumes.
Sunny Spring Salad
1- 1 1/2 c. raw yellow split peas
salt
1 carrot, peeled and shredded
1/2 c. chopped sweet onion
1/2 c. chopped sweet pepper
1/2 c. chopped parsley
1/2 c. snipped chives
1/4 c. olive oil
1/4 c. cider vinegar
salt and pepper to taste
6 c. mixed Spring greens
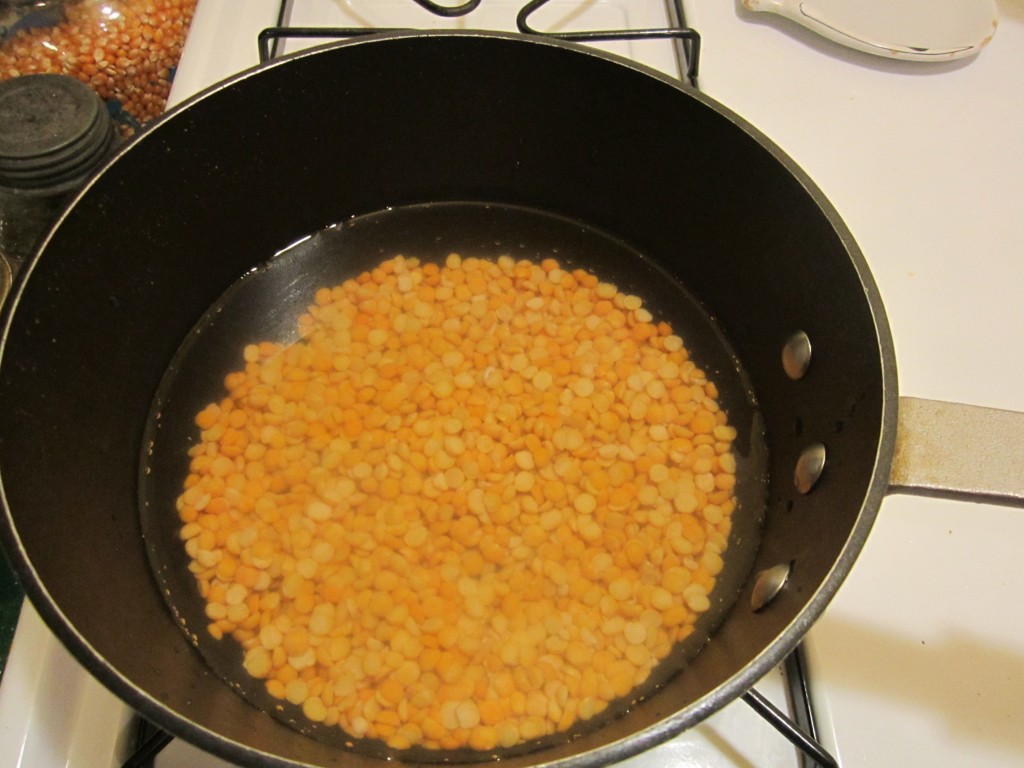
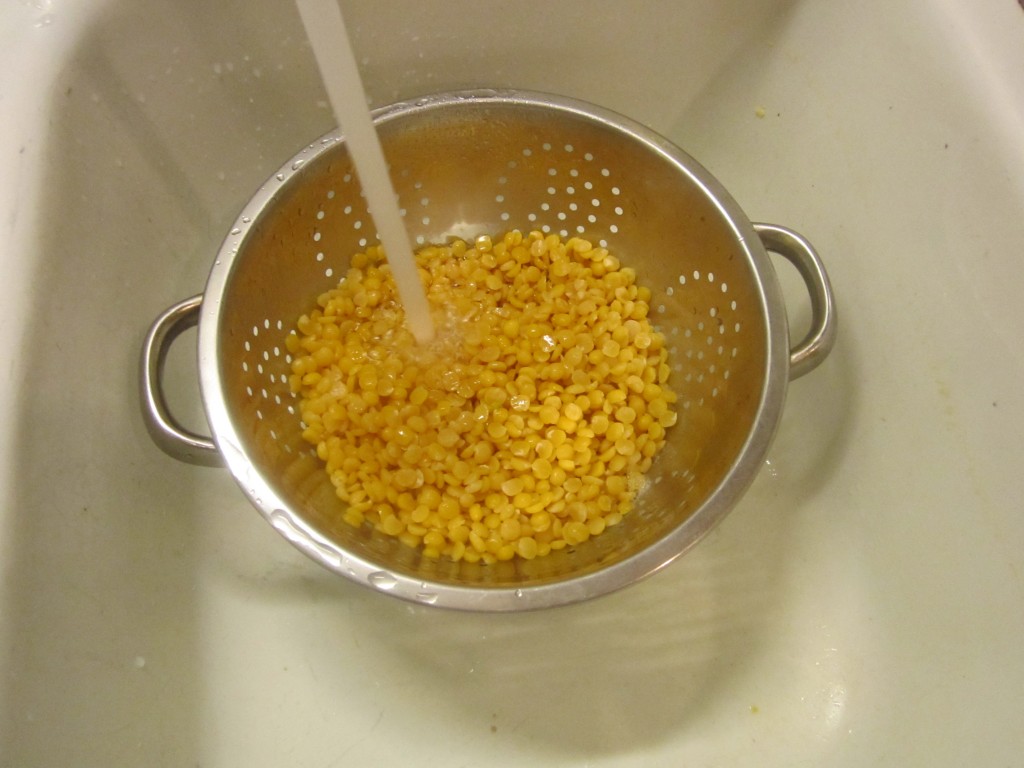
Rinse peas and place in a saucepan. Cover with water and add a little salt. Bring to a boil and simmer until peas are tender, about 20 minutes. Drain and rinse under cold water. Combine peas with carrots, peppers and onion and toss well. Add parsley, chives, oil, vinegar and salt and pepper to taste. Chill until ready to use. Serve on greens. Serves 3-4.
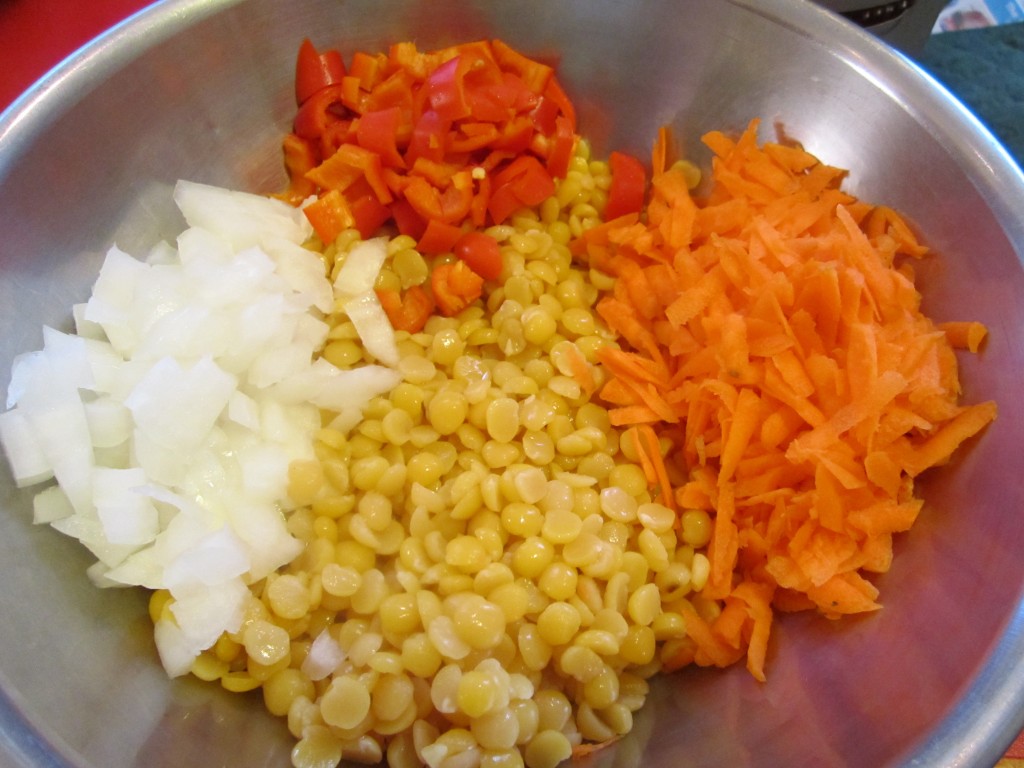
Combine peas with other veggies
Praline Biscuits


When you are craving a sticky bun, but don’t want to wait hours for a yeast dough to rise, these Praline Biscuits might be just what you are looking for. They share a lot of the ingredients of sticky buns: pecans, brown sugar, butter, cinnamon. The flavors are a lot alike. The difference is that these tasty biscuits can be ready in 30 minutes or less.
The biscuits use biscuit mix, like Bisquick or Jiffy Mix for the dough. I actually like to make my own baking mix- recipe follows- but store bought is fine, too.
The texture will be different from a traditional sticky bun. Like the name implies, these are biscuits. I don’t think you will mind at all. We made them in class last night and everybody loved them. They would make a great addition to any brunch or breakfast menu.
So here is the recipe, simple and sweet. Enjoy!!
Praline Biscuits
1/2 c. butter
1/2 c. brown sugar
36 pecan or walnut halves
cinnamon
2-c. biscuit mix
1/3 c. applesauce
1/3 c. milk
Preheat oven to 450 degrees. In each of 12 muffins cups place 2 t. butter, 2 t. sugar and 3 nut halves. Sprinkle cinnamon in each. Heat in oven until melted. Combine remaining ingredients and spoon over nut mixture. Bake 10 minutes, invert on heatproof serving platter. Makes 12.
Biscuit Mix
8 c. flour
1 c. powdered milk
1 c. powdered buttermilk
¼ c. baking powder
1 T. salt
1½ c. shortening- I like to use coconut oil- you can also use butter, but mixture needs to be kept in the fridge if you use butter
In large bowl combine dry ingredients and mix well. Cut in shortening until mixture resembles coarse crumbs. Store in a tightly closed container and use in 1-2 months. Makes 10 cups.
Almond Biscotti

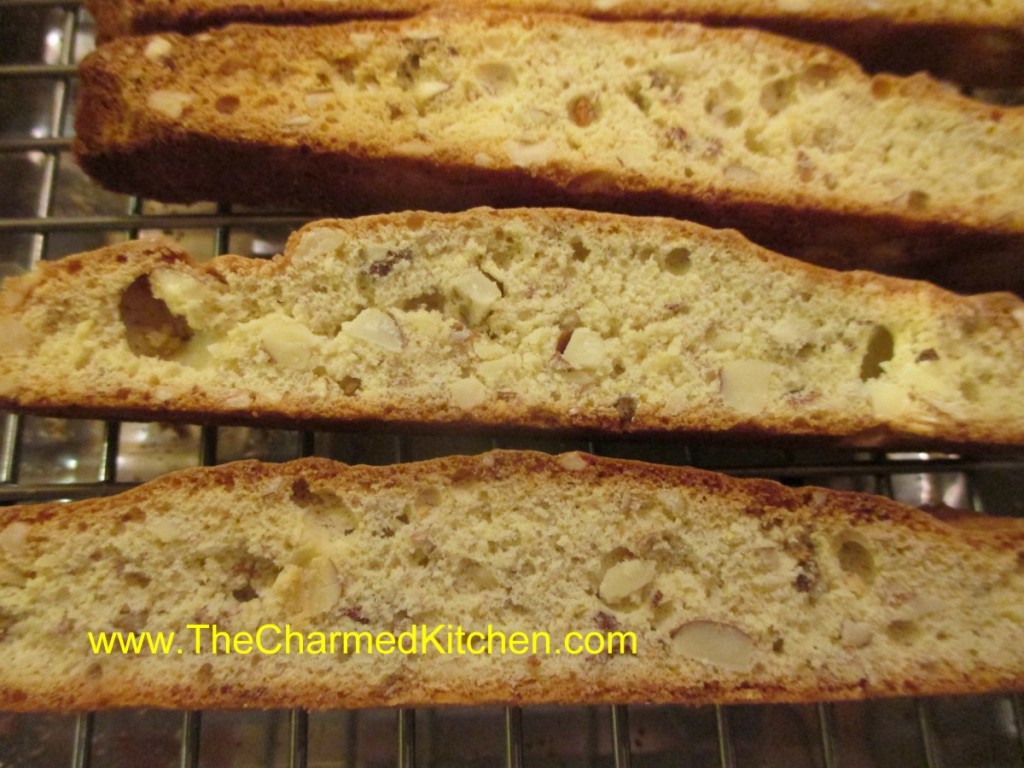
I love these biscotti. They are just the thing to dunk in a cup of hot coffee or tea on a chilly morning. Besides chopped almonds, they are flavored with Amaretto, lemon zest and lemon juice. The almonds and lemon work really well together.
The hard texture of biscotti comes from twice baking them. First the dough is formed into a log and partially baked. Then the “log” of dough is sliced- and the slices are baked a second time. For the second baking, most recipes tell you to turn the biscotti halfway through the baking process. This is so they dry and crisp up on both sides evenly.
I have a much easier way to handle the second bake. Just place a cooling rack on your baking sheet. Then arrange the slices on top of the cooling rack. Now, when you bake the slices- the heat dries them out and crisps them up on both sides. No need for turning them over mid-bake.
Biscotti are so easy to make, I wonder why more people don’t make their own. The ones from the store are never as good.
So here is the recipe. I hope you try to make your own biscotti, if you haven’t before.
Almond Biscotti
2 c. flour
1 t. baking powder
1/4 t. salt
1 c. sugar
3 eggs
2 T. Amaretto liqueur
1 T. lemon juice
2 t. grated lemon peel
2 c. coarsely chopped almonds, about 9 oz.
Combine dry ingredients and set aside. Beat sugar and eggs together until light and lemon colored, about 3 minutes. Mix in liqueur, juice and peel. Beat in dry ingredients and stir in almonds. Mixture will be very sticky. Spray large baking sheet with non-stick coating. By spoonfuls transfer dough to baking sheet forming 2 14-inch long strips. Using floured hands shape each strip into 2 1/2 inch wide log. Bake in a 350-degree oven for about 30 minutes. Logs should be light golden and firm to touch. Transfer to cutting board and using a serrated knife, cut into 3/4-inch thick slices. Place a cooling rack on your baking sheet and arrange slices on top of the cooling rack, cut side down. Bake 11-12 minutes. Remove from oven and cool completely. Can be stored in airtight container for a week. Makes about 40.
Smoky Brussels Sprouts Salad


I know some people don’t like Brussels sprouts. I am not one of them. I have always loved them, even when I was a kid. I like them steamed with butter, roasted, pan fried and even raw. This salad is a great way to enjoy their crunchiness in raw form. The smoky flavor come from the bacon. The dressing, sweetened with maple syrup, really makes the dish.
The nice thing about this salad, is that it tastes good even the next day. The sprouts are like little cabbages. Unlike leaf lettuce, which wilts quickly once dressed, the sprouts soften some, but retain most of their crunch.
Smoky Brussels Sprouts Salad
8- 10 oz. Brussels sprouts
1 large orange, peeled and cubed
4 slices bacon, cooked and crumbled
¾ c. dried cranberries
½ c. toasted slivered almonds*
Dressing:
¼ c. olive oil
¼ c. apple cider vinegar
2 T. maple syrup
1 T. fresh chopped parsley- or 1 t. dried
2 t. hot sauce, or to taste
½ t. dried thyme
½ t. dried basil
Salt and pepper to taste
Trim bottoms off the sprouts, cut in half and slice thin. You should end up with about 4 cups of sliced sprouts. Place in large bowl with the remaining salad ingredients. Place dressing ingredients in a jar with a tight fitting lid and shake well to combine. Toss over Brussels sprout mixture.
Note: The salad ingredients can all be assembled a day ahead, then just dressed when ready to serve. This salad is also good the next day.
*To toast the almonds, place in a skillet over medium low heat and stir occasionally, until toasted. Be careful, once they start to brown, they can burn easily.
Orange and Cream Scones


These are wonderful scones. They are just what a good scone should be, tender and crumbly, without being dry. The orange flavor comes from the orange zest used in the recipe. It is subtle, but there.
I love scones because you can have them for breakfast or with a cup of coffee or tea. You can also use them as the base for a shortcake dessert by splitting them, adding sweetened fruit and whipped cream.
I was in the mood for scones, but wanted to try something new. I had come across this recipe in an old file of mine. I had ripped it out of a magazine a long time ago. They looked promising, so I decided to make them. I made few changes from the original recipe. I was very happy with how they came out. I think you will be, too. I enjoyed one this morning with some homemade clementine marmalade.
Orange and Cream Scones
2 c. flour
¼ c. sugar
1-2 T. orange zest, I used 1 tablespoon, but could have used more
2 t. baking powder
½ t. salt
10 T. unsalted cold butter, cut into ½ -inch cubes
1 egg
½ c. cold half and half
1 t. vanilla
Extra flour
2 T. half and half or orange juice to brush the scones
Extra sugar for sprinkling on top- 3-4 tablespoons
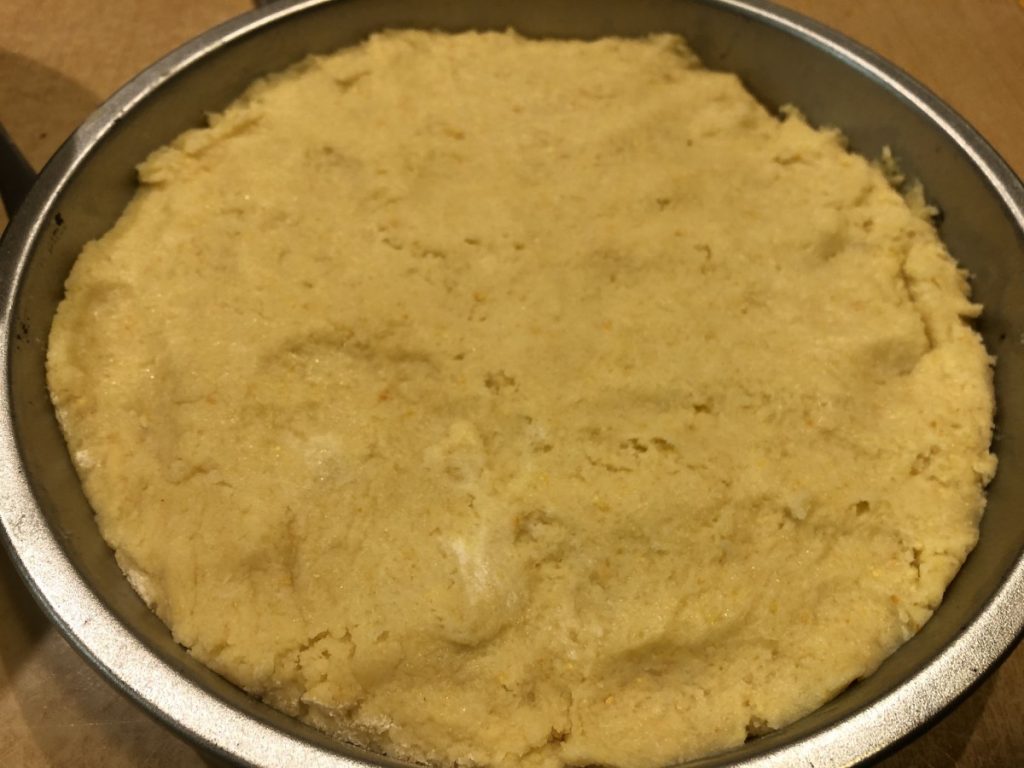
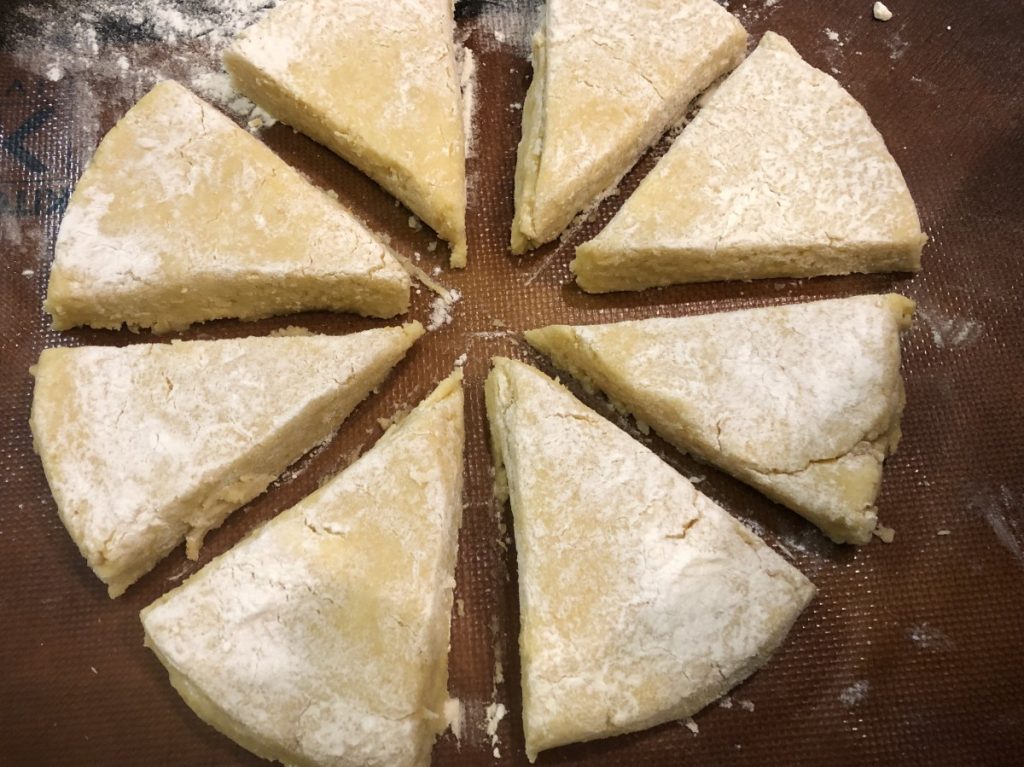
Preheat oven to 375. Line a large baking sheet with parchment paper or use a silicone liner. Set aside. In a large bowl mix together the dry ingredients. Using your fingers, rub the butter into the flour mixture until it looks like coarse crumbs. You can also use a pastry blender, but what fun is that? In a small bowl, beat together the egg, half and half and vanilla. Pour into flour mixture and stir until mixture starts to hold together. I am going to save you from messing up your counter with this next part. Get an 8-inch round cake pan and sprinkle flour in the bottom of it. Don’t be stingy, be sure there is a layer over the whole pan. One or two tablespoons should do it. Go back to your dough and sort of knead it in the bowl. That is why I said to use a large bowl. You don’t really need to knead it on your counter. Use a wooden spoon, rubber spatula or your hands to get the dough to form into a ball. Make sure you get all the dry bits from the bottom of the bowl. This isn’t a yeast dough. The idea is to get it to stick together with as little actual kneading as possible. Trust me, this is how you end up with super tender scones. As soon as the dough will hold together, and form into a ball, use a rubber scraper to get it into the floured cake pan. Press the dough evenly into the pan. Now a fun trick. You want to turn to the pan over so the dough ends up on the prepared baking sheet. You don’t want to do this slowly or the dough might plop out too soon. You also want to dough to come out. In one motion turn the cake pan over quickly onto the baking sheet. You want to actually slam it firmly on the baking sheet. Then lift up the cake pan. If all has gone according to plan, you’ll have a perfect 8-inch circle of dough on the baking sheet. I could have told you to just place the dough on the baking sheet and form it into an 8-inch circle, but I prefer the cake pan method. You get nice, even edges. There will be some flour on the dough. Leave it there for now. Using a bench scraper, or a long knife, cut the dough in half, then in half again, like cutting a pie. The dough is pretty moist, so the extra flour on top should make them easier to cut. Repeat two more times so you end up with 8 wedges. Pull them apart a little, so they can expand when they bake. I used a metal spatula to do this. If there is still extra flour on top and it is bothering you, you can brush it off. Using a pastry brush, brush a little half and half or orange juice over the scones. Then sprinkle the tops with the extra sugar. Bake for 25 minutes, or until golden brown. Makes 8. Great plain or served with jam.
Spring Lemon Tart


This would make a lovely dessert for any Spring dinner. It would be a nice dessert for Easter, too.
I was leaning towards making a cheesecake. I already had cookie crumbs, I could use for the crust. Then, I discovered I only had one box of cream cheese. Not enough for a cheesecake. While searching my fridge for cream cheese, I found a couple of lemons. I suppose I could have made a lemon pie, but I decided to just make something up with what I had, including the cream cheese.
What I ended up with is a sweet/tart lemon dessert. Really nice, actually.
Before I get to the actual recipe, let me talk about the lemons, and including fresh lemon juice in recipe directions.
Recipes will often list the “juice of a lemon” in the ingredients. There is about the same amount of lemon juice in all lemons, so that a little difference, one way or the other, is no big deal. The amount is anywhere from 2-3 tablespoons of juice in a lemon. You might get 4 tablespoons, if the lemon is really big. I have used that phrase in recipes myself.
Sometimes, however, you have to recognize when you have lemons that aren’t “average”.
The two lemons I had on hand were big, really big. When I juiced them, I ended up with 2/3 of a cup of lemon juice. So, in this recipe I used the actual measurement of the juice, rather than saying, “the juice of 2 lemons.” Three or four average sized lemons should give you 2/3 cup of juice.
So here is the recipe for my lemon tart, the happy end result of using what I had, and making it work.
Spring Lemon Tart
Crust:
1½ c. crushed vanilla cookies
4 T. melted butter
Filling:
1 (8oz.) container cream cheese, softened
½ c. sugar
2/3 c. lemon juice
Zest of two lemons
3 eggs
¼ c. cornstarch
Combine crust ingredients in medium bowl. Press crumb mixture into a 9–inch springform or tart pan. Bake in a preheated 350-degree oven for 10 minutes. While the crust is baking, make the filling. In mixing bowl combine the cream cheese with the sugar and beat until fluffy. Add the lemon juice and zest and beat well. Add the eggs and cornstarch and beat until smooth. Pour filling over the baked crust and return to oven. Bake for 35 minutes, or until golden on top. Center will be soft, but firms as the tart cools. Cool, then refrigerate until ready to serve. You can dust with powdered sugar, if you like. Serves 6.
Fried Catfish


I love fried fish. I don’t make it at home that often. It is more of a treat around here than an every day meal. This time of year, Friday night fish fries are very popular. I love them. You don’t have to go out to have great fried fish.
I toyed with the idea of baking it, but frying won out. Nothing quite as good as fried catfish in my mind. Had a few friends over and I knew they would like it. too.
This is going to be one of those recipes that is more narrative that exact amounts. I really am good about writing stuff out. I just can’t seem to locate my notes for this one- so I’ll share what I did as best I can remember. It is also so easy to fry fish. Don’t be scared to try.
I started with catfish fillets that were cut down into smaller pieces. The smaller size made them fast and easy to cook. It also made them fun to eat. Like chicken nuggets, only made with catfish.
Since they had been frozen, I thawed them out, and dried them off a bit by patting them with paper towels. I started with a 2 pound bag of catfish. I seasoned a little over 1/2 a cup of flour with salt, pepper and paprika. Then I placed the flour in a bag and tossed in the fish pieces.
I made a mixture of 2 eggs, a little mayo, salt, pepper, garlic powder and a small amount of smoked paprika. I dipped the fish in this mixture and let it soak in there while I put the breadcrumbs in a bowl.
I took the fish out of the egg wash a few pieces at a time and dropped them in the bread crumbs. I had the crumbs in a good sized bowl- but only filled about a quarter of the way with crumbs. I started with a cup of bread crumbs, but needed more. I added the fish and sort of tossed it in the crumbs by shaking and tossing the bowl. Made sure the fish all got coated. Pressed the crumbs a few times to make sure the breading stuck. Placed fish in a square container and kept adding it as I finished breaded the fish. Covered the dish and placed it in the fridge. I fried the catfish the next day. I could have fried it right away, but I knew I would be getting home just before my guests would be arriving. I wanted to get this part of the job out of the way. Breading sticks better if you do it a little ahead of time.
Once it was time for dinner, I put the oil on to heat up.
I was using an electric pot with a thermometer so I knew when the oil reached 350. I wanted to fry the fish between 350 and 375 degrees. If you don’t have a pot with a thermometer, you can tell if your oil has reached 350 degrees with the use of popcorn. Yes, popcorn. Just put in a kernel or two of unpopped popcorn when you start heating up the oil. Popcorn pops at 350 degrees. When the popcorn pops, you know the oil is ready.
I had a pan, lined with paper towels ready as I started to drop the pieces of fish, several at a time, into the hot oil. They were cooked in just a few minutes. I pulled them when they were golden brown. Allowed them to drain on paper towels, in a warm oven, while I cooked the rest of the fish.
I served the fish with lemon wedges and homemade tartar sauce- which is just sweet pickle relish, mayo and capers.
The fish was a big hit.
As to the oil. You’ll have plenty left over. I let it cool and strained it out. Then I poured it in the bottle it came from. You can save it for your next frying project, but don’t use it again and again. Just a couple of times, then toss the rest. There were 4 of us for dinner and there was fish leftover. The 2 pounds of fish was easily enough to serve 6-8.
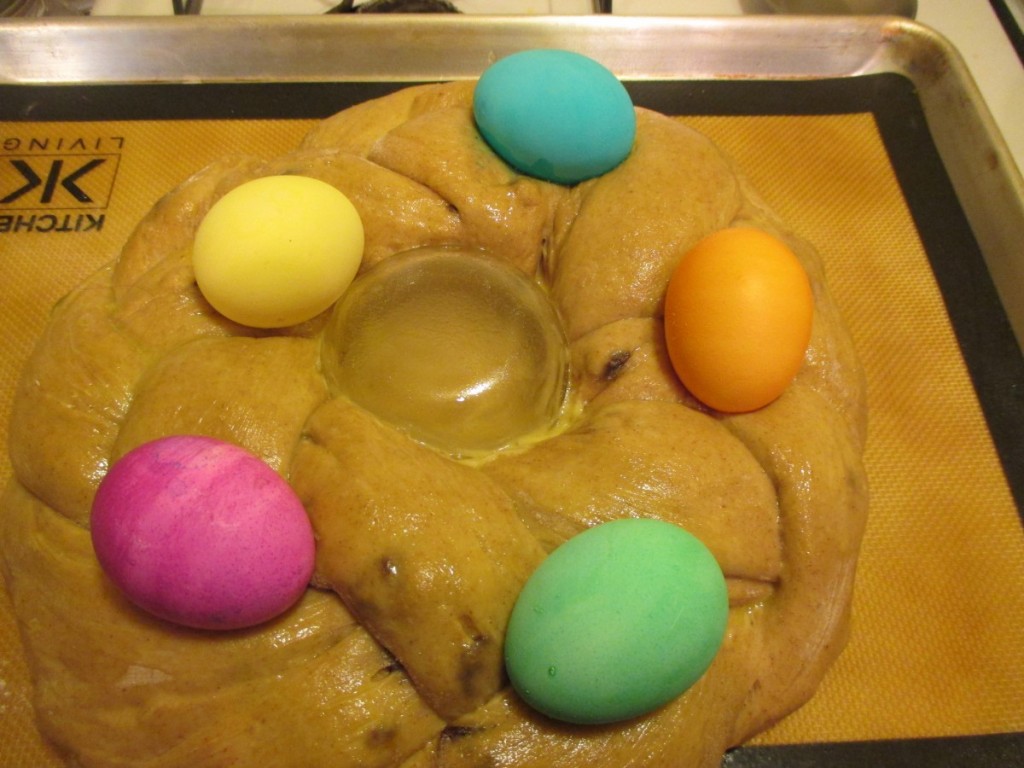
Easter Bread Wreath


This Easter bread wreath, with eggs baked on top, is a fun bread to make for the holiday. It is a tradition in many families.
I hadn’t made one in a long time, and when I went to find my recipe, I couldn’t locate it. I decided to make a new recipe.
I wanted it to have a lot of flavor- something that would be fun served at a breakfast, brunch or with dinner, but not too sweet. I added spices and raisins, but I could see using other dried fruits.
I left it plain on top – but you could easily add a powdered sugar glaze. No, I did not hard cook the eggs first. They cook while the bread is baking. Saves a step, for sure.
I tested the bread out with friends. Almost half was eaten before dinner, so I am confident to say, that this recipe is a winner. The texture of the bread is really nice and the dough is richly spiced.
I added mace, but if you don’t have any mace, add a little more nutmeg or allspice. Mace is a spice I would encourage you to try sometime. So here is the recipe. Hope you like it as much as we did.
Cinnamon Raisin Easter Wreath Bread
4½ -5 c. flour
1 pkt. yeast
½ c. brown sugar
2 t. cinnamon
1 t. salt
½ t. allspice
½ t. nutmeg
½ t. mace
1 c. warm water
½ c. butter, melted
2 eggs
½ c. raisins
5-6 uncooked eggs, dyed if you like
Combine 2 cups flour, yeast, sugar, seasonings and salt in large bowl. Heat together water and butter until warm and add to flour mixture. Beat 2-3 minutes. Beat eggs and reserve 1 tablespoon of the eggs for brushing the top of the bread later. Add remaining eggs and another cup of flour to the bowl. Beat 4 minutes. Add the raisins and enough of the remaining flour to make a soft dough. Knead on a floured surface until smooth and elastic, but still soft. Place in oiled bowl turning to oil top. Note: I actually used my stand mixer, and just left the dough in the bowl to knead, and then covered it to rise. I was able to leave the dough a little sticky this way, using less flour. Cover and let rise until doubled, about 45 minutes. While dough is rising, prepare a pan. Grease a large baking sheet- or use a silicone baking mat. Grease a one cup oven-proof custard cup and place it upside down on the middle of the baking sheet. This will keep a “hole” in the middle of your wreath. If you don’t have a custard cup, you can use a metal one-cup measure instead. Punch dough down and divide in three pieces. Roll each piece into a 20-inch long rope. Braid the ropes together. Wrap the braid around the custard cup on the baking sheet and pinch ends together to keep the braid from coming apart. Cover and allow to rise until doubled (50-60 minutes). Just before baking, combine reserved egg with a little water and brush the wreath with the egg wash. Place 5 or 6 eggs on the top of the braid- being careful not to press down too hard. Bake in preheated 350-degree oven for 25 minutes. Cover bread with foil and bake 10-15 minutes longer, or until bread sounds hollow when tapped lightly. Here is the only tricky part. You have to remove the wreath, but not drop the glass custard cup in the middle. You can let the bread cool a few minutes before moving. I use a silicone baking sheet so I slide the whole thing off the baking sheet and onto a cooling rack. I use two large spatulas to lift the wreath up and leave the custard cup behind. If it doesn’t come right out, use a knife to loosen. Lift the wreath up enough to slide the custard cup out. Let cool before serving- store leftovers in fridge, because of the eggs on top. Makes 1.