Wonton Soup

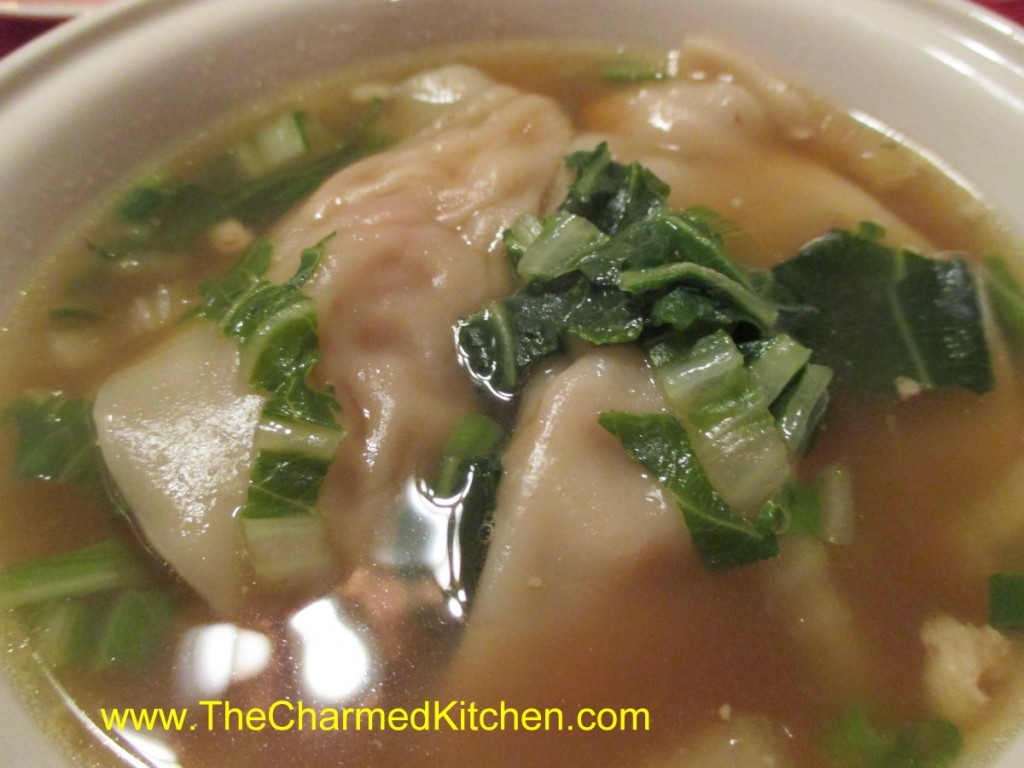
For me, Wonton soup always brings back memories of going out for Chinese food with my family, when I was a kid. The restaurant would serve it family style, and my mom or dad would ladle out everyone’s soup. It always looked and smelled wonderful. Tasted wonderful, too. Even more special, because we only had it when we out to dinner.
The one problem I find when trying to make this soup at home is finding wonton wrappers that are thick enough. The square ones I find at the neighborhood grocery store are OK, but thinner than the ones in Wonton Soup at a restaurant. At a local Asian grocery I have found round wrappers that are labelled for dumplings and are thicker. That is what I used. They worked out better. You can play around with fillings. I often add shrimp as both a filling, and to the soup itself.
Wonton Soup
1½ lb. chicken
1 head bok choy, or 4-5 baby bok choy
3 T. hoisen sauce
1 clove garlic, minced
24 won ton wrappers
2 qts. chicken stock
1 t. ginger
1 t. hot pepper sauce
Chopped green onions
Sesame oil
Bake the chicken until cooked. I used boneless chicken thighs, but even leftover roasted chicken would work. You can also used pork. Once cooled, I minced enough of the chicken to give me 1 cup of meat. The rest I cut into thin strips. I then took stems from the bok choy and minced enough of them to make 1 cup. Combine the minced chicken with minced bok choy, the hoisen and the garlic. This is the filling for your wontons. Slice more of the bok choy- using mainly the leaves, into thin shreds. This will go into the soup later, along with the strips of chicken. You should have at least a couple of cups of the shredded bok choy, but more is OK, too. To make the wontons place one on your work surface and spoon a rounded teaspoon of the filling into the middle of it. Moisten edge with water, fold in half and press to seal. I used round wrappers, but square wrappers are fine, too. Repeat with remaining wontons and fillings until done. Bring stock to a boil and add the ginger and hot sauce. Add the wontons to the simmering stock. Simmer gently for 3-4 minutes, stirring occasionally, then add the strips of chicken and the shredded bok choy greens. Cook about 5-6 minutes longer. Finish soup with chopped green onions and a drizzle of sesame oil. Serves 6-8.
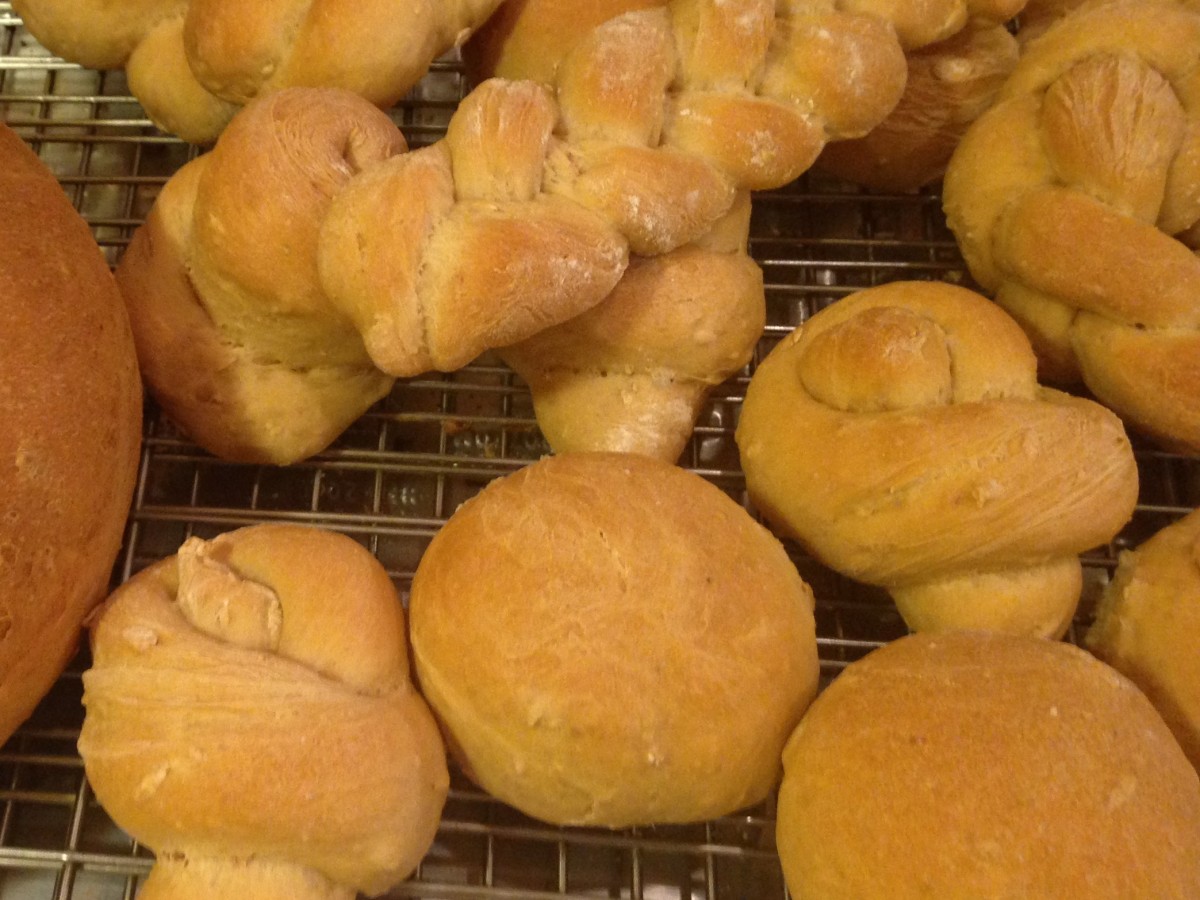
Oatmeal Bread

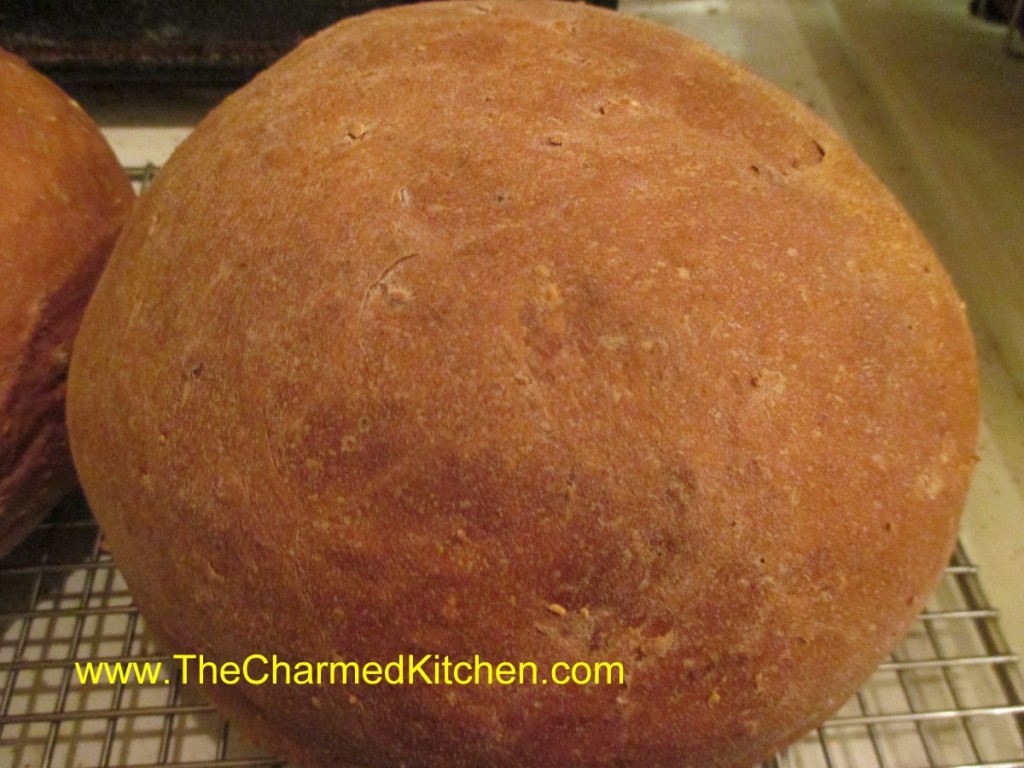
This oatmeal bread is one of my favorites. With the addition of molasses, the bread has an earthy sweetness that works well with the oatmeal. It makes a great sandwich bread and I love it for French toast.
This is a very versatile recipe. You can make 2 round loaves, or bake it in 2 loaf pans (9×5) or even make dinner rolls out of it. I sometimes make hamburger buns out of it.
When making dinner rolls, instead of loaves, reduce baking time to about 15 minutes- but check on rolls at 12 minutes. Baking temperature remains the same.
There is something about the smell of baking bread that always makes me remember my childhood and going to the movies. I know that sounds odd, but there is an explanation. When I was a kid there was a neighborhood movie theater. It was close by, and we would walk there to see movies. On the walk home we walked past a local bakery. Late at night they would be baking bread and other goodies for the next day. The air would be filled with the aroma of baking bread.
Oatmeal Bread
5-5 ½ c. flour
1 package active dry yeast – or 2 1/2 teaspoons yeast
1 ½ t. salt
1 1/3 c. water
¼ c. milk
¼ c. molasses
¼ c. butter
1 egg
1 c. old fashioned oatmeal
In large bowl mix 1 cup of the flour with yeast and salt. In small pan heat together next 4 ingredients until warm. Pour into bowl with flour mixture and beat 2 minutes. Stir in 1 cup additional flour and egg and beat 2 minutes longer. Stir in oatmeal and 1 cup more flour and stir, adding enough flour to form soft dough. Turn onto lightly floured surface and knead, adding flour as needed until dough is smooth and elastic. Place dough on a greased bowl, turning to grease top and cover, allowing to rise in warm place until doubled in bulk, about 1 hour.
Grease a large baking sheet and set aside. Punch dough down and divide in half. Shape each half into a ball and place on prepared sheet. Cover with towel and allow to rise until doubled, about 1 hour. Bake in a preheated 375 degree oven for 30 minutes or until done. Loaves are done when they sound hollow when tapped lightly. Makes 2 loaves.
This versatile dough can also be shaped into loaves and places in 8×4-inch greased loaf pans. Baking time will remain the same. Dough can also be divided into 24 equal pieces and shaped into dinner rolls. Bake rolls at 375 for 15 minutes.

Reuben Bread


If you are looking for a twist on a Reuben sandwich try baking all the traditional ingredients into a loaf of bread. By using quick rising yeast, this bread can be ready to eat in right around an hour. It tastes amazing, and looks pretty impressive, too. Easier than you think, it will look like you spent all day making it. Plus, you can switch out the ingredients in all sorts of fun combinations. In class last night we used smoked turkey instead of the corned beef for a Rachel sandwich bread.
This would make a great bread to serve for your Super Bowl party. Fun for anytime. really.
Reuben Bread
3 ¼ c. all purpose or bread flour, you can add a little rye flour, too
1 T. sugar
1 t. salt
1 package quick-rising yeast, or a scant tablespoon of yeast in bulk
1 c. hot water
1 T. oil
¼ c. thousand island dressing*
6-8 oz. thin sliced corned beef – or thin sliced smoked turkey for a Rachel
4 oz. sliced Swiss cheese
1 c. sauerkraut, rinsed and squeezed dry
1 egg white, beaten
Caraway seeds
Set aside 1 cup of the flour. Combine remaining flour with the other dry ingredients in a medium bowl. Stir in water and oil and gradually stir in enough flour to make a soft dough. Turn onto lightly floured surface and knead until dough is smooth and elastic, about 5 minutes. Roll dough into a rectangle about 16 x 8. Spread dressing down center middle of dough. Top with meat slices, cheese and sauerkraut. Cut one-inch wide strips of dough from filling to edge on both sides. It will sort of look like fringe. Alternating sides, fold strips up and over the filling at an angle. Carefully lift loaf onto greased baking sheet and place at an angle. Cover with a towel and place sheet on top of a roasting pan half-filled with simmering water for 15 minutes. Brush with egg white and top with seeds. Bake in a preheated 400-degree for 20-25 minutes or until golden brown. Cool slightly before slicing. Serve warm and refrigerate leftovers.
* You can make your own Thousand Island Dressing by combining equal parts of ketchup, mayo and sweet pickle relish.
Note: The variations for this bread are almost endless. Some favorite combinations are ham and Swiss with mustard, roast beef and cheddar, chicken, broccoli and cheese, Spinach with ricotta or feta and onions, pizza, assorted fillings. You get the idea. Use your imagination and have fun. Just be careful not to overfill, or the bread will be hard to move, use fillings that aren’t too runny and always use cold fillings.
If you want to use regular yeast use warm, rather than hot water. Also, don’t let dough rise over boiling water. After kneading cover dough and let rise 45 minutes. Punch down and assemble as in original recipe. Cover with a towel and let rise until dough looks puffy, about 40 minutes. Bake as directed above. These breads can also be frozen.
Extra Crispy Chicken Wings


I like a wing with very crispy skin. These wings are super crispy, even though they are baked in the oven, not fried. It may have to do with a rather unusual ingredient.
I got this recipe from a local television show and have made it a couple of times now. Thanks, David Moss, for this one. The wings are coated with a little salt and baking powder.
Yes, baking powder. I am not sure how it works, but the combination leaves you with wings that are super crisp on the outside and juicy inside. The only thing I changed from the original recipe, is that I use a little less salt.
These would be great served at a Super Bowl party.
Once the wings are done cooking, you can toss them in whatever sauce you like.
Extra Crispy Chicken Wings
3-4 lbs. chicken wings
2 T. baking powder
1 t. salt
Hot sauce and butter- or assorted dipping sauces
Cut wings into three pieces- discard tips, or use to make stock. Pat the wings dry. This step is important. The dry skin helps them to get crisp. Place baking powder and salt in a plastic bag and add the wing pieces, a few at a time, shaking to coat evenly. Continue until all the wings are coated. Place wings on a rack that is placed on a baking sheet. Bake wings in a preheated 250 degree oven for 30 minutes. Turn the heat up to 425 and continue cooking 45 minutes more. Remove wings from oven. You can melt butter, mix with some hot sauce and toss the wings in that mixture, or just serve the wings with your favorite sauce.
Naan Bread


If you have ever eaten at an Indian restaurant, you probably had naan bread. The bread has a soft, yet chewy texture, and is often topped with seeds. I still remember the first time I made naan. I bake bread all the time, but somehow I had never made naan. I was excited to give it a try. I figured there would be some challenges.
The thin rounds of dough are traditionally baked against the wall of a tandoori oven. The clay of the oven walls gets really hot, and cooks the bread quickly. Since I don’t have a tandoori oven, I baked my naan bread under the broiler. I was nervous that it would get burnt before it finished baking, but they turned out great. Soft, puffy bread pillows that I brushed with ghee right after baking. They came out even better than I had hoped.
If you never made naan bread before, I suggest you try it. It is so much fun, and not that difficult. Just keep an eye on it when baking.
Naan Bread
1 t. sugar
1 pkt. Yeast
2/3 c. warm water
1½ c. flour
1 T. ghee*
1 t. salt
Oil for baking pans
Extra ghee for brushing breads
Sesame, fennel or poppy seeds, if you like
In medium bowl, combine sugar with yeast and warm water. Stir and allow to sit until mixture gets bubbly, about 10 minutes. In mixing bowl place the flour, ghee and salt and mix to combine. Add the yeast mixture and stir until a soft dough forms. You might have to add a little more water. Knead dough on a floured surface until smooth and elastic, about 5 minutes. Return dough to mixing bowl, cover and allow to rise in a warm place until doubled in size, about 1½ hours. Turn dough onto floured surface and knead a couple more minutes. Unless you have a tandoori oven, you will need to cook the naan under a very hot broiler. Turn the broiler on. Line a baking sheet with foil and coat with some oil. Set aside while you prepare the dough for baking. Cut dough into 6-8 pieces. Roll each piece into a circle about 5 inches across and ½ inch thick. Place dough on the prepared baking sheet and place under the broiler. I set mine about 4 inches from the heat. Turn breads a couple of times. They will take about 7 minutes to bake. Remove from broiler, brush with extra ghee or melted butter and sprinkle with seeds, if you like. Makes 6-8. Best served soon after baking.
*Ghee is essentially clarified butter, or butter where all the solids have been removed. To make ghee, gently melt butter in a saucepan over medium-low heat. After melting, the butter will separate into three layers. This should only take a few minutes. Foam will appear on the top layer, the milk solids will migrate to the bottom of the pan, and clarified butter will float between the two. Let the butter come to a simmer and hold it here until the middle layer becomes fragrant, more golden than when you started, and clear – push the solids on top out of the way to have a peek. The milk solids at the bottom will begin to brown. At this point it is a matter of preference, you can let the solids lightly brown, or let things progress a bit further. When the ghee is finished, skim absolutely all of the top layer of foam into a bowl with a spoon or strainer, turn off the heat, and allow things to settle for a minute or so. Next, carefully pour the golden central layer through a strainer, into a clean glass jar, leaving the milk solids at the bottom of the pan. It can be used as a cooking oil, for flavoring all sorts of foods, and is amazing on popcorn.
I posted the complete directions yesterday.
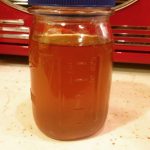
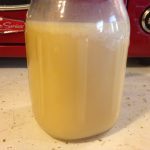
How to Make Ghee


Ghee, if you haven’t had it before, is a kind of clarified butter, often used in Indian cooking. You can buy it at stores that carry international foods, but it is easy to make. I had a lot of butter left over from holiday baking, so I used some to make ghee.
Ghee has a wonderful, toasted, nutty flavor and it can be used in all sorts of dishes. You can add it to veggies or spread it on toast. I love to add ghee to rice or pasta.
A wonderful bonus when using ghee, because the milk solids have been removed, you can fry foods in it. It doesn’t burn quickly, like regular butter.
Because the solids have been removed, you can store ghee at room temperature. Although, it is recommended to use up home made ghee in a month or so. For longer storage, you can pop it in the fridge, but you don’t have to.
The difference between ghee and clarified butter is that ghee is cooked longer, to develop a darker color and wonderful toasted flavor. The longer cooking also removes any water in the butter, leaving just the fat behind.
There are several methods for making ghee. Some suggest long, slow cooking. Others a little more heat and less cooking time. I prefer the latter. I am not the most patient person.
Here is how I made my ghee.
Start with a pound of unsalted butter. Place the butter in a heavy bottomed, medium sized saucepan. Melt the butter over low heat. As soon as the butter is melted, turn the heat up a bit- to medium. It will start to form foam on the top at this point. After a few minutes, the foaming will stop. Turn up the heat a little more- not high heat, but a little higher medium, if that makes sense. Watch for the second foam to form on the top. This takes about 7-8 minutes. It will have turned a pretty, golden color. At this point, your ghee is done. You’ll have to strain it, to keep out the solids, which will have settled to the bottom of the pan. I strained my ghee twice, through several layers of cheesecloth. Be sure the container you are straining the ghee into is heat proof- it is pretty hot at this point. I used a stainless steel bowl, then transferred the ghee to a canning jar. You could also use a fine mesh strainer, if you don’t have cheesecloth. Store in a container with a tight fitting lid- you don’t want moisture to get to your ghee. It will get more solid as it cools down.
One last thing. I used a stainless steel pot and the brown bits took a bit of scrubbing to get out of the pot. Small price to pay for your own ghee.
That’s all there is to it. Try to use within a month or store in the fridge. Trust me, it never lasts that long around here!!
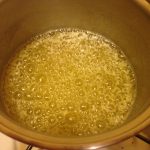
first foam
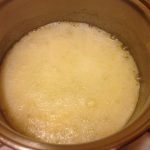
second foam
strained, still warm
All cooled down
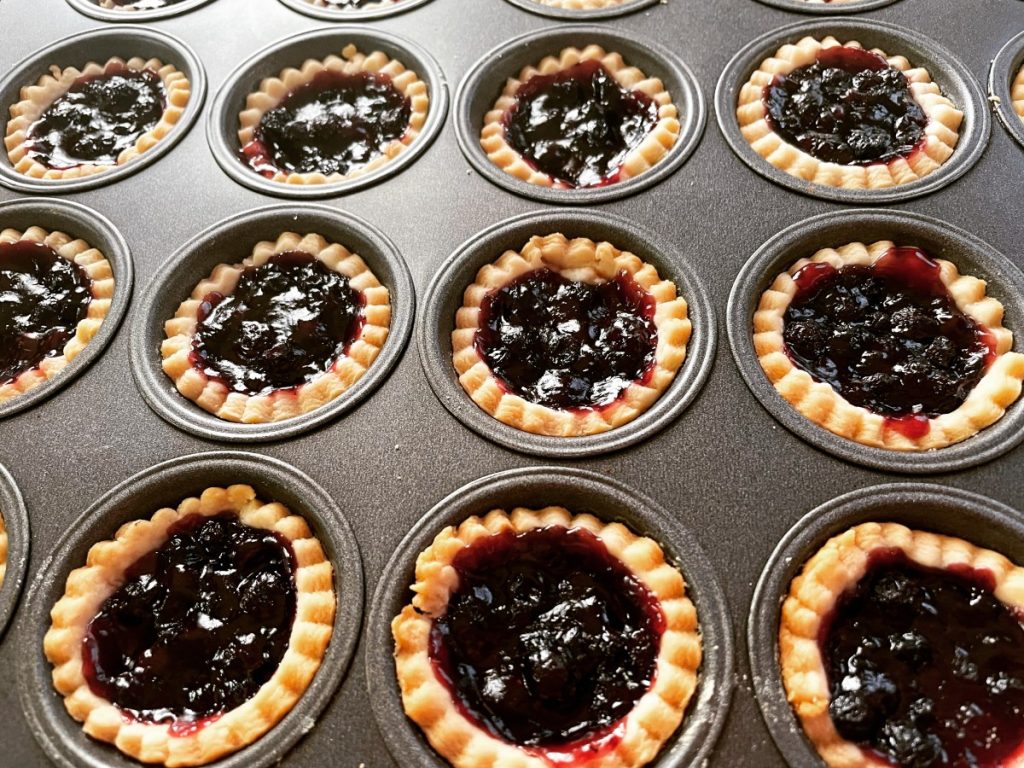
Blueberry Mini Tarts- Vegan

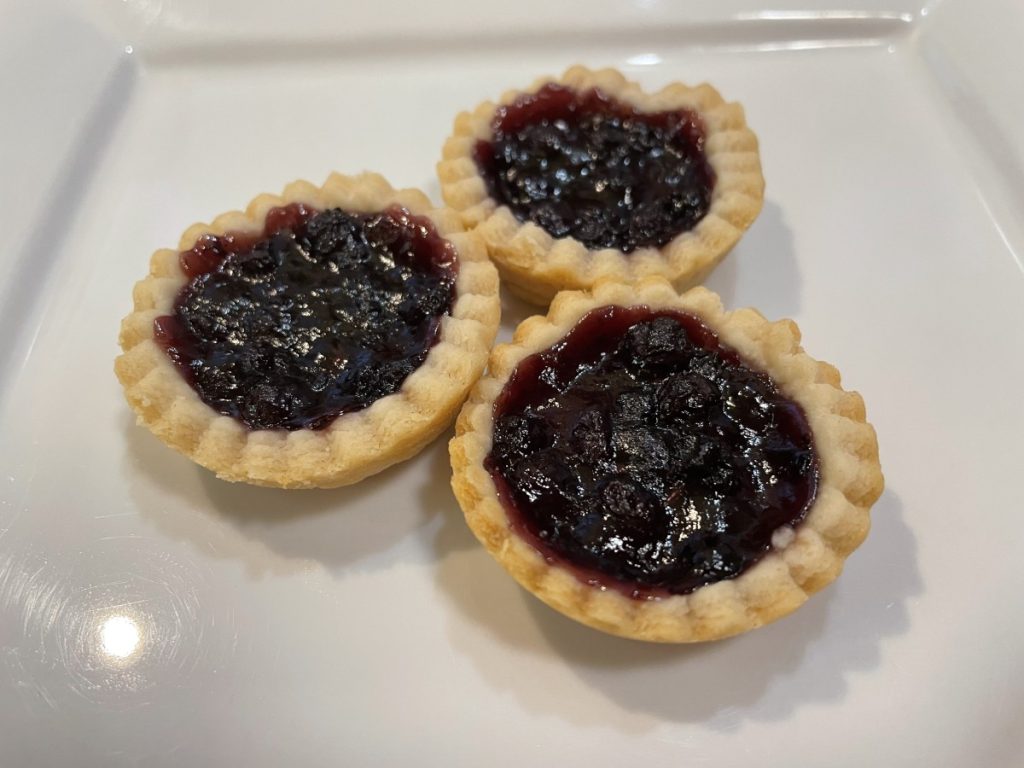
I have guests visiting from out of town and wanted to make them a special dessert. I decided to make these tarts. Making them vegan wasn’t hard at all. I just used coconut oil in the crust recipe instead of butter. The crust worked out fine, although it is very crumbly. The texture after baking is amazingly tender, but I found the dough a little harder to handle than when made with butter. I would make this crust again, even if I didn’t need a vegan version.
I used a jar of homemade blueberry pie filling made with wild Maine blueberries. You can use store bought, but I include the recipe at the bottom of the post. The recipe makes 4 cups of filling- you can use all the dough and all the filling and have 48 tarts. I didn’t need that many.
I made 24 and used a little over half of the dough recipe. Had I rolled them out a little thinner, half a recipe would be enough. I had a little blueberry filling left over, too.
Blueberry Mini Tarts
dough for 1 pie crust
About 2 cups blueberry pie filling, room temp or chilled
Flaky Pie Crust
2 c. flour
1 t. salt
3/4 c. coconut oil, chilled – you could use butter, lard or shortening
1 T. cider vinegar
4-5 T. cold water
Combine flour and salt in food processor and add coconut oil. Pulse until mixture resembles coarse crumbs. Toss in vinegar and water, 1 tablespoon at a time, pulsing as you add, until dough just holds together. Remove from processor and press dough together to form a ball. Chill at least 30 minutes before using. Makes enough for 2 pie crusts or up to 48 tarts.
Blueberry Pie Filling
3 1/2 c. blueberries, fresh or frozen
3/4 c. sugar, or to taste
1/4 c. cornstarch
1 c. water
1 T. lemon juice
In saucepan, bring blueberries and sugar to a boil, stirring often. Combine cornstarch with water and lemon juice and add to the blueberry mixture. Return to the boil and cook until thickened and bubbly. Makes 4 cups. You will not need the whole batch for the tarts.
To make the tarts:Preheat oven to 400 degrees. Roll out the dough to 1/8 inch thickness on lightly floured board. Cut out with 2-inch round cutter and place dough circles in mini muffin tins or mini tart pans. Re-roll scraps and keep cutting out until you have 24 circles. Save the rest of the dough for another use. It can be frozen. Place a rounded teaspoon of filling in each tart. I used fairly shallow pans, you can add more filling if your pans are deeper. Bake for 10 minutes, then turn down the oven to 350 and bake about 15 minutes longer, or until edges of the tarts are golden brown. Cool a little before you remove from the pans. Makes 24.
Baked Potato Soup


When I was a kid, I loved getting a baked potato, when we went out for dinner. I loved my Mom’s home cooking, including her baked potatoes, but it was different at a restaurant. It would come to the table wrapped in foil and all puffed up in the middle. As a kid it looked very special to me. They also had so many toppings you could get. Choices included sour cream, butter, chives, bacon and cheese. This soup starts off as a cream of potato soup, and then combines many of the toppings you might have on a baked potato. It feels just like those baked potatoes at the steakhouse. Comfort food on a couple of levels.
Baked Potato Soup
4 slices bacon, chopped
1 large onion, chopped
4- 5 medium potatoes, peeled and cubed
4-5 cups chicken stock
1/2 c. chopped fresh parsley
2 c. half and half
3 T. flour
salt and pepper to taste
Toppings:
Sour cream
chopped green onions or chives
shredded cheese
extra bacon, cooked crisp and crumbled
In soup pot combine bacon and onion and cook over medium heat until bacon is cooked and onion is tender. Add potatoes and stock and simmer, covered , until potatoes are tender, about 20 minutes. Add parsley and most of the half and half. Reserve a couple of tablespoons of the half and half and combine with the flour and stir until smooth. Ladle a little of the warm soup into the flour mixture and whisk until smooth. Add the flour mixture to the rest of the soup and stir until smooth. Cook until soup is thickened and bubbly. Adjust seasonings and serve. Add toppings of your choice at the table. Makes 4 servings.
Ethiopian Vegetable Soup

In soup class the other night we made this tasty and satisfying soup. A combination of veggies and lentils, along with the warm spices make it a favorite recipe of mine. Like most vegetable soups, you can add whatever veggies you have around. I veered off the original recipe by adding some zucchini, because I had some zucchini.
I used a chicken stock and added cooked chicken to the soup, but this one is easily turned into a vegetarian soup by just using vegetable stock and leaving out the meat. It is tasty either way.
Ethiopian Vegetable Soup
2 T. oil
1 large onion, chopped
3 carrots, peeled and sliced
1 c. uncooked lentils, rinsed
6-8 c. chicken or vegetable stock
1/2 lb. fresh or frozen green beans, sliced
1 can garbanzo beans, drained
1 T. paprika
1 t. each cumin, garlic powder and ginger
1/2 t. each allspice, cinnamon and cayenne pepper
2 c. diced cooked chicken, optional
Sauté onion in oil until lightly browned. Add carrots and sauté 5 minutes more. Add lentils and toss with vegetables then add stock and simmer, covered, until lentils are tender, about 1 hour. Add green beans, garbanzos and seasonings and cook 15 minutes more. Adjust seasonings and stir in chicken before serving, if desired. Good as is, or served over cooked rice for a richer dish. Serves 6-8.
Note: You can also use 2 T. Ethiopian seasoning in place of all the spices.
Italian Wedding Soup

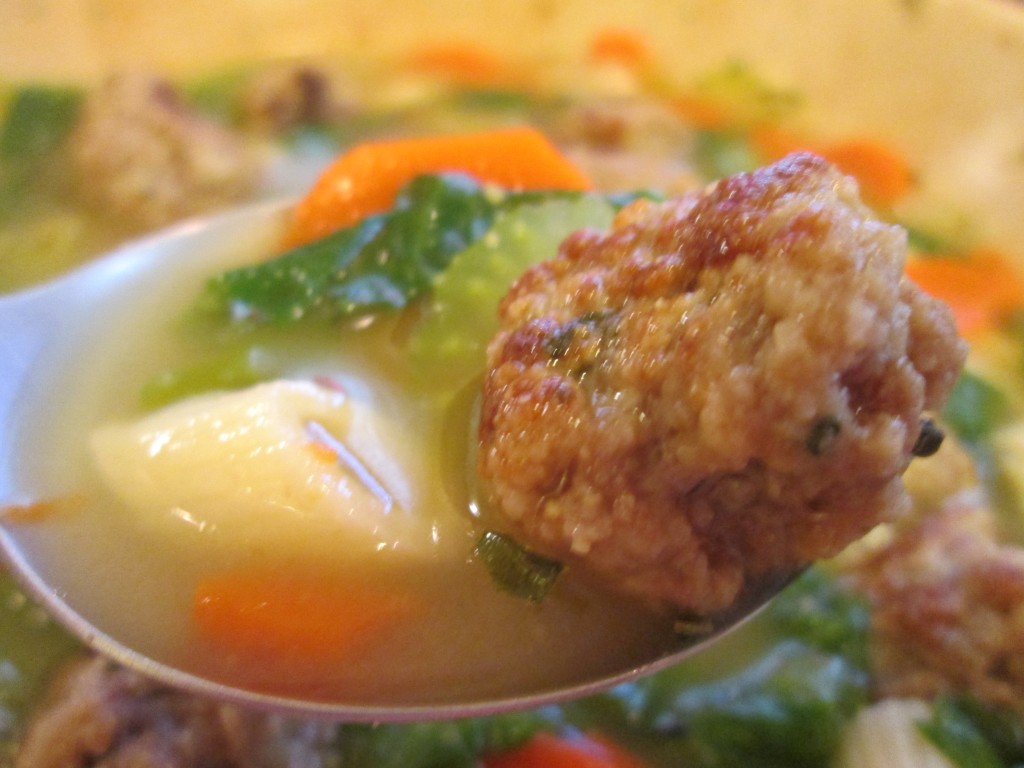
I love this soup. I’ve had different versions over the years, but they all have those wonderful little meatballs in common. This recipe came from the mother of a dear friend. I still have her handwritten copy in a file. Every time I make this soup I think of her.
In class last night, we used collard greens in the soup. Cut into thin strips, they were tender in no time. Everyone seemed to like it.
Italian Wedding Soup
Meatballs:
3/4 lb. ground beef or a mixture of beef, pork and veal or turkey
1 egg, beaten
1/4 c. dry bread crumbs
2 T. grated Parmesan cheese
1 T. dried parsley or 3 Tablespoons fresh chopped parsley
1/4 t. salt
1/4 t. garlic powder or 2 cloves of minced garlic
1/4 t. each pepper and dried oregano
1 T. oil
Soup:
8 c. chicken stock, not too salty
1 c. thin sliced carrots
1 c. thin sliced celery
1/2 c. thin sliced green onions, optional
1/2 t. dried basil or 1 1/2 t. fresh chopped
1/2 c. uncooked small pasta, I like orzo
1/2 lb. escarole or kale, cut in thin strips
To make meatballs combine all ingredients except the oil and form into 50 tiny balls. Sauté in oil until browned on all sides. Drain. In large saucepan combine broth with vegetables. Bring to a boil and simmer, covered 10 minutes. Add basil, pasta, meatballs and escarole or kale and simmer 10 minutes longer. Serves 6-8.
Note: you can use spinach instead, but add for last 5 minutes of cooking.


