Homemade Ghee
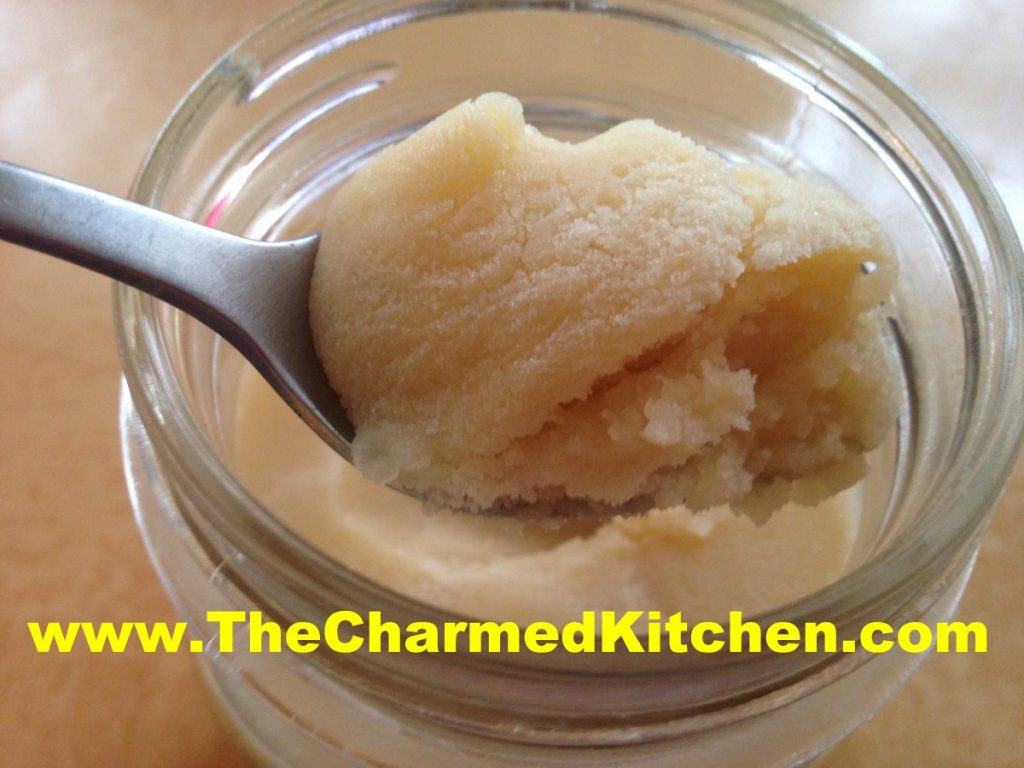
Ghee, if you haven’t had it before, is a kind of clarified butter, often used in Indian cooking. You can buy it at stores that carry international foods, but it is easy to make. I had some butter left over from holiday baking, so I used some to make ghee.
Ghee has a wonderful, toasted, nutty flavor and it can be used in all sorts of dishes. You can add it to veggies or spread it on toast. I love to add ghee to rice or pasta.
A wonderful bonus when using ghee, because the milk solids have been removed, you can fry foods in it. It doesn’t burn quickly, like regular butter.
Because the solids have been removed, you can store ghee at room temperature. Although, it is recommended to use up home made ghee in a month or so. For longer storage, you can pop it in the fridge, but you don’t have to.
The difference between ghee and clarified butter is that ghee is cooked longer, to develop a darker color and wonderful toasted flavor. The longer cooking also removes any water in the butter, leaving just the fat behind.
There are several methods for making ghee. Some suggest long, slow cooking. Others a little more heat and less cooking time. I prefer the latter. I am not the most patient person.
Here is how I made my ghee.
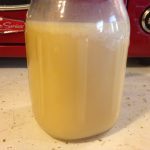
Start with a pound of unsalted butter. Place the butter in a heavy bottomed, medium sized saucepan. Melt the butter over low heat. As soon as the butter is melted, turn the heat up a bit- to medium. It will start to form foam on the top at this point. After a few minutes, the foaming will stop. Turn up the heat a little more- not high heat, but a little higher medium, if that makes sense. Watch for the second foam to form on the top. This takes about 7-8 minutes. It will have turned a pretty, golden color. At this point, your ghee is done. You’ll have to strain it, to keep out the solids, which will have settled to the bottom of the pan. I strained my ghee twice, through several layers of cheesecloth. Be sure the container you are straining the ghee into is heat proof- it is pretty hot at this point. I used a stainless steel bowl, then transferred the ghee to a canning jar. You could also use a fine mesh strainer, if you don’t have cheesecloth. Store in a container with a tight fitting lid- you don’t want moisture to get to your ghee. It will get more solid as it cools down.
One last thing. I used a stainless steel pot and the brown bits took a bit of scrubbing to get out of the pot. Small price to pay for your own ghee.
That’s all there is to it. Try to use within a month or store in the fridge. Trust me, it never lasts that long around here!!
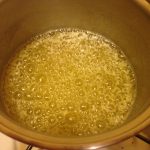
first foam
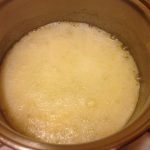
second foam

strained, still warm
All cooled down
How to Make Ghee
Ghee, if you haven’t had it before, is a kind of clarified butter, often used in Indian cooking. You can buy it at stores that carry international foods, but it is easy to make. I had a lot of butter left over from holiday baking, so I used some to make ghee.
Ghee has a wonderful, toasted, nutty flavor and it can be used in all sorts of dishes. You can add it to veggies or spread it on toast. I love to add ghee to rice or pasta.
A wonderful bonus when using ghee, because the milk solids have been removed, you can fry foods in it. It doesn’t burn quickly, like regular butter.
Because the solids have been removed, you can store ghee at room temperature. Although, it is recommended to use up home made ghee in a month or so. For longer storage, you can pop it in the fridge, but you don’t have to.
The difference between ghee and clarified butter is that ghee is cooked longer, to develop a darker color and wonderful toasted flavor. The longer cooking also removes any water in the butter, leaving just the fat behind.
There are several methods for making ghee. Some suggest long, slow cooking. Others a little more heat and less cooking time. I prefer the latter. I am not the most patient person.
Here is how I made my ghee.
Start with a pound of unsalted butter. Place the butter in a heavy bottomed, medium sized saucepan. Melt the butter over low heat. As soon as the butter is melted, turn the heat up a bit- to medium. It will start to form foam on the top at this point. After a few minutes, the foaming will stop. Turn up the heat a little more- not high heat, but a little higher medium, if that makes sense. Watch for the second foam to form on the top. This takes about 7-8 minutes. It will have turned a pretty, golden color. At this point, your ghee is done. You’ll have to strain it, to keep out the solids, which will have settled to the bottom of the pan. I strained my ghee twice, through several layers of cheesecloth. Be sure the container you are straining the ghee into is heat proof- it is pretty hot at this point. I used a stainless steel bowl, then transferred the ghee to a canning jar. You could also use a fine mesh strainer, if you don’t have cheesecloth. Store in a container with a tight fitting lid- you don’t want moisture to get to your ghee. It will get more solid as it cools down.
One last thing. I used a stainless steel pot and the brown bits took a bit of scrubbing to get out of the pot. Small price to pay for your own ghee.
That’s all there is to it. Try to use within a month or store in the fridge. Trust me, it never lasts that long around here!!
first foam
second foam
strained, still warm
All cooled down
Making Ghee
Ghee, if you haven’t had it before, is a kind of clarified butter, often used in Indian cooking. You can buy it at stores that carry international foods, but it is easy to make. I had a lot of butter left over from holiday baking, so I used some to make ghee.
Ghee has a wonderful, toasted, nutty flavor and it can be used in all sorts of dishes. You can add it to veggies or spread it on toast. I love to add ghee to rice or pasta.
A wonderful bonus when using ghee, because the milk solids have been removed, you can fry foods in it. It doesn’t burn quickly, like regular butter.
Because the solids have been removed, you can store ghee at room temperature. Although, it is recommended to use up home made ghee in a month or so. For longer storage, you can pop it in the fridge, but you don’t have to.
The difference between ghee and clarified butter is that ghee is cooked longer, to develop a darker color and wonderful toasted flavor. The longer cooking also removes any water in the butter, leaving just the fat behind.
There are several methods for making ghee. Some suggest long, slow cooking. Others a little more heat and less cooking time. I prefer the latter. I am not the most patient person.
Here is how I made my ghee.
Start with a pound of unsalted butter. Place the butter in a heavy bottomed, medium sized saucepan. Melt the butter over low heat. As soon as the butter is melted, turn the heat up a bit- to medium. It will start to form foam on the top at this point. After a few minutes, the foaming will stop. Turn up the heat a little more- not high heat, but a little higher medium, if that makes sense. Watch for the second foam to form on the top. This takes about 7-8 minutes. It will have turned a pretty, golden color. At this point, your ghee is done. You’ll have to strain it, to keep out the solids, which will have settled to the bottom of the pan. I strained my ghee twice, through several layers of cheesecloth. Be sure the container you are straining the ghee into is heat proof- it is pretty hot at this point. I used a stainless steel bowl, then transferred the ghee to a canning jar. You could also use a fine mesh strainer, if you don’t have cheesecloth. Store in a container with a tight fitting lid- you don’t want moisture to get to your ghee. It will get more solid as it cools down.
One last thing. I used a stainless steel pot and the brown bits took a bit of scrubbing to get out of the pot. Small price to pay for your own ghee.
That’s all there is to it. Try to use within a month or store in the fridge. Trust me, it never lasts that long around here!!
first foam
second foam
strained, still warm
All cooled down
How to Make Ghee
Ghee, if you haven’t had it before, is a kind of clarified butter, often used in Indian cooking. You can buy it at stores that carry international foods, but it is easy to make. I had a lot of butter left over from holiday baking, so I used some to make ghee.
Ghee has a wonderful, toasted, nutty flavor and it can be used in all sorts of dishes. You can add it to veggies or spread it on toast. I love to add ghee to rice or pasta.
A wonderful bonus when using ghee, because the milk solids have been removed, you can fry foods in it. It doesn’t burn quickly, like regular butter.
Because the solids have been removed, you can store ghee at room temperature. Although, it is recommended to use up home made ghee in a month or so. For longer storage, you can pop it in the fridge, but you don’t have to.
The difference between ghee and clarified butter is that ghee is cooked longer, to develop a darker color and wonderful toasted flavor. The longer cooking also removes any water in the butter, leaving just the fat behind.
There are several methods for making ghee. Some suggest long, slow cooking. Others a little more heat and less cooking time. I prefer the latter. I am not the most patient person.
Here is how I made my ghee.
Start with a pound of unsalted butter. Place the butter in a heavy bottomed, medium sized saucepan. Melt the butter over low heat. As soon as the butter is melted, turn the heat up a bit- to medium. It will start to form foam on the top at this point. After a few minutes, the foaming will stop. Turn up the heat a little more- not high heat, but a little higher medium, if that makes sense. Watch for the second foam to form on the top. This takes about 7-8 minutes. It will have turned a pretty, golden color. At this point, your ghee is done. You’ll have to strain it, to keep out the solids, which will have settled to the bottom of the pan. I strained my ghee twice, through several layers of cheesecloth. Be sure the container you are straining the ghee into is heat proof- it is pretty hot at this point. I used a stainless steel bowl, then transferred the ghee to a canning jar. You could also use a fine mesh strainer, if you don’t have cheesecloth. Store in a container with a tight fitting lid- you don’t want moisture to get to your ghee. It will get more solid as it cools down.
One last thing. I used a stainless steel pot and the brown bits took a bit of scrubbing to get out of the pot. Small price to pay for your own ghee.
That’s all there is to it. Use within a month. Trust me, it never lasts that long around here!!
first foam
second foam
strained, still warm
All cooled down


