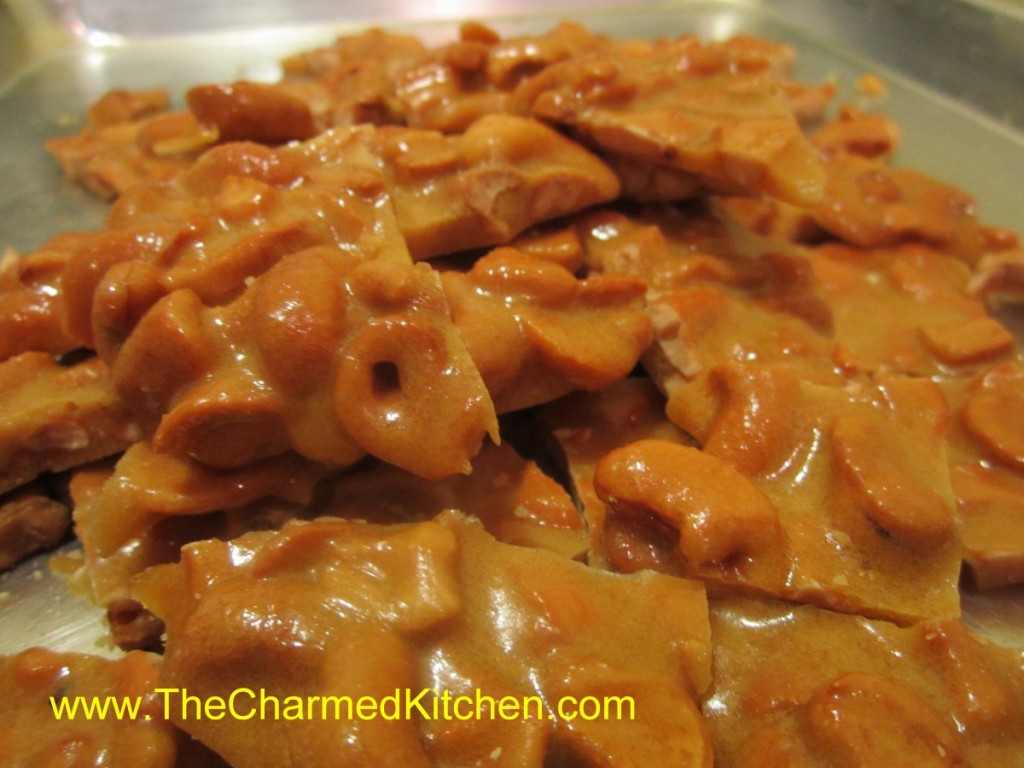
Homemade Cashew Brittle

If you need a great food gift, this brittle might just be the answer. It is fast and easy to make.
I was given this recipe at a craft show a few years ago. The brittle is cooked in the microwave. No special thermometers or equipment required. Just a glass bowl and a few minutes of your time. It could not be simpler. It is really good, too.
You can use other nuts, if you prefer, or peanuts. You can add a little cayenne pepper, if you want a spicy version. You can also dress it up with a drizzle of chocolate, once cooled. So many ways to enjoy it.
Stored in a covered container, in a cool, dry place, the brittle will stay crunchy for weeks.
Homemade Cashew Brittle
2 c. cashews*
1 c. sugar
1/2 c. corn syrup
1/8 t. salt
1 t. butter
1 t. vanilla
1 t. baking soda
Butter or oil a large baking sheet and set aside. In a 3-4 quart glass bowl combine the nuts, sugar, corn syrup and salt. Microwave on high for 3 minutes. Remove from microwave, stir well and return to microwave. Cook 3 more minutes in microwave. Remove and stir in butter and vanilla, stirring until butter has melted. Return to microwave and cook for 2 more minutes. Remove from microwave and stir in baking soda. Stir until well blended and pour mixture onto prepared baking sheet. Spread out quickly, then allow to cool. Once cool, break into pieces. Store in a cool, dry place. I normally store it in a tin or plastic container with a tight-fitting lid.
* I used salted cashews but feel free to experiment with other nuts
Note: Use high power setting on microwave.
Christmas Tree Coffeecake


This Christmas “tree” has become a tradition around here. I make one as a gift for a dear friend every year. If you are looking for something to serve for Christmas morning, or even as a dessert option, I suggest you make this coffee cake.
The recipe actually makes 2 “trees,” so you can have one to give- and one to keep. Or perhaps, one for Christmas Eve and one for Christmas Day.
The yeast dough is prepared, then chilled before rolling. You can do that a day, or up to 3 days, ahead of time. The rolls are filled with a pineapple and cream cheese mixture and are very tasty.
The rolls are arranged in a tree pattern before baking. Then, after baking, the “tree” is topped with a light glaze and gently sprinkled with red and green sugars. The original recipe called for candied cherries. You can use them, or Maraschino cherries or even dried cherries or cranberries. I can my own spiced cherries and sometimes use them. So pretty, and not that hard to make.
Here is the recipe.
Christmas Tree Coffee Cake
Dough:
4-4 1/2 c. bread flour
1/2 c. sugar
1 1/2 t. salt
2 packages active dry yeast
3/4 c. milk
1/2 c. water
1/2 c. butter
1 egg
Filling:
1 lb. Cream cheese, softened
1/2 c. sugar
1/4 t. nutmeg
dash salt
1/4 t. vanilla
1 (20 oz.) can pineapple in its own juice drained and squeezed dry
Topping:
11 Maraschino cherries, halved
2 c. powdered sugar
3 T. milk
red and green sugars
For dough in large mixing bowl combine 2 cups of the flour with the sugar, salt and yeast. Heat together the milk, water and butter until very warm. Add to flour mixture and beat 2 minutes. Add egg and 1 more cup of flour and beat 2 more minutes. Stir in enough of the remaining dough to make a stiff batter, about 1 cup. Cover bowl tightly with foil or plastic wrap and refrigerate for at least 2 hours or up to 3 days before using. For filling combine all ingredients for the filling except the pineapple and beat until smooth. Stir in pineapple and set aside until ready to use. Remove dough from fridge cut in half. Roll out one piece on lightly floured surface into a 10×11- inch rectangle. Spread with half the filling, leaving an inch at the end of 11-inch side. Roll up from eleven- inch side. Use thread or dental floss to cut through dough in 1-inch pieces by placing thread under roll and crossing ends. Pull outward and thread should cut through dough. If you aren’t having any luck you can always use a knife, but they tend to flatten the rolls. On a greased baking sheet arrange the slices (you should have 11) into a tree shape. Start with one on the top and then a row of 2 below then 3 and then 4. The last roll will serve as the trunk. Cover dough with plastic wrap and set in a warm place to rise. Repeat with the remaining dough and filling. When dough is risen, about 1-2 hours bake in a 375- degree oven for 15 minutes then cover edges with foil to prevent over browning and return to oven for 10 minutes more. Cool on wire rack. Place half a cherry in the middle of each roll. Make a glaze with powdered sugar and milk and drizzle over. Sprinkle with the sugars. Makes 2 trees, 11 rolls each. Can be frozen up to a month ahead . Defrost in a 350 -degree oven for 10 minutes and apply toppings.
Sweet Potato and Herb Biscuits


These biscuits are a favorite of mine. They go great with a bowl of chili.
I like sweet potatoes cooked any number of ways. Steamed, roasted, mashed. In this biscuit recipe, raw sweet potatoes are grated and added to the dough, along with some herbs. The biscuits come out tender, with great flavor and texture. We made them in class last night.
I enjoy them with a bit of butter, warm from the oven.
When you mix the dough, don’t be worried if it seems too dry. It takes a little bit of kneading to get the moisture out of the potatoes. The extra effort is worth it.
I cut them into triangles, but you can also just form the dough into a log shape. Then, slice the dough for round biscuits. They taste wonderful, no matter the shape.
Sweet Potato and Herb Biscuits
2 1/4 c. flour
1 T. baking powder
1/2 t. grated lemon peel
1/4 t. each baking soda, dried basil and dried thyme
1 egg, beaten
1 1/2 c. shredded sweet potato, about 1 large
1/2 c. fine chopped green onions
1/2 c. sour cream
2T. butter, melted or olive oil
Stir together dry ingredients in large bowl and set aside. Combine remaining ingredients and add to flour mixture mixing until just blended. Turn onto lightly floured surface and knead a few times until dough just stays together. Dough will look too dry- but it will come together after you knead it. Press into an 8-inch square and cut into four squares.* Cross cut each square into four triangles. Place on greased baking sheet and bake in a preheated 425 degree oven for 20 minutes. Makes 16.
* I press the dough into a lightly floured 8×8-inch baking pan and then flip it out onto the work surface, before cutting. That way you’ll get nice, even edges.
Leftover Turkey Recipes

It is that time of year, when we find ourselves waking up to leftover turkey. Sometimes quite a lot of leftover turkey.
Of course, be sure to make stock from the carcass. Turkey sandwiches are always a favorite in my family.
There is a lot more you can make with the rest of the bird, though. Here are 10 fun and tasty ways to make the most of all that turkey.
I never get tired of turkey, but if your family does not feel the same way, these recipes could come in handy. Enjoy!!
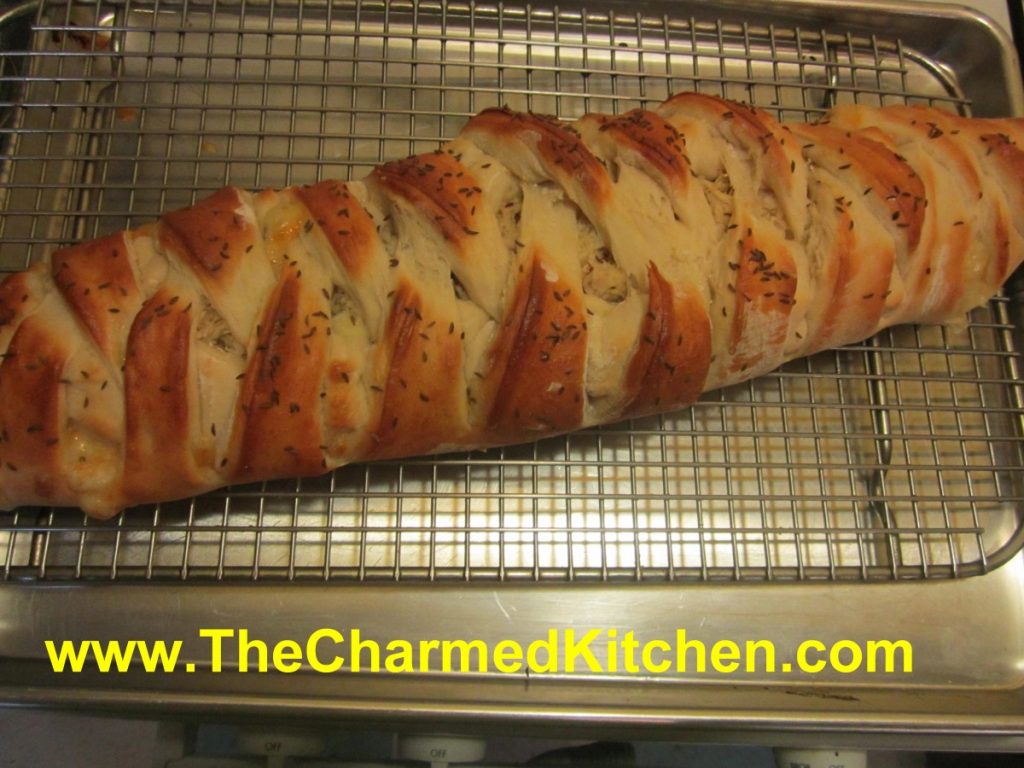
Turkey Reuben Loaf
3 ¼ c. flour
1 T. sugar
1 t. salt
1 package quick-rising yeast
1 c. hot water
1 T. oil
¼ c. thousand island dressing*
8-10 oz. thin sliced turkey
4 oz. sliced Swiss cheese
1 c. sauerkraut, rinsed and squeezed dry
1 egg white, beaten
Caraway seeds
Set aside 1 cup of the flour. Combine remaining flour with the other dry ingredients in a medium bowl. Stir in water and oil and gradually stir in enough flour to make a soft dough. Turn onto lightly floured surface and knead until dough is smooth and elastic, about 5 minutes. Roll dough into a rectangle about 16 x 8. Spread dressing down center middle of dough. Top with meat slices, cheese and sauerkraut. Cut one-inch wide strips of dough from filling to edge on both sides. It will sort of look like fringe. Alternating sides, fold strips up and over the filling at an angle. Carefully lift loaf onto greased baking sheet and place at an angle. Cover with a towel and place sheet on top of a roasting pan half-filled with simmering water for 15 minutes. Brush with egg white and top with seeds. Bake in a preheated 400-degree for 20-25 minutes or until golden brown. Cool slightly before slicing. Serve warm and refrigerate leftovers.
* You can make your own Thousand Island Dressing by combining equal parts of ketchup, mayo and sweet pickle relish.
Note: The variations for this bread are almost endless. Some favorite combinations are ham and Swiss with mustard, roast beef and cheddar, chicken, broccoli and cheese, Spinach with ricotta or feta and onions, pizza, assorted fillings. You get the idea. Use your imagination and have fun. Just be careful not to overfill, or the bread will be hard to move, use fillings that aren’t too runny and always use cold fillings.
If you want to use regular yeast use warm, rather than hot water. Also, don’t let dough rise over boiling water. After kneading cover dough and let rise 45 minutes. Punch down and assemble as in original recipe. Cover with a towel and let rise until dough looks puffy, about 40 minutes. Bake as directed above. These breads can also be frozen.
Turkey Tetrazzini
2 T. butter or oil
1 c. chopped celery
4 oz. sliced mushrooms
4 T. flour
1 1/2 c. chicken or turkey stock
1 c. half and half or milk
1/4 c. sherry
2 c. cooked turkey, cubed
4-6 oz. broken spaghetti, cooked
salt and pepper to taste
bread crumbs
butter
Parmesan cheese- optional
Heat butter or oil in pot and add celery and cook 3 minutes. Add mushrooms and cook 3 minutes more. Stir in flour and mix well. Add stock, half and half and sherry bring to a simmer- stirring often. Stir in turkey and pasta. Adjust seasonings. Place mixture in oiled casserole and sprinkle the top with bread crumbs and drizzle a little melted butter over the top. Add Parmesan cheese, if you like. Place in a 350 degree oven and bake until bubbly- about 25 minutes. Serves 4.
Turkey Noodle Soup
Oil*
2 onions, sliced
4 carrots, peeled and sliced
4 ribs celery, sliced
4 qts. Turkey stock
4-5 c. turkey meat, cubed
1 c. chopped fresh parsley
Salt and pepper to taste
Hot pepper sauce to taste
1 lb. wide egg noodles, cooked
Heat oil in soup pot and cook onions until starting to brown. Add carrots and celery and cook a few minutes more. Add stock and meat and simmer, covered, until veggies are tender. Add parsley and simmer 15 minutes longer. Adjust seasonings. Warm noodles and serve on the side so everyone can add as many noodles to their soup as they like. Serves 8.
* Since I had freshly made stock I used a little fat from the stock to cook the onions.
Turkey Won Ton Soup
1½ lbs. cooked turkey, about
1 head bok choy
3 T. hoisin sauce
1 clove garlic, minced
24 won ton wrappers
2 qts. Turkey stock
1 t. ginger
1 t. hot pepper sauce
Chopped green onions
Sesame oil
I used dark meat from the turkey, mostly. I minced enough to give me a cup of meat. The rest I cut into thin strips. I then took stems from the bok choy and minced enough of them to make 1 cup. Combine the minced turkey with minced bok choy, the hoisin and the garlic. This is the filling for your won tons. Slice more of the bok choy- using mainly the leaves, into thin shreds. This will go into the soup later, along with the strips of turkey. You should have at least a couple of cups of the shredded bok choy, but more is OK, too. To make the won tons place one on your work surface and spoon a rounded teaspoon of the filling into the middle of it. Moisten edge with water, fold in half and press to seal. I used round wrappers, but square wrappers are fine, too. I like the round ones, labelled for dumplings, because they are a little thicker. I get them at a local Asian grocery store. Repeat with remaining won tons and fillings until done. Bring stock to a boil and add the ginger and hot sauce. Add the won tons to the simmering stock. Simmer gently for 3-4 minutes, stirring occasionally, then add the strips of turkey and the shredded bok choy greens. Cook about 5-6 minutes longer. Finish soup with chopped green onions and a drizzle of sesame oil. Serves 6-8.
Turkey Chili
1 large onion, chopped
2 T. oil
2 ribs celery, sliced
1 sweet pepper, seeded and chopped
2 cans cannellini beans, drained and rinsed
2 cans lima beans, drained and rinsed
1 can ( 4 oz.) chopped green chilies
3-4 c. cubed turkey
2-3 c. stock- turkey or chicken
3 T. chili powder, or to taste
1 T. cumin, or to taste
Generous dash of hot sauce
Salt and pepper to taste
Fresh chopped cilantro
Toppings: Pick what you like. Some good toppers are shredded cheese, chopped green onions, salsa, sour cream or tortilla chips
.
In soup pot cook onion in oil until golden brown. Add the celery, peppers and chilies and cook 5 more minutes. Add the rest of the ingredients, except cilantro and bring to a boil. Turn heat down to medium and simmer until flavors blend, about 30 minutes but longer is fine. I usually cook it covered for 15 to 20 minutes and then remove the lid so it can thicken. Add the cilantro right before serving. Ladle into soup bowls add add toppings of your choice. Serves 6.
Turkey Florentine
2 T. oil or butter
1 large leek, cleaned, trimmed and chopped
4 T. flour
1½ c. stock – turkey or chicken
24 oz. fresh spinach, washed
¾ c. half and half- you could use milk instead
3 c. cubed cooked turkey
Salt and pepper to taste
2 t. hot sauce- or to taste
1 c. shredded Pecorino/ Romano cheese, plus extra for sprinkling on top
Hot cooked pasta
In large skillet cook leeks in oil or butter over medium heat until tender. Stir in flour and cook until smooth, but not brown. Add the stock and cook until mixture starts to thicken. Add the spinach and continue cooking, stirring often until the spinach is wilted. The spinach cooks down a lot- you might have to add it a little at a time to have room in the pan for all of it. As soon as the spinach is wilted add the half and half and the turkey and cook until heated through and bubbly. You might need a little more stock or half and half if the sauce is too thick for your taste. Season with the salt and pepper and the hot sauce. Stir in the cheese. Serve over hot pasta. Serves 4-6.
Turkey with Herb Dumplings
1 turkey thigh, cut off the bone and cubed
1 large onion, chopped
2 ribs celery, chopped
4 carrots, peeled and chopped
3 potatoes, peeled and cut into chunks
4 c. turkey stock
4 T. flour
salt and pepper to taste
1 c. baking mix- like Bisquick- I make my own
1/2 c. milk
2 T. chopped green onion
1 T. chopped parsley
1 t. dried basil
In Dutch oven or large pot, brown turkey thigh. Add the vegetables and brown them, too, turning to prevent burning. Add stock, cover pot, and simmer until veggies are tender, about 20 minutes. Season with salt and pepper to taste. Combine flour with some cold water or more stock until smooth. Add to the pot and stir well. Mixture will thicken. Meanwhile combine baking mix with milk and herbs. Drop dumpling batter by tablespoonfuls over the turkey mixture in pot. Reduce heat to low, cover pot and cook until dumplings are cooked, about 20 minutes. To serve place some of the turkey and vegetables with sauce in serving bowls and top with dumplings. Serves 6.
Turkey Vegetable Soup
1 onion, chopped
oil
3 carrots, peeled and sliced
3 small potatoes. peeled and cubed
1 c. corn- cut from 1-2 ears
1 medium tomato, peeled and chopped
2 c. shredded cooked turkey *
3-4 cups turkey stock- or whatever you have and like
Fresh parsley and basil
salt and pepper to taste
dash of hot sauce
Heat oil in pot and cook onion until golden. Add carrots and cook a few more minutes. Add remaining vegetables, turkey and stock and simmer, covered, for 10 minutes- or until veggies are tender. Add herbs and simmer a few more minutes. Adjust seasoning and add hot sauce. Serves 2-3 for dinner.
*If you want to turn this into a vegetarian soup add vegetable stock and add a couple of cups of cooked beans. Kidney beans would work well.
Turkey Lo Mein
1 onion, chopped
2 T. oil
1 can sliced water chestnuts, drained
1/2 c. green peas- you could also use green beans
2 c. diced cooked turkey
8 oz. angel hair pasta -I use a very fine noodle I get at the Asian market
soy sauce to taste
Hoisen sauce or oyster sauce to taste- you could also use stir-fry sauce
sesame oil
chopped green onions
Heat water for pasta. Heat oil in skillet and cook onion until browned. Add water chestnuts and cook 1 minute longer. While onion is cooking cook pasta. Add peas to onion mixture and stir to combine. Add the turkey and heat through. Drain pasta and toss into turkey mixture. Season with soy sauce and what ever Asian sauce you have on hand. Drizzle with sesame oil and top with green onions. Serves 4.
Turkey With Tortellini
1 lb. cheese tortellini, cooked and drained
2-3 c. cubed cooked turkey
2-3 c. cooked broccoli, chopped
2 T. butter or oil
2 T. flour
1 c. half and half or milk, warmed
2 c. stewed tomatoes- I used my canned tomatoes- you could substitute a 14 oz. can of tomatoes
salt and pepper to taste
fresh chopped parsley
In bowl combine tortellini with turkey and broccoli and place and a lightly greased casserole. In saucepan melt butter and add flour whisking until smooth. If using oil just combine oil and flour in pan and whisk until smooth. Add half and half and cook, stirring often until thickened and bubbly. Add tomatoes and heat through. Season to taste. Puree sauce and pour over the turkey mixture. Sprinkle with the parsley. Bake in a 350 degree oven until heated through and lightly browned around the edges- about 40 minutes.
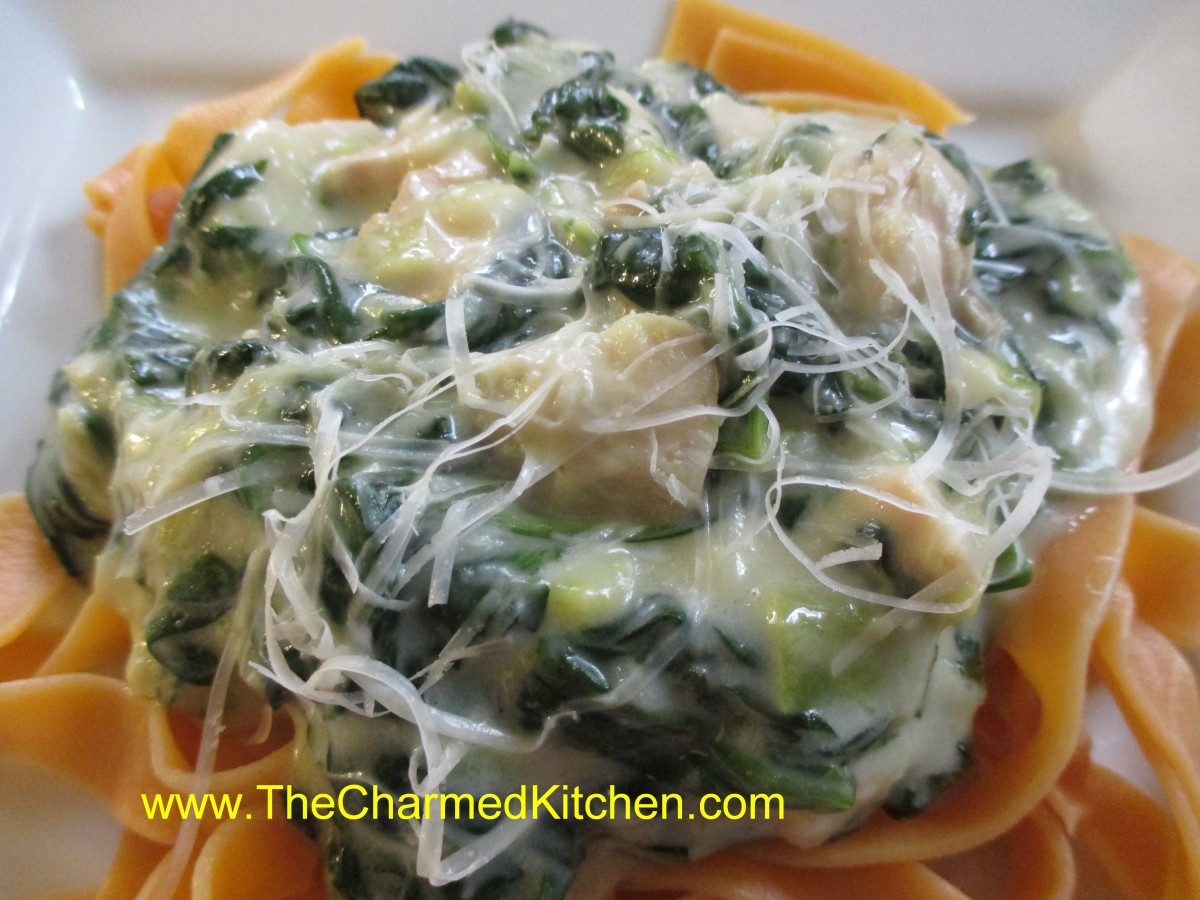
Turkey Florentine

Turkey with Herb Dumplings

Turkey Lo Mein

Turkey with Tortellini
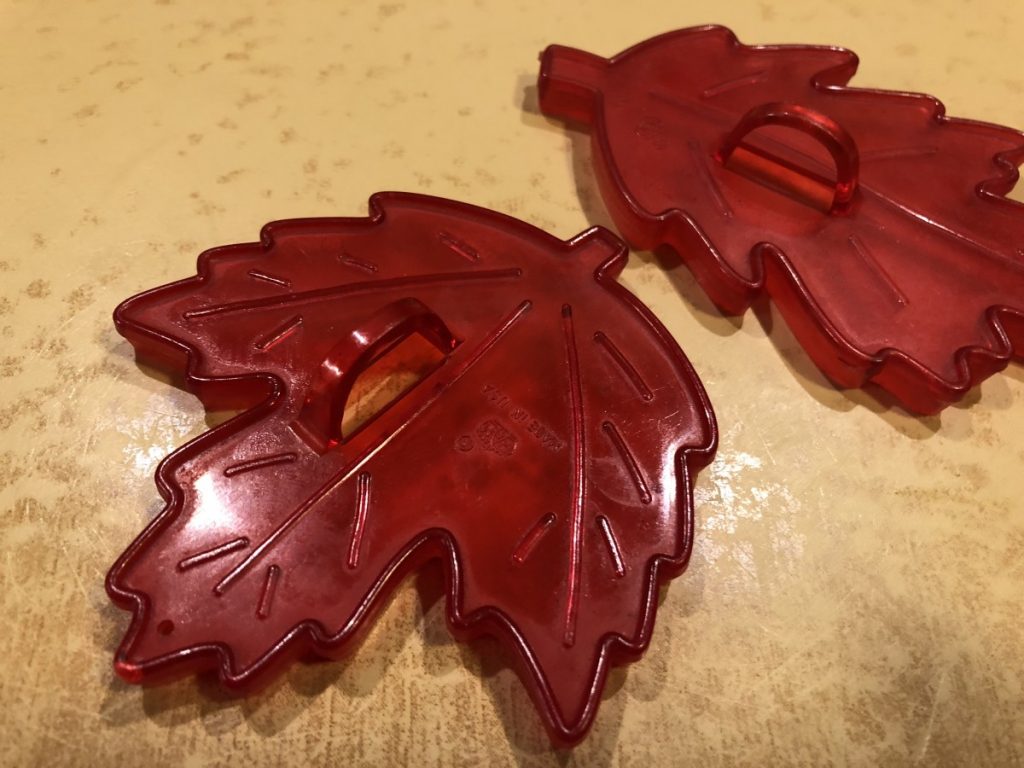
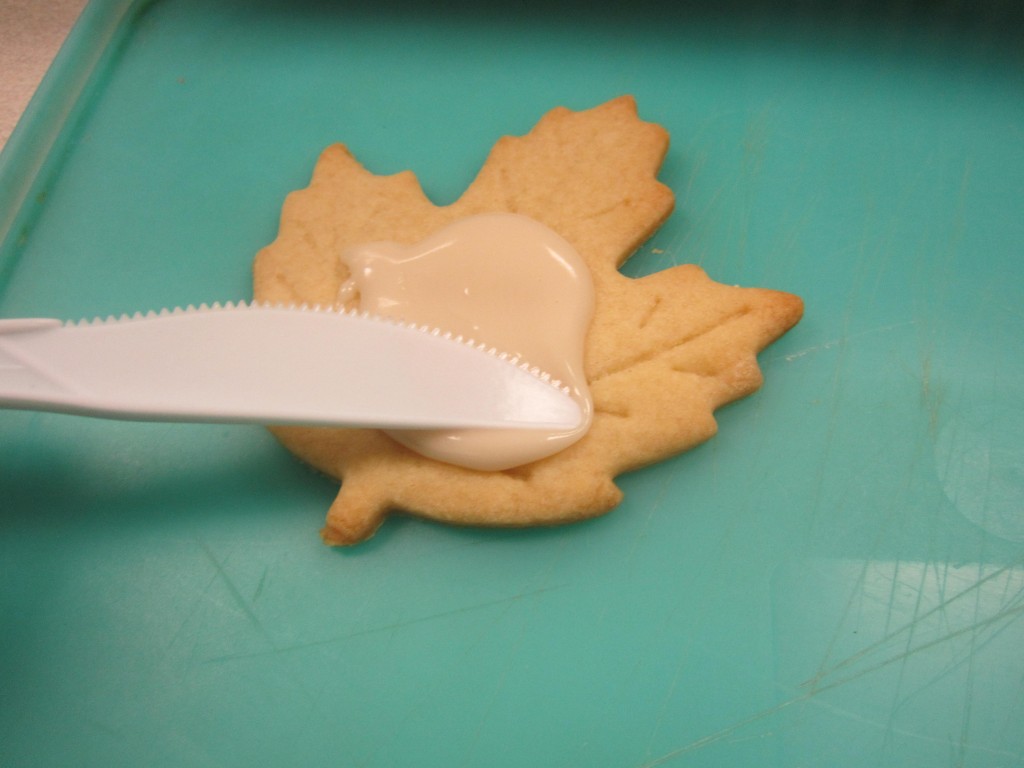
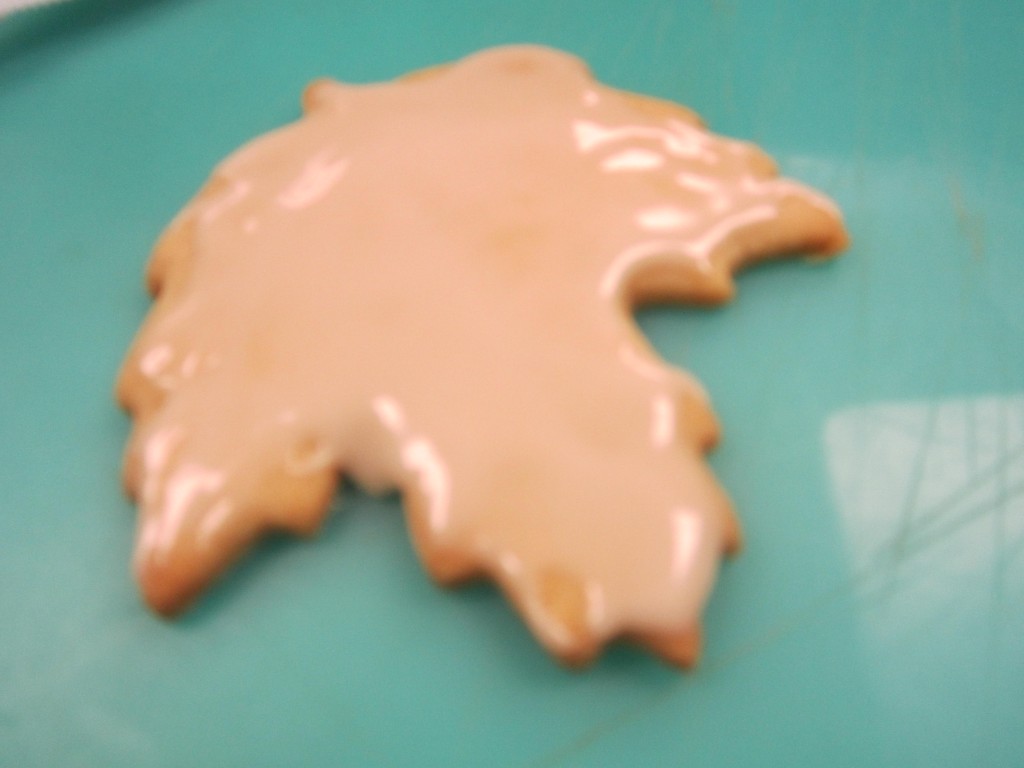
Maple Syrup Leaf Cookies


The addition of maple syrup makes these cookies really special. They make a nice dessert for any Autumn dinner. They make a nice dessert for Thanksgiving, too.
Crisp and mildly sweet, they can be eaten plain, or you can coat them with a maple glaze, after they have cooled. Cookies are crisp but will soften slightly, if glazed. Either way, they are really tasty. You could also dust with powdered sugar.
A friend suggested making sandwich cookies with them. I used some of the glaze to sandwich two cookies together. I could see using a maple buttercream, too.
I used leaf-shaped cookie cutters, but cut them out in any shape you like. I am guessing I’ll be hearing from a couple of friends who will want to borrow my cookie cutters.
Maple syrup is one of my favorite natural sweeteners. Love the stuff. I even went to high school in a city that had a maple festival every Spring.
You can do a lot more with maple syrup than just a topping for pancakes and waffles. Maple syrup can be used in sauces, salad dressings and marinades. You can also use maple syrup in baking, like in these yummy cookies.
Maple Cookies
1 c. butter
1 c. sugar
½ c. maple syrup
1 egg yolk
3 c. flour
3/4 t. salt
Glaze:
2 c. powdered sugar
½ c. maple syrup
To make glaze: Beat sugar and syrup together until smooth.
Beat together butter, sugar and syrup. Beat in yolk. Combine flour and salt and add to butter mixture. Mix well. Wrap dough in plastic wrap and chill. Roll chilled dough 1/8 inch thick and cut out with assorted cutters. Leaves and other autumnal cutter shapes are best. Place on an ungreased baking sheet and bake in a preheated 350-degree oven for 12 minutes. Cookies should be lightly browned around the edges. Cool and decorate with glaze. Makes about 4 dozen cookies.
Mashed Potatoes Three Ways

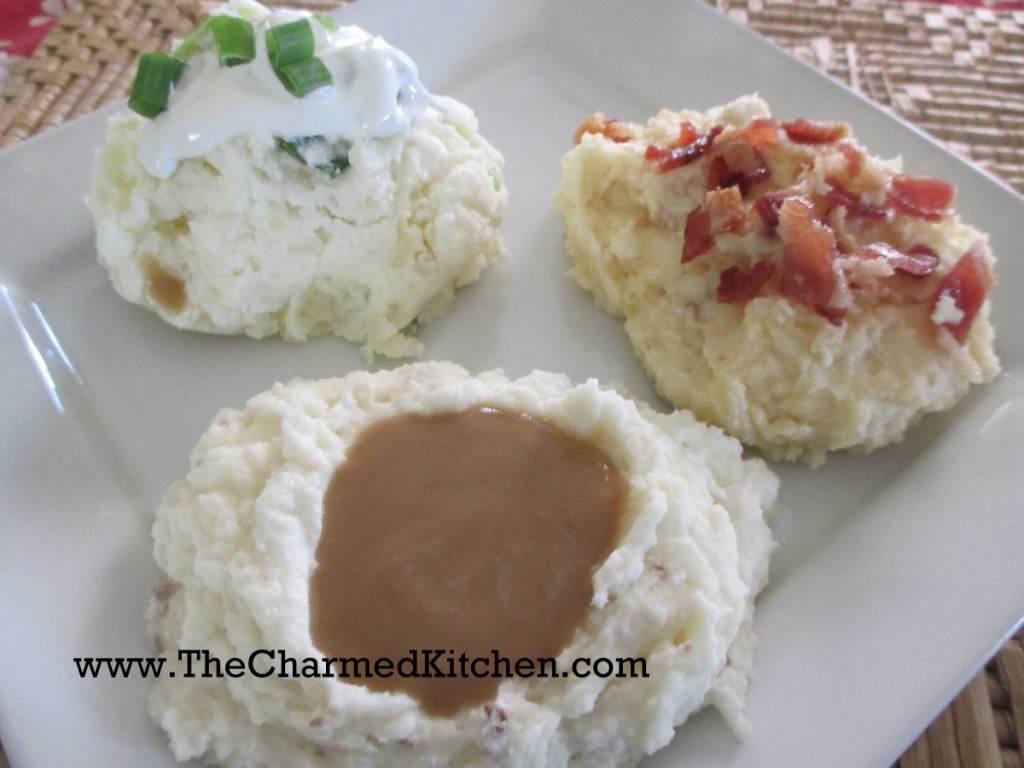
I am perfectly happy just mashing up potatoes and adding warm milk or cream and butter to them along with salt and pepper. Still, sometimes it is nice to switch things up a little. There are certainly countless variations for what you could add to mashed potatoes. If you are making mashed potatoes for Thanksgiving, and want to try something new, you might consider one of these recipes.
They are three of my favorites.
I can remember the first time my Mother added roasted garlic to mashed potatoes. They were so good. I think she added roasted garlic to them all the time after that.
Roasted Garlic Smashed Potatoes
6 cloves garlic, peeled
1/4 cup olive oil
3 lbs. potatoes, peeled and cubed
½ c. milk, warmed
¼ c. grated Parmesan cheese
2 tablespoons butter
½ t. salt
¼ t. ground black pepper
Preheat oven to 350 degrees. Place garlic cloves in a small baking dish. Drizzle with olive oil, cover, and bake 45 minutes, or until golden brown. Bring a large pot of lightly salted water to boil. Add potatoes, and cook until tender but firm. Drain, and transfer to a large mixing bowl. Place roasted garlic, milk, Parmesan cheese, and butter into the bowl with the potatoes. Season with salt and pepper. Mash to desired consistency.
Cheesy Bacon Smashed Potatoes
3 lbs. potatoes, peeled and cubed
½ c. milk or half and half, warmed
2 c. shredded cheese- I like cheddar
3 T. butter
12 oz. bacon, cooked, drained and crumbled
Salt and pepper to taste
Bring a large pot of lightly salted water to boil. Add potatoes, and cook until tender but firm. Drain, and transfer to a large mixing bowl. Place milk, cheese, and butter into the bowl with the potatoes. Season with salt and pepper. Mash to desired consistency. Stir in bacon, reserving some for the top.
Sour Cream and Green Onion Smashed Potatoes
3 lbs. potatoes, peeled and cubed
1 c. sour cream
3 T. butter
½ c. chopped green onions or chives
Salt and pepper to taste
Bring a large pot of lightly salted water to boil. Add potatoes, and cook until tender but firm. Drain, and transfer to a large mixing bowl. Place sour cream and butter into the bowl with the potatoes. Season with salt and pepper. Mash to desired consistency. Stir in green onions, reserving some for the top.
One more thing: A note about peeling. I still mostly peel potatoes that I am going to mash. My sister, Cindy, does not. She likes the flavor and texture the peel adds. Either is fine by me.
Gravy 101

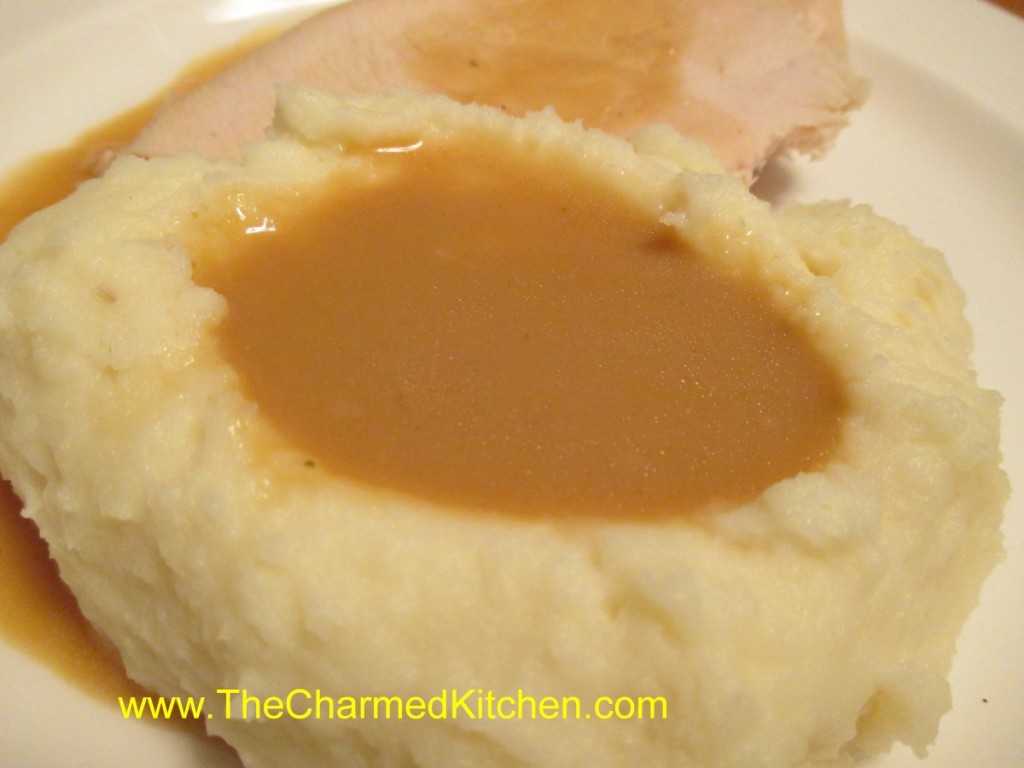
I had a conversation with a friend recently about making gravy. She said she often buys canned gravy because hers doesn’t always work out. I found that kind of sad. Gravy is so easy to make. I thought with so many people planning turkey dinners it might be a good time to post some tips for making really good gravy- every time. I’ve also included some ideas for gluten free gravy and ways to de-fat your gravy, too. For those of you who have trouble making gravy I hope this helps.
Gravy 101
1. Make a stock using wing tips and the neck and giblets, other than the liver. Use onions, carrots and some celery to add flavor and you might even use a paste-type soup base (chicken or turkey) in place of the salt and to add flavor. Just place everything in a saucepan and cover with cold water. Simmer a couple of hours and strain. I also add some herbs like parsley, thyme and a little marjoram. Don’t make too salty. I use an organic reduced sodium soup base.
2. De-glaze the roasting pan after removing the turkey. Just place the pan on a burner and add the strained stock. Turn on the burner and stir around the stock to loosen and brown bits in the bottom of the pan. This is where the gravy really gets its flavor. Strain this mixture back into the saucepan you were using to make the stock.
3. Thicken with flour and water or flour and milk, depending on your taste. I like using milk. Place flour in a jar with a tight fitting lid and cover with cold milk or water. Screw on lid and shake until mixture is smooth. You’ll need about 2 tablespoons of flour for each cup of liquid, depending on how thick or thin you like your gravy.
4. Add to the strained mixture in the saucepan and cook, stirring until thickened. Adjust seasonings and serve. If it’s too thin for your taste, just add more flour and milk or water. It is easier to add a little more flour if the gravy is too thin than to thin gravy that is too thick. Make at least ¼ cup per person plus extra for leftovers the next day.
Note: You can also thicken the gravy while it is still in the roasting pan and then strain it into a saucepan.
Gluten Free Gravy
If you want gluten free gravy you have the option of thickening it with cornstarch. I know a lot of people that swear by cornstarch. My only problem with cornstarch is that it will break and get watery when you want to reheat the gravy. I have made gluten free gravy by just saving the veggies I used to make the stock with the giblets. Usually it’s a mixture of carrots, onions and celery. After simmering in the stock they are very soft. I place the veggies in with the drippings and the stock in the roasting pan and stir it all around. I place in a saucepan and use an immersion blender to smooth it all up. The veggies thicken the gravy with no added flour.
De-fatting Gravy
There will be fat in the gravy. I remember my Mother’s gravy boat with a spout that came from the bottom- so you poured the gravy out from the bottom- leaving the fat behind. You can get rid of most of the fat quickly a couple of different ways. You can get a de-fatting cup. It looks like a measuring cup with a spout that comes up from the bottom. Ladle the gravy into the cup and pour it out into a saucepan or gravy boat. You can also take your freshly made gravy and let it sit for a few minutes in the pot, off the heat. Use a metal spoon to skim off the fat then grab a handful of ice cubes and place them on the top of the gravy. The ice will freeze the fat. Move them around the surface very gently. The fat will harden on the ice cubes. Use a slotted spoon to remove the ice cubes with most of the fat stuck to them. Do this quickly, so you don’t dilute your gravy.
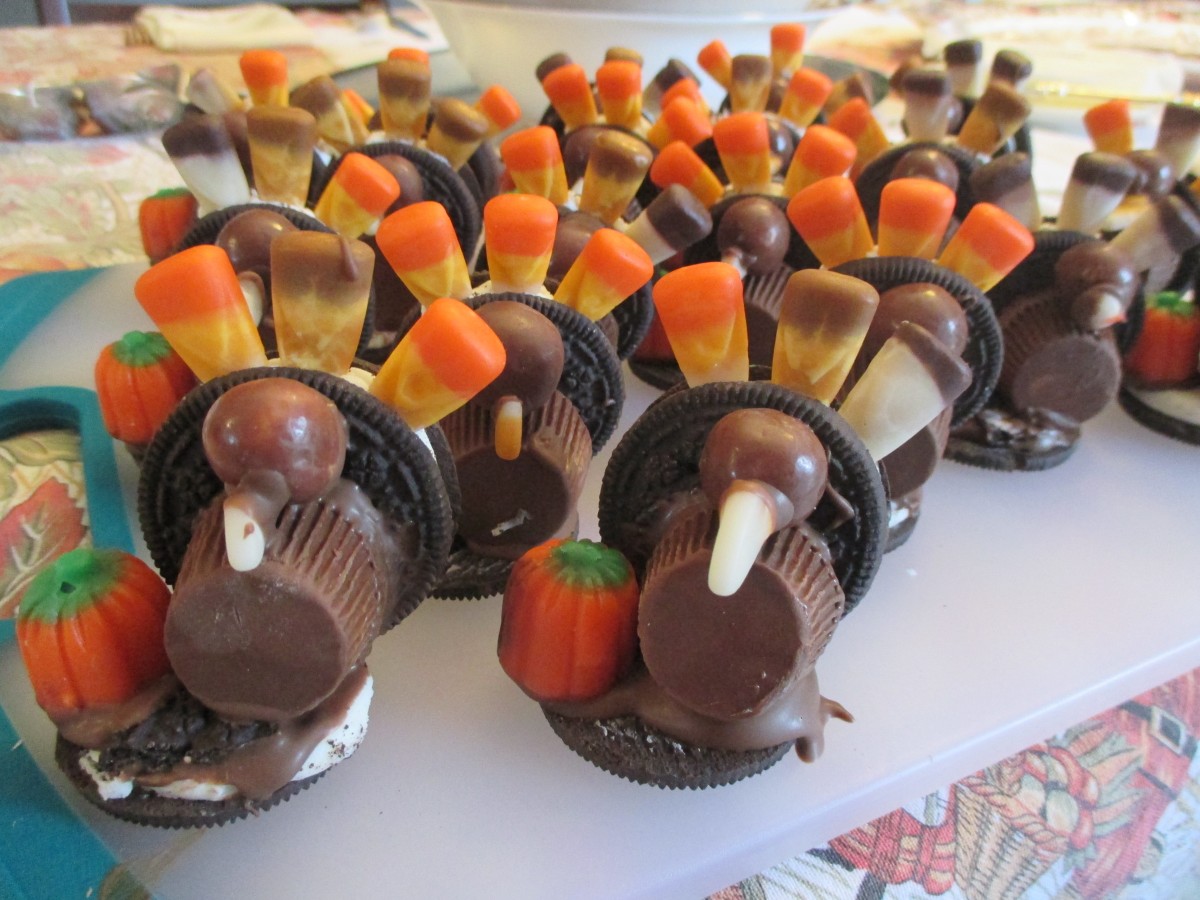
Candy Turkeys


Every year, I spend the day before Thanksgiving making some special treat or craft with my niece, Elia. One year we made these cookie “turkeys”. She liked making them so much we are making them again this year. They are really easy to make, and since there is no baking involved, you don’t tie up the oven if you need it for other things, like maybe a real turkey. Here are the ingredients you will need. We did them sort of assembly line fashion, because Elia wanted one for each person’s place at the table.
Candy Turkeys
chocolate sandwich cookies
candy corn
mini peanut butter cup
malted milk balls
candy pumpkins
melted chocolate
To start, place a cookie on your work surface. Affix a peanut butter cup, for the body. with a little melted chocolate. Place a malted milk ball on top of the peanut butter cup, using a little more melted chocolate to make the head. Once the chocolate hardens a little break off the tip of a candy corn and affix with chocolate to make the beak. Stick a few candy corn between the cookies- into the frosting layer- for the tail. Open up a cookie and use a little more chocolate to stand up your turkey on the frosting surface- Elia wanted them to be standing on snow. Or you can use a whole cookie, if you prefer. Place it off center, so you have room for your pumpkin. Let it harden for a minute, then add a candy pumpkin, using another drop of melted chocolate.

Elia hard at work
She made quite a few
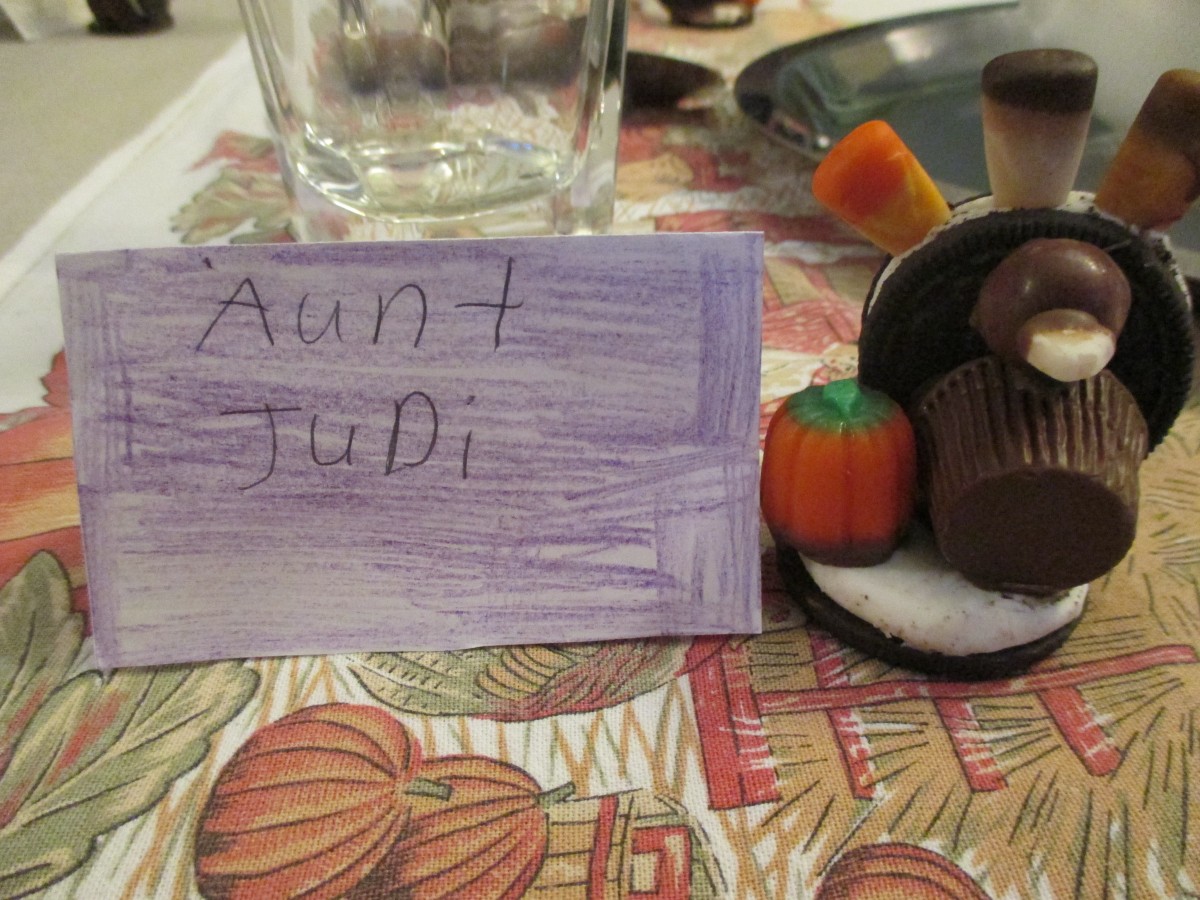
My place at the table
Sweet Potato and Herb Biscuits

These biscuits are a favorite of mine. They go great with a bowl of chili. They also would make a nice addition to your Thanksgiving table.
I like sweet potatoes any number of ways. Steamed, roasted, mashed. In this biscuit recipe, raw sweet potatoes are grated and added to the dough, along with some herbs. The biscuits come out tender, with great flavor and texture. They are also quite pretty.
I enjoy them with a bit of butter, warm from the oven.
When you mix the dough, don’t be worried if it seems too dry. It takes a little bit of kneading to get the moisture out of the potatoes. The extra effort is worth it.
I cut them into triangles, but you can just form the dough into a log shape. Then, slice the dough for round biscuits. They taste wonderful, no matter the shape.
Sweet Potato and Herb Biscuits
2 1/4 c. flour
1 T. baking powder
1/2 t. grated lemon peel
1/4 t. each baking soda, dried basil and dried thyme
1 egg, beaten
1 1/2 c. shredded sweet potato, about 1 large
1/2 c. fine chopped green onions
1/2 c. sour cream
2T. butter, melted or olive oil
Stir together dry ingredients in large bowl and set aside. Combine remaining ingredients and add to flour mixture mixing until just blended. Turn onto lightly floured surface and knead a few times until dough just stays together. Dough will look too dry- but it will come together after you knead it. Press into an 8-inch square and cut into four squares.* Cross cut each square into four triangles. Place on greased baking sheet and bake in a preheated 425 degree oven for 20 minutes. Makes 16.
* I press the dough into a lightly floured 8×8-inch baking pan and then flip it out onto the work surface, before cutting. That way you’ll get nice, even edges.
Honey-Orange Glazed Sweet Potatoes


I will admit it – I am not a fan of really sweet, sweet potato dishes. Not unless it is a dessert. My Mom never served sweet potatoes with marshmallows, but they were still served “candied”. Sweet potatoes, sometimes canned, cooked in a glaze of brown sugar and butter. It was just what we did.
Then, one year, I grew my own sweet potatoes. Everything changed after that. I can still remember the joy of digging that first plant up. There they were, a cluster of beautiful sweet potatoes. I grew a lot of them that first year. I steamed them, baked them, made soup with them. Even had them for breakfast a few times.
My Mom was so pleased when I told her I was supplying them for her Thanksgiving dinner that year. I suggested we just cook them with a little butter, salt and pepper. They were so naturally sweet, that they surely, did not need to be candied.
Not everyone was so pleased with that choice. Clearly, how to prepare sweet potatoes evokes some of the same passion as how to cook the turkey. So for awhile, there were two competing dishes of sweet potatoes on the Thanksgiving table. As if there weren’t enough dishes to worry about- we now had to have 2 types of sweet potatoes.
I hope this dish might just bridge the gap between the two camps. A little sweet, but not overly sweet. The orange juice and honey enhance the sweet potatoes nicely. The sugared nuts are a fun addition, too.
Honey Orange Glazed Sweet Potatoes
4 T. butter
4-5 c. peeled and sliced sweet potatoes
1 c. fresh orange juice
Zest of 2 oranges
¼ c. honey
2 t. hot sauce, or to taste
Salt and pepper to taste
Fresh grated nutmeg
Sugared nuts- optional* recipe follows
Melt butter in large skillet. Add sweet potatoes and cook over medium heat, for 5- 8 minutes. Potatoes should start to turn a little golden. Add orange juice, honey and seasonings and turn heat down to low. Cook, uncovered, until potatoes are tender and liquid is evaporated, about 10 minutes. If you want more color on the sweet potatoes, turn the heat up a little once they are tender, and liquid is mostly gone. Serve with sugared nuts sprinkled on top, if you like. These can be made a day ahead and reheated.
*Sugared Nuts
4-5 c. nuts, I like walnuts or pecans
2 c. sugar
1 c. water
1 t. cinnamon
1 t. orange peel
1 t. salt, optional
Place all ingredients in heavy skillet and cook over medium heat, stirring often, until all the water disappears. Whatever liquid in the pan will be clinging to the nuts and syrupy. Dump nuts onto a large cookie sheet and break apart with a wooden spoon to prevent clumping. As nuts cool, stir once or twice to remove any remaining clumps, and to cool faster. Nuts will lose their glossy appearance and attain a sugary crust. If it looks like nut soup, you didn’t cook them long enough, and you must return all to the skillet and cook longer. As the nuts start to get drier during cooking, you can turn down the heat a little to prevent burning. Once you’ve made a few batches, though, you will get good at judging when to stop cooking. You can also make a spicy version by adding a teaspoon of cayenne pepper along with the other ingredients. Store in cool, dry place to keep nuts fresh longer.


