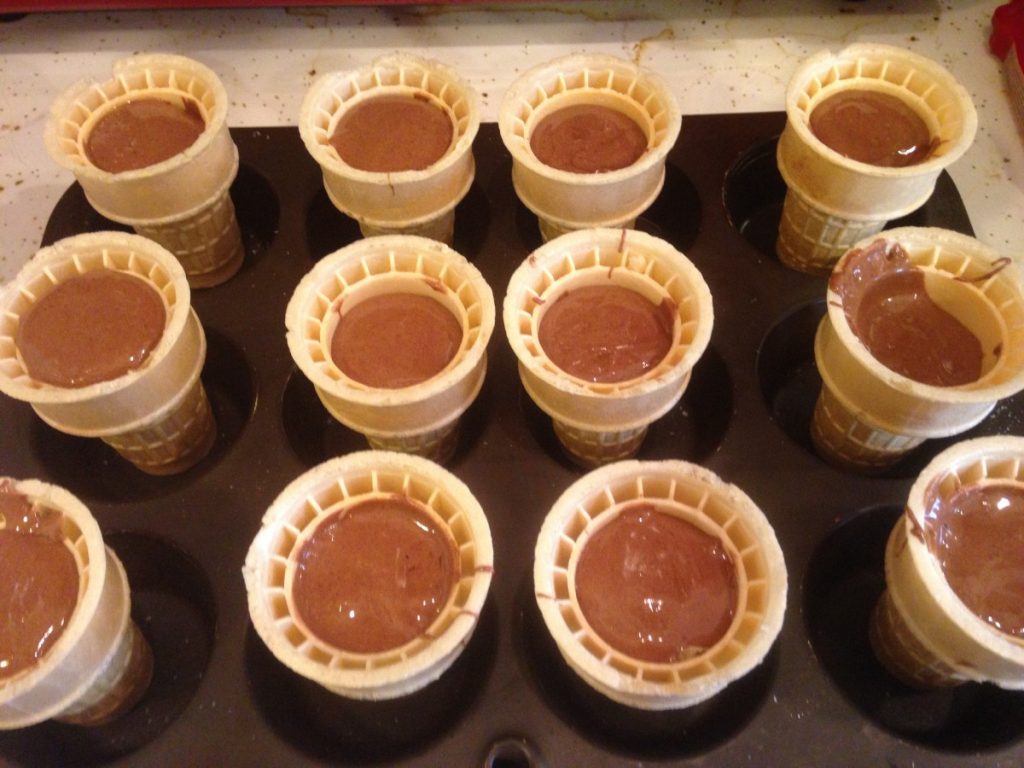
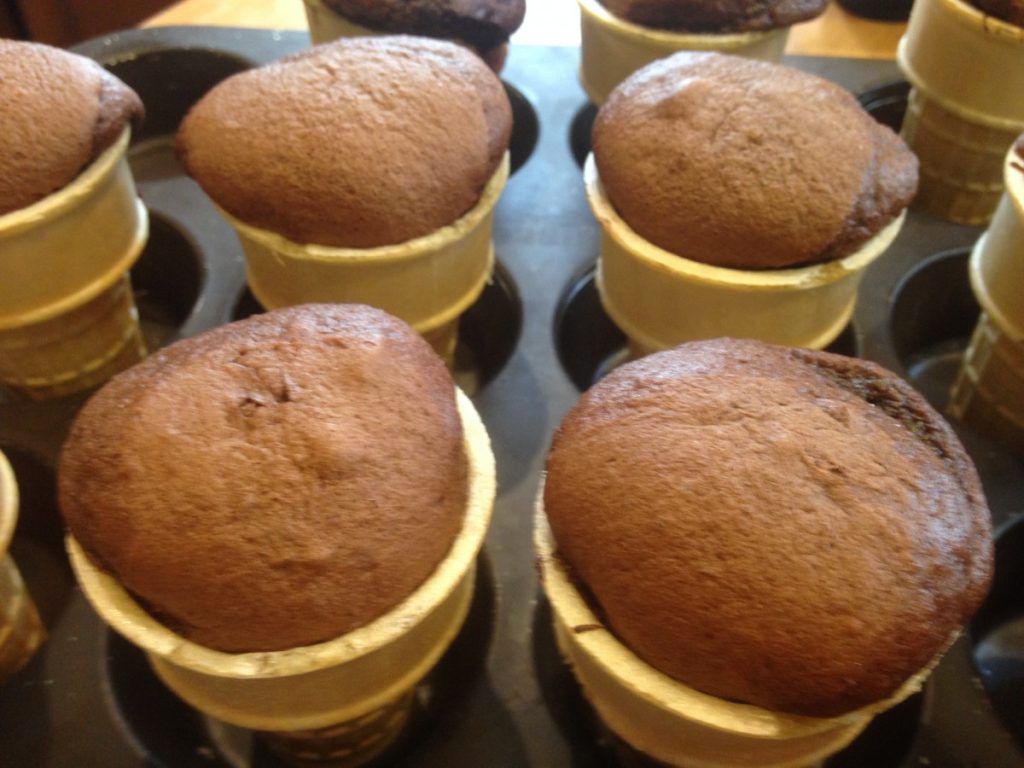
“Ice Cream” Cupcakes


This might look like an ice cream cone, but it isn’t. It is a cupcake!! The batter is baked inside ice cream cones, then decorated to look like ice cream cones. I used from scratch recipes for both the cupcake batter and the frosting, but feel free to use what ever recipe you like. This is such a fun twist on a cupcake. Great for summer parties.
Because you use more frosting than you might normally use for more traditional cupcakes, make sure to have extra. I chose the recipe I did because it makes plenty of frosting. I did not tint my frosting, but you can, if you like.
These are fun for kids to make. You can let them decorate their own “cone”. For a kid’s party you can even have a couple of different cupcake flavors and frostings to pick from- and some assorted toppings, like cherries, tiny candies and assorted sprinkles.
Once you frost the cupcakes, they become a little top heavy. I find setting them together, letting them touch each other a little, helps to keep them from tipping over.
Sometimes, some of the batter drips over the edge of the cone when baking. Just pretend some of the “ice cream” has melted and cover drips with frosting.
Here are the recipes I used, with the directions for baking the cupcakes.
Chocolate “Ice Cream Cone” Cupcakes
4 oz. semisweet chocolate
1 cup butter
1 cup all-purpose flour
1 3/4 cups sugar
4 eggs
1 teaspoon vanilla extract
24 flat bottomed ice cream cones
Preheat oven to 325 degrees. In the top of a double boiler, combine chocolate and butter. Heat, stirring occasionally, until mixture is melted and smooth. Remove from heat and allow to cool to lukewarm.
Sift flour and sugar together into a large bowl. With mixer on low speed, beat in eggs one at a time. Stir in chocolate mixture and vanilla. Place 24 cones in muffin tins to hold them up and fill 2/3 full with batter. Bake for about 20 minutes, or until cupcakes puff to top of cones. Test with a toothpick. Cool and frost to look like ice cream. Decorate with sprinkles. Makes about 24.
Super Fluffy Frosting
1½ cup butter
1 1/2 tablespoons vanilla extract
1½ lbs. confectioners’ sugar –
1/8 teaspoon salt
3 T. milk
In a mixer, combine the butter, vanilla and 1 tablespoon milk. Add the sugar and salt, beat until well mixed. Add a tablespoon or two more of milk, if needed. Turn mixer to the highest speed and beat for 15 minutes.

Nutty Cole Slaw

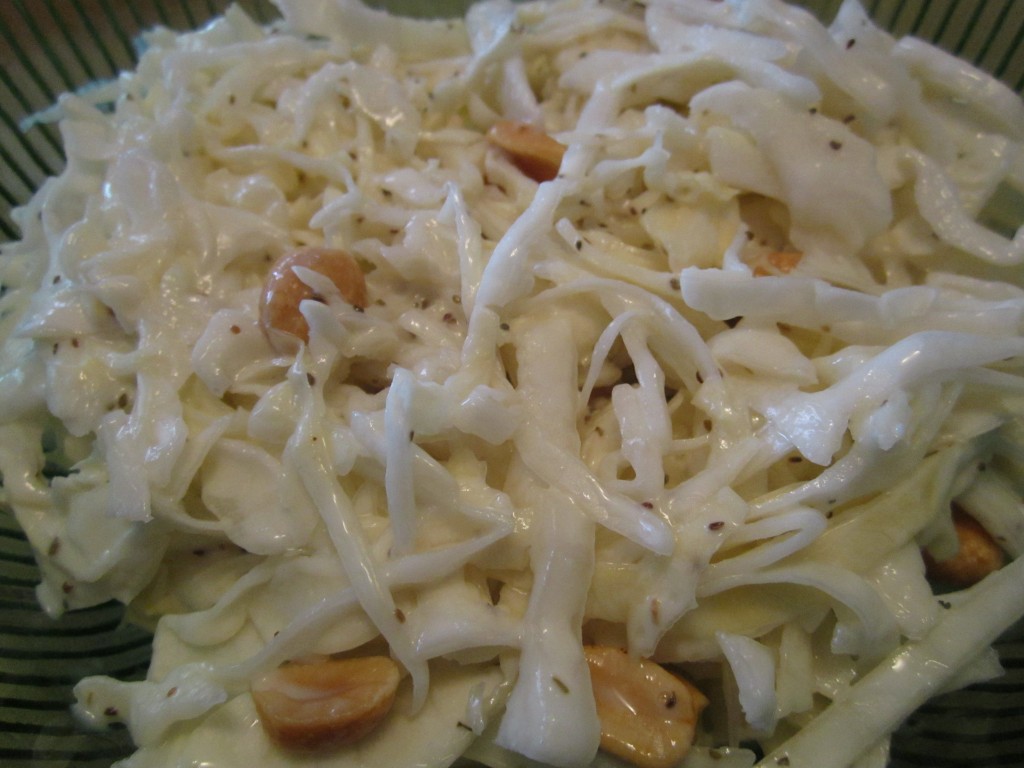
I love cole slaw and enjoy it both as a side salad or on sandwiches. I was making cole slaw and decided to add some peanuts. I enjoyed the crunch they added to the dish. I must confess, if I had cashews I would have used them instead, but the peanuts were great, too. This salad would make a nice addition to your holiday menu.
Nutty Cole Slaw
6-8 cups finely sliced cabbage
2/3 c. mayo, you can add a little more if you like- I don’t like a lot of dressing on mine
1/4 c. cider vinegar
1/4 c. sugar
1 t. celery seeds
1/2 c. peanuts, or more
Place cabbage in mixing bowl. In a small bowl combine the rest of the ingredients, except the peanuts, and stir until smooth. Pour over the cabbage and toss to coat. Chill. Add peanuts just before serving.
Lemon (or Lime) Italian Ice

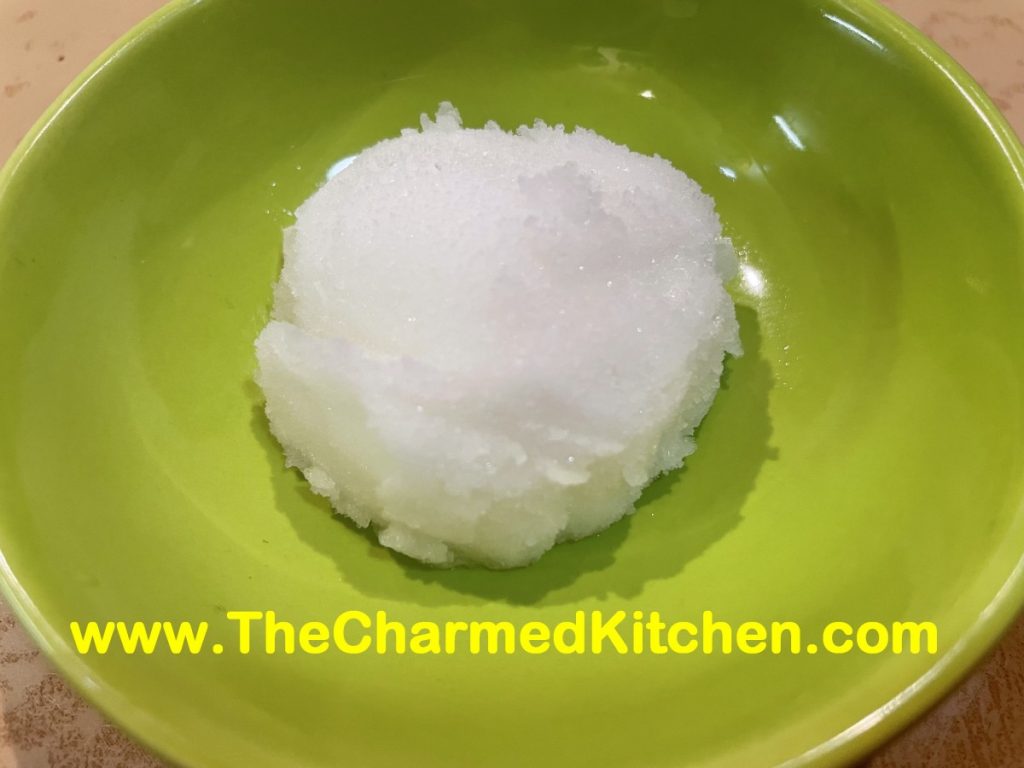
I hadn’t made Italian ice in a long time. As a kid, I remember getting little cups of this treat in the summer and I loved it. I decided it was time to make some again.
The recipe couldn’t be simpler. Just water, sugar and juice. You can also add zest. You don’t even need any special equipment. Lemon is more traditional, but lime works great, too. You can add more juice or less or more sugar to suit your own taste. I like my lemon ice to have a nice strong lemon flavor. Taste it before you freeze it to make it to suit your taste.
Italian ice is a great, light dessert or it can be served as a palate cleanser. Make more than you think- it goes fast.
Enjoy!!
Lemon Italian Ice
2½ c. water
1½ c. sugar
1¼ c. lemon juice*
Zest of 2 lemons, optional
Combine water and sugar in bowl and stir until sugar dissolves. Add lemon juice and zest, if adding, and stir until well combined. Freeze.
You have options here. You can place the mixture in a shallow tray- preferably one with a tight lid- and place in the freezer. Or you can put the mixture in any shape container with a tight lid and freeze. It kind of depends on how you plan to serve your ice, once it is frozen. Some recipes call for stirring the mixture every 30 minutes as it freezes. Then to serve it, you just scrape over the surface with a heavy spoon for a grainy ice- a granita. This is one option and a tasty one. Works best in the flatter, longer container.
Another option is to just freeze it. Once frozen, allow the lemon ice to soften a few minutes, then break into chunks and place in a food processor. Run the processor until the mixture is smooth- then serve or put back in the freezer until you want to serve it. You can even repeat the food processing part another time for a smoother end product. This is what I did with this batch. I wanted a sorbet – like texture.
If you didn’t have enough choices already, you can also put the lemon juice mixture in an ice cream machine to freeze. This method will also give you a sorbet like final product.
No one way is best- it is just what you like. Makes about a quart.
* you can use lime juice and zest instead, for lime ice- or even use them together.
Fresh Peach Salsa

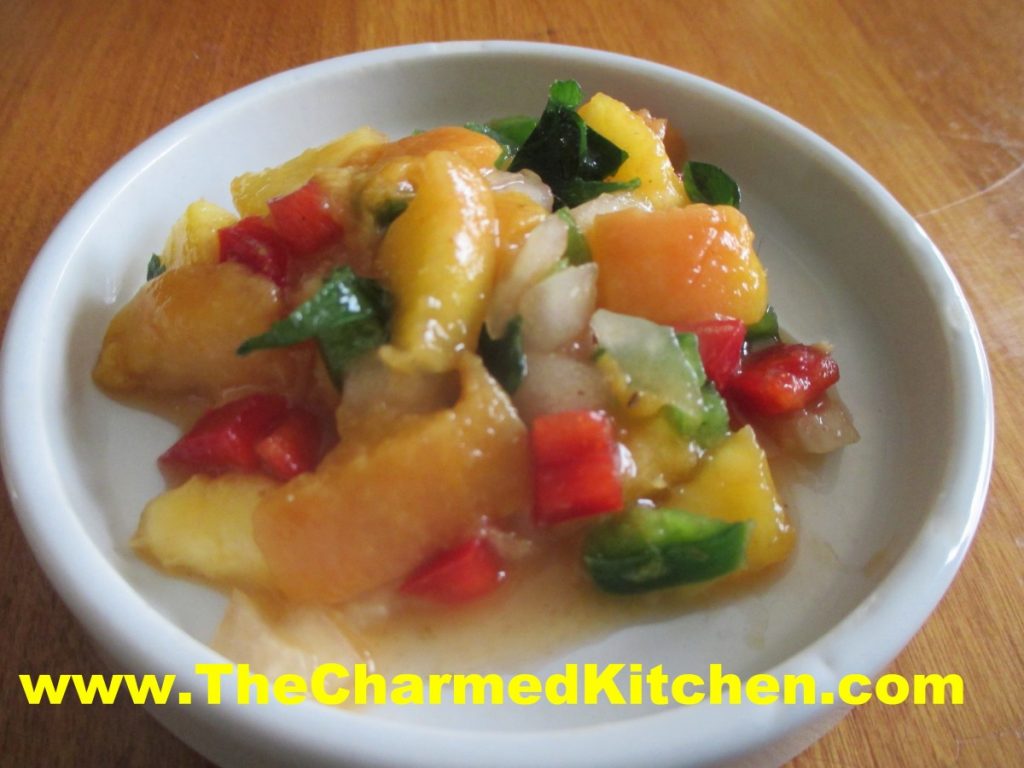
This salsa makes a great topper for grilled meats or fish. It is also fun to serve with chips. While salsa may traditionally be made with tomatoes, there are other options. The peaches give the salsa a great natural sweetness. It is so colorful.
I used really ripe peaches, which are tough to peel. To help peel them, I placed the peaches in boiling water for a minute. Then I put them in cold water. Once they were cool enough to handle, they peeled easily.
I used 5 peaches and ended up with almost 2 cups of prepared fruit. You might need more or less, depending on the size of the fruit.
You can make the salsa as spicy as you like. I added a jalapeno pepper and some hot sauce. I tasted the salsa 30 minutes after I made it and added a little more hot sauce.
Fresh Peach Salsa
4-5 ripe peaches, peeled, pitted and diced
½ c. minced sweet onion
½ c. minced sweet pepper
1 jalapeno, seeded and minced
2-3 T. chopped fresh cilantro
1t. hot sauce, or to taste
zest and juice from 1 lemon, you could use a lime instead
salt and pepper to taste, don’t be afraid to give this dish a good bit of salt
Combine all ingredients in a bowl and stir until mixed. Check seasonings. Chill for at least 30 minutes and taste again- you will likely add more seasoning. Serve over grilled meats or with chips.
Picnic Potato Salads


If you are looking for a side dish for Labor Day, why not bring a potato salad? Everybody loves potato salad. I love potato salad.
Actually, I love potatoes pretty much any way they are prepared. With so many cookouts and picnics, you can never have enough potato salad recipes, right? I am sharing three of my favorite potato salad recipes. The first one is really simple, enhanced with fresh thyme leaves. Thyme pairs well with the potatoes. The second one uses some of my fresh basil in a pesto sauce that is tossed with the potatoes. Who says pesto is just for pasta? The third salad is the way I remember my Mom making potato salad. She never wrote down her recipe, but I think I got it right.
Just in Thyme Potato Salad
With my herb garden growing like crazy right now I thought this was the perfect dish to make. This salad can be served warm or cold and goes well with so many dishes. I find when I have leftovers, I’ll even brown it in a skillet and serve it like hash browns with eggs for breakfast.
2 lbs. boiling potatoes, cut into bite sized pieces*
½ c. olive oil
¼ c. red wine vinegar
1 T. fresh lemon juice
2 t. fresh thyme leaves
Salt and pepper to taste
Cook potatoes until tender. Drain and toss with the rest of the ingredients and serve right away or chill to serve later. Serves 6-8.
* You can really use any potato you like. I often bake the potatoes whole and then peel and cut up. Cook them any way you prefer.
Pesto Potato Salad
This salad always makes me think of a warm summer day. I think it’s because of the basil. During the summer, my driveway is lined with pots of basil. I cook with it almost every day. Pesto can be used in a lot of different dishes beyond pasta. Here I’ve paired it up with potatoes. The combination works great together. I always freeze extra basil so I can enjoy it year round.
2 lbs. Boiling potatoes, cut into bite sized pieces
1 c. basil leaves
3 T. pine nuts
3 T. olive oil
2 garlic cloves, minced
1/3 c. Parmesan cheese
Salt to taste
Cook potatoes until tender. Cool. In blender combine remaining ingredients, except 1 tablespoon of the pine nuts. Pour blended mixture over potatoes and sprinkle with the reserved nuts. Chill. Serves 6-8.
Mom’s Mustard Potato Salad
When I was a kid I did not like the taste of mustard- except in this recipe. It adds such a wonderful flavor.
4 lbs. potatoes- I used Klondike Rose and I did not peel them
4 hard cooked eggs, peeled and chopped
1 sweet pepper, seeded and chopped, optional
1 c. mayo- maybe a little less
1/4 c. prepared mustard- I like a grainy brown mustard
salt and pepper to taste
dash of hot sauce
Bake whole potatoes until tender and allow to cool. Cube potatoes into large bowl and combine with remaining ingredients. Chill until ready to serve. Serves 8.

Pesto Potato Salad

Mustard Potato Salad
Avocado Gelato

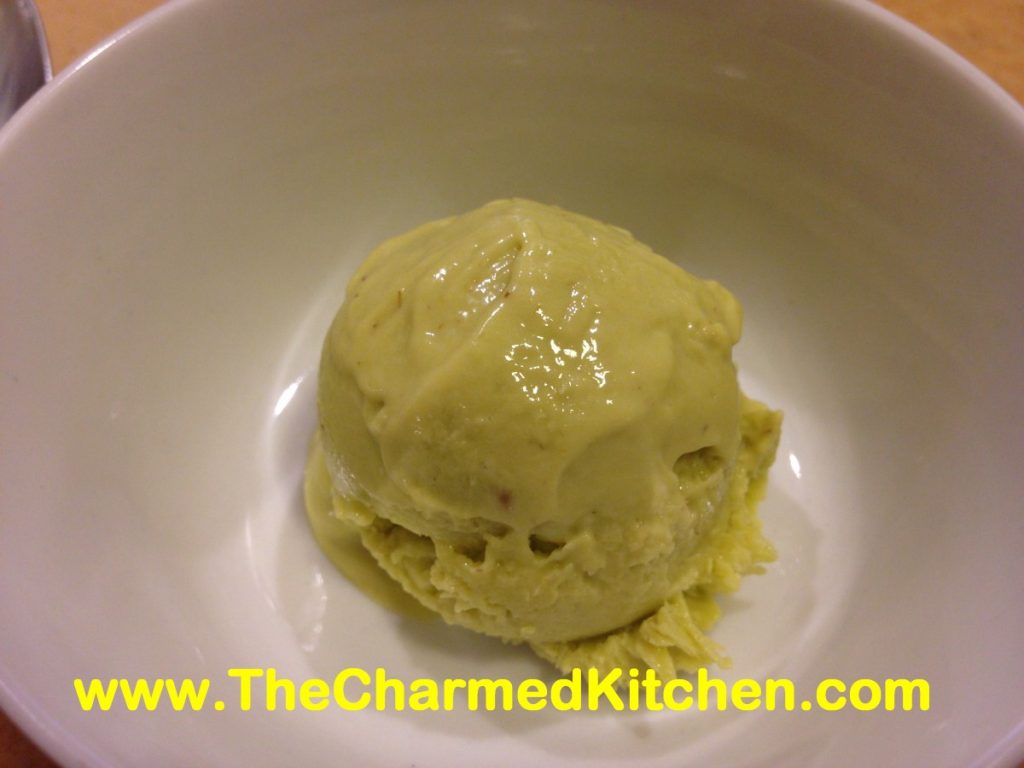
I wanted a dessert and somehow this is what I came up with. It worked out so well. The gelato is silky smooth, not too sweet and has a rich, buttery flavor.
It started awhile back, when a sweet lady gave me a dozen perfect avocados. I knew I would not be able to use them up quickly enough, so I froze some of them.
It is easy to freeze avocados. Just cut them open, remove the pit and the skins. Then just place avocado in small freezer bag or container and drizzle with a little lemon or lime juice. That will prevent the avocados from discoloring. Freeze until you want to use them.
You could, of course, use fresh avocados as well.
I just blended the gelato twice, for a creamy texture. If you have an ice cream machine, you can blend up the mixture, then freeze in the ice cream maker. Either way will give you a wonderful finished project.
Since I still have some frozen avocados, I will definitely be making this recipe again.
Avocado Gelato
3-4 avocados- you want to end up with 2 c. avocado
1 ½ c. half and half
¾ c. sugar- or to your taste
2 T. lemon juice
2 t. vanilla
Place all ingredients in a blender or food processor, then process until smooth. If you use frozen avocado, you will have something like an avocado milkshake at this point. Taste it for sweetness level. Once frozen it will taste less sweet, so keep that in mind. You could use honey to sweeten, if you prefer. Just use less. Honey is a lot sweeter than sugar. Put in the freezer. Sometime after it is frozen, you are going to want to process it again. Remove from the freezer. Let stand a few minutes to soften a little. Break into chunks and place in a food processor and process until smooth and creamy. Freeze again until ready to serve- or eat right away. Makes 1 qt.
Corn and Barley Salad with Basil

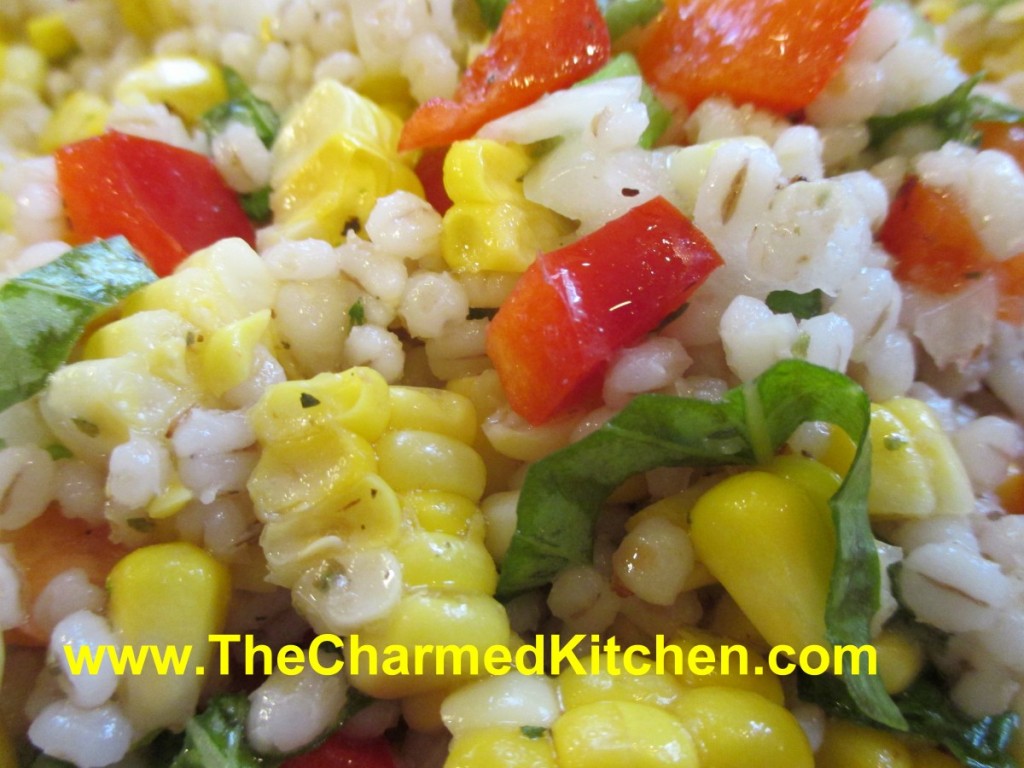
This colorful salad can be a side dish or main dish. I like it as a main dish for hot summer days. It somehow manages to be light and filling at the same time. It makes a wonderful lunch, served over a bed of salad greens.
The combination of sweet corn and barley works so well together. I don’t think most people think of salad, when they think of barley. Barley is more commonly used in soups. But this versatile grain can also be a nice ingredient in a salad. Perfect on a hot day, when you want a lighter meal.
I had grilled corn, and had some leftover, so that is what I used. I think the smokiness of the grilled corn added a nice touch. I had some fresh basil so I added that, too.
If you are looking for a new salad idea this summer- you might try adding barley to your next salad.
Corn and Barley Salad with Basil
½ c. pearl barley
salt
3 T. cider or white wine vinegar
1 t. Dijon mustard
fresh ground pepper
3 T. olive oil
3 T. fresh basil, cut into thin strips
3 c. cooked corn, from about six ears
1 c. diced sweet onion
1 c. diced sweet pepper, any color
¼ c. sliced green onions
Combine barley, 2 cups water and ½ t. salt in saucepan and simmer, covered until barley is tender, about 50 minutes. Drain and rinse under cold water. Combine remaining ingredients and toss with barley in large bowl. Makes 6 servings.
“Melon Ball” Sorbets

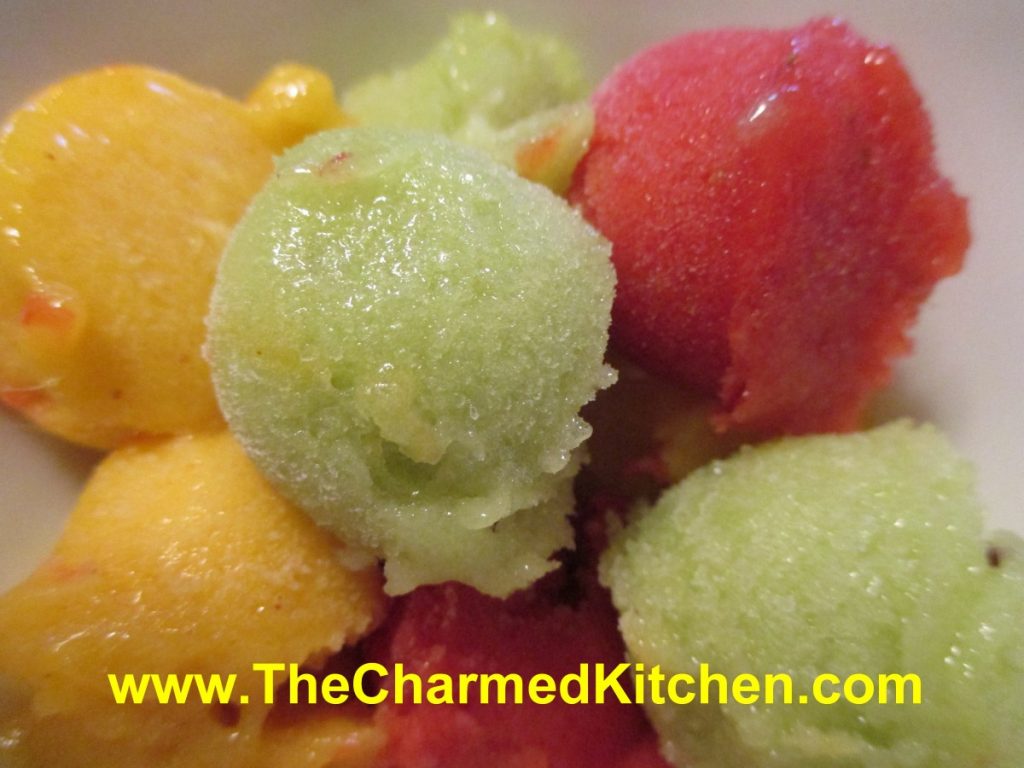
I remember making melon balls for fruit salad, when I was a kid. My mom showed me how. It always seemed like a special occasion when we made them. I had to learn how to use the melon “baller” to get pieces that were all perfect little rounds.
I will admit, I haven’t made melon balls in a long time, but I still like the way they look.
I used melon balls at the inspiration for this dish. Funny thing is- there isn’t any melon in the dish. I made three different sorbets- strawberry, mango and kiwi. Each one is meant to resemble a different melon- watermelon, cantaloupe and honeydew. You can, of course, make sorbet from melons. I just didn’t happen to do that.
They can be served alone and make a light, wonderful dessert. You can add a scoop of ice cream or whipped cream, if you like. They can also be served with cake or cookies. You can even add some to a glass of lemonade or a summer cocktail, just for fun.
This dessert is easy to make and a nice alternative to ice cream. Don’t get me wrong, I love ice cream, but sometimes I want something lighter. Nice for those who are lactose intolerant, too. Once made, you can have them on hand for dessert anytime.
Strawberry Vanilla Sorbet
2 c. fresh or frozen strawberries (allow frozen berries to thaw a little first)
1/4 c. sugar, or to taste
3 T. fresh lemon juice
1 t. vanilla
Place ingredients in food processor and process until smooth. Place in shallow pan and freeze. If you are using frozen berries re-freezing will take only about 1 hour. Up to 30 minutes before serving remove sorbet from freezer and allow to soften enough to break into chunks. Place in processor and blend again until very smooth. Return to freezer until needed.
Mango Honey Ginger Sorbet
2-3 large, ripe mangoes, seed and peeled
1/4 c. honey, or to taste
2-3 t. fresh grated ginger
Place ingredients in food processor and process until smooth. Place in shallow pan and freeze. Up to 30 minutes before serving remove sorbet from freezer and allow to soften enough to break into chunks. Place in processor and blend again until very smooth. Return to freezer until needed. For an even smoother sorbet, you can blend it another time.
Kiwi Lime Sorbet
6 kiwi, peeled
juice of 1 lime
1/4 c. sugar, or to taste
Place ingredients in food processor and process until smooth. Place in shallow pan and freeze. Up to 30 minutes before serving remove sorbet from freezer and allow to soften enough to break into chunks. Place in processor and blend again until very smooth. Return to freezer until needed.
To serve the sorbets, use a cookie scoop to make the “melon” balls. I made them as I was serving them, but you can also make the balls and return them to the freezer until ready to serve. Posted in Cooking |
Homemade Blackberry Ice Cream

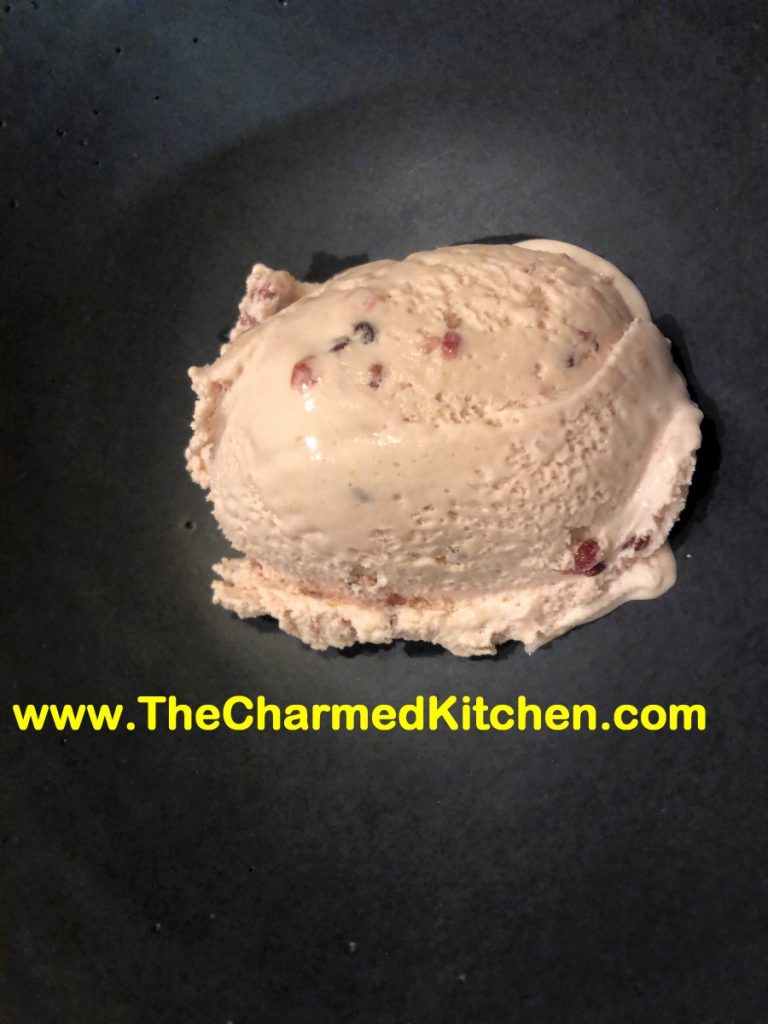
I am so happy with this ice cream. The flavor came out just right. The texture is super creamy and not too sweet. The chunks of blackberry add just the right amount of tartness. I love fruit based ice creams, but I never made blackberry ice cream before. I will be making it again, for sure.
I have had the inspiration to make a new recipe for all sorts of reasons. Sometimes creative reasons, or sometimes nostalgic feelings. This ice cream came about because of expiration dates. I had both heavy whipping cream and half and half that needed to be used up soon. I didn’t want to freeze them and I wasn’t going to waste them. Since I had a carton of blackberries in the fridge, it seemed only natural to make a blackberry ice cream. I don’t always add eggs to my ice cream, but I had a dozen eggs that needed to be used, too.
Whatever the motivation, this ice cream is one of my favorites. There is a little more work to making an egg-based custard ice cream. But the extra effort is worth it. The texture is so creamy.
With any fruit based ice cream, you don’t want to just put raw fruit in the mixture and freeze it. That will cause the fruit to get big ice crystals. Fruit can be cooked first, like I did with the berries in this recipe, or the fruit can be frozen, then thawed before being added to ice cream base.
So here is the recipe. I used an orange because I had an orange. I could see using a lemon instead, or perhaps lime. I left a little wiggle room on the amount of sugar you add to it. Before someone asks- yes- you can sweeten with honey, if you prefer. Just use a light hand. Honey is sweeter than sugar. Enjoy!!
Blackberry Ice Cream
6 oz. blackberries, washed
1 large orange
½ c. sugar
1½ c. half and half
1 c. heavy whipping cream
3 egg yolks
¾ c. sugar- or a little more or less to taste
1 t. vanilla
In medium saucepan, place the blackberries. Zest the orange and add the zest to the berries. Juice the orange and add the juice to the berries along with the ½ cup of sugar. Heat until mixture comes to a boil. Reduce heat and simmer until mixture starts to thicken, about 6-8 minutes. Stir occasionally. Don’t let it burn. Remove mixture to a bowl to cool down. You can use the same saucepan to heat the half and half and cream to a low boil. In a small bowl, beat together the egg yolks, sugar and vanilla. Add ½ cup of the hot cream mixture to the eggs, whisking in well. Add another ½ cup of the cream mixture, whisking again. Add one last ½ cup of the hot cream and again, whisk until smooth. Pour the egg mixture into the saucepan with the cream and while whisking, simmer until mixture starts to thicken and will coat the back of a spoon. This will take about 5 minutes. Don’t use too high a heat, or you will scramble your eggs. Mixture should reach 160 degrees to be sure eggs are cooked. Remove from heat, stir in reserved blackberry mixture. Pour mixture into a bowl. Allow ice cream base to cool down, then chill in fridge. Chilled mixture can be frozen in an ice cream maker once cold- in a few hours- or even the next day. Once mixture has been frozen in ice cream maker, place in a container and freeze until ready to serve. Makes about 5-6 cups of ice cream.
Tomato Pasta Salad

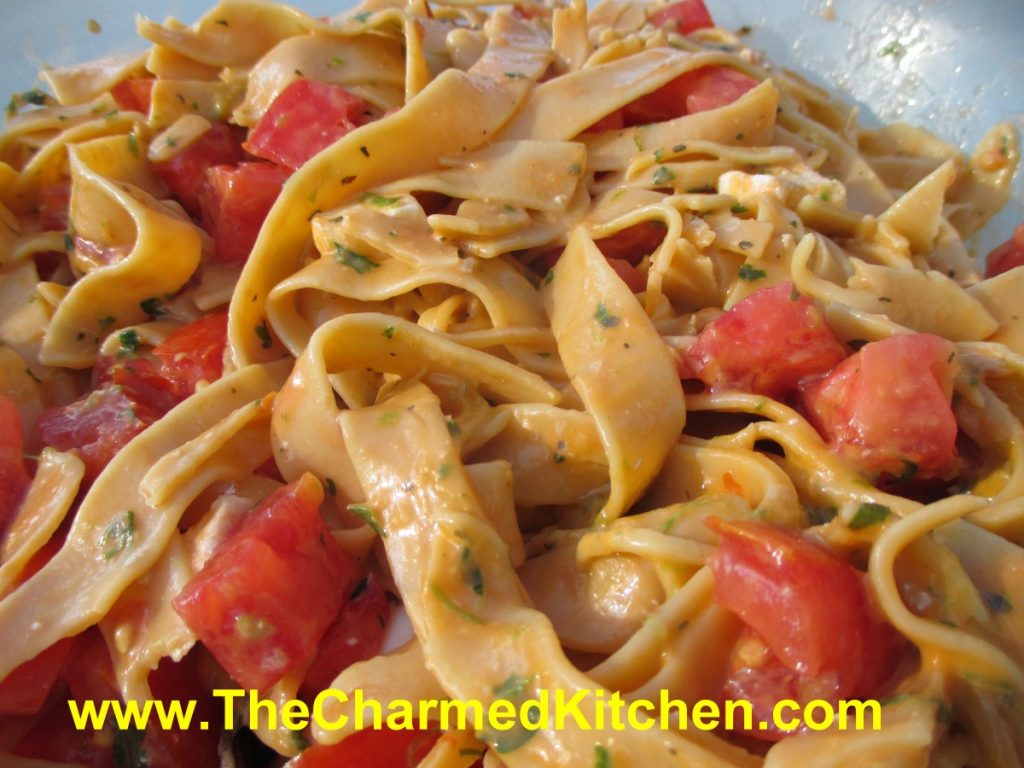
I have been enjoying plenty of fresh, local tomatoes and I am always looking for new ways to enjoy them. This salad really celebrates the tomato.
I used tomatoes three different ways in this one salad. I started with a homemade tomato pasta, added fresh diced tomatoes and finished it with a tomato salad dressing.
The salad has fresh mozzarella cheese added to it, along with some hard cooked eggs. You could easily add cooked chicken or shrimp, if you prefer.
Here is the recipe for the salad and the dressing. I posted the recipe for the homemade tomato pasta at the bottom of this post. You can, of course, use store-bought pasta, if you prefer.
Tomato Pasta Salad
8 oz. tomato pasta or tri-color pasta, I used homemade
12 oz. diced tomatoes
2 sweet peppers, seeded and chopped
½ c. sliced green onions
4 oz. mozzarella cheese, cubed or shredded
3-4 hard cooked eggs
Tomato herb dressing- recipe follows- or use the vinaigrette of your choice.
Cook pasta according to package directions. Drain. Combine with remaining ingredients and toss. Serve immediately or chill. Serves 4.
Tomato and Herb Dressing
1 c. tomatoes, peeled and seeded, fresh or canned
½ c. chopped parsley
2 green onions, chopped
2 T. fresh celery or lovage leaves
2 T. fresh basil leaves or 2 t. dried
½ t. each salt and garlic powder
½ c. olive oil
Dash hot pepper sauce
Combine all ingredients in blender until smooth. Makes 1½ cups.
Fresh Tomato Pasta
2 c. flour
1 t. salt
½ -2/3 c. tomato juice- I just pureed a fresh tomato in the blender, seeds, skin and all. You might need a little more.
Fresh minced herbs, like chives, basil, parsley, rosemary, optional
Place flour and salt in bowl and stir to blend. Start adding the tomato juice, stirring to form a firm dough. Knead until smooth and cover dough, allowing to rest at least 20 minutes. I like to mix the dough in a food processor. Just mixes faster. You can also mix in a stand mixer using the dough hook. Once dough is rested, roll out to desired thickness and cut into noodles or use as the base for ravioli. Fresh pasta cooks in just a couple of minutes. Watch carefully. Serves 3-4.


