Edible Flowers

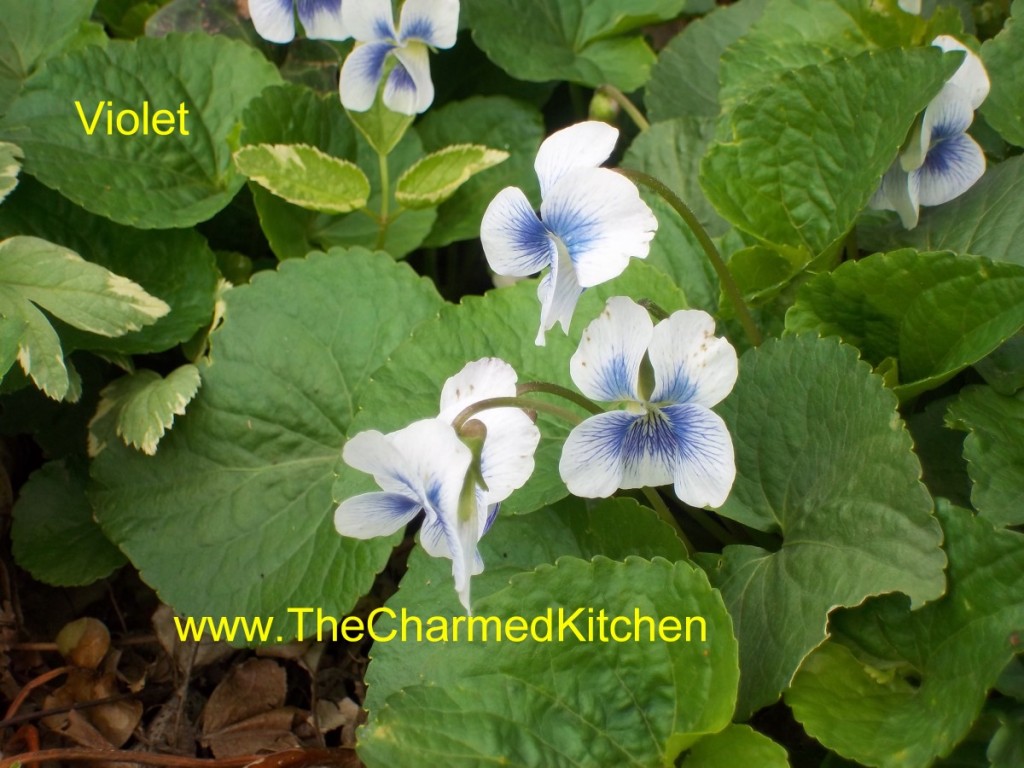
When deciding which flowers to plant in your yard- why not plant flowers that are also edible? That way they do double duty. They make your yard look beautiful and they can make your food look beautiful, too.
I cook a lot with flowers. I often add them to salads, infuse vinegar and make jelly with them. You can also use them to decorate cakes or other desserts, in salad dressings and marinades, floating in tropical cocktails, in punch bowls and in ice cubes.
Flowers can also top off dips, cheese, fruit trays and other appetizers, be used to make teas, infused in honey or mixed with soft cheese and spread on crackers or toast. I candy violets every year.
Add some to baked goods like quick breads, cookies and muffins or in yogurt, cottage cheese or sorbet. Wherever your food needs a little color or flavor, flowers make it special.
Below are 2 lists- one of edible flowers- the other a list of flowers that are poisonous. I would be remiss if I didn’t caution you about flowers that are not edible. Be sure to get a positive identification of any flower before you eat it. Only eat flowers that have been grown pesticide free.
Some Edible Flowers
Calendula, Chives, Daylily, Mint, Nasturtium, Pansy, Rose, Sage, Signet Marigold, Squash Blossoms, Anise Hyssop, Apple, Arugula, Basil, Bee Balm, Borage, Broccoli, Chamomile, Chicory, Chrysanthemum, Coriander, Dandelion, Dianthus, Dill, Elderberry, English Daisy, Evening Primrose, Fennel, Garlic Chives, Hibiscus, Honeysuckle, Hyssop, Jasmine, Johnny-Jump-Up, Lavender, Lemon, Lilac, Linden, Magnolia, Marjoram, Mustard, Nasturtiums, Nodding Onion, Okra, Orange, Oregano, Pea, Pineapple Guava, Pineapple Sage, Radish, Red Clover, Redbud, Rose of Sharon, Roselle, Rosemary, Runner Beans, Sage, Safflower, Scented Geraniums, Shungiku, Society Garlic, Sunflower, Sweet Woodruff, Thyme, Tuberous Begonia, Tulip, Violet, Winter Savory, Yucca
Some Poisonous Flowers
Aconite, Anemone, Anthurium, Atamasco Lily, Autumn Crocus, Azalea, Baneberry, Black Locust, Bloodroot, Boxwood, Burning Bush, Buttercup, Butterfly Weed, Caladium, Call, Carolina Jasmine, Castor Bean, Cherry Laurel, Chinaberry, Christmas Rose, Clematis, Daffodil, Deadly Nightshade, Death Camas, Delphinium, Dogbane, Dumbcane, Elephant Ears, False Hellebore, Four O’clock, Foxglove, Gloriosa Lily, Golden Chain Tree, Goldenseal, Heavenly Bamboo, Henbane, Horse Chestnut, Horse Nettle, Hyacinth, Hyacinth Bean, Hydrangea, Iris, Ivy, Jack-in-the-Pulpit, Jerusalem Cherry, Jessamine, Jetbead, Jimsonweed, Jonquil, Kentucky Coffee Tree, Lantana, Larkspur, Leopard’s Bane, Lily of the Valley, Lobelia, Marsh Marigold, May Apple, Mescal Bean, Mistletoe, Morning Glory, Mountain Laurel, Nightshade, Oleander, Periwinkle, Philodendron, Pittosporum, Poison Hemlock, Potato, Privet, Rhododendron, Rock Poppy, Schefflera, Spring Adonis, Spurge, Star of Bethlehem, Sweet Pea, Tobacco, Trumpet Flower, Water Hemlock, Wild Cherry, Wisteria, Yellow Allamanda, Yellow Oleander, Yesterday, Today and Tomorrow.
Neither of these lists in meant to be complete. Most important of all is to be sure you can identify these plants. If you are unsure plant identifications can be done at your local Extension office, garden center, nursery, arboretum and botanical garden. When in doubt, err on the side of caution. There are more than enough easy to identify flowers out there to enjoy without taking chances.
Violet Jelly

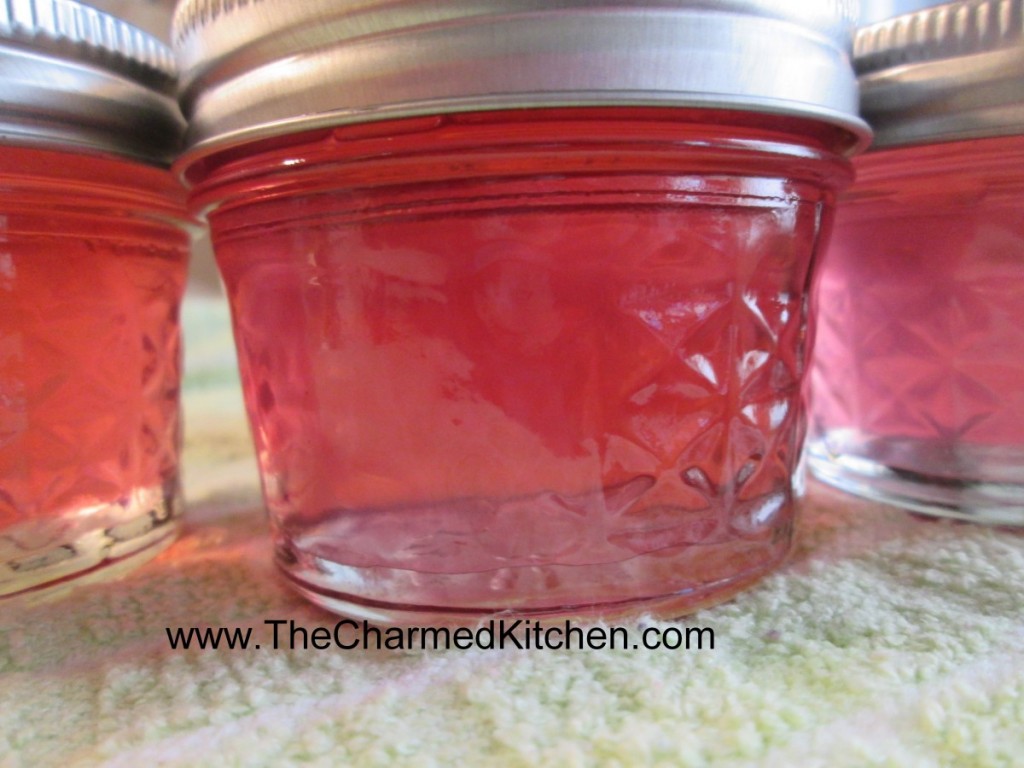
I am always interested in new and different ways to use my edible flowers. A few years ago, I started making jelly with my violets.
I started by making violet-infused vinegar from some of the violets. I like the vinegar for dressing salads.
I decided to use some of the violet vinegar as a base for the jelly. It worked out great. The end product had a sweet taste of violets, but the vinegar added a tartness I really liked. It also came out a stunning pink color.
Since the violets are steeped in vinegar- you can harvest over several weeks- just keep adding blossoms to the vinegar. If you don’t have a lot of blossoms at once, you can harvest a few at a time over a longer period of time. The violets in vinegar will keep, so you don’t have to make the jelly right away.
I like to have equal parts flowers and vinegar for a nice strong floral flavor, but you can get by with fewer blossoms if you need.
Start with a clean jar, and put your violets in it. Pour vinegar over to cover. White vinegar or white wine vinegar can be used. Heck you could probably use red wine vinegar, too. Cider vinegar might affect the color. You can continue to add flowers to the jar as you pick them. I picked 4 cups of violets and put them in a quart mason jar. I added vinegar to fill the jar, closed it up and let the flavors blend for a week. I could have let it sit longer if I was too busy to get to it. If you are in a hurry and want to make the jelly right away just heat up the vinegar and steep the flowers.
After a week, I strained it out then poured the mixture through a coffee filter to get it really clear. I ended up with 3 1/2 cups of violet “vinegar” to use for my violet jelly. I had a basic idea of how much sugar I would need so I went from there. It worked out great and jelled perfectly.
Violet Jelly
3 1/2 cups violet vinegar*
1/2 c. lemon juice
1 box powdered pectin (1 3/4 oz.)
5 c. sugar
Wash and prep jars and get water bath heating up. Place violet vinegar in pan and add lemon juice and pectin. Bring mixture to a rolling boil over high heat. Add sugar and return to the boil. Stir often. Once mixture gets to a full rolling boil, boil 1 minute. Remove jelly from heat and skim off any foam. Ladle hot liquid into jars leaving 1/4 inch headspace. Wipe rims and adjust lids. Process in a boiling water bath for 10 minutes for 4 oz. and 8 oz. jars. Remove jars to cooling rack and check seals once they have cooled down. Yield: about 7 half pint jars or 13-14 (4 oz.) jars.
*For 3 1/2 cups of violet vinegar you will need 3-4 cups of blossoms and 3 1/2 cups of vinegar.
Sweet and Sour Baked Onions

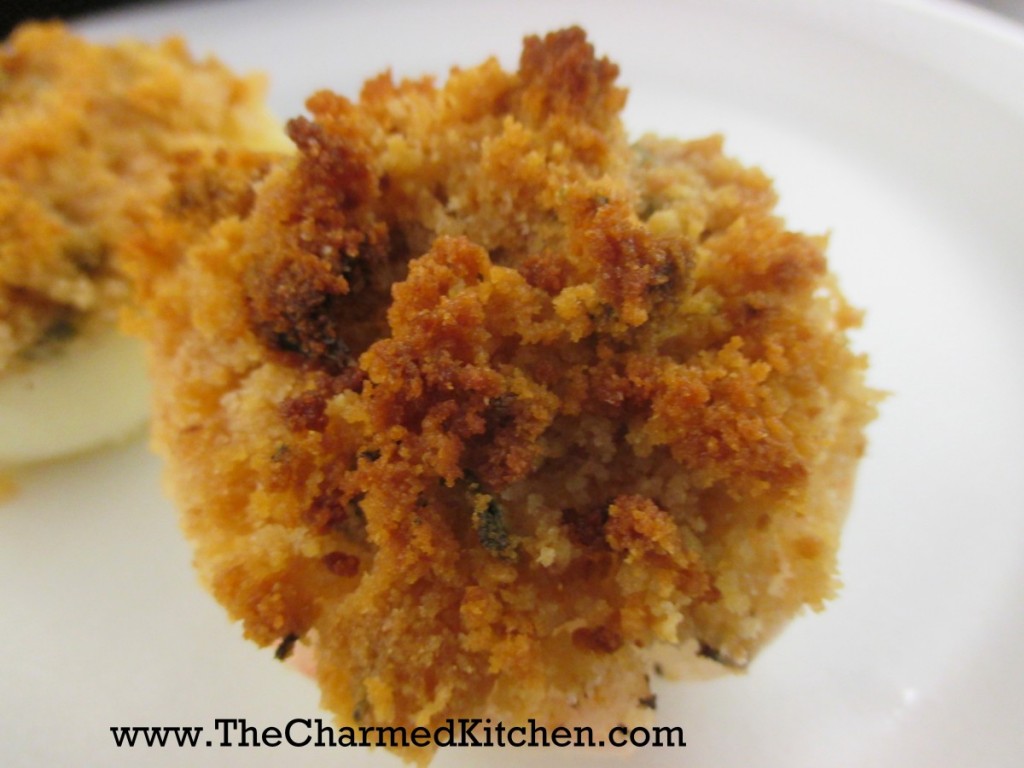
I never met an onion I didn’t love. Most of my savory dishes start with sauteing onions in a pan. But in many ways, the onions are in the supporting role, making the other ingredients taste better.
In this recipe, the onions are the star. Plain old yellow cooking onions are elevated to a tasty side dish I think you will like. This make a great side dish for any meal.
The onions are peeled, halved and drizzled with a vinegar/sugar mix. Then, they are topped with a bread crumb and herb mix that gets crispy, while the onions roast and become tender. The recipe reminds me of onion rings in flavor. The presentation is so pretty, though. Much more elegant than onion rings.
If you never tried baking onions this way, you might want to try it. Just a warning- they are addictive. Bake a few more than you think you need. People go for seconds on this dish.
Sweet and Sour Baked Onions
4 cooking onions, peeled and halved- I use yellow onions, but you can use red or white- about the size of a tennis ball or baseball
2 tablespoons cider vinegar
2 teaspoons sugar
1 cup dried bread crumbs
1/2 cup olive oil
1 teaspoon dried rosemary
1/4 cup chopped fresh parsley
Salt and pepper to taste
Preheat oven to 375 degrees. Arrange the onions in a 9×13 inch baking pan. Arrange the onions round side down. In a small mixing bowl mix together the vinegar and sugar. Spoon the mixture onto the flat surface of the onions. Sprinkle with a little salt and pepper. In another mixing bowl combine the breadcrumbs with 1/4 cup oil, rosemary and parsley. Mix until well combined. Pat the mixture evenly onto the flat side of the onions. Drizzle the remaining 1/4 cup of oil over the onions and bake for 45 minutes or until the onions are tender when pierced. Let the onions cool a little at room temperature. Serve with extra salt and pepper to taste.
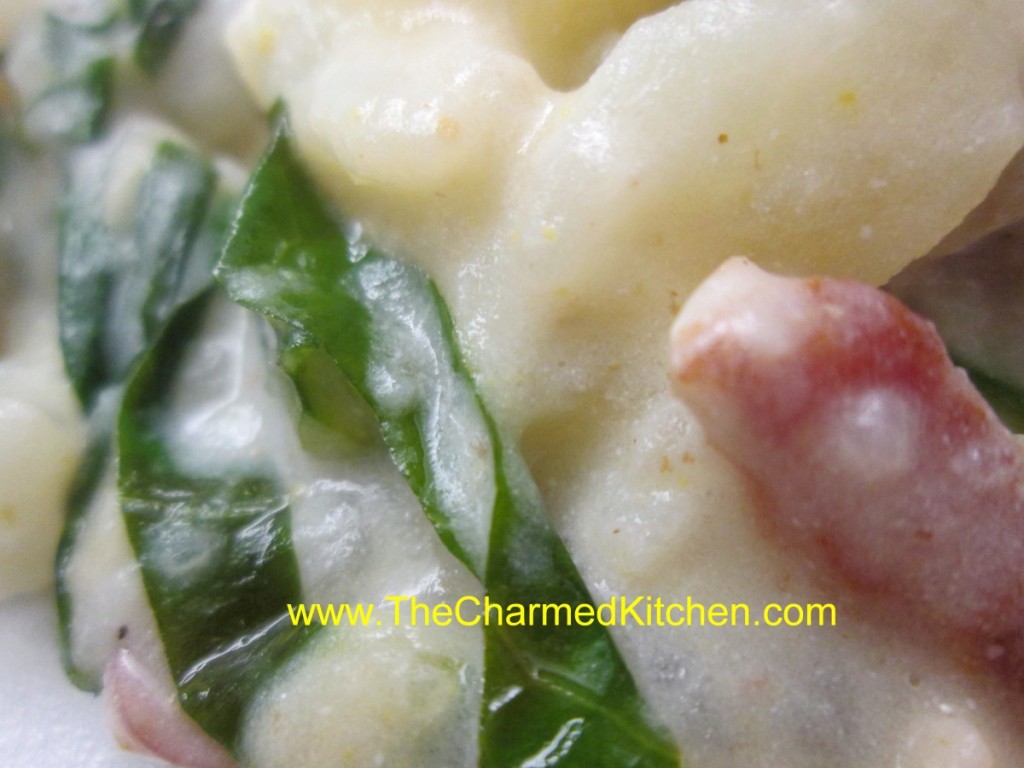
Mushroom Stroganoff with Mushroom Pasta

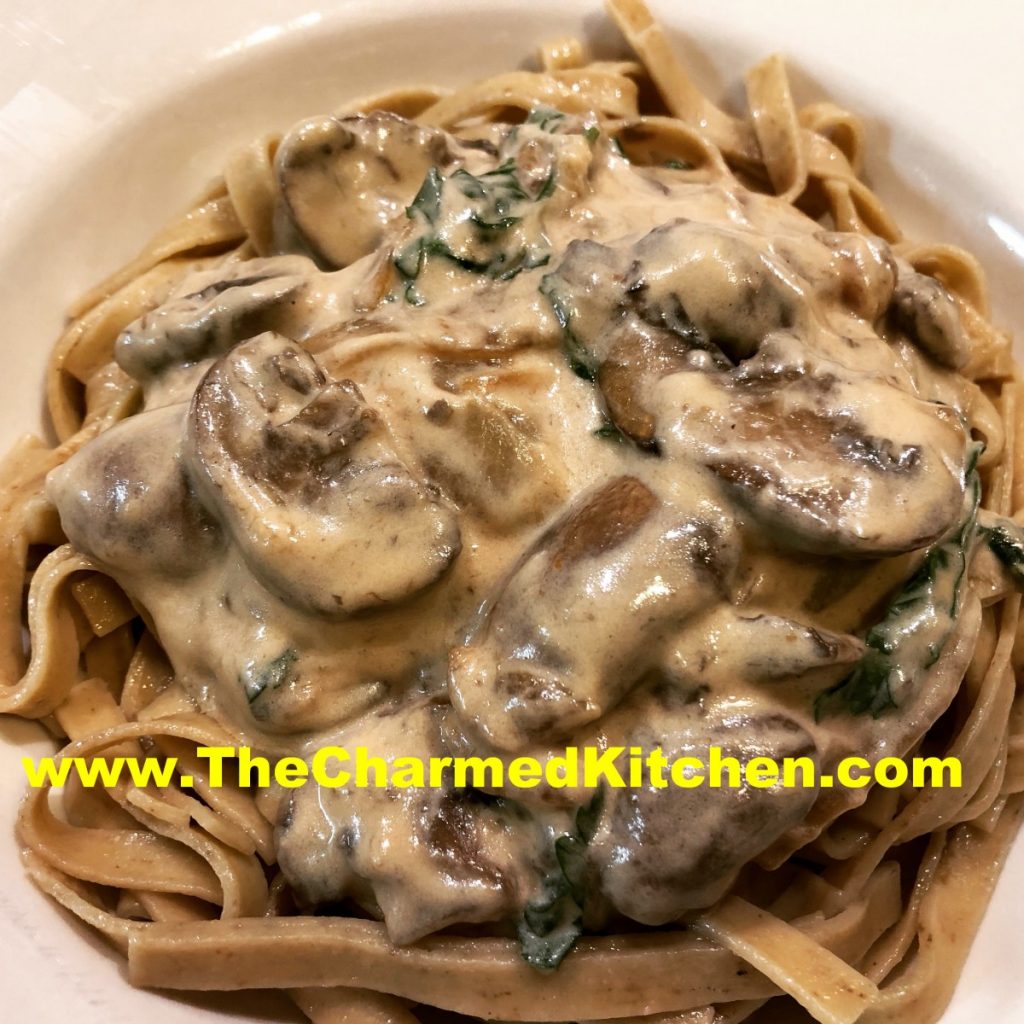
If you are looking for a meat-free meal, you can’t go wrong with mushrooms. Mushrooms add so much flavor to any dish. This mushroom stroganoff is easy to make and tastes great. I also made mushroom pasta, but you can use store bought pasta.
I used a pound of mushrooms, but I could see making this dish with even more mushrooms. I also think it would be fun to make it with a few different types of mushrooms.
For the pasta, I used mushrooms I had dried myself. Store bought dried mushrooms often have to be soaked first, to remove dirt. I only recommend using mushrooms you washed and dehydrated yourself. You don’t want grit in your mushroom powder or pasta.
Mushroom Stroganoff
3 T. oil or butter
1 c. chopped onions
1 lb. mushrooms, washed, trimmed and sliced
1 c. stock- I used chicken stock, veggie or beef would also work
1/2 c. dry sherry
1 c. sour cream
1/2 c. half and half
1/2 c. fresh chopped parsley
salt and pepper to taste
Heat oil in large skillet and cook onions until golden. add mushrooms and cook until they are golden, too. Add stock and sherry and cook until most of the liquid is cooked off. Remove from the heat and stir in the sour cream, half and half and parsley. Warm gently for several minutes until sauce thickens a little. Adjust seasonings and serve over mushroom pasta. Recipe follows. Serves 4-5. I only used some of the pasta for the dish.
Mushroom Pasta
3 c. flour, more if using electric pasta machine. See note.
½ c. mushroom powder- made from dried mushrooms
1½ t. salt
4 eggs
Water, as needed
Mix flour, mushroom powder and salt. Stir in eggs, kneading until dough is smooth and elastic. Dough will be very stiff. Add a little water, as needed, to hold dough together. You may wish to mix the dough in a mixer or food processor. Cover dough and let rest at least 15-20 minutes before rolling. Under kneading your dough will result in coarse, crumbly pasta. This batch makes about 1 pound. Serves 4-6.
Roll dough out on a well-floured board or with a pasta machine until desired thickness in reached. Add flour as needed to prevent sticking. Cut into strips or whatever shapes are desired. You might want to let the noodles dry 1-hour or more before cooking, but this is not necessary. Pasta can be hung to dry or separated and allowed to dry flat on a table. When pasta is not hanging to dry it must be turned occasionally to dry evenly. Although you may hear otherwise, homemade pasta, even when dried, should be frozen for long term storage. Storing at room temperature can lead to spoilage. Fresh pasta can also be stored in the refrigerator for a day or two.
Cooking fresh pasta happens quickly. For most noodles you are looking at 2-3 minutes at the most. Thicker cuts and ravioli would take a little longer. Watch it carefully. Drain after cooking, and toss with your favorite sauce.
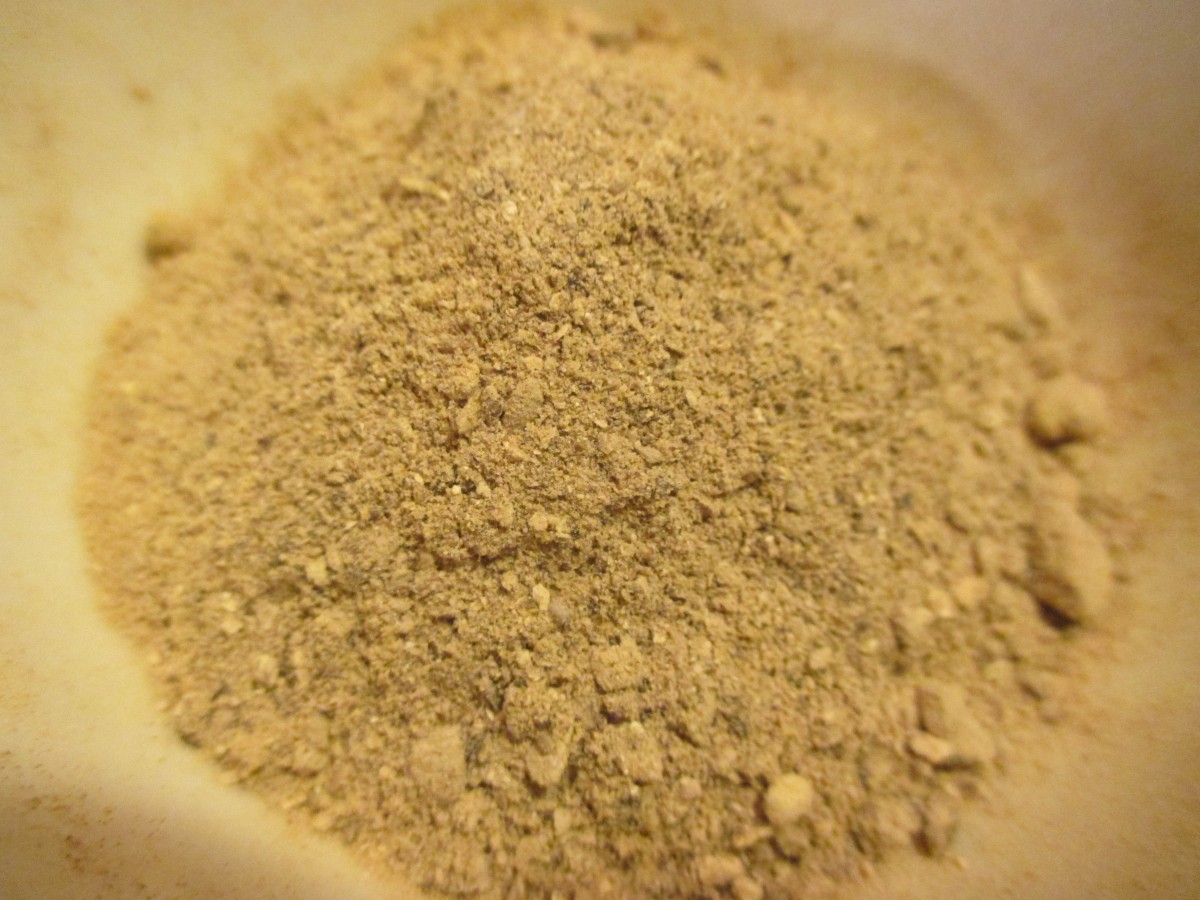
Mushroom powder
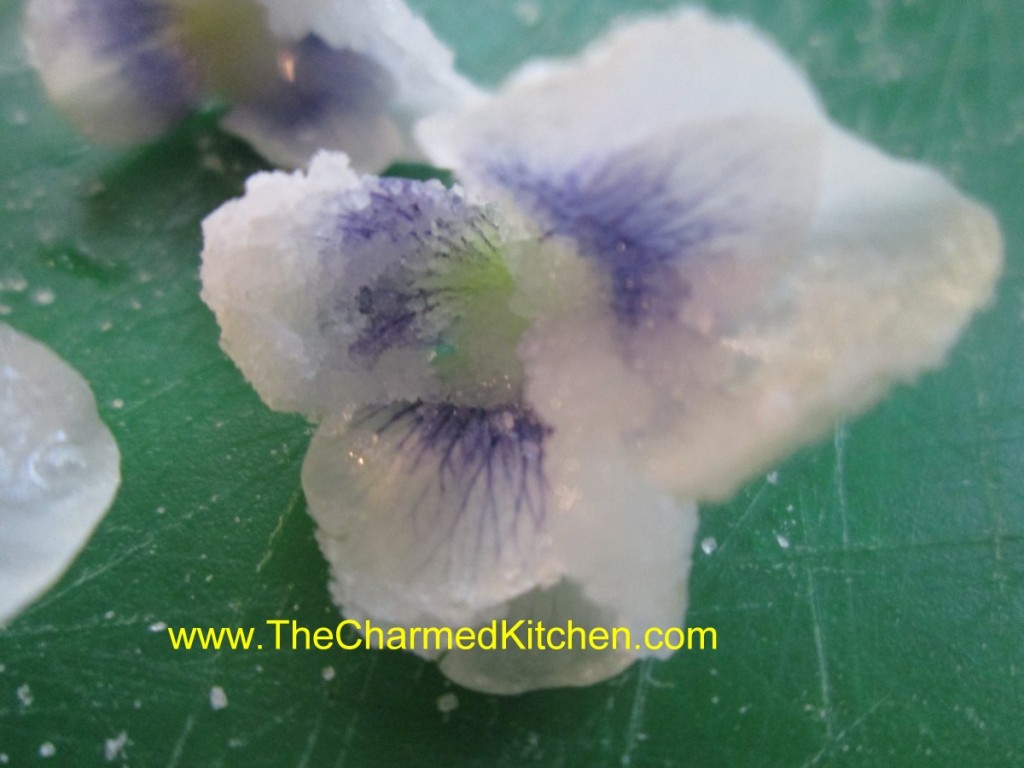
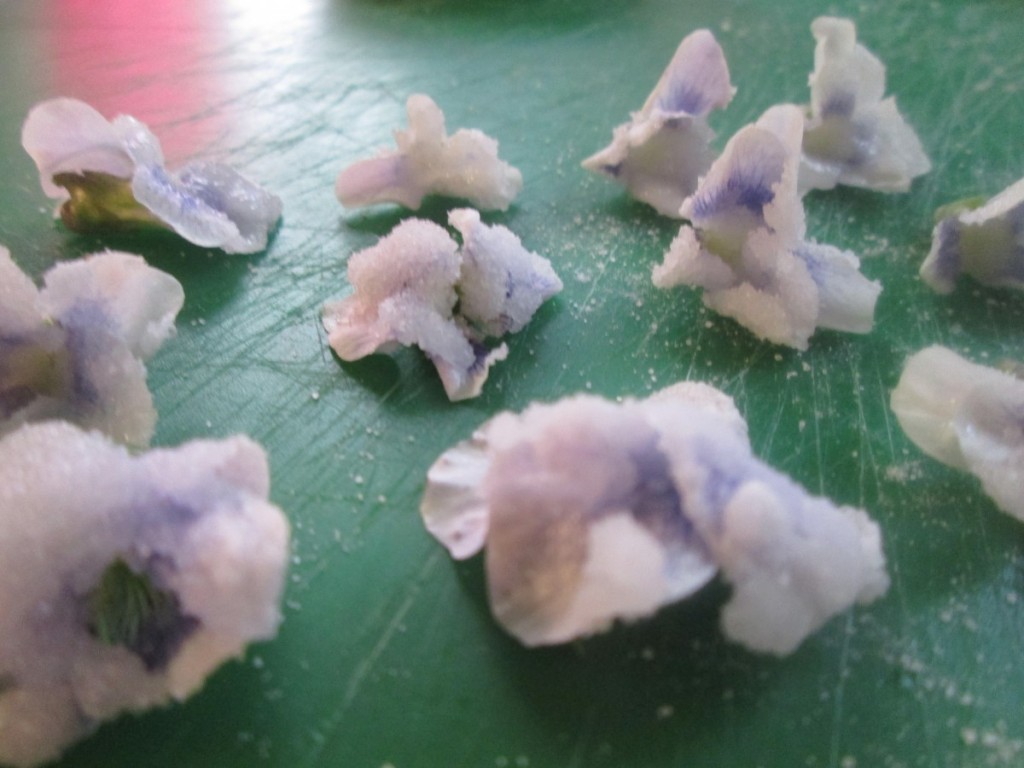
How to Candy Violets

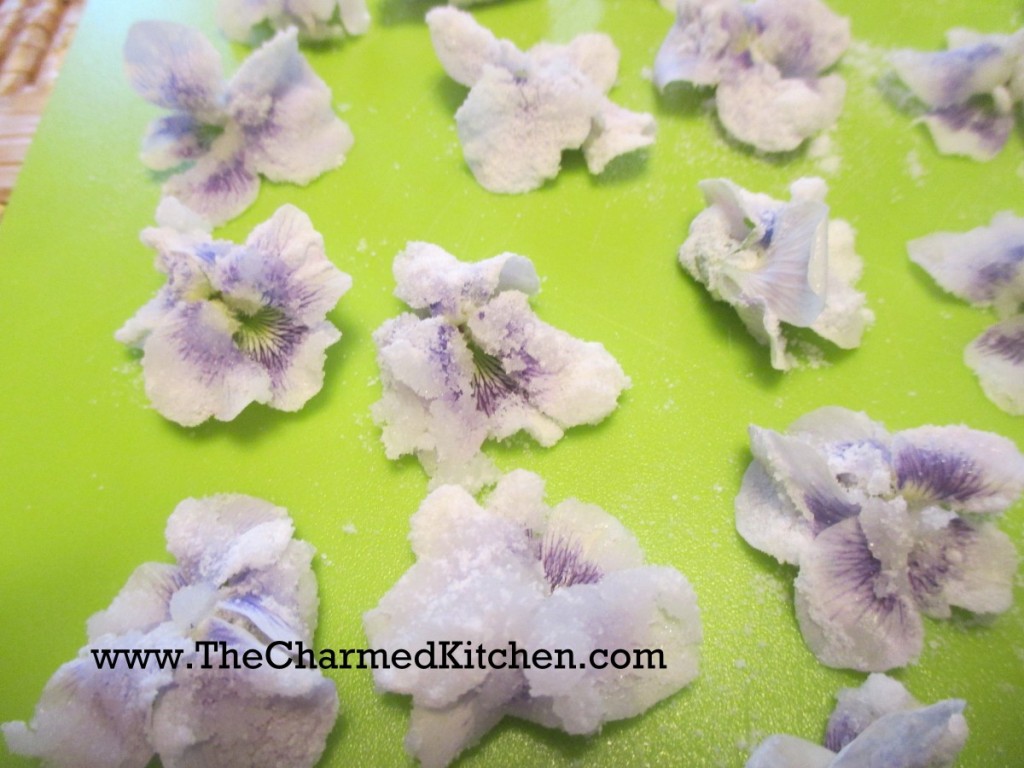
This time of year, I always get requests about how to make candied violets. I thought I would share the recipe again.
Since my yard is full of violets right now, I decided to candy some today. It’s an easy way to enjoy these delicate flowers throughout the year.
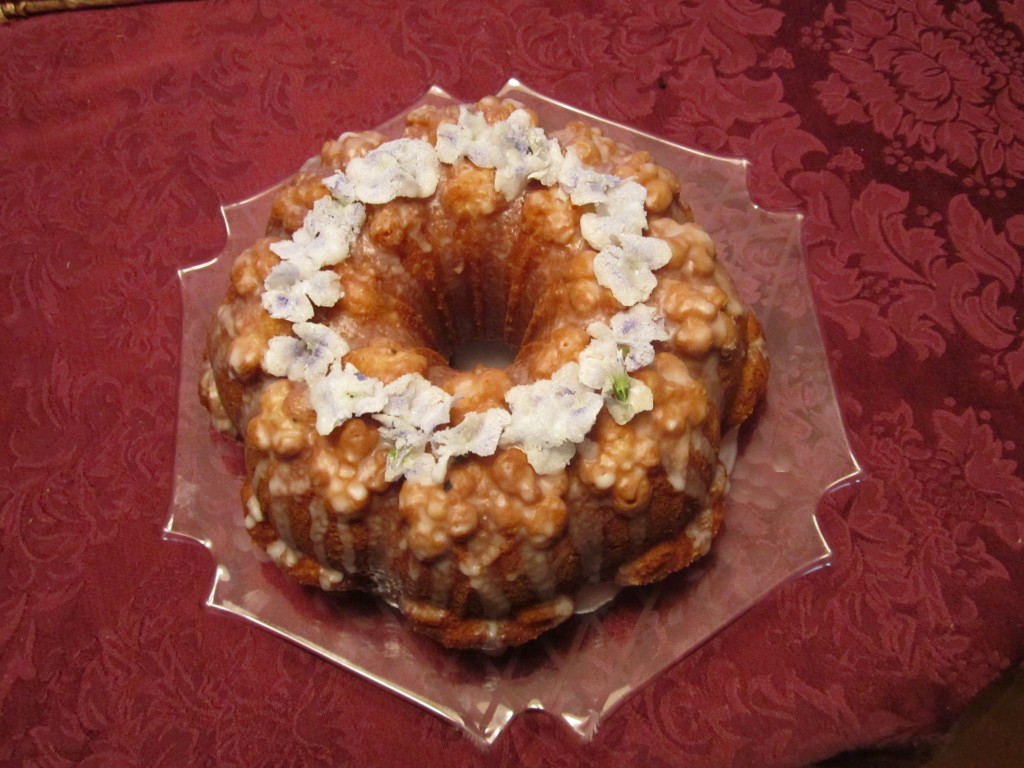
I use them to decorate baked goods. Lovely on a cake, they also add a sweet touch to cupcakes.
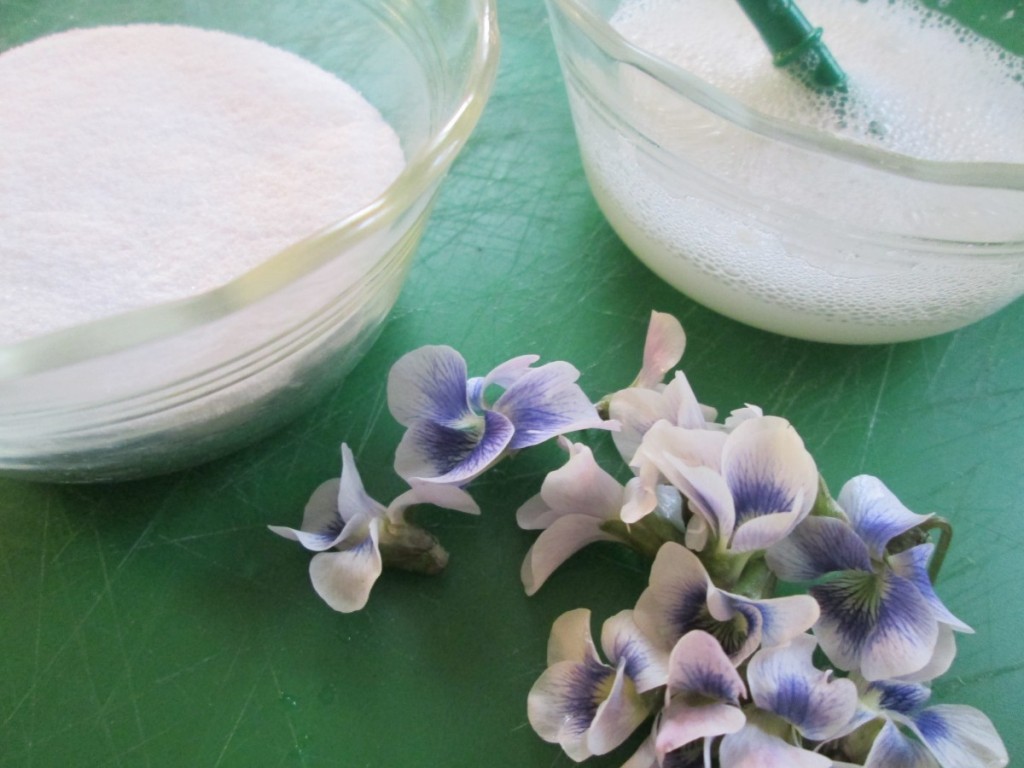
Candied Violets
Powdered egg whites (see note)
Water
Superfine sugar (see note)
Fresh violet flowers, rinsed and drained on paper toweling- Not African violets
Following package directions reconstitute egg whites to the equivalent of one or two egg whites. You can dilute them a little to make them easier to brush on. Place sugar in a shallow bowl. With a food-grade fine brush coat a violet with the egg white and press into the sugar. Place on wax paper and repeat with remaining flowers. Allow to dry for about a week. Store in a container with a tight fitting lid in a cool place. I like to store them in the freezer.
Note: By using powdered egg whites, you remove the risk of salmonella from using raw eggs whites. Powdered egg whites can be found in some grocery stores and in cake decorating and candy making shops. Meringue powder can also be used.
Lemon Tea Cake

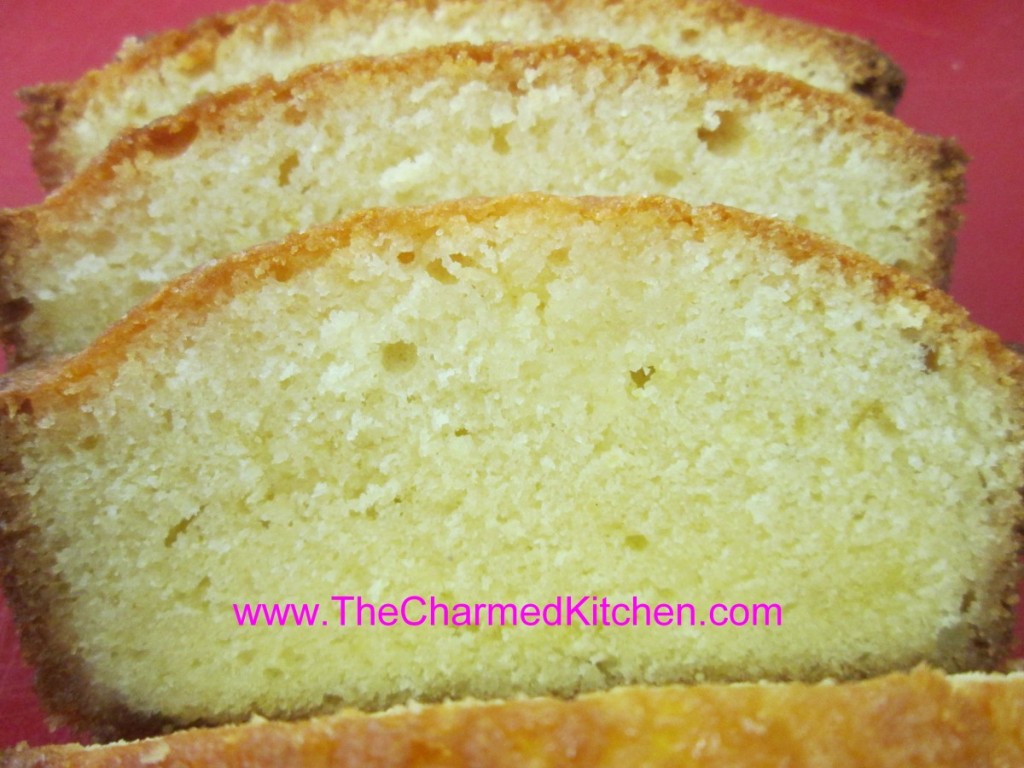
This is one of my favorite cakes of all time. It is a simple cake, enhanced with the flavor of lemon juice and lemon zest. Once out of the oven, you poke the hot cake with a large fork or a skewer, and pour a lemon syrup over it. The syrup gives the cake an extra lemony tang.
It is a perfect addition to afternoon tea.
Great all on its own, this cake is also wonderful served with fresh berries and whipped cream for a Spring dessert. On a hot day, I have been known to top it with a scoop of ice cream.
Before you ask, the measurements are correct- only 3/4 cup of flour. No leaveners like baking powder or baking soda, either. The cake does not rise a whole bunch, but the texture is still very nice. The texture of the cake helps it to stand up to the lemon syrup.
I hope you will give it a try. I made it for a fire pit gathering with a few friends last night. Everyone liked it.
Lemon Tea Cake
2 lemons
3 T. sugar for topping
½ c. butter, softened
¾ c. sugar
2 eggs, beaten
3/4 c. flour
6 T. milk or half and half
Preheat oven to 375 degrees. Grease an 8- inch loaf pan and line with wax or parchment paper. Grate the lemon rinds and set aside. Combine the juice of 1 of the lemons with the 3 tablespoons of sugar, stirring to dissolve sugar. Set aside.
Cream together the butter with the rest of the sugar and beat until fluffy. Beat in the eggs, a little at a time until well mixed. Stir in the flour and lemon peel and beat well. Add the milk and beat well. Pour batter into prepared pan and bake at least an hour. The cake should spring back when touched lightly. As soon as you remove the cake from the oven pierce it all over with a long-tined fork or a skewer. Pour over the reserved lemon juice mixture. Cool cake in pan before serving. Cake will be moist and tangy.
Violet Liqueur

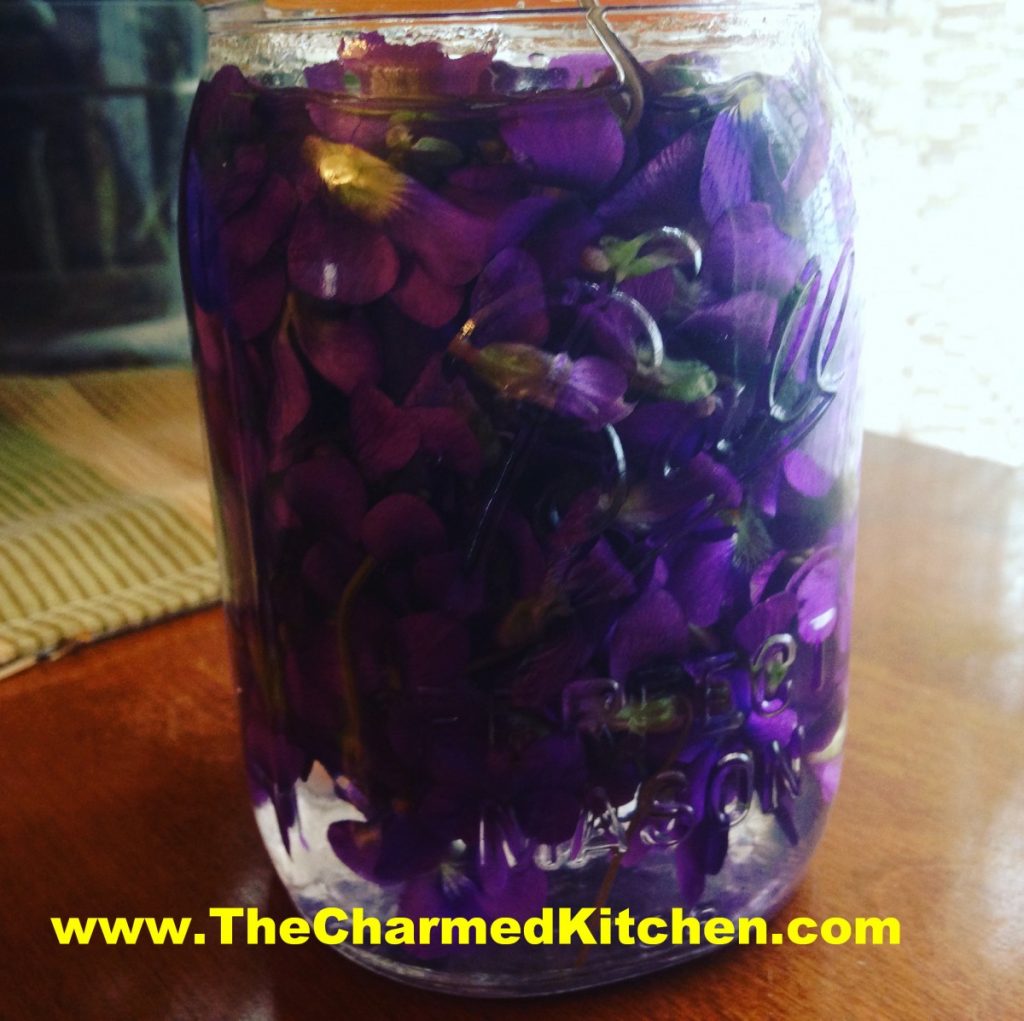
I have received requests for directions on how to make violet liqueur. Violet liqueur is, in its most basic sense, a combination of violets and vodka, steeped together for several weeks, then strained and filtered. Once strained, the mixture is sweetened to taste with simple syrup. You can use other alcohols, if you like. Brandy perhaps.
Violet liqueur can just be sipped and enjoyed as is, but it is often used as an ingredient in cocktails.
I have made violet liqueur with the violets that grow in my yard. They are mostly white, with a small amount of purple color. The liqueur tastes great, but doesn’t have a lot of color. It comes out a light golden color. That is fine with me.
For this batch, I am using purple violets I got from a friend’s garden. The color will end up a light purple color. To make the color of your liqueur more purple, you can add a few raspberries or blackberries to the mix.
We need to talk about sweetening, too. A simple syrup is added to suit your taste. The recipe for simple syrup is at the end of this post. How sweet you make your liqueur determines whether it is a liqueur, or creme de violette. Lightly sweetened and it is violet liqueur. Double the amount of simple syrup and it is creme de violette. Strictly your choice and preference.
If you prefer to leave your violet mixture unsweetened, it is a violet eau du vie, which translates to violet water of life.
I use 1/2 cup of simple syrup for each cup of liqueur. Equal amounts of liqueur and syrup creates the creme de violette.
Violet Liqueur
1- 1 1/2 c. violet flowers, rinsed and drained
1 c. vodka
1″ piece vanilla bean, optional
a few fresh raspberries or blackberries, optional
1/2 c. simple syrup recipe follows
Combine violet flowers and vodka in a jar with vanilla bean and berries, if using. Screw on the lid and place the jar in a cool, dark place for at least 3 weeks for the flavors to combine. You can add more violets as you harvest them, if you don’t have enough at first. After a few weeks, strain out the flowers and other ingredients and discard them. Filter vodka mixture through coffee filters or several layers of cheesecloth to get it really clear. Sweeten to taste. Return to jar, seal and allow flavors to mellow another week. Enjoy!!
Simple Syrup
Simple syrup is made from 1 cup of sugar and ½ cup of water. Bring to a boil, then cool. You will have 1 cup of syrup. You can sweeten with honey, if you prefer. Watch when you substitute honey for sugar, as it is sweeter and stronger flavored. Add a small amount, let it sit for a day or so- and give it a taste. You can always add more sweetener later.
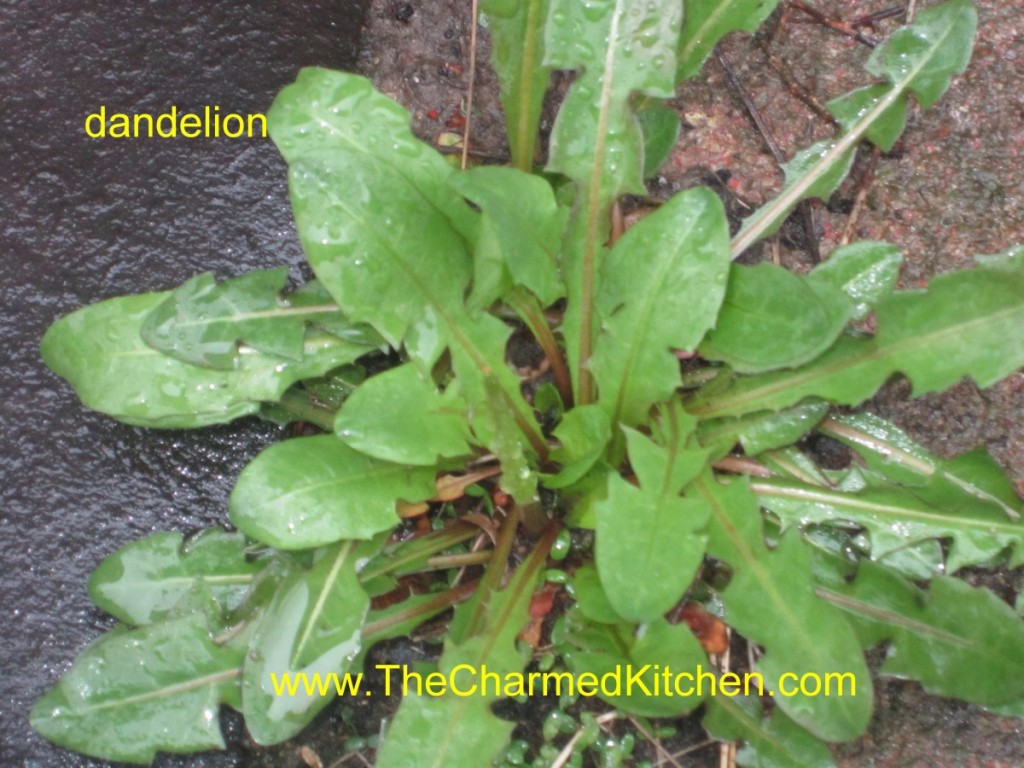
100 Flower Dandelion Muffins


The curious name for this recipe comes from my own curiosity. I wondered just how many blossoms I would need to get about a cup and a half of petals. I decided to make muffins with some of the dandelions blooming in my yard. I have a lot of dandelions, and I wanted to use a really decent amount in my muffins. I started counting as I trimmed them and stopped when I had a cup and a half. It turned out to be 100 flowers. So now, if you want to make this recipe, you will know when you can stop picking!!!
If you can’t beat them, eat them. I actually am a big fan of dandelions. I have organized dandelion cook-offs and edited a dandelion cookbook. I eat the leaves, and a tea made from the roasted roots. The flowers are a wonderful ingredient in cooking, too. They are used to make dandelion wine and I enjoy adding them to fritters, pancakes and other baked goods. So here is my recipe for dandelion muffins. They are pretty tasty, tender, light and not too sweet.
100 Flower Dandelion Muffins
2 c. flour
1 T. baking powder
½ t. salt
1 egg, beaten
1½ c. half and half
1/3 c. honey
¼ c. melted butter
1 t. vanilla
1 t. orange zest
1 ½ c. dandelion petals*
Preheat oven to 375 degrees. Line 12 muffin cups with paper liners or grease them, set aside. In medium bowl, combine flour with baking powder and salt and set aside. In another bowl, combine egg with half and half, honey, butter, vanilla and orange zest. Beat by hand until well mixed. Stir in dandelion blossoms, then stir in flour mixture. Do not over mix. Stir just until flour is mixed in. Spoon batter into prepared pans, filling them about ¾ full. Bake for 20 minutes or until lightly browned on top. Great served warm with butter and honey. Makes 12.
* To prepare the dandelion blossoms you want to trim of the tough base and just use the petals in the recipe. Some of the green sepals will get mixed in, and that is OK. Measure the petals after trimming. I picked 100 flowers and ended up with about 1½ cups of petals.
Eat Those Dandelions

It’s funny when you think about it. People spend tons of money to eradicate dandelions from their lawns, but will go to an upscale restaurant and pay good money for a salad with mixed greens including dandelions. Dandelions were not always considered a weed. In fact, immigrants brought the seeds to America as a vegetable.
While the greens can be bitter, they can also be tamed when paired with certain ingredients. Combining dandelions with tomatoes, vinegar, cheese or other dairy products, and bread or cereal products will make them less bitter when eaten.
Dandelions are packed with nutrients, and if you don’t spray your yard with herbicides, you can likely find them under your own feet. Free, tasty and nutritious. Sounds like a win all around.
The plant is pretty much edible from top to bottom. The leaves for salads, soups and other dishes. The flowers are used for wine, jelly and the “burger” recipe at the bottom of this page. I recently baked dandelion flowers into muffins. The roots are roasted and used as a substitute for coffee. If you haven’t eaten dandelions before my only question is, what are you waiting for?
A classic dish using dandelions is dandelion gravy. Some versions use bacon, others not. This one uses bacon, sour cream and is served with boiled potatoes.
Dandelion Gravy
4 strips bacon
3 T. flour
1 c. water
1 lb. dandelion greens, washed and chopped
½ c. sour cream
1 T. sugar
1 T. vinegar
Salt and pepper to taste
Hot boiled or baked potatoes
Fresh chopped parsley, optional
Chop bacon and cook in skillet until crisp. Leave bacon in the pan. Remove all but 3 tablespoons of the bacon fat and stir in the flour until smooth. Add water and dandelion greens and cook over medium heat until greens are tender- about 5- 10 minutes. Add more water if mixture is too thick. Turn off heat. Combine sour cream with sugar and vinegar and stir into dandelion mixture. Adjust seasonings. Spoon gravy over potatoes.
Serves 4.
Note: If you want leave out the bacon instead add 3 tablespoons of oil to skillet along with the flour.
The next 2 recipes come from Dr. Peter Gail, my mentor and dearly loved friend. I will always remember Peter when I cook with dandelions.
Dandelion Pita Pizza
Pita bread, toasted English muffin, or toasted bread
Spaghetti or pizza sauce
Fresh dandelion greens of any age, chopped fine
Grated cheese (any kind)
Cover bread with sauce, add chopped greens, top with cheese, and toast in oven until cheese
melts. For a more sophisticated treat, chopped dandelion greens may be sauteed in olive oil with
onions, mushrooms and several cloves of crushed garlic, and then spread on the pizza and topped
with cheese.
Dandy Burgers
1 cup dandelion flowers, green removed
½ cup flour, any kind
1/4 cup onions, chopped fine ½ tsp salt
½ tsp garlic powder
1/4 tsp thyme
1/4 tsp basil
1/4 tsp rosemary
1/8 tsp pepper
enough milk to make thick batter.
Peel dandelion flowers and put in 4 quart mixing bowl. Add onions and mix together. Blend
flour and seasonings together, add to the flowers and onions, and blend thoroughly. Add milk
slowly, blending it in until you have a thick batter.
Heat olive oil in frying pan to cover bottom. Form batter into golf-ball-sized balls. Place in
oil, and squash down flat to make a 2″ diameter patty. Fry till brown on both sides. Remove and
serve on small rolls as you would hamburger sliders.
This post is dedicated in loving memory of Dr. Peter Gail
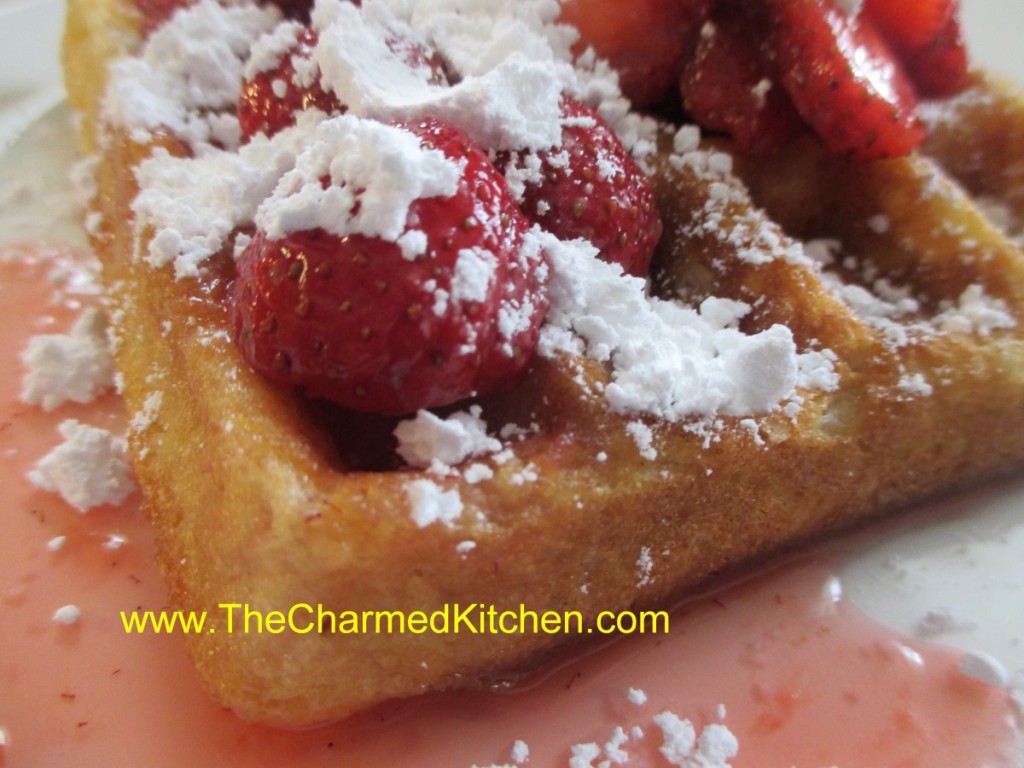
Cinnamon Vanilla Belgian Waffles

When I want a special breakfast, I make waffles. No one ever complains when you make waffles for breakfast. Or if you make waffles for lunch or dinner, for that matter.
The response is even better when you make Belgian waffles. At least that has been my experience. My theory is, that because Belgian waffles are bigger, people love them even more.
These waffles are light and rich at the same time.
Belgian waffles can be used as a dessert, too. For dessert, just top them with ice cream, chocolate sauce or whipped cream – or all three.
You can even freeze any extras. Oh, who are we kidding? There aren’t going to be leftovers. But if there were, you could freeze them.
Cinnamon-Vanilla Belgian Waffles
2 c. all-purpose flour
3/4 cup sugar
3-1/2 teaspoons baking powder
2 t. cinnamon
2 eggs, separated
1-1/2 cups half and half- or milk
1 cup butter, melted
2 t. vanilla extract
Sliced fresh strawberries, powdered sugar or syrup
In a bowl, combine dry ingredients. In another bowl, lightly beat egg yolks. Add milk, butter and vanilla; mix well. Stir into dry ingredients just until combined. Beat egg whites until stiff peaks form; fold into batter. Bake in a preheated waffle iron according to manufacturer’s directions until golden brown. Serve with strawberries, powdered sugar or syrup. Yield: 10 waffles (about 4-1/2 inches).


