10 Plants You Might Not Know are Edible


I have posted this information before. I think it is information worth sharing again. You might have a fresh salad growing all around you, and not even know it.
A lot of people don’t realize how many common plants they can eat. I thought it might be fun to share a few of them with you. Some of these are plants we grow as landscape/ornamental plants. Others are more often thought of as “weeds”. All have one thing in common. They are edible.
Some you may already know. I hope I might show you a few edibles you didn’t know about before.
I tried to stick to plants that were easy to identify. If you are not sure what it is – don’t eat it. Don’t eat plants where pesticides have been sprayed, either.
With any luck, you have at least a few of these in your yard.

Violets: Violet flowers are edible and used to decorate pastries and to make jelly. Did you know you can also eat the leaves? They are mild flavored- especially when young- and are a great addition to salads. Violet leaves are also high in vitamin C.
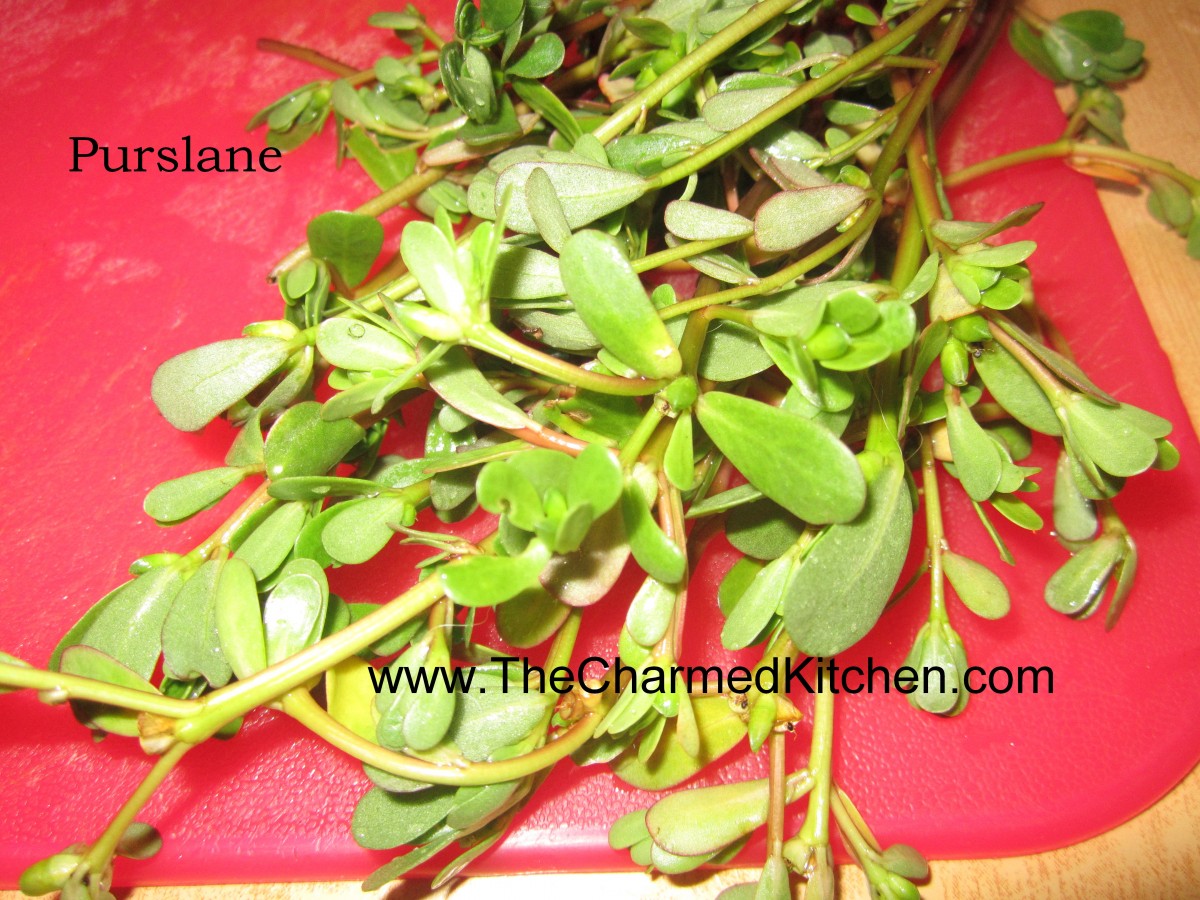
Purslane: The thick, fleshy leaves of purslane are easy to identify. Many vegetable gardeners make every effort to keep them out of their yards. Truth is, purslane is grown as a vegetable in many parts of the world. The leaves can be eaten raw in salads, can be cooked in a stir fry or just steamed as a fresh veggie. They can also be pickled. I make a salsa out of purslane leaves. They are crunchy with a slightly citrus flavor.

Lambsquarters: Lambsquarters are one of my favorites. They sprout all over my yard and in pots as soon as the weather warms up in the Spring. The leaves can be eaten raw when young or cooked as they mature. They taste just like spinach and are even better for you. Plants can get quite large and provide an easy harvest of nutritious greens.

Dandelions: We spend so much money trying to kill them. Sad because they are really a tasty green. Dandelions were brought to America by European immigrants as a vegetable. Their bitter greens can be an acquired taste. By combining the greens with certain foods you make them taste less bitter. Starchy foods like breads or potatoes, dairy products, tomatoes and vinegars all seem to tame the bitterness. Dandelion greens can be eaten cooked or raw. Flowers are used to make jelly and wine and can be added to baked goods.

Hosta: If you can get to them before the deer do, you will be pleasantly surprised. Hosta leaves are quite mild flavored, similar to Bibb lettuce. I add them to salads and even serve them with dips. The older leaves get tough so pick young leaves.

Sweet Potato Leaves: A friend from Hawaii first told me about eating sweet potato leaves. The leaves are pretty mild flavored. I normally eat them cooked although I have friends that eat them raw as well. You can eat the leaves of all sweet potatoes, including ornamental types.

Lilac: Lilac flowers are fragrant and edible. I use them every year to make lilac infused vinegar. They have a nice spicy taste that works well in the vinegar. Blossoms can be added to salads, too. This year I also made lilac jelly.

Redroot/Pigweed: This member of the amaranth family is distinguished by a reddish color to its roots. It has a spinach like flavor and can be cooked and used like spinach is any recipe. The plants can get several feet tall and often show up in places where the soil has been tilled.

Tulips: Tulips are more than pretty, they are also quite tasty. The petals taste like a mild flavored lettuce and can add a beautiful touch to salads. The bulbs are also edible but we rarely eat them because to do so would destroy the plant. The petals, however, can be harvested and eaten year after year without harming the plant.

Roses: Rose petals have been used to make fragrances for a very long time. The petals are also edible and can be added to salads and used to make jelly, syrup and of course, rose water. The hips are also quite edible. Rose hips are the round balls that are left after the bloom is spent. They are full of vitamin C and can be cooked and used to make tea and jelly.
This is far from a complete list. Just a few things from my yard that I thought you might have, too.
Cooking with Ramps


If you haven’t tried ramps, you really don’t know what you are missing. Ramps are a member of the onion/allium family. They grow wild in wooded areas and are only around for about a month, during the Spring. They are sometimes called wild leeks or wild onions. Their flavor might best be described as a garlicky leek.

People have been foraging ramps forever. A recent increase in their popularity has put them at risk in some areas. Only pick ramps where it is legal to harvest them. Only purchase ramps from someone who you trust to harvest responsibly. While I love the bulbs, I often harvest just the leaves from them. That way the plants are not killed. I have also planted some of the harvested ramps and have had friends do the same, to start stands of them in new places.
I first had ramps when I was in college. We were on a weekend scavenger hunt for a biology class. One of my classmates came upon a stand of ramps. She explained to me what they were. We harvested a few and made soup out of them for dinner that night. Our professor, Dr. Peter Gail, was a forager and he showed us other wild edibles. This is where my love for foraging started.
So here are some of the ways I use my ramps.

Ramp butter is a wonderful way to preserve the ramps and a great way to prep them for use in all sorts of recipes. The recipe is pretty simple- ramps, mixed with softened butter, perhaps a little lemon zest and some salt, if desired. The butter is then put in small containers, or shaped into little logs and frozen. Whenever you want some ramp flavor in your cooking, you just spoon out or slice off a bit of ramp butter.
I don’t know that I have a hard and fast “recipe” for ramp butter. I can tell you how I make mine, though.
I like my ramp butter with lots of ramps in it. Ramp forward, if you will.
I mix equal parts of butter and ramps. You can add some salt to the mix, too. Use a food processor to get the mixture well mixed and to chop the ramps up. I divided the mixture into 6 or seven containers and threw all but one in my freezer. The last container is in my fridge, being used in all sorts of dishes.

Ramp Oil
The process is similar to making ramp butter, but you use oil instead of butter. I used a lemon infused olive oil and some avocado oil. I use those oils because I like the flavors, but also because they will freeze solid. For long term storage- ramp oil should be frozen. Any stored in the fridge should be used up in a week or two.
The uses are somewhat similar to ramp butter. You can use some of the ramp oil to make ramp pesto or ramp pasta. You can use it as a base for salad dressing. It is really good added to potato salads.
Prepare the ramps the same way you would for ramp butter. I placed the cleaned ramps in a food processor and added about a cup of oil to two cups of ramps. I ran the machine until the mixture was pretty smooth. Add a little more oil, if needed. The mixture should be thick, but pour-able. The flavor is intensely ramp. That is what I like. I can cut it down with other ingredients later on.
Salmon with Ramp Butter
2 salmon sides
salt
pepper
1 c. ramp butter
2 lemons, sliced thin
Place the salmon on parchment paper and season with salt and pepper. Spread ramp butter down the center of each salmon side. Use about 1/2 cup on each one. Place lemon slices on top of the ramp butter. Bake the salmon in a 375 degree oven for about 30 minutes. Rest 5 minutes before serving. Serves 16.


Pickled Ramps
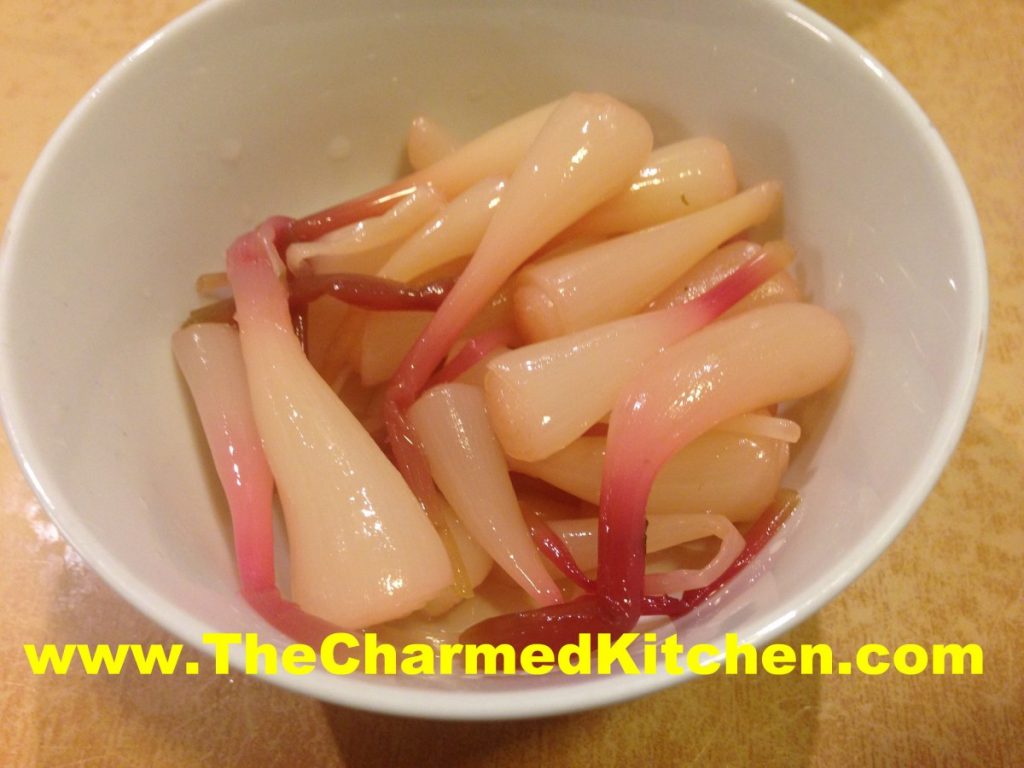
4-5 c. ramp bulbs, some stem attached, if you like
2 c. cider vinegar
1½ c. water
1 c. sugar
2 T. salt
1 T. Tuscan seasoning*
Wash ramp bulbs well and remove any roots. In pot, combine all ingredients and bring to a boil. Turn down heat to a simmer. Cover pot and simmer 10-15 minutes. Remove from heat. Pour into a heat-proof jar. Cool a little, cover and place in fridge. You can eat the ramp pickles right away, but they taste even better if you wait a few days. Will keep in the fridge for a few months.
*Tuscan Seasoning
½ c. dried basil
½ c. dried oregano
½ c. dried marjoram
3 T. dried minced onion
2 T. dried minced garlic
2 T. dried rosemary
2 T. dried parsley
1 t. crushed red pepper
Combine all. Store in a cool, dry place. Use for any number of recipes, from marinara sauce, to salad dressings.
Creamy Ramp Soup
1 lb. ramps
1/2 large sweet onion such as Vidalia or Walla Walla, thinly sliced
1/4 teaspoon white pepper
2 tablespoons oil
1/3 cup dry white wine
3 1/2 cups reduced-sodium chicken broth
1/4 cup grated Parmigiano-Reggiano
2 tablespoons unsalted butter
Garnish:extra-virgin olive oil
Trim roots from ramps and slip off outer skins if loose. Cut green tops from ramps and coarsely chop enough greens to measure 3 cups (reserve remainder for another use). Thinly slice ramp bulbs, including pink stems. Cook ramp bulbs, onion, white pepper, and 1/2 teaspoon salt in oil in a large heavy saucepan over medium heat, stirring occasionally, until softened, about 10 minutes. Add wine, then boil over high heat, stirring occasionally, until evaporated completely. Add broth and simmer, partially covered, stirring occasionally, until onions and ramps are very soft, about 20 minutes. Stir in ramp greens and boil 1 minute.Working in batches, purée soup in a blender until very smooth, about 1 minute per batch (use caution when blending hot liquids), then strain through a fine-mesh sieve into a large heatproof bowl, pressing hard on and then discarding solids. Return soup to cleaned pot and bring just to a boil. Whisk in cheese and butter until smooth. Season with salt. Serves 4.
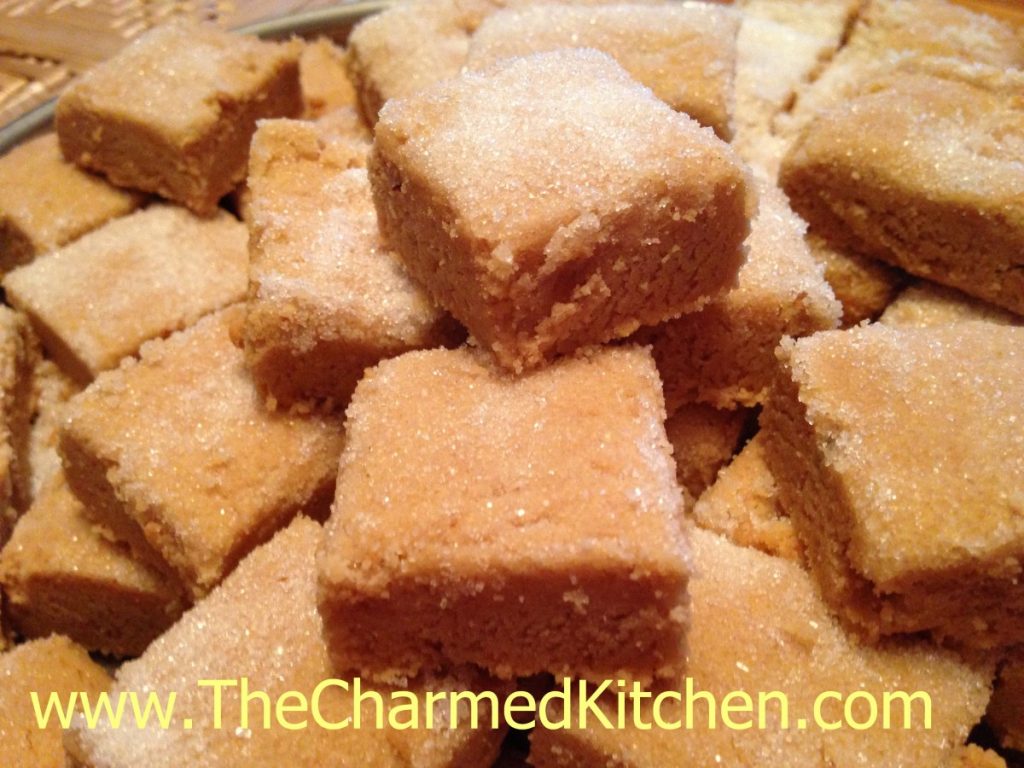
Peanut Butter Coconut Shortbread- Vegan

I made these for my niece, who is visiting from out of town. She is vegan. The original recipe for the shortbread was her great grandmother’s. It is a great recipe, but not vegan. I tweaked it a little.
The original recipe called for a pound of butter. I swapped out the butter with a cup each of peanut butter and coconut oil. It worked out great.
The cookies had that same wonderful crumbly texture and rich flavor you expect in a good shortbread cookie. I used crunchy peanut butter- it was what I had. I like the bits of peanuts in the cookies. I could see adding a few more chopped peanuts the next time I make these cookies.
You could also use other nut butters, like almond or cashew, if that is what you have.
Peanut Butter-Coconut Shortbread
1 c. sugar, plus 1/4 cup extra for sprinkling
1 c. peanut butter
1 c. coconut oil
4 c. flour
2 t. vanilla
Cream together sugar, peanut butter, coconut oil and vanilla. Stir in flour until mixture forms into a dough. Press into 9×13-inch baking dish. Sprinkle extra sugar over the cookies dough, and cut into squares. Bake in a 300 degree oven for an hour or until light brown around edges. Re-cut while warm. Makes 4 dozen. They can be frozen.
Cucumbers and Sour Cream

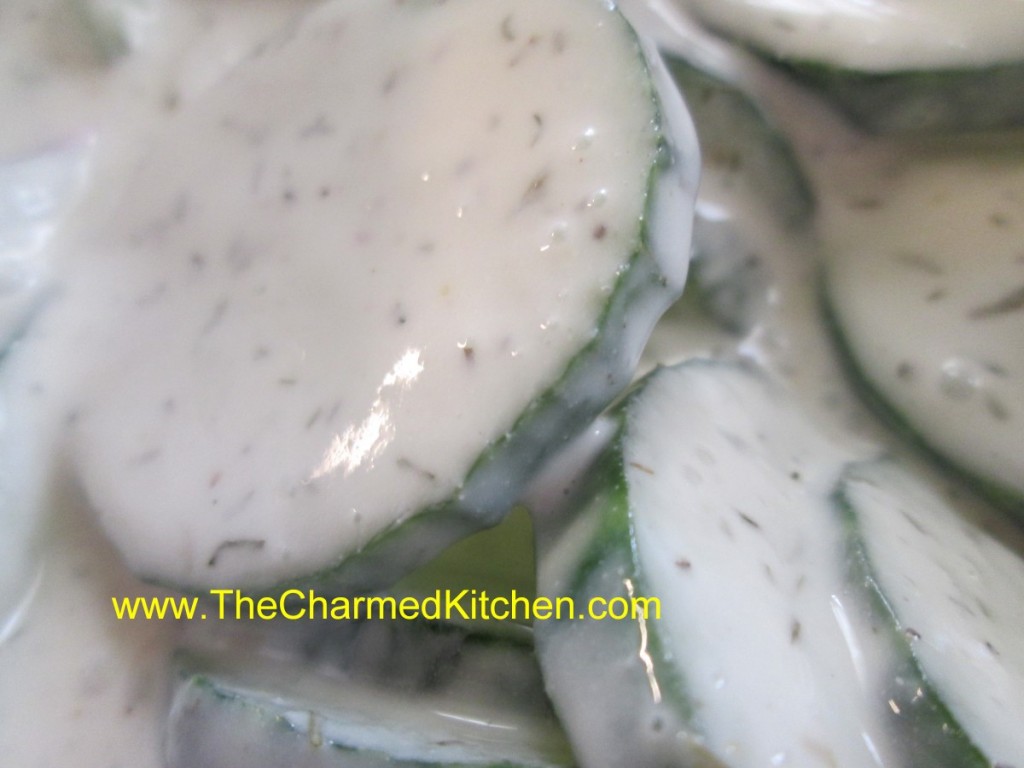
This is one of the recipes we made in salad class last night. This salad was such a summer tradition in my family. Sliced cucumbers in a creamy, sour cream based dressing, flavored with fresh dill. It always gives me a nostalgic feeling.
It was one of the first dishes I can remember helping my Mother make. She let me slice the cucumbers and mix the dressing. It seemed we often had it on the weekends when my Father was grilling. I can’t make this salad without thinking of the wonderful smells wafting into the kitchen from that grill.
You can use any type of cucumber you like in this recipe. English cucumbers don’t have to be peeled. You might want to peel cukes with tougher skins.
Cucumbers and Sour Cream
2-3 medium cukes, sliced
1 c. sour cream or strained yogurt
¼ c. sugar
¼ c. vinegar
2 green onions, chopped
1 –2 T. chopped fresh dill or 1-2 t. dried
Combine all ingredients and chill at least 10 minutes. Serves 6-8.
A Dozen Recipes for Leftover Ham


Of course, ham makes a great sandwich, but there are a lot more things you can do with it.
If you enjoyed a ham over the holidays, you may find yourself with leftovers. Here are some recipes for all that ham.
Ham is versatile and can be used in all sorts of dishes. Added to soups, stir fry, breads, salads and omelets, it adds a wonderful smoky flavor to every dish. And of course, the ham bone can flavor a whole pot of soup.
So here are some recipes you might want to try.
Ham and Asparagus Quiche
1 (9-inch) unbaked pie crust
1½ c. shredded cheese – I used Havarti
4 t. flour
1½ c. diced cooked ham
12 oz. asparagus, trimmed, cut in ½- inch pieces and steamed 3 minutes
4 eggs
1 c. milk or half and half
2 T. fresh chopped parsley or 2 teaspoons dried
¼ t. salt
1T. Dijon mustard
1 t. hot sauce
Toss cheese with flour in a bowl and place in pie crust. Sprinkle the ham and asparagus over the cheese and set aside. Combine remaining ingredients in a small bowl beating well to combine. Pour over the ham and asparagus mixture and bake in a preheated 400-degree oven for 15 minutes. Turn down heat to 350-degrees and bake until knife inserted off-center comes out clean, about 30 minutes more. Makes 1.
Note: This quiche freezes well. After adding the fillings just wrap in heavy foil and freeze solid until ready to bake. When ready to bake unwrap and allow to sit at room temperature for 30-60 minutes. Bake as with the fresh version, but add another 10-15 minutes to the baking time. If you don’t want to freeze the pie pan, you can line the pie pan with foil before you add the crust. Once it is frozen you can remove the frozen quiche from the pie pan and wrap, returning to freezer. When ready to use unwrap and put the quiche back in the pie pan before baking. Or, if you are planning on freezing it, you can use a foil pie pan.
Ham and Swiss Calzones
4 c. flour
2 c. rye flour
2 T. sugar
2 t. salt
2 packages quick-rising yeast
2⅓ c. hot water
2 T. oil
2 lb. thin sliced ham- more or less
1 lb. sliced Swiss cheese
Thousand island dressing- recipe follows
1 egg , beaten
Set aside 2 cups of the all-purpose flour. Combine remaining flour with the other dry ingredients in a medium bowl. Stir in water and oil and gradually stir in enough flour to make a soft dough. Turn onto lightly floured surface and knead until dough is smooth and elastic, about 5 minutes. Cover dough and let rest 20 minutes. Divide dough into 12 pieces and roll one piece into a 8 -inch circle. In the middle of the dough place 1 1/2 ounces of the Swiss cheese, a spoonful of the dressing and 2-3 ounces of the ham. Brush the edge of the dough with water. Fold over the dough in half and press the edges to seal. Brush the edge again with water and roll the edge over again. It will give you a prettier look and seal the calzone better. Repeat with remaining dough and fillings. Place calzones on greased baking sheets- or on a baking sheet with a silicone liner or parchment paper liner. You will end up with 12 calzones in all. Only put 4 on one baking sheet. Cover and let rest 15 minutes while preheating the oven to 400 degrees. Before placing calzones in the oven brush with beaten egg and make a few slashes with a knife to help steam to escape while baking. I put 2 baking sheets in the oven at the same time and switch them halfway through baking. Bake in a preheated 400-degree for 20-25 minutes or until golden brown. If baking 2 at once switch them after 10 minutes or so. Cool slightly before eating. Serve warm and refrigerate leftovers. Makes 12.
If you want to use regular yeast use warm, rather than hot water. Also, allow a little more time for the dough to rise the first time, about 40 minutes. Everything else will work the same.
Thousand Island Dressing
Combine equal parts of ketchup, mayo and sweet pickle relish. You likely need at least a cup for this recipe. I made extra so the sandwiches could be dipped in extra dressing, if desired.
Tortellini and Ham Salad
¼ c. olive oil
¼ c. red wine vinegar
1 t. fresh rosemary
1 clove garlic, minced
1 t. sugar, optional
1/2 t. red pepper flakes
12 oz. mushroom or cheese tortellini, cooked
1½ c. diced ham or turkey ham
1 red pepper, seeded and diced
1 c. sauteed, sliced mushrooms, cooled
4 green onions, chopped
Parmesan cheese, optional
Combine first 6 ingredients in large bowl and whisk to blend well. Add next 5 ingredients and toss to coat. Add salt and pepper to taste. Chill at least 30 minutes before serving. Serve with Parmesan cheese on the side. Serves 4.
Corn and Ham Saute
1 T. oil
1 small onion, diced
1 c. diced ham
4 c. corn- fresh or frozen
salt and fresh ground pepper to taste
In pan cook onion in oil until tender. Add the ham and cook a few minutes longer. Add corn and continue cooking until corn is heated through. Season to taste and serve. Serves 3-4.
Ham and Swiss Bread Florentine
3 ¼ c. flour
1 T. sugar
1 t. salt
1 package quick-rising yeast
1 c. hot water
1 T. oil
¼ c. Dijon mustard
6-8 oz. sliced ham
4 oz. sliced Swiss cheese
1 large bunch fresh spinach, rinsed and steamed a few minutes to wilt, drained well.
Set aside 1 cup of the flour. Combine remaining flour with the other dry ingredients in a medium bowl. Stir in water and oil and gradually stir in enough flour to make a soft dough. Turn onto lightly floured surface and knead until dough is smooth and elastic, about 5 minutes. Roll dough into a rectangle about 16 x 8. Spread mustard down center middle of dough. Top with meat slices, cheese and spinach. Cut one-inch wide strips of dough from filling to edge on both sides. It will sort of look like fringe. Alternating sides, fold strips up and over the filling at an angle. Carefully lift loaf onto greased baking sheet and place at an angle. Cover with a towel and place sheet on top of a roasting pan half-filled with simmering water for 15 minutes. Bake in a preheated 400-degree for 20-25 minutes or until golden brown. Cool slightly before slicing. Serve warm and refrigerate leftovers.
Note: The variations for this bread are almost endless. Some favorite combinations are Corned beef and Swiss with sauerkraut and thousand island dressing., roast beef and cheddar, chicken, broccoli and cheese, Spinach with ricotta or feta and onions, pizza, assorted fillings. You get the idea. Use your imagination and have fun. Just be careful not to overfill, or the bread will be hard to move, use fillings that aren’t too runny and always use cold fillings.
If you want to use regular yeast use warm, rather than hot water. Also, don’t let dough rise over boiling water. After kneading cover dough and let rise 45 minutes. Punch down and assemble as in original recipe. Cover with a towel and let rise until dough looks puffy, about 40 minutes. Bake as directed above. These breads can also be frozen.
Ham and Corn Chowder
I was looking for a quick soup for dinner the other night. Inspiration hit when I came across some corn in the freezer. I had blanched and frozen it during the summer at the peak of corn season. I had a little ham in the fridge I was wanting to use up and the pairing was a natural. I started by sauteing an onion in a little butter. Once the onion was tender I added a peeled and diced potato, the corn, the diced ham and about 2 or 3 cups of chicken stock. I covered the soup and let it simmer until the potato was tender, about 15 minutes. I then took 4 tablespoons of flour and put it in a jar. I added a cup of milk, put on the lid and shook it until the flour was well mixed in. I poured the flour mixture into the pot and brought the mixture up to a gentle boil. I stirred it as it thickened up. I cooked it for a few minutes and adjusted the seasonings adding salt, fresh ground pepper and a dash of hot sauce. I also added some chopped parsley. The end result was a wonderful chowder that took almost no time at all. Sometimes the best dishes come from just looking at what we already have. In this case some frozen veggies and a bit of leftover ham.
Ham and Veggie Stir Fry
2 T. oil
1 medium onion, sliced
1 medium carrot, peeled and sliced thinly
1 c. sliced cabbage
1 clove garlic, peeled and chopped
1 sweet red pepper, seeded and cut into thin strips
2 c. sliced bok choy
1 1/2 c. cubed cooked ham
2 green onions, trimmed and sliced
1/2 c. whole almonds
fresh grated ginger- or powdered, to taste
soy sauce to taste
dash of hot sauce
Heat oil in wok or skillet and cook onion and carrots for 3 minutes. Add cabbage add garlic and stir fry 2-3 minutes longer. Toss in the pepper and bok choy and cook 3 more minutes. Add ham, green onions and almonds along with seasonings and soy sauce and cook until ham is heated through. Serve over hot cooked rice or pasta. Serves 3-4.
Ham with Brussels Sprouts
I started by trimming the Brussels sprouts and cutting small ones in half. I quartered the larger ones. I heated a little butter in a skillet and added 3 cups of prepared Brussels sprouts. I cooked them until they were getting a little color on them. I think their flavor is enhanced by sauteing. I then added 1 1/2 cups of diced cooked ham and 1/2 cup of water. The water helps steam the sprouts so they are tender. I like Brussels sprouts tender. You can skip the water, if you like. The water evaporates quickly and as soon as the ham starts to brown a little the dish was pretty much done. I added a little freshly ground pepper- but it didn’t need salt. I also served it with fresh grated Romano cheese. You could serve it as is or toss in some cooked pasta with the ham. Simple and really good. You might even get a Brussels sprout hater to give this one a try.
Corn, Ham and Bacon Chowder
1 lb. bacon
1 onion, chopped
2 carrots, peeled and sliced
6 c. chicken stock
2 potatoes, peeled and cubed
6 c. corn – I used frozen corn
2 c. chopped ham
2 cups half and half or milk
¼ c. flour
Salt and pepper to taste
Hot sauce to taste
Fresh chopped parsley
Cut bacon in 1-inch pieces and fry in a Dutch oven until crisp. Tip pot and spoon out most of the fat. Add the onion and sauté until translucent. Add carrots and stock. Cover and simmer 10 minutes, then add the potatoes, corn and ham. Cover and simmer 15-20 minutes, or until potatoes are tender. In jar with a tight fitting lid, combine 1 cup of the half and half or milk with the flour. Put on the lid and shake until mixture is smooth. Stir into the pot along with the remaining half and half or milk and cook, stirring often until mixture thickens up. Adjust seasoning to taste. Stir in parsley and serve. Serves 6.
Swedish Yellow Split Pea Soup
1 lb. yellow split peas, rinsed
2 qts. Boiling water or stock
1 bay leaf
2 c. chopped onion
2 c. sliced carrots
1 tsp. dried marjoram
1/4 t. ginger
dash nutmeg
1/2 t. pepper
1 T. salt, or to taste
2 cups diced ham
Note: you can use 1 teaspoon liquid smoke if omitting meat.
Combine peas, boiling water or stock and bay leaf and simmer, covered, about an hour, stirring occasionally. Remove bay leaf. Add remaining ingredients, except diced meat and salt, and cook, covered, over low heat for about 30 minutes. Add meat and cook 1 hour more, stirring occasionally. Season to taste. Serve with a pumpernickel bread. Freezes well. Serves 6-8.
Ham and Cheese Strata
12 slices bread, crusts removed if desired – I used rye
6 slices cheese – I used Swiss
1/4 c. diced green onions
1/2 c. chopped sweet pepper
2 c. diced cooked ham or turkey ham
3 eggs
2 c. milk
1 t. salt
1/8 t. pepper
Place six slices of bread on bottom of 2-quart oblong casserole. Top each slice of bread with a slice of cheese. Top cheese with the onions, peppers and ham. Top with remaining bread and cut each “sandwich” in half diagonally. Combine remaining ingredients and pour over sandwiches. Cover dish and let stand several hours or overnight in the fridge. Bake uncovered in a 350-degree oven for 40-45 minutes, or until puffed and set. Serves 6.
Ham and Swiss Quiche
1 (9-inch) unbaked pie crust
1½ c. shredded Swiss or Gruyere Cheese
4 t. flour
1 c. diced cooked ham or turkey ham
3 eggs
1 c. milk or half-half or evaporated milk
2 T. fresh chopped parsley or 2 teaspoons dried
¼ t. salt
¼ t. dry mustard
Dash of hot sauce
Toss cheese with flour in a bowl and place in pie crust. Sprinkle the ham over the cheese and set aside. Combine remaining ingredients in a small bowl beating well to combine. Pour over the ham and cheese mixture and bake in a preheated 400-degree oven for 15 minutes. Turn down heat to 350-degrees and bake until knife inserted off-center comes out clean, about 30 minutes more. Makes 1
Note: This quiche freezes well. After adding the fillings just wrap in heavy foil and freeze solid until ready to bake. When ready to bake unwrap and allow to sit at room temperature for 30-60 minutes. Bake as with the fresh version, but add another 10-15 minutes to the baking time. If you don’t want to freeze the pie pan, you can line the pie pan with foil before you add the crust. Once it is frozen you can remove the frozen quiche from the pie pan and wrap, returning to freezer. When ready to use unwrap and put the quiche back in the pie pan before baking. You can also use a foil pie pan.
Recipes for Hard Cooked Eggs


If you have hard cooked eggs leftover from Easter, you might want some recipes to use them up. I have put together a few of my favorites recipes, including a cookie recipe!!! Enjoy.
Scotch Eggs
6 hard-cooked eggs, well chilled
1 pound breakfast sausage
1/2 cup flour
2 eggs, beaten
3/4 cup fine bread crumbs
Vegetable oil for frying
Peel eggs and set aside. Divide sausage into 6 portions. Roll each egg in flour and with hands press a portion of the sausage around each egg. If the sausage sticks to your hands, dip your hands in a little water to make pressing the sausage easier. Dip sausage-wrapped eggs into beaten eggs and roll in bread crumbs. Heat vegetable oil to 350 degrees. Cook each egg in oil about 4-5 minutes or until sausage is cooked and browned. Drain on paper toweling. Serve warm. Makes 6.
Mom’s Macaroni Salad
1 lb. uncooked pasta, shells are preferred
Salt and pepper
Mayonnaise, about 1 cup
Salad dressing, like Spin Blend or Miracle Whip, about ½ cup
3-4 ribs celery, sliced thin
4-5 green onions, trimmed and sliced thin
8-12 hard-cooked eggs, cooled and peeled
Cook pasta according to package directions, but do not overcook. Rinse with cold water and drain well. Place drained pasta in a large bowl and sprinkle with salt and pepper to taste. Add dressings and vegetables and stir until well mixed. You may want to add more dressing to suit your taste. Chop eggs and stir into salad. Adjust seasonings if needed and chill before serving. Serves 8-10.
Polish Butter Cookies
This cookie dough includes cooked eggs yolks. I wish I remember where I got the recipe. It is a Polish recipe, at least according to the name, but my Mom never heard of it. So, wherever the source, it is a good cookie, with nice flavor and texture.
Dough:
1 c. butter
3/4 c. sugar
5 hard-cooked egg yolks, pressed through a fine sieve
1 t. vanilla
2 1/4 c. flour
1 t. salt
Glaze:
1 egg white
1 t. water
1/3 c. sugar
1/2-1 t. cinnamon
Beat together butter and sugar until light and fluffy. Beat in egg yolks and vanilla. Stir in flour and salt. Wrap dough and chill for at least an hour. Roll out 1/4 of the dough at a time into scant 1/4 -inch thickness. This dough is soft, so I use a pastry cloth to prevent sticking. Use extra flour sparingly and use a marble rolling pin or one with a cloth sleeve. I also keep extra dough chilled until ready to roll. Cut out with cookie cutters and place on greased baking sheet. Mix egg white with water and brush on cookies. Combine sugar and cinnamon and sprinkle on cookies. Bake in a preheated 350-degree oven for about 10-12 minutes. Cookies will be golden. Makes around 5 dozen, depending on the size of the cutters.
Wilted Kale Salad with Bacon
2-3 slices thick sliced bacon, chopped
1 onion, sliced
4-5 cups kale, washed and torn into pieces
2 T. cider vinegar
1 T. maple syrup
dash of hot sauce
2 hard- cooked eggs, peeled and cubed
In skillet cook bacon until crispy. Remove bacon from pan and set aside. Remove some of the fat from the pan- leaving about 2 tablespoonfuls. Add onion and cook until golden. Return bacon to pan and add the kale. Cook over medium-high heat, stirring often, until kale in wilted. I don’t mind my kale on the firm side-cook it longer if you like it more tender. Drizzle in the vinegar, maple syrup and hot sauce and stir to coat evenly. Place on a serving dish and top with the eggs. Enjoy!!
Curried Egg Sandwiches
These tiny sandwiches are perfect for a tea party.
3 T. mayonnaise
½ t. curry powder, or to taste
½ t. salt
¼ t. fresh ground pepper
4 hard-cooked eggs
6 T. butter, softened
¼ c. chutney, chopped, or sweet pickle relish
16 very thin slices whole wheat or pumpernickel bread, crusts trimmed
Combine mayo with seasonings. chop eggs and add to mayo mixture, stirring to blend. In small bowl combine butter with chutney. Spread a slice of bread with some of the butter mixture then top off with some of the egg mixture. Top with another slice of bread that has also been spread with the butter mixture. Cut sandwich into quarters, diagonally, making 4 sandwiches. Repeat with remaining ingredients. Makes 32 sandwiches.
Cornbread Salad
4 c. crumbled cornbread or corn muffins
1 c. shredded mild cheese
1 sweet red pepper seeded and diced
1 c. diced celery
½ c. diced green onion
4 hard-cooked eggs, peeled and chopped
¼ c. chopped parsley
1-1 ½ c. mayonnaise or salad dressing, sometimes I use potato salad dressing or even slaw dressing
2 c. diced fresh tomatoes
1 c. toasted pecans
paprika for sprinkling on the top, optional
Place cornbread and next 6 ingredients in a medium bowl. Stir in dressing until desired moistness is achieved. Chill and stir in tomato and nut just before serving. Sprinkle with paprika if you like. Serves 6.
Note: You can add whole kernel corn also if you like.
Mom’s Mustard Potato Salad
4 lbs. potatoes- I used Klondike Rose and I did not peel them
4 hard cooked eggs, peeled and chopped
1 sweet pepper, seeded and chopped, optional
1 c. mayo- maybe a little less
1/4 c. prepared mustard- I like a grainy brown mustard
salt and pepper to taste
dash of hot sauce
Bake whole potatoes until tender and allow to cool. Cube potatoes into large bowl and combine with remaining ingredients. Chill until ready to serve. Serves 8.
Deviled Eggs
12 hard cooked eggs, peeled and cut in half
¼ c. mayonnaise
1 T. mustard – I like Dijon or horseradish mustard- use what you like
Salt and pepper to taste
Pinch of cumin
Pinch of paprika
Pinch of garlic powder
Snipped chives, optional
Carefully scoop out the yolks and place them in a bowl. Set whites on a plate for now. Use a fork to mash up the yolks, adding the remaining ingredients, except the chives. Taste and adjust seasonings. I use a small cookie scoop to place the yolk mixture in each of the egg whites. You can also use a piping bag. Top with a sprinkle of chives, if you like. Chill until ready to serve. Makes 24.
Blueberry Scones


I was looking for something for brunch with a friend. I had blueberries in the freezer so I decided to make blueberry scones. I added some cinnamon to the dough- I love the flavor of blueberry with cinnamon. Really was the right move. They are so good. Tender and just sweet enough. They are great served with butter and jam or you can use them as the base for shortcakes.
These would be a nice addition for a Sunday brunch.
Blueberry Scones
2 c. flour
3 T. sugar
1 T. baking powder
2 t. cinnamon
¾ t. salt
6 T. chilled butter
1 ½ c. blueberries, fresh or frozen- do not thaw berries
1 t. lemon or orange zest
2 large eggs
1/3 c. heavy cream
Mix dry ingredients together in bowl and cut in butter to resemble coarse crumbs. Toss in blueberries and zest. Beat together eggs and cream and stir into flour mixture. Mix very gently to avoid bruising berries. Use a small ice cream scoop to scoop out batter and place on baking sheet. Place scoops about an inch apart. Press down slightly. Brush with a little cream and sprinkle with a little extra sugar. Bake in a preheated 400-degree oven for 20-22 minutes. Makes 15-18.
Fricassee of Lamb with Lemon Egg Sauce

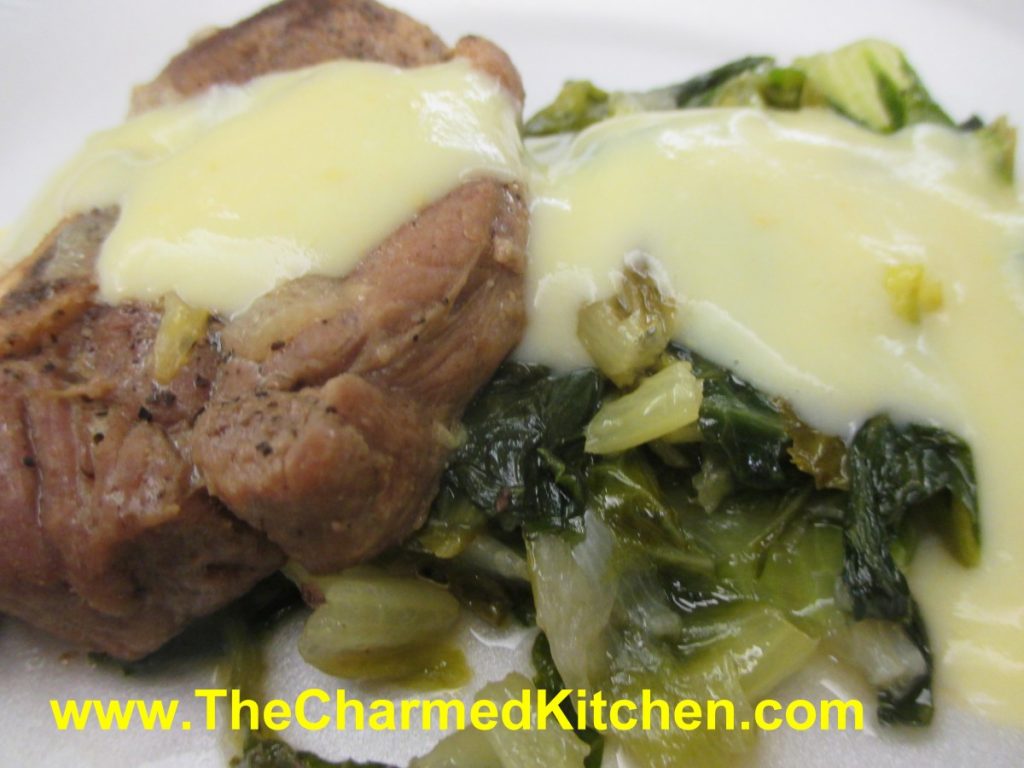
I am not sure which I love more in this recipe- the lamb that is cooked to tender perfection- or the Greek lemon egg sauce. Both are very special. I love lamb and have cooked it lots of different ways. This preparation will always be a favorite. This a great dish to serve for Easter dinner.
The recipe uses lamb shoulder, cooked with onions and Romaine lettuce- yes lettuce. The lamb is browned and then cooks gently until tender. The lettuce also cooks down and adds a nice green flavor to the dish. I have used lamb shoulder chops, and cooked them bone in. You could certainly use lamb shanks, if you prefer. Just allow enough time for the shanks to get tender.
The real magic is the lemon egg sauce, used to top the lamb once finished. It is creamy and has just the right amount of tang from the lemon juice.
If you are thinking of serving lamb for Easter, this would be a lovely recipe to use.
You could make this dish with pork or even chicken, but my favorite version is with lamb. I also use the lemon sauce with meat and rice stuffed zucchini. My dear friend Amy, had the dish on a trip to Greece and we made it often.
Fricassee of Lamb with Lemon Egg Sauce
2 1/2-3 lbs. lamb shoulder, or use pork
3 medium onions, chopped
2-3 heads romaine lettuce, washed and sliced thin
1/2 c. olive oil
Egg and Lemon Sauce -recipe follows
Cut the meat into serving pieces. Heat the oil in a pot and sauté the meat. Add salt, pepper, the onions, lettuce and a small amount of water. Cover the pot and let the fricassee simmer for about an hour. Prepare the egg and lemon sauce, pour it over the fricassee and serve.
Lemon and Egg Sauce
1-2 c. stock
2 eggs
juice of 1 lemon
flour, about 1-2 tablespoons, depending on how thick you want the sauce
Bring stock to the simmer. Beat eggs well. Mix the flour with the lemon juice.
Add to the eggs and keep beating. Add the hot broth slowly while you keep beating. Pour the egg and lemon sauce in the pot and bring to a simmer, stirring constantly. Makes 1-2 cups. For a thinner sauce eliminate the flour.
Fried Catfish


I love fried fish. I don’t make it at home that often. It is more of a treat around here than an every day meal. This time of year, Friday night fish fries are very popular. I love them. You don’t have to go out to have great fried fish.
I toyed with the idea of baking it, but frying won out. Nothing quite as good as fried catfish in my mind. Had a few friends over and I knew they would like it. too.
This is going to be one of those recipes that is more narrative that exact amounts. I really am good about writing stuff out. I just can’t seem to locate my notes for this one- so I’ll share what I did as best I can remember. It is also so easy to fry fish. Don’t be scared to try.
I started with catfish fillets that were cut down into smaller pieces. The smaller size made them fast and easy to cook. It also made them fun to eat. Like chicken nuggets, only made with catfish.
Since they had been frozen, I thawed them out, and dried them off a bit by patting them with paper towels. I started with a 2 pound bag of catfish. I seasoned a little over 1/2 a cup of flour with salt, pepper and paprika. Then I placed the flour in a bag and tossed in the fish pieces.
I made a mixture of 2 eggs, a little mayo, salt, pepper, garlic powder and a small amount of smoked paprika. I dipped the fish in this mixture and let it soak in there while I put the breadcrumbs in a bowl.
I took the fish out of the egg wash a few pieces at a time and dropped them in the bread crumbs. I had the crumbs in a good sized bowl- but only filled about a quarter of the way with crumbs. I started with a cup of bread crumbs, but needed more. I added the fish and sort of tossed it in the crumbs by shaking and tossing the bowl. Made sure the fish all got coated. Pressed the crumbs a few times to make sure the breading stuck. Placed fish in a square container and kept adding it as I finished breaded the fish. Covered the dish and placed it in the fridge. I fried the catfish the next day. I could have fried it right away, but I knew I would be getting home from work just before my guests would be arriving. I wanted to get this part of the job out of the way. Sometimes breading sticks better if you do it a little ahead of time.
Once it was time for dinner, I put the oil on to heat up.
I was using an electric pot with a thermometer so I knew when the oil reached 350. I wanted to fry the fish between 350 and 375 degrees. If you don’t have a pot with a thermometer, you can tell if your oil has reached 350 degrees with the use of popcorn. Yes, popcorn. Just put in a kernel of popcorn when you start heating up the oil. Popcorn pops at 350 degrees. When the popcorn pops, you know the oil is ready.
I had a pan, lined with paper towels ready as I started to drop the pieces of fish, several at a time, into the hot oil. They were cooked in just a few minutes. I pulled them when they were golden brown. Allowed them to drain on paper towels, in a warm oven, while I cooked the rest of the fish.
I served the fish with lemon wedges and homemade tartar sauce- which is just sweet pickle relish, mayo and capers.
The fish was a big hit.
As to the oil. You’ll have plenty left over. I let it cool and strained it out. Then I poured it in the bottle it came from. You can save it for your next frying project, but don’t use it again and again. Just a couple of times, then toss the rest. There were 4 of us for dinner and there was fish leftover. The 2 pounds of fish was easily enough to serve 6-8.
Mushroom, Leek and Asparagus Quiche


We made this quiche in a mushroom class the other night. We used a traditional pie crust and it came out great. The first time I made this recipe, I actually used a different dough.
Sometimes there are happy accidents in the kitchen. This recipe is one of those. I had made kolachy for a friend. Kolachy are filled cookies, made with a cream cheese based dough. There was some dough leftover, and I did not want to waste it. I decided to use it for a quiche. Well, technically a tart, since it was baked in a tart pan. I looked through my fridge for what I had, and came up with the combination of leeks, mushrooms and asparagus. I also had a nice chunk of Swiss cheese, so away I went. The rest was pretty easy. I just added the eggs, half and half and seasonings to complete the dish. You could, of course, use any crust recipe you prefer. I must admit, the kolachy dough worked really well. I would most definitely make this recipe again, using the cream cheese crust. I did include the recipe for the kolachy dough at the bottom of this post. So here is the recipe. Hope you enjoy it.
Mushroom, Leek and Asparagus Quiche
1 unbaked pie shell*
2 T. oil or butter
1 c. sliced leek- white or light green part only
4 oz. sliced mushrooms- I used baby Portobello
8 oz. asparagus, trimmed and sliced
4 oz. shredded Swiss cheese
2 T. flour
3 eggs, beaten
¾ c. half and half
1 T. fresh dill or 1 teaspoon dried dill
Salt and pepper to taste
Hot sauce to taste
Roll out crust to fit a 9 or 10- inch tart pan. Place crust in pan and trim edges. Chill crust until ready to use. Preheat oven to 400 degrees. In skillet, heat oil or butter and cook leeks until tender. Add mushrooms and continue cooking until mushrooms are golden. Set aside. Steam asparagus for 3-4 minutes, or until just tender. Set aside. Combine flour with cheese and toss to coat. Spread cheese in prepared tart shell. Top with the mushroom and leek mixture. Season with salt and pepper. Combine the eggs with the half and half, dill and hot sauce. Pour over the mushrooms mixture in the tart shell. Add the asparagus. Place in preheated oven and bake at 400 for 30 minutes. Turn down heat to 350 and cook for 20-25 minutes longer, or until crust is golden and filling has set up. Serves 4-6.
* While I would normally use a more traditional pie crust, I ended up using the dough I normally use for my kolachy. It was leftover and seemed like a nice choice. The kolachy dough is 3 sticks of softened butter, 8 oz. of cream cheese and 3 cups of flour. Mix all ingredients until smooth and chill until ready to use. It was leftover, so hard to say how many crusts a full recipe would make. I would think you could easily get three crusts from one recipe. You can, of course, use your favorite pie crust recipe.


