Cabbage and Noodles


Cabbage and noodles is not a glamorous dish and it never will be. That’s fine with me. It is a dish that will always remind me of my childhood.
My Mother would make cabbage and noodles as a side dish, at least a couple of times a month. I loved it. I think of her every time I make it. It is, for me, a favorite comfort food.
One reason it tasted so good, is that Mom took the time to caramelize the onions and to let the cabbage brown some, too. That added another layer of flavor to the dish. Simple and very tasty.
A lot of people I know will be having pork for New Year’s Day. That pork is often served with sauerkraut. I like sauerkraut, but I like cabbage and noodles even more.
I used green cabbage this time, but you can use red cabbage, or a combination. Cabbage and noodles can be a side dish or even a main dish. You can play around with adding other ingredients. I added bacon to this version, sometimes I add leftover ham, or add no meat at all. If you don’t add bacon, cook the onions in a little oil.
So here is my Mom’s recipe for cabbage and noodles.
Happy New Year to all.
Cabbage and Noodles
1/2 pound bacon, cubed 1 onion, chopped
4-6 cups chopped cabbage
4 c. cooked noodles
Salt and pepper to taste
Fresh or frozen chopped parsley
Cook bacon in skillet- on medium heat- until just starting to brown. Depending on how meaty the bacon is, you might want to remove a little of the bacon fat. Personal choice. Add the onion and cook until wilted and a little brown. Add cabbage and stir fry until cabbage in tender and starts to turn a little brown. Stir in noodles and cook until heated through. Season to taste and toss in parsley. Serves 4-6.
New Year’s Day Brunch


You can enjoy brunch all year long, but I really like brunches for the holidays. If you want to plan a special brunch for New Year’s Day- or any day- I’ve assembled some of my favorite brunch recipes.
I like to include both sweet and savory dishes. I also have coffee, tea and juices for drinking. Mimosas are always a good idea, too.
Amaretto Pear Blintzes with Candied Almonds
Blintzes:
4 (8-inch) flour tortillas, I used whole wheat
2 oz. milk
2 T. butter
Filling:
4 pears, peeled, cored and sliced
½ c. brown sugar
2 T. butter
2 T. Amaretto
1 t. cinnamon
1 t. vanilla
Pinch of salt
Almonds:
¾ c. sliced almonds
½ c. sugar
¼ c. water
½ t. cinnamon
Place tortillas in shallow dish and drizzle the milk over them. Try to get some milk on each of the tortillas to soften them. While the tortillas are softening, prepare the filling. In medium skillet, combine pears with the rest of the filling ingredients and bring to a simmer. Cook on low heat for 3-4 minutes. Set aside. Combine almonds with the sugar, water and cinnamon in medium skillet. Bring mixture to a boil, stirring often. Cook until liquid is evaporated, about 5 minutes. Pour almonds onto a baking sheet lined with a silicone baking sheet or foil. Spread out and allow nuts to cool.
Place butter in skillet and start to heat up the pan. While pan is heating, divide pear filling among the 4 tortillas. Place filling along center of tortilla and fold up edges over, to cover the filling. Heat the tortillas, seam side down, in the pan until golden, turning to toast evenly on both sides. Remove from pan and place on serving plate. Top with some of the candied almonds. Serves 4.
Steak and Pepper Omelet
oil
1 small onion, sliced
1 small red pepper, seeded and sliced
1 c. cubed cooked steak
3-4 eggs
2 oz. cheese- cut in small pieces or shredded*
salt and pepper to taste
dash hot pepper sauce
Heat oil in skillet and cook onion until golden. Add a little salt to the onions while they are cooking. Add pepper and cook until tender-crisp. Remove from pan and set aside. Heat same pan adding more oil, if needed. Beat eggs in a small bowl and season with salt and pepper and hot sauce to your taste. Pour eggs into hot skillet and swirl to coat bottom of skillet. Using a spatula lift eggs a little and tip pan to allow uncooked egg to get to surface of the pan. Once omelet is almost set place some of the pepper mixture on one half. Top with the steak and cheese. Using a spatula gently fold the empty half of the omelet over the fillings. Allow to cook one more minute and slide onto a serving plate. Top with the remaining pepper mixture. Serves 2.
* I used Pepper Jack cheese because that is what I happened to have. Use any cheese you like.
Fresh Blackberry Scones
2 c. flour
1/3 c. sugar
1 T. baking powder
¾ t. salt
6 T. chilled butter
2 c. blackberries, fresh preferred, but you could use frozen
1 t. orange zest
2 large eggs
1/3 c. heavy cream or half and half
Mix dry ingredients together in bowl and cut in butter to resemble coarse crumbs. Toss in berries and zest. Beat together eggs and cream and stir into flour mixture. Mix very gently to avoid bruising berries. Use 1/2 cup ice cream scoop to scoop batter onto a baking sheet. Sprinkle with a little extra sugar, if you like. Bake in a preheated 375-degree oven for 22-24 minutes. Makes 10-12.
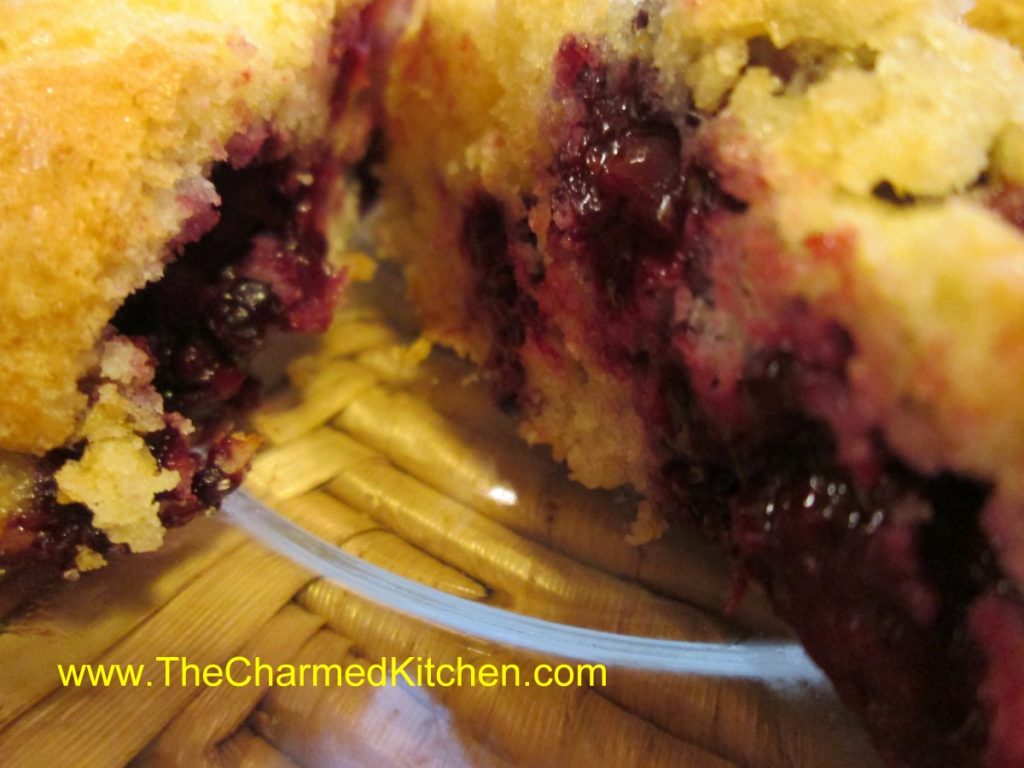
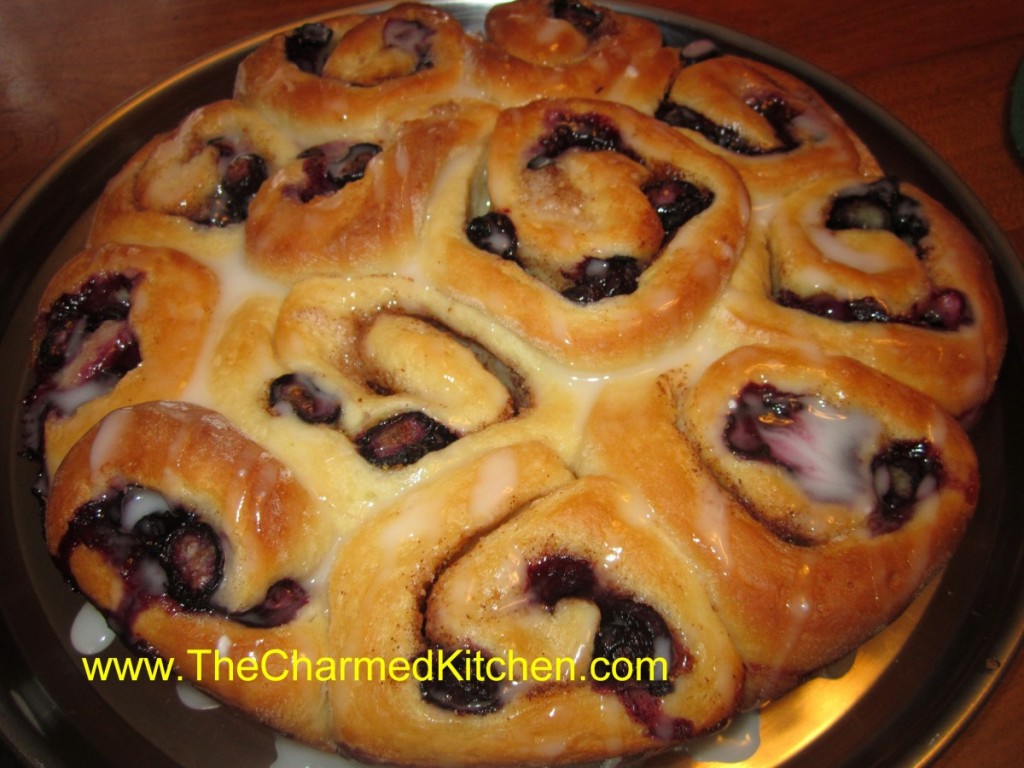
Blueberry Sweet Rolls
3-3 1/2 c. bread flour
1 package active dry yeast
1 1/3 c. evaporated milk
6 T. butter
1/4 c. sugar
1 t. salt
1 egg
6 T. butter, melted
1/2 c. sugar
2 t. cinnamon
1 t. grated lemon or orange peel
2 c. fresh or frozen blueberries
In bowl combine 1 1/2 c. of the flour with the yeast, sugar and salt. Heat together the milk and 2T. of the butter until warm and add to the flour mixture, beating 2 minutes. Add egg and beat 2 minutes longer. By hand stir in enough of the remaining flour to make a soft dough. Turn dough onto a lightly floured surface and knead, adding flour as needed until dough becomes moderately stiff. Place in greased bowl, turning once to coat and cover. Allow to double in bulk, about 1 1/2 hours. Punch dough down, cover, and let rest 10 minutes. Divide dough in half. Roll each half into a 14×8 inch rectangle. Brush dough with the melted butter. Combine the remaining sugar, peel and cinnamon and sprinkle over the dough. Top with the blueberries and press the berries into the dough. Starting at the long side roll up dough jelly roll fashion and seal edge by pinching. Repeat with second roll. Cut each roll into 12 slices and place 12 rolls in greased 9 inch round pans. Cover pans and allow to rise until doubled, about 30 minutes. Bake in a 375 degree oven for 20-25 minutes. While rolls are warm, you can top with a powder sugar glaze, if desired. Makes 24.
Ham and Asparagus Quiche
1 (9-inch) unbaked pie crust
1½ c. shredded cheese – I used Havarti
4 t. flour
1½ c. diced cooked ham
12 oz. asparagus, trimmed, cut in ½- inch pieces and steamed 3 minutes
4 eggs
1 c. milk or half and half
2 T. fresh chopped parsley or 2 teaspoons dried
¼ t. salt
1T. Dijon mustard
1 t. hot sauce
Toss cheese with flour in a bowl and place in pie crust. Sprinkle the ham and asparagus over the cheese and set aside. Combine remaining ingredients in a small bowl beating well to combine. Pour over the ham and asparagus mixture and bake in a preheated 400-degree oven for 15 minutes. Turn down heat to 350-degrees and bake until knife inserted off-center comes out clean, about 30 minutes more. Makes 1.
Note: This quiche freezes well. After adding the fillings just wrap in heavy foil and freeze solid until ready to bake. When ready to bake unwrap and allow to sit at room temperature for 30-60 minutes. Bake as with the fresh version, but add another 10-15 minutes to the baking time. If you don’t want to freeze the pie pan, you can line the pie pan with foil before you add the crust. Once it is frozen you can remove the frozen quiche from the pie pan and wrap, returning to freezer. When ready to use unwrap and put the quiche back in the pie pan before baking. Or, if you are planning on freezing it, you can use a foil pie pan.
Scotch Eggs
6 hard-cooked eggs, well chilled
1 pound breakfast sausage
1/2 cup flour
2 eggs, beaten
3/4 cup fine bread crumbs
Vegetable oil for frying
Peel eggs and set aside. Divide sausage into 6 portions. Roll each egg in flour and with hands press a portion of the sausage around each egg. If the sausage sticks to your hands, dip your hands in a little water to make pressing the sausage easier. Dip sausage-wrapped eggs into beaten eggs and roll in bread crumbs. Heat vegetable oil to 350 degrees. Cook each egg in oil about 4-5 minutes or until sausage is cooked and browned. Drain on paper toweling. Serve warm. Makes 6.
Reuben Strata
12 slices rye bread
6 slices Swiss cheese
12 oz. thinned sliced corned beef- or 2 cups chopped corned beef
1 c. sauerkraut, squeezed dry
½ c. Thousand Island dressing*
3 eggs
2 c. milk
½ t. salt
½ t. hot pepper sauce, or to taste
Lightly grease a 9×13-inch baking dish. Place six slices of bread on bottom of the dish. You might have to trim the bread to fit. Top each slice of bread with a slice of cheese. Top cheese with the corned beef and sauerkraut. You can use a little more or less sauerkraut, depending on your taste. Spoon about a tablespoon of the dressing over each “sandwich”. Top with remaining six slices of bread, trimmed to fit pan, if needed. Combine remaining ingredients and pour over sandwiches. Cover dish and let stand in the fridge, several hours or overnight. Bake, uncovered, in a 350-degree oven for 40-45 minutes, or until puffed and set. Let sit a few minutes before serving. Serves 6.
Orange and Oatmeal Scones
2 1/2 cups flour
2 cups rolled oats
1 cup sugar
1 teaspoon salt
1 tablespoon baking powder
1/2 teaspoon baking soda
1/2 cup very cold, unsalted butter – cut into chunks
1 egg
1/2 cup orange juice
2 t. grated orange peel
1 cup raisins – plumped and well dried
Glaze
milk, sugar, orange zest
Line a large baking sheet with parchment paper (double two sheets if you have them – one inside the other). Preheat oven to 425 F. In a large bowl, place flour, oatmeal, sugar, salt, baking powder, baking soda and mix together. Cut or rub in butter to make a mealy mixture. Stir in egg and orange juice. Add orange peel and raisins. Mix to make a soft dough. Turn out onto a lightly floured board and knead for a few minutes. Roll or pat out into a thickness of 1/2 inch. Using a serrated cookie cutter cut into disks or rounds. Brush with milk and sprinkle with sugar and orange zest. Bake until nicely browned – about 14 minutes. Makes about 24.
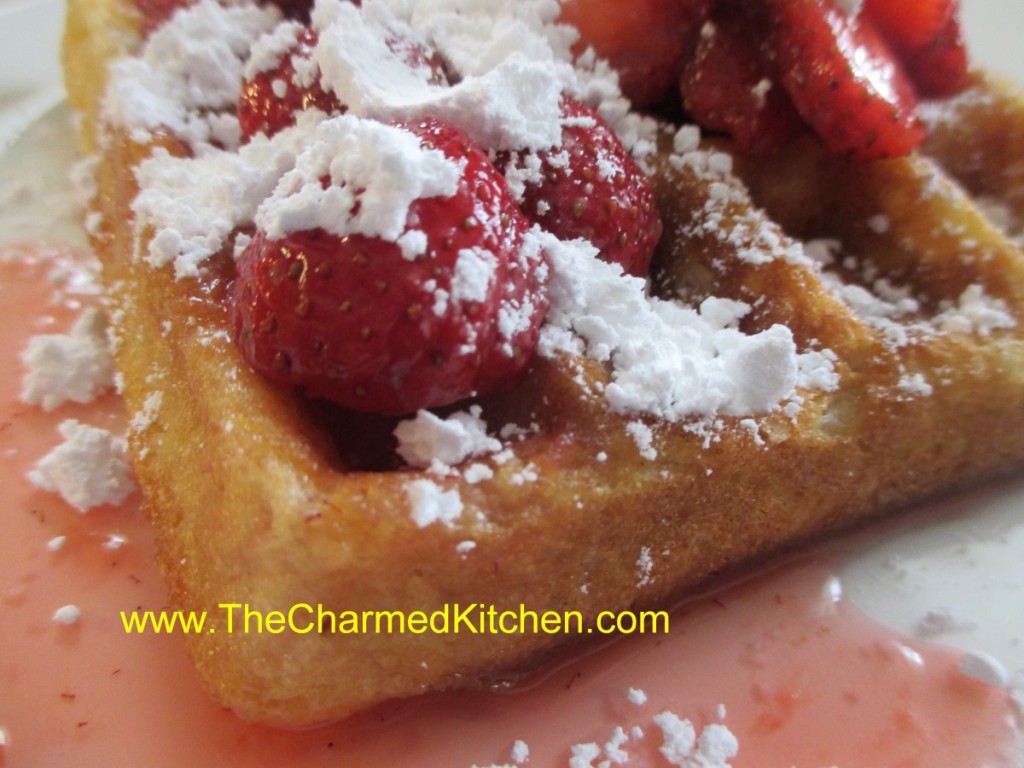
Cinnamon-Vanilla Belgian Waffles
2 c. all-purpose flour
3/4 cup sugar
3-1/2 teaspoons baking powder
2 t. cinnamon
2 eggs, separated
1-1/2 cups half and half- or milk
1 cup butter, melted
2 t. vanilla extract
Sliced fresh strawberries, powdered sugar or syrup
In a bowl, combine dry ingredients. In another bowl, lightly beat egg yolks. Add milk, butter and vanilla; mix well. Stir into dry ingredients just until combined. Beat egg whites until stiff peaks form; fold into batter. Bake in a preheated waffle iron according to manufacturer’s directions until golden brown. Serve with strawberries, powdered sugar or syrup. Yield: 10 waffles (about 4-1/2 inches).
Stuffed French Toast
1 (8 oz.) package cream cheese, softened
1 t. vanilla
1/2 c. chopped nuts
1 16-oz. loaf French bread
4 eggs
1 c. whipping cream or half and half
1 t. vanilla
1/2 t. ground nutmeg
Mix together cream cheese, vanilla and nuts. Set aside. Cut bread into 10-12 1 1/2 inch slices. Cut pocket in each slice and fill with 1 1/2 T. filling. Combine eggs and whipping cream with remaining vanilla and nutmeg. Use tongs to dip the bread, taking care not to squeeze out the filling. Cook toast on lightly greased griddle until browned on both sides. Keep toast warm in oven until ready to serve. Serve with maple syrup, warmed preserves or powdered sugar. Makes 10-12 slices.


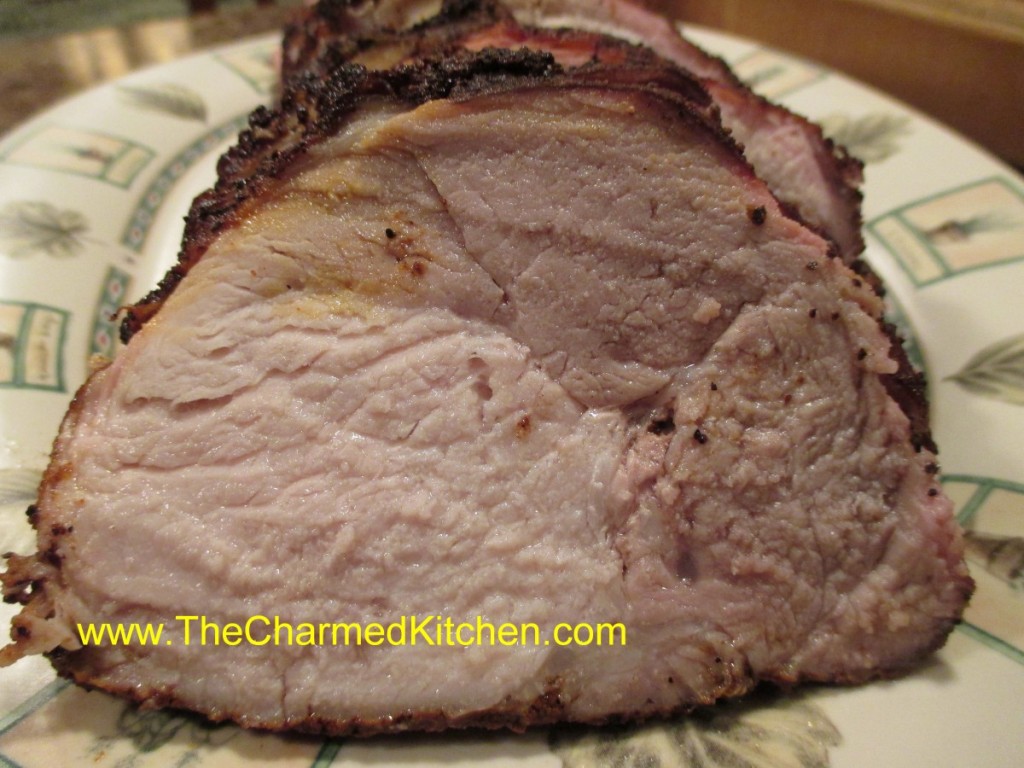
Coffee and Spice Rubbed Pork Roast

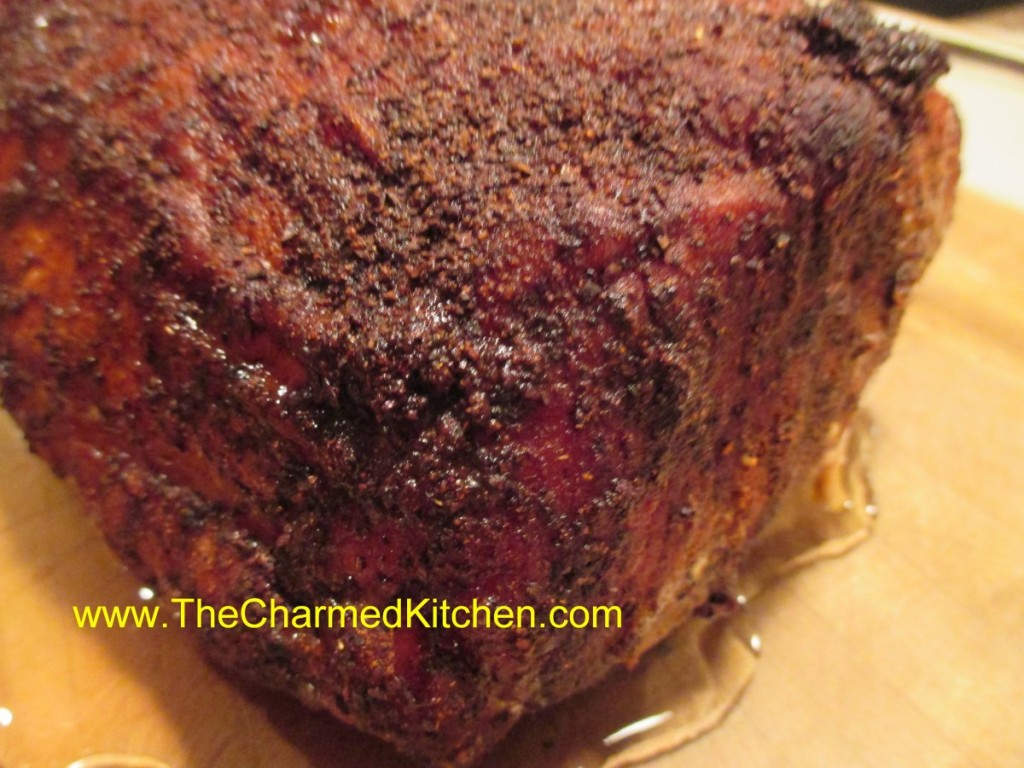
Since so many people are making a pork roast of some sort for the New Year, I thought I would re-post this recipe. I’ve had several requests for it in the last few days.
It is really good- with a rich blend of spices and coffee. The spice rub would also be great on lamb or beef. The rub can also be used on pork chops.
I am thinking of trying it on duck soon. Enjoy and Happy New Year!!
Coffee and Spice Rub
¼ c. ground coffee
¼ c. brown sugar
2 T. paprika
2 t. each cayenne pepper, cumin, garlic powder, salt and ginger
1 t. allspice
½ t. cinnamon
Combine all ingredients and stir to mix well. Store in a cool place, preferably in the refrigerator. Rub can be used on roasts or on chops, steaks and smaller cuts of meat. If using on chops that are being pan fried watch carefully as the sugar in the recipe could burn.
To use the rub: several hours before cooking place the roast in a shallow pan and sprinkle heavily with the rub. Use your hands to spread it evenly and cover completely. Place plastic wrap on clean surface and transfer roast to the wrap. Fold plastic wrap to cover roast , using more plastic wrap as needed so meat is sealed well. Return to fridge for at least a couple of hours, or overnight. When ready to cook, bring roast out and allow to stand 30 minutes. Remove plastic wrap and place roast in a roasting pan on a wire rack.
For the pork roast allow about 20 minutes per pound. Larger roasts need a little less time per pound. You want an internal temp of 145. Check with a thermometer, to be sure. You don’t want to overcook the pork. When the roast is finished- remove from oven and let stand 10 minutes, or a little longer, before slicing.
Tara’s Date Cake

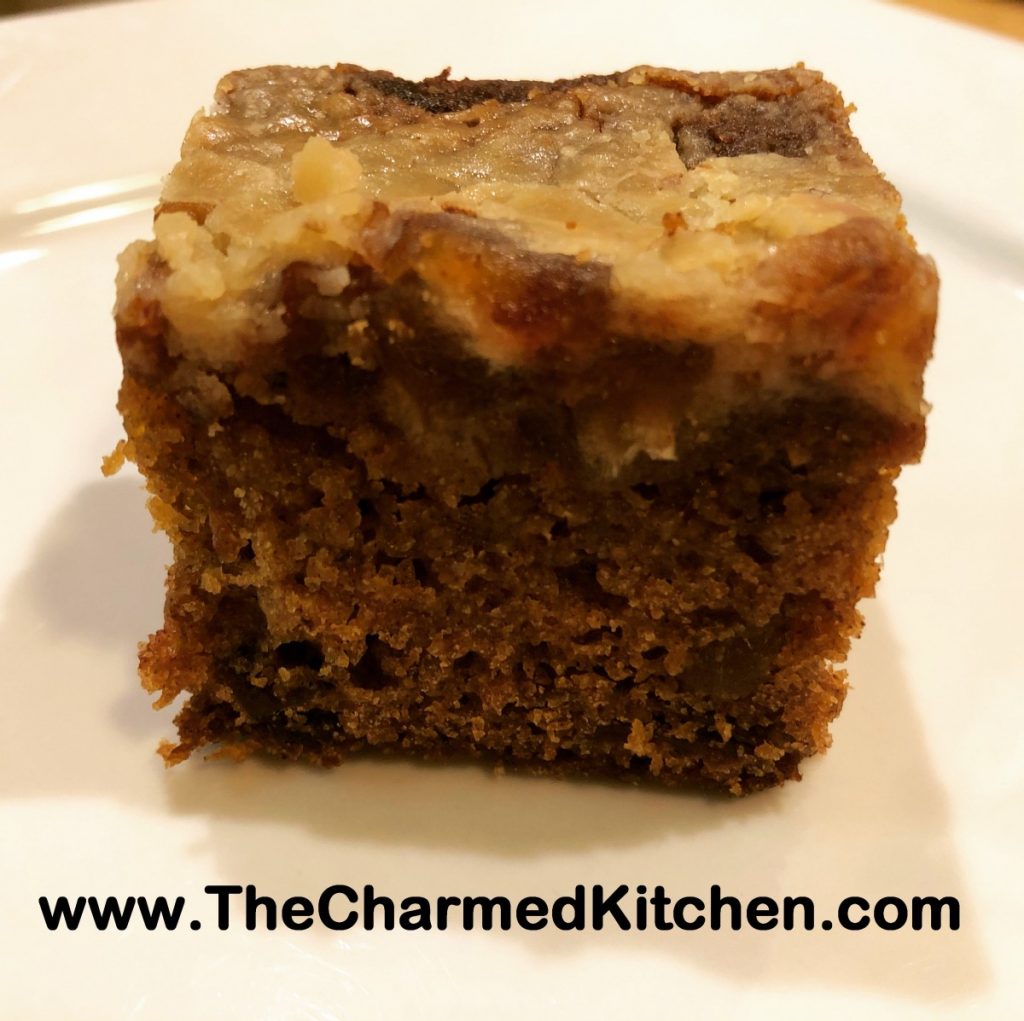
Looks can be deceiving. This is not a very pretty cake. But it is one of my all time favorites. I love dates and their natural sweetness adds a unique flavor. This cake also has a soft delicate texture, that you might not expect. I have been sharing it with various friends for feedback. So far we all agree it is a winner.
I shared some of this cake with my friend, Tara, the other day. She really loved it. We also talked about how recipe names come about. So I thought, what the heck, I will name the cake after her. Did I mention how much she liked it?
This all started because I had a request to bake a date cake. I hadn’t made one in a long time and forgot how much I like them. Unlike a date nut bread, which can be dense and more like a fruitcake, this cake is rich, but light.
The cake comes out very dark brown, but it isn’t burnt- unless you leave it under the broiler too long. Don’t ask me how I know this. The dark color just means the cake has a toasty flavor, especially around the edges.
Yes, the cake goes under the broiler for a few minutes after baking it. It gives the topping a sort of caramel flavor.
So enough chat- here is the recipe.
Tara’s Date Cake
1½ c. water
1½ c. raisins or dried cherries
¾ c. dates, pitted and chopped
½ c. butter
¾ c. granulated sugar
2 eggs
1 t. vanilla extract
1½ c. all-purpose flour
½ t. salt
1 t. baking soda
Topping
4 T butter (½ a stick)
½ c brown sugar
2 T. half and half or cream
½ cup chopped dates
½ c. chopped nuts, optional
Grease and flour a 9- inch square pan. Set aside. In a saucepan, combine water and raisins. Bring to a boil and boil for 5 minutes. Remove from heat and stir in chopped dates. Set aside to cool, about 30 minutes. Preheat oven to 350 degrees. In a large bowl, beat butter and sugar until light and fluffy. Beat in the eggs, then beat in the vanilla. Beat in the flour and salt. Combine the baking soda and date mixture. Stir well, then add date mixture to batter. Beat just until combined. Pour batter into prepared pan.
Bake 40 minutes, or until a toothpick inserted into the center of the cake comes out clean. Remove cake from oven, and set oven to broil. Make Topping: In a saucepan, melt butter. Stir in brown sugar, half and half or cream, chopped dates and nuts, if using. Spread mixture over warm cake and place under broiler until lightly browned, about 3 minutes. Watch carefully – it burns easily under the broiler. Cool before serving. Serves 12.
Pecan Crusted Salmon

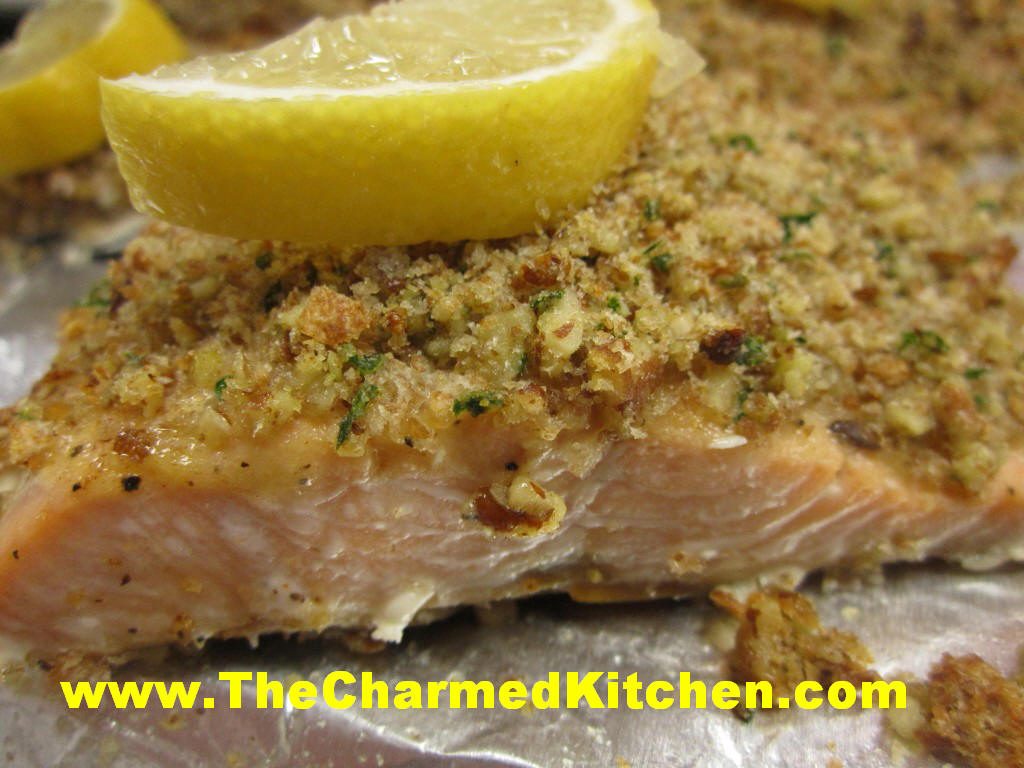
If you love salmon like I do, this is a fun way to prepare it. The crunch from the nuts adds a nice contrast to the texture of the fish. The flavors work well together, too. We had this for Christmas Eve dinner. It would be a nice dish for New Year’s Eve.
You don’t have to use pecans. I prefer them, but finely chopped walnuts, hazelnuts, almonds or even pumpkin seeds might be fun.
A combination of Dijon mustard, butter and honey helps the nuts to stick to the fish. There are a few fresh bread crumbs in there as well.
This dish is simple enough to prepare any night of the week, but special enough to make for company.
I used salmon fillets. You could use a whole side of salmon. You just have to increase the baking time to about 20-25 minutes and reduce the oven to 425 degrees. Depending on the size of the piece of salmon, it might take a few more minutes.
You could use other fish, but you need a sturdy fish that will stand up to the topping. I have made it with Steel Head Trout and it worked out beautifully.
Pecan Crusted Salmon
2 T. Dijon Mustard
2 T. melted butter
4 t. honey
1/4 c. fresh bread crumbs
1/4 c. finely chopped pecans or walnuts
2 t. chopped parsley
4 salmon fillets
Salt and pepper
Lemon wedges
Mix together mustard, butter and honey and set aside. Mix together bread crumbs, nuts and parsley and set aside. Season each fillet with salt and pepper. Place on lightly greased baking or broiling pan. Brush each fillet with mustard mixture. Divide crumb mixture among fillets, patting to hold. Bake in 450 degree oven for 10 minutes per inch thickness of fillets. Serve with lemon wedges. Serves 4.
Buckeyes


Buckeyes were the first candy I learned to make. A peanut butter filling is rolled into balls, then dipped in melted chocolate. Lovely flavor combination and very easy to make.
When I was a kid, I didn’t see them outside of Ohio much. Today everyone seems to know what buckeyes are.
Buckeyes are simple to make. Fast, too. And a great kid-friendly recipe. If you need some last minute gifts, or you just want them for your holiday party, you still have time to make a batch of buckeyes.
Here is the recipe I use. There are variations of this recipe out there, including one with crispy rice cereal in the mix. This one is still my favorite. Enjoy!!
Buckeyes
1 ½ lb. powdered sugar
1 ½ c. peanut butter
2 sticks softened butter
12 oz. chocolate chips- or dark chocolate
2 T. coconut oil or shortening
Mix together sugar, peanut butter and butter. Chill. Roll into balls, flatten slightly. Melt together, chocolate and coconut oil. Dip the peanut butter balls in melted chocolate to cover about ¾ of the surface. Use a toothpick or fondue fork to hold the balls. It makes the job of dipping a lot easier. Allow to harden on wax paper. Store in a cool place. Can be frozen.
Classic Sugar Cookies with Non- Royal Icing


These cut-out cookies are a classic, and always part of my holiday cookie baking. I will confess to having an enormous assortment of cookie cutters, so there is almost no end to the shapes I might use. This time of year I am making trees, stars, snowmen and more.
These cookies are crisp and sturdy enough to stand up to frosting, without being too hard. They also hold their shape well when baking.
I normally use royal icing to frost them, and an assortment of sprinkles and other candies. Royal icing is made with egg whites or powdered egg whites. The advantage over a butter cream, is that royal icing hardens, making the cookies easy to pack and stack. You don’t need much- just a thin layer. Tinting the frosting different colors is a big part of the fun. Depending on how much time you have, you can get really creative with decorating.
I tried a different frosting this year. Several friends had said they didn’t have, or couldn’t find, powdered egg whites and wondered if there was an alternative. There is. This one has just a few easy to find ingredients, and hardens up as nicely as royal icing, with a bit of a shine. The recipes for both icings follow the recipe for the cookies.
Sugar Cookies
1 c. butter
1 c. sugar
1 egg
1 t. vanilla
3 c. flour
2 t. baking powder
3 T. milk
Extra sugar for sprinkling, if desired
Beat butter and sugar until fluffy. Beat in egg and vanilla. Combine dry ingredients and add to butter mixture. Beat in milk. Heat oven to 375-degrees. Roll dough on lightly floured surface to about 1/3- inch thickness. Cut out with lightly floured cutters and sprinkle with sugar or colored sugar if you like and if you are not going to frost them. Bake on an ungreased baking sheet for 10-12 minutes. Cool on baking sheet 3 minutes before placing on wire rack to cool completely. Frost when cooled. Makes about 4 dozen.
Decorating your cookies:
You can use a buttercream frosting, if you like, however the topping I prefer is royal icing. Because royal icing contains egg whites it gets hard. Cookies have a smooth appearance and can be stacked. When making royal icing, use pasteurized egg whites or powdered egg whites. Raw egg whites pose a risk of salmonella.
You can also use colored sugar and sprinkles and mini chocolate chips for eyes.
Non-Royal Icing
4 c. powdered sugar 3 T. corn syrup 2 t. vanilla extract 1/3 c. lemon juice- about
Combine the first three ingredients then add the lemon juice, a little at a time until the icing gets to the consistency you want. You might need a little more. Stir until smooth and add food colorings, if you like. Spread or pipe out, allowing to dry before adding new layers of icing.
Royal Icing
1 lb. powdered sugar
½ t. cream of tartar
5¼ t. egg white powder
6 T. water
½ t. vanilla, optional
Assorted food coloring
In large mixing bowl combine dry ingredients and mix well. Add water and vanilla and beat until light and fluffy, about 10 minutes. Divide into small bowls and tint each batch as needed. Keep bowl covered with a damp towel while waiting to use so frosting will not dry out.
Cinnamon Pecan Shortbread

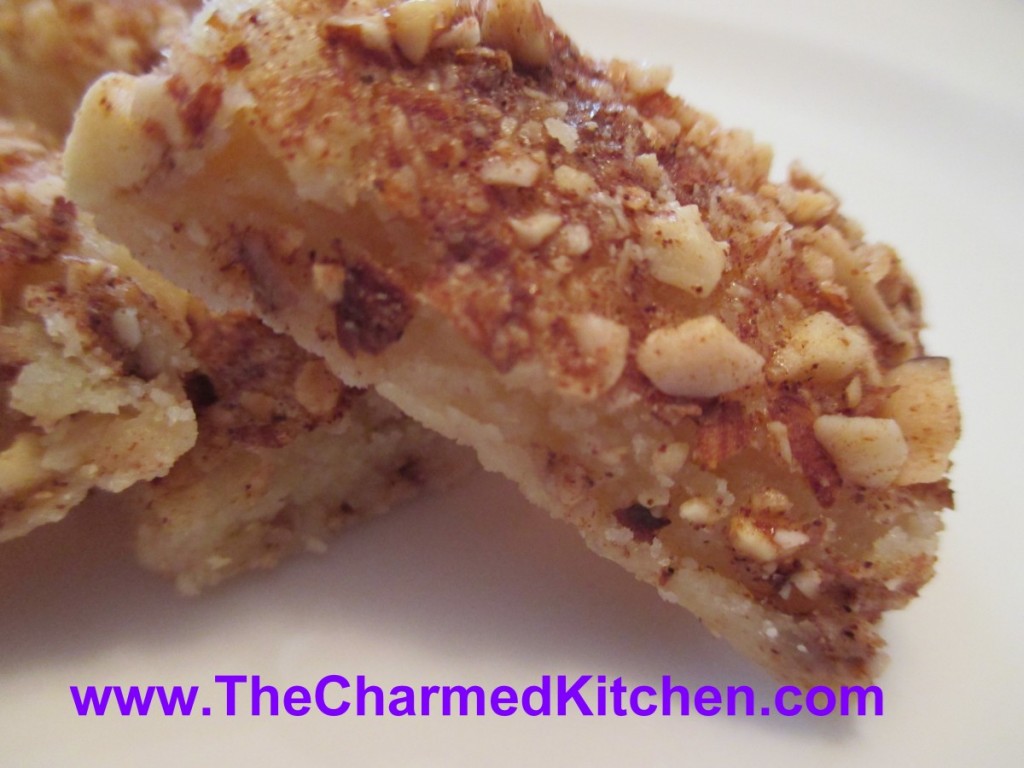
It seems I am always making variations on shortbread cookies. I love shortbread. I am not alone- so many friends and family have told me the same thing. There is something about the crumbly texture of shortbread that makes them a favorite for a lot of people.
This recipe is a classic shortbread, topped with cinnamon and pecans. They are really good. You just make a batch of dough, press into a pan, top with a cinnamon – pecan mixture, and bake. Could not be simpler.
As soon as they come out of the oven cut them into little strips or squares. I got nearly 100 out of one batch. It depends on the size you cut them. If you are looking for a simple, yet wonderful cookie, you might want to try these.
Cinnamon Pecan Shortbread Cookies
1 c. butter
1 c. sugar
1 egg, separated
2 c. flour
1 T. water
½ c. finely chopped pecans
3 T. sugar
2 t. cinnamon
Lightly grease jellyroll pan (10×15). Mix butter, sugar and egg yolk then stir in flour. Pat into pan. Beat egg white with water until frothy and spread over dough. Combine pecans, sugar and cinnamon. Sprinkle nut mixture over the dough and bake in a 350-degree oven for 20-25 minutes or until lightly browned. Cut immediately into tiny strips, makes 50- 100.
Cream Wafers


Cream Wafers are a little more work than most cookies, but they are worth it. They are the most requested cookies of all the ones I make. The secret is the dough, which contains no sugar. It is made from only three ingredients- flour, butter and heavy whipping cream.
When baked, they turn into flaky layers that melt in your mouth. Seriously, if you want to really impress this holiday season, show up at a party with these cookies.
Cream wafers are coated in sugar before baking. You can use tinted sugar, if you like. Once baked and cooled, they are made into little sandwich cookies, using a buttercream frosting. You can also tint the frosting if you like.
Because they puff when baking and become thicker, and you are using two of them to make the sandwich cookie, be sure to roll them out pretty thin.
Here is the recipe. Hope you enjoy!!
Cream Wafers
1 c. butter
1/3 c. heavy whipping cream
2 c. flour
extra fine or granulated sugar
Frosting:
¼ c. butter, softened
¾ c. powdered sugar
1 T. milk
1 t. vanilla
food coloring, if desired
Mix butter, cream and flour well. Wrap and chill at least an hour. Roll chilled dough 1/8 inch thick on lightly floured board. Cut out into 1½ inch rounds or even little hearts or stars. Transfer cookies to a sheet of wax paper heavily coated with extra fine or granulated sugar and coat both sides. Place on an ungreased baking sheet and prick each cookie 4 times with a fork. Bake at 375-degrees 7-9 minutes until lightly browned and puffy. Cool on rack. Mix frosting ingredients. Put 2 cookies together with frosting to make “sandwiches”.
Mom’s Kolachy


Since I posted Eva’s recipe for kolachy yesterday, I thought I would also share my mom’s recipe. This is the recipe for kolachy I grew up making. I have fond memories of making these delicate cookies with my Mother. I think of her every time I make them. We made them every year for Christmas.
We used all sorts of different fillings. I used fig jam this time. Pie fillings work great. Preserves work, too. Some other filling options are pineapple, cherry, apple, cheese, blueberry and nut fillings. Finish off the cookies with a light dusting of powdered sugar, if you like.
One problem people sometimes have, when making kolachy, is having them open when baking. When you fold the dough over the filling, give it a good pinch. Then fold it over and pinch it again. Also, don’t leave too much flour on the dough. It will prevent the dough from sticking to itself and will cause it to pop open. Some people like to moisten the dough a little, before sealing. That works, too. I just find the double pinch method works fine for me. Important to know- even the ones that pop open will taste amazing!!
Mom’s Kolachy
Dough
3 sticks butter
8 oz. cream cheese, softened
3 cups flour
Fig Jam– recipe follows
Powdered sugar, optional
Mix dough ingredients together and chill well before using.
Roll out chilled dough into squares or circles. Spoon a little blueberry filling into the center and pinch 2 ends or corners together. Bake in 350-degree oven for about 12 minutes, or until golden on edges. Cool and dust with powdered sugar. Makes 4-5 dozen.
Fig Jam
1 lb. dried figs
2 c. water
1-2 c. sugar- I used 1 cup, but use according to your taste
Zest of 2 lemons
2 t. cinnamon
Chop up figs and place in saucepan with the water and cook until tender, about 30 minutes. Add sugar, zest and cinnamon and cook until thickened, about 20 minutes. Stir often to prevent sticking. Puree mixture and set aside to cool.


