Busha’s Beet Soup


This colorful, tasty soup, was first made for me by my Busha, my Polish grandmother. Beets are a big ingredient in Eastern European culture. My Mom cooked with them, too.
I have fond memories of spending time with my Busha. I stayed with her on weekends a few times. One of those weekends, she taught me how to make a wonderful coffee cake. I still have the index card where I wrote down the recipe as she went along making it. Busha didn’t write her recipes down much.
Another time, she made beet soup. I loved it. I think the color is what pulled me in. I was a big fan of pink back then. I still am, especially when it comes to this soup.
I love to use fresh, raw beets, when possible. You can use cooked beets, or even canned, if you like. This time I used frozen beets- using ingredients I already have on hand.
I make homemade spaetzle, but other pasta or cooked, diced potatoes are good, too.
So here is the recipe for the soup and the spaetzle. I always think of Busha when I make it.
Busha’s Beet Soup
1 large onion, sliced thin
oil
5-6 medium beets, about 2 pounds
5-6 cups beef, chicken or vegetable stock
1 c. dairy sour cream
1 t. dill weed
cooked spaetzle, recipe follows
In soup pot, sauté onion in oil until starting to brown. Meanwhile, peel and dice the beets. You should end up with 5-6 cups of cubed beets. Add beets and stock to pot and bring to boil. Cover and turn down to a simmer. Cook until beets are tender, about 20- 25 minutes. Place sour cream in small bowl and ladle in a little of the hot soup, whisking until smooth. Add another ladle of soup and whisk again. Pour this mixture into pot of soup along with the dill weed. Serve with the spaetzle. Serves 4-5.
Note: You can also pre-cook the beets or use canned beets. Trim off leaves of beets, leaving 2 inches of stem. Leave roots intact. Boil beets in water until tender, which can take as little as 20 minutes for tiny beets or 45 minutes for the large ones. Cool in bowl of ice water and then slip off the skins. Dice and add to soup as if the beets were canned. You don’t need the long cook of fresh beets. Just bring soup up to a simmer.
If you prefer, serve the soup with diced boiled potatoes or kluski, rather than the spaetzle.
You can serve the sour cream on the side, rather than incorporating it into the soup, then allow people to add a dollop of sour cream to individual bowls. Polish beet soup usually adds the sour cream and Russian style is to dollop on the top. Both versions taste good.
Spaetzle
3 eggs
1/2 c. half and half or evaporated milk
1/2 t. salt
1 1/2 c. flour
Combine all ingredients and let rest 30 minutes. Drop by small spoonfuls into boiling water. Cook until they float and puff up, about 5 minutes. Drain and serve with soups, stews, sauces or buttered.
Homemade Blueberry Ice Cream

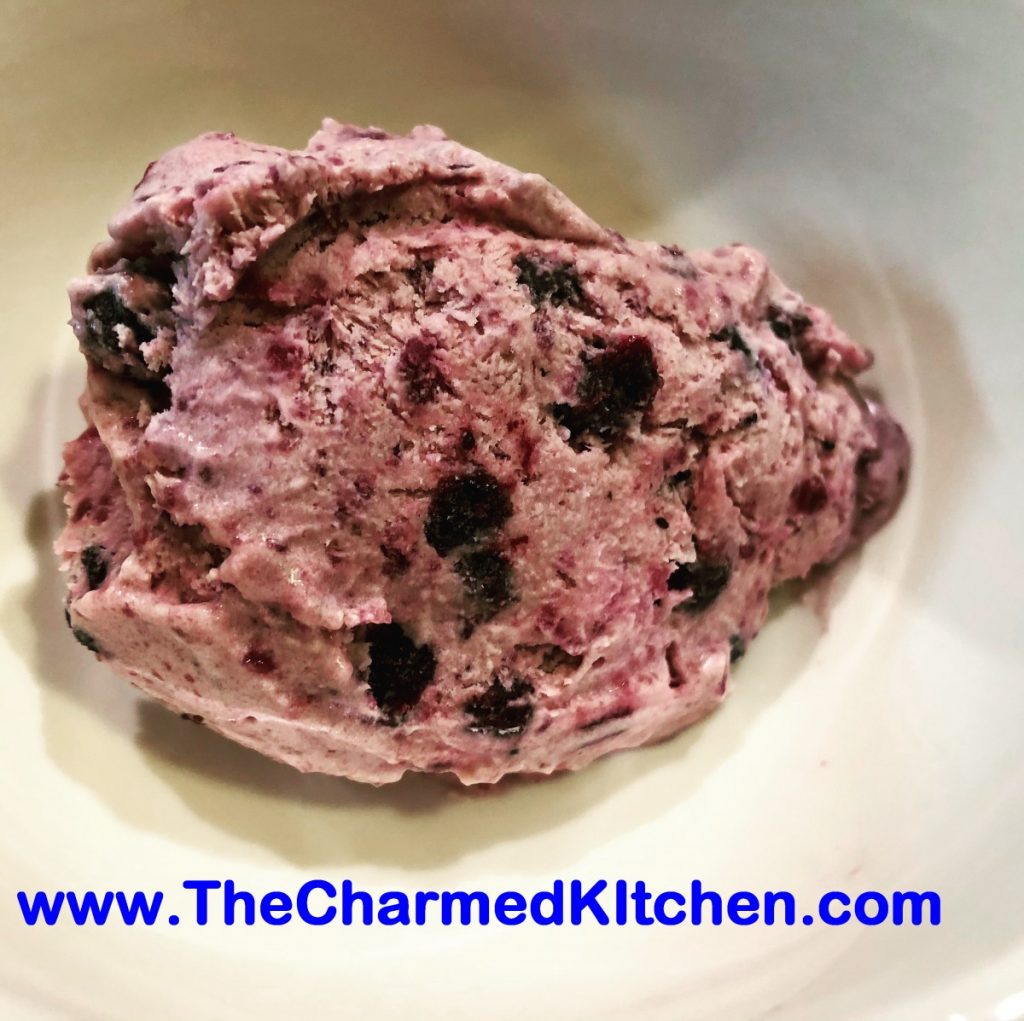
This might be the easiest ice cream you’ll ever make. It tastes pretty good, too. I almost named it Quarantine Blueberry Ice Cream. The ice cream came about because of the quarantine. I had purchased whipping cream to use in a dessert for a dinner party. Except the dinner party never happened. The whipping cream sat in my fridge, minding its own business, until I decided to give that expiration date a look. Time was up. I didn’t want it to go to waste. I could freeze it for later, or use it right away. I decided to make ice cream.
I had recently posted a recipe for a super easy ice cream, where you just combine whipped whipping cream and chocolate syrup, and freeze it. Its actually pretty good. I didn’t have chocolate syrup handy, but I did have a jar of blueberry pie filling. I used homemade, but a can from the store would be fine. It worked! The ice cream came out very nice and creamy.
I can’t say that it is as creamy as ice cream I make in the ice cream maker. But for as easy as it was to make, I have no complaints. Here is what I did.
Easy Blueberry Ice Cream
1 pint whipping cream
1 jar or can of blueberry pie filling ( other flavors should work)
powdered sugar to taste – I used about 1 cup
2 t. vanilla extract- optional
In a mixing bowl whip cream until soft peaks form. Add the pie filling and continue beating until well mixed. A stand mixer makes this easier, but a hand mixer works, too. Sweeten to taste and add the vanilla, if you are using. Put in a container with a lid- and freeze.Makes 5-6 cups.
Note: Other pie filling flavors should work fine, but you might want to cut up bigger pieces of fruit. The extra sugar really helps. When the ice cream is frozen, it will taste less sweet, so don’t be afraid to add a little extra sugar before freezing. As for the flavorings- have fun. I just added some vanilla, because I like vanilla. Other extracts, like mint or almond would be fun. I could see adding cinnamon and nutmeg to apple pie filling ice cream. Have some fun with the flavors.
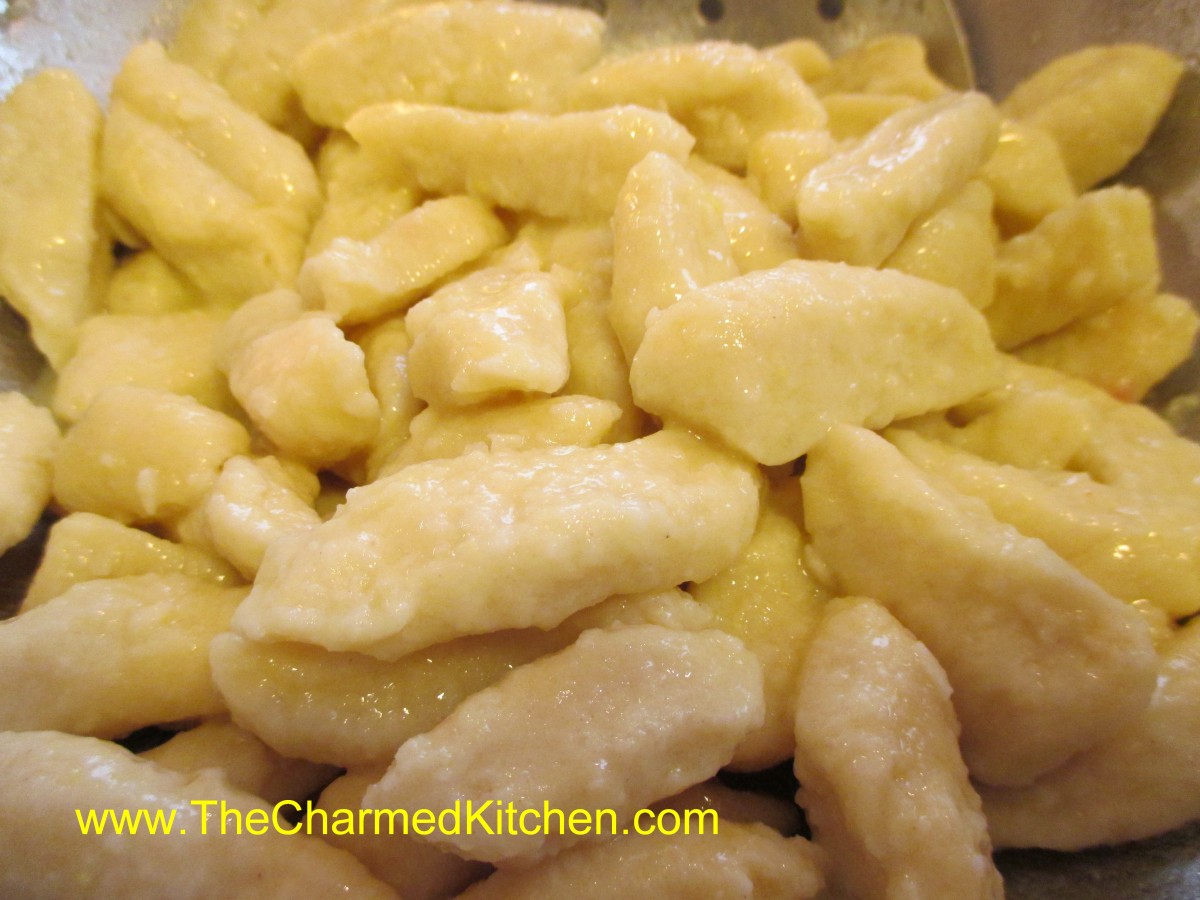
Rainbow Gnocchi


When I was a kid, my mother made dumplings or spaetzle. That was part of my Eastern European heritage. I was much older before I tasted gnocchi for the first time. Similar to dumplings, gnocchi are Italian in origin.
Made with cooked potatoes, flour and eggs, when done right, gnocchi are quite light and tender. I wish I could remember where I got this recipe. I have a hand written copy of it- but it isn’t my handwriting. This is the version I have been making forever. The original recipe calls for steaming the potatoes, but I will admit to baking them or using leftover boiled potatoes. I sometimes use red skinned or Yukon Gold, too, with nice results. All methods produced a product I was happy with.
A few times, I decided to go off course a bit, and make gnocchi using additional ingredients. Ingredients that changed the color and the flavor, but still left me with the gnocchi I loved.
Two of my favorite “non-traditional” gnocchi recipes include using sweet potatoes or beets. These ingredients make for very colorful, tasty gnocchi. So here are the recipes for all three recipes. They make a great addition to any Spring menu.
While traditional gnocchi are rolled over the tines of a fork to get a grooved surface, I didn’t do it this time. I just rolled the dough into ropes and cut into small pieces. Not quite as pretty, but the taste is still wonderful.
Classic Gnocchi
4 small russet potatoes, 22-24 oz. total, peeled, diced into 1/2-inch cubes
1 egg
2 T. whipping cream
1 1/4 t. salt
1/8 t. nutmeg
1 1/2 c. (about) flour
Steam potatoes over boiling water until tender, about 12 minutes. Place in bowl and mash or put potatoes through a ricer. Place in bowl and cool about 10 minutes. Add egg, cream, salt and nutmeg and mix well. Stir in flour and combine until slightly sticky dough forms. Add more flour a tablespoon at a time if the mixture is too moist. Turn dough onto lightly floured work surface and divide into 6 equal portions. Roll out 1 piece into a rope about 20-inches long by 3/4 inch. Cut dough into 3/4 -inch pieces and roll each piece over the tines of a fork or over a wire whisk to make grooves in them. Arrange finished gnocchi in a single layer on a floured baking sheet and repeat the process with the remaining dough. Boil the gnocchi in well-salted boiling water, about 1/3 at a time. Boil for 4-5 minutes. They will come to the surface and be tender. Check after 4 minutes. Serve with butter and Parmesan cheese or with a favorite pasta sauce.
Sweet Potato Gnocchi
1 c. mashed, cooked sweet potatoes
1/2 c. mashed, cooked russet potatoes
2 eggs
1 t. salt
1 t. turmeric, optional
2 c. flour or more
Get a pot of water boiling. In mixing bowl combine the sweet potatoes with the eggs and seasonings. Add about 1 1/2 cups of the flour and stir until a soft dough forms. Continue adding flour, a little at a time, until the dough can be handled without sticking to your hands but is still soft. Take about 1/4 of the dough at a time and roll into a rope, about 15 inches long, on a floured work surface. Cut dough into 1/2 thick pieces. Place pieces in a pot of boiling water and after a few minutes the gnocchi will float to the top. Cook them for several minutes after they have risen to the top of the pot. Remove with a slotted spoon and drain. If you aren’t going to use them right away drizzle with a little oil to prevent sticking or toss with butter. You can also run a little cold water over them instead. Repeat with the remaining dough.
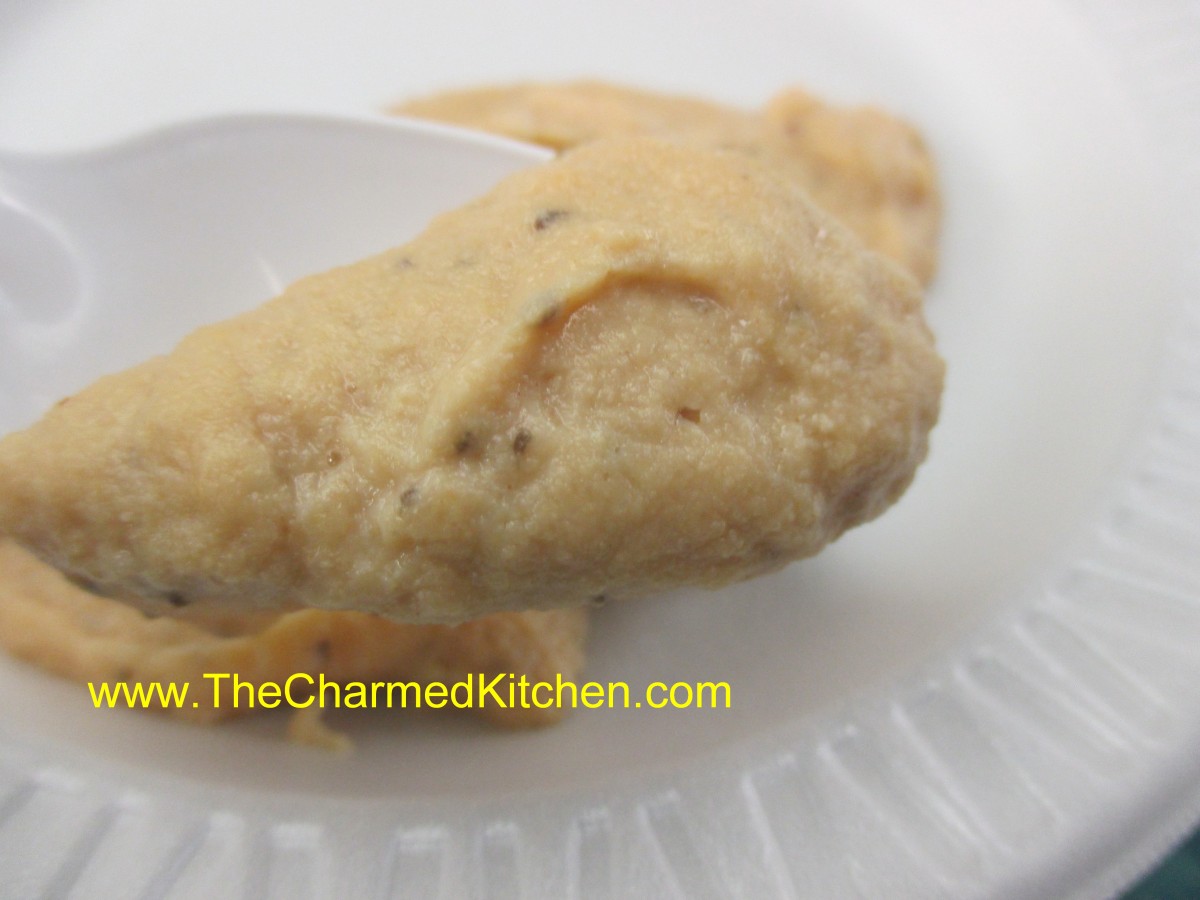
Beet Gnocchi
2 small russet potatoes, 11-12 oz. total, peeled, diced into 1/2-inch cubes
2 medium/small beets, roasted, skin on, cooled
1 egg
1/4 c. whipping cream
1 1/4 t. salt
¼ t. dill weed
1 1/2 c. (about) flour
Steam potatoes over boiling water until tender, about 12 minutes. Place in bowl and mash or put potatoes through a ricer. Place in bowl and cool about 10 minutes. Remove skins from cooled beets and dice. Place beets in a food processor or blender. Add the cream and process until smooth. Combine with potatoes, egg, salt and dill and mix well. Stir in flour and combine until slightly sticky dough forms. Add more flour a tablespoon at a time if the mixture is too moist. Turn dough onto lightly floured work surface and divide into 6 equal portions. Roll out 1 piece into a rope about 20-inches long by 3/4 inch. Cut dough into 3/4 -inch pieces and arrange finished gnocchi in a single layer on a floured baking sheet and repeat the process with the remaining dough. Boil the gnocchi in well-salted boiling water, about 1/3 at a time. Boil for 4-5 minutes. They will come to the surface and be tender. Check after 4 minutes. Serve with butter and Parmesan cheese or with your favorite sauce. Serves 6.
Homemade Food Gifts for Mom

Homemade gifts are always special. For Mother’s Day, I think homemade is even more appreciated. I’ve assembled some of my favorite food gift recipes. While some will require adult hands, there are a few kid- friendly options, too. Some are sweet, others savory or even spicy. For all the moms out there- Happy Mother’s Day.
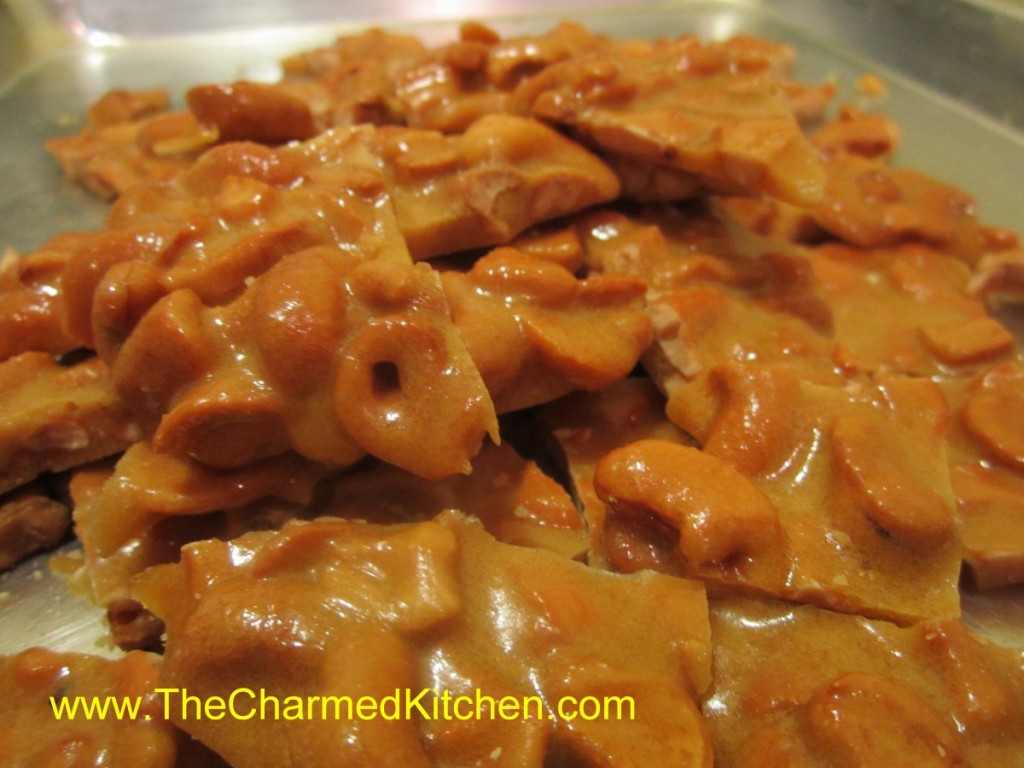
We will start with this cashew brittle recipe. Brittle was a special favorite of my own mother. I always think of her when I make it. This recipe is a breeze. Cooked in the microwave, this recipe is ready before you know it. You can, of course, use different nuts.
Homemade Cashew Brittle
2 c. cashews*
1 c. sugar
1/2 c. corn syrup
1/8 t. salt
1 t. butter
1 t. vanilla
1 t. baking soda
Butter or oil a large baking sheet and set aside. In a 3-4 quart glass bowl combine the nuts, sugar, corn syrup and salt. Microwave on high for 3 minutes. Remove from microwave, stir well and return to microwave. Cook 3 more minutes in microwave. Remove and stir in butter and vanilla, stirring until butter has melted. Return to microwave and cook for 2 more minutes. Remove from microwave and stir in baking soda. Stir until well blended and pour mixture onto prepared baking sheet. Spread out quickly, then allow to cool. Once cool, break into pieces. Store in a cool, dry place. I normally store it in a tin or plastic container with a tight-fitting lid.
* I used salted cashews but feel free to experiment with other nuts
Note: Use high power setting on microwave.
Truffles
1/3 c. Whipping cream
6 T. butter, cut into small pieces
2 c. chocolate chips- or 12 oz. dark chocolate, grated or chopped coarsely
Unsweetened cocoa
Heat cream to boiling in small saucepan. Stir in butter and cook until melted. Remove from heat and stir in chocolate until melted. Place in shallow bowl and chill until firm, at least a couple of hours. Roll mixture into 1-inch balls and roll in cocoa. Sometimes the mixture is quite firm and hard to roll into perfectly smooth balls. You can roll them out as smooth as you can, roll in cocoa and then roll again to smooth out. You might want to give them another roll in the cocoa after that. Makes about 30.
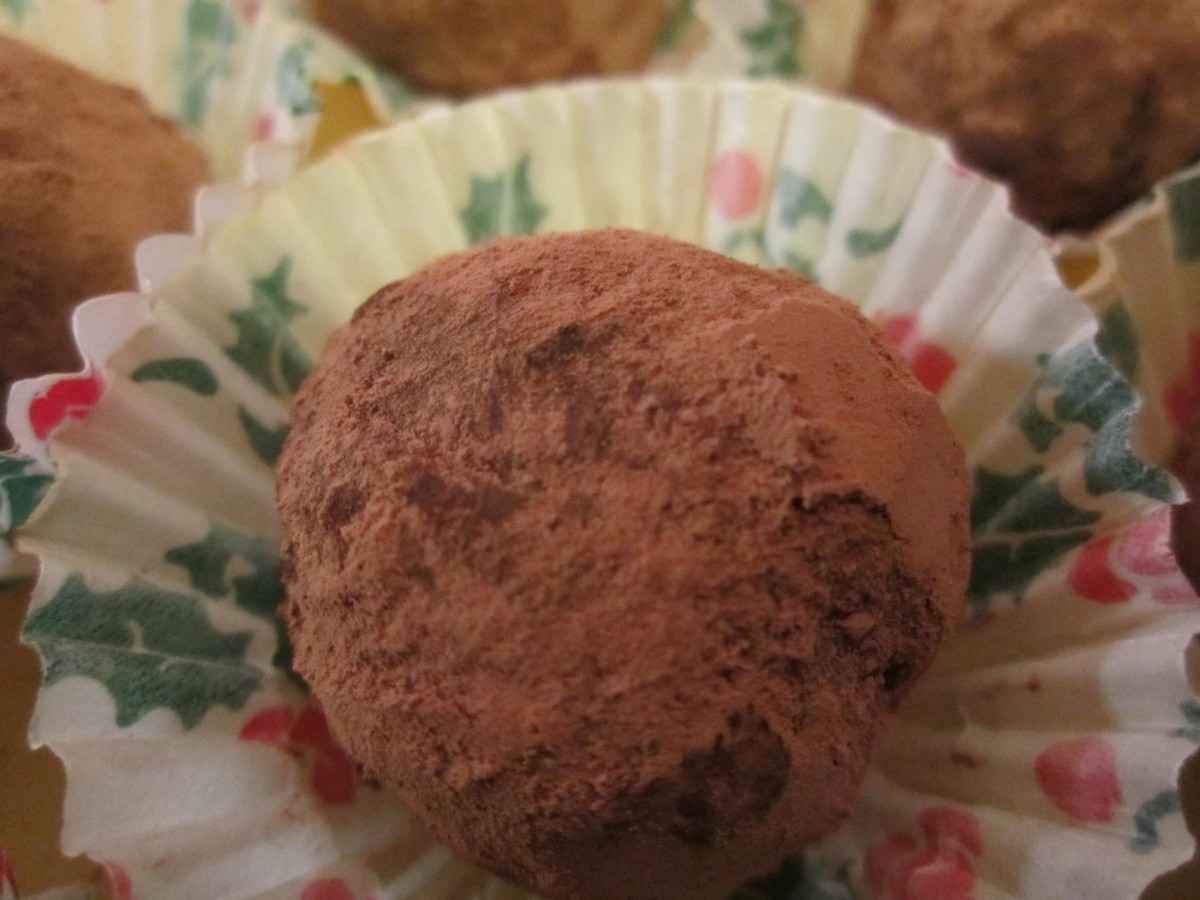
Chocolate Truffles

Minty Cocoa Hearts
Sugared Nuts
Homemade Bavarian Mustard
Minty Cocoa Hearts
If you are looking for a simple chocolate treat- that requires no cooking – try Minty Cocoa Hearts. This easy to make candy is made with just a few ingredients. The “dough” is mixed and rolled out. Then you just cut them out into little hearts. They taste great and they are also a nice project for kids. There is no special equipment needed other than a tiny heart-shaped cookie cutter. So if time is short and you really want to make something homemade this Mother’s Day- these could be the answer.
9 c. powdered sugar
1 c. cocoa
1/2 c. butter, softened
1/2 c. water
2 t. peppermint extract
In large bowl combine ingredients until well blended. You can add more water, if needed, 1 teaspoon at a time. Divide mixture into 2 pieces and shape in balls. Place each between sheets of wax paper and roll out to 1/4 -inch thickness. Cut out with tiny cutters and place on foil-lined tray. Chill several hours, then wrap up in colored foil or place in tiny candy bags. Makes 80 (1-inch) candies.
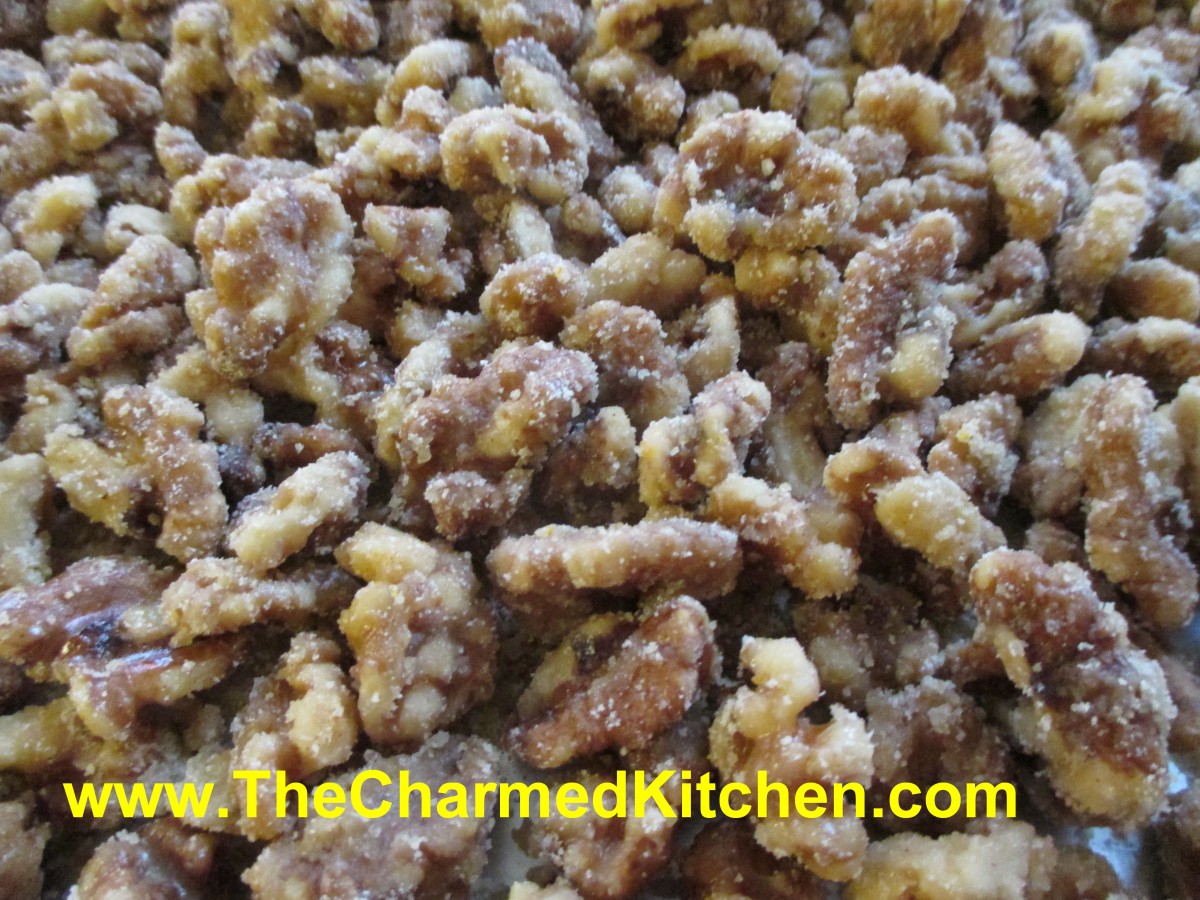
Sugared Nuts
Many years ago, my sister Cindy gave me the recipe for making these nuts. I make at least a few batches every year, and they are always a big hit. I will admit to tweaking the recipe a little over time, but the basics are still the same. Nuts are placed in a heavy skillet with sugar, water and seasonings. The mixture is then brought to a boil and cooked until most of the liquid cooks off. This takes about 10 minutes, give or take. You dump the nuts onto a cookie sheet, and start stirring immediately. If you don’t stir them, they will stick together. This is where the magic happens. The nuts look wet when you pour them out and start stirring, but in a few minutes, they cool and dry, and the sugar crystallizes on the nuts. Once cooled, the nuts are crunchy and sweet and very tasty. You can use them as a snack, or in all sorts of recipes. This is a really fast confection to make, and is a nice gift, too.
4-5 c. nuts, I like walnuts or pecans
2 c. sugar
1 c. water
1 t. cinnamon
1 t. orange peel
1 t. salt, optional
Place all ingredients in heavy skillet and cook over medium heat, stirring often, until all the water disappears. Whatever liquid in the pan will be clinging to the nuts and syrupy. Dump nuts onto a large cookie sheet and break apart with a wooden spoon to prevent clumping. As nuts cool, stir once or twice to remove any remaining clumps, and to cool faster. Nuts will lose their glossy appearance and attain a sugary crust. If it looks like nut soup, you didn’t cook them long enough, and you must return all to the skillet and cook longer. As the nuts start to get drier during cooking, you can turn down the heat a little to prevent burning. Once you’ve made a few batches, though, you will get good at judging when to stop cooking. You can also make a spicy version by adding a teaspoon of cayenne pepper along with the other ingredients. Store in cool, dry place to keep nuts fresh longer.
Horseradish Mustard
1 c. dry mustard
3/4 c. white wine vinegar
1/3 c. dry white wine or dry sherry
1/4 c. brown sugar
1/4 c. granulated sugar
1 T. dried minced onion
2 t. caraway seeds
1 1/2 t. salt
1/4 t. coarse ground mustard
2 eggs, slightly beaten
1 T. prepared horseradish
Combine all ingredients, except eggs and horseradish in top of double boiler and let stand at room temperature for 2 hours. Whisk in eggs and cook over simmering water until mixture has thickened and eggs are cooked, about 10 minutes. Remove from heat and stir in horseradish. Pour into sterilized jar, cool and cover. Store in fridge for up to 3 months. Makes 2 cups.
Bavarian Mustard
3/4 c. beer
2/3 c. dry mustard
2 T. sugar
2 T. cider vinegar
2 t. salt
1-t. celery seeds
1/2 t. fresh grated ginger or 1/4 t. dry
1 egg, beaten
Combine all but the egg in the top of a double boiler and let stand 2 hours at room temperature. Stir in egg and cook over simmering water. stirring constantly until mixture thickens and egg is cooked, about 10 minutes. Pour into sterilized jars and cool before covering. Store in fridge for up to 2 months. Makes 2 cups.
Spicy Mustard
1 c. dry mustard
2/3 c. dry white wine
1/2 c. vinegar, flavored with herbs or garlic
1/2 c. sugar
2 t. salt
1 t. basil
1 t. chili powder
1 t. dried minced garlic
1 t. oregano
1/2 t. cracked pepper
2 eggs, slightly beaten
Mix all ingredients, except eggs, in top of double boiler and let stand 2 hours at room temperature. Add eggs and cook over simmering water, stirring constantly until mixture thickens and eggs are cooked, about 10 minutes. Pour into sterilized jars and cool down before covering and refrigerating. Keeps in fridge for up to 2-3 months. Makes 2 cups.
French Herb Mustard
1/4 c. dry mustard
1/4 c. white wine vinegar
1/4 c. white wine or dry sherry
1/4 c. brown sugar
1/2 t. salt
1/2 t. tarragon
1/4 t. dill seed
1/4 t. celery seed
1/4 t. ground cloves
3 egg yolks or 1 whole egg
Combine all ingredients, except eggs, in top of double boiler and let stand at room temperature 2 hours. Whisk in eggs and cook over simmering water, stirring constantly, until mustard thickens and eggs are cooked, about 5 minutes. Store in crock or jar in fridge for up to 1 month. Makes 1 cup, recipe can be doubled.
Cookie Pops
These are a fun and easy gift to make with kids. I used white “chocolate” discs, but you can use real chocolate, too. Kids can make Mom an edible “bouquet”.
All you need are vanilla wafers, peanut butter or frosting to stick the cookies together, Popsicle sticks, some sort of chocolate you can melt and candies to decorate. After that it’s pretty easy. Dip the end of a stick into the peanut butter. Press 2 cookies together on the end of the stick. Press firmly. Melt the chocolate- I used a glass bowl in the microwave,but be careful not to burn the chocolate. Dip the cookies into the melted chocolate until covered. Allow excess to drip off. Place cookies on wax paper. Decorate your “pops” to look like flowers- I used M&M’s. Allow them to dry/cool then you can just peel them off the wax paper.
You can get M&M’s in so many colors, the “chocolate” discs, too, that color combinations are pretty limitless. If there are nut allergies to consider use frosting to stick the cookies together.

Cookie Pops
Hot Fudge Sauce
If Mom is a chocolate lover, this sauce makes a great gift. Don’t forget the ice cream!
1 c. unsweetened cocoa powder
¾ c. sugar
½ c. brown sugar
1/8 t. salt
1-c. heavy or whipping cream
½ c. butter, cut into pieces
1 t. vanilla extract
In saucepan , stir together dry ingredients then stir in cream and butter. Heat to boiling and boil 1 minute. Remove from heat, cool 5 minutes and stir in vanilla. Store leftovers in fridge. Rewarm before using. Makes 2 ½ cups.
Lemon Tea Cake

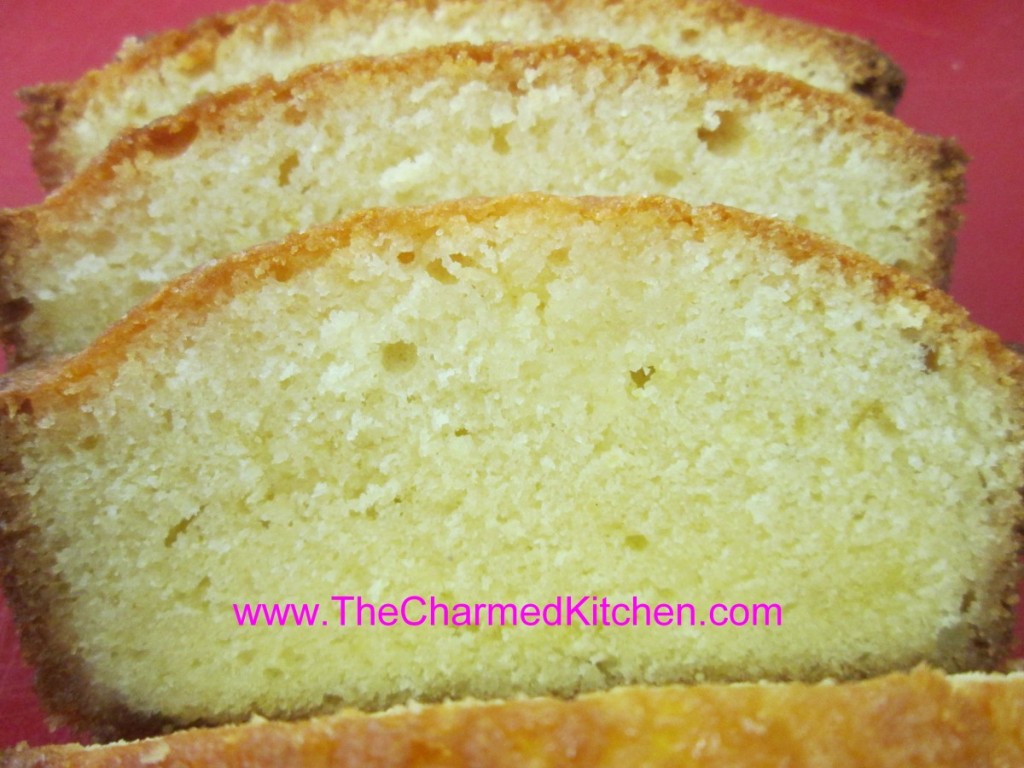
This is one of my favorite cakes of all time. It is a simple cake, enhanced with the flavor of lemon juice and lemon zest. Once out of the oven, you poke the hot cake with a large fork or a skewer, and pour a lemon syrup over it.
Moist, tangy and fragrant, it is a perfect addition to afternoon tea.
Great all on its own, this cake is also wonderful served with fresh berries and whipped cream for a Spring dessert. On a hot day, I have been known to top it with a scoop of ice cream.
Before you ask, the measurements are correct- only 3/4 cup of flour. No leaveners like baking powder or baking soda, either. The cake does not rise a whole bunch, but the texture is still very nice. The denseness of the cake helps it to stand up to the lemon syrup.
I hope you will give it a try.
Lemon Tea Cake
2 lemons
3 T. sugar for topping
½ c. butter, softened
¾ c. sugar
2 eggs, beaten
3/4 c. flour
6 T. milk or half and half
Preheat oven to 375 degrees. Grease an 8- inch loaf pan and line with wax or parchment paper. Grate the lemon rinds and set aside. Combine the juice of 1 of the lemons with the 3 tablespoons of sugar, stirring to dissolve sugar. Set aside.
Cream together the butter with the rest of the sugar and beat until fluffy. Beat in the eggs, a little at a time until well mixed. Stir in the flour and lemon peel and beat well. Add the milk and beat well. Pour batter into prepared pan and bake at least an hour. The cake should spring back when touched lightly. As soon as you remove the cake from the oven pierce it all over with a long-tined fork or a skewer. Pour over the reserved lemon juice mixture. Cool cake in pan before serving. Cake will be moist and tangy.
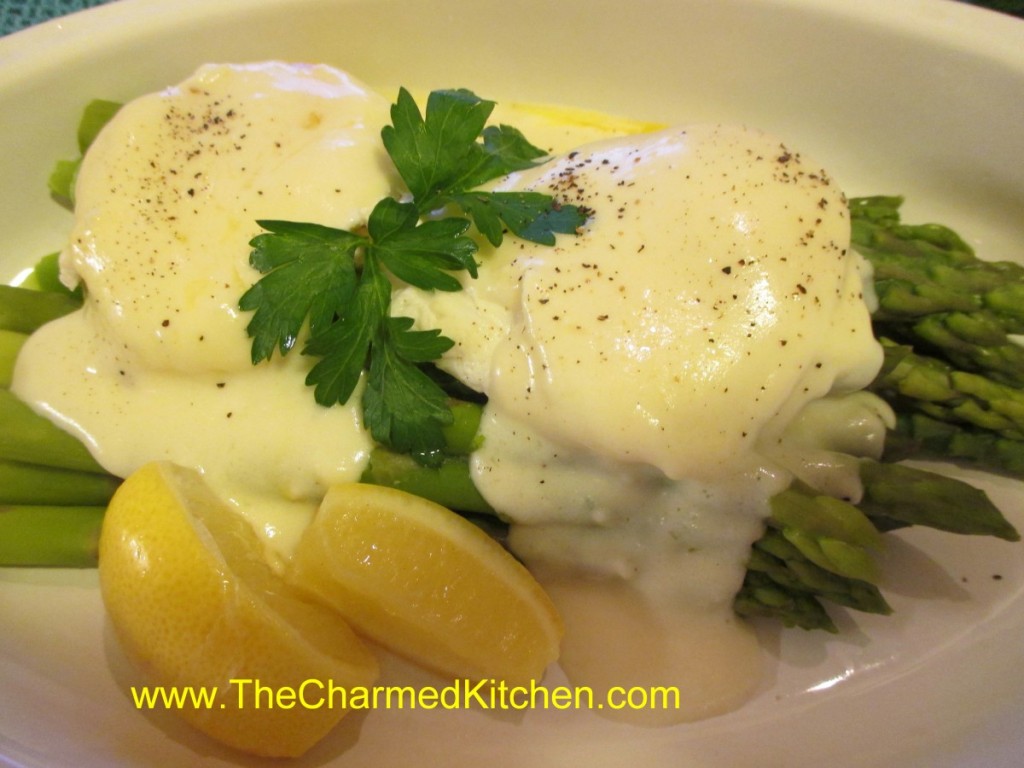
Asparagus Irene

Asparagus will always be one of my favorite vegetables. I just love it. This would be a nice breakfast or lunch dish for Mother’s day.
As I started writing out the recipe for this dish, I was thinking about my Mom and how much she loved asparagus. She always wanted the bigger asparagus spears- she said they had more flavor.
I remember her showing me how to break the bottom of the stalks off and how she would cook them until they were just done- but not mushy.
She wouldn’t consider eating canned asparagus- only fresh- so the season was short. It was something to be savored while it lasted.
Most times she just placed the cooked asparagus on a plate, topped with a pat of butter and a sprinkle of salt. One time, though, she made a white sauce and poured it over the asparagus. It was bliss.
Naming a recipe can be tricky. I started out calling this Asparagus with Eggs, which was fine. Then I thought of how much my Mom loved asparagus. So in her memory- I named the dish after her.
For this version I used a white sauce, and topped the asparagus with 2 poached eggs, too. It is a lovely dish and makes a great dinner, too.
It also makes a nice meat-free meal.
Here is the recipe.
Asparagus Irene
1 lb. fresh asparagus, washed and stems trimmed
white sauce- recipe follows
fresh lemon, cut in wedges
2 eggs
vinegar- for the poaching water
salt and pepper to taste
Put the asparagus in a steamer and cook for about 5 minutes- or until almost done. Set aside. Make white sauce, but add some lemon juice to it. I just kept squeezing lemon wedges in until it tasted right to me. Set sauce aside. Boil some water in a shallow pan and add a tablespoon of vinegar to the water. Drop the two eggs in and simmer, covered until the whites are opaque and the yolks are still runny. While the eggs are cooking return the asparagus to the heat and cook until just tender. Place asparagus on a serving dish. Sprinkle with a little salt. Gently place the eggs on top of the asparagus. Spoon some of the white sauce over the eggs. You will have more sauce than you need. Save it for another use. Garnish with lemon wedges and parsley, if you like. Finish with some salt and fresh ground pepper. Serves 2.
Basic White Sauce (Bechamel)
The start of many a classic dish.
2 T. butter or oil
2 T. flour
1 1/4 c. warmed milk
salt and pepper to taste
In saucepan melt butter or heat oil and add flour, stirring until smooth. Slowly whisk in milk, stirring constantly until thickened and bubbly. Turn heat down and continue to cook, stirring constantly for a couple minutes longer. Season to taste. If you are going to store the sauce for later use place a layer of wax paper on top, store in a container with a lid or pour a little milk over the top to prevent a skin from forming. Makes about 1 c.
Lemon: Add zest of a lemon, 2 T. lemon juice and 2 T. butter just before serving.
Creamy Spinach Sauce

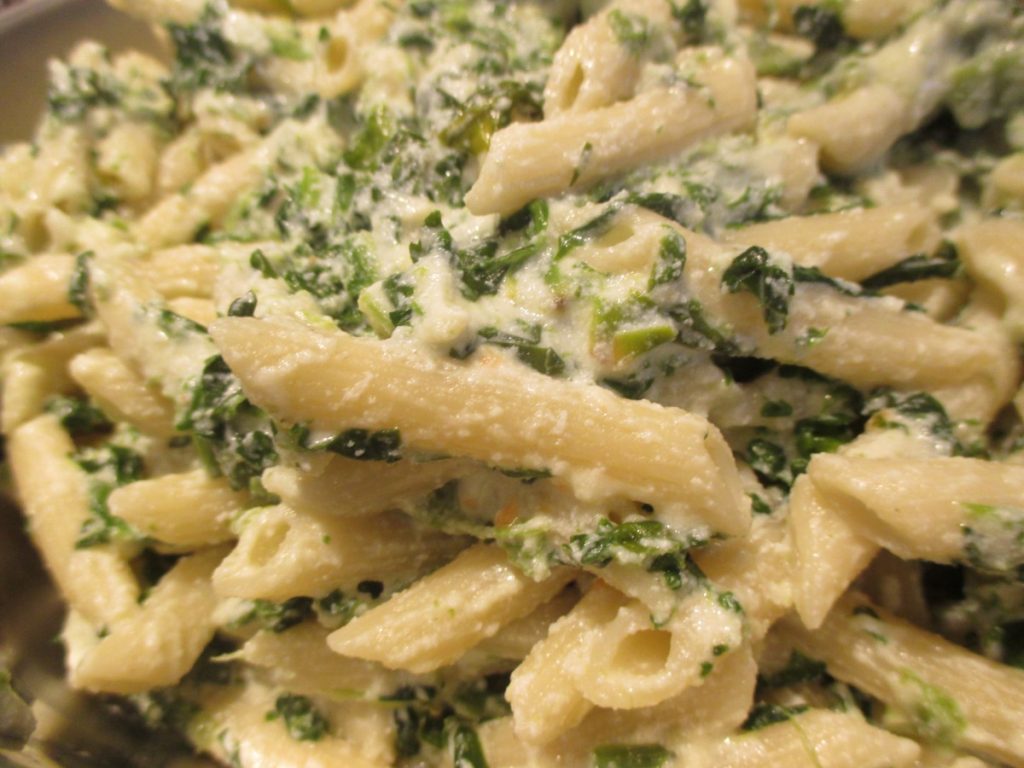
The sauce reminds me of creamed spinach, a favorite childhood dish of mine. The recipe makes enough to generously sauce a pound of pasta. It is very tasty and easy to make. Great when you need a home made meal, but don’t have a lot of time. You can also use this sauce on hot cooked rice or baked potatoes.
The recipe uses frozen spinach, but you can use fresh spinach , if you prefer. Just cook down 12-16 oz. of fresh spinach and use like the frozen spinach.
There is Parmesan cheese in the sauce, but I like to serve extra on the side.
Creamy Spinach Sauce
1/4 c. butter
1 (10 oz.) package frozen spinach, thawed and drained
1 t. salt
1 c. ricotta cheese
1/4 c. grated Parmesan cheese
1/4 c. milk
Heat spinach in butter for 5 minutes. Add remaining ingredients and heat gently until warmed through. Do not boil sauce. Toss sauce over hot, cooked pasta. Makes 2 1/2 cups, enough for about a pound of pasta.
Cinnamon Shortbread Cookies- Gluten Free


These shortbread cookies are a favorite of mine. They have a nice crunchy texture and a wonderful cinnamon flavor. They are also gluten-free, so everyone in my family can enjoy them.
If you, or someone you love, can’t have gluten, the options are getting better. Even a few years ago, it was hard to find decent gluten-free baked goods. Now they seem to be everywhere.
Gluten-free home baking has gotten easier too. Rather than mixing up numerous ingredients, you can buy a bag of gluten-free flour, ready to bake with. Gluten-free flour is getting easier to find, too.
There are some differences. I find things made with gluten-free flour brown faster. I often bake at a slightly lower temp, or for a shorter time. This recipe has already been adjusted for that.
When I made these cookies I was really pleased with the results. Not because these cookies are OK, but because these cookies are GREAT. I would make them again in a minute. Super crisp and not too sweet, they were also very easy to make.
Cinnamon Shortbread Cookies- Gluten Free
1/2 c. butter, softened
1/2 c. sugar
1 t. vanilla
pinch of salt
1 c. gluten-free flour
2 t. cinnamon
extra sugar for topping the cookies
Preheat oven to 325 degrees. In mixing bowl cream together the butter and sugar until smooth. Stir in the vanilla and salt. Stir in the flour and then stir in the cinnamon. Roll dough into 1-inch balls and place on an ungreased baking sheet. Flatten the cookies out by dipping the bottom of a glass in some sugar and pressing down on the dough. To help the sugar to stick to the bottom of the glass rub a tiny bit of butter on the bottom of the glass. I used the paper the butter was wrapped in. After you dip the glass the first time the sugar will stick to it. Bake cookies for 12-15 minutes- or until golden around the edges. Cool on wire rack. Makes 30.
Velvet Crumb Cake

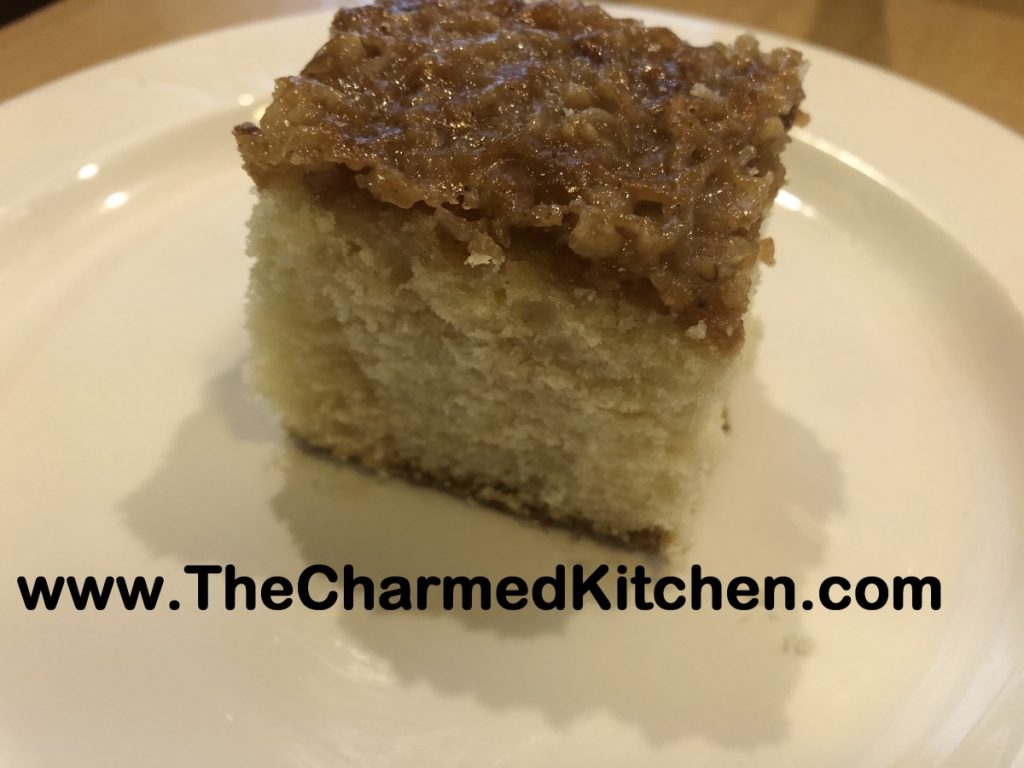
This cake has a soft, delicate texture and a crunchy, coconut-nut topping. For added fun- the cake is finished under the broiler to toast the topping. Probably not the way you finish most cakes!
For some reason, I have been feeling nostalgic all week. My cooking has certainly reflected that. Today is no different. When I was a child, my Mom made this cake pretty often. I am not sure I ever remember having it as an adult. It was probably the only way I would eat anything coconut as a kid.
I found the recipe in a Bisquick cookbook. I tweaked it a little from the original. I wondered if I would like it as much as I did when I was a child. I was not disappointed. It was every bit as good as I remember.
Here is the recipe.
Velvet Crumb Cake
Cake:
1½ c. baking mix- like Bisquick or Jiffy Mix
½ c. sugar
½ c. milk or half and half
2 T. butter, softened
1 t. vanilla
1 egg
Topping:
½ c. flaked coconut
1/3 c. brown sugar
¼ c. finely chopped nuts
3 T. butter, softened
2 T. milk or half and half
1 t. cinnamon
Preheat oven to 350 degrees. Grease an 8×8-inch baking pan or 9-inch cake pan. Set aside. In medium bowl, combine all of the cake ingredients. Combine with electric mixer for 30 seconds on low to mix. Then bring speed up to medium and continue beating batter for 4 minutes. Pour batter into prepared pan and bake 30-35 minutes or until wooden pick comes out clean when inserted into cake. While cake is baking, combine topping ingredients in small bowl, mixing until well mixed. Let cake cool a few minutes before spreading topping over the cake. Place cake under the broiler- about 4 inches away, until topping gets golden brown. This only takes 3-4 minutes. Watch carefully. Remove from broiler and cool cake before slicing.
Noodles and Eggs


This was one of my favorite breakfast dishes when I was a kid. It is just what the name says, noodles- or pasta- combined with with eggs. This time I used bow tie pasta.
I suspect this recipe came about as a way to stretch eggs to feed more people. Or perhaps somebody had some leftover cooked noodles to use up.
You can keep it simple, or add cooked meats, like ham, sausage or bacon. You could add some shredded cheese or even some cooked veggies. This is a great way to use up leftovers, the way you might in an omelet.
I always think of my Mom when I make noodles and eggs.
Noodles and Eggs
1 T. butter or oil
8 oz. cooked noodles- any pasta you like is fine
8 eggs
Salt and pepper to taste
Heat butter in large skillet and add noodles, cooking until heated through. Beat eggs in bowl and add to hot noodle mixture, stirring until eggs are cooked and dish no longer looks wet. Season to taste and serve. Serves 6-8.
Variations: Add diced cooked ham, bacon or Canadian bacon with the noodles. Other options add 1 c. chopped tomato or chopped up cooked veggies. You can add 1-2 c. shredded cheese just after you add the eggs.


