Chocolate Lover’s Waffles

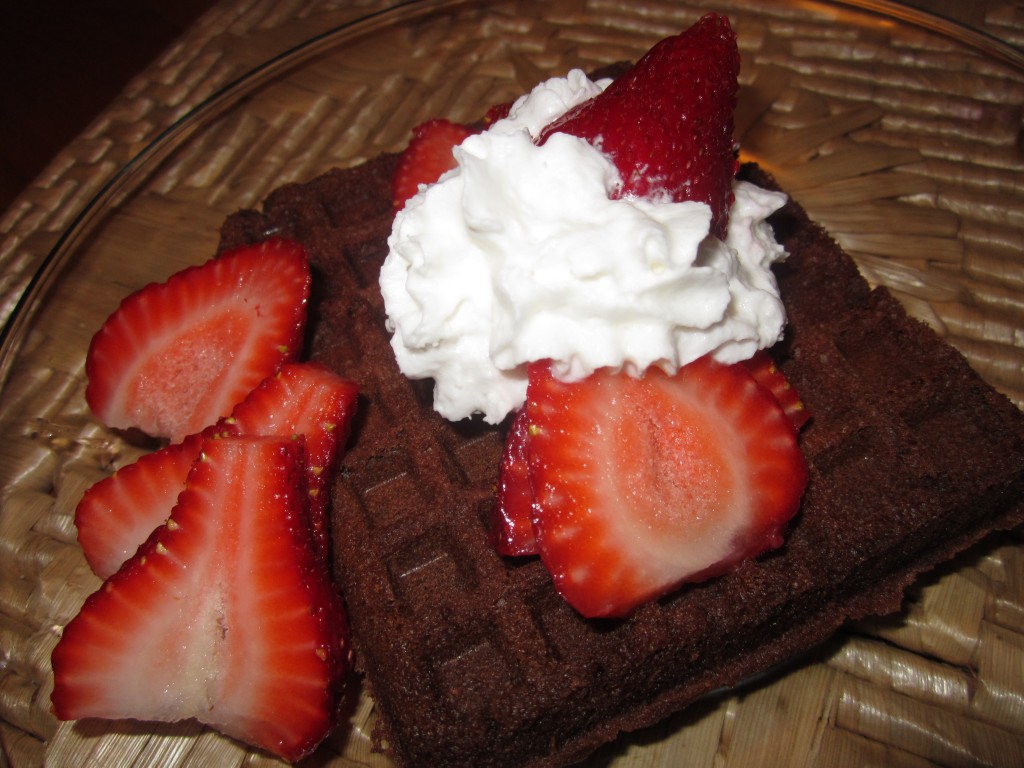
These waffles can make a great start to Valentine’s Day. Chocolate for breakfast? Why not? They also make a wonderful dessert.
The waffle batter has cocoa in it, for the chocolate flavor, but I added some cinnamon and nutmeg for a little spice. The flavor is wonderful.
Top them with whatever you like. For breakfast, warm maple syrup or a dusting of powdered sugar work well.
For dessert, I enjoy topping them with whipped cream and berries. You can also top with a scoop of ice cream and hot fudge. If you like, add some chocolate chips to the batter for a stronger chocolate taste.
Chocolate Waffles
2 eggs, room temperature
1/2 stick butter, melted and cooled
1 t. vanilla
1 c. buttermilk
1 c. flour
3/4 c. sugar
1/2 c. cocoa
1 t. cinnamon
1/2 each baking powder and baking soda
1/4 t. salt
1/4 t. nutmeg
Beat first three ingredients until light and foamy, about 2 minutes. Stir in milk. Beat in dry ingredients just until blended. Bake until waffles are cooked through. Makes 4 cups batter. Serve with whipped butter or sour cream and fresh fruit. I like them just dusted with powdered sugar, too.
Red Onion Relish

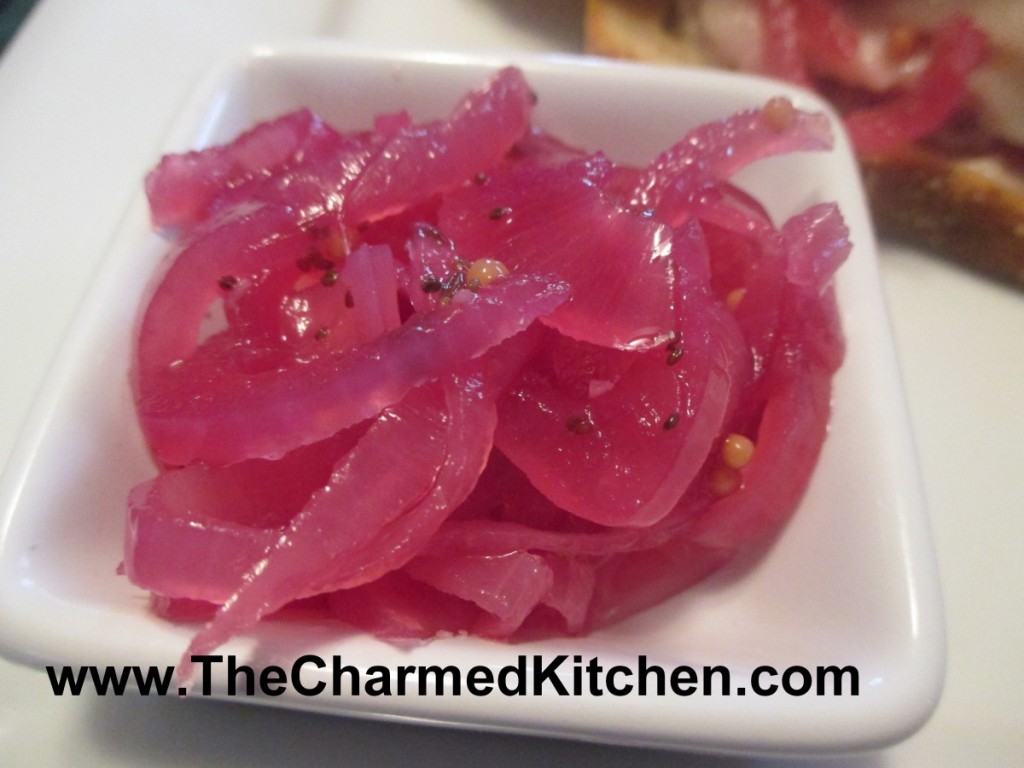
We made this recipe in a winter salad class the other night. I love the tart flavor and bright color it adds to my food. This relish is a great topper for sandwiches, but can be used for a whole lot more.
The onions can be served with cheese and crackers for an easy appetizer. You can add some to salads, and the liquid can be combined with a little oil for a simple salad dressing. In class, we added some to a zucchini “noodle” salad. Sometimes I just like to serve it as a side dish.
I even had some with my scrambled eggs for breakfast. After you cook it, you just ladled into jars, cool it down, and store it the fridge. It will keep for weeks and weeks.
Red Onion Relish
4-5 medium red onions, peeled and sliced thin
2 c. red wine vinegar
1½ water
1 c. sugar- or to taste
2 T. salt
1 T. mustard seed
1 T. celery seed
1 t. fennel seeds, optional
2 cloves garlic, minced
1 cinnamon stick- 4 inch
4 whole cloves
Place all ingredients in a pot and bring to a boil. Turn down to a
simmer and cook, uncovered for 10-15 minutes. Cool and place in jars,
then store in the fridge. Use as a sandwich topper, salad addition,
appetizer with cheese and crackers. You can also use the liquid as the
base for a salad dressings, with the addition of some oil. Keeps for
weeks in the fridge. Makes 5 cups.
Mini Chocolate Eclairs


If you want to surprise someone with a very special sweet treat, you could make them some eclairs. These are a bit or work, but the end result is so wonderful. I think they are worth the effort, especially for special occasions.
I decided to make a mini version this time, just for fun.
You start by make a pate a chou, or cream puff pastry. This is the same dough used to make cream puffs. It is a combination of water, butter, milk and flour- cooked on top of the stove, then enriched with the addition of eggs. The dough is piped onto baking sheets and baked until puffed, golden and crisp. Once cooled, they are filled with sweetened whipped cream or, more traditionally, a custard filling, then topped with chocolate ganache.
Mini Eclairs
1 recipe Cream Puff Pastry (Pate a Chou)- recipe follows
Egg custard- for filling, or sweetened whipped cream- recipe follows
Chocolate Ganache- for topping- recipe follows
Start by making the dough. This recipe will make 12-18 medium eclairs or 3 dozen of the mini ones.
Cream Puff Pastry
¾ c. water
¼ c. milk*
¼ t. salt
½ c. (1 stick) unsalted butter
1¼ c. flour – unbleached or bread flour preferred
4 large eggs
Extra milk for brushing
In saucepan, heat together water, milk butter and salt into a full boil. Butter has to be melted. While stirring, dump flour into saucepan, stirring constantly. Mixture will form into a ball. Reduce heat to medium and continue cooking dough, while stirring, for another minute or two. Place dough in an electric mixer and allow it to cool down a little before adding the eggs. Mixture has to be at 140 degrees F, or below, before you start adding the eggs. I use the paddle attachment and beat the dough before adding the eggs. This cools the dough down faster. Beat in eggs, one at a time, until each is fully incorporated. Beat until dough is shiny. A spoon, lifted out of the batter, should leave a peak that does not fall down. *You can use all water, instead of the combination of water and milk, if you prefer. Use 1 cup water in total, if omitting milk.
Preheat oven to 425. Line a baking sheet with foil or parchment. I used a silicone liner and was happy with the result. Don’t grease the pan. Using a piping bag, squeeze the dough into 2-3-inch strips on the baking sheet- leaving a little room in between. Strips should be about ¾ -inch in diameter. Using a little milk on your finger, smooth down any peaks on the puffs. They should resemble miniature hot dog buns. Bake at 425 for 10 minutes, then turn oven down to 375. Bake eclairs 10 more minutes, or until golden brown. Tap the shells. They should sound hollow. Turn off the heat and leave oven door open a crack, allowing them to dry completely. Cool before filling. Makes about 36.
Custard Filling
2 cups milk
2 tablespoons cornstarch
1⁄3 cup sugar
2 eggs, lightly beaten
1 teaspoon vanilla
Using a whisk, combine milk, sugar and cornstarch in a medium
saucepan over medium heat on stove top. Allow milk to scald (heat to the
point when tiny bubbles form around edges of pan). Whisk occasionally
to prevent cornstarch from clumping on bottom edges of pan. Remove milk
mixture from heat, preferably to a burner that’s turned off.
Mix about 2 tablespoons of scalded milk mixture into eggs using whisk,
then introduce eggs into milk mixture in a slow stream, whisking milk
mixture constantly. Immediately return pan to heat and whisk gently
until custard thickens, another two or three minutes. Do not allow to
boil. (If you find that you have egg white strands in custard, feel free
to pass it through a fine-mesh sieve into a different bowl now.) Remove
pan from heat and stir in vanilla. Cool before using. Makes 3 cups.
To fill the eclairs, using a small piping tip with a pastry bag, filled with the custard. Squeeze filling in on one end, on through the bottom, squeezing until it seems full.
Once eclairs are filled, top with a chocolate ganache. I just dip the tops of the eclairs in the warm ganache and chill until chocolate sets. Filled eclairs should be stored i8n fridge until ready to serve. They can be frozen.
Chocolate Ganache
4- 6 oz. dark chocolate, chopped- or 1 cup chocolate chips
2 oz. heavy whipping cream
In saucepan, heat chocolate and cream together until just heated through. Remove from heat and stir until smooth. You can also do this in a microwave safe bowl, in the microwave for about a minute. Remove and stir until smooth. Makes 1 cup.
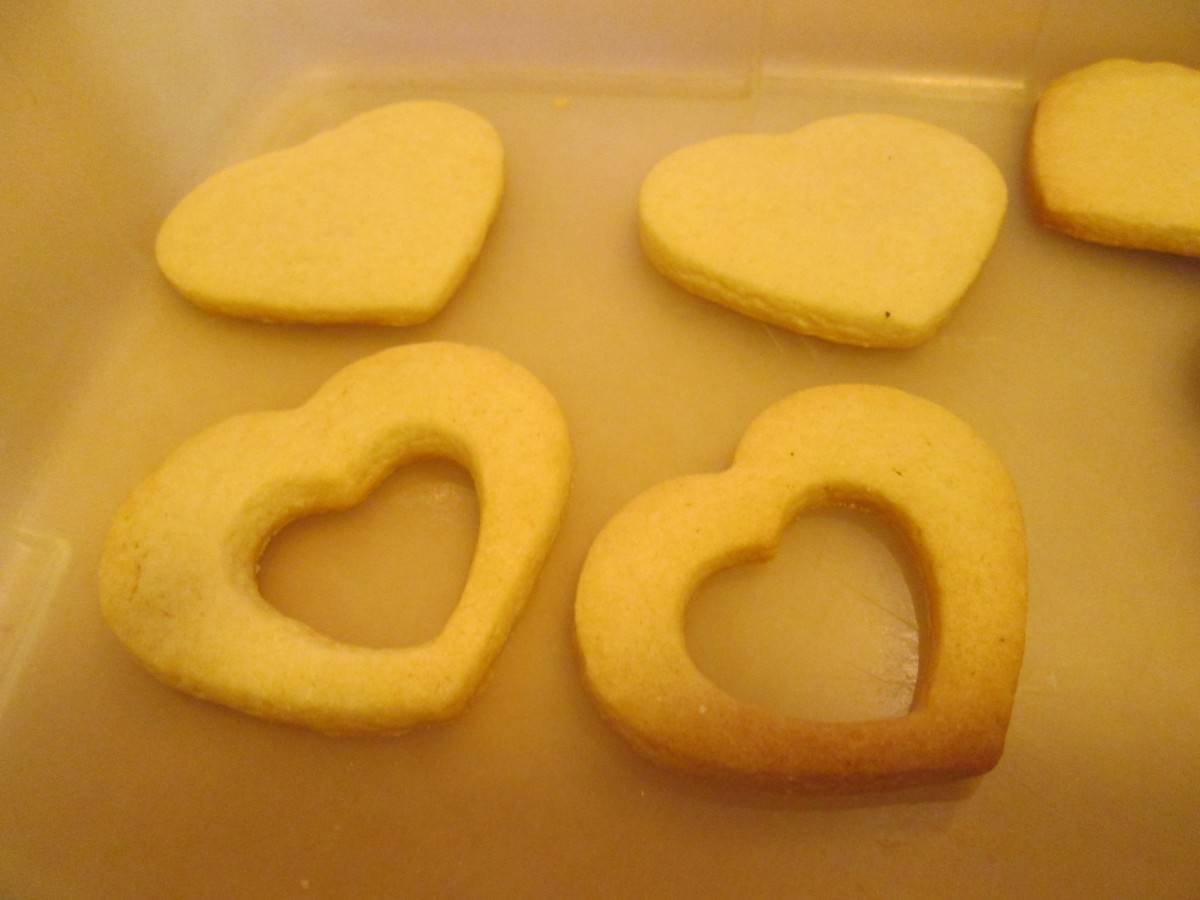
Sweetheart Sugar Cookies


For Valentine’s Day, not every dessert has to be chocolate. These sugar cookies would be a great way to share the love.
I used my favorite sugar cookie recipe and cut out hearts. Then used a smaller heart cookie cutter and cut out smaller hearts from the center of half of the cookies.
Sandwich the baked cookies together with homemade strawberry preserves. Use one of the “cutout” cookies on top. It gives a pretty effect to the finished cookies. I used strawberry jam, but any red jelly or jam could be used.
Since I also had a bunch of tiny heart cookies from the cut outs, I used melted chocolate to turn them into tiny heart shaped sandwich cookies.
Sweetheart Sugar Cookies
1 c. butter
1 c. sugar
1 egg
1 t. vanilla
3 c. flour
2 t. baking powder
3 T. milk
Extra sugar for sprinkling, if desired
strawberry preserves or jam
Beat butter and sugar until fluffy. Beat in egg and vanilla. Combine dry ingredients and add to butter mixture. Beat in milk. Heat oven to 375-degrees. Roll dough on lightly floured surface to about 1/3- inch thickness. Cut out with lightly floured cutters and sprinkle with sugar or colored sugar if you like and if you are not going to frost them. Bake on an ungreased baking sheet for 10-12 minutes. Cool on baking sheet 3 minutes before placing on wire rack to cool completely. Sandwich together with jam when cooled. Makes about 4 dozen.

Sweetheart Sugar Cookies
My Favorite Blueberry Muffins


I froze a lot of blueberries when they were in season. I realized that recently when I defrosted my freezer. This time of year I often enjoy using some of those frozen berries in baked goods. Reminds me of warm summer days.
This muffin recipe is one of my favorites. The secret, I think, is the cup of melted butter that is folded into the batter. I also add a little cinnamon, which goes so well with the berries.
You end up with a rich muffin with a crumbly, tender texture and a great flavor. This recipe makes 36 muffins, so you will have extra to freeze. They freeze great.
Rich Blueberry Muffins
4 c. flour
2 T. baking powder
1 ½ t. salt
1 t. cinnamon
1½ c. sugar, plus extra for sprinkling
2 eggs
1 ½ c. milk
2 sticks (1 cup) butter, melted
4 c. blueberries -fresh or frozen
Paper line 36 muffin cups or grease lightly and preheat oven to 375 degrees. In large bowl mix dry ingredients. In smaller bowl mix eggs and milk and beat until smooth. Stir into flour mixture with a fork and mix until just moistened. Fold in melted butter and blueberries divide batter among cups. Sprinkle muffins with a little extra sugar. Bake 25 minutes, or until light golden. Makes 36.
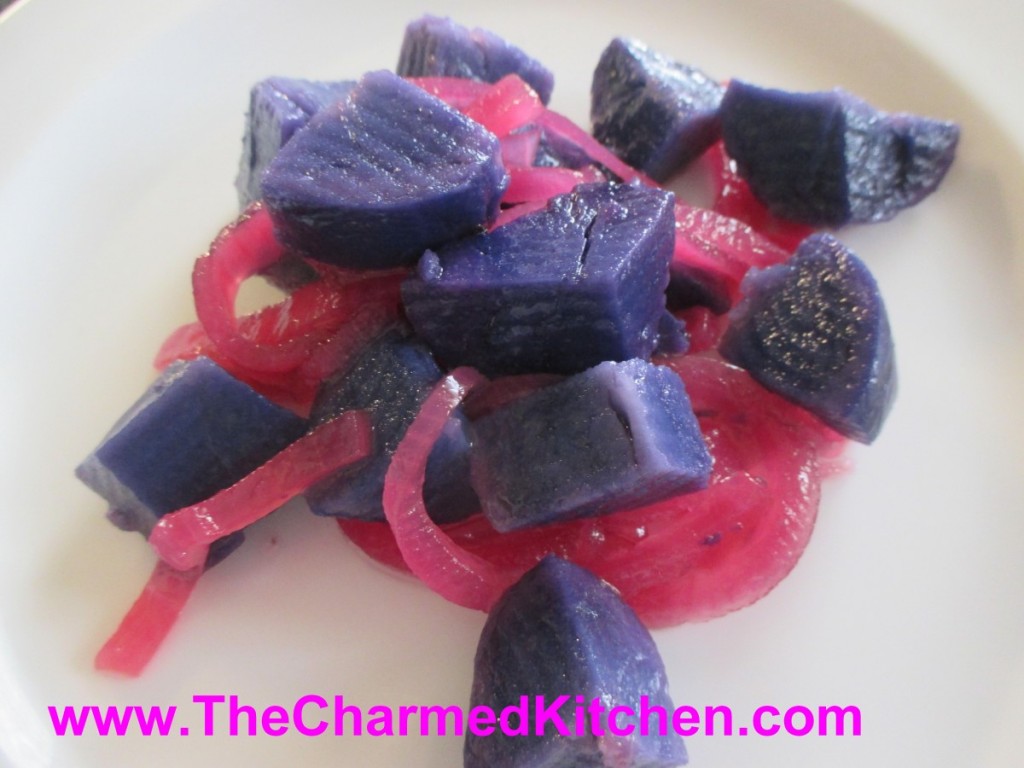
Purple Potato Salad

Sometimes we just need a little extra color in our day. Especially this time of year. My pop of color came in the form of a potato salad. Yes, a potato salad. I had picked up some purple potatoes at a local produce market. I’ve had them before. Normally, they lose a little color once cooked.
For whatever reason, these potatoes retained all of that purple color. I cooked them in the microwave, and maybe that is why. Maybe they were just a brighter color to begin with. All I know, is that when I started cutting them up for my salad, I was amazed at how purple they were.
Since I had red onions, I decided to use them with the potatoes for my salad. I ended up with a purple and pink salad.
Pretty and quite tasty. I do think, a salad made with less colorful veggies, would still taste as good, but it would not be nearly as much fun to eat.
Purple and Pink Salad
1 lb. purple potatoes
1 lb. red onions
1 c. apple cider vinegar
1/2 c. sugar
1/4 c. water
salt and pepper to taste
1 t. celery seed
1/4 c. oil
Bake potatoes until tender. I used the microwave and it took about 7 minutes, but you can bake in a conventional oven, too. While potatoes are baking, peel, then slice onions thin and place in a saucepan with the rest of the ingredients, except the oil. Bring to a boil, then simmer for about 5-8 minutes until onions are just tender. Some of the liquid will cook off. Peel and cube potatoes and place in a bowl. Drizzle with the oil. Add the onion mixture and stir gently. Adjust seasonings, if needed. Chill. Serves 4.
Warm Shrimp and Soba Noodle Salad

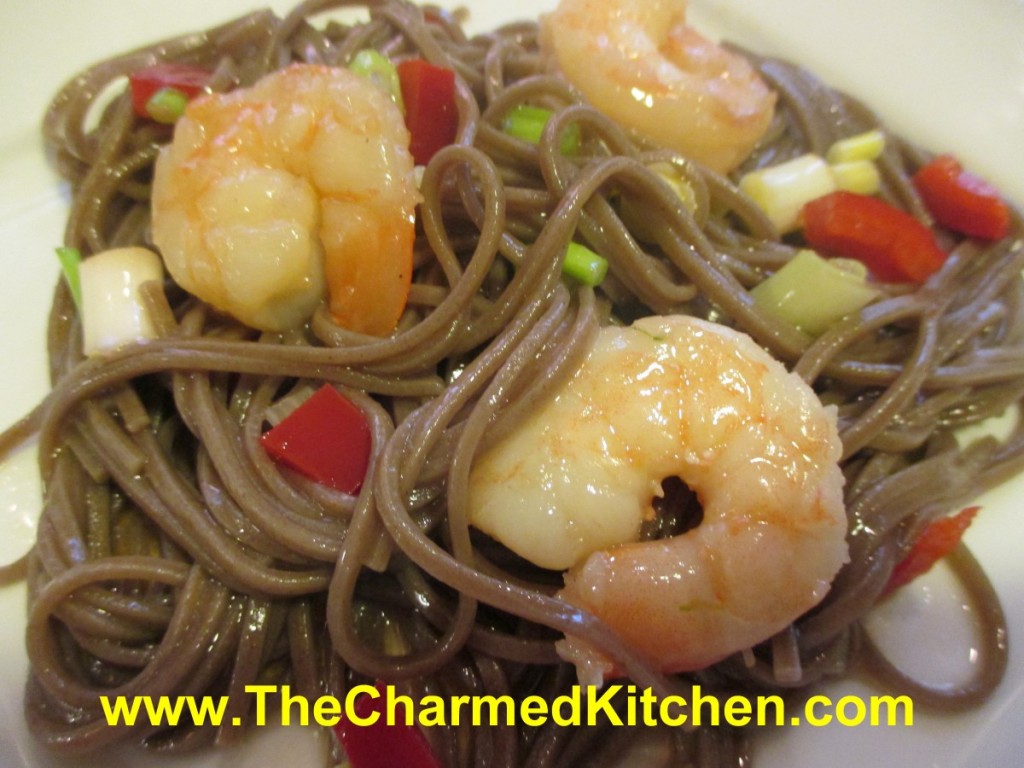
I eat salads all year round, even in winter. Since it is unseasonably warm today, I decided to treat myself to this very special salad for lunch today.
Whenever I make soba noodles, I wonder why I don’t eat them more often. I really love their flavor.
Soba noodles are made from buckwheat flour. They have a wonderful, almost nutty flavor. I picked these up at a recent visit to the Asian market. You can find soba noodles in some grocery stores, too.
I have enjoyed soba noodles in cold salads, hot soups and stir fries. This time, I decided to use them in a salad that fell somewhere between hot and cold. It made a great meal for a winter afternoon.
Warm Shrimp and Soba Noodle Salad
12 oz. soba (buckwheat) noodles
1 lb. raw shrimp, shelled and de-veined
2 T. oil
2 cloves minced garlic
½ c. chopped sweet peppers
½ c. chopped green onions
Dressing:
¼ c. oil
2 T. Rice wine vinegar
1 t. sesame oil
1 t. soy sauce, or more to taste
1 t. hot sauce, or more to taste
1 t. ginger
In pot of boiling, salted water, cook noodles according to package directions. They only take a few minutes. Be careful not to overcook them. Drain and set aside. Heat a skillet and add the oil. Add the shrimp and garlic and stir fry until shrimp are just cooked through. Time will vary based on the size of the shrimp you are cooking. Place soba noodles in a bowl. Add the cooked shrimp and veggies. Make dressing by placing all dressing ingredients in a jar with a tight fitting lid. Shake until mixed well. Pour dressing over the noodle mixture and toss to coat evenly. Serve while still warm. Serves 4-5.
Busha’s Tomato Bisque Soup


I have such fond memories of this soup. My Polish grandmother used to make it every year in late summer. She would use the beefsteak tomatoes my Uncle John grew.
The soup is a tomato rice soup, with a healthy amount of sour cream in it. Simple and very good.
When my Busha made it, she just added everything to the pot, without measuring, as far I as could tell, and it came out perfect every time. It was magic. The first time I tried to duplicate it, I used way too much rice and it was closer to Spanish rice, than a soup. I played with it a few more times, reduced the rice and now I can make a soup pretty close to hers.
In the winter, when I don’t have access to garden tomatoes, I use a quart jar of my home canned. I love the smell of a freshly opened jar of tomatoes. Any canned tomatoes you like will work in this recipe. You can use fresh tomatoes, too, when they are in season.
Technically, it should have seafood in it to be called a bisque, but since my Busha called it a bisque, I call it a bisque. I do sometimes add seafood to it. Suggestions are listed at the end of the recipe.
Busha’s Tomato Bisque Soup
2 T. oil or butter
1 c. chopped onion
28-29 oz. can whole tomatoes, cut up or diced tomatoes, undrained
1 qt. beef or chicken or vegetable stock- Busha used beef stock
½ c. raw rice
1 c. sour cream
Cook onions in oil until tender. Add tomatoes and stock and bring to the boil. Add rice, cover and simmer until rice is tender, about 20 minutes. Place sour cream in bowl and stir in a cup of the hot soup, stirring until smooth. Add another cup of the soup and then add this mixture to the pot. Heat through, but do not boil. Makes 6-8 servings.
Variations: Brown or wild rice can be added instead, but cooking times will be longer, about 45-50 minutes. Barley can also be added instead of the rice, but allow 45 minutes to cook.
Seafood variation: Once rice is tender, but before adding sour cream you can add any one of the following; ½ -1 pound raw diced fish (mild white fish are good or even salmon for a special treat), ½ -3/4 pound raw shrimp, 2 cans crab meat, 2 (10 oz.) cans clams, drained.
Pepperoni Pizza Bread

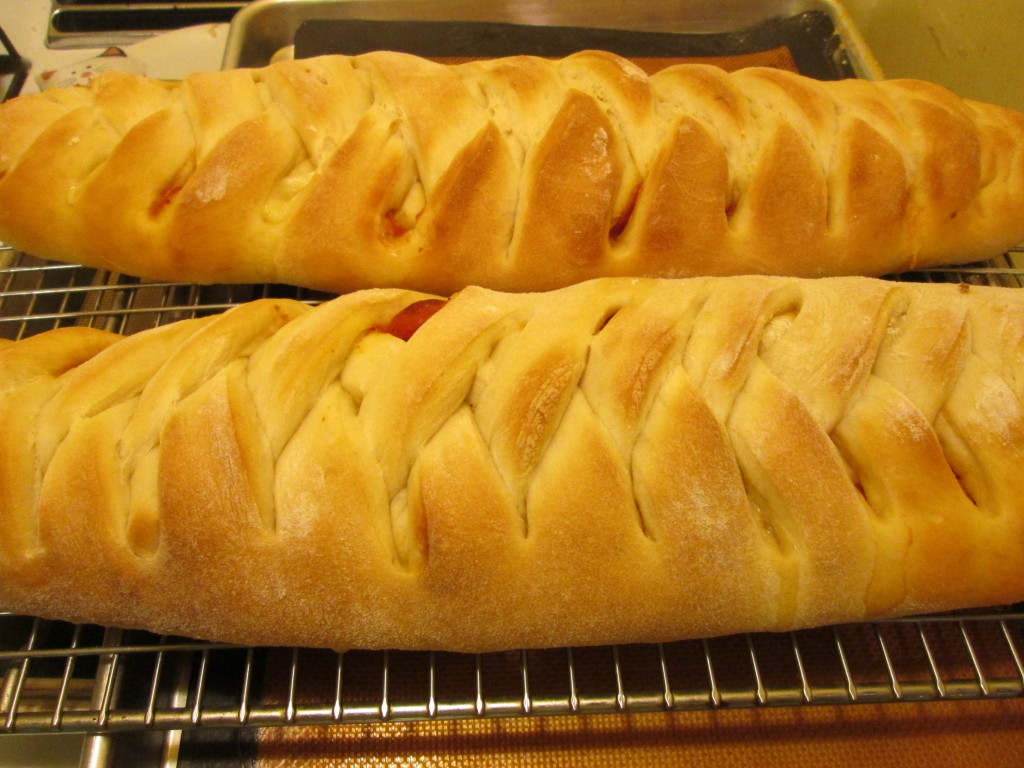
If you are still looking for food to serve for Super Bowl Sunday, you can make these filled breads in no time at all. They might look difficult, but they are pretty easy to make. They are similar to Stromboli. You can fill them with all sorts of ingredients.
I have made them with Reuben sandwich fillings, spinach with cheese, and have even made a breakfast version with scrambled eggs, cheese and sausage.
The pizza fillings are always popular with my friends and family. Pictured is a double batch- which made two loaves. The recipe below makes one bread, but feel free to double the recipe.
Here is the recipe for one loaf.
Pepperoni Pizza Bread
3 ¼ c. flour
1 T. sugar
1 t. salt
1 package quick-rising yeast
1 c. hot water
1 T. oil
Extra oil for brushing on the dough
1/2 c. marinara sauce
6 oz. mozzarella or provolone cheese
2 oz. sliced pepperoni, about
Set aside 1 cup of the flour. Combine remaining flour with the other dry ingredients in a medium bowl. Stir in water and oil and gradually stir in enough flour to make a soft dough. Turn onto lightly floured surface and knead until dough is smooth and elastic, about 5 minutes. Roll dough into a rectangle about 16 x 8. Brush with oil down center middle of dough. Top with sauce, cheese and pepperoni. Cut one-inch wide strips of dough from filling to edge on both sides. It will sort of look like fringe. Alternating sides, fold strips up and over the filling at an angle. Carefully lift loaf onto greased baking sheet and place at an angle. Cover with a towel and place sheet on top of a roasting pan half-filled with simmering water for 15 minutes. Bake in a preheated 400-degree for 20-25 minutes or until golden brown. Cool slightly before slicing. Serve warm and refrigerate leftovers. Makes one loaf.
Note: The variations for this bread are almost endless. Some favorite combinations are ham and Swiss with mustard, roast beef and cheddar, chicken, broccoli and cheese, spinach with ricotta or feta and onions, curried veggies. You get the idea. Use your imagination and have fun. Just be careful not to overfill, or the bread will be hard to move, use fillings that aren’t too runny and always use cold fillings.
If you want to use regular yeast, use warm, rather than hot water. After kneading cover dough and let rise 45 minutes. Punch down and assemble as in original recipe. Cover with a towel and let rise until dough looks puffy, about 40 minutes. Bake as directed above. These breads can also be frozen.
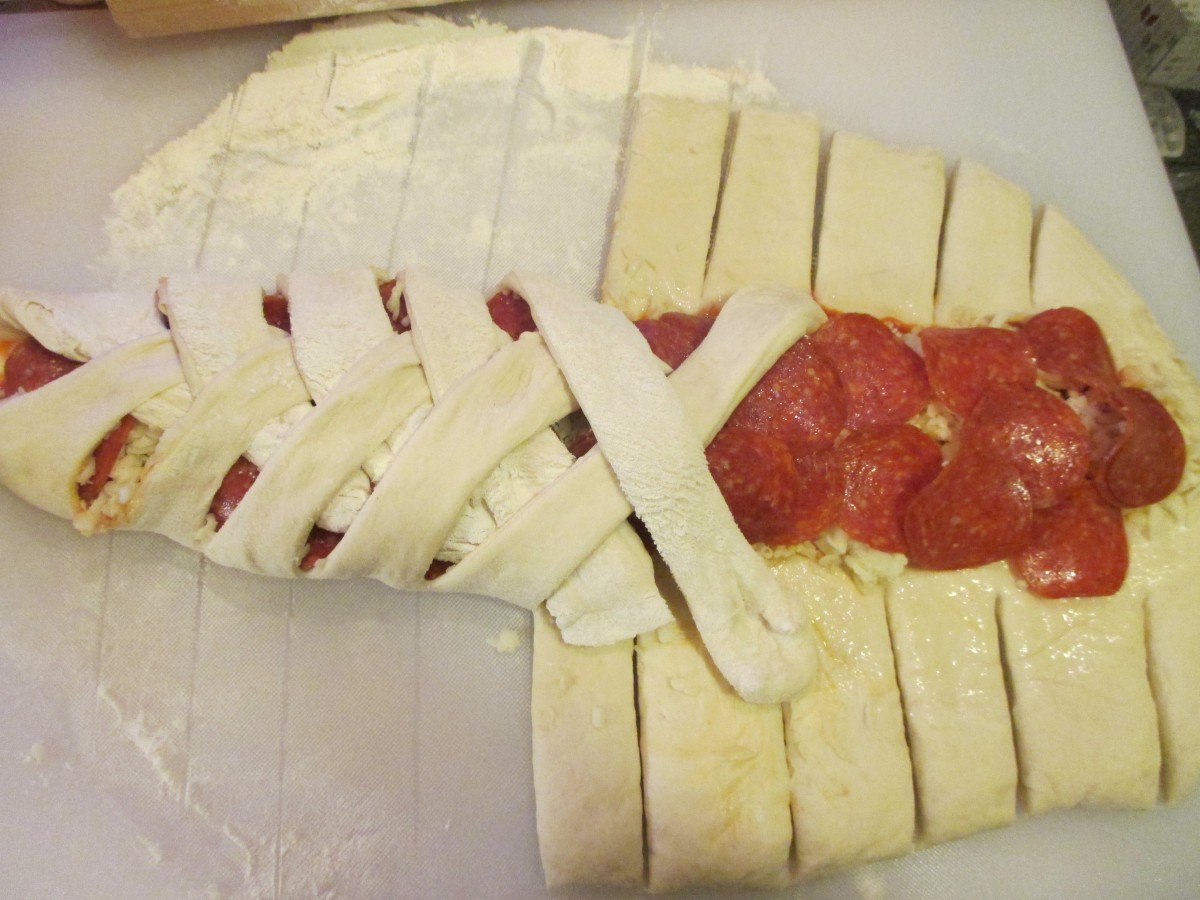
Cut strips of dough and fold over the filling
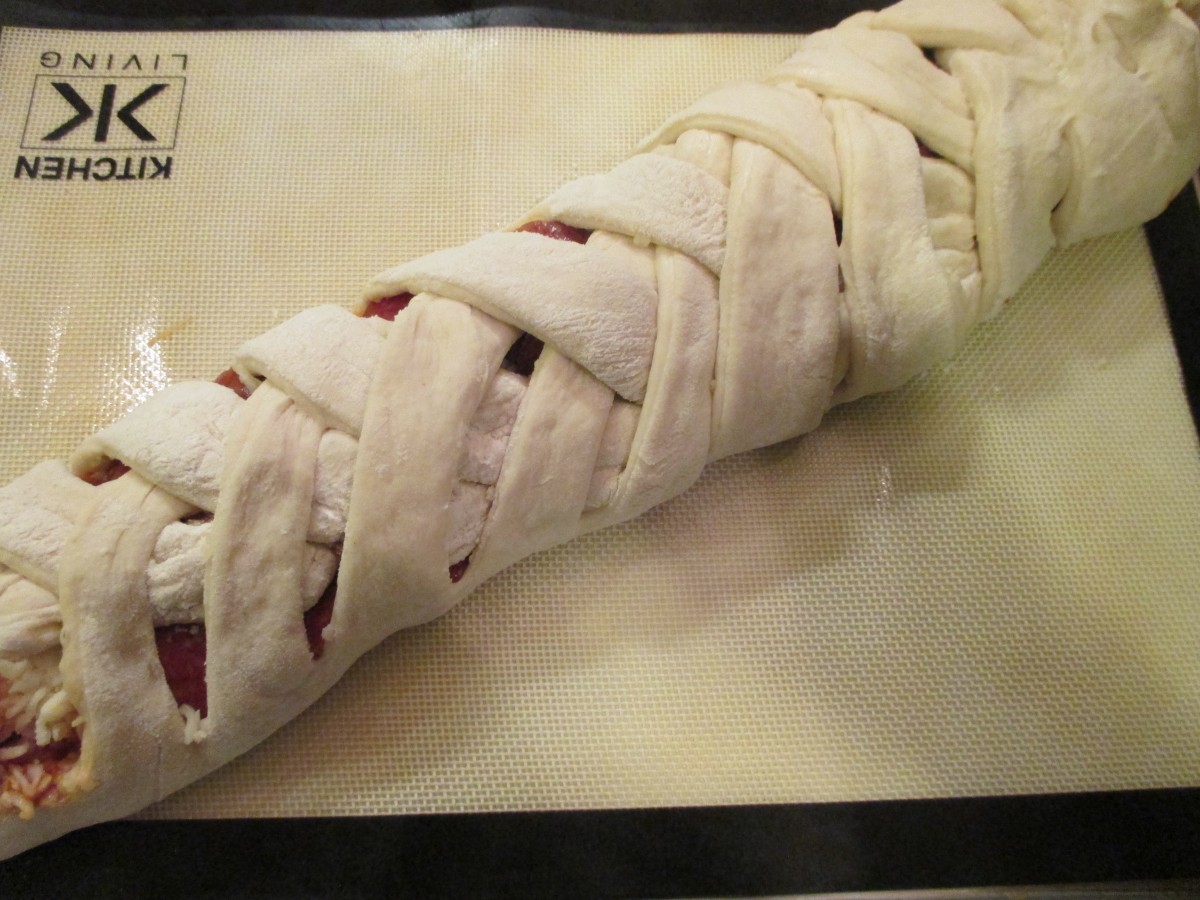
Transfer to baking sheet to rise.
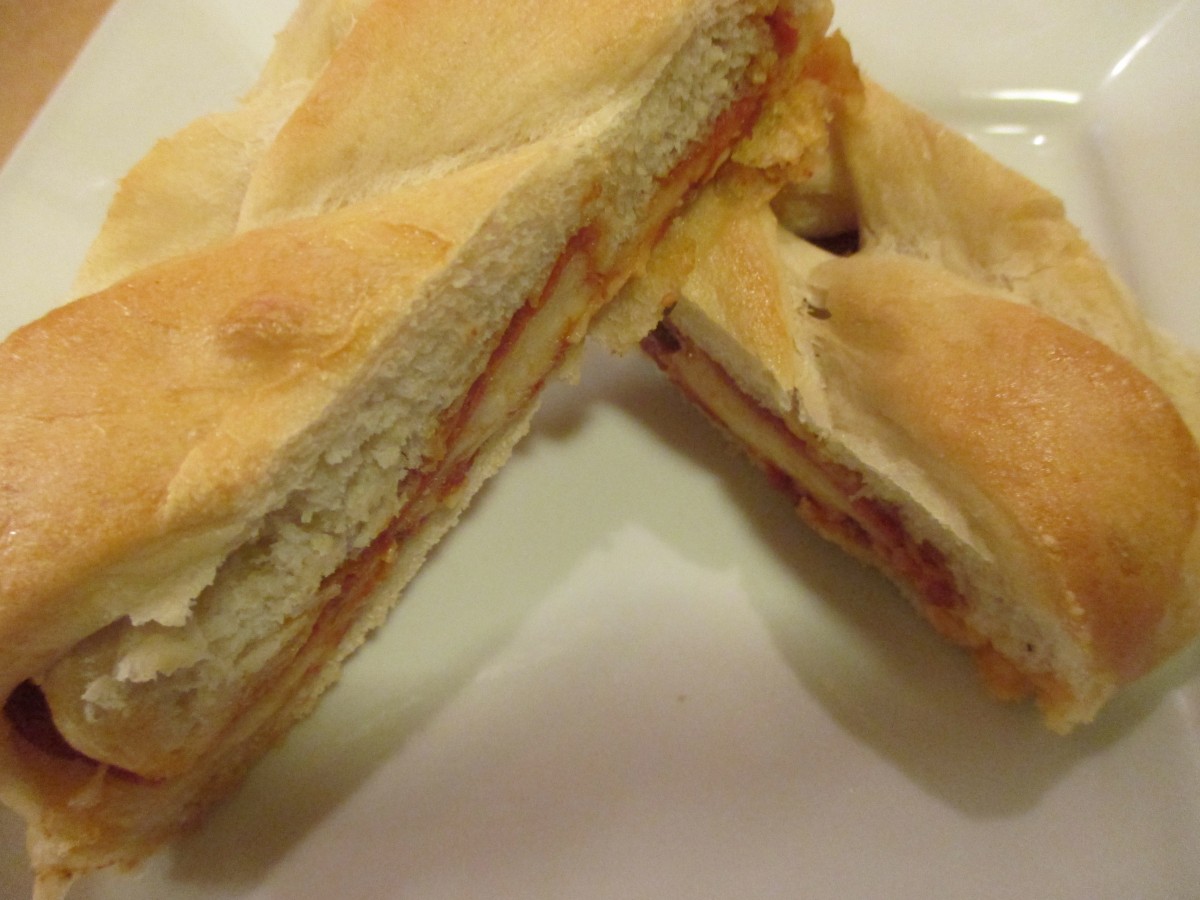
Cool a few minutes before slicing
“Super” Crispy Chicken Wings


If you are planning a party to watch the Superbowl, there is a good chance you will be serving chicken wings. Chicken wings are one of the most popular foods on Superbowl Sunday.
I like a wing with very crispy skin. These wings are super crispy, even though they are baked in the oven, not fried. It may have to do with a rather unusual ingredient.
I got this recipe from a local television show and have made it a couple of times now. Thanks, David Moss, for this one. The wings are coated with a little salt and baking powder.
Yes, baking powder. I am not sure how it works, but the combination leaves you with wings that are super crisp on the outside and juicy inside. The only thing I changed from the original recipe, is that I use a little less salt.
Once the wings are done cooking, you can toss them in whatever sauce you like.
Super Crispy Chicken Wings
3-4 lbs. chicken wings
2 T. baking powder
1 t. salt
Hot sauce and butter- or assorted dipping sauces
Cut wings into three pieces- discard tips, or use to make stock. Pat the wings dry. This step is important. The dry skin helps them to get crisp. Place baking powder and salt in a plastic bag and add the wing pieces, a few at a time, shaking to coat evenly. Continue until all the wings are coated. Place wings on a rack that is placed on a baking sheet. Bake wings in a preheated 250 degree oven for 30 minutes. Turn the heat up to 425 and continue cooking 45 minutes more. Remove wings from oven. You can melt butter, mix with some hot sauce and toss the wings in that mixture, or just serve the wings with your favorite sauce.


