Dilly Green Beans

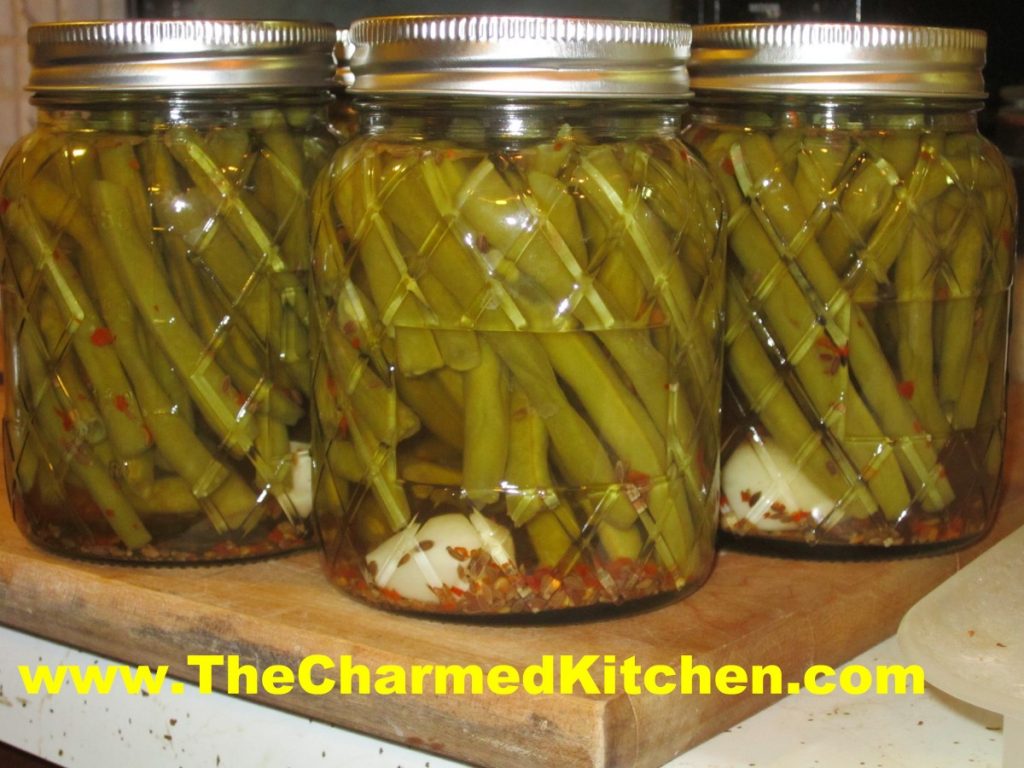
These are one of my favorite pickled veggies. I like pretty much any type of pickle, and I love green beans, so no surprises there. They have a great, tart flavor.
If you have an abundance of green beans, you might consider making a batch of these to enjoy year round. Green beans are also at local farm markets now, and are at their peak.
These are good just eaten like other pickles, as a side. But they are also a fun addition to a Bloody Mary- or so I am told. I also like to serve them as an appetizer with cheeses, crackers and olives. Who am I kidding? I eat them right out of the jar.
While the recipe calls for 1/4 teaspoon of red pepper flakes per jar- feel free to add more, for a spicier version.
Dilly Green Beans
4 lbs. table‑perfect whole green beans
1 3/4 t. crushed dried hot red pepper
3 1/2 t. dried dill seed or seven fresh dill heads
7 cloves of fresh garlic, peeled
5 c. vinegar
5 c. water
1/2 c. less 1 T. pickling salt
Wash beans thoroughly. Remove stems and tips, and cut them as much as possible in uniform lengths to allow them to stand upright in canning jar, coming to the shoulder of the jar. have jars clean and very hot, and lids and sealers ready in scalding water. In each jar place one dill head or 1/2 t. dill seed, add one garlic clove, and 1/4 t. crushed hot red pepper. Pack beans upright in jars, leaving 1 inch of head room. Heat together the water, vinegar and salt. When the mixture boils, pour it over the beans, filling each jar to 1/2 inch from the top. Run a plastic knife down and around to remove trapped air. Adjust lids, and process in a boiling water bath for 10 minutes, start timing after the water in the canner returns to a boil. Remove jars. …Wait at least 2 weeks for these beans to develop their flavor. Yield: 7 pints
Source: Putting Food By
Canning Tomatoes

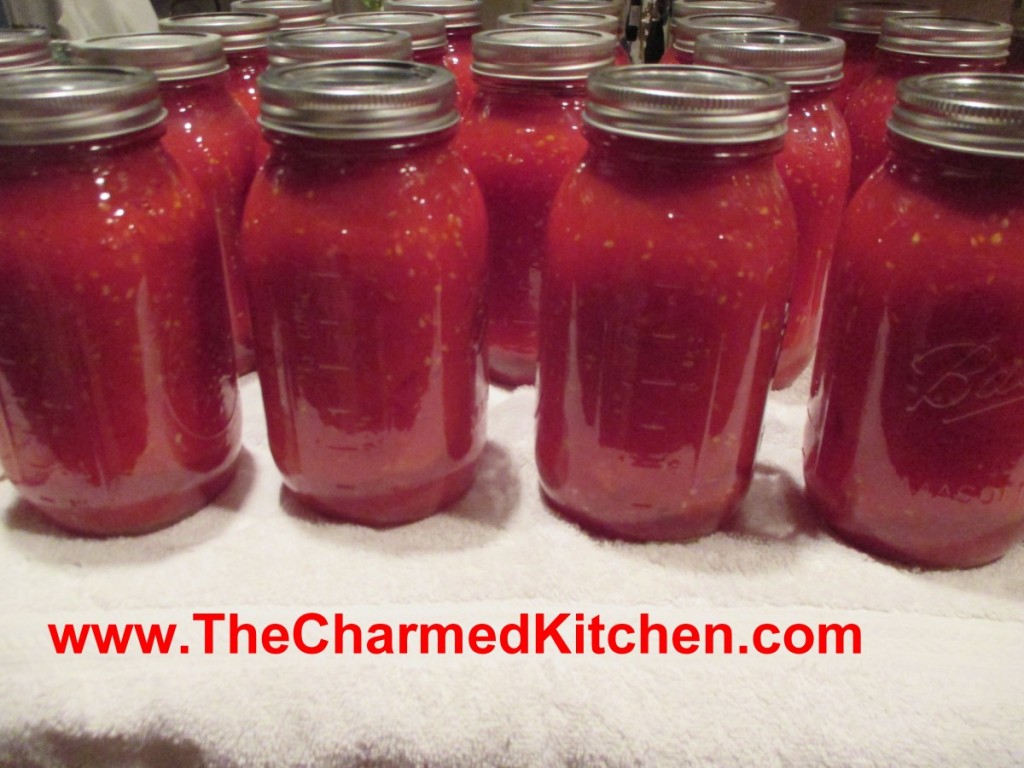
I love my home-canned tomatoes. They taste so much better than anything than comes in a can. Worth the effort. We canned tomatoes in class last night.
You have options when canning tomatoes- crushed, juice, sauce- and more. The one option you won’t see for home- canned tomatoes is diced. There is a reason for that. When tomatoes are canned commercially, calcium is added to keep them firm. That is why commercially canned diced tomatoes hold their shape. Home canned diced tomatoes will just cook down, get very soft and not hold their shape. Canning tomatoes whole will give you a firmer end product, if that is what you want.
I have been asked several times in canning classes, if it is safe to can yellow or orange tomatoes. We have all heard that yellow and orange tomatoes are lower in acid, so are they still safe to can? The answer is yes, they are safe to can.
Why?
In spite of you might have been told, orange and yellow tomatoes are not acid free or low acid.
Truth is, that yellow and orange tomatoes have just as much acid as red tomatoes.
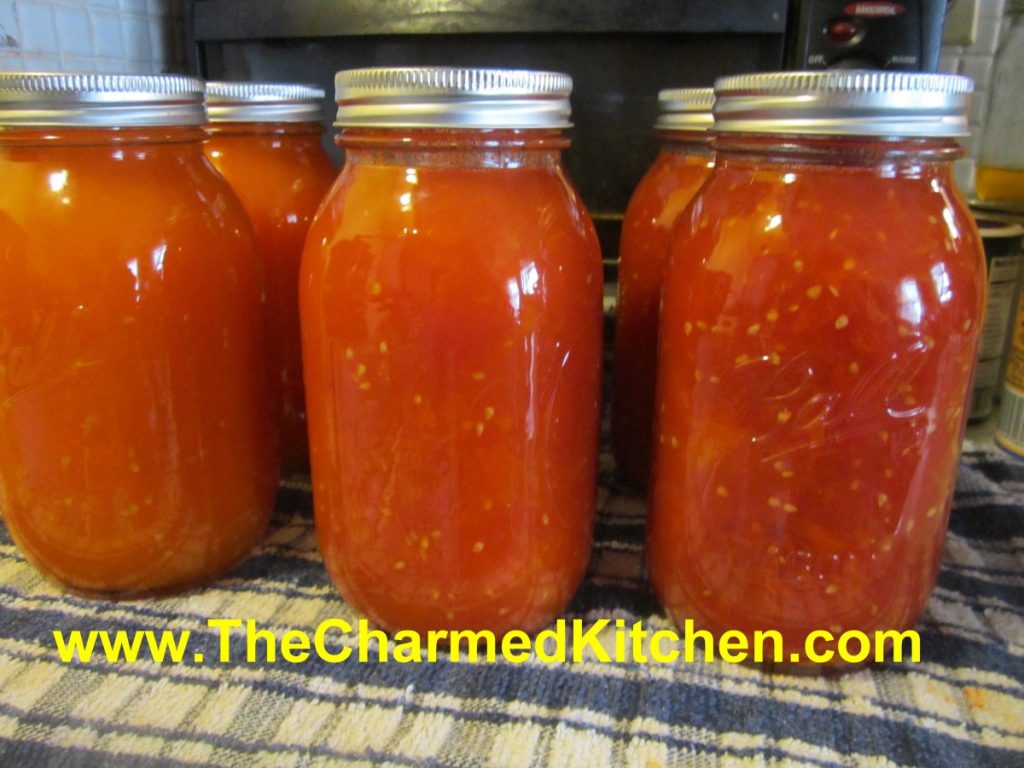
Well, for the most part at least. In terms of acidity or Ph, yellow and orange tomatoes are about average. Some cultivars have more, some less. Bottom line is that all tomatoes are safe to can- as long as you acidify them.
Adding salt is optional, and is for flavor only. Use canning/pickling salt or non-iodized salt when canning.
Here are some popular canning recipes to get you started.
All follow the NCHFP (National Center for Home Food Preservation) recommended procedures.
Crushed Tomatoes
Peel and core tomatoes , trim off any bad spots and quarter. Place about 1/4 of your prepared tomatoes in the kettle and cook, stirring constantly over high heat. Use a potato masher to crush tomatoes and extract juices. Once they are boiling add remaining tomatoes, stirring constantly. You don’t need to crush these tomatoes. Bring to a boil and boil for 5 minutes. In clean, hot jars add needed acidity listed below. You can also add 1 teaspoon of canning salt per quart if desired. Ladle in hot tomatoes, leaving 1/2-inch headspace. Wipe jar rims clean and adjust lids. Process in boiling water bath. Pints 35 minutes, quarts, 45 minutes. 1,000-3000 ft over sea level add 5 minutes. Twenty-two pounds of tomatoes will yield about 7 quarts of tomatoes.
Whole Tomatoes in Juice
Use any extra tomatoes to make juice. I use tomatoes that are too big to can whole, or those that have blemishes that need to be trimmed. Cut up clean, unpeeled tomatoes in a kettle and cook, stirring often until tomatoes are mushy. Strain mixture, pressing on solids or run through a food mill or tomato juice extractor. Set aside,. Place peeled, whole tomatoes in kettle and add enough tomato juice to cover them. Heat to a simmer and simmer gently 5 minutes. Add lemon juice or citric acid to jars, using amounts listed below. Add salt, if desired. Add tomatoes and cover with hot juice, leaving 1/2 -inch headspace. Wipe rims and adjust lids. Process both pints and quarts 85 minutes in a boiling water bath.
Tomato Juice
Wash, stem and trim bruises off tomatoes. Cut into chunks. Add about 1 pound of tomatoes to kettle and bring to a boil while crushing. Continue to add additional cut up tomatoes slowly, keeping mixture boiling. This will keep the juice from separating later. Simmer an additional 5 minutes once the tomatoes have all been added. Press mixture through a strainer , sieve or food mill to remove seeds and skins. Add lemon juice or citric acid to jars according to directions listed below. Add salt if desired. Return juice to boil and add to prepared jars leaving 1/2-inch headspace. Wipe rims and adjust lids. Process n a boiling water bath pints 35 minutes and quarts 40 minutes. Add 5 minutes processing time at elevations between 1,001 and 3,000 ft.
Tomato Sauce
Prepare as for juice. After juice is made return to pot and start cooking down to desired thickness. You’ll lose about 1/3 of the volume for thin sauce and 1/2 of the volume for thick. Add lemon juice or citric acid to prepared jars as described below. Add salt if desired. Add boiling sauce leaving 1/4 -inch headspace. Wipe rims and adjust lids. Process in a boiling water bath 35 minutes for pints and 40 minutes for quarts. Add five minutes at 1,001-3,000 ft. elevation.
Acidity and Tomatoes
Tomatoes must be acidified before canning. When canning either whole, crushed or juiced tomatoes you must add either 2 T. bottled lemon juice per quart or 1/2 t. citric acid . For pint use 1 T. lemon juice or 1/4 t. citric acid. You can also use 4 T. (5%) vinegar per quart, but it will alter the flavor and is not recommended. You can add a little sugar to offset the flavor, if you like.
Zucchini Bread Pudding

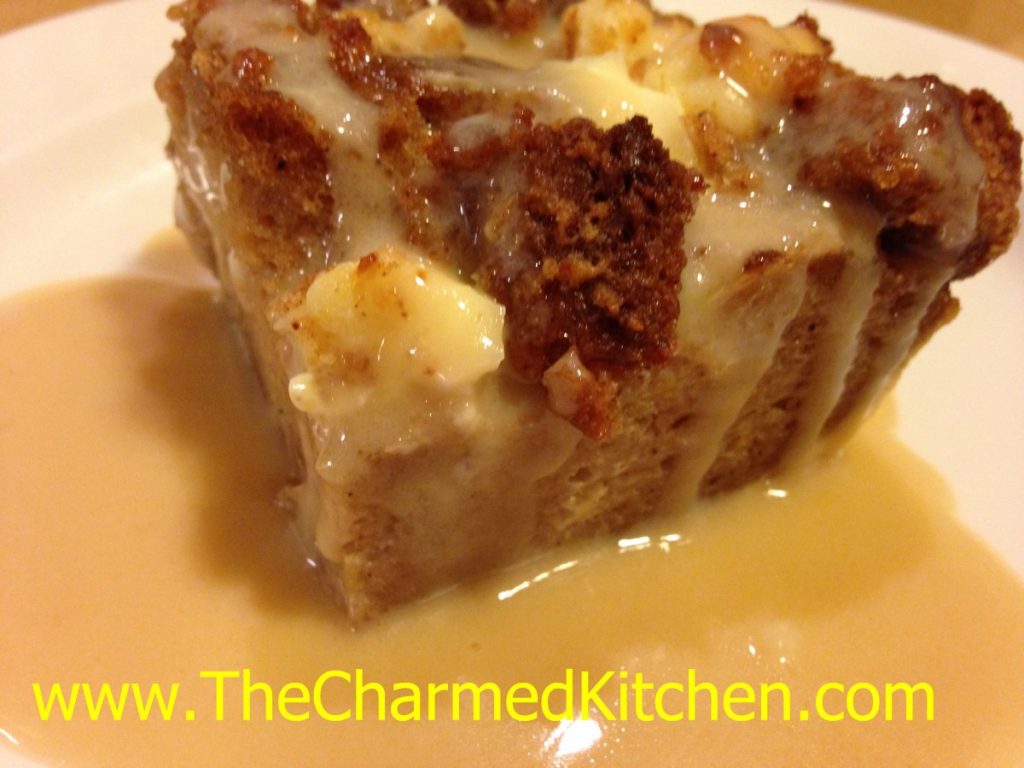
I had some extra zucchini bread and wanted to do something different with it. I ended up making this zucchini bread pudding. It came out even better than I thought it would. Rich, not too sweet. A simple, classic dessert.
I felt it needed some sort of topping or sauce. I made a vanilla caramel sauce to dress it up a little. It worked great. My neighbor really liked it. Ice cream or whipped cream would have worked, too.
I guess I should really call it a zucchini bread bread pudding. After all, it is bread pudding made from zucchini bread. My spell check hates it when I type the same word twice, so zucchini bread pudding it is.
I know this would also work with other quick breads, like pumpkin or banana bread.
So here is the recipe- for the bread pudding, the zucchini bread and the caramel sauce.
Zucchini Bread Pudding
6-8 cups cubed zucchini bread- recipe follows
8 oz. cream cheese- cubed
2 c. half and half
3 eggs
1 T. vanilla
1 t. cinnamon
Vanilla Caramel sauce- recipe follows
Butter a 2-quart casserole. Preheat oven to 350 degrees. Place half the cubed zucchini bread in the prepared pan. Add half the cubed cream cheese, scattering over the bread. Repeat with remaining bread and cheese. In bowl, combine the remaining ingredients, beating until well mixed. Pour over the zucchini bread mixture. Place casserole in oven and bake for 30 minutes, or until bread pudding is set. Allow bread pudding to cool a little before serving. Serve with the vanilla caramel sauce or top with ice cream or whipped cream. Serves 8.
While often served warm, this bread pudding is tasty served chilled, too. Heck, I just had some for breakfast.
Zucchini Bread
3 c. flour
3 eggs
2 c. sugar
2 c. shredded zucchini
1 c. oil
1 c. chopped nuts or raisins
½ c. sour cream or strained yogurt
1 t. each vanilla, cinnamon, baking powder, salt and baking soda
Preheat oven to 350 degrees and grease 2 (9×5 inch) loaf pans. Set aside. Place flour in large bowl. Beat eggs and add with remaining ingredients to flour, mixing well and scraping bowl. Pour batter into prepared pans and bake 1 hour and 20 minutes, or until browned and toothpick in center emerges clean. Cool in pans on wire rack. Freezes well. Makes 2.
Vanilla Caramel Sauce
1 c. sugar
¼ c. water
4 T. butter
2 t. vanilla
¼ c. half and half
Pinch of salt
Combine sugar and water in a small saucepan. Bring to a boil and cook for about 3 minutes. Remove from the heat and add the remaining ingredients. Stir until smooth.
Giant Zucchini Bread


Let me be clear. The bread is normal size- the zucchini are giant. Even the most diligent of gardeners will have a few zucchini get away from them.
Zucchini seem to go from too small to gigantic in the blink of an eye. A friend just brought me a really big zucchini. I knew it would make nice zucchini bread.
This time of year I get a lot of questions about overgrown zucchini. People seem to think there is nothing you can do with them. That’s not true. Even older squash can be eaten in all sorts of ways.
You can determine if the skin is too tough to eat by trying to pierce it with a fingernail. If you can easily poke the skin- it is tender enough to eat. If it isn’t, just peel before using.
Cut the zucchini in half lengthwise and look at the seed cavity. If the middle looks spongy, hollow or if the seeds are developing scoop out the middle and discard. The remaining zucchini can be cubed or sliced and added to stews, soups, stir fries and all sorts of dishes.
One of my favorite things to make with the bigger zucchini, is zucchini bread. I shred up a whole zucchini and portion it out in amounts I will need for my bread. I freeze what I won’t be using that day. It is really nice in the dead of winter to be able to make zucchini bread. Here is the recipe I use. It is a favorite and makes 2 loaves, which is a bonus.
Zucchini Bread
3 c. flour
3 eggs
2 c. sugar, I use less
2 c. shredded zucchini
1 c. oil
1 c. chopped nuts or raisins, optional
½ c. sour cream or Greek yogurt
1 t. each vanilla, cinnamon, salt and baking soda
Preheat oven to 350 degrees and grease 2 (9×5 inch) loaf pans. Set aside. Place flour in large bowl. Beat eggs and add with remaining ingredients to flour, mixing well and scraping bowl. Pour batter into prepared pans and bake 50-60 minutes, or until browned and toothpick in center emerges clean. Cool in pans on wire rack. Freezes well. Makes 2 .
Peach Pie Filling

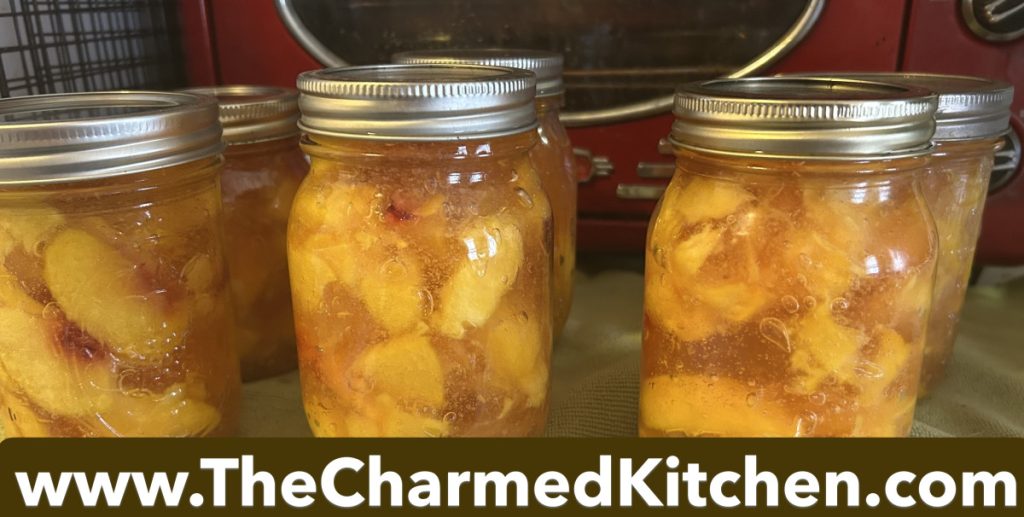
While I have made plenty of pie fillings before, for some reason I never canned peach pie filling. I will definitely do it again. It’s not that difficult and it makes it wonderfully convenient to make peach pie and other peach desserts year round.
There are a few steps before you get to putting the mixture into jars and canning. You’ll need to peel and slice the peaches. I have a nice sharp peeler, so I just peeled them. You might have to blanch them in boiling water to get the skins off. The peaches are sliced and blanched in boiling water for a minute then set aside while you make the clear gel mixture. Have everything else ready before you prep the peaches. Jars washed, boiling water bath simmering and ready to go.
It might sound like a lot of work, but it really isn’t. I had the jars of pie filling in the canner pretty fast. After you are done processing the pie filling, leave them in the canner 10 minutes. Pie fillings are notorious for siphoning. That just means they bubble out of the jars after processing. The 10 minutes really helps. My peach pie filling did not siphon at all. All 6 jars sealed just fine.
The color is so pretty and I know I will be enjoying these long after peach season is over.
So here is the recipe. Enjoy.
Peach Pie Filling
10½ cups peeled, sliced peaches- I started with 9 very large peaches
1 t. Citric acid or ¼ cup lemon juice to prevent the peaches from browning
3 c. sugar
1 cup plus 1 T. Clear Gel – cook type
2¼ c. cold water
½ t. cinnamon, optional
¾ c. lemon juice
Start by washing jars and lids. Set aside. Set water bath canner over medium heat and start heating up water in it- water should be deep enough to cover jars by 1-2 inches. Set a soup pot on the stove, add a gallon of water and start heating it up.
Wash and peel peaches. I found my peaches were firm enough that I just used a good peeler to do the job. You can blanch the peaches in boiling water for a minute or two and chill down, the skins also slip off easy. As you peel the peaches you want to set them in acidified water to prevent browning. I used citric acid in about a gallon of water in a large bowl. Once the peaches are peeled, cut them in half, remove the pits and slice in ½ inch thick slices. Return to the bowl of water. Once the gallon of water on the stove is boiling, drain the peaches and add them to the boiling water. Leave them in the water for 1 minute, then drain, cover with a towel to keep warm and set aside. In a large saucepan, heat together the sugar, Clear Gel, cold water and cinnamon, if using. I used the same pot I blanched the peach slices in. Stir constantly. Mixture gets super thick. Once it starts bubbling, add the lemon juice and cook one more minute. Add the peaches. Stir them in gently and cook over low heat just until the peaches are warmed through. Ladle mixture into pint or quart jars. Leave an inch of headspace. Wipe rims and attach lids and bands. You should end up with 6 pints or 3 quarts.
Place jars in canner. Once water comes to a boil, start timing. Process pints or quarts 30 minutes. 35 minutes if your elevation is 1,000-3,000 ft. Once the time is finished, turn off the heat and leave jars in the canner 10 minutes before removing. Place jars on a towel or cooling rack. Once they cool down, check seals. Yield 6 pints or 3 quarts.
Adapted from NCHFP recipe.
Spiced Chocolate Zucchini Cupcakes


It’s that time of year. Zucchini time. Maybe I should call it, “What do I do with all my zucchini time?” Zucchini and other summer squash are in abundance right now. This recipe is another, tasty way, to use them.
These are wonderfully spiced, moist cupcakes. Instead of frosting them, I decided to top them with melted butter and cinnamon sugar. It’s something I’ve done with muffins, in the past. I didn’t see why I couldn’t do the same thing with cupcakes.
It was a really good idea. The cupcakes stand up well in summer heat. Besides, not everyone likes frosting.
As an added bonus- it is a another recipe using zucchini, and that is never a bad thing.
Spiced Chocolate Zucchini Cupcakes
2 cups all-purpose flour
1 t. baking soda
½ t. salt
1 t. cinnamon
½ t. nutmeg
Pinch of cloves
¼ c. unsweetened cocoa
½ cup butter, softened
½ cup olive oil
1½ c. sugar
2 eggs
½ c. buttermilk
1½ t. vanilla
2½ c. grated zucchini
1 cup chocolate chips
Topping:
½ c. butter, melted
½ c. sugar
2 t. cinnamon
Preheat oven to 325 degrees. Grease and flour 24 muffin cups or use paper liners. Mix together the dry ingredients. Set aside. In a large bowl, cream together the butter, olive oil and sugar until light and fluffy. Beat in the eggs one at a time, then stir in the buttermilk and vanilla. Beat in the flour mixture, just until incorporated. Stir in the grated zucchini and chocolate chips. Pour batter into prepared pans. Bake for 25 to 30 minutes, or until the top of the cupcakes spring back when lightly pressed. Cool in pans over a wire rack for at least 10 minutes or until cool enough to handle. Dip top of cupcakes in melted butter, then dip in the cinnamon sugar. Place on rack to finish cooling off. Makes 24.
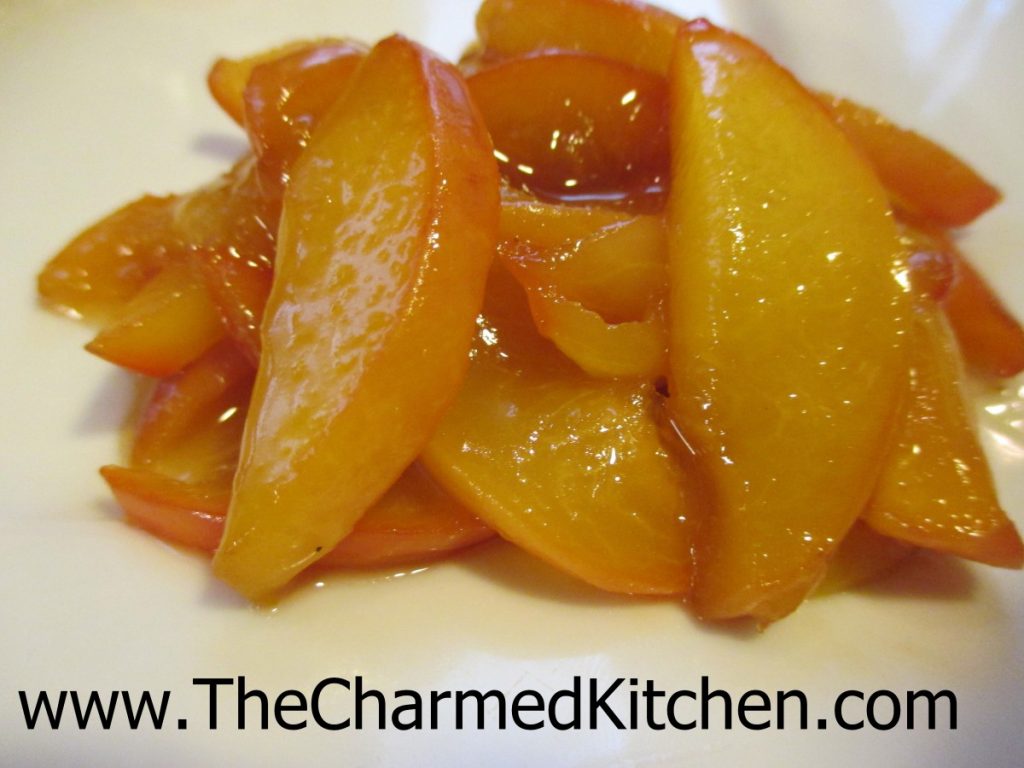
Honey Ginger Glazed Peaches

I am always looking for new ways to cook with old favorites. Peaches are a great example. When they are in season, I can’t get enough of them.
I have made peach ice cream, peach pie, peach pancakes, peach preserves, peach liqueur….. you get the idea. I wanted to enjoy peaches with dinner the other night. I decided, rather than just slicing them up and adding them to a salad, I would do a little more to transform them.
So I glazed them, the way you might glaze carrots. So simple. Why had I never thought of it before? The peaches were soft, slightly sweet, and a perfect side dish for the broiled chicken. I want to try these with lamb, pork or maybe duck next time.
I kept it pretty simple- peaches, butter, honey, ginger, salt and a dash of sriracha. I could see adding other herbs and spices. Might have to do a little experimenting. For now, here is the recipe for glazed peaches. I did not have any leftovers, so a hit, for sure. I did not peel my peaches, but feel free to, if you like.
Honey Ginger Glazed Peaches
4 medium peaches, pitted and sliced thin
2 T. butter
4 T. honey
1/2 t. fresh grated ginger
pinch of salt
Hot sauce to taste
Place peach slices in a small skillet. Add butter and remaining ingredients. Cook over medium heat until peaches start to get tender. This will take about 5 minutes. Stir once in a while to prevent sticking. Be gentle so you don’t mash the peach slices. Reduce heat to low and continue cooking a few more minutes. Peaches should be soft and the sauce thickened. Adjust seasonings.
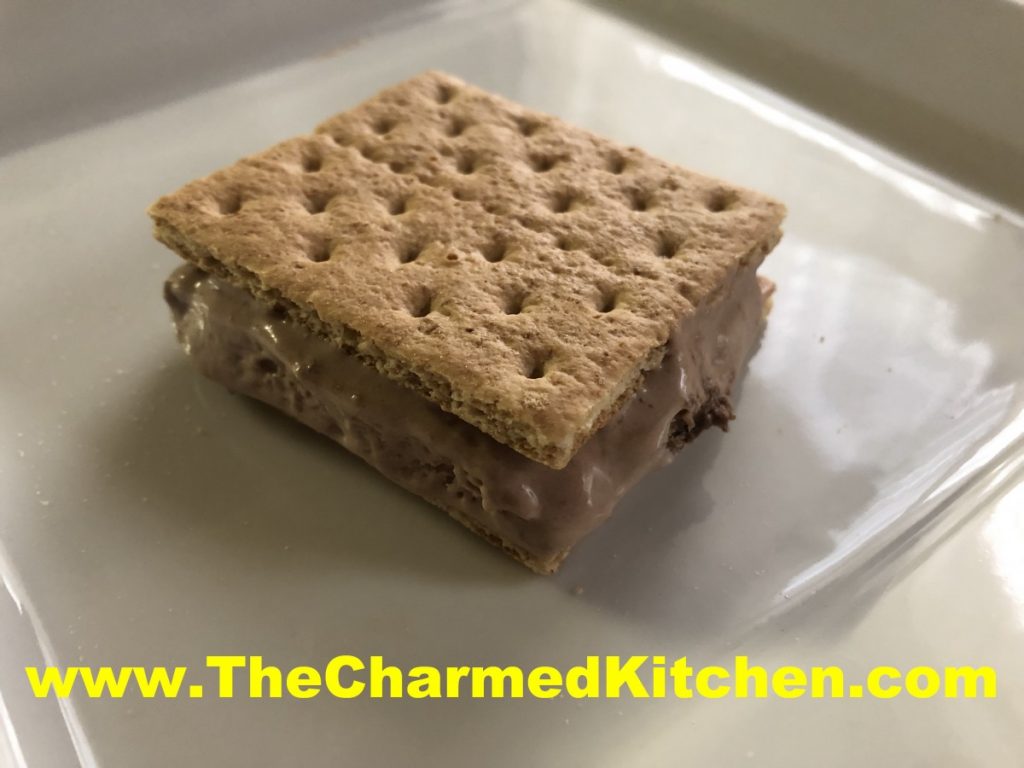
S’Mores Ice Cream Sandwiches

Summer is the time for picnics, campfires and S’mores. Summer is also the time of year to eat lots of ice cream and other frozen treats.
This dessert combines the ingredients of S’mores in a frozen treat. How fun is that?
They aren’t hard to make, but you need to allow time for ingredients to freeze. The mixture is frozen, then cut into squares and sandwiched between Graham crackers. They get returned to the freezer to harden up. It is a nice treat to have on hand.
We make these in cooking camp every year. The kids love them!!
So here is the recipe.
S’mores Ice Cream Sandwiches
1 (14 oz.) can sweetened condensed milk
2/3 c. chocolate syrup
1 c. coarsely crushed graham crackers
1 c. mini marshmallows
2 c. whipping cream, whipped
72 graham cracker square halves
In large mixing bowl combine sweetened condensed milk and syrup. Fold in crackers, marshmallows and whipping cream. Pour in foil lined 9×5-inch loaf pan and freeze until firm, about 6 hours, or longer. Remove from pan and peel off foil. Slice loaf in half lengthwise and then each half into 18 (½ inch) slices. Place one slice between two crackers and repeat with rest. Wrap and freeze until ready to eat. Makes 36. Note: You can slice the filling thicker. You’ll have fewer “sandwiches”, but they will have more filling. I usually get about 2 dozen.
Cherry Pie Scones

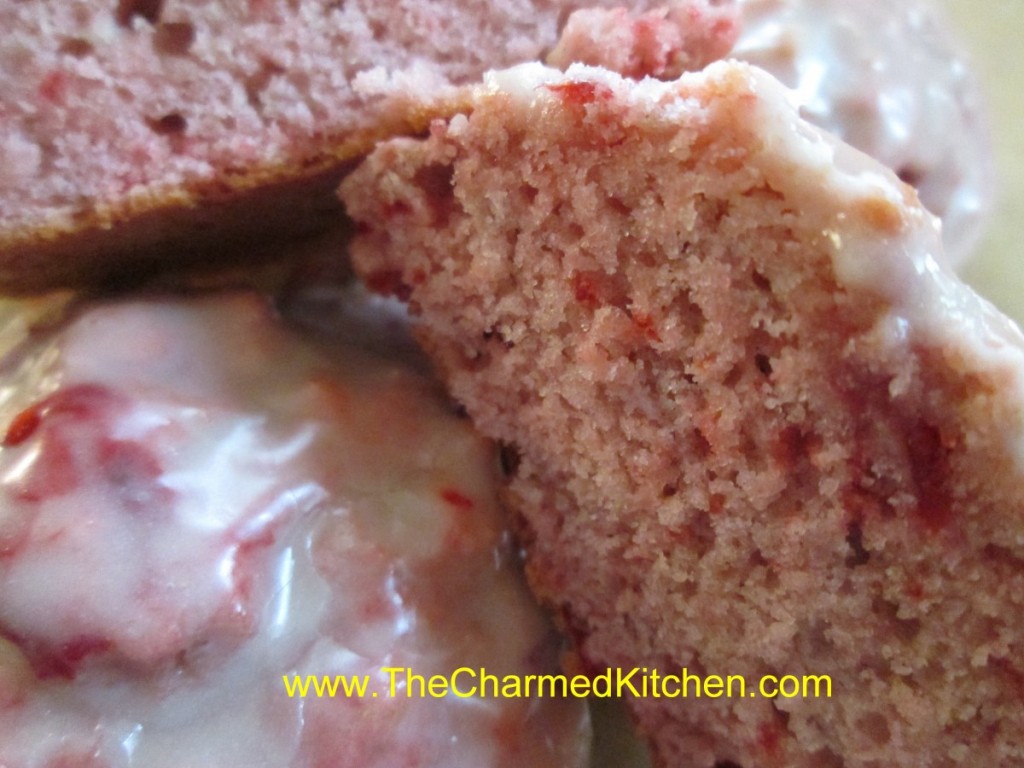
Who doesn’t love cherry pie? I know I do. After making cherry pie blintzes I found myself with some leftover cherry pie filling. I decided to use it in these scones.
My pie filling was homemade. Store bought cherry pie filling would work fine, too. They were just sweet enough and came out this beautiful pink color. They did remind me a little of cherry pie. Nothing bad about that.
The scones were great just as they were- but would also make a wonderful base for shortcake. I think with a scoop of ice cream or a bit of whipped cream, these scones would also make a nice dessert. Maybe a few blueberries, too.
Cherry Pie Scones
3 c. flour
1/4 c. sugar
1 T. baking powder
1 t. salt
1/2 c. cold butter
1 1/3 c. cherry pie filling
2 eggs
2 t. vanilla
Glaze:
2 c. powdered sugar
2 T. vanilla
water
Preheat oven to 400 degrees. Line 2 baking sheets with parchment paper or grease lightly. I have silicone baking mats so that is what I use. Set aside. In mixing bowl combine dry ingredients and cut in butter to resemble coarse crumbs. Combine pie filling with eggs and vanilla and stir to blend well. Add to dry ingredients and stir until mixed well. Mixture will be a stiff batter. Scoop 1/4 cup portions of batter onto the baking sheets- leaving a couple of inches between them. You will need both baking sheets. I used a 2 oz. ice cream scoop and got 22 scones. Bake for 15-17 minutes or until golden brown on the bottom. I switched my baking sheets about halfway through the baking. Remove to a cooling rack and make the glaze.
Combine the powdered sugar and vanilla in a small bowl and add enough water so the glaze is about the thickness of maple syrup, probably a couple of tablespoons. Dip the tops of each of the warm scones in the glaze and return to the cooling rack.
Cherry Pie “Blintzes”


In cooking camp a couple of weeks ago, we made these as our last dish of the week. One of the girls said it was her favorite thing from the whole week. These are not traditional blintzes. The secret is that the blintzes are made with flour tortillas instead of traditional crepes. I love the texture flour tortillas take on when softened in milk. They really work well, and with a fraction of the work of making crepes. They make a great dessert. The kids dusted them with powdered sugar, but you can also top them with ice cream or whipped cream. They remind me a warm cherry pie.
In camp we made some with apple pie filling, too. Those were topped with a drizzle of caramel sauce or cinnamon sugar.
Blintzes also make a great breakfast or brunch dish.
I didn’t use a lot of sugar in my pie filling because I was using sweet cherries. I also think with the powdered sugar on top, they are sweet enough. Adjust the sugar in the recipe to suit your own taste. If using tart cherries, you might want to add a little more sugar. You can certainly use store bought pie fillings, too.
So here is the recipe. I think you will love them as much as I do.
Cherry Pie Blintzes
Cherry Pie Filling
4 c. pitted sweet or sour cherries
1½ c. water
½ c. sugar- use a little more if using tart cherries
Pinch of salt
¼ c. cornstarch
Place cherries in a saucepan with 1 cup of the water, sugar and the salt. Bring to a simmer. Mix cornstarch with the ½ cup of water and add to the cherry mixture, cooking until just thickened. Cool. Makes about 4 cups.
Blintzes
8-10 Flour tortillas
½ c. Milk
4 T. Butter
Powdered sugar
Make the pie filling ahead of time, so it is cooled down. Place the tortillas in a shallow pan and pour milk over them. Turn them to make sure they all get covered in the milk. Let the tortillas soften for 5 minutes. Place a tortilla on a flat surface and spoon about ½ cup of the pie filling in the middle. Fold sides in until they almost touch in the middle. Roll up from the bottom to form a little bundle. Repeat with remaining tortillas and filling. Heat butter in saucepan over medium heat and brown the blintzes, turning over as needed to brown on both sides. Start them off seam side down, to keep them from popping open. Place on serving dish and dust with powdered sugar. Serve warm. Makes 8-10.

Browning in the skillet


