Ice Cream Cone Cupcakes


Ice Cream Cone Cupcake
This might look like an ice cream cone, but it isn’t. It is a cupcake!! The batter is baked inside ice cream cones, then decorated to look like ice cream cones. I used from scratch recipes for both the cupcake batter and the frosting, but feel free to use what ever recipe you like.
Because you use more frosting than you might normally use for more traditional cupcakes, make sure to have extra. I chose the recipe I did because it makes plenty of frosting. I did not tint my frosting, but you can, if you like.
These are fun for kids to make. You can let them decorate their own “cone”. For a kid’s party you can even have a couple of different cupcake flavors and frostings to pick from- and some assorted toppings, like cherries, tiny candies and assorted sprinkles.
Once you frost the cupcakes, they become a little top heavy. I find setting them together, letting them touch each other a little, helps to keep them form tipping over.
Sometimes, some of the batter drips over the edge of the cone when baking. Just pretend some of the “ice cream” has melted and cover drips with frosting.
Here are the recipes I used, with the directions for baking the cupcakes.
Chocolate “Ice Cream Cone” Cupcakes
4 oz. semisweet chocolate
1 cup butter
1 cup all-purpose flour
1 3/4 cups sugar
4 eggs
1 teaspoon vanilla extract
24 flat bottomed ice cream cones
Preheat oven to 325 degrees. In the top of a double boiler, combine chocolate and butter. Heat, stirring occasionally, until mixture is melted and smooth. Remove from heat and allow to cool to lukewarm.
Sift flour and sugar together into a large bowl. With mixer on low speed, beat in eggs one at a time. Stir in chocolate mixture and vanilla. Place 24 cones in muffin tins to hold them up and fill 2/3 full with batter. Bake for about 20 minutes, or until cupcakes puff to top of cones. Test with a toothpick. Cool and frost to look like ice cream. Decorate with sprinkles. Makes about 24.
Super Fluffy Frosting
1½ cup butter
1 1/2 tablespoons vanilla extract
1½ lbs. confectioners’ sugar –
1/8 teaspoon salt
3 T. milk
In a mixer, combine the butter, vanilla and 1 tablespoon milk. Add the sugar and salt, beat until well mixed. Add a tablespoon or two more of milk, if needed. Turn mixer to the highest speed and beat for 15 minutes.
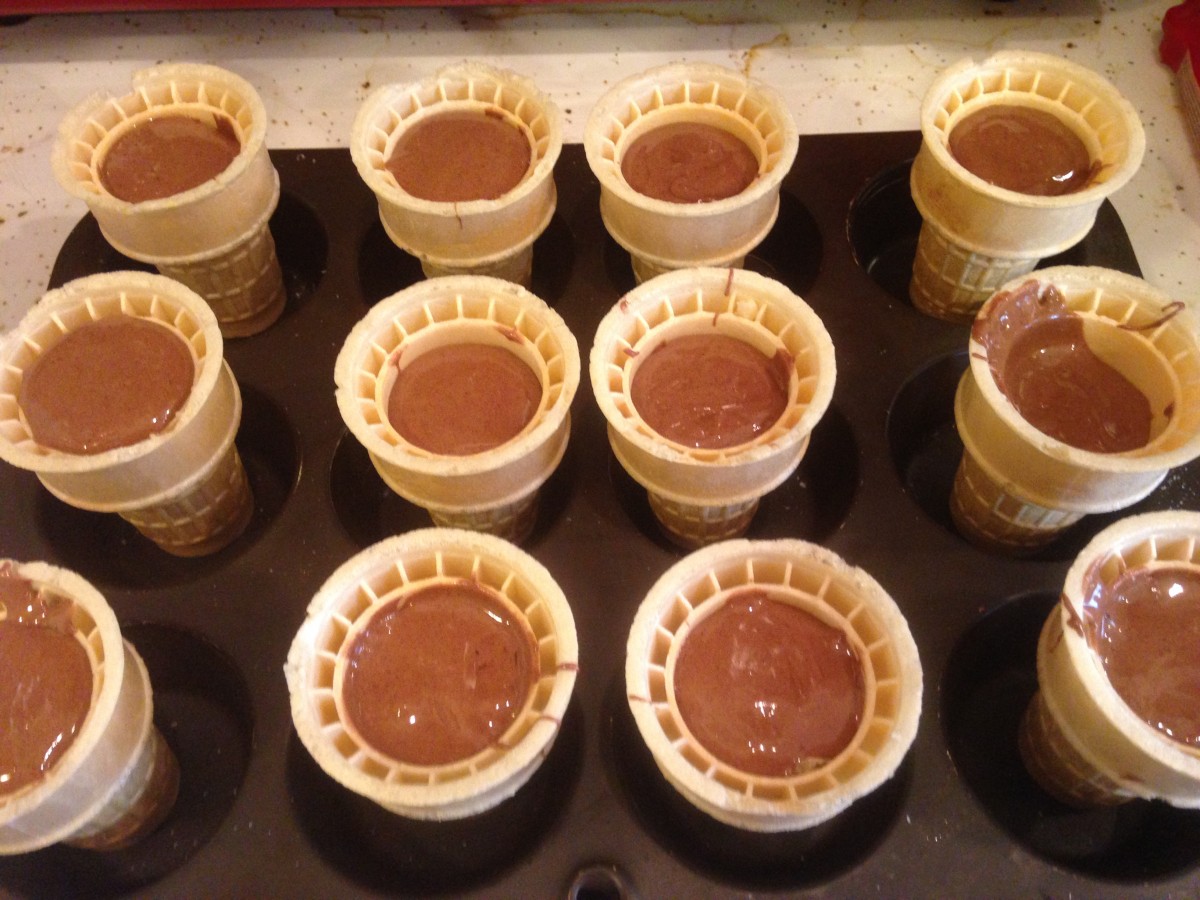
Cones filled, and ready to bake
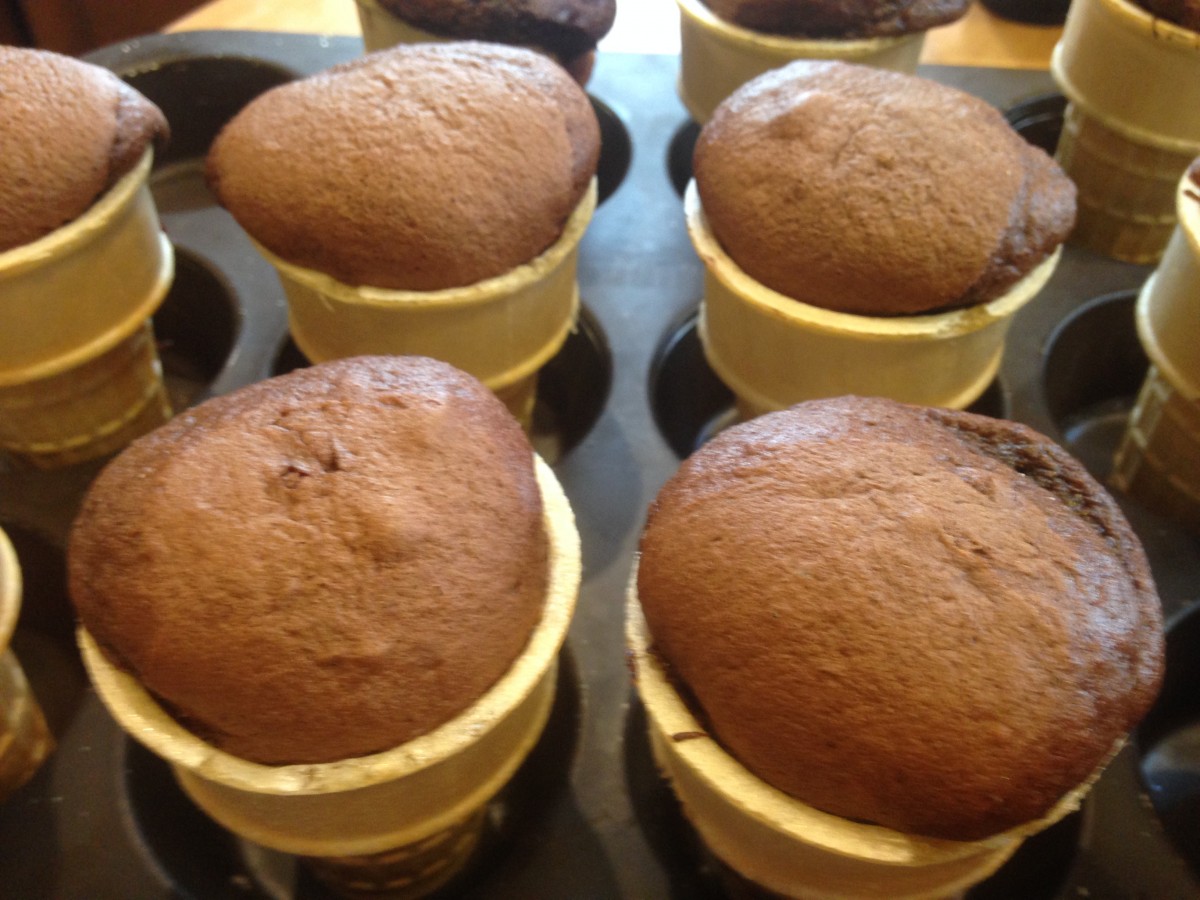
Fresh out of the oven

Ready for the party
How to Clean Leeks


Fresh Leeks
I love to cook with leeks. They have an onion flavor, but with lovely sweetness. Leeks are a wonderful addition to soups, chowders and stews. They also can be fried for a crunchy garnish.
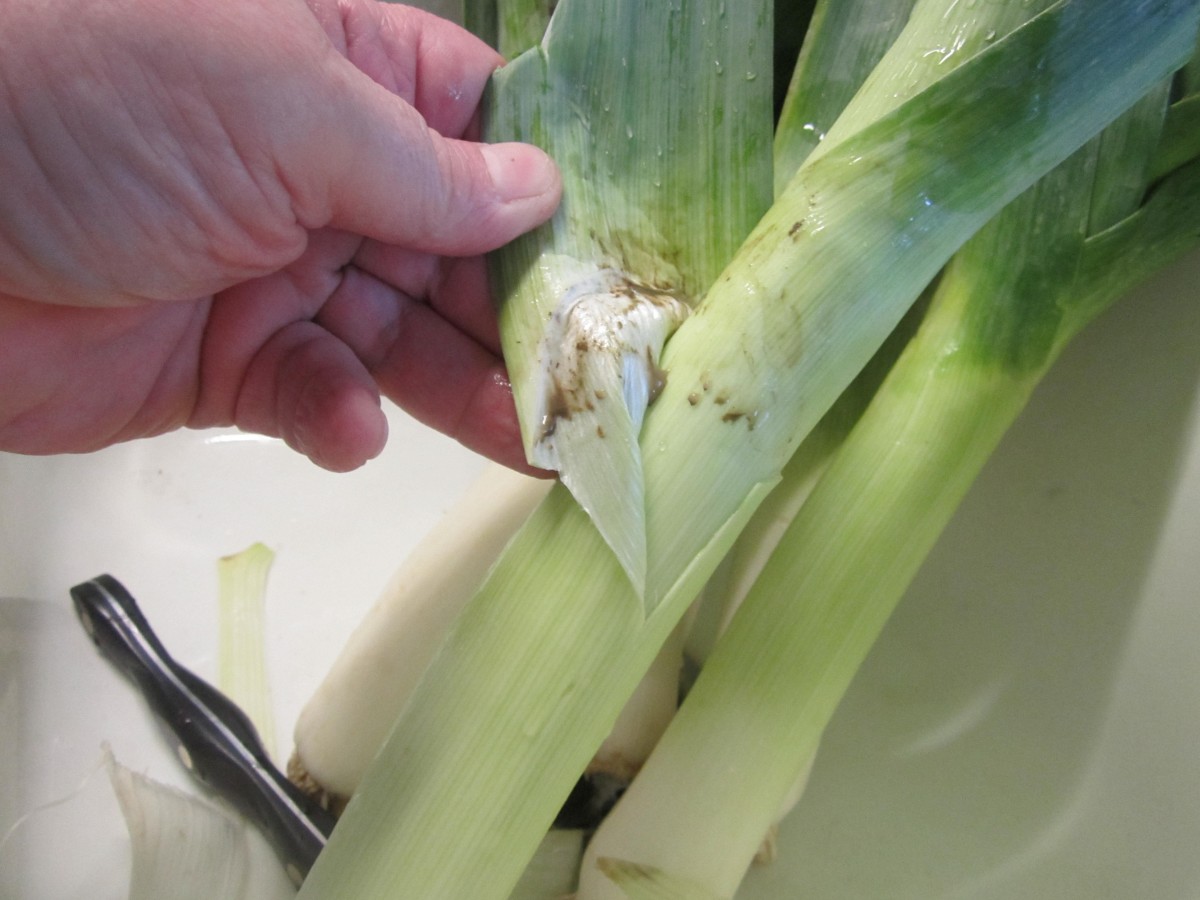
I get asked all the time about how to prep them. Leeks are full of sand and have to be prepped properly, so you don’t get any grit in your food. The edible part is the white and light green parts. The dark green leaves are tasty, but tough. They can be used for making stock.
To get started, peel off the first layer of leaves. There is often a lot of sand there. Cut off the bottom about 1/2 -inch from the root. You should be able to see the rings, or layers, of the leek when you do this. Trim off any dark green parts at the top. You’ll have a trimmed leek at this point.
Now you have to clean it. Cut the leek lengthwise in half. Hold one half at a time under running water while fanning the leaves to dislodge any dirt. Take the rinsed halves and cut them into 1/2-inch slices. You could also cut them into thin strips, if you like.
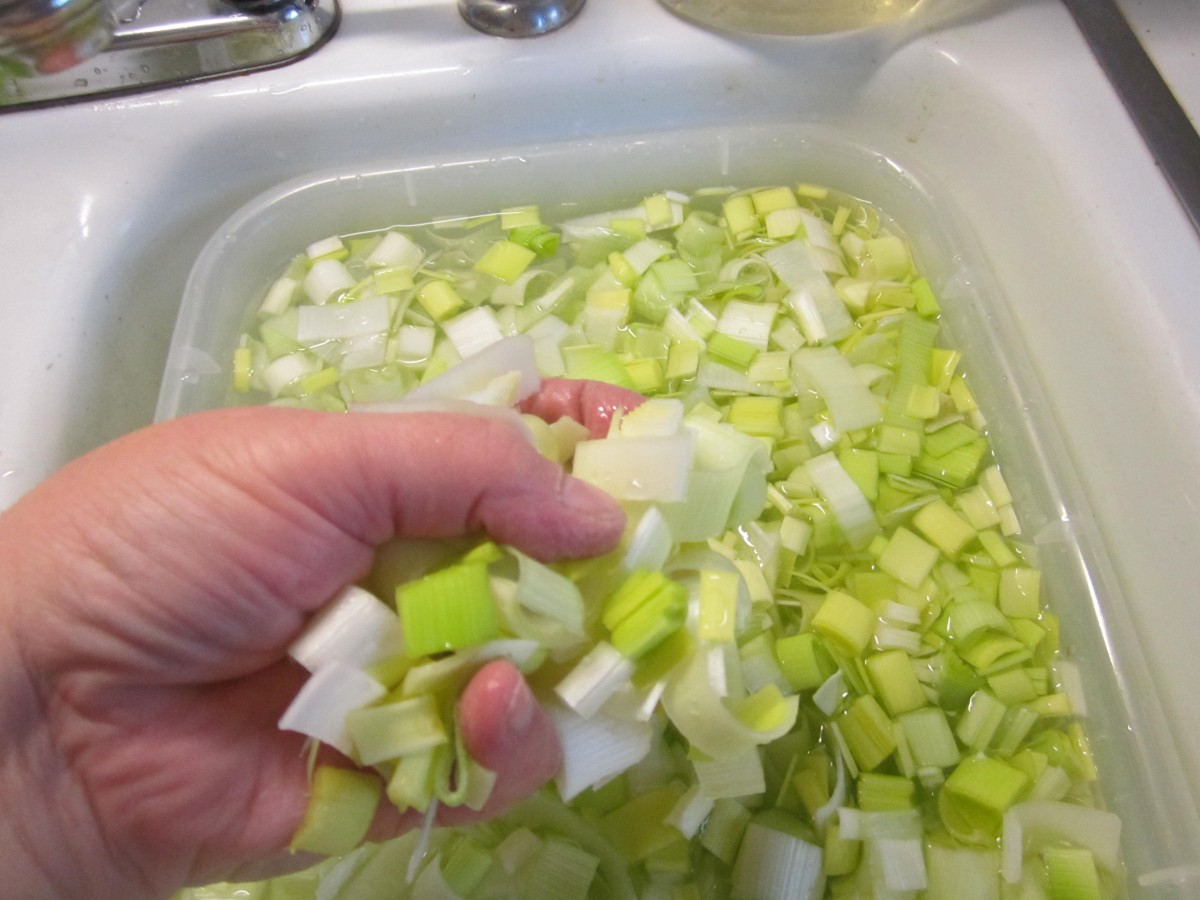
Place the slices in a large pan or bowl, filled with cold water, and agitate them to loosen any remaining sand. Use your fingers to separate the layers. Make sure the bowl is deep enough for the leeks to float, several inches from the bottom. The leeks will float and the sand and dirt will sink. Let them stand a few minutes and then lift them out of the water to drain. Any grit will be at the bottom of the bowl.
If there is a lot of grit in the bottom of the bowl, you might want to repeat the rinsing process one more time. It might sound like a lot of work, but it really doesn’t take that much time and the leeks will be completely clean. I often buy a lot of leeks when they are on sale, and clean them all at once.Then I saute the cleaned leeks in oil, and freeze for later use.
Remove one or 2 outer layer of leaves

Trim off bottom 1/2-inch above the root

Layers should be visible
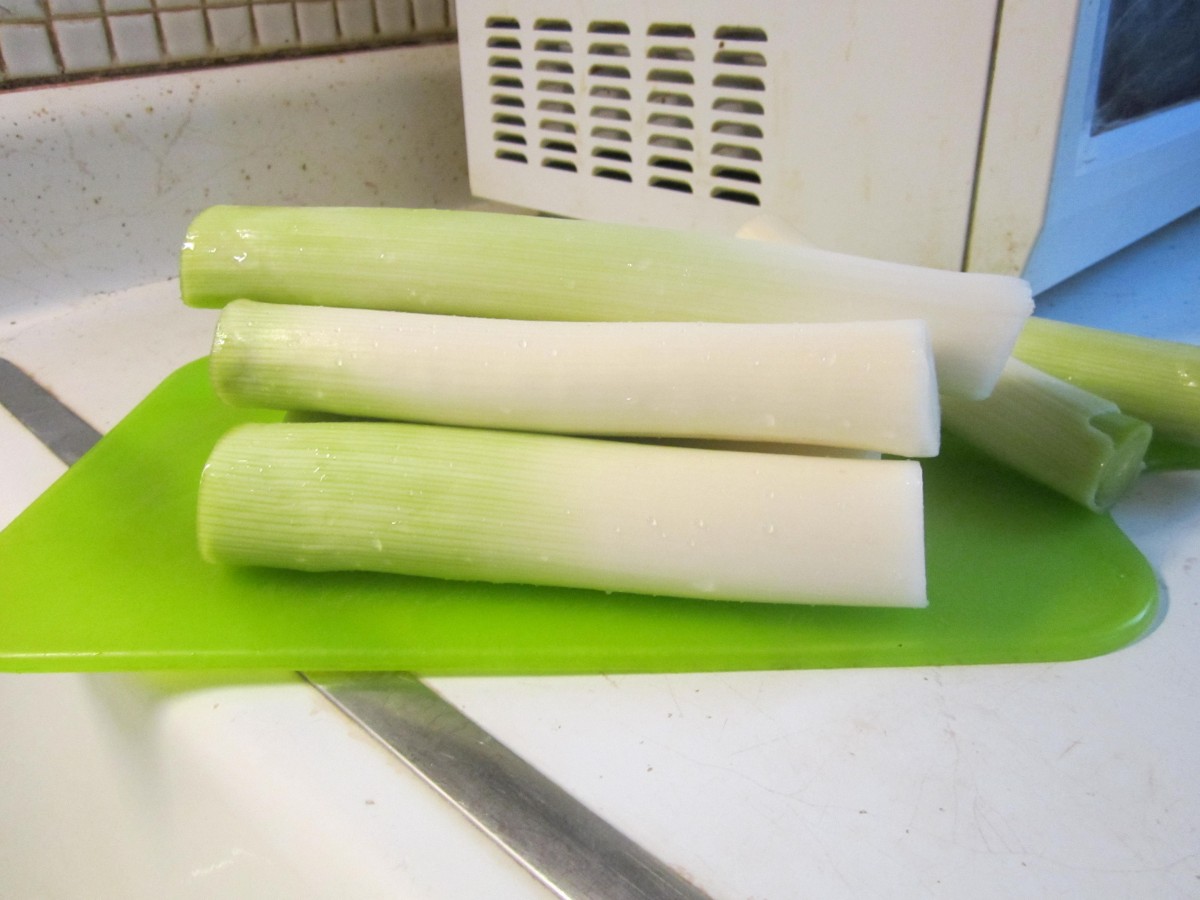
Properly trimmed leeks
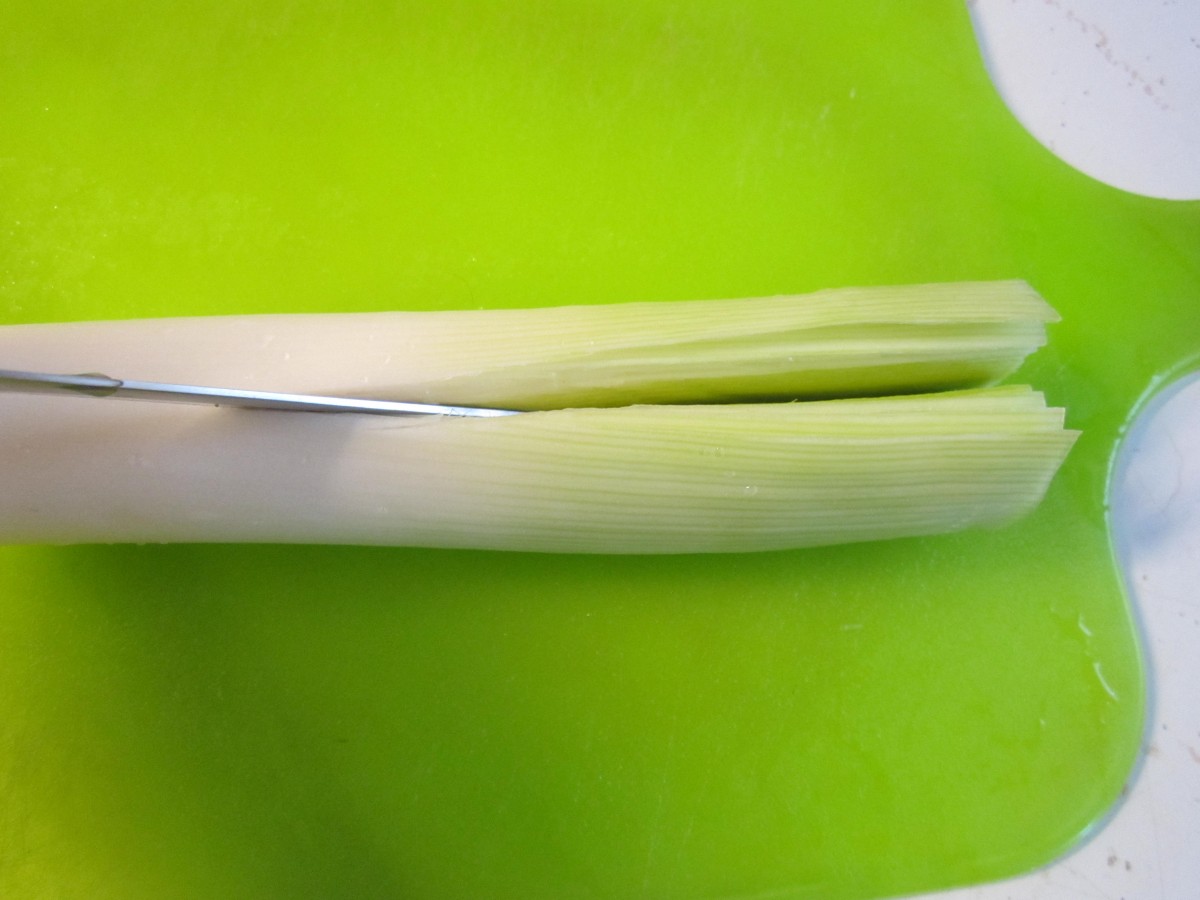
Split leek lengthwise

Rinse under running water while fanning layers
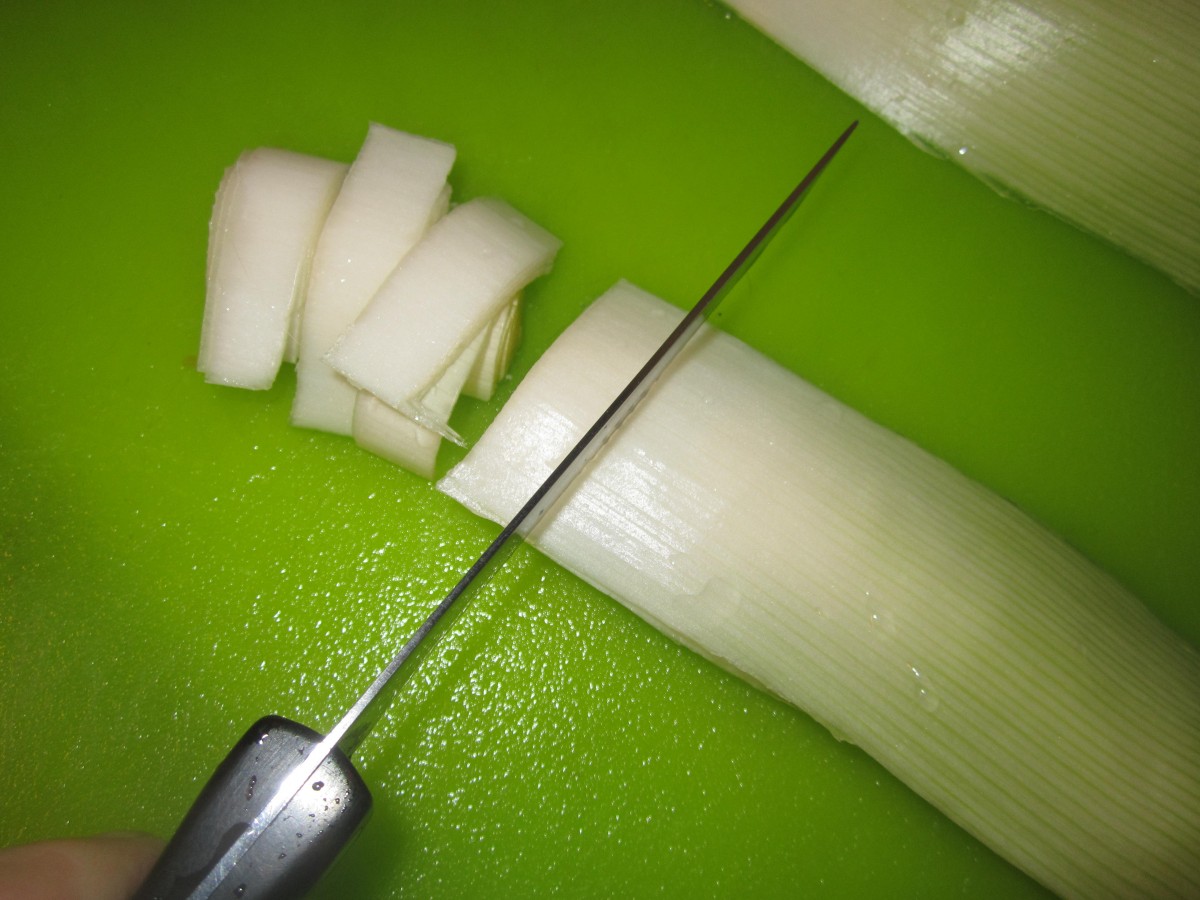
Cut into 1/2-inch slices
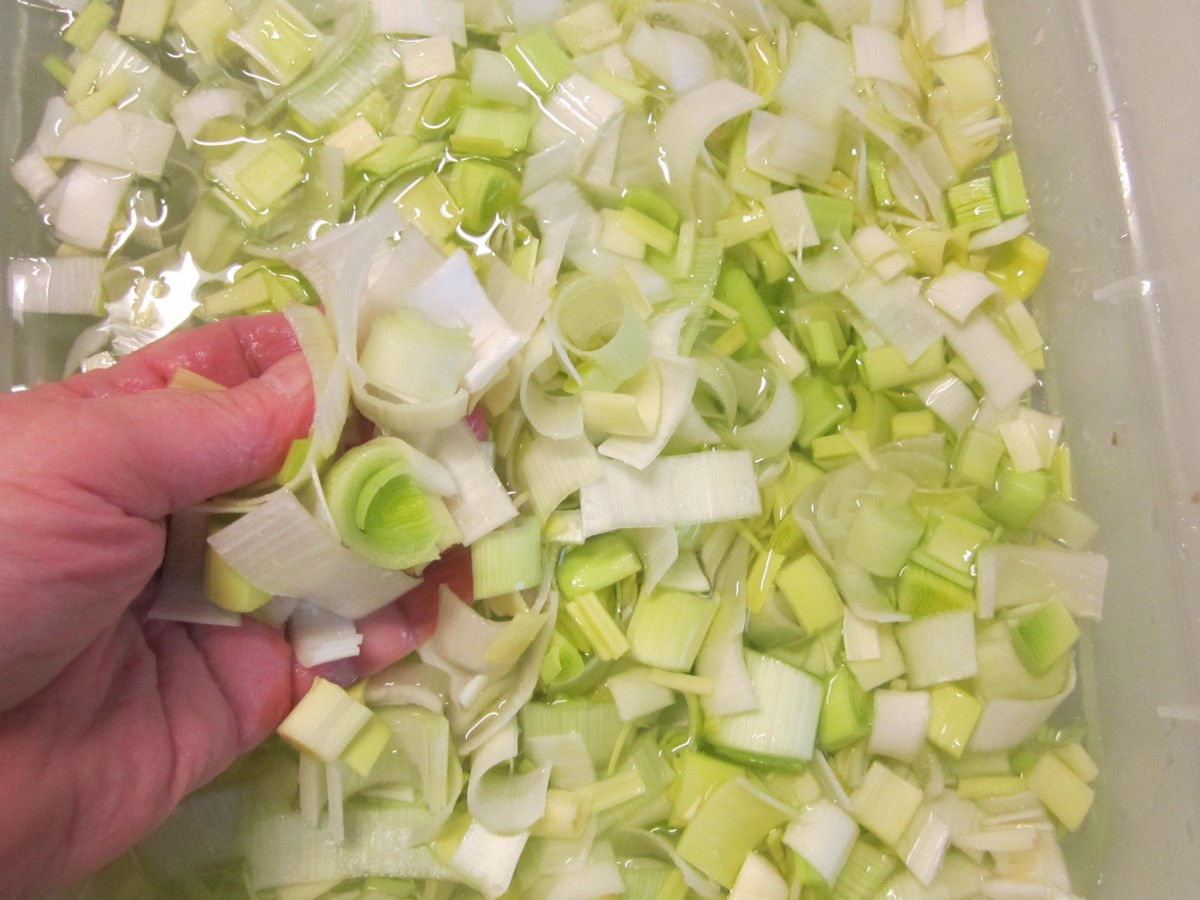
Place in large container of cold water and separate the layers
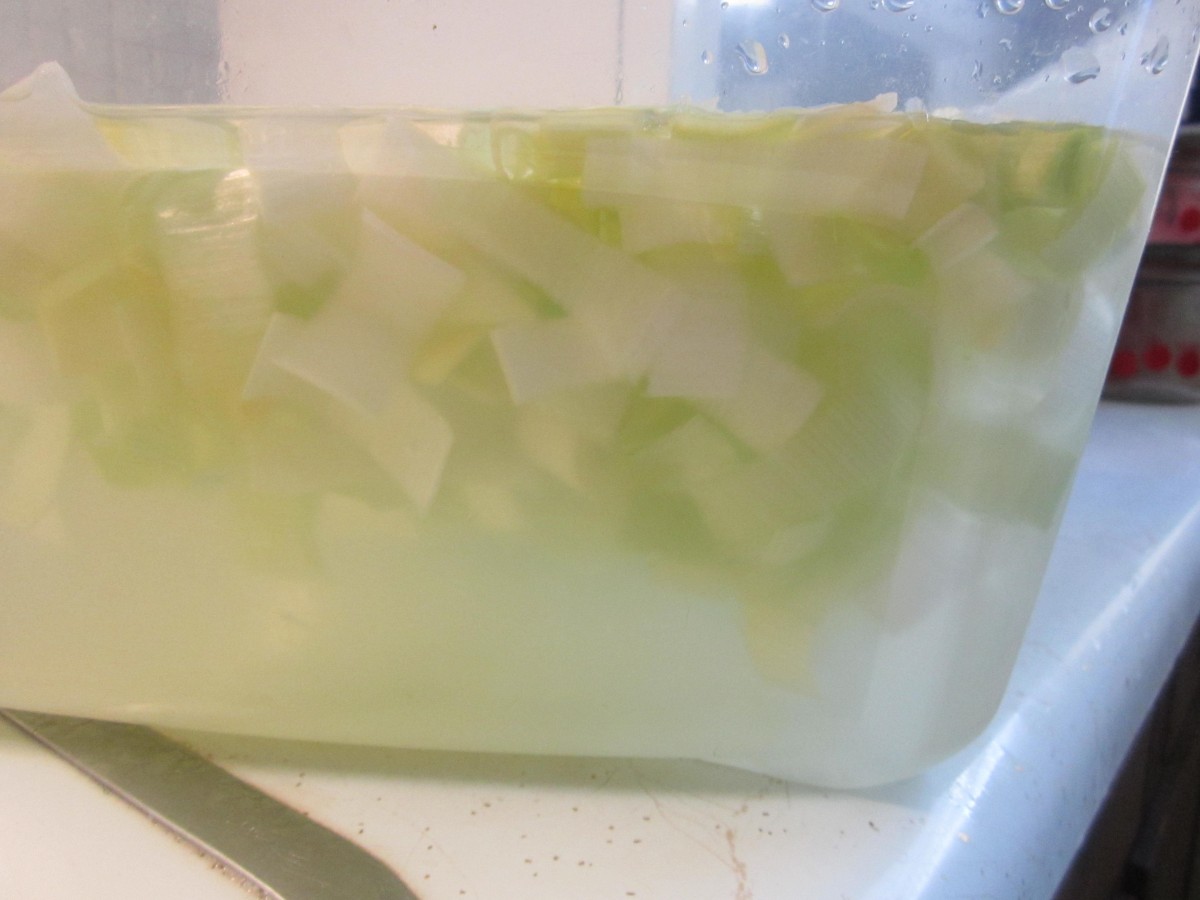
Leeks float- dirt sinks
Lift clean leeks out of the water

Clean and ready for cooking
Nisu- Finnish Bread with Cardamom

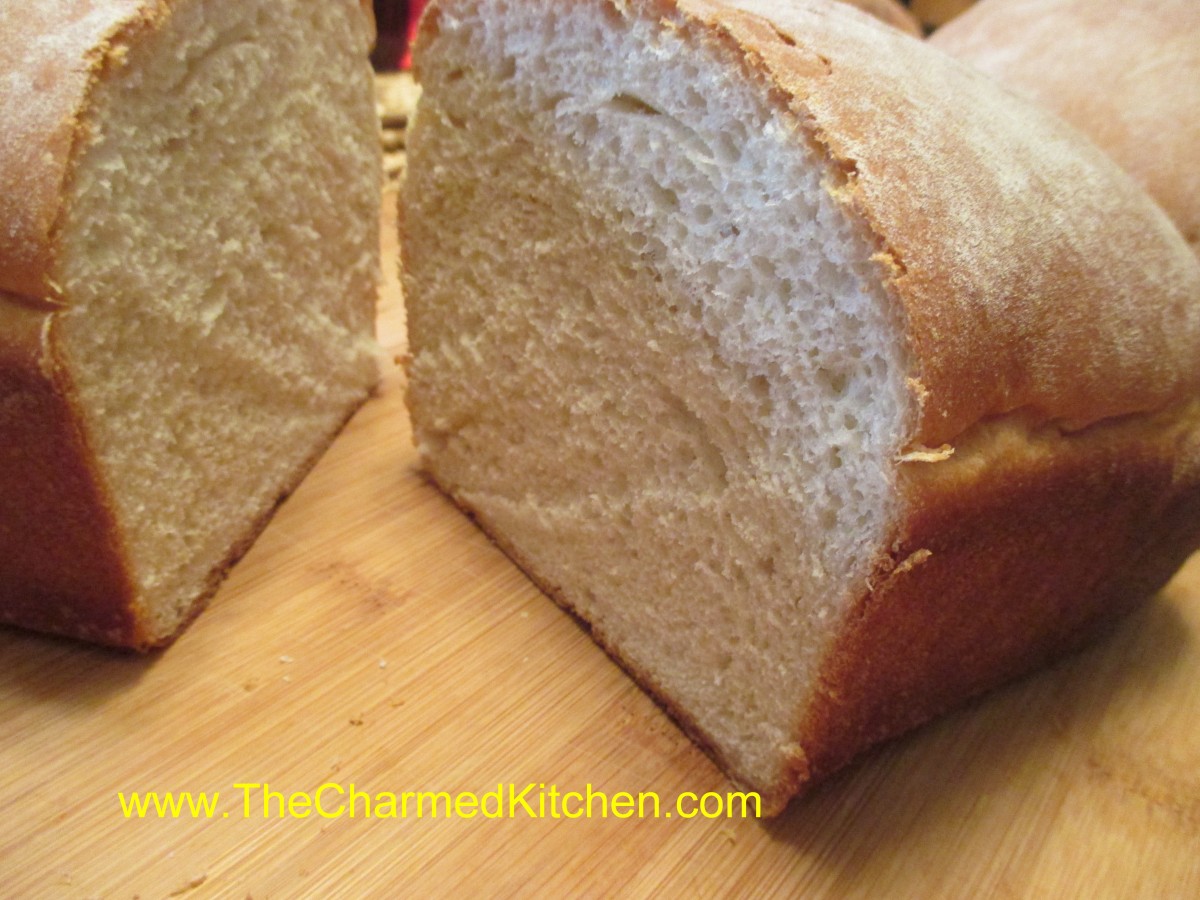
Nisu Bread
This wonderful recipe came from the Finn grandmother of two good friends. I think of her every time I make this bread. She was a sweet and loving woman.
Nisu is a soft, slightly sweet bread, made special with the addition of cardamom.
Cardamom is a spice that has a rich, sweet flavor and fragrance. You can purchase it ground or whole, in pods.
Cardamom is often used in baked goods and adds a nice flavor to frosting and glazes. It is also used to flavor coffee.
Cardamom is a little pricey. The good news is a little goes a long way. If you buy ground cardamom, you can store it in the freezer to keep it fresh longer.
This bread is lovely just toasted, and makes great French toast.
It is also a nice sandwich bread.
The recipe makes three loaves, so you can leave one out and freeze the other two.
Nisu
½ c. warm water
2 packages active dry yeast
2 c. milk
½ c. sugar
2-3 t. ground cardamom
1 t. salt
6 T. butter
6-7 c. flour, preferably bread flour
2 eggs
Dissolve yeast in water and set aside. Place milk in large bowl and add the sugar, cardamom, salt and butter. Heat in microwave until liquid is very warm. Butter might not be completely melted. Stir mixture until sugar is dissolved. Place 2 cups of flour in a mixing bowl and add the milk mixture, eggs and yeast mixture. Beat on medium speed for 3 minutes. Add 1 cup more of the flour and beat 2 minutes more. Stir in enough of the remaining flour to make a soft dough. Turn onto a floured surface and knead until dough is firm and smooth, about 10 minutes. Place in an oiled bowl and turn dough to coat. Cover with a towel and allow to rest until doubled in bulk, about 1 hour. Punch dough down and divide into 3 pieces. Roll each piece into a loaf and place in greased 9×5 inch bread pans. Cover and allow to rise until doubled in bulk, about 45 minutes. Bake in a 375-degree oven for 30 minutes or until golden and loaf sounds hollow when tapped lightly. Makes 3 loaves.
The Sinister Garden

 Did you know that daffodils are poisonous? They are.
I am always encouraging people to forage. There are so many common plants that are both edible and tasty. As the new season, starts I also want to be a little cautionary. As much as there are common plants out there that can nourish you, there are also common plants that are dangerous and even deadly.
Be sure you know what the plant is. If you can’t identify it for sure, find someone who can. Your local Extension office can help.
There are also plants where some parts are edible and others not -like tomatoes. Potatoes are wonderfully edible, but the foliage on potato plants is poisonous. There are also plants that are only edible in certain stages of growth or when prepared a certain way. If you aren’t sure- don’t eat it!!!!
While this is not meant to be a complete list here are some plants you should watch out for. Even more true if you have small children, or pets that might ingest them. Some are quite toxic, others might cause skin irritations etc.
Some Poisonous Plants
Bryony (Bryonia): all parts are poisonous, Boxwood (Buxus),: contact with the sap may irritate skin, Christmas rose, Lenten rose, hellebore (Helleborus): all parts may cause severe discomfort if ingested and the sap may irritate skin, Clematis, old man’s beard, virgin’s bower (Clematis): all parts are poisonous, causing mouth pain if eaten and minor brief skin irritation, Columbine (Aquilegia): contact with the sap may irritate skin, Comfrey (Symphytum): roots and leaves may cause severe discomfort if eaten and leaves may irritate skin, Daffodil (Narcissus): bulbs toxic if eaten in large quantities; skin may be irritated by handling bulbs, flowers and stems, Elder (Sambucus): all parts may cause severe discomfort if ingested and the leaves may irritate skin, False acacia (Robinia preudocacia): all parts may cause severe discomfort if eaten, Foxglove (Digitalis): all parts may cause severe discomfort if ingested and the leaves may irritate skin, Ivy (Hedera): all parts may cause discomfort if eaten and the sap or airborne hairs may aggravate allergies and irritate skin, Juniper (Juniperus): contact with foliage may irritate skin allergies, Lobelia (Lobelia): the sap may irritate skin, Lily of the valley (Convallaria majalis): seeds can cause stomach upset, Lords and ladies (Arum): all parts may cause severe discomfort if ingested and the sap may irritate skin, Lupine (Lupinus): the seeds may cause severe discomfort if ingested, Mountain laurel (Kalmia): all parts may cause severe discomfort if eaten, Potato, potato vine, false Jerusalem cherry, eggplant (Solanum): toxic compounds causing weakness and confusion are concentrated in stems, leaves, sprouts and fruits. They are increased by exposure to light, damage and age. Levels are kept low in food varieties and the compounds are mostly destroyed by cooking. Privet (Ligustrum): all parts may cause severe discomfort if eaten, Rhubarb (Rheum): leaves may cause discomfort if ingested. Use only the leaf stalk in recipes. Windflower (Anenome): contact with the sap may irritate skin, Wisteria (Wisteria): all parts may cause severe discomfort if ingested
Some Poisonous Flowers
Aconite, Anemone, Anthurium, Atamasco Lily, Autumn Crocus, Azalea, Baneberry, Black Locust, Bloodroot, Boxwood, Burning Bush, Buttercup, Butterfly Weed, Caladium, , Carolina Jasmine, Castor Bean, Cherry Laurel, Chinaberry, Christmas Rose, Clematis, Daffodil, Deadly Nightshade, Death Camas, Delphinium, Dogbane, Dumbcane, Elephant Ears, False Hellebore, Four O’clock, Foxglove, Gloriosa Lily, Golden Chain Tree, Goldenseal, Heavenly Bamboo, Henbane, Horse Chestnut, Horse Nettle, Hyacinth, Hyacinth Bean, Hydrangea, Iris, Ivy, Jack-in-the-Pulpit, Jerusalem Cherry, Jessamine, Jetbead, Jimsonweed, Jonquil, Kentucky Coffee Tree, Lantana, Larkspur, Leopard’s Bane, Lily of the Valley, Lobelia, Marsh Marigold, May Apple, Mescal Bean, Mistletoe, Morning Glory, Mountain Laurel, Nightshade, Oleander, Periwinkle, Philodendron, Pittosporum, Poison Hemlock, Potato, Privet, Rhododendron, Rock Poppy, Schefflera, Spring Adonis, Spurge, Star of Bethlehem, Sweet Pea, Tobacco, Trumpet Flower, Water Hemlock, Wild Cherry, Wisteria, Yellow Allamanda, Yellow Oleander
Homemade Chocolate Eclairs


Homemade Mini Chocolate Eclairs
If you want to surprise someone with a very special sweet treat, you could make eclairs. These are a bit or work, but the end result is so wonderful. I think they are worth the effort, especially for special occasions.
I decided to make a mini version this time. Not everyone wants to eat a full size eclair, especially after a big meal.
You start by make a pate a chou, or cream puff pastry. This is the same dough used to make cream puffs. It is a combination of water, butter, milk and flour- cooked on top of the stove, then enriched with the addition of eggs. The dough is piped onto baking sheets and baked until puffed, golden and crisp. Once cooled, they are filled with sweetened whipped cream or, more traditionally, a custard filling, then topped with chocolate ganache.
Homemade Mini Eclairs
1 recipe Cream Puff Pastry (Pate a Chou)- recipe follows
Egg custard- for filling, or sweetened whipped cream- recipe follows
Chocolate Ganache- for topping- recipe follows
Start by making the dough. This recipe will make 12-18 medium eclairs or 3 dozen of the mini ones.
Cream Puff Pastry
¾ c. water
¼ c. milk
¼ t. salt
½ c. (1 stick) unsalted butter
1¼ c. flour – unbleached or bread flour preferred
4 large eggs
Extra milk for brushing
In saucepan, heat together water, milk butter and salt into a full boil. Butter has to be melted. While stirring, dump flour into saucepan, stirring constantly. Mixture will form into a ball. Reduce heat to medium and continue cooking dough, while stirring, for another minute or two. Place dough in an electric mixer and allow it to cool down a little before adding the eggs. Mixture has to be at 140 degrees F, or below, before you start adding the eggs. I use the paddle attachment and beat the dough before adding the eggs. This cools the dough down faster. Beat in eggs, one at a time, until each is fully incorporated. Beat until dough is shiny. A spoon, lifted out of the batter, should leave a peak that does not fall down.
Preheat oven to 425. Line a baking sheet with foil or parchment. I used a silicone liner and was happy with the result. Don’t grease the pan. Using a piping bag, squeeze the dough into 2-3-inch strips on the baking sheet- leaving a little room in between. Strips should be about ¾ -inch in diameter. Using a little milk on your finger, smooth down any peaks on the puffs. They should resemble miniature hot dog buns. Bake at 425 for 10 minutes, then turn oven down to 375. Bake eclairs 10 more minutes, or until golden brown. Tap the shells. They should sound hollow. Turn off the heat and leave oven door open a crack, allowing them to dry completely. Cool before filling. Makes about 36.
Custard Filling
2 cups milk
2 tablespoons cornstarch
1⁄3 cup sugar
2 eggs, lightly beaten
1 teaspoon vanilla
Using a whisk, combine milk, sugar and cornstarch in a medium saucepan over medium heat on stove top. Allow milk to scald (heat to the point when tiny bubbles form around edges of pan). Whisk occasionally to prevent cornstarch from clumping on bottom edges of pan. Remove milk mixture from heat, preferably to a burner that’s turned off.
Mix about 2 tablespoons of scalded milk mixture into eggs using whisk, then introduce eggs into milk mixture in a slow stream, whisking milk mixture constantly. Immediately return pan to heat and whisk gently until custard thickens, another two or three minutes. Do not allow to boil. (If you find that you have egg white strands in custard, feel free to pass it through a fine-mesh sieve into a different bowl now.) Remove pan from heat and stir in vanilla. Cool before using. Makes 3 cups.
To fill the eclairs, using a small piping tip with a pastry bag, filled with the custard. Squeeze filling in on one end, on through the bottom, squeezing until it seems full.
Once eclairs are filled, top with a chocolate ganache. I just dip the tops of the eclairs in the warm ganache and chill until chocolate sets. Filled eclairs should be stored i8n fridge until ready to serve. They can be frozen.
Chocolate Ganache
4- 6 oz. dark chocolate, chopped- or 1 cup chocolate chips
2 oz. heavy whipping cream
In saucepan, heat chocolate and cream together until just heated through. Remove from heat and stir until smooth. You can also do this in a microwave safe bowl, in the microwave for about a minute. Remove and stir until smooth. Makes 1 cup.
Purple Sweet Potato Gelato


Purple Sweet Potato Gelato
This might be one of the oddest frozen desserts I have ever made. It is also one of the tastiest. I started with a purple sweet potato, which I peeled and steamed until it was tender. Once the potato cooled down, I pureed it with a can of coconut milk. I then sweetened the mixture and added some vanilla. I chilled the mixture, then froze it in my ice cream maker.
The texture was so smooth and the flavor was wonderful. The pretty purple color was an added bonus.
The sweet potato itself doesn’t look like anything special, until you cut it open. While the outside is a pale, whitish color, the inside is bright purple. When cooked, it tasted like any other sweet potato.
I used one pretty good sized sweet potato. Thinking just under a pound. Here is the recipe.
Purple Sweet Potato Gelato
1 large purple sweet potato, peeled, cooked and cooled down
1 can ( about 13 oz.) coconut milk
3/4 c. sugar- or to taste
2 t. vanilla
In blender or food processor, combine sweet potato and coconut milk. Process until mixture is very smooth. Sweeten to taste with sugar and add the vanilla. Chill mixture, then process in an ice cream machine. If you don’t have an ice cream machine- freeze mixture. Then remove from freezer and let it soften a few minutes. Process in a food processor until smooth and creamy. Makes about 1 quart.
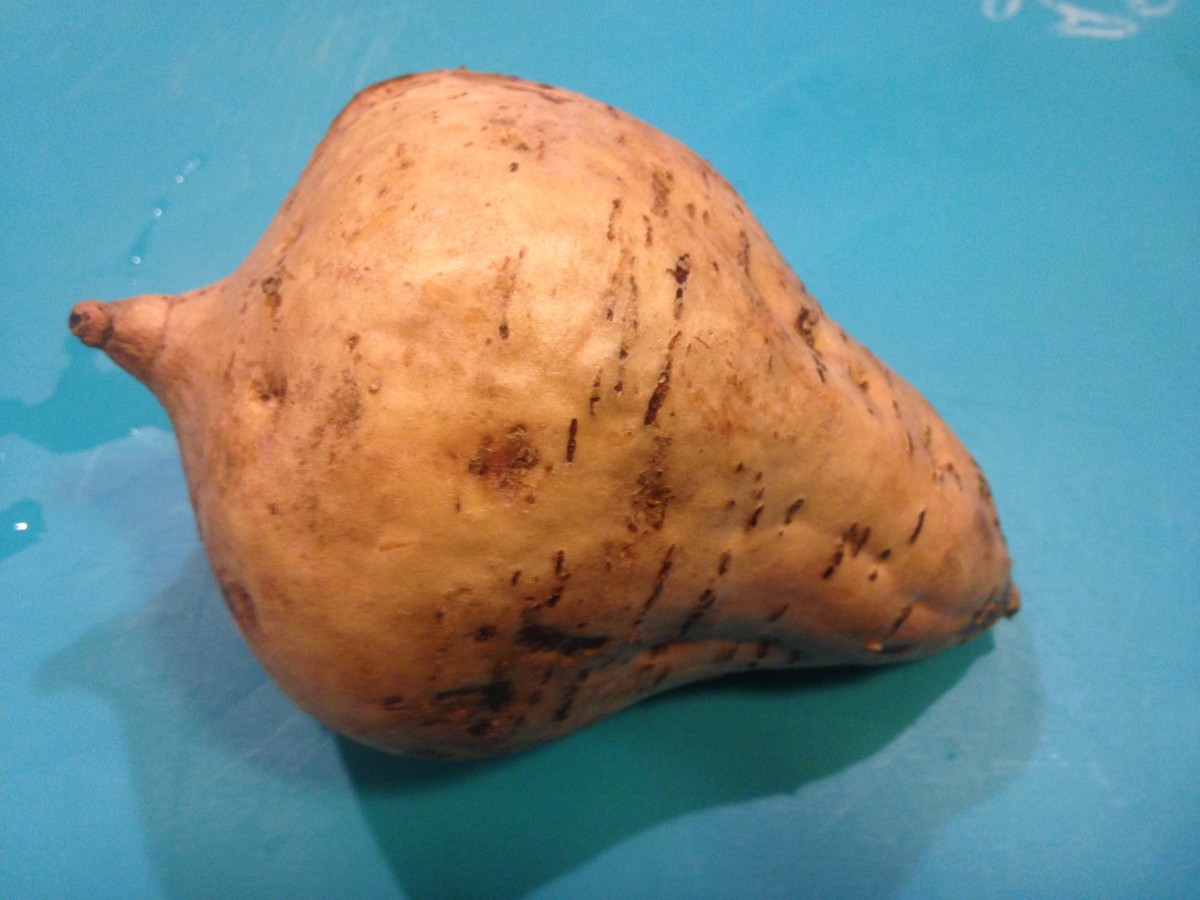
Purple Sweet Potato, uncut
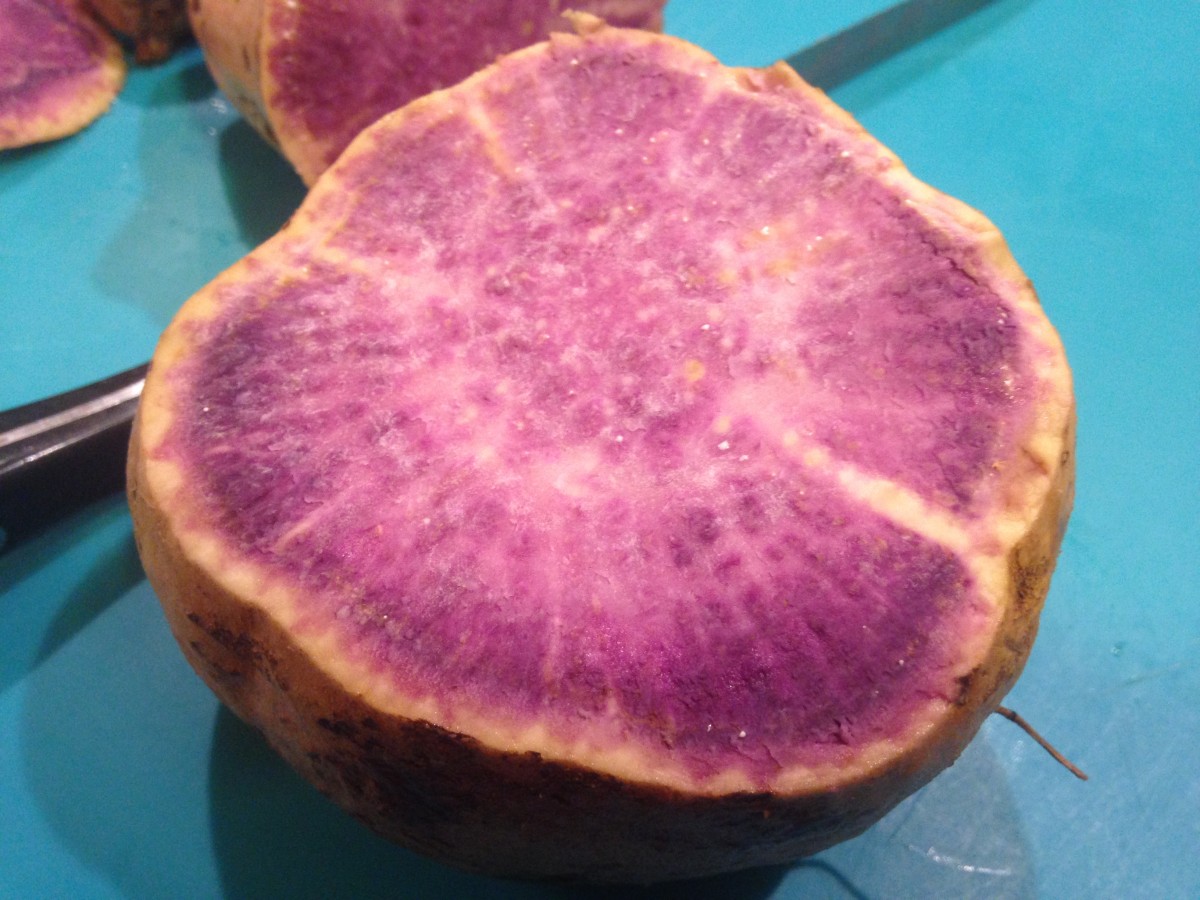
Purple Sweet Potato – inside
Edible Flowers


Violet
When deciding which flowers to plant in your yard- why not plant flowers that are also edible? That way they do double duty. They make your yard look beautiful and they can make your food look beautiful, too.
I cook a lot with flowers. I often add them to salads, infuse vinegars and make jelly with them. You can also use them to decorate cakes or other desserts, in salad dressings and marinades, floating in tropical cocktails, in punch bowls and in ice cubes.
Flowers can also top off dips, cheese, fruit trays and other appetizers, be used to make teas, infused in honey or mixed with soft cheese and spread on crackers or toast.
Add some to baked goods like quick breads, cookies and muffins or in yogurt, cottage cheese or sorbet. Wherever your food needs a little color or flavor, flowers make it special.
Below are 2 lists- one of edible flowers- the other a list of flowers that are poisonous. I would be remiss if I didn’t caution you about flowers that are not edible. Be sure to get a positive identification of any flower before you eat it. Only eat flowers that have been grown pesticide free.
Some Edible Flowers
Calendula, Chives, Daylily, Mint, Nasturtium, Pansy, Rose, Sage, Signet Marigold, Squash Blossoms, Anise Hyssop, Apple, Arugula, Basil, Bee Balm, Borage, Broccoli, Chamomile, Chicory, Chrysanthemum, Coriander, Dandelion, Dianthus, Dill, Elderberry, English Daisy, Evening Primrose, Fennel, Garlic Chives, Hibiscus, Honeysuckle, Hyssop, Jasmine, Johnny-Jump-Up, Lavender, Lemon, Lilac, Linden, Marjoram, Mustard, Nasturtiums, Nodding Onion, Okra, Orange, Oregano, Pea, Pineapple Guava, Pineapple Sage, Radish, Red Clover, Redbud, Rose of Sharon, Roselle, Rosemary, Runner Beans, Sage, Safflower, Scented Geraniums, Shungiku, Society Garlic, Sunflower, Sweet Woodruff, Thyme, Tuberous Begonia, Tulip, Violet, Winter Savory, Yucca
Some Poisonous Flowers
Aconite, Anemone, Anthurium, Atamasco Lily, Autumn Crocus, Azalea, Baneberry, Black Locust, Bloodroot, Boxwood, Burning Bush, Buttercup, Butterfly Weed, Caladium, Call, Carolina Jasmine, Castor Bean, Cherry Laurel, Chinaberry, Christmas Rose, Clematis, Daffodil, Deadly Nightshade, Death Camas, Delphinium, Dogbane, Dumbcane, Elephant Ears, False Hellebore, Four O’clock, Foxglove, Gloriosa Lily, Golden Chain Tree, Goldenseal, Heavenly Bamboo, Henbane, Horse Chestnut, Horse Nettle, Hyacinth, Hyacinth Bean, Hydrangea, Iris, Ivy, Jack-in-the-Pulpit, Jerusalem Cherry, Jessamine, Jetbead, Jimsonweed, Jonquil, Kentucky Coffee Tree, Lantana, Larkspur, Leopard’s Bane, Lily of the Valley, Lobelia, Marsh Marigold, May Apple, Mescal Bean, Mistletoe, Morning Glory, Mountain Laurel, Nightshade, Oleander, Periwinkle, Philodendron, Pittosporum, Poison Hemlock, Potato, Privet, Rhododendron, Rock Poppy, Schefflera, Spring Adonis, Spurge, Star of Bethlehem, Sweet Pea, Tobacco, Trumpet Flower, Water Hemlock, Wild Cherry, Wisteria, Yellow Allamanda, Yellow Oleander, Yesterday, Today and Tomorrow.
Neither of these lists in meant to be complete. Most important of all is to be sure you can identify these plants. If you are unsure plant identifications can be done at your local Extension office, garden center, nursery, arboretum and botanical garden. When in doubt, err on the side of caution. There are more than enough easy to identify flowers out there to enjoy without taking chances.
Chocolate Pecan Cupcakes


Chocolate Pecan Cupcakes
These cupcakes are full of chocolate flavor and the crunch of pecans. Topped with a silky chocolate frosting, they are a treat for any of the chocolate lovers in your life.
I toasted the pecans first, for more crunch. I just placed the pecans on a baking sheet and baked them in a 3oo degree oven for 10-12 minutes. Watch so they don’t burn. Cool before adding to the batter.
You don’t have to toast the nuts, but it adds a wonderful texture and a stronger pecan flavor.
You can also top the cupcakes with a few chopped pecans, if you like.
Chocolate Pecan Cupcakes
4 oz. semisweet chocolate
1 cup butter
1 cup all-purpose flour
1 3/4 cups sugar
4 eggs
1 teaspoon vanilla extract
2 cups chopped pecans, toasted if you like
Preheat oven to 325 degrees. Line 24 muffin cups with paper liners. In the top of a double boiler, combine chocolate and butter. Heat, stirring occasionally, until mixture is melted and smooth. Remove from heat and allow to cool to lukewarm.
Sift flour and sugar together into a large bowl. With mixer on low speed, beat in eggs one at a time. Stir in chocolate mixture, vanilla and pecans. Fill muffin cups 2/3 full. Bake in the preheated oven for 25 minutes. Do not over bake. Tops should be shiny but give slightly when touched. Makes 24.
Chocolate Silk Frosting
4 ½ c. confectioners’ sugar
1 cup butter, softened
3 (1 ounce) squares unsweetened chocolate, melted
1 teaspoon vanilla extract
3 tablespoons milk
In a medium bowl, blend confectioner’s sugar, butter, melted chocolate and vanilla on low speed. Increase speed to high. Gradually add milk; beat until smooth and fluffy.
Spinach and Cheese Breads


Spinach and Cheese Bread
I love these filled breads. They aren’t hard to make, and everyone seems to love them. I had been cleaning out my freezer and came upon some frozen spinach. I also had both feta and mozzarella cheese, so I decided to combine them in these breads. The breads came out great.
Because you can swap out the fillings, you can make them to suit most any taste. I have a list of some other filling ideas at the bottom of this post.
While there are two loaves in the picture, that is because I doubled the recipe. The recipe makes one loaf.
I have made this recipe with plenty of different fillings. This just might be one of my favorites.
Spinach and Cheese Bread
3¼ c. all purpose or bread flour
1 T. sugar
1 t. salt
1 package quick-rising yeast
1 c. hot water
1 T. oil
Filling:
1 (10 oz.) package frozen spinach, thawed and squeezed dry
1½ c. shredded mozzarella cheese
1 c. crumbled feta cheese
2 T. chopped parsley
1 T. lemon juice
2 t. hot sauce, or to suit your taste
1 t. dill weed
Grease a large jelly roll pan and set aside. Place a shallow roasting pan on the stove and fill halfway with water. Start heating the water up. You’ll need it later.
Prepare filling: Take spinach and place in a medium bowl. Combine it with cheeses and remaining filling ingredients. Use your hands and squeeze the ingredients together, partly to mix them up well, but also to get them to stick together a little. Set aside and prepare the dough.
Set aside 1 cup of the flour. Combine remaining flour with the other dry ingredients in a medium bowl. Stir in water and oil and gradually stir in enough flour to make a soft dough. Turn onto lightly floured surface and knead until dough is smooth and elastic, about 5 minutes. Roll dough into a rectangle about 16 x 8 inches in size. Spread spinach mixture down center of dough. Squeeze it a little, sort of in a tube shape. You need to fold the dough over this mixture, so pressing it together helps with the next step. Cut one-inch wide strips of dough from filling to edge on both sides. It will sort of look like fringe. Alternating sides, fold strips up and over the filling at an angle. Pinch the ends. Carefully lift loaf onto greased jelly roll pan and place at an angle, so it will fit. Cover with a towel, and place the jelly roll pan on top of a roasting pan, half-filled with simmering water for 15 minutes. Because quick-rising yeast is more heat tolerant, the simmering water helps the dough to rise faster. After 15 minutes, remove towel and place jelly roll pan in oven. Bake in a preheated 375-degree for 20-25 minutes, or until golden brown. Cool slightly before slicing. Serve warm and refrigerate leftovers.
Bread can be baked ahead of time and reheated, too. Wrap in foil and place in a preheated 350 degree oven for about 25 minutes. Loosen the foil after 10 minutes so the bread does not get soggy.
Note: The variations for this bread are almost endless. Some favorite combinations are ham and Swiss with mustard, roast beef and cheddar, chicken, broccoli and cheese,, pizza, assorted fillings. You get the idea. Use your imagination and have fun. Just be careful not to overfill, or the bread will be hard to move, use fillings that aren’t too runny and always use cold fillings.
If you want to use regular yeast, in place of quick rising yeast, use warm, rather than hot water. Also, don’t let dough rise over boiling water. After kneading cover dough and let rise 45 minutes. Punch down and assemble as in original recipe. Cover with a towel and let rise until dough looks puffy, about 40 minutes. Bake as directed above. These breads can also be frozen.
Sunny Spring Salad

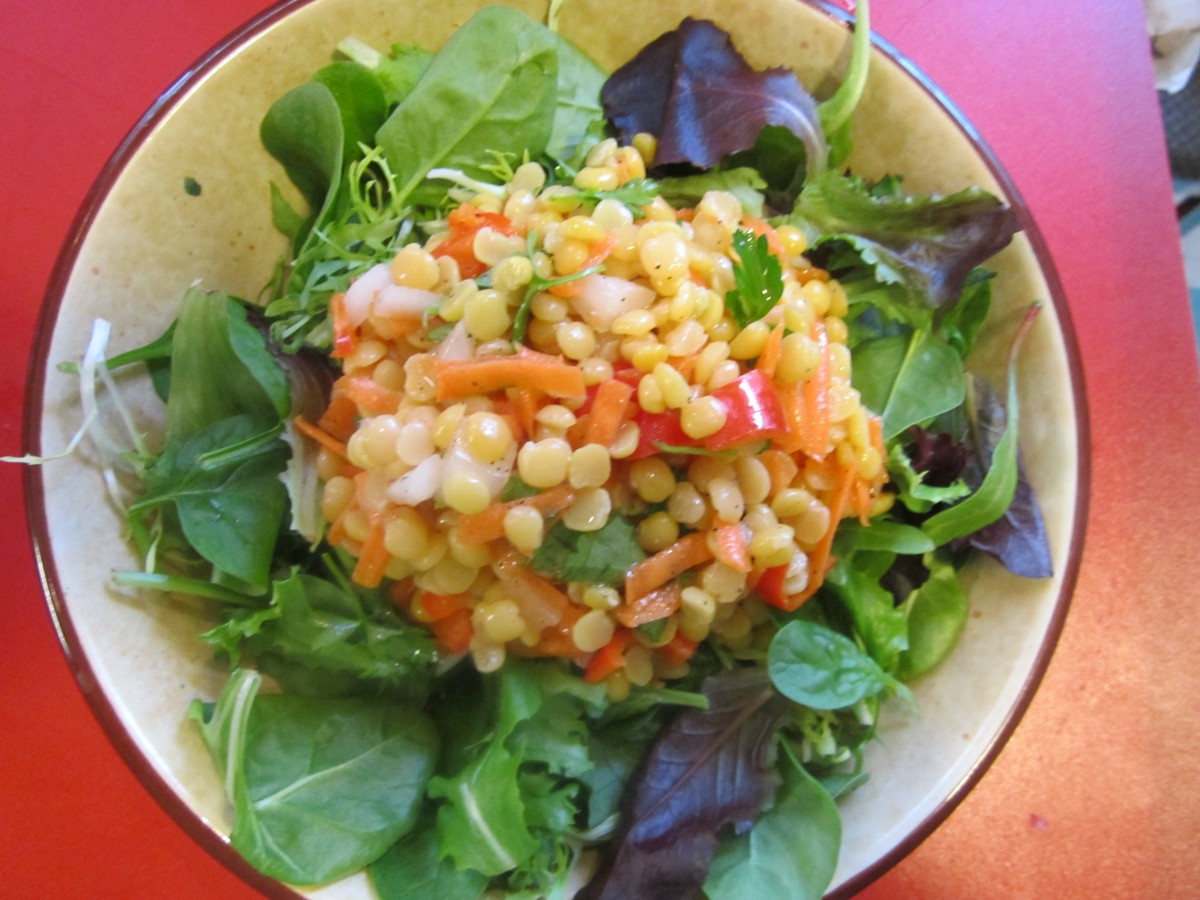
Sunny Spring Salad
Today’s recipe is a tasty vegetarian salad that is as satisfying as it is pretty. The color is bright, just perfect after several days of rainy/snowy/grey weather. If it doesn’t feel like Spring outside, it can feel like Spring inside.
When I say split peas, what comes to mind? Split pea soup? GREEN split pea soup? Years ago my dear friend, Dale Gallis, turned me on to yellow split peas. I started making soup from them, but also use them in salads.
The yellow split peas are combined with carrots, sweet onion, sweet peppers and fresh herbs, then tossed with a simple combination of apple cider vinegar and olive oil. You can serve it right away, or let the flavors blend in the fridge for a bit. I served my salad over a mix of Spring greens.
Yellow (or green) split peas cook to al dente in about 20 minutes, so they are a quick option, too. Much shorter cooking times than other legumes.
Sunny Spring Salad
1- 1 1/2 c. raw yellow split peas
salt
1 carrot, peeled and shredded
1/2 c. chopped sweet onion
1/2 c. chopped sweet pepper
1/2 c. chopped parsley
1/2 c. snipped chives
1/4 c. olive oil
1/4 c. cider vinegar
salt and pepper to taste
6 c. mixed Spring greens
Rinse peas and place in a saucepan. Cover with water and add a little salt. Bring to a boil and simmer until peas are tender, about 20 minutes. Drain and rinse under cold water. Combine peas with carrots, peppers and onion and toss well. Add parsley, chives, oil, vinegar and salt and pepper to taste. Chill until ready to use. Serve on greens. Serves 3-4.
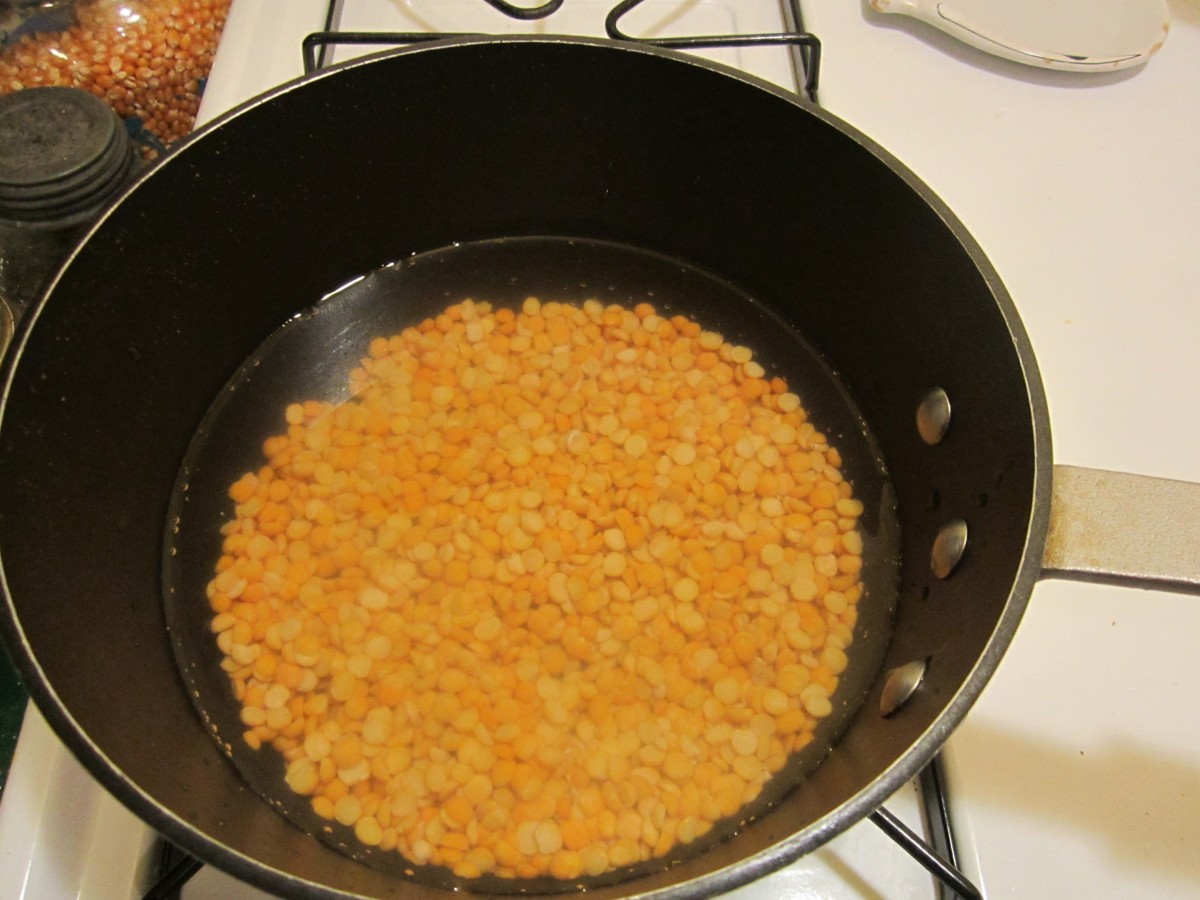
Cook in simmering water until tender

Rinse in cold water after cooking
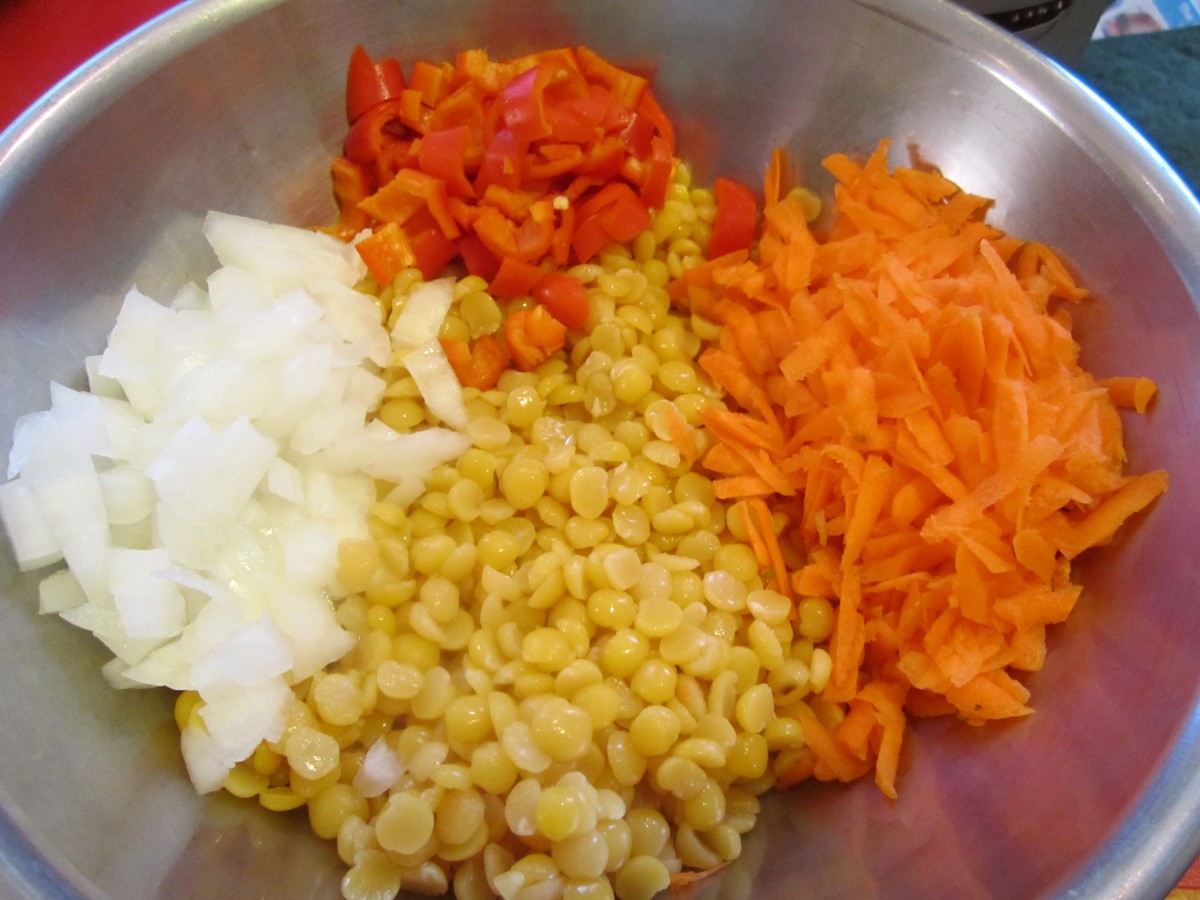
Combine peas with other veggies


