Honey Ginger Glazed Peaches


Honey Ginger Glazed Peaches
I am always looking for new ways to cook with old favorites. Peaches are a great example. When they are in season, I can’t get enough of them.
I have made peach ice cream, peach pie, peach pancakes, peach preserves, peach liqueur….. you get the idea. I wanted to enjoy peaches with our dinner the other night. I decided, rather than just slicing them up and adding them to a salad, I would do a little more to transform them.
So I glazed them, the way you might glaze carrots. So simple. Why had I never thought of it before? The peaches were soft, slightly sweet, and a perfect side dish for the lamb chops.
I kept it pretty simple- peaches, butter, honey, salt and ginger. I could see adding other herbs and spices. Might have to do a little experimenting. For now, here is the recipe for glazed peaches. I did not have any leftovers, so a hit, for sure. I did not peel my peaches, but feel free to, if you like.
Honey Ginger Glazed Peaches
4 medium peaches, pitted and sliced thin
2 T. butter
4 T. honey
1/2 t. fresh grated ginger
pinch of salt
Place peach slices in a small skillet. Add butter and remaining ingredients. Cook over medium heat until peaches start to get tender. reduce heat to low and continue cooking a few more minutes. Peaches should be soft and sauce thickened. Adjust seasonings.
Strawberry Shortcakes


Strawberry Shortcakes
With strawberry season in full swing, I thought I would share another favorite strawberry recipe. These little shortcakes are as cute as they are tasty. You can have all the components ready, then just assemble when ready to serve.
When I made these for a dinner with friends, one of my friends said they looked like sliders and the name stuck. I made the shortcake base with a scone recipe, and used an ice cream scoop to put the batter on the baking sheet. They ended up looking like little sandwich buns. Split and filled with sweetened strawberries, I replaced the top and added chocolate ganache and whipping cream to finish them off. They were a big hit. The scone was tender and not too sweet. Satisfying and light at the same time.
Strawberry Shortcake “Sliders”
The shortcakes
2 c. flour
1/4 c. sugar
½ t. salt
1 T. baking powder
1 1/4 c. heavy cream or 1 cup half and half
Preheat oven to 425 degrees. Sift together dry ingredients and gradually add cream to form soft dough. Stir mixture until it just holds together. Using an ice cream scoop place batter on baking sheet a couple of inches apart. You should get about a dozen. Bake 10-12 minutes or until golden. Makes about 12. Cool on rack until ready to use.
The berries
2 lbs. strawberries, sliced thin
1/2 c. sugar, or to taste
Combine berries and sugar in medium bowl and place in fridge until ready to use. Berries should be in the sugar for at least a couple of hours and can even be prepped a day ahead to allow the juices to come out of the berries.
The ganache
1 c. semi sweet chocolate chips or 6 oz. semi sweet chocolate, chopped
1/2 c. heavy whipping cream.
Combine both in double boiler or in microwave and heat until mixture is just warm enough to melt the chocolate. Stir until smooth.
The whipped cream – use whipped cream, sweetened or unsweetened according to your taste.
Assembly: Slice the caps off the tops of the shortcakes. Place a generous spoonful of the sliced berries on the bottoms of the shortcakes and spoon some of the strawberry liquid over them as well. Place the tops of the shortcakes back on and spoon on a dollop of the chocolate ganache. I let me get to room temperature so it didn’t drip down exactly as I had planned. Top with some whipped cream and serve. Makes about 12.
Strawberry Lemonade


Strawberry Lemonade
I love this “pink” lemonade. The lovely blush comes from strawberries, not artificial color. The strawberries add more than just color- they add their wonderful flavor as well.
This is a great drink for hot summer days. Heck, I think its a good drink anytime. You don’t have limit yourself to lemonade. I have also made a pink limeade which is also very tasty.
The strawberry seeds will settle to the bottom of the pitcher- so be careful when pouring out the last bit of lemonade. No one wants a mouth full of seeds.
Here is the recipe. I have also included some helpful information when buying strawberries.
Strawberry Lemonade
7 c. water
1¼ c. sugar
1¼ c. lemon juice
2-3 c. fresh strawberries, washed and stemmed
In a pitcher, combine water with sugar and lemon juice and stir until sugar dissolves. Place berries in blender and add about 2 cups of the lemonade. Process until strawberries are pureed. Add strawberry mixture to the remaining lemonade. Chill before serving. Serve over ice, garnishing with whole berries, if desired. Watch as seeds will accumulate on the bottom of the pitcher.
Shopping Tip
When berries are priced by weight or volume it is not always easy to decide which is the best price. If one store has quarts for $2 and another had berries for $2 per pound where would you get the better deal? Also, if a recipes calls for 4 cups sliced berries how many do you need to buy? Here are some approximate guidelines.
3/4 lb. = 1 full pint
1 1/2 lbs. = 1 full quart
1 1/2 lbs. = 4 cups sliced
1 lb. frozen = 1 1/3 c. whole berries
To help your berries last longer soak them in a water/vinegar solution for a few minutes as soon as you get them home. Then just drain and put in the fridge. This will keep them from getting mold as quickly. I use 1/2 cup of vinegar and 4 cups of water.
Hazelnut Biscotti

Hazelnut Biscotti
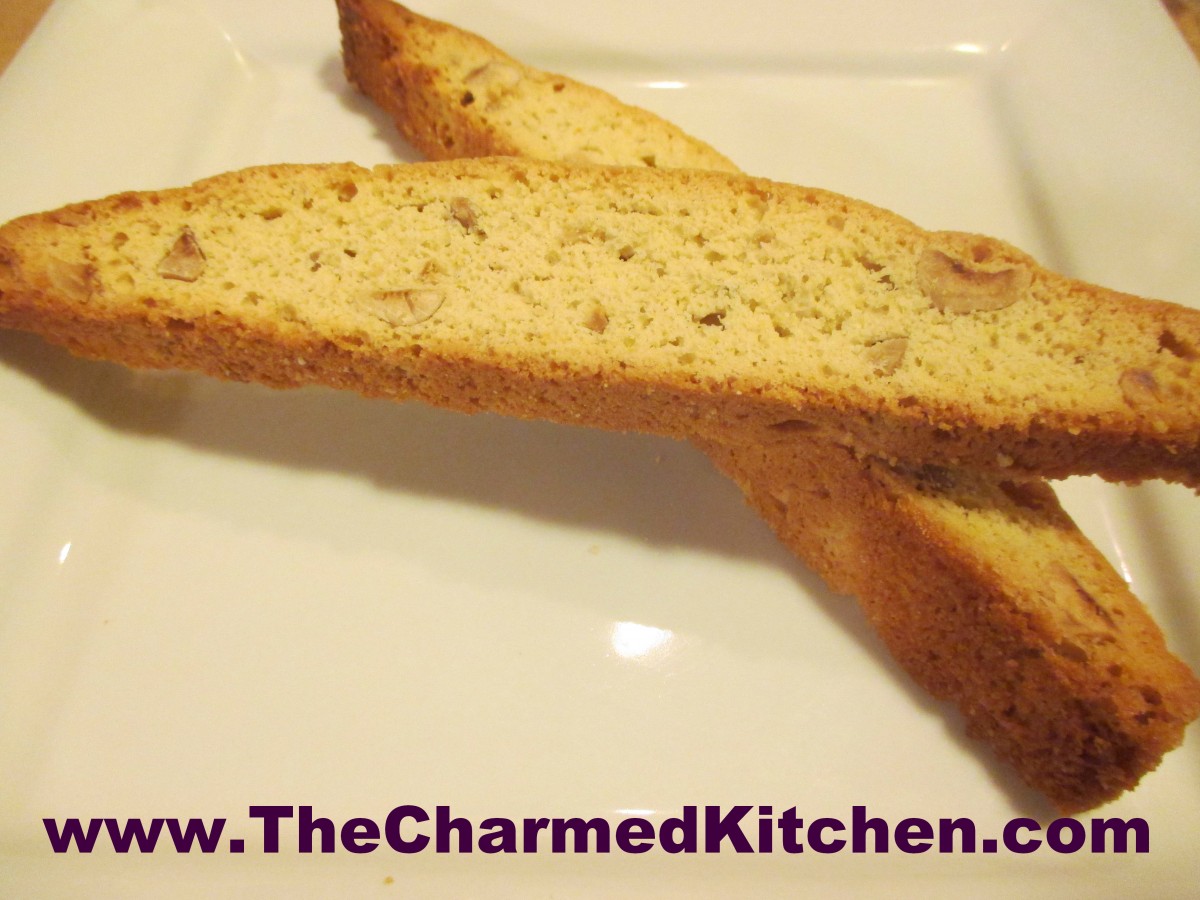
These biscotti are the perfect treat to have with your morning cup of coffee or tea. Crisp, but not too hard, they are studded with crunchy hazelnuts and flavored with vanilla and orange peel. I like them just the way they are, but you could dress them up with a drizzle of powdered sugar glaze. You can also dip one end of each biscotti in melted chocolate.
I don’t know why more people don’t make their own biscotti. They are so easy to make, and you can flavor them to suit your own taste. Once baked, store them in an air tight container, and they stay crisp for weeks. Assuming you don’t eat them first!
Biscotti get their distinctive, extra crunchy texture, from being baked not once, but twice. The batter is spread on a cookie sheet and baked until firm. Once cooled and little, the loaf is sliced and the slices are returned to the oven to get baked until crisp and toasted. I put the slices on a cooling rack, placed on the baking sheet, before the second bake. That way, the biscotti toast on both sides evenly.
So here is the recipe. I hope if you haven’t made biscotti before, you give them a try.
Hazelnut Biscotti
3 c. flour
2 t. baking powder
1/2 t. salt
3 eggs
1 c sugar
1/4 c. butter, melted
1/4 c. olive oil
1 1/2 t. vanilla
1 t. grated orange peel
1 c. hazelnuts, toasted, peeled and chopped
Combine dry ingredients and set aside. Mix together eggs, sugar, butter, oil, vanilla and peel. Beat until smooth and stir in flour mixture and nuts. Grease a large baking sheet, oil your hands, and place dough on sheet, forming into a 16×4-inch log. Bake at 325-degrees until tester inserted in center comes out clean, about 30 minutes. Loaf with spread a bit. Cool 15 minutes and leave oven on. Use serrated knife to cut into 1/2 -inch thick slices. Place cooling rack on a baking sheet. Place slices, cut side down, on cooling rack and return to oven for 20-22 minutes. Cool. Makes about 24.
Hidden Treasure Strawberry Pie


Hidden Treasure Strawberry Pie
This pie has it all. Fresh strawberries, glazed and sitting on a flaky crust. But it doesn’t stop there. The crust is topped with chocolate and a layer of sweetened cream cheese. The chocolate and cheese are under the berries. They provide a wonderful surprise when eating the pie. The chocolate is such a natural match for the strawberries. The cream cheese gives a little “cheesecake” feel. In the end, the combination works perfectly together.
During strawberry season, I enjoy so many different dishes made with fresh berries. Fresh strawberry pie is always going to be a favorite. I try to make different versions and this one was definitely a version I will make again.
Hidden Treasure Strawberry Pie
1 9-inch pie crust * recipe follows
1 c. chocolate chips
1 T. butter
1 qt. strawberries (1¼ lbs.), hulled
1 c. sugar
2 T. cornstarch
¼ c. water
1 T. butter
8 oz. cream cheese, softened
½ c. powdered sugar
Whipped cream, optional
Using a pie pan, roll out your crust and fit it into the pan- trim off any excess. Pre-bake your crust. To do this: The prepared pie crust should be pricked all over with a fork. Cover the surface with foil and then pie weights. I use dry beans for my pie weights. Pre-heat oven to 400-degrees. Bake crust for 15-20 minutes. Check to be sure it doesn’t get too brown. Remove weights and foil. Melt chocolate chips and butter together, stirring until smooth. Pour over crust and use a spatula to spread into a thin layer on the bottom and, if you like, up the sides of the crust. Set aside and allow crust to cool and chocolate to set up. Select about 25-30 berries to be placed in pie crust, large side down, and set aside. You might need fewer berries, if they are really big. Puree or crush remaining berries. Place in a saucepan with the sugar and bring to a boil. Combine cornstarch with water and stir until smooth. Add to the strawberry mixture and cook, stirring constantly until mixture thickens and gets clear. Simmer about 5 minutes. Remove from heat and stir in butter. Set aside. Place cream cheese in a bowl and beat in the powdered sugar. Spread cheese over the chocolate layer. Arrange the reserved berries on the cheese layer, pointy side up. Put the largest berry in the middle and arrange the rest around it decoratively. Spoon the puree over the berries and allow the pie to cool down a little before putting in the fridge. Serve with whipped cream, if desired.
Note: other berries can also be used including raspberries, blackberries and blueberries, or a combination. This recipe can also be used as a filling for tarts and tartlets.
Half and Half Dough*
This is a great crust for liquid fillings like custard type pies and fresh fruit pies.
¼ c. butter, room temp
½ c. shortening, room temp- you can use lard instead
¼ c. sugar
½ t. salt
2½ c. pastry or all purpose flour
1/8 t. baking powder
¼ c. milk
1 t. lemon juice
Cream together the first 4 ingredients until smooth. Mix together the flour and baking powder. Set aside. Combine milk with the juice and set aside. Stir ½ c. of the flour into butter mixture. Stir until smooth. Add a little of the milk, stirring until smooth. Add remaining ingredients alternately until finished. Dough will firm up once chilled. Chill at least 4 hours before using. Makes 2 crusts. You only need half the dough for the strawberry pie.
Ham and Asparagus Quiche


Ham and Asparagus Quiche
I had some fresh asparagus and wanted to make something special with it for dinner. I decided to make a quiche. I had just baked a strawberry pie- and had an extra crust. I also had some ham, so combining the two ingredients in a quiche seemed like a good idea. It was a very good decision.
Quiches are so versatile. You can fill them with almost any ingredients. They can also be served for breakfast, brunch, lunch or dinner. You can also bake it right away, or freeze it for later. I often make two quiches, just so I can freeze one for later use.
The mix of ham, asparagus and Havarti cheese worked well together. You could use any number of cheeses that you like. Swiss would be nice, Gruyere or even a sharp cheddar.
I use a homemade crust, but you can use a store bought crust, if you prefer.
Ham and Asparagus Quiche
1 (9-inch) unbaked pie crust
1½ c. shredded cheese – I used Havarti
4 t. flour
1½ c. diced cooked ham or turkey ham
12 oz. asparagus, trimmed, cut in ½- inch pieces and steamed 3 minutes
4 eggs
1 c. milk or half and half
2 T. fresh chopped parsley or 2 teaspoons dried
¼ t. salt
1T. Dijon mustard
1 t. hot sauce
Toss cheese with flour in a bowl and place in pie crust. Sprinkle the ham and asparagus over the cheese and set aside. Combine remaining ingredients in a small bowl beating well to combine. Pour over the ham and asparagus mixture and bake in a preheated 400-degree oven for 15 minutes. Turn down heat to 350-degrees and bake until knife inserted off-center comes out clean, about 30 minutes more. Makes 1.
Note: This quiche freezes well. After adding the fillings just wrap in heavy foil and freeze solid until ready to bake. When ready to bake unwrap and allow to sit at room temperature for 30-60 minutes. Bake as with the fresh version, but add another 10-15 minutes to the baking time. If you don’t want to freeze the pie pan, you can line the pie pan with foil before you add the crust. Once it is frozen you can remove the frozen quiche from the pie pan and wrap, returning to freezer. When ready to use unwrap and put the quiche back in the pie pan before baking.
You can also use a foil pie pan.
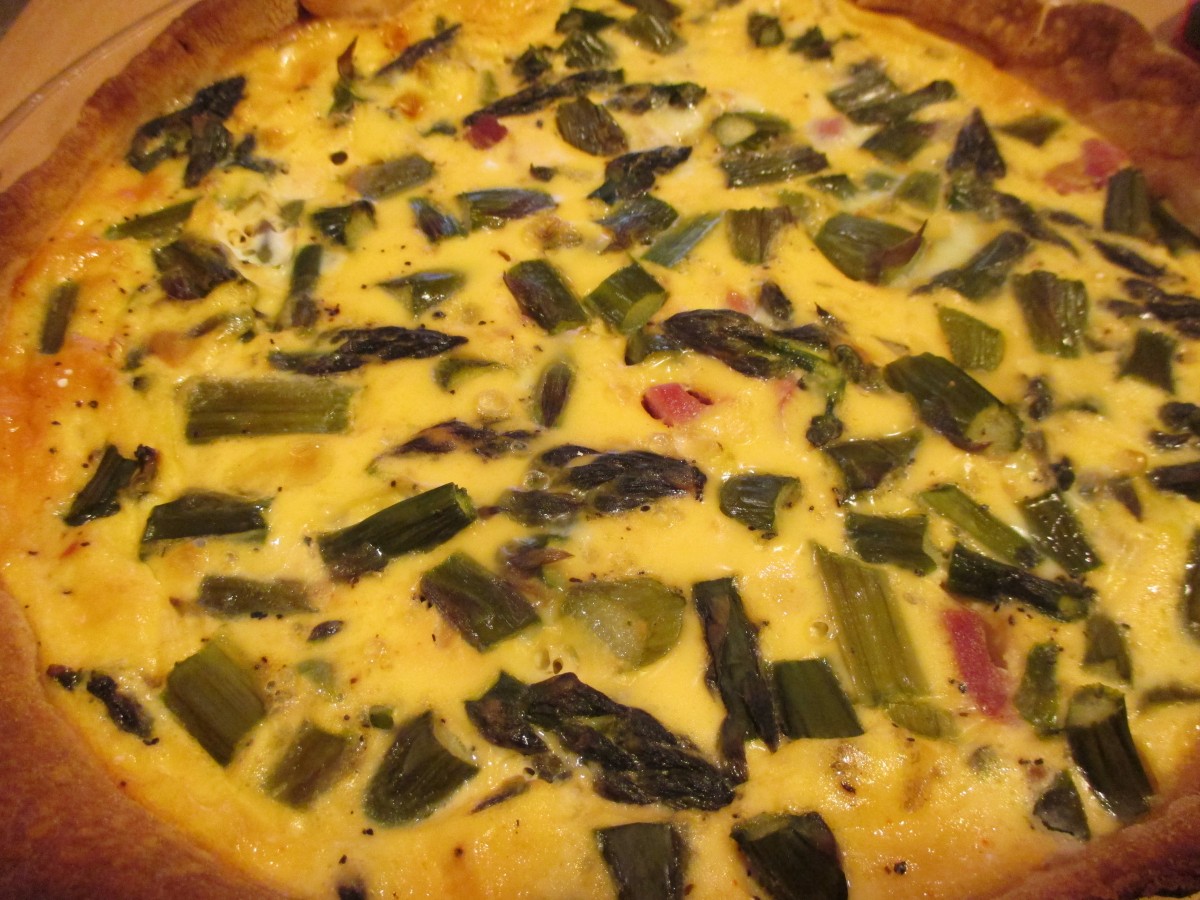
Fresh from the oven
Strawberry Vanilla Jam

Strawberry Vanilla Jam
Once you taste homemade jam, you will understand why it is worth the effort to make your own. Homemade jams, preserves and jellies are a great way to save seasonal fruits to enjoy all year. They also make nice gifts.
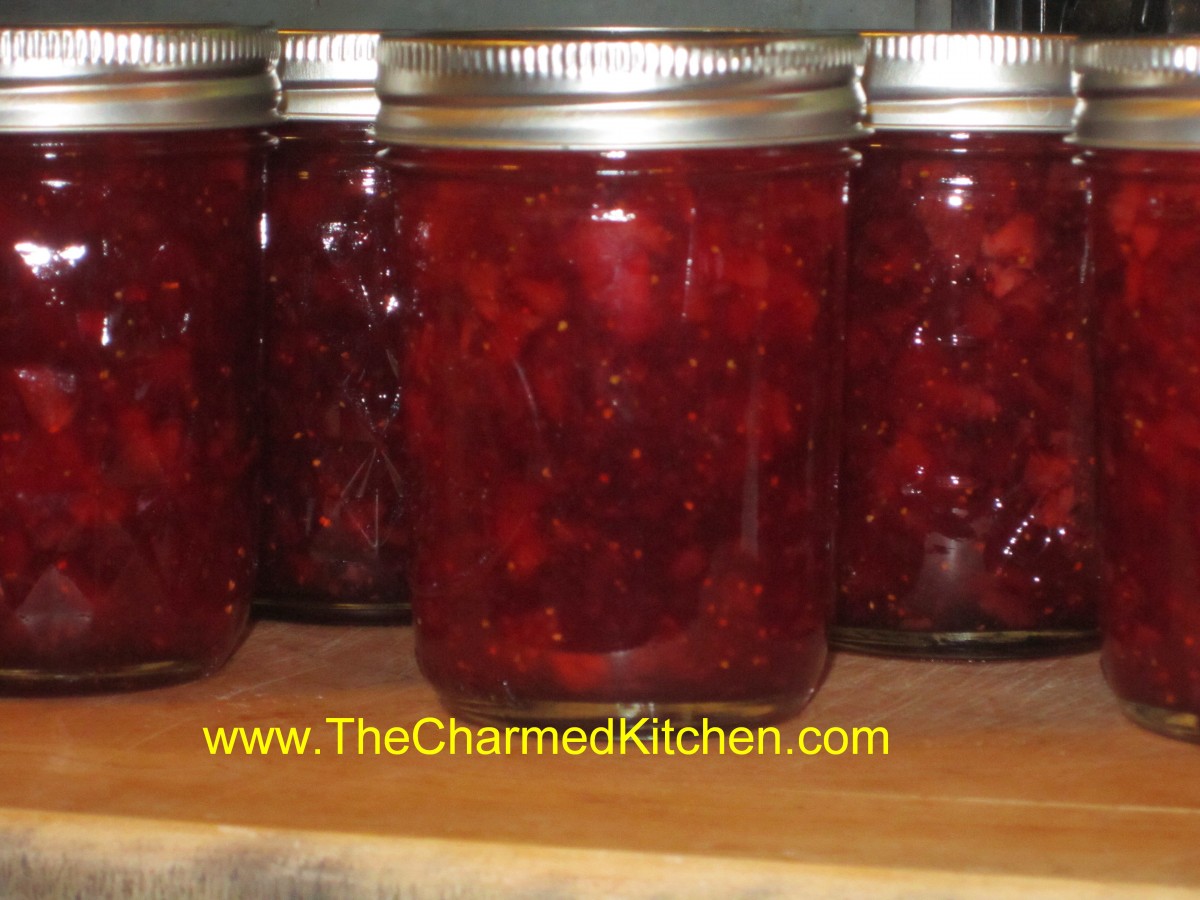
One of my favorite homemade jams is strawberry. I like the addition of some vanilla to my strawberry jam. I think it adds an additional layer of flavor, without covering up the natural beauty of the berries.
I try to make enough to last all year, but I end up running out quickly. This jam is great on toast, but also a nice addition to several desserts I make.
With local berries in season now, it is a perfect time to make a batch, or two.
In grocery stores, berries are often sold in one pound packages, not in quarts. A quart of strawberries should weigh 1 1/4 pounds. That should help you figure out how many berries you will need.
Here is the recipe.
Strawberry-Vanilla Jam
2 qts. strawberries, stemmed, washed and crushed
2 T. pure vanilla
1 package dry pectin
1/4 c. lemon juice
7 cups sugar
Combine berries, vanilla, pectin and lemon juice in large saucepan and bring to a boil over medium heat, stirring often. Add sugar and turn heat up to high. Stir often until mixture comes to a boil. Boil hard one minute stirring constantly. Ladle hot jam in to jars leaving 1/4 inch headspace. Wipe rims and screw on lids comfortably tight. Place in boiling water bath and process 5 minutes. Remove to cooling rack, towel or wooden surface to cool. Makes 8-9 half pints.
Fresh Broccoli Soup


Fresh Broccoli Soup
I admit to loving broccoli. I could eat it every day. Still, I get a little tired of just steamed broccoli. When I want to change things up, I will often make a broccoli stir fry or a salad.
This time, I decided to make a broccoli soup. I kept it simple, just adding a few fresh herbs from the garden, in addition to the other ingredients. It tasted wonderful and made a great light dinner. The leftovers actually made a nice breakfast, too.
This is a nice soup for this time of year. It can be eaten hot, cold or somewhere in between.
I made sure not to cook the broccoli too long, so it stayed a nice, bright green color. As soon as it was tender, I took it off the heat and finished prepping it. I topped it with shrimp and a little hot sauce. You can add whatever toppers you prefer- or leave it plain.
Fresh Broccoli Soup
1 qt. stock- chicken or veggie
2 medium onions, peeled and chopped
4-5 cups chopped fresh broccoli
1 T. parsley
1 T. lovage leaves- or celery leaves
2 t. mint leaves
1 c. half and half- or a bit more
Salt and pepper to taste
Cooked shrimp, optional
Sriracha sauce, or any hot sauce you like
In soup pot, heat stock and add onions, cooking until onions are very tender, about 15 minutes. Some of the stock will cook off, concentrating the flavor. Add the broccoli and herbs and cover, simmering until broccoli is just tender, about 5-7 minutes. Puree mixture, adding enough half and half to get the thickness you like. Adjust seasonings. Soup can be served hot or cold. Ladle into bowls and top with shrimp, if you like, and a few drops of hot sauce. Serves 4.
Strawberry Liqueur


Strawberry Liqueur
With strawberries coming into season, this is the time of year to enjoy them. I have been eating strawberries in breakfasts, desserts and salads. I will be making strawberry jam and freezing berries, too.
Another way to preserve strawberries, is by making a liqueur with them. It is pretty simple. Just combine berries with vodka and a small amount of powdered sugar. I use half gallon canning jars for this, but you could use any food safe container with a tight fitting lid. Let the mixture steep long enough for the berries to infuse the alcohol with their flavor. You can sweeten it later on, or even leave it unsweetened, if you prefer. I like to sip the liqueur as is, or serve on the rocks with a splash of club soda.
Strawberry Liqueur
3 cups fresh strawberries, sliced
3 T. powdered sugar
3 c. vodka
1 c. simple syrup*
Sprinkle powdered sugar over berries and let dissolve. Pour over vodka and let steep 2 weeks. Crush berries and strain then filter. Add sugar syrup and mature 1 week. Makes 5 cups.
*Simple syrup is made from 1 cup of sugar and ½ cup of water. Bring to a boil, then cool. You will have 1 cup of syrup. You can sweeten your liqueur with honey, if you prefer. Watch when you substitute honey for sugar, as it is sweeter and stronger flavored. Better to use orange or clover honey. Add to suit your taste.
Strawberry Filled Chocolate Crepes


Chocolate Crepes with Strawberries
Since strawberries are in season, I feel the need to share as many strawberry recipes this week as I can. This is one of my favorites. The chocolate crepes pair so nicely with the fresh berries.
If you haven’t made crepes, this might be just the reason to start. I often make a double batch of the crepes, then freeze some, between layers of wax paper. That way I can have crepes whenever I want.
Truth is, you can fill these crepes with all sorts of stuff. I had fresh berries, so that is what I used. I added some Kahlua to the batter for a little extra flavor and it worked out just great.
Here is the recipe.
Chocolate Crepes
1 c. flour
4 eggs
1 1/2 c. milk
¼ c. cocoa
3 T. sugar
¼ c. Kahlua or other coffee flavored liqueur or ¼ c. strong coffee
1/4 c. butter, melted and cooled
Mix all ingredients in blender (except butter) until smooth, scraping sides often. Add butter and blend well. Let stand for 30 minutes before using, or batter can be refrigerated, covered, overnight. Beat again, just before using.
Heat 6 or 7 inch skillet. Brush with butter or oil and pour in about 1 tablespoon of batter, tipping pan to cover bottom of pan completely with batter. Cook until edges start to brown, turn over and cook until lightly browned (about 2 minutes per side.)
Crepes can be made day ahead or even frozen between sheets of waxed paper and frozen. Makes 18.
Strawberry filling: I just sliced a couple of pounds of berries and added a little sugar- about ½ cup- a tablespoon of vanilla and a healthy dash of cinnamon.
When filling the crepes I spooned some berries down the center of the crepe and added some whipped cream. Folded over, topped with a few berries and another bit of whipped cream.


