Homemade Fruit Soda

Homemade Fruit Sodas
I drink a lot of water. Truth is, most days I am perfectly content to just drink water. But I get that most people aren’t like that.
When friends stop over, I want to offer them something more than just ice water. Alternatives might include fruit juice or soda pop. I sort of combined the two into a fruity, fizzy drink that is fun to drink.
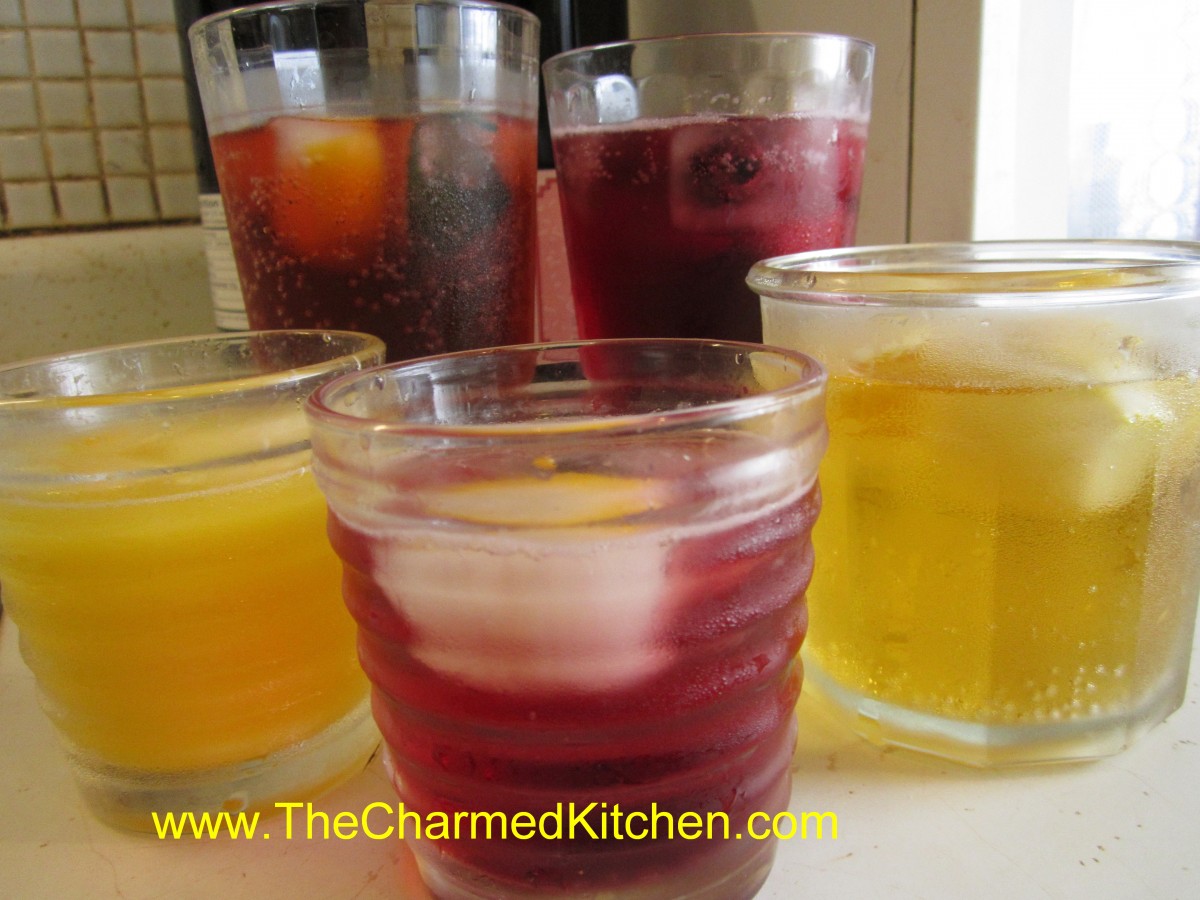
When it’s hot- and even when it’s not- cold, fizzy drinks are fun to drink. No special equipment is required to make these, and they are better for you than commercial soda pop. I use 2 ingredients- club soda and either concentrated fruit juice or fruit syrups. In every grocery store you can find juice concentrates in the freezer section. Just place a spoonful of the concentrated juice in your glass- add club soda and stir gently to mix. Add ice and serve. Ready when you want it.
One benefit is that you can control how much juice to add. Make it more, or less sweet, to suit your taste. Sometimes I add just a little, so it is more like infused water than soda. If you like it sweeter, fine.
You can also use fruit syrups- sold in lots of grocery stores and beverage stores. Read the label. The ones I buy have 2 ingredients- fruit juice- which is listed first and sugar which is listed second. That’s it. No high fructose corn syrup or a bunch of artificial ingredients and most of what is in the bottle is juice.
I’ve make “soda” from frozen concentrated grape juice, orange juice, apple juice and pineapple juice. I’ve used fruit syrups made from blueberries, sour cherries, strawberries and blackberries. You can use them individually or do combos. They are fun for kids to make, too.
Dress them up with fancy ice cubes. I add small pieces of fruit or mint leaves to ice cube trays and then fill with water and freeze. Also nice when guests stop over.
Is this stuff better for you than water? I suppose not. But sometimes we all want something more than plain water. For me, this is a nice option- fizzy fruit juice.
Honey Ginger Mango Sorbet


Honey Ginger Mango Sorbet
Sorbet is a great dessert for warm weather. When I saw Champagne mangoes on sale the other day, I knew I wanted to turn them into sorbet. I also picked up a fresh piece of ginger root, and decided to add some to the sorbet, along with some honey for extra sweetness. The flavors worked great together.
The secret to a creamy sorbet is pureeing the mixture twice. Once with the fresh fruit, then again once the mixture has frozen. Once pureed the second time, you can put your sorbet back in the freezer until ready to serve. It is a nice dessert to have on hand.
Sorbet can be served on its own, with cookies, cake or fresh fruit. You can also add a scoop of sorbet to your favorite Summer cocktail.
I like to keep several different sorbets on hand, so my guests can mix and match. Making a fresh fruit sorbet is also a way of saving seasonal fruits for use throughout the year.
Here is the recipe for the mango sorbet. You might want to add a little more, or less, honey to suit your own taste.
Honey Ginger Mango Sorbet
6 ripe mangoes
½ c. honey
1 T. fresh grated ginger
Remove peel and pits from mangoes. Puree the mangoes and add the honey and ginger. Freeze. After the mixture is frozen, place mango puree in a food processor and mix again until creamy. Serve, or place back in freezer until ready to serve. Makes about 1 quart.
Black Forest Mini Cheesecakes

Black Forest Mini Cheesecakes
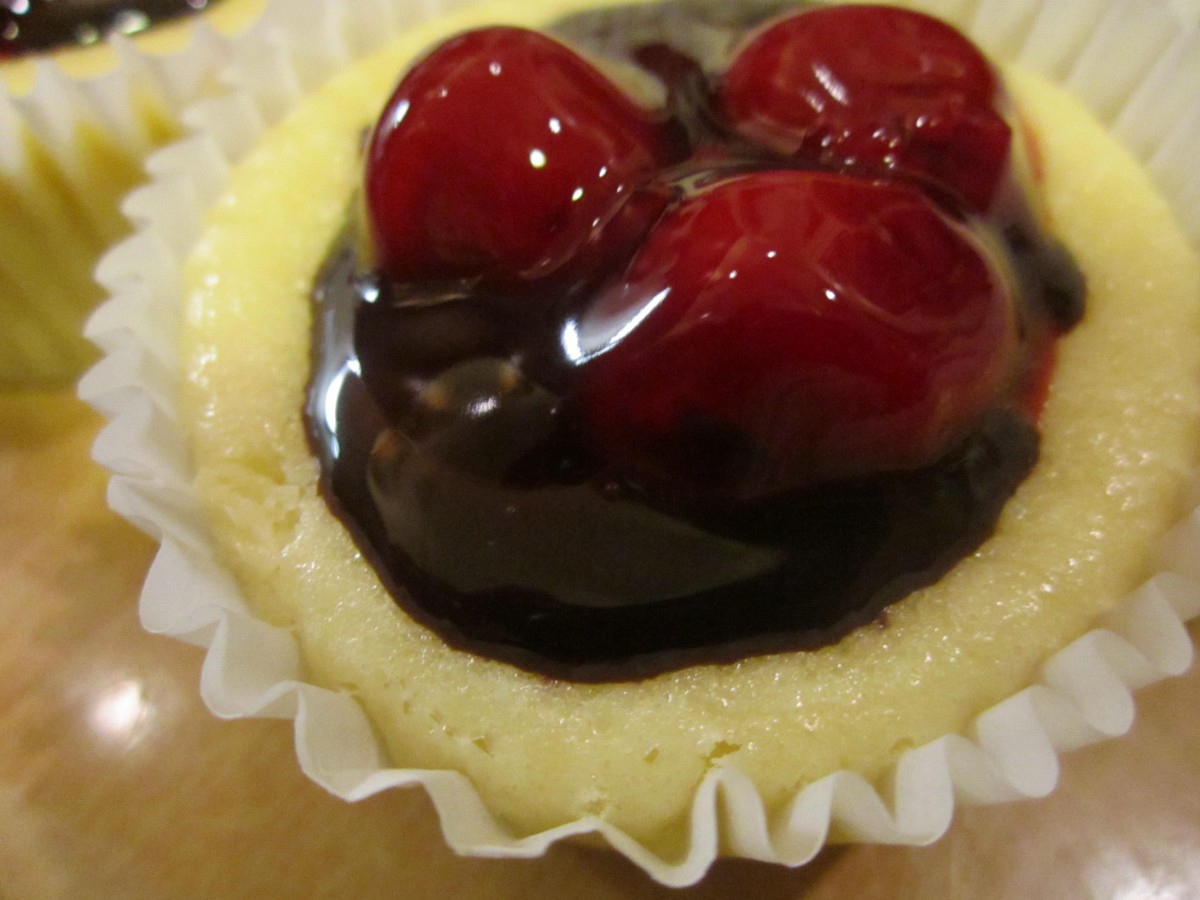
I love when things just fall into place. I had some cherry pie filling left over from making Danish. I wanted to use it up. I also needed a dessert for dinner with a friend. These little cheesecakes worked out as the perfect dessert for us.
To start with, it’s cheesecake, which is always a good thing. It is also a really quick recipe, and simple to make. Finally, the recipe just makes 6 little cheesecakes. Perfect for when you don’t need a whole cheesecake. Nothing stopping you from doubling, or tripling the recipe, if you need a few more. I used cherry pie filling (homemade), but you could top these with almost any pie filling or fresh fruit you liked, or even eat them plain.
Black Forest Mini Cheesecakes
6 vanilla wafers
8 oz. cream cheese, softened
1/3 c. sugar
1 t. vanilla
1 egg
chocolate syrup or sauce
cherry pie filling
Preheat oven to 350 degrees. Place paper liners in 6 muffin tins and place a vanilla wafer in each one. Set aside. In medium mixing bowl beat together cream cheese, sugar and vanilla until smooth. Beat in egg until just mixed. Spoon batter into prepared muffin tins. Bake for 15- 20 minutes. Cheesecakes will puff up and then deflates a little when cooled. Once cooled top each cheesecake with a little chocolate syrup and a spoonful of cherry pie filling. Chill. Makes 6. Serves 2-3.
Orange Oatmeal Scones

Orange Oatmeal Scone
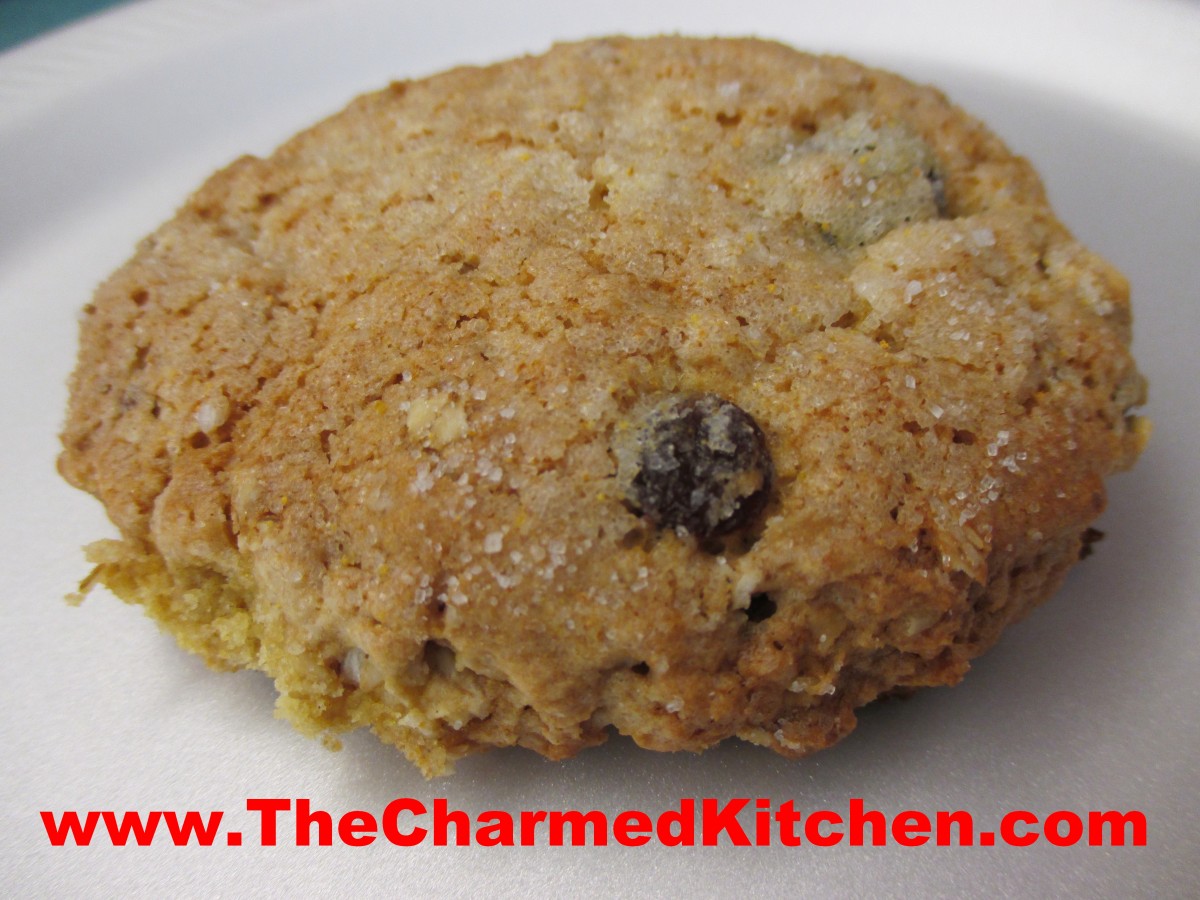
I just love fresh scones, still warm from the oven. These scones have a nice, crunchy outside and crumbly, tender middle. The orange juice and orange zest gives them a wonderful flavor. The oatmeal gives them a lovely texture and the raisins add just a bit if sweetness.
These are great served warm, topped with sweet butter and jam. They are perfect for breakfast or brunch.
You can also use these scones as the base for a berry shortcake. Split, topped with sweetened berries and some whipped cream, they turn into a simple and tasty dessert.
Orange Oatmeal Scones
2 1/2 cups flour
2 cups rolled oats
1 cup sugar
1 teaspoon salt
1 tablespoon baking powder
1/2 teaspoon baking soda
1/2 cup very cold, unsalted butter – cut into chunks
1 egg
1/2 cup orange juice
2 t. grated orange peel
1 cup raisins – plumped and well dried
Glaze
milk, sugar, orange zest
Line a large baking sheet with parchment paper (double two sheets if you have them – one inside the other). Preheat oven to 425 F. In a large bowl, place flour, oatmeal, sugar, salt, baking powder, baking soda and mix together. Cut or rub in butter to make a mealy mixture. Stir in egg and orange juice. Add orange peel and raisins. Mix to make a soft dough. Turn out onto a lightly floured board and knead for a few minutes. Roll or pat out into a thickness of 1/2 inch. Using a serrated cookie cutter cut into disks or rounds. Brush with milk and sprinkle with sugar and orange zest. Bake until nicely browned – about 14 minutes. Makes about 24.
Phyllo Chocolate Fans


Phyllo Chocolate Fan Cookies
For a recent memorial for a friend, I was asked to make these cookies. They are a “fan” of everyone who tries them. If you want a cookie that is really going to impress, make these Chocolate Fans. They are crisp, not too sweet, and tipped with chocolate and fine chopped nuts.
While they look difficult to make, they are actually quite easy. For starters, you don’t have to make dough. These are made with phyllo dough. Phyllo is found in the freezer section at the grocery store. Phyllo dough (also spelled filo) can be a little fussy. Be sure to keep extra dough covered with a damp towel so it won’t dry out and get brittle.
It is best to work quickly when making these. I made these dipped in finely chopped toasted walnuts. Other nuts could be used. You could also use white chocolate, if you prefer. .
Phyllo Chocolate Fan Cookies
1 lb. phyllo dough, thawed*
1 c. butter, melted
12-oz. chocolate chips
2 T. shortening- you can use coconut oil instead
1 c. finely chopped nuts or coconut, pistachios are extra nice
Remove phyllo from box, still rolled up and cut crosswise into 5-6 equal pieces. Keep unused dough covered in a damp towel to prevent drying out. Take one piece of dough and open it up, cutting it in half crosswise. Take 1 sheet and brush with butter. Place another sheet on top and brush again with butter. Place third piece of dough on top and butter again. Starting at short end begin to fold the dough in ¾ inch folds, accordion style. Pinch together at one end and fan out the dough at the other. It should look like a little fan. Place on ungreased baking sheet and repeat with remaining dough. Bake at 375 degrees for 5 minutes. Cool. Melt chocolate and shortening together in microwave or on top of double boiler. Stir to smooth. Dip tip of wide end of fans in melted chocolate and then in the nuts or coconut. Place on a rack to cool and harden. Makes about 65 fans. Can be frozen.
*I buy frozen phyllo dough but be sure to get the right one. Around here there are 2 different sizes. You’ll need the long box- where the dough is 15 inches long.
These are for you, Amy, with love.
Remembering Amy

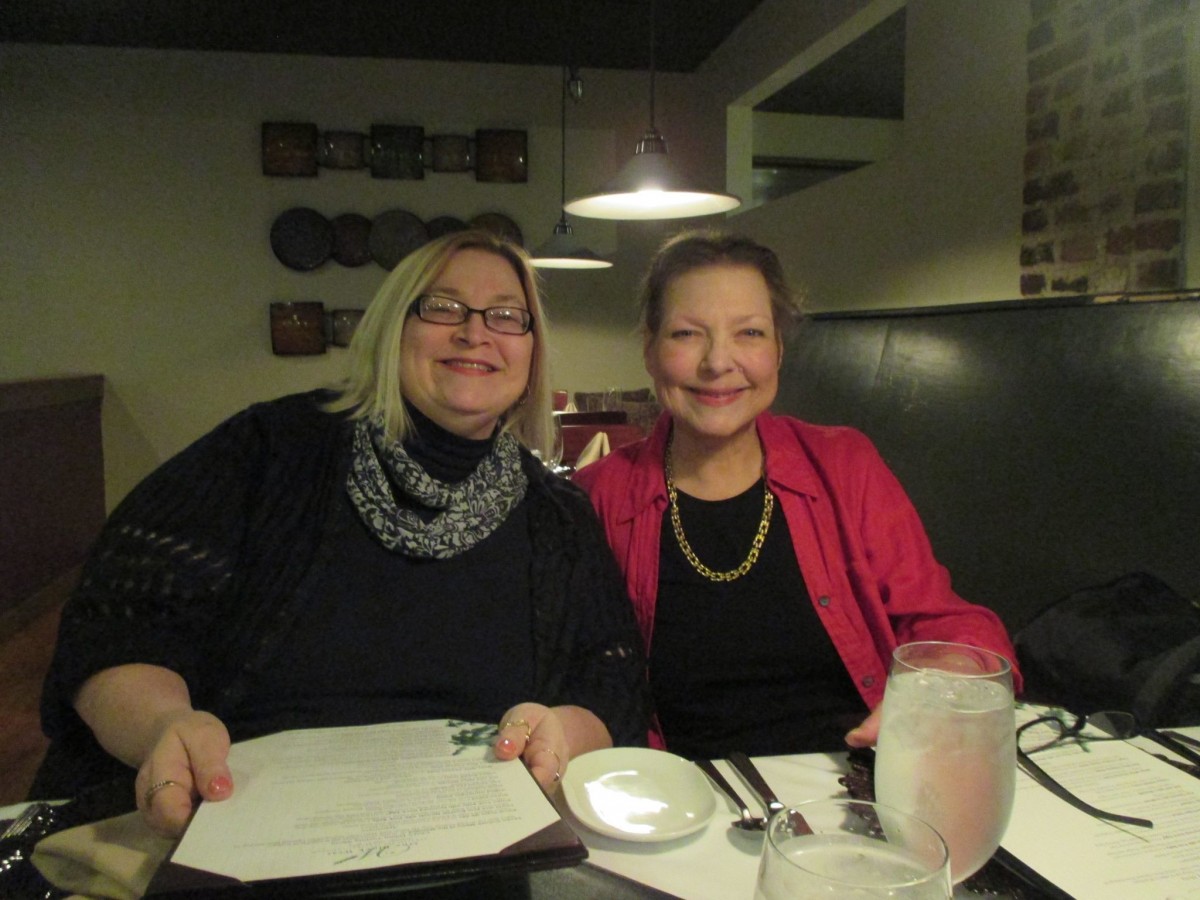
Amy and Martha
For Mother’s Day this year, I will be spending the day remembering Amy Merrick McWilliam. Friends and family will be gathering together to celebrate her life, her spirit and her love.
She was a dear friend, like a sister to me. She was a wonderful mother, wife, sister, aunt and friend. Her loss was sudden and unexpected, just a few weeks ago. I still find myself thinking of things I want to tell her. Still miss her a lot.
I’d like to share some things I will always remember about her.
Amy was one of the most generous and caring people I will ever know. She was always there to help, if needed. She was there for family, for her friends, for anyone who needed a hand. If someone needed help, she would drop everything to step in.
It is fitting that her final party be on Mother’s Day. Amy was a great Mom and loved her boys so much. She was always there for them, in good times and bad. She never faltered in her determination to raise two wonderful young men. She did that.
Amy was brilliant. She could talk to you about almost any subject. You would never be bored chatting with Amy. She always had interesting things to say.
Amy was creative. She could design kitchens and jewelry. She had an artistic sensibility that was amazing.
Amy loved music. Her party will be filled with music today, just as she would have wanted.
Many of the dinner party pictures and recipes I shared, were because of Amy. She was my partner in crime. We spent many happy hours discussing what ingredients we had, and what we would do with them. Sometimes she would call me from a local farm market, to discuss the produce she was getting.
Amy became so good at plating the food. I can’t tell you how many times I was about to take a picture and she would stop me. There was something she wanted to add. Some subtle tweak she felt the food needed. She would have me pick which serving pieces to use. No detail was too small. She had everybody trained to ask if the pictures had been taken, so they could start eating.No one set a prettier table, especially for holidays.
Our dinner parties were about more than food. They were about friendship and sharing and laughter. Lots and lots of laughter. Evenings spent with the people who could make you laugh so hard, you could barely breathe.
No one told a story better than Amy. She had a way of bringing her stories to life. They were often quite funny, often at her own expense. Amy could laugh at herself and bring you along for the ride.
So today, I will spend time with the people who loved her. We will share stories and listen to stories. We will laugh and we will cry. Amy would want more laughter, than tears, so that is the goal.
I love you Amy- now and forever.
Homemade Vanilla Pudding

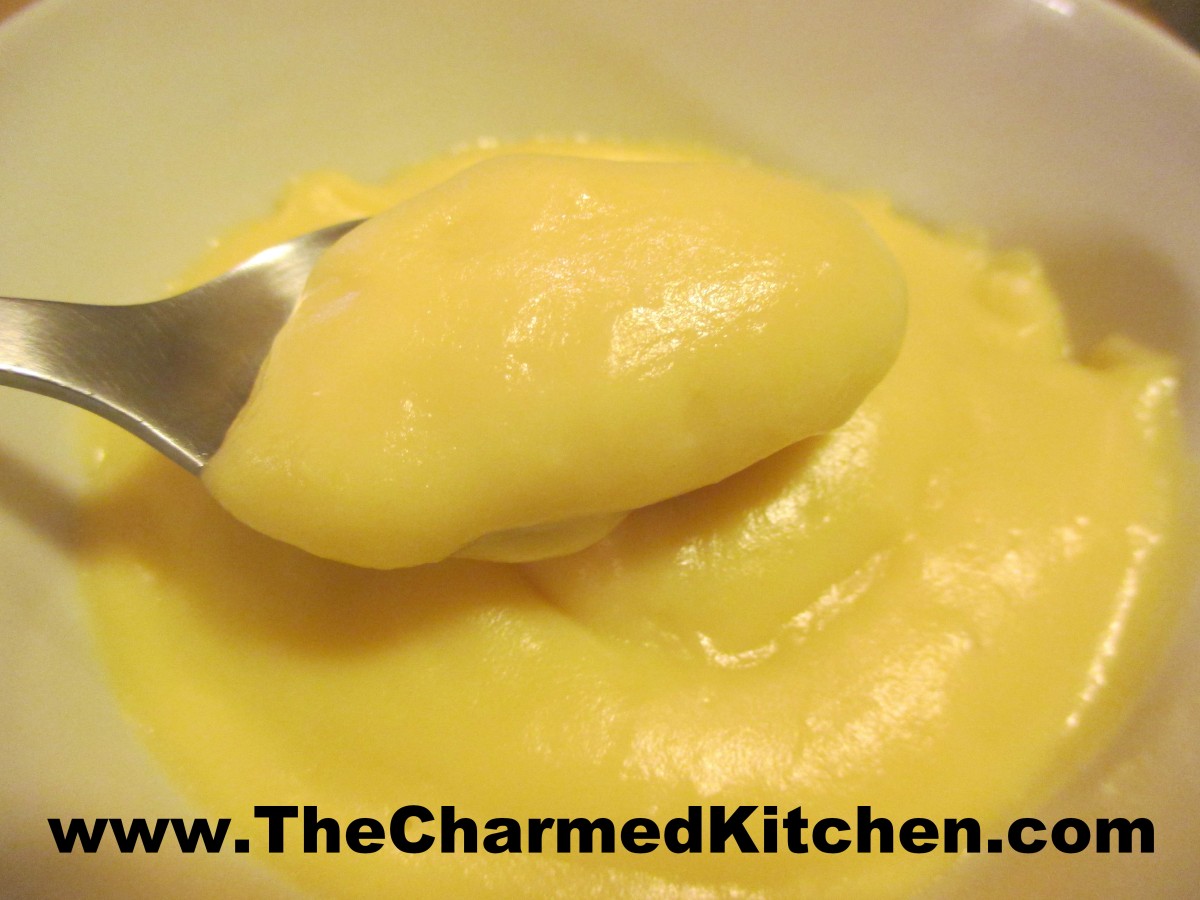
Vanilla Pudding
Homemade pudding is easy to make and tastes great. If you never made pudding before- the effort is well worth it. The actual cooking only takes a few minutes. The most difficult part is waiting for the pudding to cool down.
I was making white cupcakes and had some egg yolks leftover. It seemed like a perfect time to use them to make pudding.
To keep your pudding from getting lumpy- don’t heat it up too quickly. You want the egg yolks to cook slowly, to thicken the pudding, without turning into scrambled eggs. Cooking over medium heat will give you perfect, creamy results every time. Also, whisk the whole time the pudding is on the heat to give you the best results.
Vanilla Pudding
4½ c. milk or half and half
1 c. sugar
5 T. cornstarch
6 large egg yolks, beaten
1 T. vanilla extract
Heat 4 cups of the milk in a large saucepan, over medium heat, until milk starts to steam. Whisk the sugar and cornstarch together in a bowl. Whisk in the egg yolks and the remaining ½ cup of milk. Whisk half of the hot milk into the egg mixture until smooth, then gradually whisk the egg-milk mixture into the saucepan. Cook over medium heat, whisking constantly, until the mixture boils. Continue to cook, whisking constantly, until it has thickened. about 3 minutes. Remove from the heat and stir in the vanilla. Cool slightly, stirring a few times to prevent a skin from forming. Place a piece of plastic wrap directly on top of the pudding and refrigerate until completely cooled and thickened, about 4 hours. Whisk before serving. Makes about 5 cups.
Busha’s Pierogi

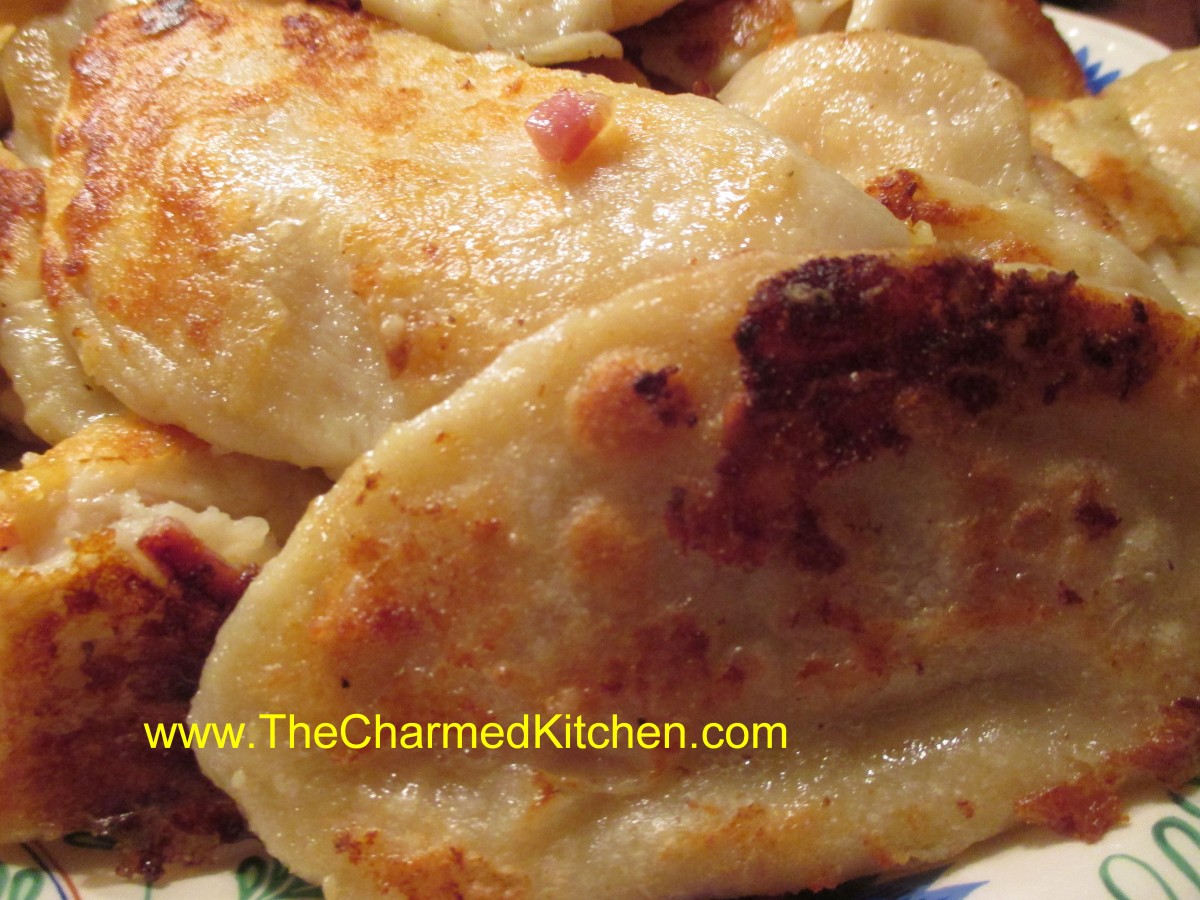
Pierogi
I taught a class earlier this week called My Mother’s Polish Kitchen. We all got a chance to make pierogi in class. It was a great way to honor her memory- and have some great food. Also honors the memory of my Busha (Polish grandmother).
Pierogi, if you didn’t know, are pasta filled with different fillings, often potato based. They are also sometimes stuffed with prune filling or sauerkraut. Today you can find pierogi filled with all sorts of fillings. There are variations in the dough, too. Some use just eggs, flour, water and salt. Others add some dairy in the form of milk or sour cream.
Once the pierogi are made, you can boil them and just serve them up, or brown the boiled pierogi in butter and serve with caramelized onions and sour cream. My mother used to make sweet and sour cabbage and serve it with the pierogi, or sometimes even use it as a filling. I can’t make them without remembering her.
Pierogi
Dough:
2 c. flour
1 t. salt
½ c. water (you can also use half milk and half water)
1 egg
Mix all ingredients together and knead on floured surface until smooth. Cover and let rest at least 15 minutes. Roll out thin and cut into circles. Re-roll scraps. You should get between 20-30. Spoon filling of your choice on center of dough circle. Fold dough in half over filling and press edge with fork to seal. Wetting the edge of the dough will help the dough to stick. Don’t overfill or the pierogi will split. Test a couple first to get the hang of it. Place a few at a time into salted boiling water and cook until they float. You can eat them as is or brown cooked pierogi in butter in a skillet. Serve with grilled onions and/or sour cream. We would often make a larger batch and then freeze them, uncooked on wax paper-lined baking sheets. When frozen they would be transferred to a freezer bag or container. Place right from the freezer into boiling water when ready to use.
Potato filling:
2 lbs. Potatoes, peeled and boiled
½ onion, minced
2-3 T. cottage cheese or farmer’s cheese, optional
salt and pepper to taste
Mash potatoes with other ingredients and season to taste.
Note: you can also add cheddar cheese if you like. In class we had some with cheddar cheese and added ham, too.
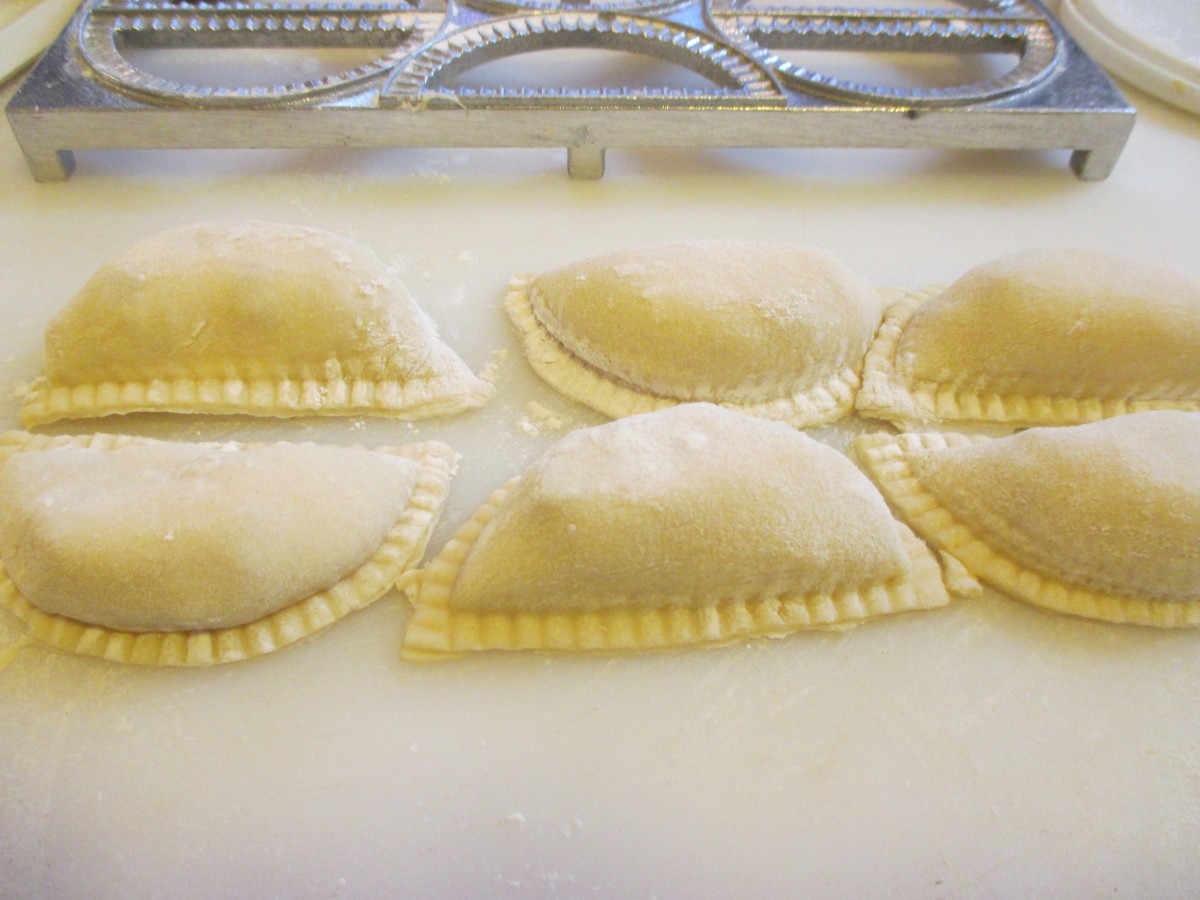
Fresh made pierogi
Mom’s Strawberry Crepes


Mom’s Strawberry Crepes
Since Mother’s Day is fast approaching, I thought I would share some of my favorite “Mom” recipes.
My mother was a great cook. I learned a lot from her. I still make many of her recipes. When I make crepes, I always think of her.
I have fond memories of watching my mother make crepes when I was a little girl. She would add the batter and tilt the pan to get the crepes smooth and thin. She made it look effortless. With a little practice, they actually are. Crepes are easy to make and versatile, too.
They can be served for breakfast, brunch or dessert and can be sweet or savory. I made a slightly sweet crepe batter, perfect for a fruit filling. I used strawberries – you can use your imagination to fill them any way you like. These make a wonderfully elegant dessert, yet are really easy to make.
Strawberry Crepes
1 recipe dessert crepe batter- see below
2 lbs. fresh strawberries, washed, hulled and sliced
sugar to taste- start with 1/2 cup, then adjust to your taste
1 t. vanilla
1 t. grated orange peel
powdered sugar
whipped cream, optional
Make the crepe batter (recipe below) and cook the crepes. Toss the berries with the sugar, vanilla and orange peel. Place a crepe on your work surface and spoon berries down the middle. Fold up the sides of the crepe and move to serving dish. Repeat with remaining ingredients until you run out of something. I tend to put a lot of the berries in each crepe so I run out of berries and have left over crepes. How much fruit you put in each one is completely up to you and your taste. Dust filled crepes with powdered sugar and top with extra berries- if you have any left. You can also add some whipped cream on the top. I list it as optional- but I really think you’re going to want that whipped cream. Makes about 12 crepes, give or take.
Dessert Crepes
1 c. flour
4 eggs
1 1/2 c. milk
1 T. sugar
2-T. orange-flavored liqueur or orange juice concentrate
1/4 c. butter, melted and cooled
Mix all ingredients in blender (except butter) until smooth, scraping sides often. Add butter and blend well. Let stand for 30 minutes before using, or batter can be refrigerated, covered, over night. Beat again, just before using.Heat 6 or 7 inch skillet. Brush with butter or oil and pour in about 2 teaspoons of batter, tipping pan to cover bottom of pan completely with batter. Cook until edges start to brown, turn over and cook until lightly browned (about 2 minutes per side.)Crepes can be made day ahead or even frozen between sheets of waxed paper and frozen.Makes 20.
Baklava with Chocolate

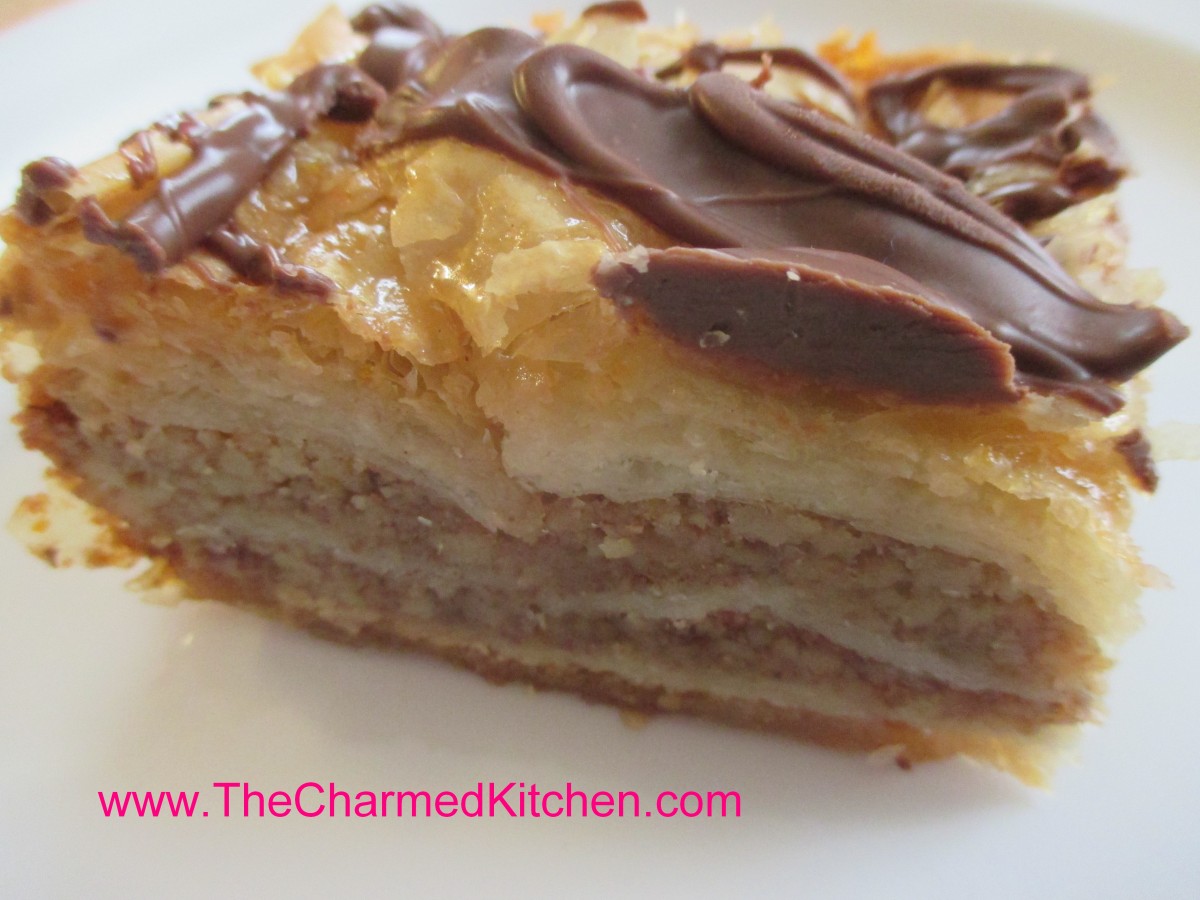
Baklava with Chocolate Drizzle
If you are looking for an extra special dessert for Mother’s Day- you could make Mom baklava. Baklava isn’t hard to make. You just have to move quickly while assembling it. The phyllo leaves (or sheets), dry out quickly, and can get brittle. Just have everything ready before you open the package of dough and get started.
Baklava is a dessert made from layers of phyllo, finely chopped nuts, melted butter and spices. It is baked until golden. Then a sugar/honey syrup is poured over it. This recipe is dressed up a bit, with the addition of melted chocolate, drizzled over the baklava after it is baked and cooled.
The phyllo sheets I used are pretty big so I folded them in half to fit the pan I used. There was a little trimming to do, but not much. Well worth the effort.
Baklava with Chocolate Drizzle
1 lb. phyllo
½ lb. butter, preferably unsalted
¾ lb. walnuts or blanched almonds, chopped fine
¼ c. sugar
½ t. cinnamon
Syrup, recipe follows
½ c. melted chocolate – I used dark chocolate
Combine nuts, sugar and seasonings and set aside. Brush a 9×13-inch pan with butter and line bottom with 8 phyllo sheets, folded in half to fit pan, brushing each with butter as you go. Spread ½ of the nut mixture on phyllo leaves. Top with 3-4 buttered sheets of phyllo. Spread with the rest of the nut mixture. Add the rest of the leaves for the top. Brush top layer of leaves with remaining butter. With a sharp pointed knife score the top sheets in whatever shapes and sizes you want. Bake in a preheated 350-degree oven for 45 minutes to an hour. Baklava should be golden brown. Meanwhile prepare syrup. When baklava has cooled, warm up the syrup and pour over. Drizzle with melted chocolate. Allow chocolate to set, before cutting into squares to serve.
Syrup:
1 c. sugar
½ c. honey
1 c. water
zest of 1 lemon or orange
Bring to a boil and simmer 10 minutes. Strain and set aside.


