Rainbow Ravioli

Rainbow Ravioli
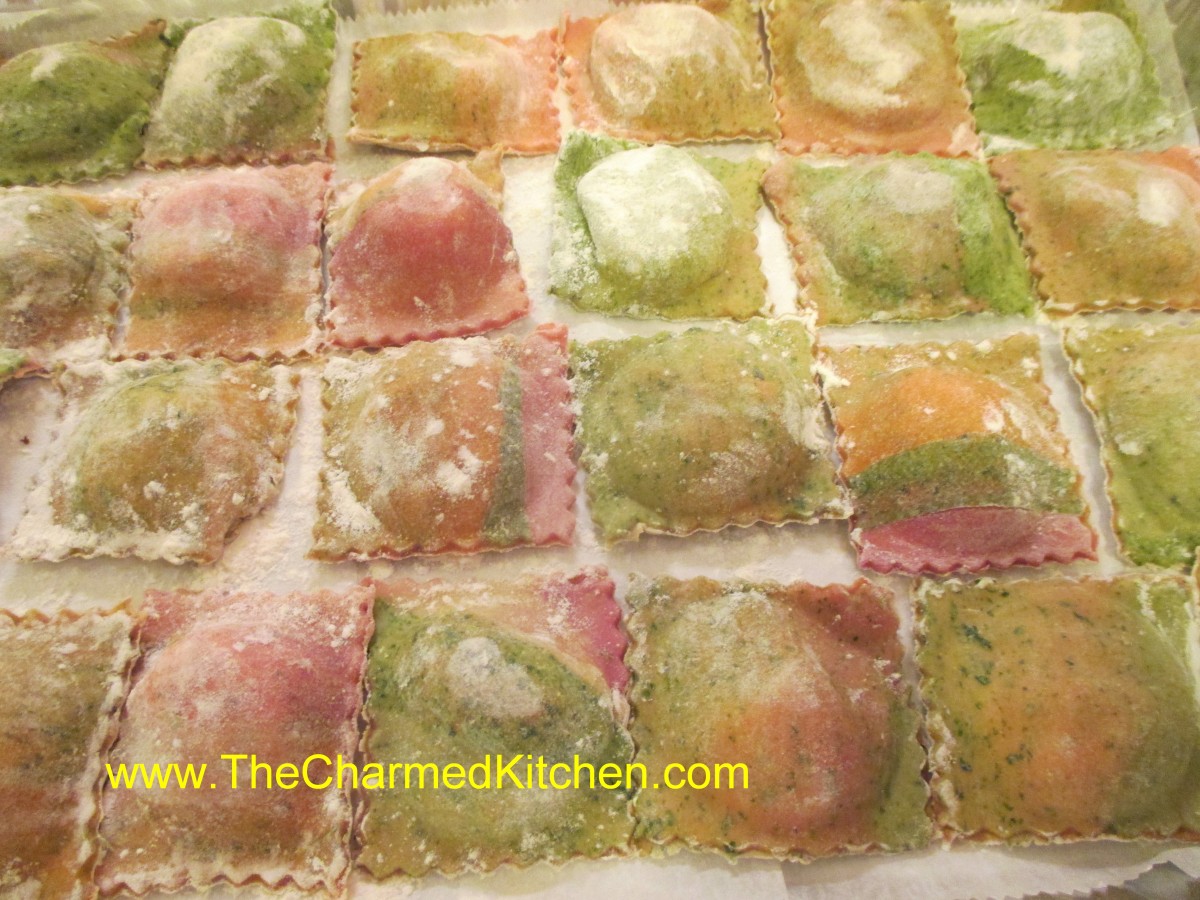
You are sure to get a smile when you serve rainbow ravioli. These colorful ravioli are made with vegetable-based dough. Recipes for all the pastas and the filling follow below. Unused dough can be frozen and used later. Extra ravioli can also be frozen, so you can make a big batch and enjoy them for several meals.
To make the rainbow effect just grab a piece of the plain dough and add a few pieces of each of the veggie pastas. As you roll out the dough the colors will begin to spread out and blend. I fold and re-roll the dough a few times to get the colors to blend a little more. Every batch is a little different.
I often use a food processor to make pasta dough, especially the vegetable pastas because I often use vegetables that need to be pureed. I have a small processor which is perfect for small batches using no more than 1 cup of flour. I often use my stand mixer for larger batches and for plain dough. Always best to make pasta dough at least 30 minutes ahead and let it rest. You can even make it the day before and chill until ready to use.
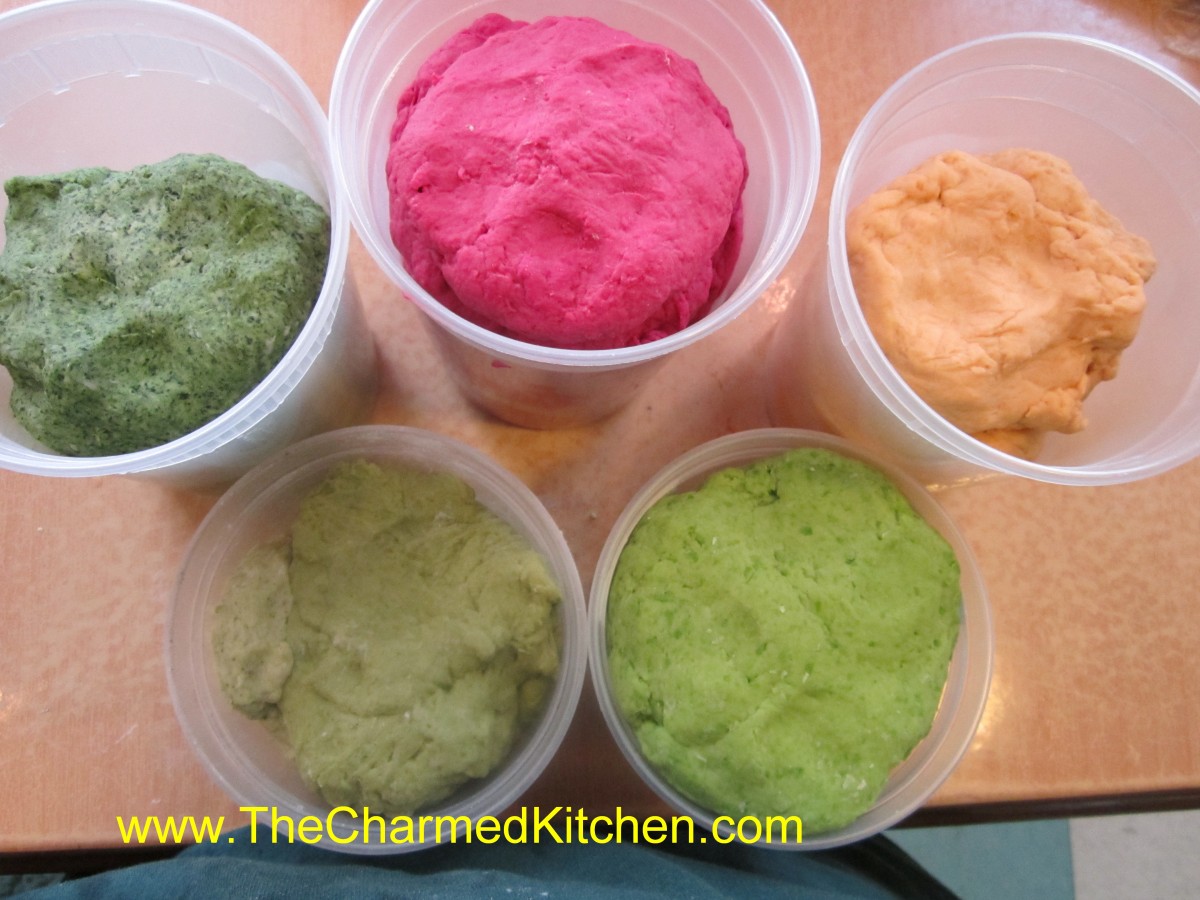
Assorted pastas
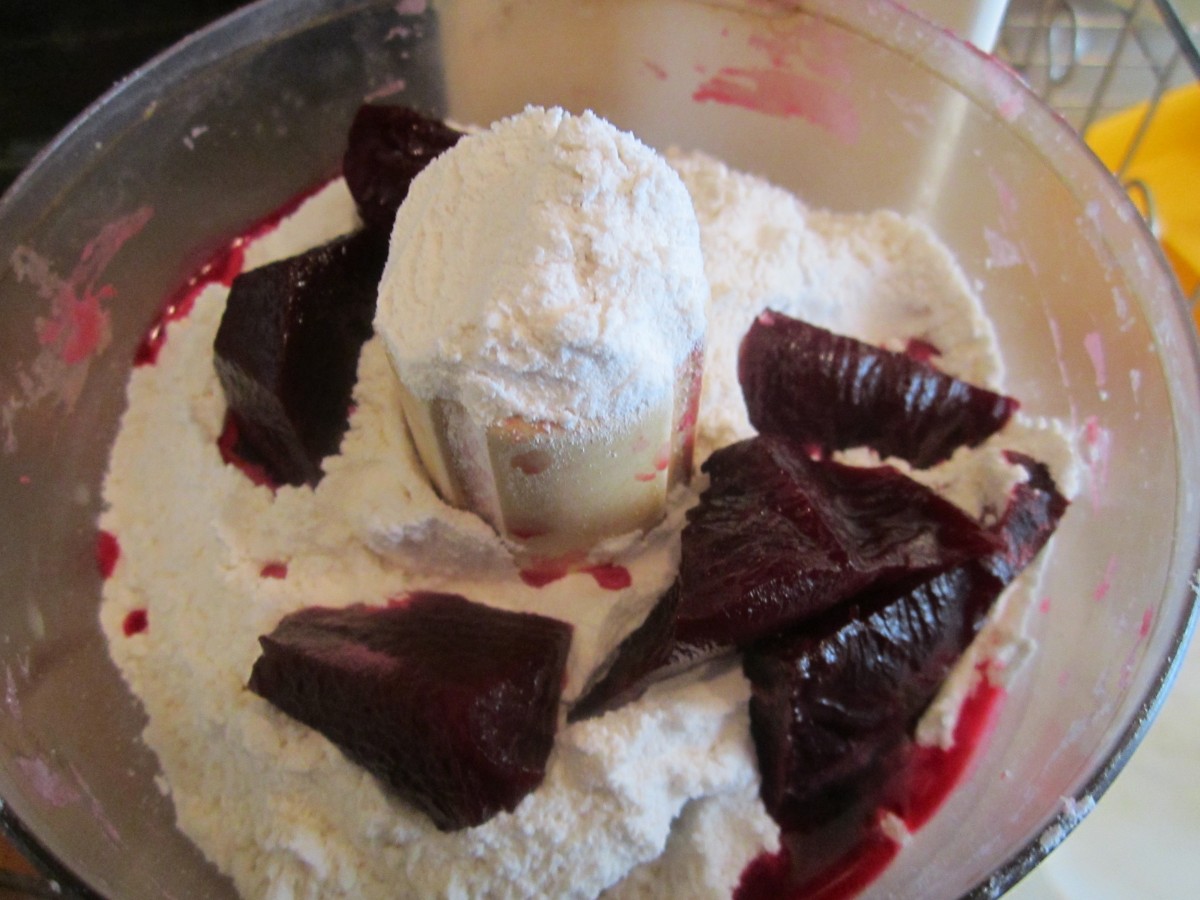
Cooked beets and flour
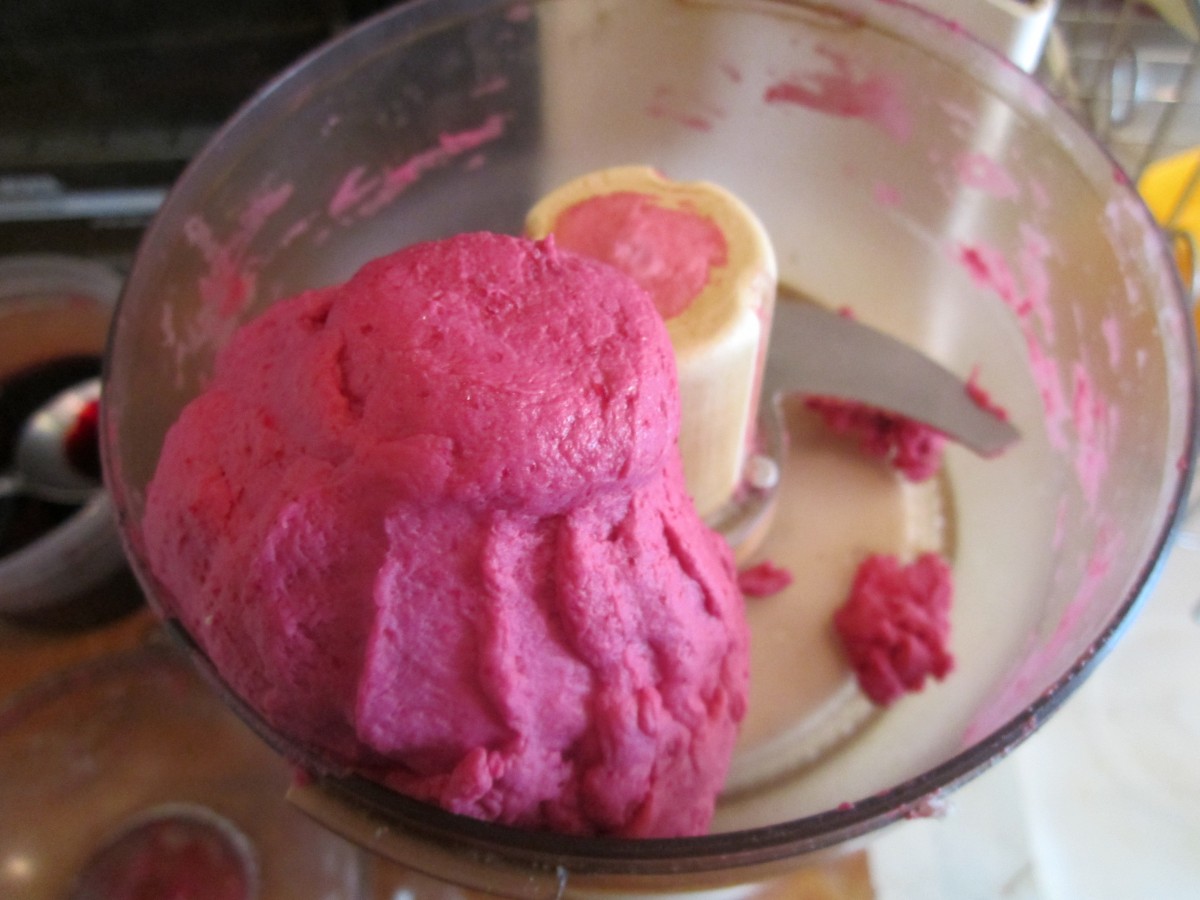
Process until dough forms

Freshly rolled sheets of dough
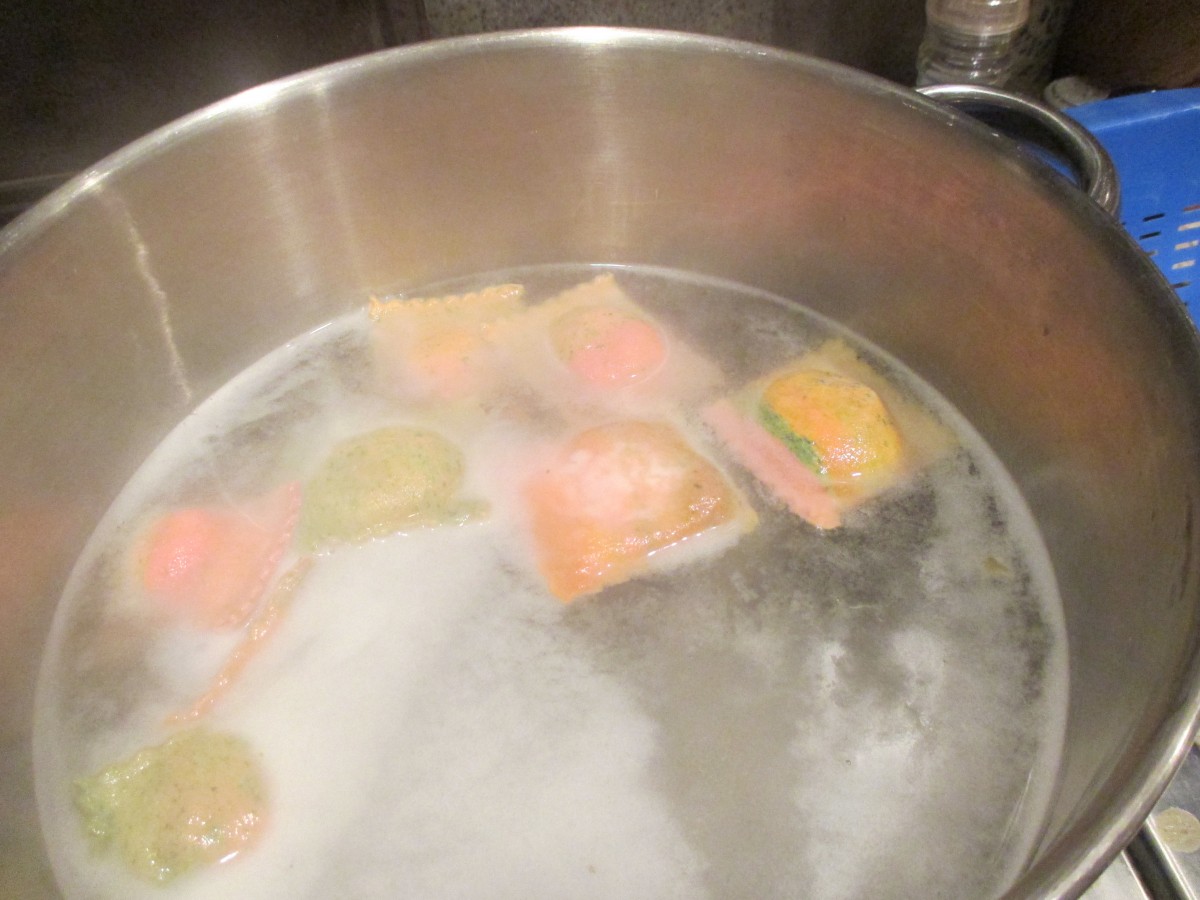
Simmer ravioli 3-5 minutes
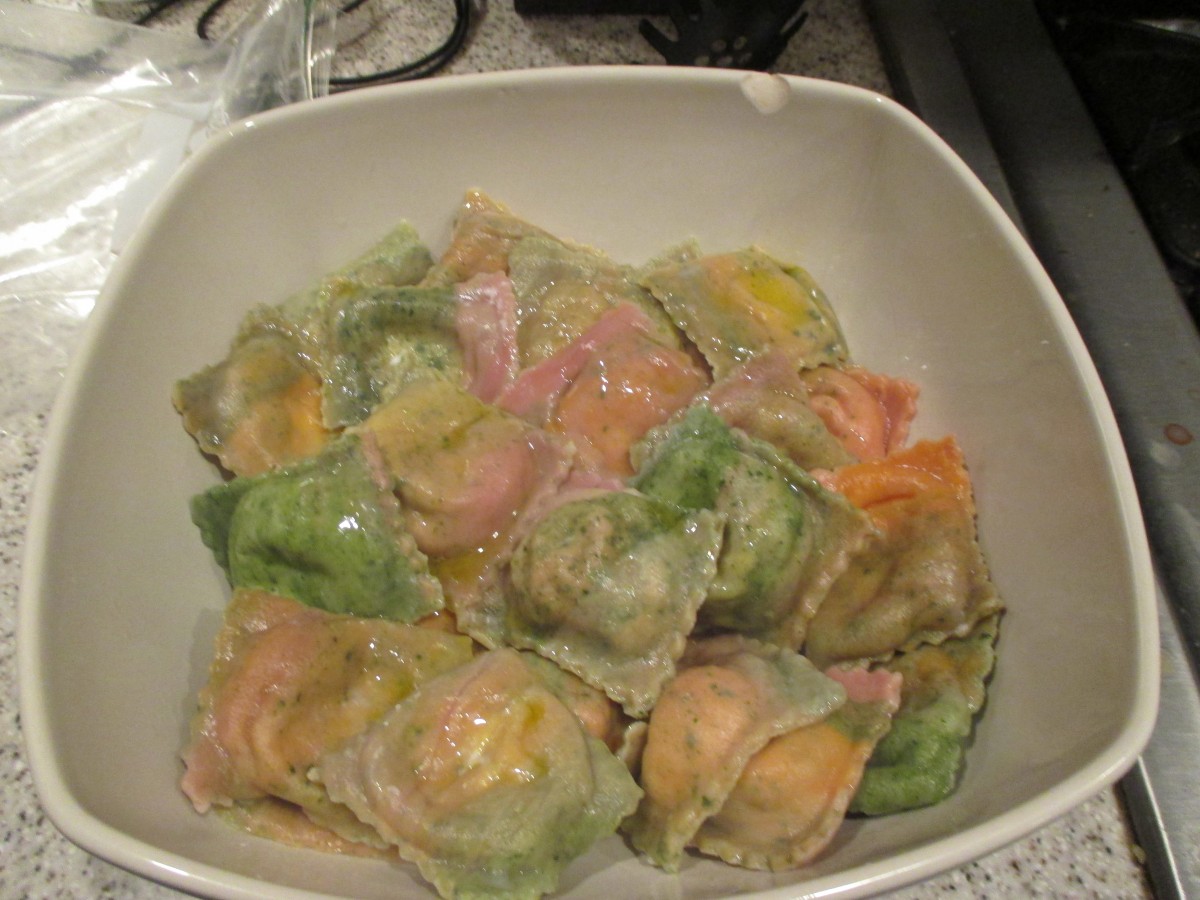
Ready to enjoy
Basic Homemade Pasta
3 c. flour, more if using electric pasta machine. See note.
1 1/2 t. salt
4 eggs
Water, if needed
Mix flour and salt and stir in eggs, kneading until dough is smooth and elastic. Dough will be very stiff. Add a little water if needed to hold dough together. You may wish to mix the dough in a mixer or food processor. Cover dough and let rest 15-20 minutes before rolling. Under kneading your dough will result in coarse, crumbly pasta. This batch makes about 1 pound. Serves 4-6.
Roll dough out on well floured board or in pasta machine (non-electric) until desired thickness in reached. Add flour as needed to prevent sticking. Cut into strips or whatever shapes are desired. You might want to let the noodles dry 1-hour or more before cooking, but this is not necessary. Pasta can be hung to dry or separated and allowed to dry flat on a table. When pasta is not hanging to dry it must be turned occasionally to dry evenly. Although you may hear otherwise, homemade pasta, even when dried, should be frozen for long term storage. Storing at room temperature can lead to spoilage. Fresh pasta can also be stored in the refrigerator for a day or two.
Note: All electric pasta machines vary slightly and you should use their recipes as much as possible. Still, for most models, adding 1/4 c. flour for each cup in a hand rolled recipe works the best. Also recipes that contain seeds and vegetables may clog an electric pasta maker. Follow your manufacturer’s instructions.
These are smaller batches which can be mixed in a processor or by hand. If you want to mix a vegetable based pasta by hand, puree the vegetables first.
Carrot Pasta
1 c. flour
1/2 t. dried dill
1/3 c. carrot puree
1-2 T. water, if needed
Beet Pasta
1 c. flour
1/2 t. dill
1/3 c. beet puree
1-2 T. water, if needed
Spinach Pasta
2 c. flour
1 10 oz. package frozen spinach, cooked, drained, reserving some of the liquid
Mix this dough as for other pastas, but don’t be too quick to add reserved liquid. While kneading you’ll get water out of the spinach. May require more kneading and rolling than other pasta doughs. Be patient, it’s worth the work.
Broccoli Pasta
1 c. flour
1/2 c. broccoli puree
Ravioli Filling
4 oz. cream cheese, softened
2/3 c. shredded mozzarella cheese
2/3 c. ricotta or cream cheese
1/3 c. grated Parmesan or Romano cheese
Combine all ingredients well and chill until needed.
Roll a batch of dough into a rectangle, 18×12 inches and 1/16 inch thick. Arrange well rounded teaspoonfuls of the cheese filling two inches apart on the pasta sheet. Roll out additional dough into an 18×12 inch rectangle. With a pastry brush moisten bottom sheet of pasta around edges with water. Place second sheet of pasta on top, using fingers to seal the dough around the edges of the filling. With a pastry wheel or sharp knife, cut between the ravioli to separate them. You should have 24 ravioli.
To cook the ravioli- just drop them into simmering water and cook 3-5 minutes. If using frozen ravioli increase cooking time by about 2 minutes. Time will differ depending on how thick you rolled the dough and how many you are cooking at one time.
Spelt Biscotti with Walnuts


Spelt and Walnut Biscotti
These biscotti are made with spelt flour. Spelt is an ancient grain that is very closely related to wheat. It does contain gluten, so not an option for people with wheat allergies or Celiac, but a nice way to add a whole grain to your menu if you do eat wheat. Unlike whole wheat flour, which tends to be heavy in baking, spelt has a lighter texture and acts more like white flour. I used it to make these biscotti and they are crisp, light and very tasty.
Biscotti are so easy to make. I don’t know why more people don’t bake their own. They are always nice to have with coffee, tea or a cold glass of milk. These aren’t too sweet, so biscotti make a nice breakfast. They also stay crisp for a long time, if stored in an air tight container.
Biscotti are twice baked. First in a loaf shape, then they are sliced and baked again. Most recipes will tell you to bake the slices half way, then turn them over to finish baking. A little time saving trick- just place a cooling rack on the baking sheet, then place the sliced biscotti on the rack. That way, they get crisp on both sides at once and there is no need to turn them.
Spelt Biscotti – with Walnuts
1 ¼ c. spelt flour*
⅓ c. sugar
1 t. baking powder
¼ t. salt
½ c. walnuts
¼ c. golden raisins- I often use dried cranberries or other dried fruit
2 eggs
1 t. vanilla
Combine dry ingredients with nuts and raisins in medium mixing bowl. In small bowl combine eggs and vanilla and add to dry ingredients. Stir together to make a slightly sticky dough. With oiled hands shape into loaf (2”x11”) on oiled sheet. Bake at 350-degrees for 20 minutes. Remove from oven. Slice the loaf thin using a serrated knife and place slices on a rack on a baking sheet then return to oven, reduce heat to 300-degrees bake 25 minutes. Remove from oven and allow to cool. Store in an airtight container to retain crunch. Makes about 16.
* If you can’t find spelt flour you can use 3/4 c. all purpose flour and 1/2 c. whole wheat flour instead or substitute the entire amount of flour with whole wheat pastry flour.
Root Vegetable Soup


Root Vegetable Soup
Root vegetables are often associated with winter cooking. Before produce came from around the world, people lived off what they grew locally. In cold climates, that meant in the winter you ate the veggies that you preserved, or that stored well.
Root vegetables work well in winter foods. Most take a fair amount of cooking to get tender and add flavor and richness to soups, stews, chowders and more. Today, I used some root veggies to make soup.
When the air is chilly I am always in the mood for a nice hot bowl of homemade soup. This soup came about as I rummaged through the veggie bin. I had a number of root vegetables, so I decided to make them the focal point. I happened to have homemade turkey stock, but you could easily swap it out for chicken stock or vegetable stock as well. So here it it- the recipe that was created based on what I happened to have on hand. The end result was really good.
Root Vegetable Soup
3 T. oil
1 onion, chopped
2 large carrots, peeled and sliced
2 small parsnips, peeled and sliced
6 c. stock, I used turkey
2 c. peeled and diced turnips, about 2 medium
2 c. diced potatoes, about 2 medium
1 pint home canned tomatoes, or a (14 oz.) can of diced tomatoes, un-drained
1 medium sweet potato, diced
1/4 c. chopped parsley
2 T. apple cider vinegar
1 T. hot sauce, or to taste
salt and pepper to taste
In soup pot heat the oil and cook the onion until light golden. Add the carrots and parsnips and cook until they are light golden, too. Add the stock, turnips, potatoes and tomatoes and bring to a boil. reduce heat and simmer, covered, until veggies are tender, about 20-30 minutes. Add sweet potatoes and remaining ingredients and cook until sweet potatoes are tender, about 10-15 minutes. Adjust seasonings and serve. Serves 6-8.
Classic White Cupcakes with Cherry Vanilla Buttercream


White Cupcake with Cherry Vanilla Frosting
I made these cupcakes for the wedding of two dear friends. They wanted just a simple white cupcake with white frosting. Always a classic, and perfect for the wedding reception. When it came time to make the frosting, I went with a simple vanilla buttercream, but I wanted to make it special for them. I decided to add cherry flavoring.
Pure cherry flavoring is clear, so the frosting was not going to turn pink. The combination of the vanilla and cherry was just the right touch. The frosting has a really nice flavor and fluffy texture, without being too sweet.
Well, I have to get ready for the wedding. Here are the recipes for both the cupcakes and the frosting.
Classic White (Vanilla) Cupcakes
1 cup sugar
1/2 cup butter
2 eggs
2 teaspoons vanilla extract
1 1/2 cups all-purpose flour
1 3/4 teaspoons baking powder
1/2 cup milk
Preheat oven to 350 degrees. Line a muffin pan with 12paper liners. In a medium bowl, cream together the sugar and butter. Beat in the eggs, one at a time, then stir in the vanilla. Combine flour and baking powder, add to the creamed mixture and mix well. Finally stir in the milk until batter is smooth. Pour or spoon batter into the prepared pan. Bake 20 to 25 minutes. Cupcakes are done when they springs back to the touch. Makes 12.
Cherry Vanilla Butter Cream
1/3 cup butter
4 ½ c. sifted confectioners’ sugar
¼ c. milk or half and half
1 t. vanilla extract
1 t. pure cherry flavoring
In a bowl beat butter until fluffy. Gradually add 2 cups of the confectioners’ sugar, beating well. Slowly beat in the 1/4 milk and flavorings. Slowly beat in remaining sugar. Beat in additional milk, if needed, to make of spreading consistency.
100% Whole Wheat Bread


100% Whole Wheat Bread
A lot of us want to eat more whole grains, but are unhappy when we try to make 100% whole wheat bread at home. There is a secret to baking whole wheat bread that is both tender, and slices easily. Whole wheat flour, high in gluten, also is high in fibers, which make it harder to get the gluten to that stretchy state. If you knead whole wheat bread dough for 5- 10 minutes, like white bread dough, you’ll have a dough that is far from elastic. The secret? Knead it longer. I knead my whole wheat bread dough about 20 minutes. That is easy if you have it in a stand mixer. Just set it on low and let the dough hook do the work. Not so easy if you are kneading by hand. When kneading for 20 minutes by hand, more and more flour gets added to the dough, to keep it from sticking. The extra flour results in a heavy dough, and a loaf of bread that is best used as a door stop. If you have to knead by hand- knead on a wet surface. The dough won’t stick to your hands or the board and you can knead it long enough to get a properly worked dough. How do you know your dough has been worked long enough? Hold the dough up to light and pull it. It should stretch thin enough so that you can see the light through it, without tearing. Here is one of several recipes I have for 100% whole wheat bread. I love it and I think you will, too.
100% Whole Wheat Bread
2 packets active dry yeast
2 2/3 c. warm water
½ c. oil
½ c. honey, molasses or maple syrup
6 ½ -7 c. whole wheat flour
½ c. non fat dry milk
2½ t. salt
Combine first 4 ingredients in a mixing bowl and stir in 3 cups of the flour the dry milk and the salt. Beat with electric mixer for 3 minutes. Stir in enough flour for mixture to form a thick batter and continue mixing on low in mixer for 15-20 minutes. Dough takes time to become elastic. Add extra flour slowly until dough comes away from the sides of the work bowl, but not too soon. Note: if you must do this by hand add flour until dough starts to come away from the sides of the bowl and knead with wet hands on wet work surface for 15-20 minutes. Transfer dough to lightly greased bowl and cover, allowing to rise until puffy, about 1 hour. Punch dough down and transfer to a lightly floured surface. Divide in half and shape each half into a loaf. Place in a lightly greased 9×5 – inch pan. Brush top with oil and place a piece of plastic wrap over the top. Allow to rise until doubled. Bake in a preheated 350 degree oven for 40 minutes. Tent with foil after 20 minutes to prevent over browning of the top. Test for doneness by removing bread from pan and thumping on the bottom. Bread should sound hollow. Makes 2.
Bird Seed Wreaths

Birdseed Wreath
The other day, my friend Dale posted a recipe for making these bird seed wreaths on my wall. I had recounted my frustration on trying to fill my bird feeder on a very windy day. He thought these might be a solution. He was right. They are also fun to make.
This recipe comes from a website called Garden Answer.
My first attempt, I didn’t follow the recipe exactly. The wreath, while pretty, was a little crumbly. The birds still loved it, though. I didn’t hang it up, as the original post suggested. I have a porch with a wide concrete ledge, so I just put it on the ledge. It was gone in a day and a half.
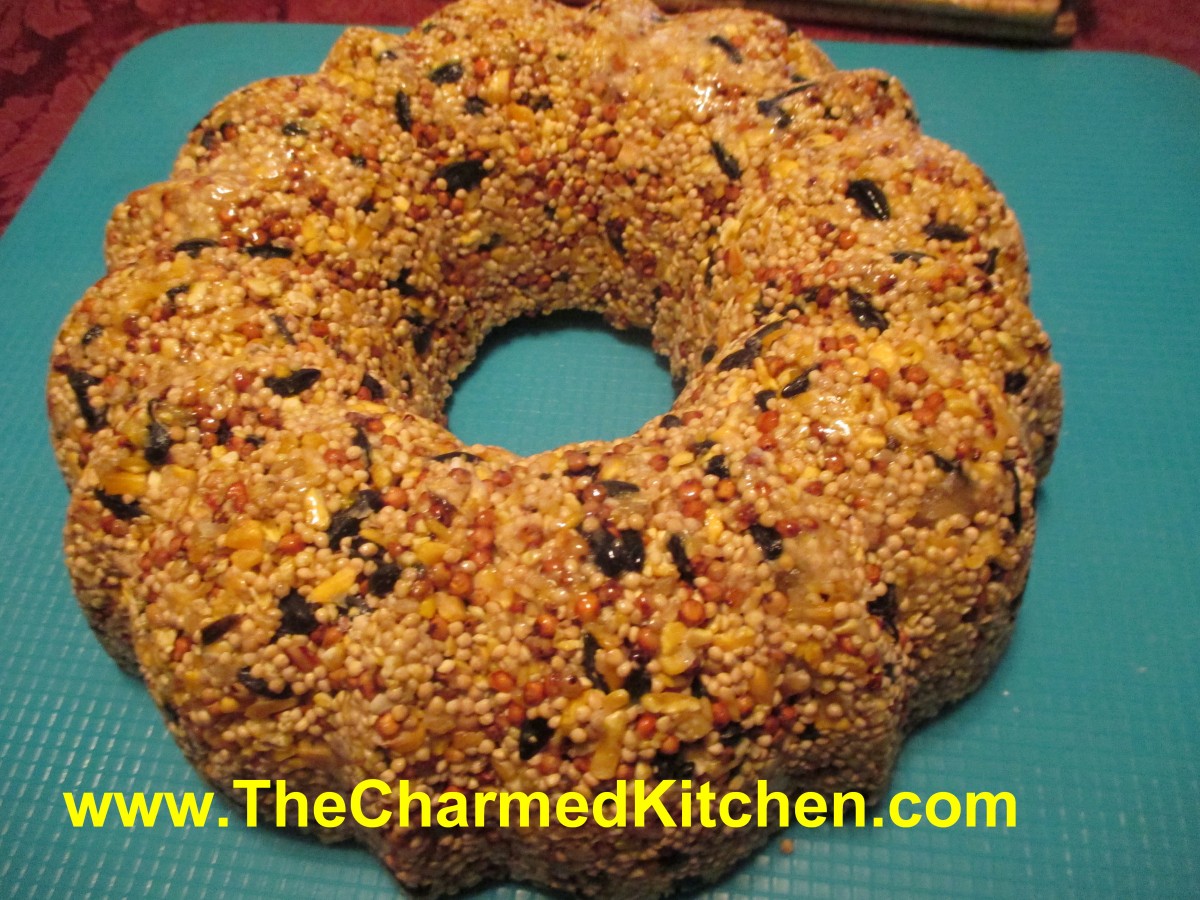
I decided to try again, this time following the recipe. They came out great. Nice and sturdy.
I made two different sizes the second time. I made one large one, then made a second batch of the seed mixture and made 12 smaller ones as well. Not only are these a nice way to feed the birds, it can be a fun craft project for kids and they would be a nice gift for a bird lover.
Once dried, you can tie a ribbon on them and hang in a tree- or just hang on a hook. I have several shepherd’s hooks in my yard and would use them.
Not sure how well they would hold up in rainy weather, but should hold up well on snowy days.
So here is the recipe. You could add some peanuts or dried fruit for more variety.
Bird Seed Wreaths
2 packets unflavored gelatin- or two tablespoons
1 c. warm water
6 T. light corn syrup
1 1/2 c. flour
8 c. bird seed
Grease a full sized Bundt pan or 12 small ones. You can use a non-stick spray or lightly brush with oil. Set aside. In large bowl, combine the gelatin and warm water and stir until gelatin is dissolved. Stir in the corn syrup, then the flour and mix well. Stir in the birdseed and make sure it gets evenly coated with the gelatin mixture. Press mixture into prepared pan. Press firmly. This part is important. Pressing firmly gives you a firmer final product. Allow the wreaths to dry for 24 hours before un-molding. To hang you can tie on a ribbon or place on a hook. You can also place them on platform feeders.

Smaller version
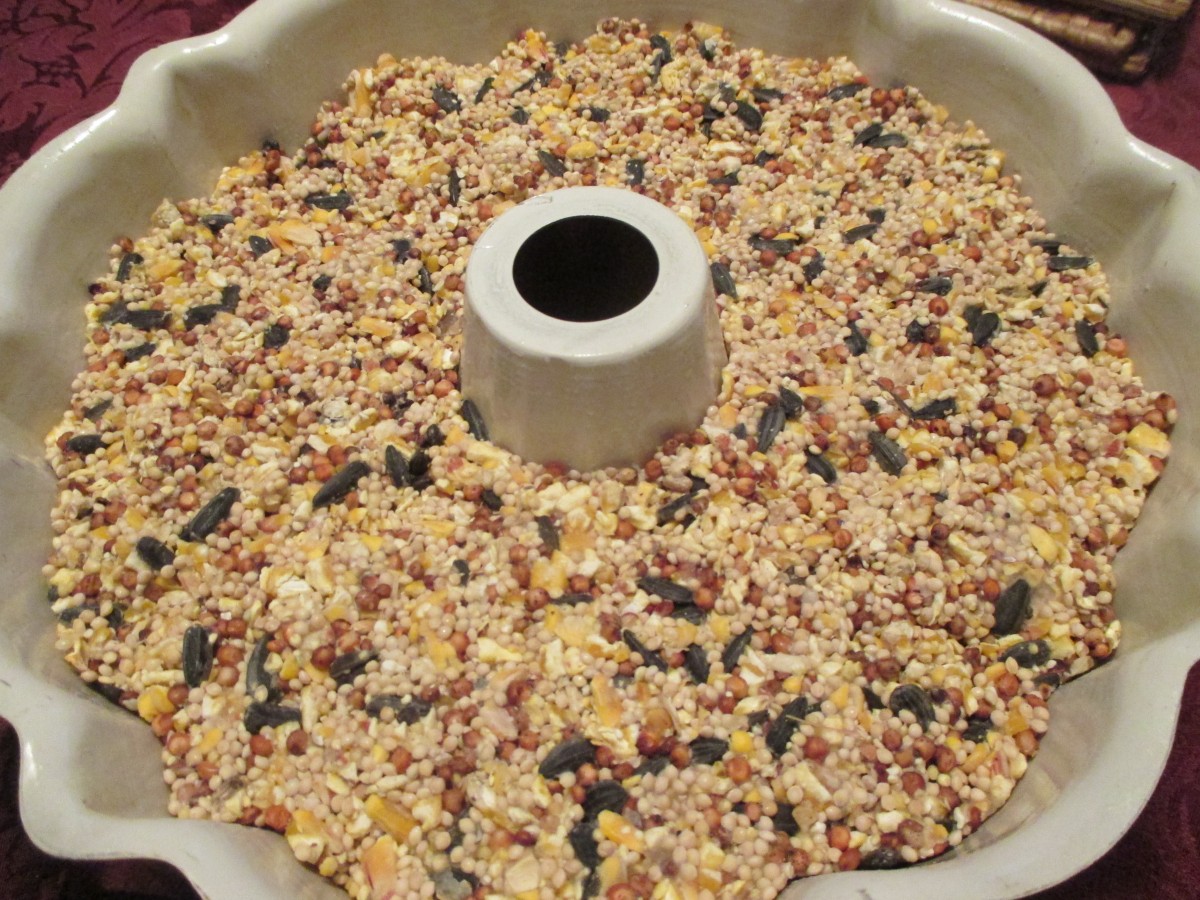
Allow to dry a full day

You can make different sizes
Spiced Yellow Pea Soup


Spiced Yellow Split Pea Soup
While a lot of people think of green split peas when they think of pea soup, I enjoy making pea soup with yellow split peas, too. The color of the peas leaves you with a pretty golden yellow soup. I added some turmeric for extra color, too. For this batch, I had a ham bone, so I cooked the bone in water with aromatic veggies to make a soup stock. I then strained and used the stock for the liquid in the soup- adding extra flavor. I also added some of the ham to the soup. I added a fair number of herbs and spices, to add more even more flavor. On a chilly day, a soup with a little extra spice suits my mood. Simple and satisfying this is a soup that is also a meal in itself.
Spiced Yellow Split Pea Soup
1 lb. yellow split peas, rinsed
8 c. stock or water
2 c. chopped onion
2 carrots, peeled and sliced
3 potatoes, peeled and cubed
½ lb. sliced green beans
1 T. parsley
2-3 t. hot pepper sauce
1 t. chopped fresh sage- or ½ t. dried sage
1 t. dried thyme
1 t. ginger
1 t. cumin
1 t. turmeric
½ t. white pepper
2 cups diced ham
Salt to taste
Note: you can use 1 teaspoon liquid smoke if omitting meat.
Combine peas, water or stock and simmer, covered, about an hour, stirring occasionally. Add remaining ingredients, except salt, and cook, covered, over low heat for about 60 minutes. Add salt to taste. Freezes well. Serves 6-8.
Orange Tea Bread

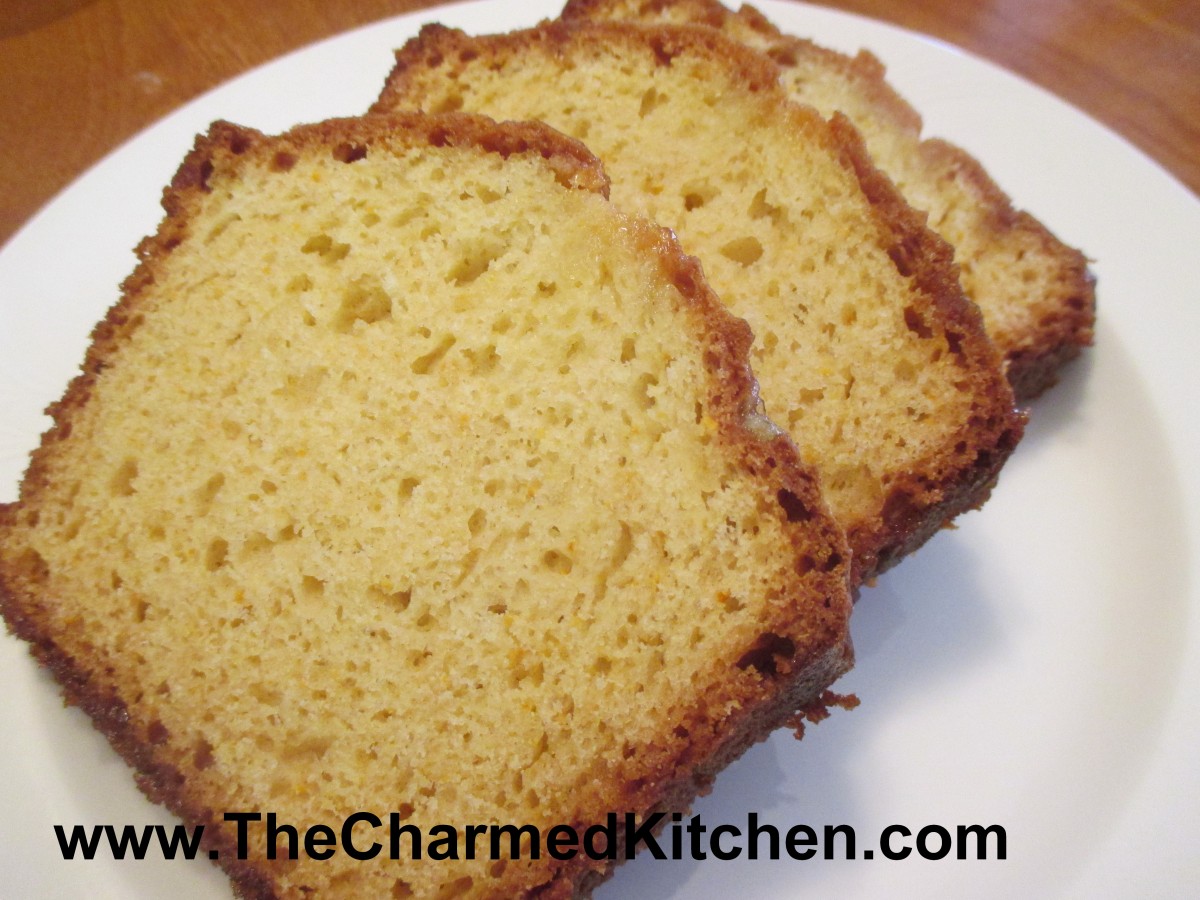
Orange Tea Bread
Winter is citrus season and I have been eating a lot of oranges lately. Besides eating them fresh, I also like to cook with oranges. If you are looking for a new recipe for a quick bread, and like oranges as much as I do, I would recommend trying this one.
The bread is flavored with orange zest in the batter, then a warm orange syrup is drizzled over the bread, right out of the oven. This makes for a bread that is flavorful and moist. It can be breakfast, a brunch dish or even a dessert, when topped with ice cream or whipped cream. The recipe makes one loaf, but I often double the recipe and make two. It seems to disappear around here pretty quickly. The bread freezes well, too.
Orange Tea Bread
2 cups all-purpose flour
1-1/2 teaspoons baking powder
1 teaspoon baking soda
1/2 teaspoon salt
2/3 cup Greek yogurt or sour cream
2/3 cup sugar
2 large eggs
3 tablespoons melted unsalted butter
1 tablespoon grated orange zest
Syrup:
1/2 cup orange juice
1/4 cup sugar
Preheat oven to 350 degrees. Grease an 8-1/2″x4-1/2″x2-5/8″ loaf pan. Line pan with wax paper or parchment and set aside. Sift flour, baking powder, baking soda and salt into a bowl. In a separate bowl, whisk together yogurt, sugar, eggs, butter and orange zest. Add liquid ingredients to dry ingredients, and stir mixture until well combined. Transfer batter to loaf pan, smoothing top, and bake in oven for 45 to 50 minutes, or until skewer inserted in middle comes out clean. While the bread is baking, combine orange juice and sugar in a saucepan. Bring mixture to a boil over moderate heat while stirring, and simmer for 1 minute. Keep syrup warm. Make holes in top of bread with a thin wooden skewer and drizzle with syrup. Let stand in pan until cool. Makes 1 loaf.
Smoky Corn Chowder


Smoky Corn Chowder
I was defrosting my freezer and found local sweet corn I had frozen last summer. I had forgotten all about it. I wanted to make soup for a dinner with friends, so I decided to use the frozen corn to make this chowder. I also had a pound of bacon, which gave the soup a wonderful smoky flavor. I cooked the bacon in the soup pot, allowing it to get pretty crisp. I removed as much of the fat as I could, but left the bacon in the pot. Then, when I cooked the onions and added the stock, all the little brown bits of bacon in the pot added even more flavor. It was a big hit. A perfect dish for a snowy evening.
Smoky Corn Chowder
1 lb. bacon
1 onion, chopped
2 carrots, peeled and sliced
6 c. chicken stock
2 potatoes, peeled and cubed
6 c. corn – I used frozen corn
2 cups half and half or milk
¼ c. flour
Salt and pepper to taste
Hot sauce to taste
Fresh chopped parsley
Cut bacon in 1-inch pieces and fry in a Dutch oven until crisp. Tip pot and spoon out most of the fat. Add the onion and sauté until translucent. Add carrots and stock. Cover and simmer 10 minutes, then add the potatoes and corn. Cover and simmer 15-20 minutes, or until potatoes are tender. In jar with a tight fitting lid, combine 1 cup of the half and half or milk with the flour. Put on the lid and shake until mixture is smooth. Stir into the pot along with the remaining half and half or milk and cook, stirring often until mixture thickens up. Adjust seasoning to taste. Stir in parsley and serve. Serves 6.
Mini Cream Puffs


Mini Cream Puffs
If you want to surprise someone with a very special sweet treat, you could make cream puffs. These are a bit or work, but the end result is so wonderful. I think they are worth the effort, especially for special occasions. I have a dear friend who had to miss our New Year’s Eve party, due to illness. I wanted something special for our make-up party last night. There were not any leftover, so that is a good sign.
You start by make a pate a chou, or cream puff pastry. This is the same dough used to make eclairs. It is a combination of water, butter, milk and flour- cooked on top of the stove, then enriched with the addition of eggs. The dough is piped onto baking sheets and baked until puffed, golden and crisp. Once cooled, they are filled with sweetened whipped cream or, more traditionally, a custard filling. You can serve them as is, or top with chocolate or dust with powdered sugar.
The size you make your cream puffs is really a matter of personal choice. I decided to make mini puffs- about an inch in size. I find them a fun size to serve at a party.
Homemade Cream Puffs
1 recipe Cream Puff Pastry (Pate a Chou)- recipe follows
Egg custard- for filling, or sweetened whipped cream- recipe follows
Chocolate Ganache- for topping- recipe follows, or just use melted chocolate.
Start by making the dough. This recipe will make 3-4 dozen mini cream puffs.
Cream Puff Pastry
¾ c. water
¼ c. milk
¼ t. salt
½ c. (1 stick) unsalted butter
1¼ c. flour – unbleached or bread flour preferred
4 large eggs
Extra milk for brushing
In saucepan, heat together water, milk butter and salt into a full boil. Butter has to be melted. While stirring, dump flour into saucepan, stirring constantly. Mixture will form into a ball. Reduce heat to medium and continue cooking dough, while stirring, for another minute or two. Place dough in an electric mixer and allow it to cool down a little before adding the eggs. Mixture has to be at 140 degrees F, or below, before you start adding the eggs. I use the paddle attachment and beat the dough before adding the eggs. This cools the dough down faster. Beat in eggs, one at a time, until each is fully incorporated. Beat until dough is shiny. A spoon, lifted out of the batter, should leave a peak that does not fall down.
Preheat oven to 425. Line a baking sheet with foil or parchment. I used a silicone liner and was happy with the result. Don’t grease the pan. Using a piping bag, squeeze the dough into 1-inch balls on the baking sheet- leaving a little room in between. Using a little milk on your finger, smooth down any peaks on the puffs. I missed a few and did get a couple that had cracks on the top. The smoother the balls look, the nicer your puffs will look. Bake at 425 for 15 minutes, then turn oven down to 375. Bake puffs 5- 10 more minutes, or until golden brown. Tap the shells. They should sound hollow. Turn off the heat and leave oven door open a crack, allowing them to dry completely. Cool before filling. Makes 3-4 dozen.
Custard Filling
2 cups milk
2 tablespoons cornstarch
1⁄3 cup sugar
2 eggs, lightly beaten
1 teaspoon vanilla
Using a whisk, combine milk, sugar and cornstarch in a medium saucepan over medium heat on stove top. Allow milk to scald (heat to the point when tiny bubbles form around edges of pan). Whisk occasionally to prevent cornstarch from clumping on bottom edges of pan. Remove milk mixture from heat, preferably to a burner that’s turned off.
Mix about 2 tablespoons of scalded milk mixture into eggs using whisk, then introduce eggs into milk mixture in a slow stream, whisking milk mixture constantly. Immediately return pan to heat and whisk gently until custard thickens, another two or three minutes. Do not allow to boil. (If you find that you have egg white strands in custard, feel free to pass it through a fine-mesh sieve into a different bowl now.) Remove pan from heat and stir in vanilla. Cool before using. Makes 3 cups.
To fill the puffs, using a small piping tip with a pastry bag, filled with the custard. Squeeze filling in on the bottom, squeezing until it feels full.
Once cream puffs are filled, top with melted chocolate or chocolate ganache. I just dipped the tops of the cream puffs in melted chocolate. The chocolate hardened into a thin, crisp shell of chocolate on the puffs, adding a fun crunch.Filled puffs should be stored in fridge until ready to serve. They can be frozen.
Chocolate Ganache
4- 6 oz. dark chocolate, chopped- or 1 cup chocolate chips
2 oz. heavy whipping cream
In saucepan, heat chocolate and cream together until just heated through. Remove from heat and stir until smooth. You can also do this in a microwave safe bowl, in the microwave for about a minute. Remove and stir until smooth. Makes 1 cup.


