Spelt Biscotti

Spelt Biscotti
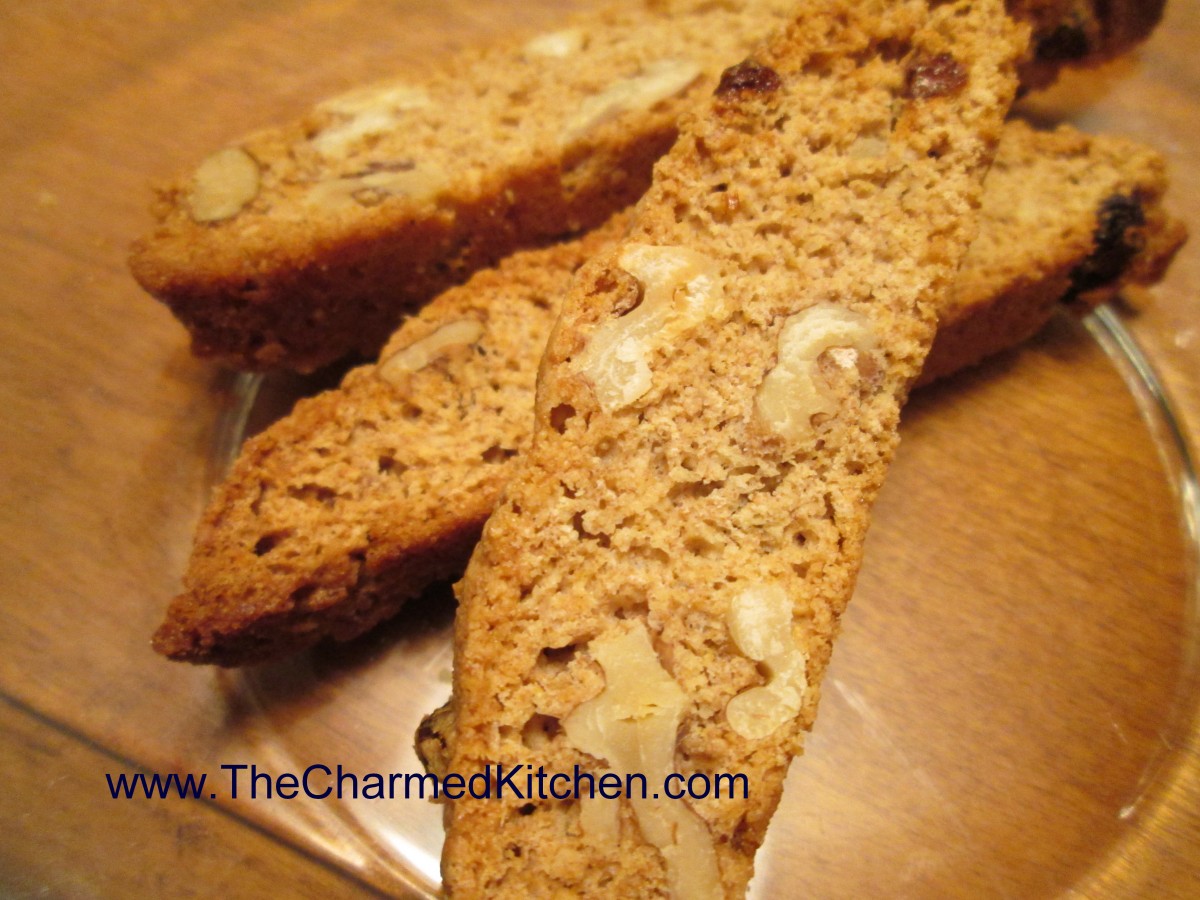
Biscotti are so easy to make. I like having them around for when company is over. Always nice to have with coffee or even a cold glass of milk. A lot less expensive than buying them, too. Biscotti are twice baked. First in a loaf, then sliced and baked again. Most recipes will tell you to bake the slices half way then turn them over to finish. A little time saving trick- just place a cooling rack on the baking sheet then place the sliced biscotti on the rack. That way they get crisp on both sides at once and there is no need to turn them. These are made with spelt flour. Spelt is an ancient grain that is very closely related to wheat. It does contain gluten, so not an option for people with wheat allergies or Celiac but a nice way to add a whole grain to your menu if you eat wheat. Unlike whole wheat flour which tends to be heavy in baking, spelt has a lighter texture and acts more like white flour. I used it to make these biscotti and they are crisp, light and very tasty.
Spelt Biscotti
1 ¼ c. spelt flour*
⅓ c. sugar
1 t. baking powder
¼ t. salt
½ c. walnuts
¼ c. golden raisins- I often use dried cranberries or other dried fruit
2 eggs
1 t. vanilla
Combine dry ingredients with nuts and raisins in medium mixing bowl. In small bowl combine eggs and vanilla and add to dry ingredients. Stir together to make a slightly sticky dough. With oiled hands shape into loaf (2”x11”) on oiled sheet. Bake at 350-degrees for 20 minutes. Remove from oven. Slice the loaf thin using a serrated knife and place slices on a rack on a baking sheet then return to oven, reduce heat to 300-degrees bake 25 minutes. Remove from oven and allow to cool. Store in an airtight container to retain crunch. Makes about 16.
* If you can’t find spelt flour you can use 3/4 c. all purpose flour and 1/2 c. whole wheat flour instead or substitute the entire amount of flour with whole wheat pastry flour.
Whole Wheat Bread


100% Whole Wheat Bread
A lot of us want to eat more whole grains, but are unhappy when we try to make 100% whole wheat bread at home. There is a secret to baking whole wheat bread that is tender and slices easily. Whole wheat flour, high in gluten, also is high in fibers which make it harder to get the gluten to that stretchy state. If you knead whole wheat bread dough for 5- 10 minutes, like white bread dough, you’ll have a dough that is far from elastic. The secret? Knead it longer. I knead my whole wheat bread dough about 20 minutes. That is easy if you have it in a stand mixer. Just set it on low and let the dough hook do the work. Not so easy if you are kneading by hand. When kneading for 20 minutes, more and more flour gets added to the dough to keep it from sticking. The extra flour results in a heavy dough and a loaf of bread that is best used as a door stop. If you have to knead by hand- knead on a wet surface. The dough won’t stick to your hands or the board and you can knead it long enough to get a properly worked dough. How do you know your dough has been worked long enough? Hold the dough up to light and pull it. It should stretch thin enough so that you can see the light through it, without tearing. Here is one of several recipes I have for 100% whole wheat bread. I love it and I think you will, too.
100% Whole Wheat Bread
2 packets active dry yeast
2 2/3 c. warm water
½ c. oil
½ c. honey, molasses or maple syrup
6 ½ -7 c. whole wheat flour
½ c. non fat dry milk
2½ t. salt
Combine first 4 ingredients in a mixing bowl and stir in 3 cups of the flour the dry milk and the salt. Beat with electric mixer for 3 minutes. Stir in enough flour for mixture to form a thick batter and continue mixing on low in mixer for 15-20 minutes. Dough takes time to become elastic. Add extra flour slowly until dough comes away from the sides of the work bowl, but not too soon. Note: if you must do this by hand add flour until dough starts to come away from the sides of the bowl and knead with wet hands on wet work surface for 15-20 minutes. Transfer dough to lightly greased bowl and cover, allowing to rise until puffy, about 1 hour. Punch dough down and transfer to a lightly floured surface. Divide in half and shape each half into a loaf. Place in a lightly greased 9×5 – inch pan. Brush top with oil and place a piece of plastic wrap over the top. Allow to rise until doubled. Bake in a preheated 350 degree oven for 40 minutes. Tent with foil after 20 minutes to prevent over browning of the top. Test for doneness by removing bread from pan and thumping on the bottom. Bread should sound hollow. Makes 2.
Cooking Classes


Pierogis- My Mother’s Polish Kitchen Class
I finally finished updating my schedule for cooking classes for this winter. If you are looking to take a class or two here is the information you need. We always have a good time and there is plenty to taste and recipes to take home. There are some daytime classes being offered at both the Mentor location and at The Wellness Center in Rocky River. These were very popular last fall so we decided to offer some again. Most classes are held in the evening.
2015 Schedule
My classes are held in a number of different venues. It is important to register early so you won’t be shut out or so the class will not be canceled. Most classes are demonstrations with plenty of food for tasting and recipes to take home. Registration fees vary from one location to the next. Food fees are payable to me the night of the class. Unless otherwise noted all classes are from 7-9 pm. Please bring containers along so you can take leftovers home with you.
I am happy to announce that there will be some daytime classes at both the Wellness Center and at Wildwood In Mentor.
Mentor
Mentor classes are held at Wildwood Center at 7645 Little Mountain Road. Unless otherwise noted all Mentor classes are held on Tuesdays. You can register online at CityofMentor.com/play or by phone at 440 974 5720 from Cleveland call 440 942 8796.
Classes in Mentor sell out quickly. Please be sure to ask to go on the waiting list if the class you want to attend is full. We do get openings and if there are enough people on the waiting list we can always schedule an additional session. Cost to residents is $14, non-resident fee is $17. That does not include the food fee paid to me the night of the class. Unless noted- all evening Mentor classes are on Tuesdays.
Winter/Spring 2015
Evening Classes
Jan. 20: Chili: Chili is almost as American as apple pie. You can’t believe how many types there are. There are some with tons of meat and some with none. There is lentil chili and even white chili. In class you’ll get to sample several and take home the recipes for many more. Food Fee $9.00.
Jan. 27: Cooking with Bacon: There is almost no finer smell than that of bacon cooking. In this class you’ll learn how to add the flavor and crunch of bacon to all sorts of dishes. Recipes include Bacon Cornbread, Bacon Yorkshire Pudding, Bacon Buttermilk Waffles and many more. Bacon- it’s not just for Breakfast anymore. Plenty to taste in class and recipes for home. Food Fee $10.00
Feb. 3: Cookies, Cookies, Cookies: What could be friendlier than a plate of fresh baked cookies? In class you’ll get hands-on experience making both traditional and innovative cookies including Holiday Fans, Ginger Cookies, Snow People and many more. Bring an apron and baking sheet and be prepared to have a sweet time. There will be cookies to take home and recipes, too. Food Fee $9.00
Feb. 10: Quick and Easy Meals: With busy lifestyles many of us just don’t have much time to cook. Still, all fast food does not have to come from a drive-thru window. In class you’ll learn how to make plenty of tasty, fast meals that the whole family will enjoy. In class you will also learn how to save time in many ways and how to freeze your own convenience foods. There will be samples to taste in class and recipes to take home. Food Fee $8.00
Feb. 24: 5 or Fewer: If you are tired of recipes with long ingredient lists try this class. All the recipes use 5 or fewer ingredients. Mostly main dishes and sides there are also some delectable desserts. Learn to make dinner simply, often using items you can have on hand and by using some convenience foods. Food Fee $9.00.
Mar.3: Citrus Cuisine: Winter is citrus season and it makes sense to take advantage of that fact. Well beyond making juice in class you will learn how to use a variety of citrus fruits in main dishes, side dishes, salads, desserts and more. You will get a chance to taste several dishes in class and will get a lot of recipes to take home. Food Fee $9.00.
Mar. 10: Hors d’oeuvres: Good appetizers can set the mood for the whole evening. They can be fast and easy or quite complex. In this class they will be generally easy to make. Recipes include Crab Mousse, Brie with Sun-dried Tomatoes and Pesto, Rueben Dip and more. You’ll also get party planning tips and plenty of samples to taste in class. There will also be recipes to take home. Food Fee $9.00
Mar. 24: Easter Baking: Baking is very much a part of our holiday traditions. Some breads are associated with springtime and Easter. In class you’ll taste breads and other baked treats from different cultures. You’ll get recipes from hot cross buns and Easter bunny rolls to Bird’s Nest Biscotti plus you’ll have the chance to do some hands on work. You’ll also get tips on how to bake better bread. Food Fee $8.00
Mar. 31: My Mother’s Polish Kitchen: You don’t have to be Polish to love Polish food! This class will be a sharing of recipes and cooking tips from the instructor’s Polish Mother. You’ll get recipes for all the traditional favorites from Kielbasa to Pierogis as well as recipes for soups, salads, main dishes and desserts. There will be several dishes for tasting so come hungry. Food Fee: $9.00
Apr. 7: Sushi for All: Sushi is fun to eat and is not hard to make, with a little practice. . In this class you’ll get a hands-on chance to roll your own using some typical and untypical ingredients. From the California Roll to Sweet and Sour Sushi (made with chicken!) you will get a chance to have some fun and see sushi in a whole new way. Food Fee: $10.00 Note: There is no raw fish served in this class.
Apr. 14: Power Lunches, Solutions for Brown Baggers: If you pack your lunch and are tired of the same old same old why not expand your horizons? Take lunch beyond the peanut butter and jelly to fun, easy and different ideas. From seasonal salads to make ahead and freeze dishes you will learn how to make lunchtime fun and still save money over eating out. You will learn how to make some convenience foods, too. There will be dishes to sample in class and recipes and ideas to take home. Food Fee $8.00.
Apr. 21: Gourmet Vegetarian: Cooking without meat does not mean your food has to be tasteless or boring. In fact you can create terrific gourmet meals and your guests will never miss the meat. In class you will learn how to make nutritious foods elegant, too. There will be plenty of foods to try in class and recipes to take home. Food Fee $8.00.
Apr. 28: Onions and Garlic: While these aromatic foods are a staple in most cuisines some people are hesitant to use them. Both onions and garlic are more than just tasty, they are good for you. In class you will learn how to roast, grill, caramelize and much more. Plenty to taste in class and to recipes to take home, too. Food Fee $8.00
Daytime Classes (11am-1 pm)
Feb.11: Seafood Made Easy: Do you enjoy seafood when dining out but face disappointment when preparing it at home? If you know a few basics cooking seafood need not be difficult. From Salmon Quiche to Creole Jambalaya you will get a chance to taste several seafood dishes and learn how to make it right every time. Recipes will be handed out to take home. Food Fee $10.00.
March.11: Sugar-Less: If you are trying to eliminate or at least reduce the amount of refined sugar in your diet this class can show you how. We will discuss sugar alternatives from artificial sweeteners to fruit-based sweetening. While most of the recipes will involve desserts there will also be recipes for main dishes and side dishes, too. Food Fee $9.00
Apr. 22: One Pot Meals: You can create tasty meals for your family without creating chaos in your kitchen. This class is all about making meals that cook in one dish for easy preparation and easy clean up. From casseroles to soups you’ll get to sample a wide array of dishes and you’ll get plenty of time saving tips as well as recipes to take home. Food Fee $9.00.
Fairview Hospital Wellness Center
Located at 3035 Wooster Rd., in Rocky River, the Wellness Center is operated by Fairview Hospital, a Cleveland Clinic hospital. Unless otherwise noted classes here are on Mondays. For more information, or to register for classes, visit fairviewhospital.org/wellnesscenter or call 440-356-0670.
Evening Classes Winter 2015
Jan. 19: Cooking with Grains: Rich sources of fiber, vitamins and minerals grains have sustained the world for years. In class we’ll explore the array of grains out there and how to make them a part of our diets. From rice to millet, quinoa to teff you will get a chance to taste many dishes using these important foods. There will also be recipes to take home. Food Fee $9.00.
Jan. 26: Go Green, Cooking with Leafy Green Vegetables: We know we should eat them but many of us just aren’t sure what to do with leafy green vegetables. This class will give plenty of tasty recipes using all sorts of greens. From delicate salad greens to the hearty winter greens you will learn how to prepare them all. Collards, beet greens, kale, broccoli rabe, spinach, chard, dandelion greens and many more. There will recipes to sample in class and recipes for home. Food Fee: $8.00
Feb. 2: Vegetarian Cooking: Watching your cholesterol? Looking for an alternative to meat and potatoes? In this class you will learn the basics of eating meatless meals including ‘protein pairing’ and how to make food the family will enjoy, too. Whether you are already a vegetarian or just want a change of pace this class will give you a lot of information and plenty of good food. There will recipes to take home and samples to taste in class. Food Fee $8.00.
Feb. 9: Soups of the World: Soup seems to be the universal comfort food. From hearty to light, piping hot to icy cold soup recipes are as different as the places they come from. This class will explore many cultural soup traditions. From Eastern Asia to Eastern Europe, South America to West Africa you will get a chance to sample soup from all over the globe. Recipes will also be provided. Food Fee $9.00
Feb. 16: Gourmet Vegetarian: Cooking without meat does not mean your food has to be tasteless or boring. In fact you can create terrific gourmet meals and your guests will never miss the meat. In class you will learn how to make nutritious foods elegant, too. There will be plenty of foods to try in class and recipes to take home. Food Fee $8.00.
Feb. 23: One Pot Meals: You can create tasty meals for your family without creating chaos in your kitchen. This class is all about making meals that cook in one dish for easy preparation and easy clean up. From casseroles to soups you’ll get to sample a wide array of dishes and you’ll get plenty of time saving tips as well as recipes to take home. Food Fee $9.00.
Mar. 2: Mediterranean: With a beautiful climate and access to the sea the foods of the Mediterranean will awake your senses. From the Grecian Isles to foods of the Middle East you will get a chance to try some tasty, simple dishes that you can easily duplicate at home. Plenty of recipes for home, too. Food Fee: $9.00.
Mar. 9: Foods of Italy: A country of diverse regions, people and cuisine, Italy has long been the home of great cooking. From classics like polenta, risotto and tiaramisu to earthy country dishes this class will expose you the foods of Italy in all their many forms. There will of course be much sampling to do and recipes to help you bring a little bit of Italy home with you. Food Fee $9.00.
Mar. 23: My Mother’s Polish Kitchen: You don’t have to be Polish to love Polish food! This class will be a sharing of recipes and cooking tips from the instructor’s Polish Mother. You’ll get recipes for all the traditional favorites from Kielbasa to Pierogis as well as recipes for soups, salads, main dishes and desserts. There will be several dishes for tasting so come hungry. Food Fee: $9.00
Mar. 30: Easter Baking: Baking is very much a part of our holiday traditions. Some breads are associated with springtime and Easter. In class you’ll taste breads and other baked treats from different cultures. You’ll get recipes from hot cross buns and Easter bunny rolls to Bird’s Nest Biscotti plus you’ll have the chance to do some hands on work. You’ll also get tips on how to bake better bread. Food Fee $8.00
Apr. 13: Scones and Muffins: The smell of fresh baked scones or muffins is a great way to start any day. In class you’ll learn how to make scones, muffins, quick breads and biscuits. From choosing the right flour to mixing the right way you’ll learn how to make fast and easy home-baked treats. Lots of food to taste in class and recipes for home. Food fee $8.00
Apr. 20: Breakfast in Bed: Pamper the ones you love as well as yourself with picture perfect breakfast foods. Besides learning the basics of preparing eggs and omelets you will also learn how to make fun foods like chocolate waffles, peanut butter pancakes and even homemade granola. There will plenty to taste in class and recipes to take home. Food Fee $8.00
Apr. 27: Sunday Brunch: Whether it’s for a few friends or the whole neighborhood, brunches can be a fun way to entertain. Brunch enchiladas, easy Danish and stuffed French toast are just a few of the recipes you will receive in class. You will get plenty to try in class and recipes to take home. Food Fee $9.00.
Daytime Classes at The Wellness Center
All classes listed below are held from 11am-1 pm.
Jan. 29: More One- Pot Meals: One- pot meals can be casseroles, crock pot meals, stews, soups and skillet dinners. Most are easy to prepare and leave behind a minimum of dishes. They are also comfort foods everybody loves. In this follow-up class the instructor will share even more of her favorite one-pot dinners including both meat-based and vegetarian meals. There will also be hints on getting the most from a crock pot. Food Fee: $9.00.
Feb. 19: Cooking With Tortillas: If the only time you eat a tortilla is at a Mexican restaurant be prepared to be pleasantly surprised. The flour and corn tortillas in the dairy counter at your grocery store can be used for everything from appetizers to breakfast, sandwiches to desserts. You’ll learn how to make Mexican and non-Mexican dishes including a baked egg roll! Tortillas are easy to use and can make cooking easier. Recipes to take home and plenty of samples to taste in class. Food Fee $8.00
Mar. 19: Tea Time: Serving tea in an English tradition that is gaining popularity here. Learn how to make proper tea and how to make all the tasty treats that are part of a proper tea party. From scones to lemon cake and cucumber sandwiches to crumpets you will get a chance to taste several tea party foods and you will receive plenty of recipes to take home. Food Fee $9.00
Apr. 16: Quick and Easy Meals: With busy lifestyles many of us just don’t have much time to cook. Still, all fast food does not have to come from a drive-thru window. In class you’ll learn how to make plenty of tasty, fast meals that the whole family will enjoy. In class you will also learn how to save time in many ways and how to freeze your own convenience foods. There will be samples to taste in class and recipes to take home. Food Fee $8.00
SELREC/ Adult
South Euclid/ Lyndhurst Recreation Department classes are held in the cooking room in Beachwood Middle School. To register for classes you can call 216 382 4300. You can also request a brochure for all SELREC classes when you call.
Winter 2015
Jan: 15: Soup’s On: What could be nicer than a simmering pot of homemade soup? In this class you’ll learn how to make wonderful soups staring with how to make stock from scratch. You’ll get to taste Tomato Bisque and Cabbage Soup along with Bean and Barley. There will plenty of recipes to take home, too. Food Fee $9.00
Jan. 28: Chili: Chili is almost as American as apple pie. You can’t believe how many types there are. There are some with tons of meat and some with none. There is lentil chili and even white chili. In class you’ll get to sample several and take home the recipes for many more. Food Fee $9.00.
Feb. 11: Chowders and Stews: This class is all about the ultimate comfort foods. Learn how to make all kinds of warm, thick and creamy dishes for chilly nights You will get a chance to sample several dishes in class and will have plenty of recipes for home. You will also learn how to thicken chowders and stews without flour or cornstarch. Food Fee $9.00
Feb. 25: Brownies: From moist and chewy to cherry studded or kissed with mint you will get to sample a wide array of the classic chocolate treat. Blondies, fudge and even recipes using box mixes that have been tweaked to make them better. If you love brownies try this class for the recipes, the tasting and the smells! Food Fee $9.00
March 11: One Pot Meals: You can create tasty meals for your family without creating chaos in your kitchen. This class is all about making meals that cook in one dish for easy preparation and easy clean up. From casseroles to soups you’ll get to sample a wide array of dishes and you’ll get plenty of time saving tips as well as recipes to take home. Food Fee $9.00.
Mar. 25: More One- Pot Meals: One- pot meals can be casseroles, crock pot meals, stews, soups and skillet dinners. Most are easy to prepare and leave behind a minimum of dishes. They are also comfort foods everybody loves. In this follow-up class the instructor will share even more of her favorite one-pot dinners including both meat-based and vegetarian meals. There will also be hints on getting the most from a crock pot. Food Fee: $9.00.
Beachwood Recreation
Cooking classes for Beachwood Recreation are held at the Beachwood Middle School in the home ec room. The School is located on Richmond Road behind the library. You can register by calling 216 292 1970.
All classes listed in Selrec schedule can also be registered through Beachwood Rec.
Winter 2015
Jan: 15: Soup’s On: What could be nicer than a simmering pot of homemade soup? In this class you’ll learn how to make wonderful soups staring with how to make stock from scratch. You’ll get to taste Tomato Bisque and Cabbage Soup along with Bean and Barley. There will plenty of recipes to take home, too. Food Fee $9.00
Jan. 28: Chili: Chili is almost as American as apple pie. You can’t believe how many types there are. There are some with tons of meat and some with none. There is lentil chili and even white chili. In class you’ll get to sample several and take home the recipes for many more. Food Fee $9.00.
Feb. 11: Chowders and Stews: This class is all about the ultimate comfort foods. Learn how to make all kinds of warm, thick and creamy dishes for chilly nights You will get a chance to sample several dishes in class and will have plenty of recipes for home. You will also learn how to thicken chowders and stews without flour or cornstarch. Food Fee $9.00
Feb. 25: Brownies: From moist and chewy to cherry studded or kissed with mint you will get to sample a wide array of the classic chocolate treat. Blondies, fudge and even recipes using box mixes that have been tweaked to make them better. If you love brownies try this class for the recipes, the tasting and the smells! Food Fee $9.00
March 11: One Pot Meals: You can create tasty meals for your family without creating chaos in your kitchen. This class is all about making meals that cook in one dish for easy preparation and easy clean up. From casseroles to soups you’ll get to sample a wide array of dishes and you’ll get plenty of time saving tips as well as recipes to take home. Food Fee $9.00.
Mar. 25: More One- Pot Meals: One- pot meals can be casseroles, crock pot meals, stews, soups and skillet dinners. Most are easy to prepare and leave behind a minimum of dishes. They are also comfort foods everybody loves. In this follow-up class the instructor will share even more of her favorite one-pot dinners including both meat-based and vegetarian meals. There will also be hints on getting the most from a crock pot. Food Fee: $9.00.
Concord
Students may enroll in classes directly at the Concord Community Center, at 7671 Auburn Road, Concord Township OH 44077. They can call to inquire about classes at 440-639-4650. They can register in person or send in registration to the above address. A registration form is available on our website at concordtwp.com, under Current Happenings/Township Newsletter. Or, in place of a registration form, they can just write a note stating their name, address, phone, the class they are enrolling in, dates, times and payment – and send it in with their check.
Winter/ Spring 2015
Feb. 19: Mardi Gras: This class is for anyone who has enjoyed the food of New Orleans or always wanted to. With a rich ethnic heritage New Orleans cooking is like no where else. From earthy Cajun dishes to classy Creole you’ll learn how to make everything from savory Gumbo to melt in your mouth pralines. Food Fee $9.00
Mar. 4: Gourmet Vegetarian: Cooking without meat does not mean your food has to be tasteless or boring. In fact you can create terrific gourmet meals and your guests will never miss the meat. In class you will learn how to make nutritious foods elegant, too. There will be plenty of foods to try in class and recipes to take home. Food Fee $8.00.
Mar. 18: For Chocolate Lover’s Only: For many people consuming chocolate is one of life’s great joys. Cooking with chocolate can be enjoyable, too. From the basics of handling and working with chocolate to baked treats this class will give you plenty of ways to indulge. You will get a chance to taste plenty of chocolate treats and will have recipes to take home. Food Fee: $9.00
Apr. 9: Salad: Salads can be side dishes or main dishes and nothing quite matches a properly tossed salad. Still, salads can be so much more than lettuce. In class you’ll learn how to make salads of all types and you’ll learn how to make salad dressings, too. There will be plenty to taste in class and recipes to take home. Food Fee $8.00.
Apr. 23: Cinco Di Mayo: Mexican and Tex-Mex foods are really hot! Popular and spicy these are foods that always make the party. If you don’t know your ancho from your poblano its time to take the toro by the horns. Class will include a glossary of ingredients as well as sources. There will be plenty of food for tasting in class and recipes for home. Ole! Food Fee $9.00.
May 14: Picnic: The classic summertime feast will be planned and enjoyed in this class. From a family reunion to an intimate meal for two you will learn how to have perfect picnics every time. From classic dishes to fun new ideas you will get plenty of samples to take in class and recipes to take home. There will also be information on food safety. Food Fee: $8.00.
6 Recipes for Leftover Ham


Ham and Swiss Calzones
If you enjoyed ham for New Years you might be looking for ways to use some of the leftovers. Here are some recipes I wanted to share with you. I hope you enjoy them. Happy New Year.
Ham and Swiss Calzones
4 c. flour
2 c. rye flour
2 T. sugar
2 t. salt
2 packages quick-rising yeast
2⅓ c. hot water
2 T. oil
2 lb. thin sliced ham- more or less
1 lb. sliced Swiss cheese
Thousand island dressing- recipe follows
1 egg , beaten
Set aside 2 cups of the all-purpose flour. Combine remaining flour with the other dry ingredients in a medium bowl. Stir in water and oil and gradually stir in enough flour to make a soft dough. Turn onto lightly floured surface and knead until dough is smooth and elastic, about 5 minutes. Cover dough and let rest 20 minutes. Divide dough into 12 pieces and roll one piece into a 8 -inch circle. In the middle of the dough place 1 1/2 ounces of the Swiss cheese, a spoonful of the dressing and 2-3 ounces of the ham. Brush the edge of the dough with water. Fold over the dough in half and press the edges to seal. Brush the edge again with water and roll the edge over again. It will give you a prettier look and seal the calzone better. Repeat with remaining dough and fillings. Place calzones on greased baking sheets- or on a baking sheet with a silicone liner or parchment paper liner. You will end up with 12 calzones in all. Only put 4 on one baking sheet. Cover and let rest 15 minutes while preheating the oven to 400 degrees. Before placing calzones in the oven brush with beaten egg and make a few slashes with a knife to help steam to escape while baking. I put 2 baking sheets in the oven at the same time and switch them halfway through baking. Bake in a preheated 400-degree for 20-25 minutes or until golden brown. If baking 2 at once switch them after 10 minutes or so. Cool slightly before eating. Serve warm and refrigerate leftovers. Makes 12.
If you want to use regular yeast use warm, rather than hot water. Also, allow a little more time for the dough to rise the first time, about 40 minutes. Everything else will work the same.
Thousand Island Dressing
Combine equal parts of ketchup, mayo and sweet pickle relish. You likely need at least a cup for this recipe. I made extra so the sandwiches could be dipped in extra dressing, if desired.

Ham with Brussels Sprouts

Ham and Swiss Bread Florentine
Ham and Veggie Stir Fry
Corn and Ham Saute
1 T. oil
1 small onion, diced
1 c. diced ham
4 c. corn- fresh or frozen
salt and fresh ground pepper to taste
In pan cook onion in oil until tender. Add the ham and cook a few minutes longer. Add corn and continue cooking until corn is heated through. Season to taste and serve. Serves 3-4.
Ham and Swiss Bread Florentine
3 ¼ c. flour
1 T. sugar
1 t. salt
1 package quick-rising yeast
1 c. hot water
1 T. oil
¼ c. Dijon mustard
6-8 oz. sliced ham
4 oz. sliced Swiss cheese
1 large bunch fresh spinach, rinsed and steamed a few minutes to wilt, drained well.
Set aside 1 cup of the flour. Combine remaining flour with the other dry ingredients in a medium bowl. Stir in water and oil and gradually stir in enough flour to make a soft dough. Turn onto lightly floured surface and knead until dough is smooth and elastic, about 5 minutes. Roll dough into a rectangle about 16 x 8. Spread mustard down center middle of dough. Top with meat slices, cheese and spinach. Cut one-inch wide strips of dough from filling to edge on both sides. It will sort of look like fringe. Alternating sides, fold strips up and over the filling at an angle. Carefully lift loaf onto greased baking sheet and place at an angle. Cover with a towel and place sheet on top of a roasting pan half-filled with simmering water for 15 minutes. Bake in a preheated 400-degree for 20-25 minutes or until golden brown. Cool slightly before slicing. Serve warm and refrigerate leftovers.
Note: The variations for this bread are almost endless. Some favorite combinations are Corned beef and Swiss with sauerkraut and thousand island dressing., roast beef and cheddar, chicken, broccoli and cheese, Spinach with ricotta or feta and onions, pizza, assorted fillings. You get the idea. Use your imagination and have fun. Just be careful not to overfill, or the bread will be hard to move, use fillings that aren’t too runny and always use cold fillings.
If you want to use regular yeast use warm, rather than hot water. Also, don’t let dough rise over boiling water. After kneading cover dough and let rise 45 minutes. Punch down and assemble as in original recipe. Cover with a towel and let rise until dough looks puffy, about 40 minutes. Bake as directed above. These breads can also be frozen.
Ham and Corn Chowder
I was looking for a quick soup for dinner the other night. Inspiration hit when I came across some corn in the freezer. I had blanched and frozen it during the summer at the peak of corn season. I had a little ham in the fridge I was wanting to use up and the pairing was a natural. I started by sauteing an onion in a little butter. Once the onion was tender I added a peeled and diced potato, the corn, the diced ham and about 2 or 3 cups of chicken stock. I covered the soup and let it simmer until the potato was tender, about 15 minutes. I then took 4 tablespoons of flour and put it in a jar. I added a cup of milk, put on the lid and shook it until the flour was well mixed in. I poured the flour mixture into the pot and brought the mixture up to a gentle boil. I stirred it as it thickened up. I cooked it for a few minutes and adjusted the seasonings adding salt, fresh ground pepper and a dash of hot sauce. I also added some chopped parsley. The end result was a wonderful chowder that took almost no time at all. Sometimes the best dishes come from just looking at what we already have. In this case some frozen veggies and a bit of leftover ham.
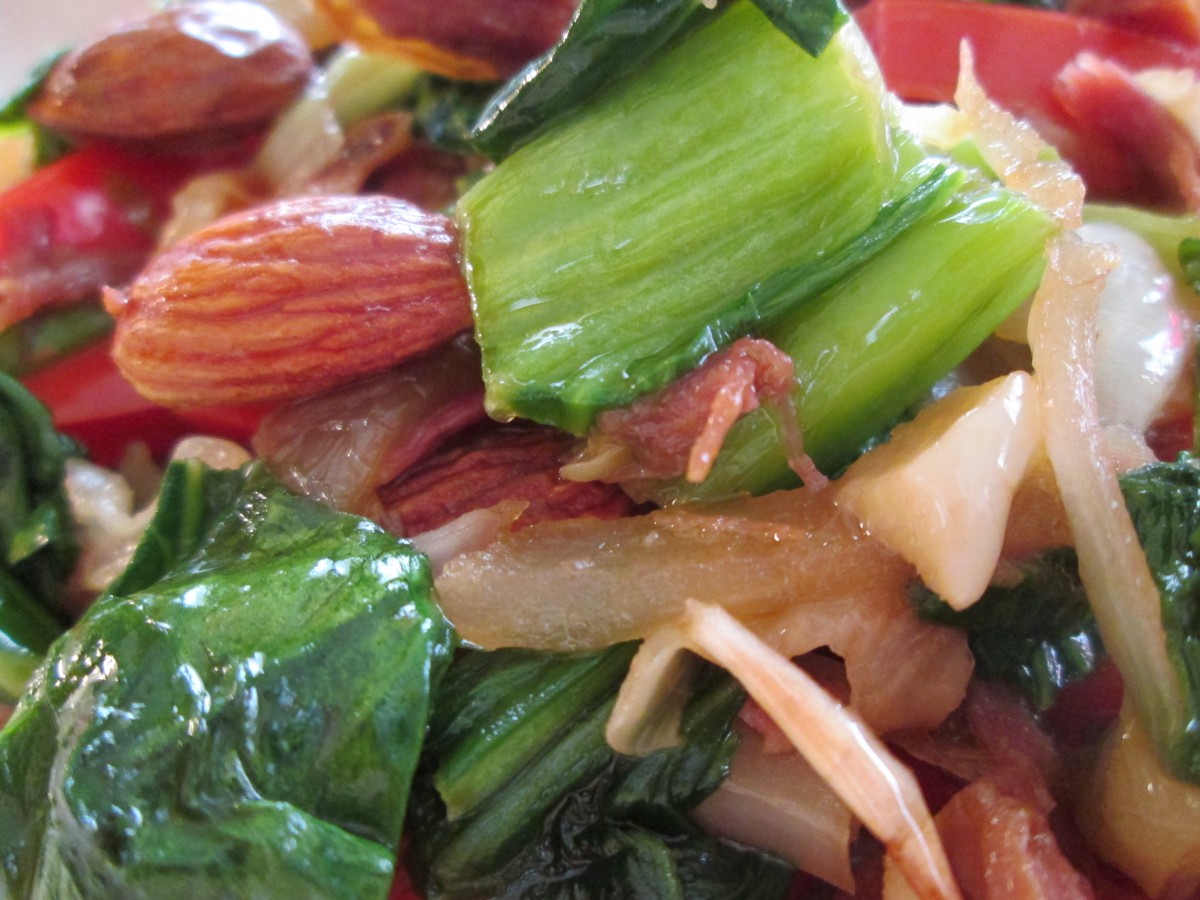
Ham and Veggie Stir Fry
2 T. oil
1 medium onion, sliced
1 medium carrot, peeled and sliced thinly
1 c. sliced cabbage
1 clove garlic, peeled and chopped
1 sweet red pepper, seeded and cut into thin strips
2 c. sliced bok choy
1 1/2 c. cubed cooked ham
2 green onions, trimmed and sliced
1/2 c. whole almonds
fresh grated ginger- or powdered, to taste
soy sauce to taste
dash of hot sauce
Heat oil in wok or skillet and cook onion and carrots for 3 minutes. Add cabbage add garlic and stir fry 2-3 minutes longer. Toss in the pepper and bok choy and cook 3 more minutes. Add ham, green onions and almonds along with seasonings and soy sauce and cook until ham is heated through. Serve over hot cooked rice or pasta. Serves 3-4.
Ham with Brussels Sprouts
I started by trimming the Brussels sprouts and cutting small ones in half. I quartered the larger ones. I heated a little butter in a skillet and added 3 cups of prepared Brussels sprouts. I cooked them until they were getting a little color on them. I think their flavor is enhanced by sauteing. I then added 1 1/2 cups of diced cooked ham and 1/2 cup of water. The water helps steam the sprouts so they are tender. I like Brussels sprouts tender. You can skip the water, if you like. The water evaporates quickly and as soon as the ham starts to brown a little the dish was pretty much done. I added a little freshly ground pepper- but it didn’t need salt. I also served it with fresh grated Romano cheese. You could serve it as is or toss in some cooked pasta with the ham. Simple and really good. You might even get a Brussels sprout hater to give this one a try.
Pancakes and Waffles


Blueberry Pancakes with Blueberry Syrup
For breakfast you can’t do much better than pancakes or waffles. I love both but rarely have them unless there is a special reason. For the New Year I am planning on making at least one of these. The hard part will be deciding which one. I often serve pancakes and waffles with a fruit based syrup or powdered sugar. I prefer to warm the syrup up. It keeps the pancakes and waffles from cooling down too quickly. Of course, you can’t do much better than real maple syrup, warmed up with some fresh butter.
Blueberry Pancakes
2 c. biscuit mix*
1 c. milk
2 eggs
1 c. fresh or frozen blueberries
Combine mix, milk and eggs until just blended. Fold in berries. Pour batter by scant 1/4 cups in lightly greased griddle or skillet over moderate heat. Turn when pancakes are dry around the edges. Cook until golden brown. Makes about 13.
* Like Bisquick or Jiffy Mix or home made- recipe follows
Biscuit Mix*
8 c. flour
1 c. powdered milk
1 c. powdered buttermilk (or 1 more cup powdered milk)
1/4 c. baking powder
1 T. salt
1 1/2 c. shortening*
Combine dry ingredients and cut in shortening until well mixed. Store in tightly covered container. Makes 10 cups.
* You can substitute coconut oil or butter for the shortening- but mix will have to be kept cool. Refrigerate if using butter and use within 3 months.
Blueberry Syrup
4 c. blueberries
1 c. water
1½ c. sugar
In saucepan heat berries and water to a boil and boil 2 minutes. Crush berries with a potato masher as they cook. Add sugar and cook for 10- 15 minutes on medium heat until mixture thickens. Process syrup with an immersion blender or in a blender until smooth. Cool, then refrigerate. Keeps a couple of weeks. Makes about 3½ cups.

Pumpkin Pancakes

Peanut Butter Pancakes with Red Grape Syrup

Orange Pecan Waffles
Pumpkin Pancakes
2 c. baking mix – like Bisquick or Jiffy Mix – I make my own*
3 T. brown sugar
2 t. cinnamon
1 t. nutmeg
1 1/2 c. evaporated milk
1 c. solid pack pumpkin
2 eggs, beaten
2 t. vanilla
Combine dry ingredients in mixing bowl and set aside. Whisk together wet ingredients and stir into dry ingredients. Lightly grease a skillet and cook over moderate heat. Use about 1/3 c. of batter per pancake. Turn when edges appear dry. Makes 16.
Peanut Butter Pancakes
1 c. buttermilk baking mix, like Bisquick or Jiffy mix, I make my own
2 T. sugar
1 egg
1/3 c. peanut butter
2/3 half and half
1/4 c. water
Combine baking mix and sugar and set aside. Whisk together remaining ingredients until smooth and add the dry ingredients, stirring until just combined. Heat and lightly oil skillet and use 1/4 c. of better for each pancake. Cook over medium heat. Turn when edges appear dry. Makes 8.
Red Grape Syrup
I took about 2 cups of frozen grapes and set them in a small skillet with about 1/4 cup of sugar. I let this mixture cook over medium high heat until the grapes were tender and the liquid in the pan had created a syrup. I didn’t need to add water as the frozen grapes gave off their juices as soon as they started to heat up. With fresh grapes you might want to add a little water to get the whole process going. It took about 15 minutes in all. While the grapes were cooking I made the pancake batter and began cooking the pancakes. When the pancakes were done I topped them with a few grapes and a drizzle of the pretty grape syrup.
Orange Pecan Waffles
2 cups flour
4 teaspoons baking powder
2 tablespoons sugar
1 teaspoon salt
1 t. orange zest
2 eggs
1 cup orange juice
½ c. milk
½ c. melted butter
1 T. vanilla
¾ c. pecans. Note: Probably would have been better to chop them up a little. I just tossed them in the batter whole.
Whisk together dry ingredients and set aside. Beat together remaining ingredients and add to dry ingredients mixing until smooth. Cook in a waffle iron until crisp.
Fudge Waffles
2 eggs, room temperature
1/2 stick butter, melted and cooled
3/4 c. sugar
1 t. vanilla
1 c. buttermilk
1 c. flour
1/2 c. cocoa
1/2 each baking powder and baking soda
1/2 t. cinnamon
1/4 t. salt
1/2 c. chopped nuts, optional
1/2 c. chocolate chips, optional
Beat first three ingredients until light and foamy, about 2 minutes. Stir in vanilla and milk. Beat in dry ingredients just until blended. Stir in nuts and chips. Bake until waffles are cooked through. Makes 4 cups of batter. Serve with whipped or sour cream and fresh fruit.

Fudge Waffles
Coffee and Spice Rubbed Pork Roast


Coffee and Spice Rubbed Pork Roast
Since so many people are making a pork roast of some sort for the New Year I thought I’d re-post this recipe. I’ve had several requests for it in the last few days. It is really good- with a rich blend of spices and coffee. The spice rub would also be great on lamb or beef. I am thinking of trying it on duck soon. Enjoy and Happy New Year!!
Coffee and Spice Rub
¼ c. ground coffee
¼ c. brown sugar
2 T. paprika
2 t. each cayenne pepper, cumin, garlic powder, salt and ginger
1 t. allspice
½ t. cinnamon
Combine all ingredients and stir to mix well. Store in a cool place, preferably in the refrigerator. Rub can be used on roasts or on chops, steaks and smaller cuts of meat. If using on chops that are being pan fried watch carefully as the sugar in the recipe could burn.
To use the rub: several hours before cooking place the roast in a shallow pan and sprinkle heavily with the rub. Use your hands to spread it evenly and cover completely. Place plastic wrap on clean surface and transfer roast to the wrap. Fold plastic wrap to cover roast , using more plastic wrap as needed so meat is sealed well. Return to fridge for at least a couple of hours, or overnight. When ready to cook, bring roast out and allow to stand 30 minutes. Remove plastic wrap and place roast in a roasting pan on a wire rack.
For the pork roast allow about 20 minutes per pound. Larger roasts need a little less time per pound. When roast is finished- remove from oven and let stand 5 minutes, or a little longer before cutting.

Ready to serve
10 Easy Appetizers


Won Ton Appetizers
If you are looking to serve appetizers for an upcoming party here are some easy ones that your guests will love. Some can be made ahead of time, saving you time the day of the party. The won ton appetizers pictured here are from left to right- Crab Rangoons, Sesame Spinach Triangles and Honey Ginger Chicken Won Tons.
Sesame Spinach Triangles
oil
1 small onion, chopped fine
12 oz. fresh spinach, cooked, chopped and drained or 1 (10 oz.) box frozen spinach, thawed, cooked and drained
1/2 c. chopped water chestnuts
2 T. oyster sauce
2 t. sesame oil
1 t. hot sauce
won ton wrappers
Heat oil in skillet and cook onion until tender. Remove from the heat and stir in the remaining ingredients, except won ton wrappers. Adjust seasonings, if needed. Allow mixture to cool. Place 1 tablespoon of the filling in the center of a won ton wrapper. Moisten edges with a little water and fold over to form a triangle. Press to seal edges. Place filled triangles in 375 degree oil and fry for about 2 minutes or until golden.
Honey Ginger Chicken Won Tons
1 c. cooked diced chicken- I used thighs
1/4 c. minced celery
1/4 c. mayo
2 T. honey
2 T. dried minced onion
1 T. hoisen sauce
1 t. fresh grated ginger
salt and hot sauce to taste
won ton wrappers
Combine all ingredients, except the wrappers, and mix well. Place 2 teaspoons of filling in the center of each won ton wrapper. Moisten edges with a little water. Fold in 2 corners to meet in the middle. Starting at one of the remaining corners fold up and over and form into a roll. Press to seal edges. Fry in hot oil ( 375 degrees) for 1-2 minutes or until golden brown.
Crab Rangoons
1 clove garlic, minced
1 (8 ounce) package cream cheese
1 (6 ounce) can crab meat, drained and flaked
2 green onions with tops, thinly sliced
2 teaspoons Worcestershire sauce
1/2 teaspoon light soy sauce
won ton wrappers
Combine all filling ingredients and chill until ready to use. Place 2 teaspoons of filling onto the center of each wonton skin. Moisten the edges with water and bring 2 corners together. Bring the other 2 corners up and press all together to seal. Press all seams to seal. It should look like a little bundle. Fry in hot oil until golden brown, about 1-2 minutes.
Combine all ingredients in ovenproof bowl and mix until smooth. Bake in a 300-degree oven for 25-30 minutes or until hot and bubbly. You can also heat mixture in microwave for 90 seconds or until hot. You can mix the ingredients ahead of time and chill until ready to heat and serve. Serve with crackers, crusty breads or veggies. You can also spoon mixture into hollowed out tomatoes and broil until crab dip is hot and bubbly.
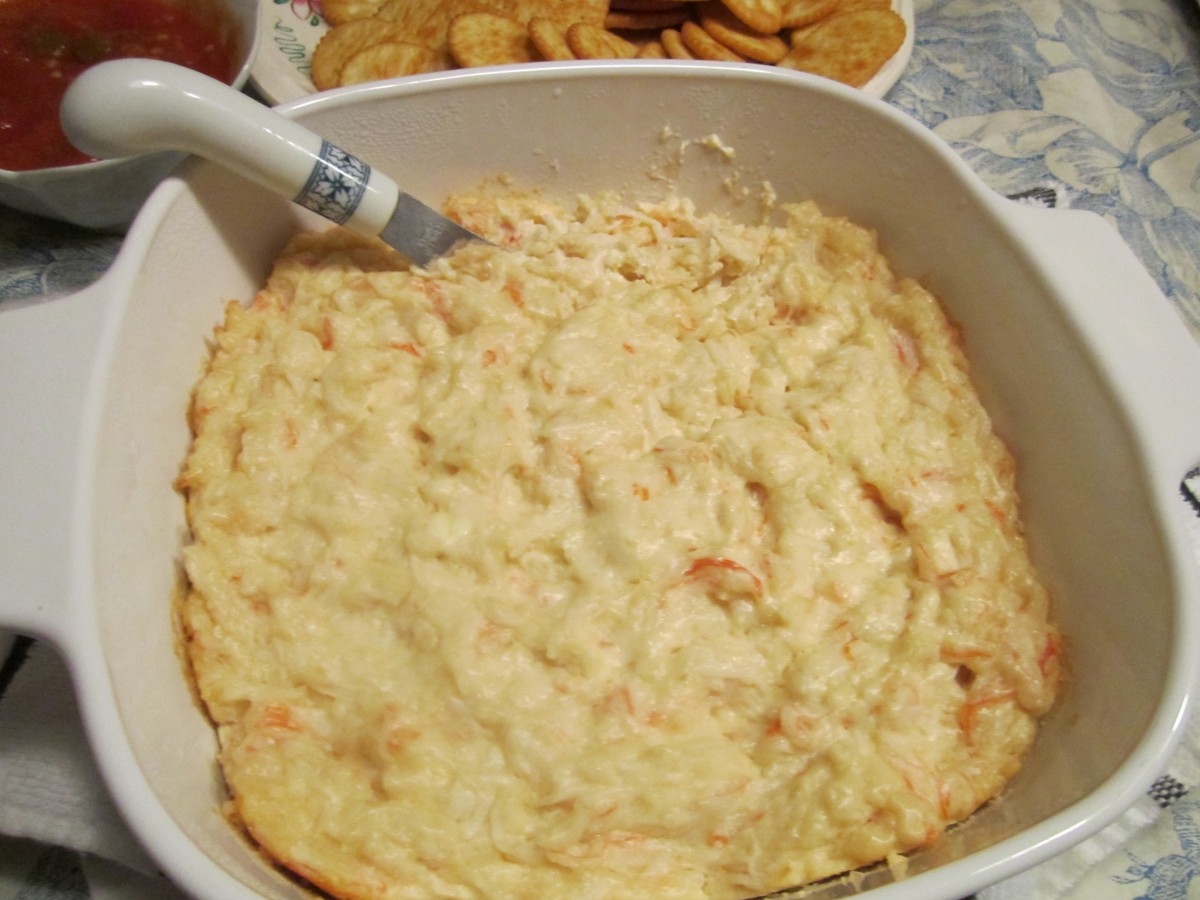
Easy Hot Crab Dip

Brie with Pesto and Sun Dried Tomatoes

Caramelized Onion “Toasts”
Pineapple Glazed Chicken Wings
12 chicken wings, cut into 2 pieces, save tips for another use
1 medium onion, chopped
1 can (or jar) of pineapple chunks, drained, reserving liquid- I used a pint jar- if using store bought use the 20 oz. can.
salt and pepper
Sauce:
1/2 c. apple cider vinegar
1/2 c. sugar
3 T. ketchup
3 T. sherry
2 T. soy sauce
1 t. minced garlic
1 t. red pepper flakes
reserved pineapple juice
3 T. cornstarch
Preheat oven to 400 degrees. Place wings in pan and season with salt and pepper. Bake chicken wings in roasting pan for 30 minutes. Add the onions and pineapple chunks to the pan with the chicken wings and return to the oven for 30 minutes longer. While chicken is cooking combine the first seven sauce ingredients in a small pot and bring to a boil. Check baking pan for any juices- Spoon them out and add to the sauce. Combine pineapple juice and cornstarch in small bowl, stirring until smooth and add to the sauce. Return to boil and stir until sauce is thickened and bubbly. Pour hot sauce over chicken and return to the oven to bake 20-30 minutes longer or until wings look nicely glazed and sauce has started to brown. Makes 24.
Brie Truffles
8 oz. brie, room temperature- I remove the rind from the brie for a smoother texture.
8 oz. cream cheese, softened
1 stick ( 4 0z.) butter, softened
2 c. fresh pumpernickel bread crumbs*
In food processor combine cheeses with butter until smooth. Chill mixture 30 minutes or longer. With a small cookie scoop or teaspoon form mixture into small balls. Place crumbs in a bowl and roll the balls of cheese in the crumbs to coat. Place in small paper cups and chill until ready to serve. Makes 3-4 dozen.
* To make the crumbs just place torn
Caramelized Onions “Toasts”
2 lbs. Onions, chopped
3 T. oil
1 t. salt
2 T. brown sugar
¼ c. balsamic vinegar
Dash red hot pepper sauce
Paprika
Sauté onions in oil with salt over low heat for 25-30 minutes. Onions should begin to caramelize and brown without burning. Add remaining ingredients and cook slowly another 15 minutes. Adjust seasonings, if needed and serve warm with crusty bread, crackers or smoked meats. Keeps in fridge for a couple of weeks or can be frozen. To make the toasts I placed a little of the onions on Wheat crackers and topped with squares of sliced Swiss cheese. Placed in a 400 degree oven until the cheese melted.
Brie with Pesto and Sun-Dried Tomatoes
2 c. basil leaves
3 T. Pine nuts, walnuts or pecans
2 T. olive oil
2 cloves garlic
3 T. Parmesan cheese
salt and pepper to taste
½ c. sun-dried tomatoes, soaked in water and chilled overnight
1 T. oil
1 t. oregano
small wheel of Brie 1-2#
Combine first five ingredients in a blender or processor until smooth. Add salt and pepper to taste. Drain tomatoes and chop coarsely. Combine with remaining oil and oregano and season to taste. Split Brie horizontally into 3 pieces. Spread
One layer with pesto and top with a piece of Brie. Spread with tomato mixture and top with remaining Brie. Wrap and chill overnight. Serve at room temperature or warm slightly. I warmed it wrapped in foil at 400 degrees for 10 minutes.Wanted it to brown a bit. Goes best with crusty breads.
Caponata
2 small eggplants, unpeeled and cut into 1/2-inch pieces, about 5-6 cups
1 large onion, chopped
1/2 c. olive oil, or a little more
4 celery ribs, sliced
2 sweet peppers, seeded and chopped
1 heaping tablespoon chopped garlic
3 tomatoes, chopped- or 1 (14.5) can diced tomatoes- undrained
1 c. sliced black olives
3-4 T. red wine vinegar
salt and pepper to taste*
Soak eggplant in salted water for at least 15 minutes. Rinse, drain and pat dry. Set aside. Meanwhile in skillet cook onion in 2 tablespoons of the oil until tender. Add the celery and cook until the celery is tender-crisp. Place mixture in a mixing bowl and set aside. Heat 2 tablespoons more of the oil and cook the peppers until tender. Add garlic and cook 1 minute longer. Add the tomatoes and cook 1 minute longer. Add this mixture to onion mixture and return skillet to the heat. Add remaining oil to skillet and cook eggplant until golden brown and tender. You may have to do this in 2 batches. Add remaining ingredients to bowl while eggplant is cooking. When eggplant is done add it to the bowl and mix well., Season to taste. Serve with crusty breads cold, hot or at room temperature. Serves 10-12.
* While I don’t have any herbs listed in the ingredients I often add oregano and basil or an Italian or Tuscan seasoning blend. I also like to add capers.
Mushroom Spread
½ lb. mushrooms, trimmed, washed and chopped
2 T. butter or oil
1 medium onion, chopped
½ t. salt
Fresh ground pepper
Dash of nutmeg
1 t. lemon juice
2 t. flour
½ c. sour cream or strained yogurt
½-1 t. dill weed
Sauté onions and mushrooms in butter or oil for 4 minutes. Add seasonings, lemon juice and flour and cook 3 minutes more. Remove from heat and stir in sour cream or yogurt and dill. Serve with pumpernickel bread, crackers or in mini cream puff shells.
“Sell by Dates” – What do they really mean?

I saw this report on ABC news and thought I’d share it with you. I know we all struggle with wanting to be sure our food is safe and not wanting to throw out good food. After watching this report you’ll understand why we are confused. It takes a few minutes for the link to open- but it is well worth watching.
http://abcnews.go.com/GMA/video/making-sense-sell-best-labels-food-27836316
Sweet Potato Pancakes


Sweet Potato Pancake
For dinner with a friend the other night I was looking for something fun to do with sweet potatoes. I have quite a few of them and didn’t want to just roast or steam them. I ended up shredded them and making sweet potato pancakes. Amy had duck fat so that is what we used to fry them in. They were amazing. Crispy on the outside and tender in the middle. I am definitely going to make them again. I could see making smaller ones and serving as an appetizer. Here is the recipe.
Sweet Potato Pancakes
2 small sweet potatoes, peeled and shredded- you want to end up with 3-4 cups of shredded sweet potatoes- 1 medium /large one would also work
2 eggs
½ c. panko bread crumbs
1 T. parsley flakes
1 t. hot pepper sauce, or to taste
½ t. garlic powder
½ t. onion powder
Salt and pepper to taste
Oil for frying- we used duck fat and it was wonderful
Combine all ingredients in a mixing bowl and stir until well mixed. Heat oil or fat in large skillet to 350 degrees.* Spoon batter into skillet in 4-5 pancakes, depending on the size you prefer. Cook until golden on one side- and starting to firm up- about 5 minutes. You might have to cook them in two batches – depending on the size of your pan. Don’t over crowd. They are tricky to turn over. Turn over carefully and cook at least another 5 minutes or until both sides are golden brown and crispy. Makes 4-5
* A little trick to know when your oil is hot enough. Place an un-popped kernel of popcorn in your pan with the oil when you are heating it up. Popcorn pops at 350 degrees. When the popcorn pops – it is time to add the batter.
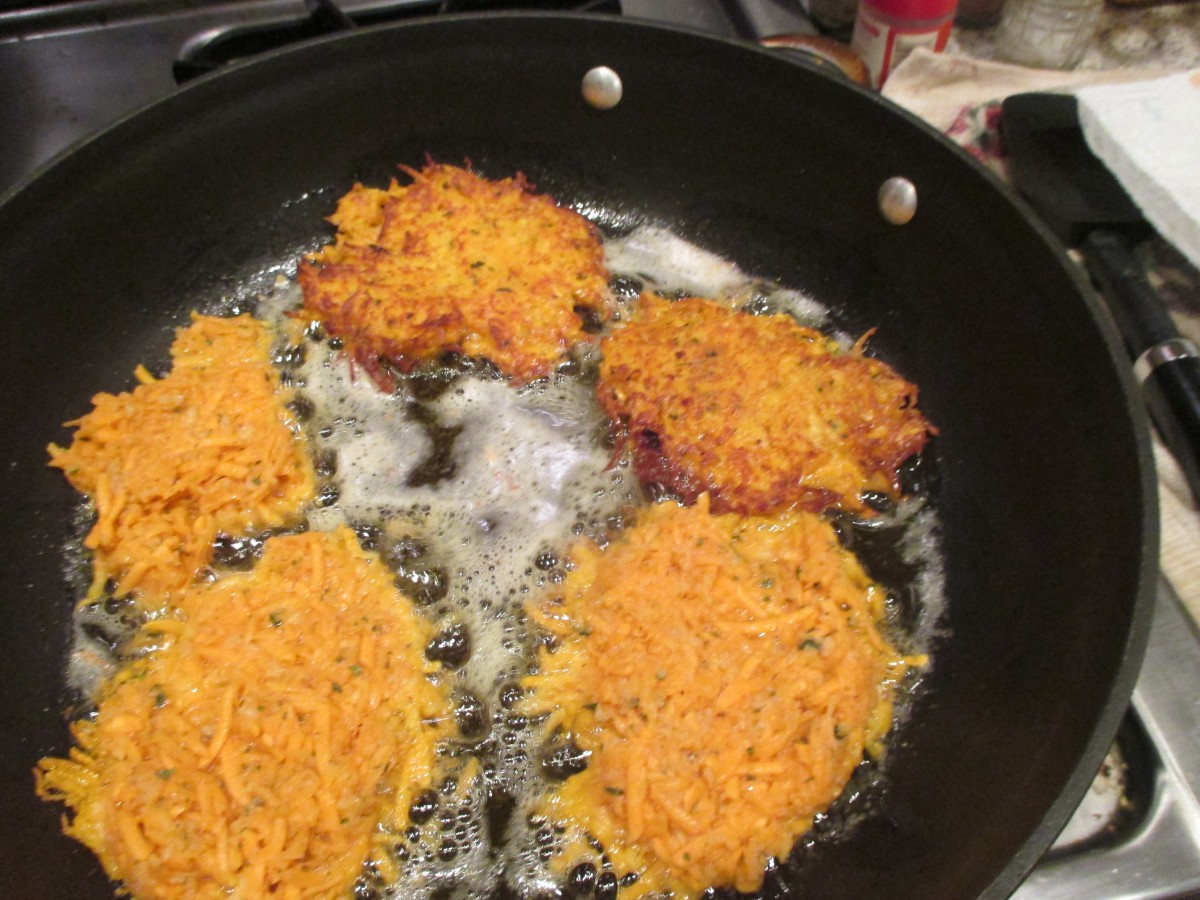
Sweet potato pancakes cooking
Easy Cashew Brittle

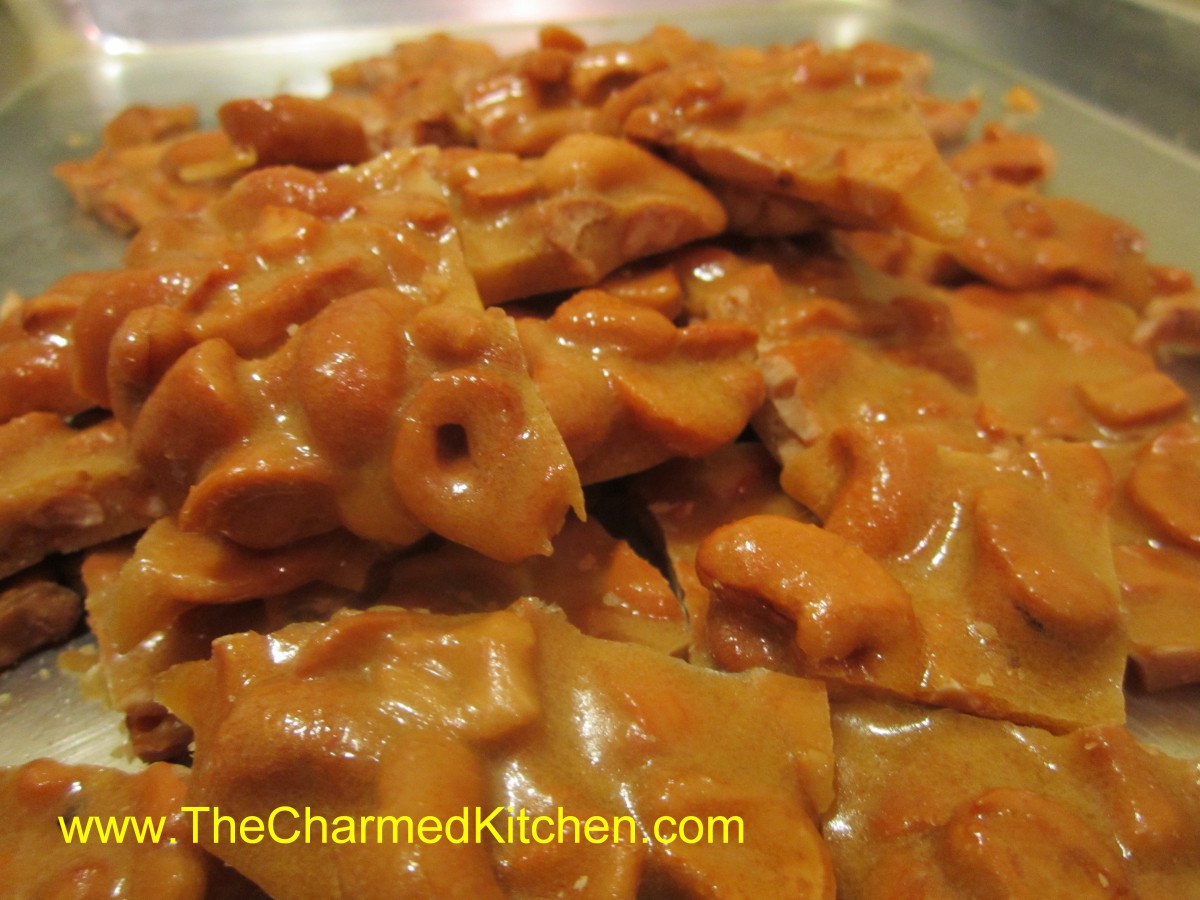
Easy Cashew Brittle
If you need a last minute gift- perhaps something to bring to a holiday party- this brittle might just be the answer. I was given this recipe at a craft show a few years ago. The brittle is cooked in the microwave. No special thermometers or equipment required. Just a glass bowl and a few minutes of your time. It is really good, too. You can dress it up with a drizzle of chocolate, if you like. Perhaps just putting it in a pretty tin. But let’s be honest- people love this stuff and in the end- that is what matters. It tastes great.
Cashew Brittle
2 c. cashews*
1 c. sugar
1/2 c. corn syrup
1/8 t. salt
1 t. butter
1 t. vanilla
1 t. baking soda
Butter or oil a large baking sheet and set aside. In a 3-4 quart glass bowl combine the nuts, sugar, corn syrup and salt. Microwave on high for 3 minutes. Remove from microwave, stir well and return to microwave. Cook 3 more minutes in microwave. Remove and stir in butter and vanilla, stirring until butter has melted. Return to microwave for and cook for 2 more minutes. Remove from microwave and stir in baking soda. Stir until well blended and pour mixture onto prepared baking sheet. Spread out quickly then allow to cool. Once cool, break into pieces. Store in a cool, dry place. I normally store it in a tin or plastic container with a tight-fitting lid.
* I used salted cashews but feel free to experiment with other nuts
Note: Use high power setting on microwave.


