Green Tomato Sweet Relish

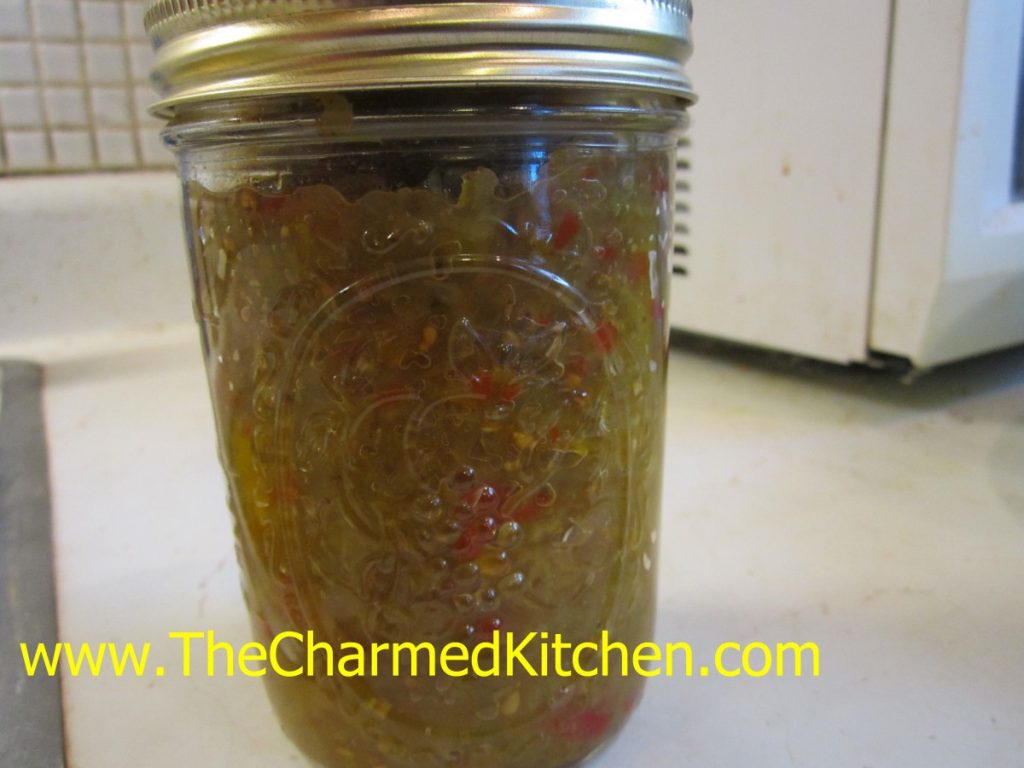
This sweet relish is a great way to preserve those last of the season tomatoes. It is every bit as good as relishes made from cucumbers.
Someone asked me for the recipe- so here it is.
Green Tomato Sweet Relish
6 pounds green tomatoes, about 22 medium
2-3 medium onions
2 medium sweet red peppers
1 sweet green pepper
1 large rib celery
1 3/4 c. white or cider vinegar ( 5% acidity)
1 2/3 c. sugar
3 T. canning salt
1 1/2 t. celery seeds
1/2 t. each cinnamon, cloves, allspice and turmeric
1/4 t. cayenne pepper
Wash trim and quarter vegetables. Put vegetables through food grinder using medium blade or pulse in food processor to chop finely. Drain, discarding liquid. Wash jars in hot, soapy water. Rinse and set aside. Combine vinegar with remaining ingredients in large saucepan and bring to a boil. Add vegetables and simmer 10 minutes, stirring occasionally. Continue simmering while packing hot jars, one at a time. Fill to within 1/2 -inch from top of jar. Wipe rims and place on lids. Process 10 minutes in a boiling water bath. Makes 5-6 pint jars.
Cinnamon Pear Coffee Cake


This pear-studded cake is perfect to have with that morning cup of coffee- or for dessert. The tender cake is topped with chopped pears, cubes of cream cheese, cinnamon sugar and a vanilla glaze. The taste is amazing. I used Bartlett pears, but any ripe pear would work.
I will say up front, that this is not the prettiest cake out there. It comes out of the oven kind of lumpy, from all those pears and the tiny cubes of cream cheese. Once you top it with the cinnamon sugar, and later the glaze, it looks a lot better. It is one of the tastiest cakes, though, and isn’t that what’s important?
So if you want to enjoy one of my favorite late Summer/early Autumn fruits in a new way- try making this simple, tasty pear coffeecake. I don’t think you will be disappointed.
Cinnamon Pear Coffeecake
1 stick (½ cup) butter
1 egg, lightly beaten
1 c. half and half
1 c. all-purpose flour
1 c. sugar
2 t. baking powder
2 t. cinnamon
1 t. vanilla
½ t. salt
2 lbs. pears, about 4 large, cored, peeled and sliced *
8 oz. cream cheese, cut in small pieces
Topping
3 T. cinnamon sugar
Glaze:
½ c. powdered sugar
1-2 T. milk
½ t. vanilla
Preheat oven to 350 degrees. Melt butter and pour into a 9-by-13-inch glass baking dish. In a small bowl, mix together the egg, half and half, flour, sugar, baking powder, cinnamon, vanilla and salt. Pour directly over the butter in the baking dish, but do not stir. Drain pears well. Add the pears, arranging in a single layer as much as possible. Sprinkle cream cheese pieces over fruit. Place in preheated oven and bake for 45 minutes, or until top is golden brown and edges are bubbling. When you remove the cake from the oven, sprinkle with the cinnamon sugar. Set cake aside to cool. Make glaze by combining glaze ingredients. Add just enough milk for a nice consistency for drizzling. Drizzle over cooled cake. Store leftovers in fridge. Serves 12.
* To keep pears from discoloring place in a bowl with 2 cups of water and 2 tablespoons lemon juice
Chocolate Beet Cake


When I say beet cake, a lot of people give me a funny look. First, there are the beet haters, and you know who you are. The people who just don’t like the taste of beets. I get that, beets are an acquired taste.
Then there are the people who like beets, but could never picture them in a cake. I bake cakes with carrots in them, zucchini and even parsnips. Adding beets to a cake is not so far off. The beets add a subtle red color to the cake, but they also add moistness. The end result is a cake that is full of flavor and has a wonderful, moist texture. Rumor has it that the first red velvet cake was tinted red with beet juice, not artificial red coloring.
Truth is, I don’t really taste the beets in the cake much at all. I taste the chocolate. So here is the chocolate beet cake recipe. I hope you enjoy it.
Chocolate Beet Cake
2 cups all-purpose flour
1½ teaspoons soda
1/2 teaspoon salt
1 1/2 cups sugar
1/2 cup cocoa powder
3 large eggs, beaten
1 cup plus 2 tablespoons oil
1½ cups grated cooked beets
2 teaspoons vanilla
Powdered sugar, optional, or cream cheese frosting- recipe below
Preheat oven to 350°. Combine flour, soda, salt, sugar and cocoa in a bowl; set aside. In a mixing bowl, combine the eggs and oil. Beat in vanilla and continue beating until well blended. Slowly beat in dry ingredients until well mixed; stir in beets. Pour into a greased and floured 9×13-inch baking pan. Bake at 350° for 25 to 35 minutes, or until cake bounces back when touched lightly with finger. Cool in pan on a rack. Frost cooled cake, or dust with powdered sugar.
Frosting recipe:
8 oz. Cream cheese, softened
3/4 c. powdered sugar- or more to taste
1 stick butter, room temperature
Beat all together until fluffy. Frost cake and refrigerate until ready to eat.
Plum and Pomegranate Sauce


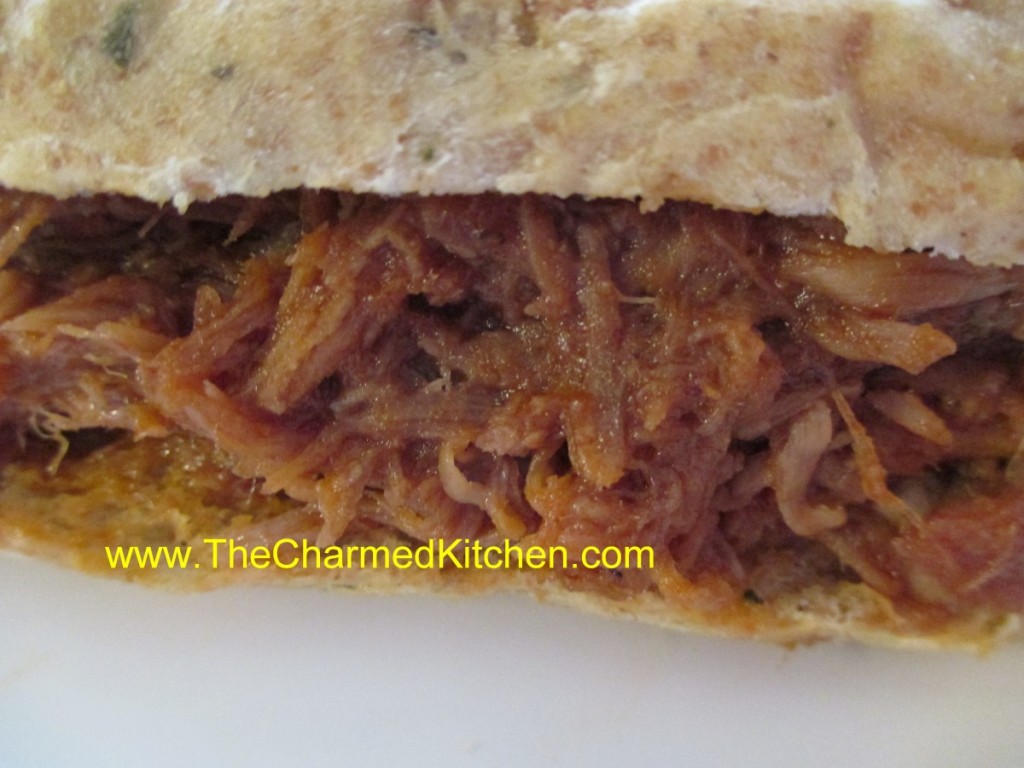
Pulled Pork with Plum and Pomegranate Sauce
For a Labor Day gathering I wanted to use a pork shoulder for part of the dinner. I had plums and wanted to use them. I like pairing fruits with meats and other savory ingredients. I pureed the plums, then used them as the base for a sauce I needed for pulled pork. One of my dinner guests was not a big fan of more tomato based barbecue sauces, so I figured plum sauce might be a better option. I added pomegranate syrup for more tang- and for its pretty color, along with a handful of other ingredients. I let it simmer down until nice and thick, then stirred it into my pulled pork. Even the guest who said she is not normally a fan of pulled pork liked it with this sauce. It would also go well with poultry and lamb.
Plum and Pomegranate Sauce
3 T. oil- you could use butter or bacon fat, if you like
1 medium onion, minced
2 gloves garlic, minced
2 c. plum puree*
½ c. pomegranate molasses**
½ c. apple cider vinegar
2 T. honey- or a little more to taste
2 t. hot sauce- or to taste
1 t. grated ginger
Salt and pepper to taste
Heat oil in pan and cook onions until very tender. Add the garlic and cook another minute or two, being careful not to burn the garlic. Add remaining ingredients and cook until sauce is thickened, about 30 minutes. I simmer the sauce and stir more often as it reduces to avoid scorching. You should cook it down to around 2 cups. Adjust seasonings once it is cooked down. Use with pulled pork, on chicken or as a glaze for duck or even lamb.
* To make the plum puree- dip plums in boiling water for 30 -60 seconds. Remove them to a bowl with ice water to cool. Slip off skins and discard. Remove pits and discard them, too. Place plums in a blender or food processor and puree until smooth. You’ll need about 1½ pounds of plums for 2 cups of puree.
** Pomegranate molasses can be found in some grocery stores and in specialty stores. It is pomegranate juice that is boiled down until it becomes thick and syrupy.
Preserving Basil

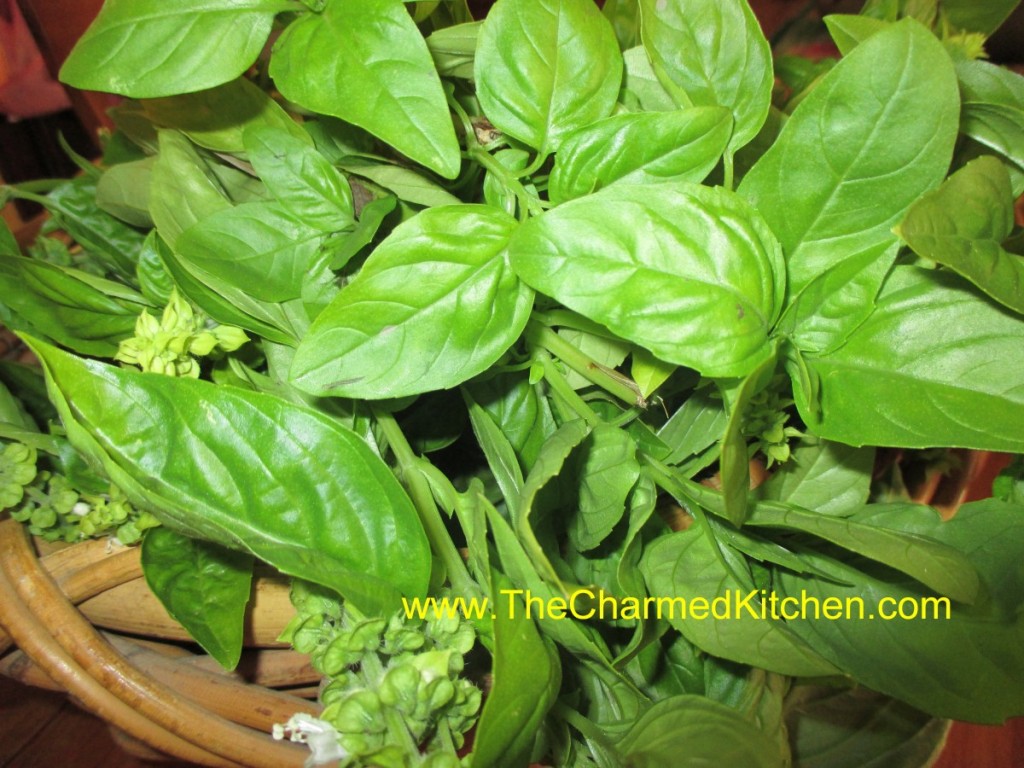
This time of year, I am looking to preserve as many herbs as I can, to enjoy year round. Basil is one of my favorites. I grow, and use, a lot of it. I am doing a major harvest of basil today. Some will be frozen in olive oil, some dried, and some added to vinegar.
None of the preservation methods is difficult. Basil can be tricky to dry, though. Unlike a lot of herbs, basil does not air dry well. I have a dehydrator, but if you don’t have one, you can still dry your basil successfully. Believe it or not, you can dry basil, and other herbs, in a microwave. Directions follow.
So I am off to harvest my basil. One thing is sure- my house will smell really good today.
Freezing in Oil
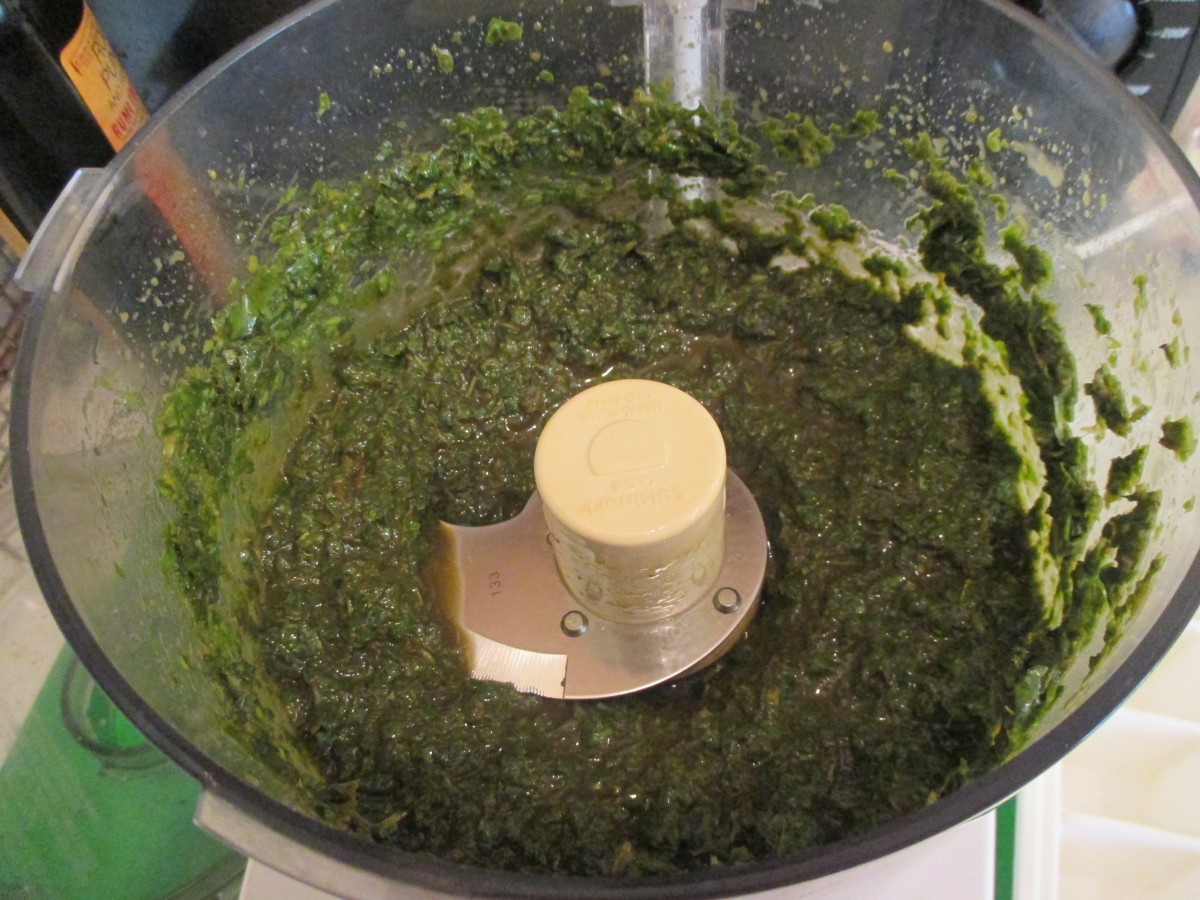
To use basil in pesto sauce, dried just won’t do. You can easily freeze your basil in olive oil and have it ready whenever you want it. Just place clean basil leaves in a blender or food processor and add olive oil. It is important that you use olive oil because it freezes solid. While the machine is running pour in oil until basil is blended. I use very little oil for two reasons. It takes up less room in the freezer and I don’t need so much oil. I can add more oil when I use it, but this way if I am doing a big batch i don’t go through all my oil. Once the mixture is blended pour or spoon it into ice cube trays and freeze. Once frozen solid pop out the basil cubes and put in freezer bags and return to the freezer.You can also freeze chopped basil without the oil. I like it better in the oil, but I freeze other herbs by just chopping them up and freezing them.
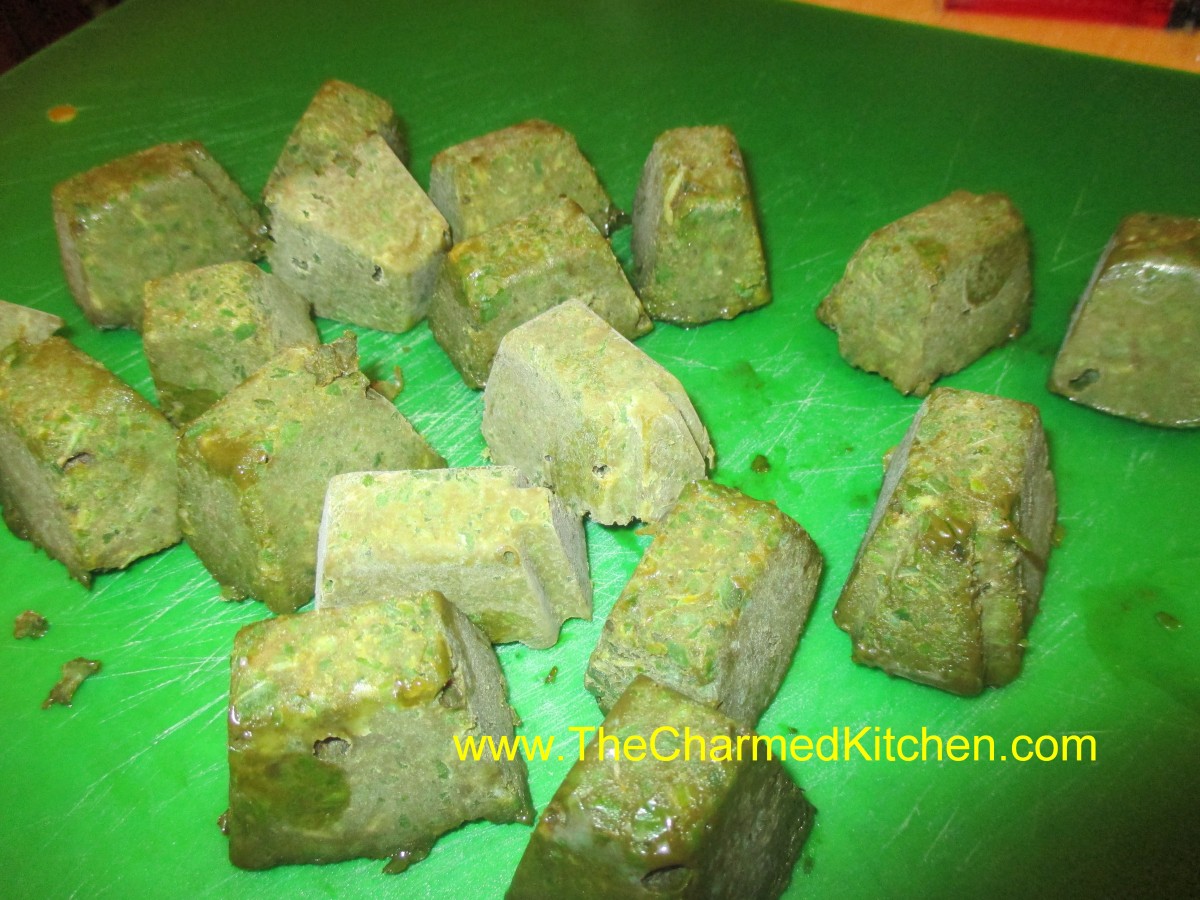
Frozen Basil Cubes
Process basil and olive oil until smooth
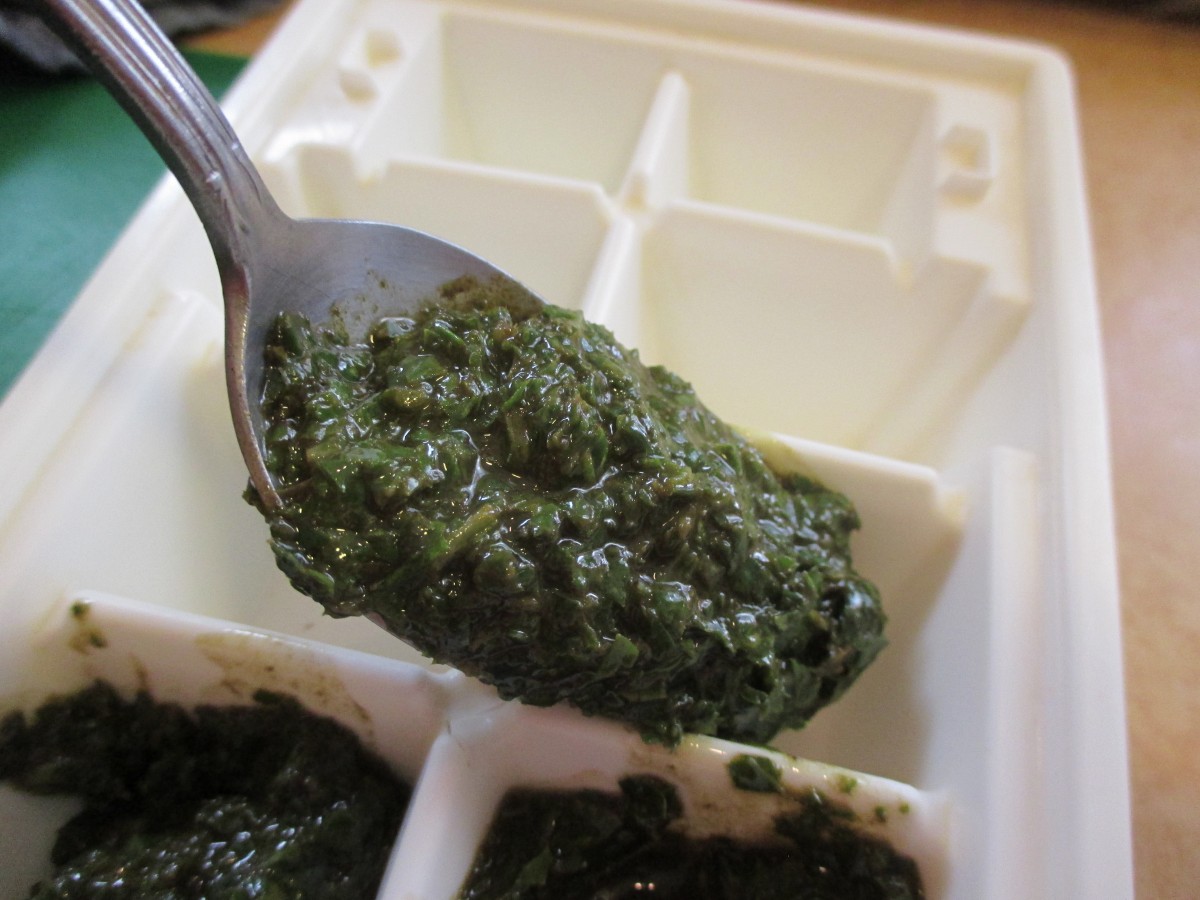
Spoon mixture into ice cube trays and freeze
Microwave Drying
If you don’t have a dehydrator you can dry herbs in your microwave. It only takes a couple of minutes per batch. Just place a handful of fresh, clean basil leaves in a linen-type kitchen towel. Fold the towel over the herbs and place in the microwave. Be sure to put a raw potato in with the herbs in the oven. If you only put the herbs in, it is like running the oven empty and can damage the microwave. Just put the potato off to the side. If you do several batches you will have a baked potato. ? If you have a turntable, just cook on high for 2 minutes. Check and see if they are dry- you might need a little more time. I need about 2 1/2 minutes in my microwave. Better to put them in for 15 more seconds at a time than to over dry them. If you don’t have a turntable microwave on high for a minute. After the first minute turn the herbs 1/4 turn and cook 15 seconds, turn again and cook another 15 seconds. Repeat four times in all. You can dry other herbs in the microwave. Small leaved herbs like thyme are done even faster. Remove the herbs from the oven and allow them to cool. check if they are dry enough and return, wrapped to cook longer if needed. Store in containers in a cool place.
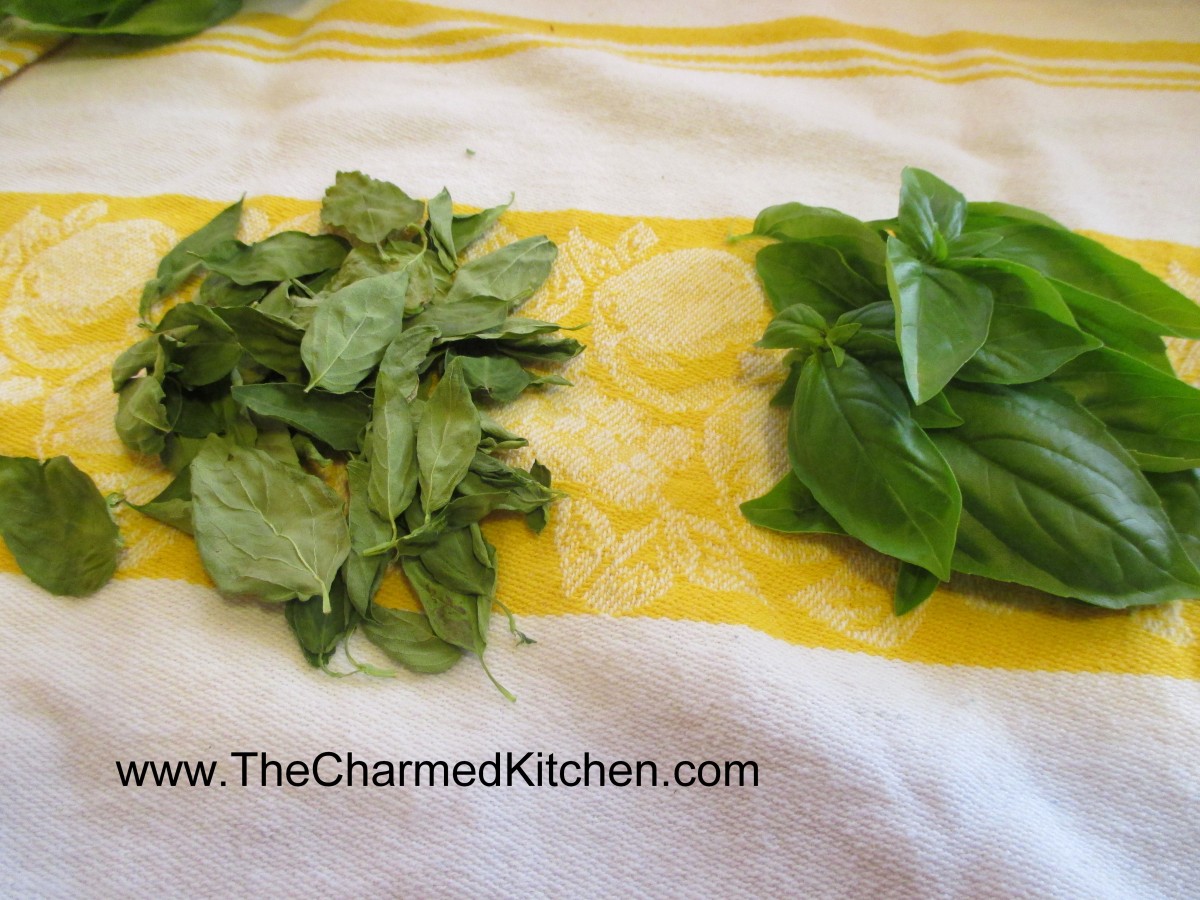
Microwave dried basil on the left and fresh basil on the right
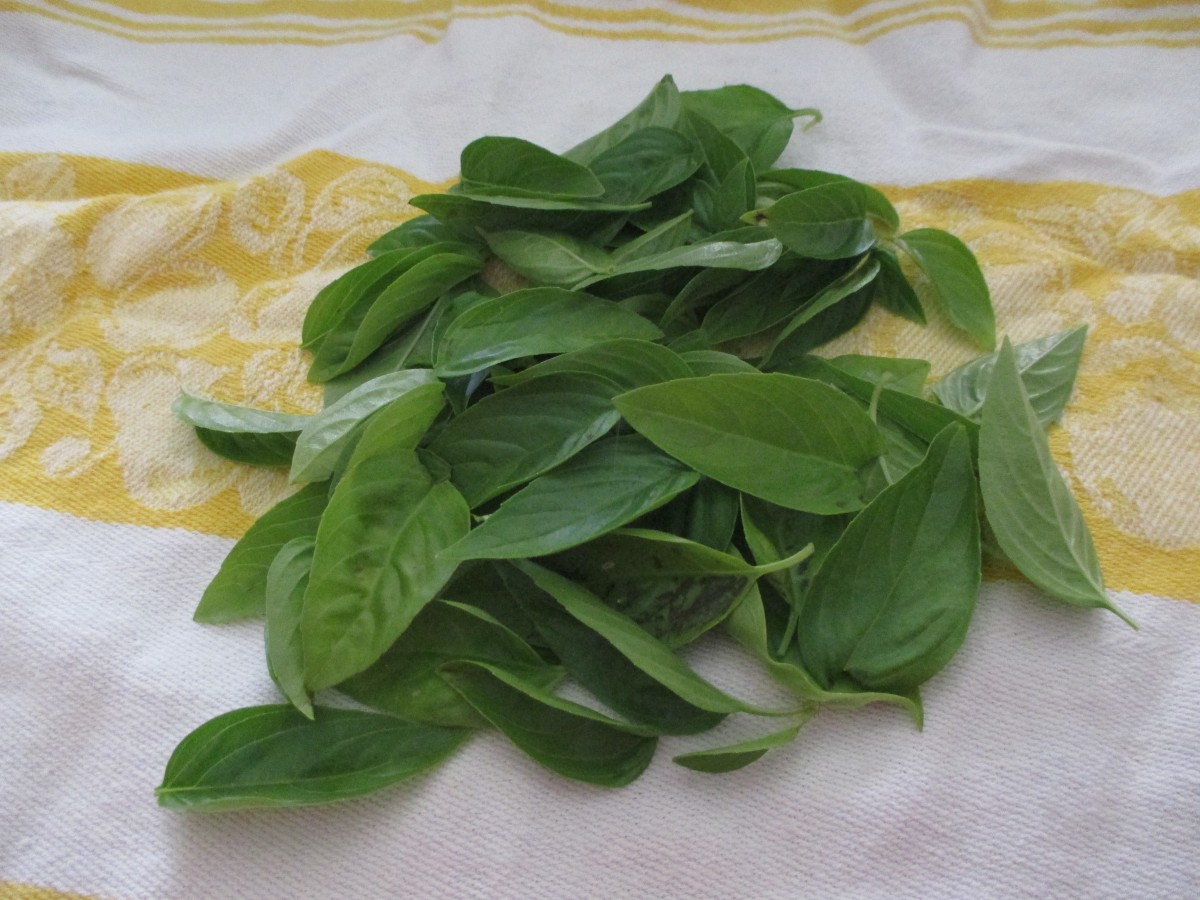
Place fresh basil on a towel and fold towel over the herbs
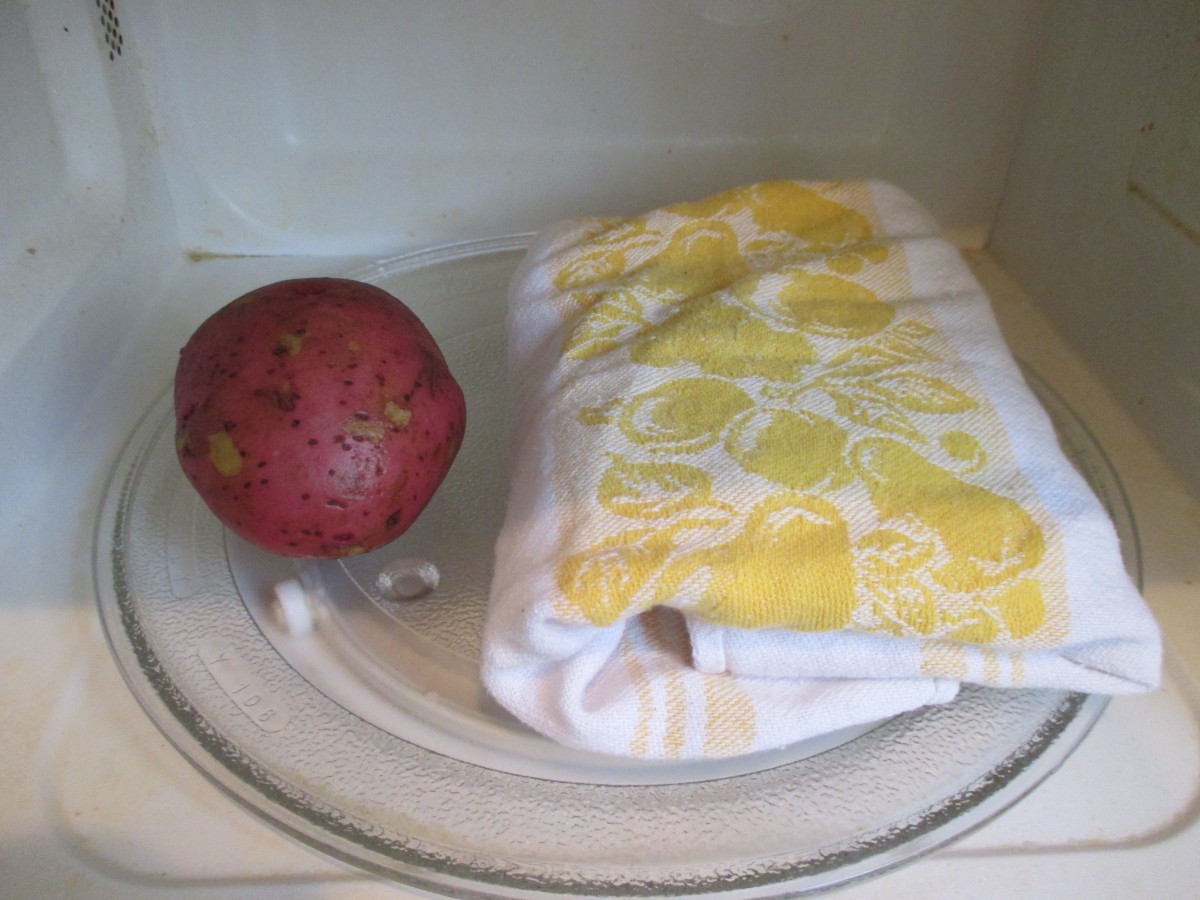
Place in microwave with a potato
All microwaves are different. Some will take longer and some even less time. Watch your herbs carefully. While I have never seen it happen I was told once that theoretically, they could catch on fire if left in too long. Urban legend perhaps, but just be careful.
Herb Vinegar
When I grow basil, I try to keep the blossoms pinched off. Better for leaf production. But by this time of year some are blooming. Rather than dumping the blossoms you can use them to flavor vinegar. Just snip off the blossoms and place them in a sterilized bottle or jar. Use several sprigs of basil flowers for every 2 cups of vinegar. Make sure the vinegar is at least 5% acidity. I like to use different vinegars for different herbs. I often use cider vinegar, red wine vinegar (for purple basil) and white wine vinegar. Leaves can be used, too. Vinegar should be heated up to 190 degrees- or just below the boiling point. Close up the jar and store in a cool place (50-70 degrees) for a couple of weeks. Before using strain out the herbs and filter- I use coffee filters or you could use cheese cloth. Store in a pretty bottle, if you have one. They can be kept for up to a year when stored in the fridge.
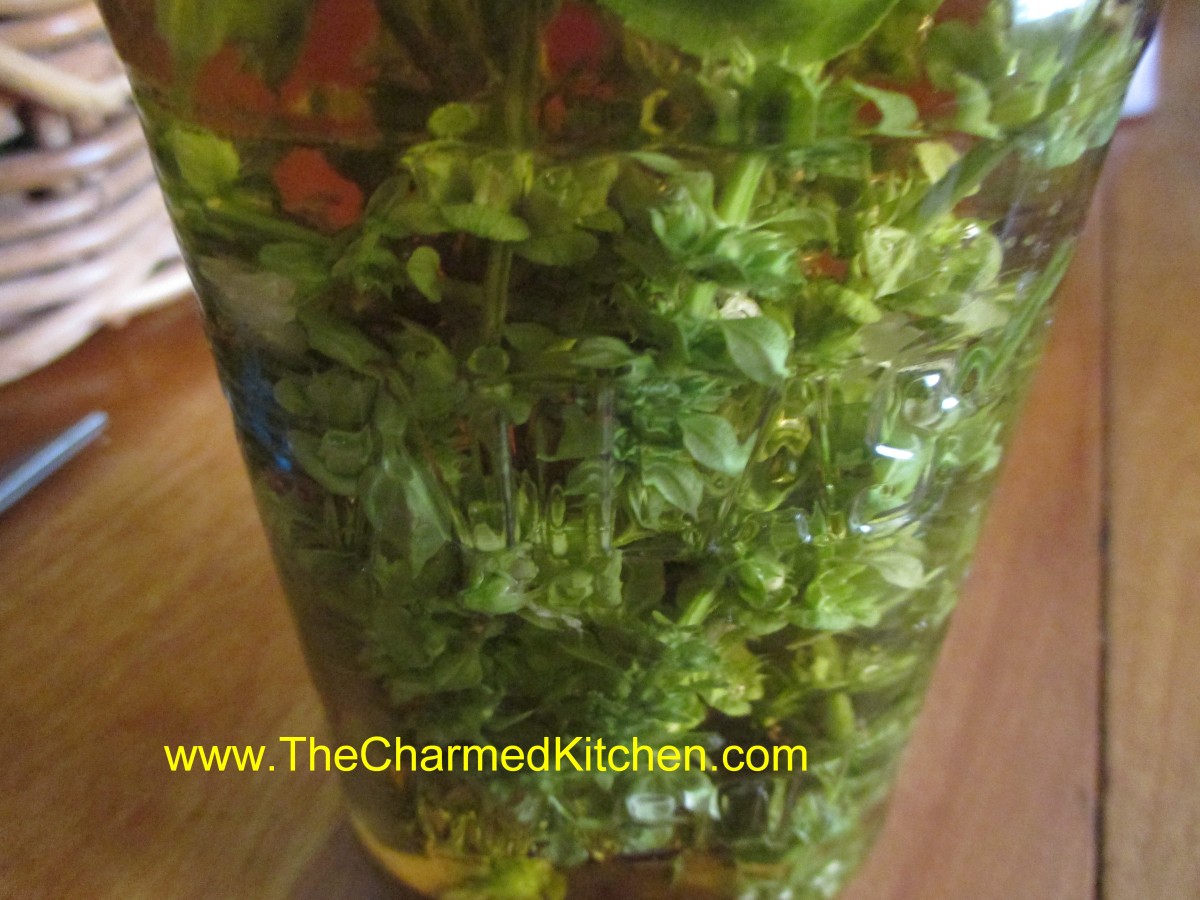
Basil blossoms in vinegar
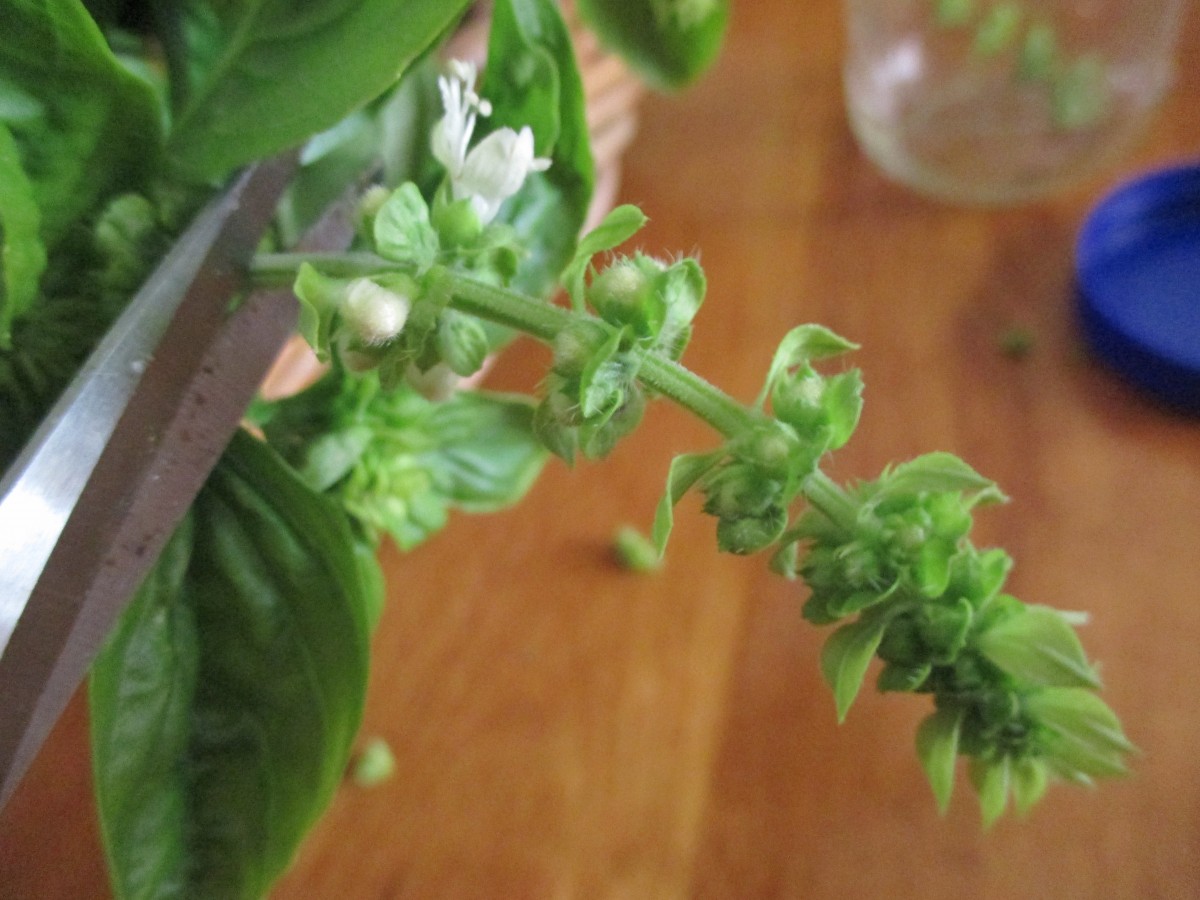
Snip off basil blossoms
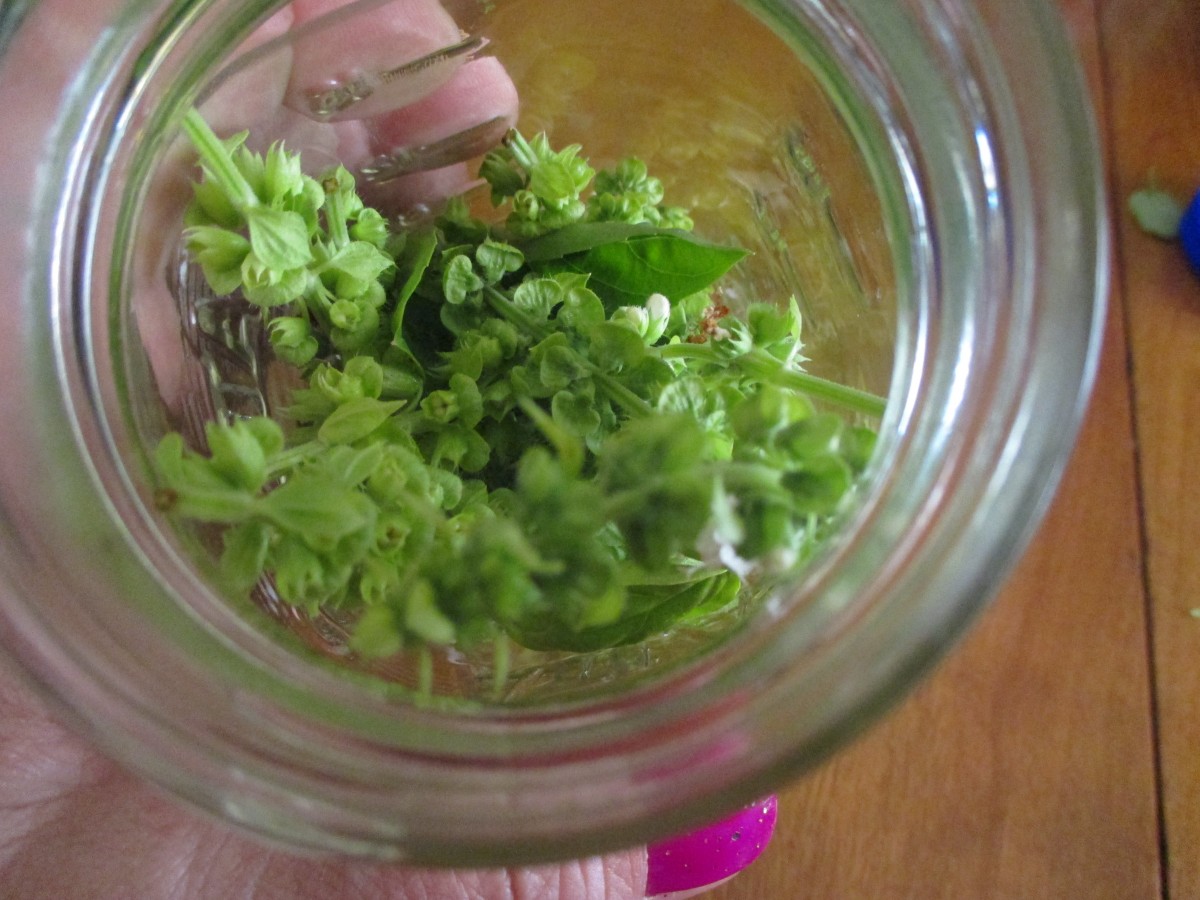
Place blossoms in a jar or bottle
Peach Scones


I’ve really been in the mood to make scones lately. Since I had some beautiful peaches, I decided to use them in the batter.
They worked out even better than I had hoped. I added cinnamon, nutmeg and cloves into the dough, for a little extra flavor. Nicely complimented the sweetness of the peaches.
These are wonderful for breakfast, brunch or with tea or coffee. They would also make a nice base for shortcake. I could see them with berries and whipped cream for a perfect summer dessert.
I used a 2 oz. cookie scoop and got 25 scones. You could make them bigger, just increase the baking time a couple of minutes. I also placed only one baking sheet in the oven at a time. You could put both in at once, but reverse the rack you have them on- half way through baking- so they bake more evenly. Also, if both trays are in the oven at once, increase baking time a couple of minutes.
Peach Scones
3 cups flour
½ c. sugar
1 tablespoon baking powder
1 t. cinnamon
1 t. nutmeg
Pinch of cloves
½ t. salt
10 T. cold butter (1 stick plus two tablespoons)
¾ c. half and half or milk
1 egg
1½ t. vanilla
1½ c. peeled, chopped peaches – about 3-4 peaches
Glaze:
2 c. powdered sugar
About 2-3 T. half and half
1 t. vanilla
Preheat oven to 425. Line 2 baking sheets with parchment paper, or use silicone liners. In a bowl, place the dry ingredients and stir to mix. Cut in butter to resemble coarse crumbs. Make a well in the center and stir in half and half, vanilla and egg. Stir to make a soft dough. Fold in peaches. Use ice cream scoop to make scones, placing scoops of dough onto baking sheets. Bake until browned – 14-16 minutes. Cool on a rack. Make glaze and dip tops of scones in glaze or drizzle it over them. Makes 22-25 depending on size.
Homemade Plum Jam

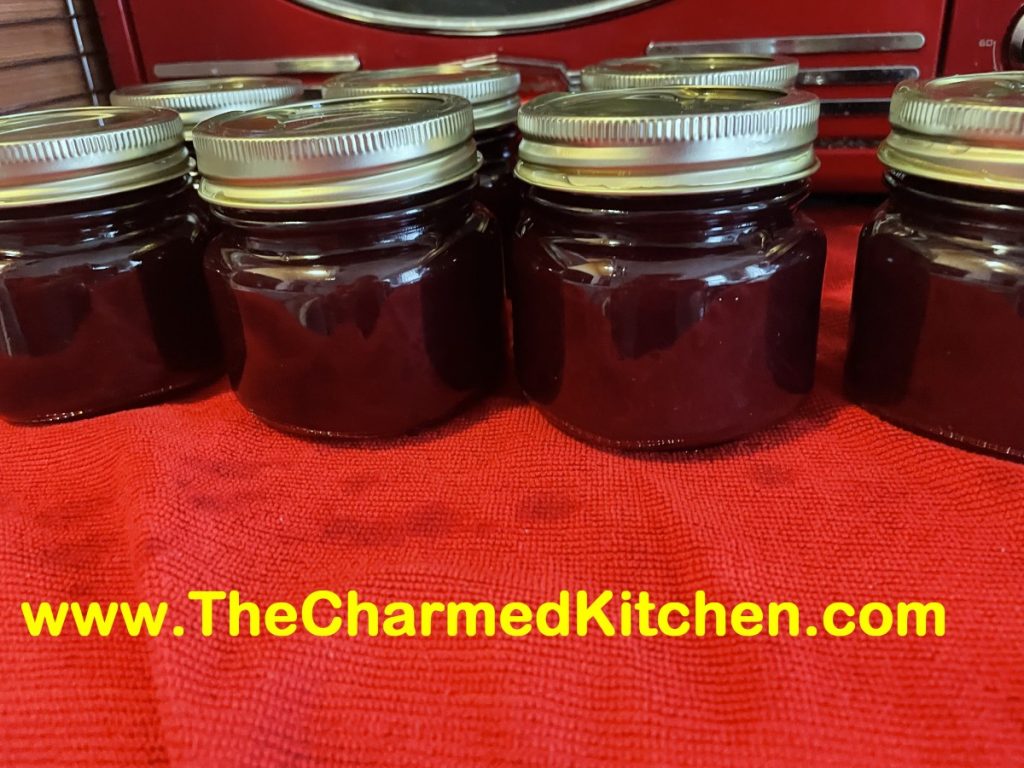
This is one of the easiest jams you can make. You don’t need pectin and it cooks pretty quickly into sweet, thick jammy goodness. I prefer a softer set, so I stopped cooking mine a little sooner than you might prefer. I like a jam that spreads easily, even after it has been opened and stored in the fridge. I love this jam.
I did a test with just a couple of plums. The flavor was great, but some of the pieces of the peel seemed too big. I could see them in the finished jam. To insure the skins got chopped up, I cooked my jam for awhile then used an immersion blender to smooth it out. This is just a cosmetic preference. You can just cook down chopped up plums and they will be fine.
So here is the recipe. I got it from the NCHFP website. The only changes I made was to up the processing time to 10 minutes, so I didn’t have to sterilize the jars. I also let the jam sit in the canner a few extra minutes to prevent siphoning.
Plum Jam
2 quarts chopped, pitted tart plums (about 4 pounds) – any plums will work
6 cups sugar
1½ cup water
¼ cup lemon juice
Combine all ingredients; bring slowly to boiling, stirring occasionally until sugar dissolves. Cook rapidly to, or almost to, the jellying point (which is 8°F above the boiling point of water, or 220°F at sea level). Stir constantly to prevent sticking or burning.
Pour hot jam into hot jars, leaving ¼ inch headspace. Wipe rims of jars with a dampened clean paper towel; adjust two-piece metal canning lids. Process in a boiling water bath canner for 10 minutes. Turn off the heat and allow jars to remain in canner 5 minutes before removing. Set jars on cooling rack or towel in a draft free place while they cool down. Check seals once jars are cool. Yield: About 8 half-pint jars.
Eggplant Parmesan


I have been making this dish for a long time and it is always a favorite. Eggplant Parmesan is a cheesy and satisfying vegetarian meal, even for the die-hard meat lovers among us.
The recipe has changed over time. I used to dredge the eggplant slices in flour before baking. It was very good that way. My mom used to bread eggplant slices for my father, using bread crumbs. She would serve the eggplant with a little tomato sauce on top and sprinkled with mozzarella cheese. He loved them.
That is what first inspired me to bread the eggplant slices, rather than just using the flour dredge. I think the breaded eggplant slices stand up well to the other ingredients. They stay a little crunchier than the “flour only” version.
I also used to just use mozzarella cheese and the Parmesan. A friend said she added ricotta, like you would for a lasagna. I tried it and liked the addition of the ricotta. Now I make it that way all the time.
The biggest change might have been how I cook the eggplant before adding them to the rest of the ingredients. I used to pan fry the eggplant. Let me just say that eggplant soak up oil like a sponge. I remember making Eggplant Parmesan for a group of 250 once and went through an enormous amount of oil. Now, I just place the breaded eggplant slices on a baking sheet and drizzle oil all over them, before baking them in the oven. I use a lot less oil that way. It is also a lot simpler than pan frying.
So here is my often revised recipe for Eggplant Parmesan. In my family, we just call it E.P.
Eggplant Parmesan
2 large eggplants or 4-5 small ones
salt
flour
1 egg
½ c. half and half or milk
Pepper
1 T. Tuscan seasoning- recipe follows
About 2 c. of bread crumbs
oil
1 (15 oz.) container ricotta cheese
3 c. tomato sauce or marinara sauce
12 oz. mozzarella cheese
Parmesan cheese – you could also use Asiago or Romano cheese, if you prefer
Peel and slice eggplant about ¾ -inch thick. You don’t have to peel the eggplant if you don’t want to. Place about 1/2 cup of flour in a bowl and season with salt. Set aside. Combine egg, half and half, pepper to taste, and half of the Tuscan seasoning in bowl. Whisk to combine. Set aside. Place bread crumbs in a shallow dish, set aside. Dredge eggplant slices in flour, dip each slice in egg wash, then dip in bread crumbs, turning to coat evenly. Place eggplant slices on a baking sheet lightly coated with oil. Once all the slices are in the pan, drizzle with a little more oil. Bake in a 400-degree oven, turning once, until browned and tender, about 20 minutes. Drain. Place a small amount of sauce in the bottom of a casserole dish. Add a layer of eggplant slices. Combine ricotta with remaining Tuscan seasoning and spread over the eggplant. Top cheese with a little more sauce and another layer of eggplant. Top with mozzarella, remaining eggplant and remaining sauce. Sprinkle generously with Parmesan cheese and bake, uncovered in a 350-degree oven for about 40 minutes, or until bubbly and browned around the edges. Serves 6-8.
Tuscan Seasoning
½ c. dried basil
½ c. dried oregano
½ c. dried marjoram
3 T. dried minced onion
2 T. dried minced garlic
2 T. dried rosemary
2 T. dried parsley
1 t. crushed red pepper
Combine all. Store in a cool, dry place. Use for any number of recipes, from marinara sauce, to salad dressings.
Pork with Plum Chutney

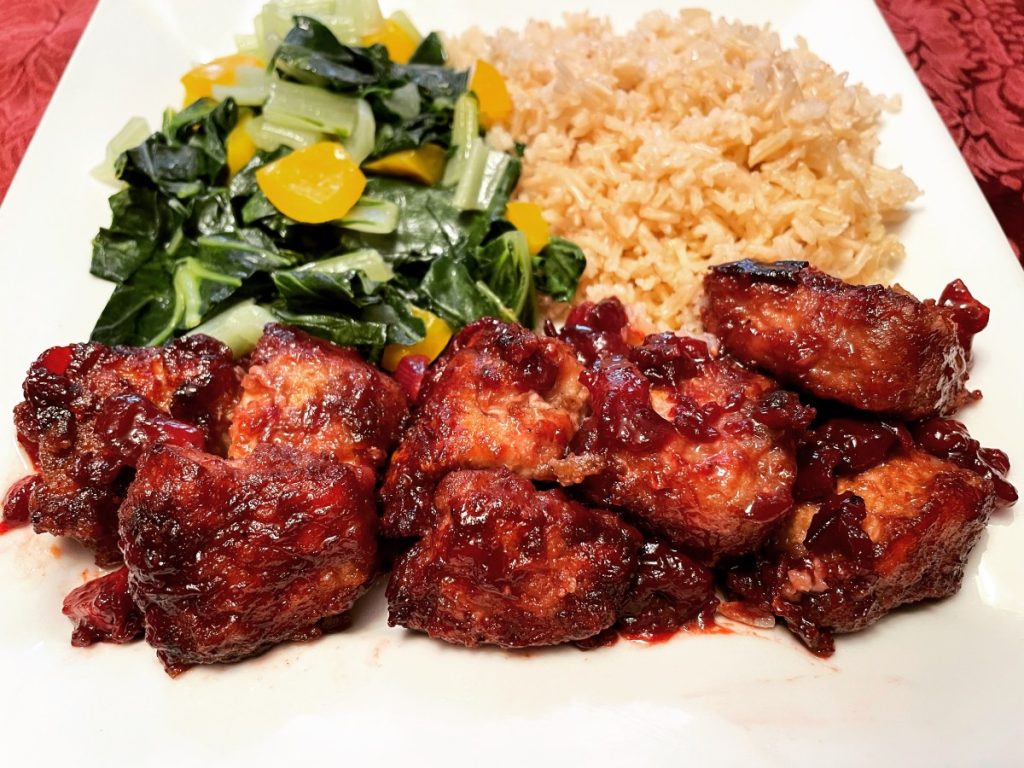
I had very ripe plums and wanted to use them in a savory dish rather than a dessert. I had made a pear chutney before, so that gave me the idea of using the plums in a chutney. I had some pork loin defrosted and I thought they would work well together. I was not disappointed.
I started by pitting and chopping up the plums. They were very ripe. I say in the recipe it was 2 cups, but let’s say a generous 2 cups. You can be off a little bit here. A few more plums aren’t going the hurt anything. I threw everything in a pot and let it cook until the mixture thickened. After it was finished I added a little honey because it seemed too tart. Trust your taste here for how much sweetening it needs.
Here is the recipe for the chutney and for the pork.
Plum Chutney
2 c. pitted chopped plums
1 small onion, minced
4 cloves garlic, sliced thin
¼ c. balsamic vinegar
¼ c. brown sugar
2 T. honey
1 t. cinnamon
Salt, pepper and cayenne to taste
Combine all ingredients, except the seasonings in a medium saucepan and s= cook over medium heat until thickened. This took about 20 minutes, maybe a bit longer. As the mixture gets thicker, stir more often to prevent sticking. I added the honey later as the chutney seemed too tart when it was finished. That is partly based on how sweet the fruit is and your personal taste. Makes about 2 cups. Will keep in fridge for weeks. Great on pork, duck and chicken or served with cheese and crackers as an appetizer.
Pork with Plum Chutney
1 lb. boneless pork, cubed
2 T. cornstarch
2 T. sherry, not cooking sherry
1 T. soy sauce
Oil
Additional cornstarch for dredging
Salt and pepper
About ¾ c. plum chutney
Place cubed pork in a small bowl and combine with the cornstarch, sherry and oil. Chill several hours, if possible. Heat oil in skillet. Dredge the pork in cornstarch and sauté until cooked through. Season with salt and pepper and spoon any excess oil out of the pan. Add the chutney and simmer until heated through. Serves 3-4.

Green Tomato Pickles

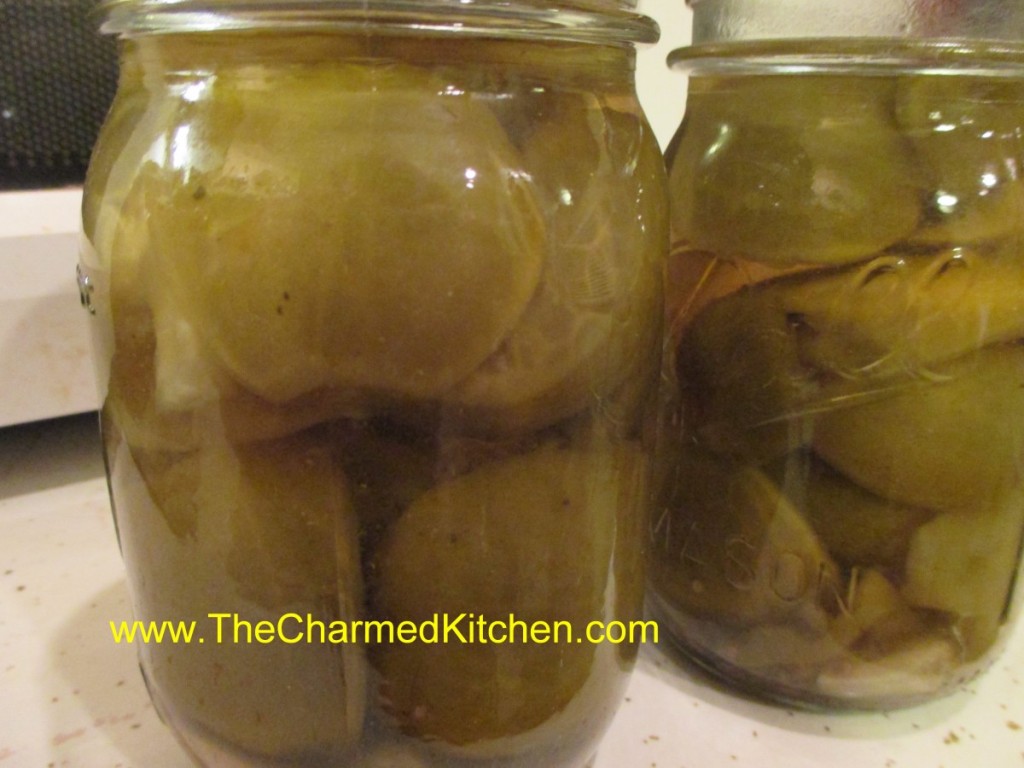
The garden season is winding down around here. A number of friends have posted pictures of their last ripe tomatoes of the year. That is a sad time. But, don’t forget about those green tomatoes. You can make fried green tomatoes, which are great. You can also make these pickles. That way, you can enjoy those home grown tomatoes a little longer.
The recipe is pretty simple. I sometimes add a teaspoon of red pepper flakes to each jar for a spicy version. The hardest part is waiting. Once the tomatoes are canned, you have to give them 4-6 weeks for the pickling to finish. Trust me, it is worth the wait. While the recipe calls for using quart jars, you can use pints. Process for the same time as the quart jars. I like to use pints for the green cherry tomatoes.
Just because your ripe tomatoes are done for the year, harvest those green ones and get a little something more from your garden.
Green Tomato Dill Pickles – Kosher Style
Green tomatoes
6 ribs celery, cut in 2-inch pieces
6 Sweet green peppers
6 cloves Garlic, peeled
2 quarts water
1 quart vinegar- 5% acidity- you can use white or cider vinegar
1 cup canning or pickling salt
Dill, optional
Use small firm green tomatoes. Pack into hot, clean canning jars. Add to each quart jar a clove of garlic, 1 piece of celery, and 1 green pepper cut into fourths. Make a brine of the water, vinegar, and the salt. Boil with the dill for 5 minutes. Pour the hot brine over the pickles to within 1/2 inch of the top of the jar. Put on cap, screw band firmly tight. Process in a boiling water bath for 15 minutes. These pickles will be ready for use in 4- 6 weeks. Yield: About 6 quarts. Source: NCHFP


