Mom’s Strawberry Crepes

Mom’s Strawberry Crepes
Since Mother’s Day is fast approaching, I thought I would share some of my favorite “Mom” recipes.
My mother was a great cook. I learned a lot from her. I still make many of her recipes. When I make crepes, I always think of her.
I have fond memories of watching my mother make crepes when I was a little girl. She would add the batter and tilt the pan to get the crepes smooth and thin. She made it look effortless. With a little practice, they actually are. Crepes are easy to make and versatile, too.
They can be served for breakfast, brunch or dessert and can be sweet or savory. I made a slightly sweet crepe batter, perfect for a fruit filling. I used strawberries – you can use your imagination to fill them any way you like. These make a wonderfully elegant dessert, yet are really easy to make.
Strawberry Crepes
1 recipe dessert crepe batter- see below
2 lbs. fresh strawberries, washed, hulled and sliced
sugar to taste- start with 1/2 cup, then adjust to your taste
1 t. vanilla
1 t. grated orange peel
powdered sugar
whipped cream, optional
Make the crepe batter (recipe below) and cook the crepes. Toss the berries with the sugar, vanilla and orange peel. Place a crepe on your work surface and spoon berries down the middle. Fold up the sides of the crepe and move to serving dish. Repeat with remaining ingredients until you run out of something. I tend to put a lot of the berries in each crepe so I run out of berries and have left over crepes. How much fruit you put in each one is completely up to you and your taste. Dust filled crepes with powdered sugar and top with extra berries- if you have any left. You can also add some whipped cream on the top. I list it as optional- but I really think you’re going to want that whipped cream. Makes about 12 crepes, give or take.
Dessert Crepes
1 c. flour
4 eggs
1 1/2 c. milk
1 T. sugar
2-T. orange-flavored liqueur or orange juice concentrate
1/4 c. butter, melted and cooled
Mix all ingredients in blender (except butter) until smooth, scraping sides often. Add butter and blend well. Let stand for 30 minutes before using, or batter can be refrigerated, covered, over night. Beat again, just before using.Heat 6 or 7 inch skillet. Brush with butter or oil and pour in about 2 teaspoons of batter, tipping pan to cover bottom of pan completely with batter. Cook until edges start to brown, turn over and cook until lightly browned (about 2 minutes per side.)Crepes can be made day ahead or even frozen between sheets of waxed paper and frozen.Makes 20.
Baklava with Chocolate
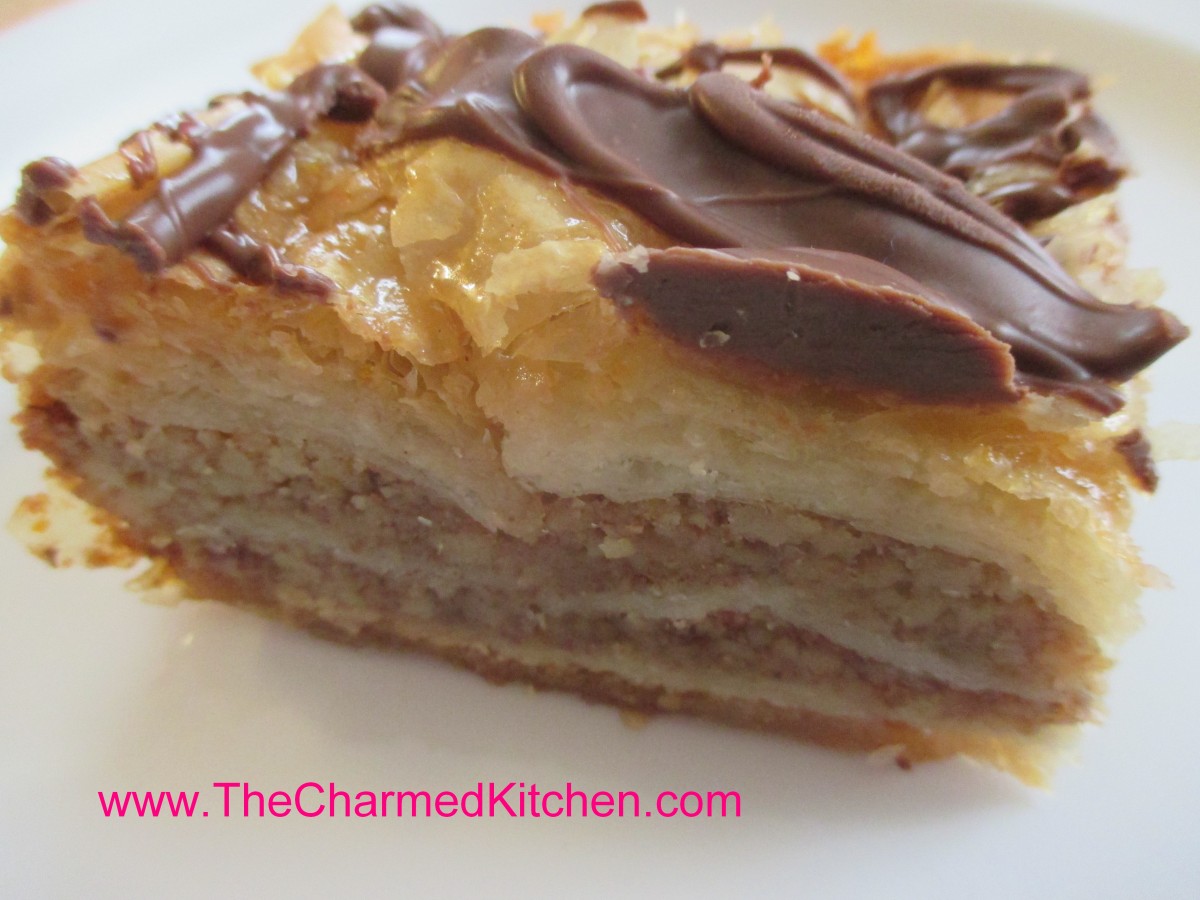
Baklava with Chocolate Drizzle
If you are looking for an extra special dessert for Mother’s Day- you could make Mom baklava. Baklava isn’t hard to make. You just have to move quickly while assembling it. The phyllo leaves (or sheets), dry out quickly, and can get brittle. Just have everything ready before you open the package of dough and get started.
Baklava is a dessert made from layers of phyllo, finely chopped nuts, melted butter and spices. It is baked until golden. Then a sugar/honey syrup is poured over it. This recipe is dressed up a bit, with the addition of melted chocolate, drizzled over the baklava after it is baked and cooled.
The phyllo sheets I used are pretty big so I folded them in half to fit the pan I used. There was a little trimming to do, but not much. Well worth the effort.
Baklava with Chocolate Drizzle
1 lb. phyllo
½ lb. butter, preferably unsalted
¾ lb. walnuts or blanched almonds, chopped fine
¼ c. sugar
½ t. cinnamon
Syrup, recipe follows
½ c. melted chocolate – I used dark chocolate
Combine nuts, sugar and seasonings and set aside. Brush a 9×13-inch pan with butter and line bottom with 8 phyllo sheets, folded in half to fit pan, brushing each with butter as you go. Spread ½ of the nut mixture on phyllo leaves. Top with 3-4 buttered sheets of phyllo. Spread with the rest of the nut mixture. Add the rest of the leaves for the top. Brush top layer of leaves with remaining butter. With a sharp pointed knife score the top sheets in whatever shapes and sizes you want. Bake in a preheated 350-degree oven for 45 minutes to an hour. Baklava should be golden brown. Meanwhile prepare syrup. When baklava has cooled, warm up the syrup and pour over. Drizzle with melted chocolate. Allow chocolate to set, before cutting into squares to serve.
Syrup:
1 c. sugar
½ c. honey
1 c. water
zest of 1 lemon or orange
Bring to a boil and simmer 10 minutes. Strain and set aside.
Lemon-Sour Cream Cupcakes

Lemon and Sour Cream Cupcake
I love the lemon flavor in these cupcakes. They are rich, without being too heavy, and full of zest. I had picked up a bunch of lemons recently. Since I need dessert for dinner, I thought I would bake up a batch.
Lemon zest in both the batter and the frosting, really makes them special. Cupcakes are also such a nice, easy dessert. If you try these, I am sure you will be pleased, as will your family and friends.
It makes a big batch, so you can freeze some for later.
Even though I normally frost these, you can also just combine powdered sugar with a little lemon zest and dust them with it, instead of the frosting.
Lemon and Sour Cream Cupcakes
1 cup butter, softened
2 cups sugar
3 eggs
2 teaspoons grated lemon peel
1 teaspoon vanilla extract
3½ cups all-purpose flour
1 teaspoon baking soda
½ teaspoon each baking powder and salt
2 cups sour cream
Frosting:
9 tablespoons butter, softened
6 ¾ cups confectioners’ sugar
6 tablespoons lemon juice
1 T. vanilla extract
¾ teaspoon grated lemon peel
3 tablespoon milk
In a mixing bowl, cream butter and sugar. Beat in eggs, one at a time. Add lemon peel and vanilla; mix well. Combine dry ingredients; add to creamed mixture alternately with sour cream (batter will be thick). Fill 30 greased or paper-lined muffin cups with 1/4 cup of batter. Bake at 350 degrees for 25-30 minutes or until a toothpick inserted near the center comes out clean. Cool for 10 minutes; remove to wire racks to cool completely. For frosting, cream butter and sugar in a small mixing bowl. Add lemon juice, vanilla, lemon peel and milk; beat until smooth. Frost cupcakes. Makes 30.
Rich and Chewy Brownies
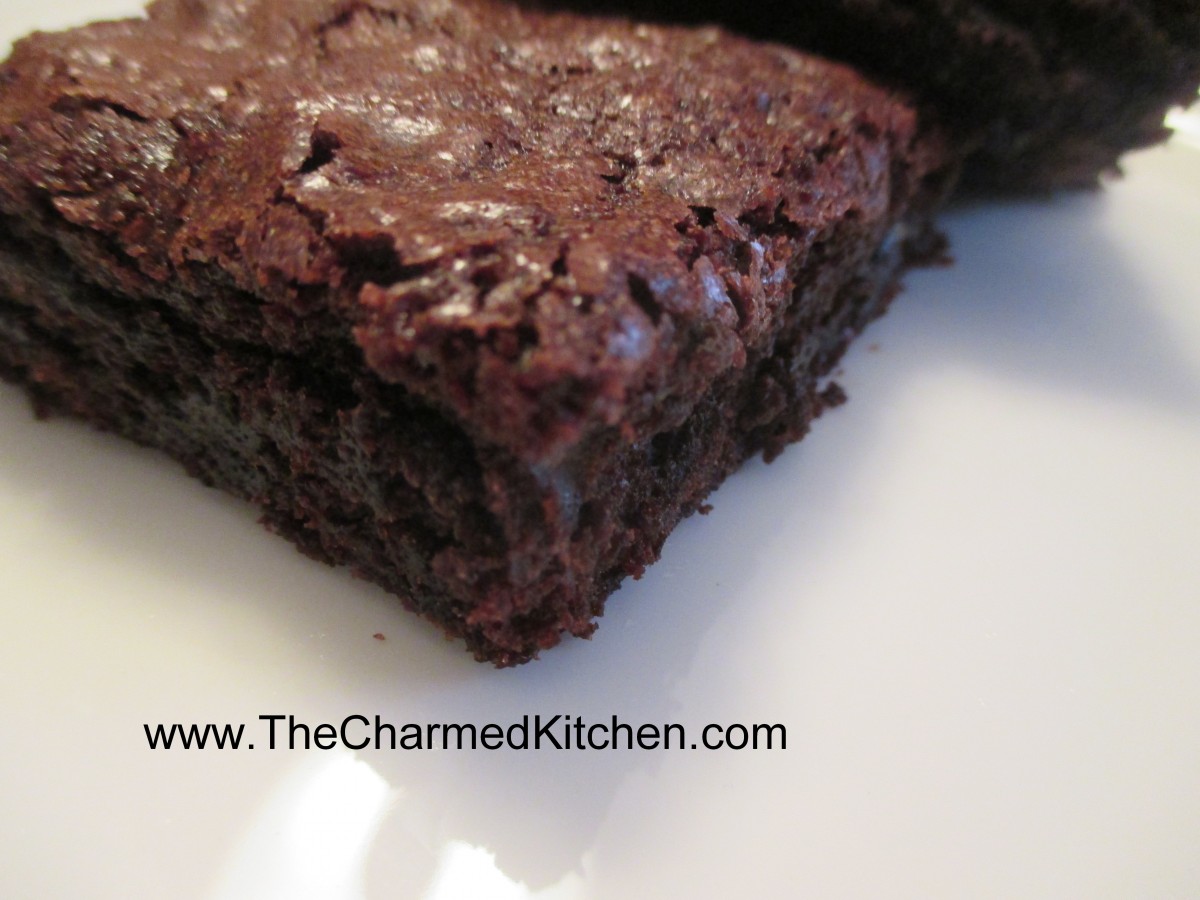
Rich and Chewy Brownies
Brownies have been around for almost 100 years. The story about the creation of brownies, is that they were an accident. A woman was making a chocolate cake. She couldn’t find her recipe, so she made the cake as best she could from memory. The cake didn’t rise- and brownies were invented.
What a happy accident that was for the rest of us.
There are a lot of versions of brownies around. Some are more like a chocolate cake, just a little denser. Others are moist, and so dense they are almost fudge like.
I have a lot of brownie recipes. This is one of my favorites. If you make them, you will understand why. They are soft, rich and a little chewy. They can be serves plain, dusted with powdered sugar, or frosted.
Rich and Chewy Brownies
3 sticks butter, melted and cooled
3 c. sugar
1 T. vanilla
6 large eggs
1½ c. flour
1 c. cocoa
1 t. baking powder
1 t. cinnamon
1 c. chocolate chips
Heat oven to 350 degrees and grease a 13×9 inch pan. Beat together butter, sugar and vanilla. Whisk in eggs one at a time. Combine dry ingredients and stir into batter. Stir in chocolate chips and spread batter in prepared pan. Bake 40-45 minutes, or until brownies pull away from sides of pan. Cool brownies completely in pan, on a rack and cover with foil. Let stand 6 hours before serving. Makes 24.
To serve, you can leave them plain, dust with powdered sugar, or frost. Here is a great frosting recipe for these brownies.
Easy Chocolate Butter Cream
6 T. butter, softened
1/3 – 3/4 c. cocoa, depending on how dark you want your frosting.
2 2/3 c. powdered sugar
1/3 c. milk
1 t. vanilla
Cream butter. Combine cocoa and sugar. Beat cocoa mixture in alternately with the milk until frosting is spreading consistency. Beat in vanilla. You may need an additional tablespoon of milk. Makes about 2 cups.
Amy’s Hot Cross Buns Bread Pudding
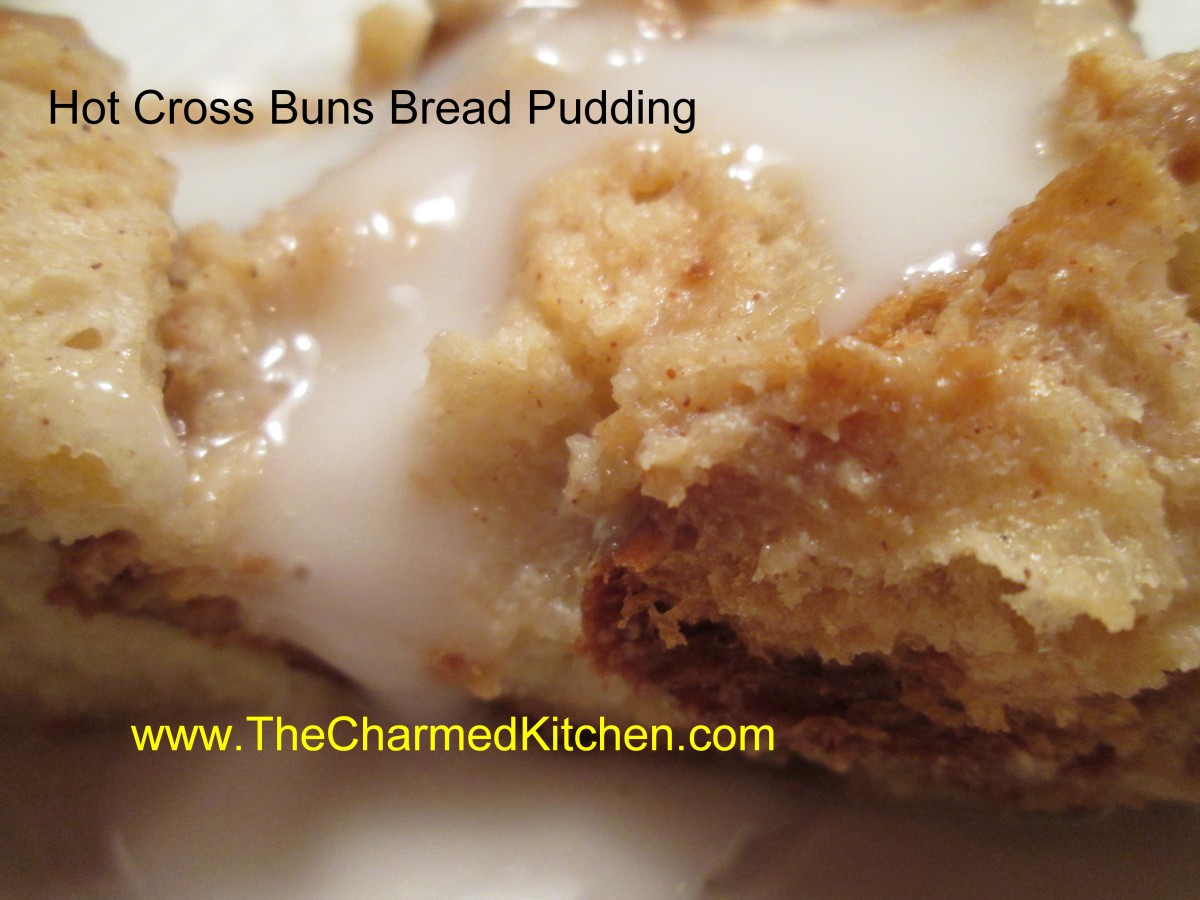
Amy’s Hot Cross Buns Bread Pudding
The first time I made this dish, it was sort of an accident. It was right after Easter, a few years ago. I was having dinner with friends, and I was in charge of making dessert. I had leftover hot cross buns, so I decided to re-purpose them into bread pudding.
The end result was really good. So good, that my friend Amy said it was one of the best desserts I had ever made. I now bake extra hot cross buns, just so I can make bread pudding from them.
You could use home made or store bought buns for this recipe. My recipe for hot cross buns is at the bottom of this post.
Amy’s Hot Cross Buns Bread Pudding
12 c. torn up hot cross buns- I used 8 buns
2 c. half and half
1 c. milk – I used almond milk
1 c. sugar- or less if you are using frosted buns
5 eggs
1 T. vanilla
1 T. cinnamon
Frosting:
1 c. powdered sugar
4 t. milk
In large mixing bowl place the torn up buns. Mix remaining ingredients and pour over the buns. Stir to moisten evenly. Spoon mixture into a buttered 9×13-inch pan. Bake in a preheated 350 degree oven for 35-40 minutes or until bread pudding is set and a little golden on top. While the bread pudding is baking combine powdered sugar with milk to make a frosting thin enough to drizzle. Let bread pudding cool 10 minutes and drizzle with frosting. Serves 8-10.
Love you, Amy. Miss you.
Homemade Pineapple Sorbet

Pineapple Sorbet
Sorbet can be the perfect ending for almost any meal. I was making dinner for a couple of friends and wanted something light for dessert. I had this pineapple and knew right away I wanted to make a sorbet.
You can use pretty much any fruit to make sorbet. Pineapple is one of my favorites. The ingredients are fruit and sweetener. After that, extras like fruit juices, extracts, herbs and spices are up to you. Keep it simple, or spice it up, to suit your mood. I often add fresh herbs to my sorbet. Mint is the obvious choice, but I have also added basil, lavender and pineapple sage.
Keep in mind that once frozen, the mixture will taste less sweet. Sweeten to taste, but allow for that change in flavor. If it isn’t sweet enough for you once it is frozen, you can add a little honey when processing it. You can also serve it topped with a fruit syrup for extra sweetness, if desired.
Pineapple Sorbet
1 pineapple
½ c. sugar- or a little more to suit your taste
1 T. lemon juice
Wash pineapple, remove rind and core. Chunk up the flesh of the pineapple and puree in a food processor until smooth. Place pineapple puree in a bowl and sweeten to taste. I had a really ripe, sweet pineapple, so I used about ½ cup of sugar. You might want more, or less, according to your own taste. Once frozen, the sorbet will taste less sweet- so make sure to sweeten it enough. You can also sweeten with honey. Stir in the lemon juice, too. Place in a container with a lid and place in freezer.
Once the mixture is frozen- remove from the freezer, let soften a little bit- just a few minutes. Use a spoon or fork to break off chunks of the sorbet. Place in a food processor and puree until smooth. Mixture should start to look creamy. I have had the most success using a smaller processor and doing this in batches, but do what works for you. Return to freezer until ready to serve.
Note: You can repeat the process of processing another time or two. Each time the frozen sorbet is reprocessed, it will get a little smoother. I only processed this pineapple sorbet one time- after it was frozen. The texture was delightful and my guests loved it.
Yield: You should get about a quart of sorbet.
Blueberry Lemon Trifle
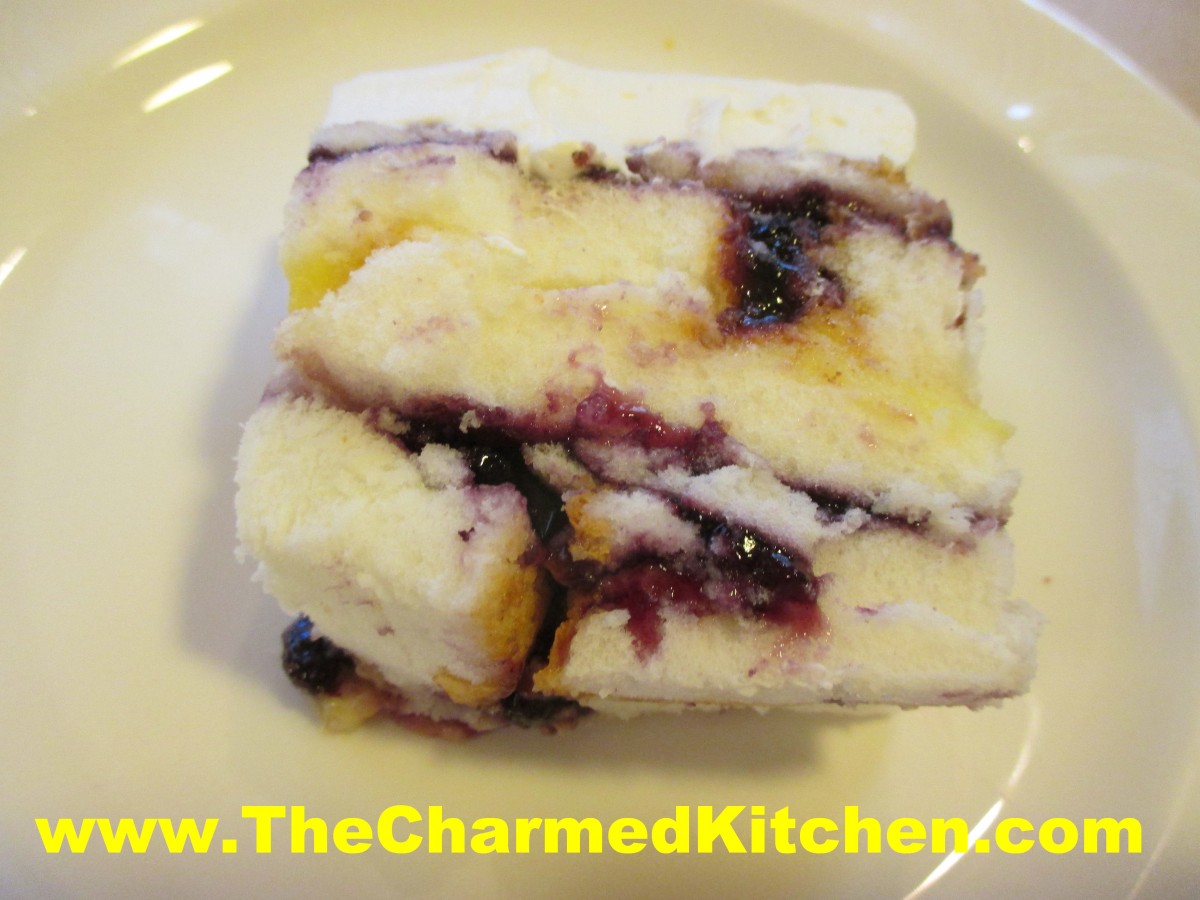
Blueberry Lemon Trifle
This blueberry and lemon trifle was a perfect finish for a Spring dinner with friends. I hadn’t planned on making a trifle. I went shopping and there was a marked down angel food cake in the bakery…. I just had to have it.
Once I got home, I realized I had to do something with the cake. I thought of trifle right away. Trifle is one of those desserts that can be whatever you want it to be. The basics of a traditional trifle are sponge cake, layered with some sort of pudding or custard and fruit. The cake is sometimes soaked in sherry or some other alcohol. Trifles are often topped with whipped cream.
I had just finished canning blueberry pie filling. That would be the fruit element of my trifle. I also had a few lemons that needed to be used soon, so the lemon curd was a good choice. Besides, lemon and blueberries pair so nicely together.
Once you have all the ingredients, the trifle is simple to assemble. Pick a nice, glass bowl, so you can see the layers in the trifle. It is best to put your trifle together a bit in advance, so the cake can soak up some of the moisture from the berries and the lemon curd. It also helps the trifle to stay together. I could actually slice the trifle to serve it.

Blueberry Lemon Trifle, ready to serve
So here is the recipe. I made the pie filling and lemon curd from scratch, but you can use store bought, to save time.
Blueberry Lemon Trifle
1 angel food cake, sliced thin
2 c. blueberry pie filling- homemade or store bought- recipe follows
2 c. lemon curd- recipe follows
1 c. whipping cream
1/4 c. powdered sugar
Place a layer of cake slices in the bottom of the bowl. Spread half of the blueberry mixture on top of the cake. Place another layer of cake slices on top of the blueberry layer and press down a little to even it out. Cut cake pieces to fit as best you can. Add half of the lemon curd and top with more cake. Repeat the process one more time. Don’t worry if something isn’t perfect in the layers- that is kind of the charm of a trifle. Just be sure to get all the ingredients in the bowl. Cover and chill the trifle. When ready to serve beat the whipping cream and powdered sugar together until stiff peaks form and spread over the trifle. You can do this part ahead of time, if you prefer, Just keep trifle, covered, in the fridge, until ready to serve. Serves 6-8.
Blueberry Pie Filling
3 1/2 c. blueberries
3/4 c. sugar, or to taste
1/4 c. Clear Gel*
1 c. water
1 T. lemon juice
In saucepan, bring blueberries and sugar to a boil, stirring often. Combine clear gel with water and lemon juice and add to the blueberry mixture. Return to the boil and cook until thickened and bubbly. Makes 4 cups. You might not need the whole batch for the cookies.
*Clear gel is a modified cornstarch. It is used in commercial pie fillings and in homemade pie fillings, as well. Unlike regular cornstarch, Clear Gel retains it’s thickness, even if you reheat it. You can find it online or in some specialty food stores.
Lemon Curd
1/2 c. lemon juice
zest from one good sized lemon- you should have 2-3 teaspoons
1/2 c. sugar
3 eggs
6 T. unsalted butter- cut into little cubes
In medium saucepan combine all ingredients. Whisk the mixture until the eggs are well blended. Cook over medium low heat, whisking often, until the mixture thickens. This will take 5-7 minutes. Whisk more often as mixtures warms and starts to thicken. Better to heat over lower heat and take longer than over too high a heat. You don’t want the eggs to scramble. Once the mixture is thickened , transfer to a bowl or jar. Cover the surface with a piece of plastic wrap to keep the surface from developing a skin- like any pudding will do. Chill until ready to use. Makes about 2 cups. Will keep in fridge a week or two.
Homemade Lemon Curd
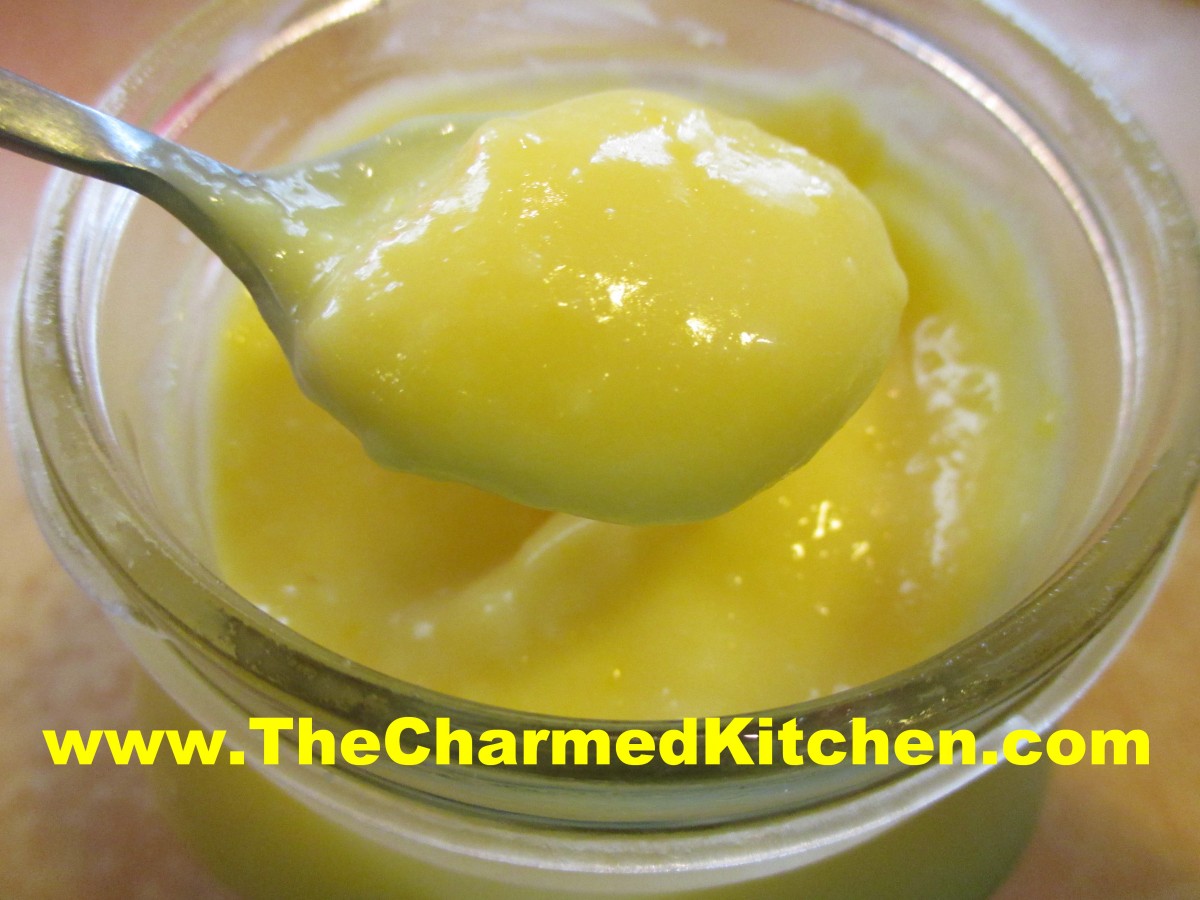
Lemon Curd
Lemon curd is such a versatile dish. It’s a sort of lemon pudding and can be served plain, or with a dollop of whipped cream. It is also great in trifle or served as a topper for any number of cakes and sweet treats. I especially like to make lemon curd to serve with scones. It is also really nice served with berry shortcakes. I am using this batch in a blueberry lemon trifle.
It is easy to make and packed with fresh lemon flavor. Lemon curd is just a few ingredients, cooked over low heat until it thickens up. You can make a batch in under 10 minutes. The longest part of the prep time is just waiting for it to cool down after cooking.
So here is the recipe for the lemon curd. If you never made your own- you might want to give it a try. Certainly worth the effort.
Lemon Curd
1/2 c. lemon juice
zest from one good sized lemon- you should have 2-3 teaspoons
1/2 c. sugar
3 eggs
6 T. unsalted butter- cut into little cubes
In medium saucepan combine all ingredients. Whisk the mixture until the eggs are well blended. Cook over medium low heat, whisking often, until the mixture thickens. This will take 5-7 minutes. Whisk more often as mixtures warms and starts to thicken. Better to heat over lower heat and take longer than over too high a heat. You don’t want the eggs to scramble. Once the mixture is thickened , transfer to a bowl or jar. Cover the surface with a piece of plastic wrap to keep the surface from developing a skin- like any pudding will do. Chill until ready to use. Makes about 2 cups. Will keep in fridge a week or two.
“Pi” Day Blueberry Pie
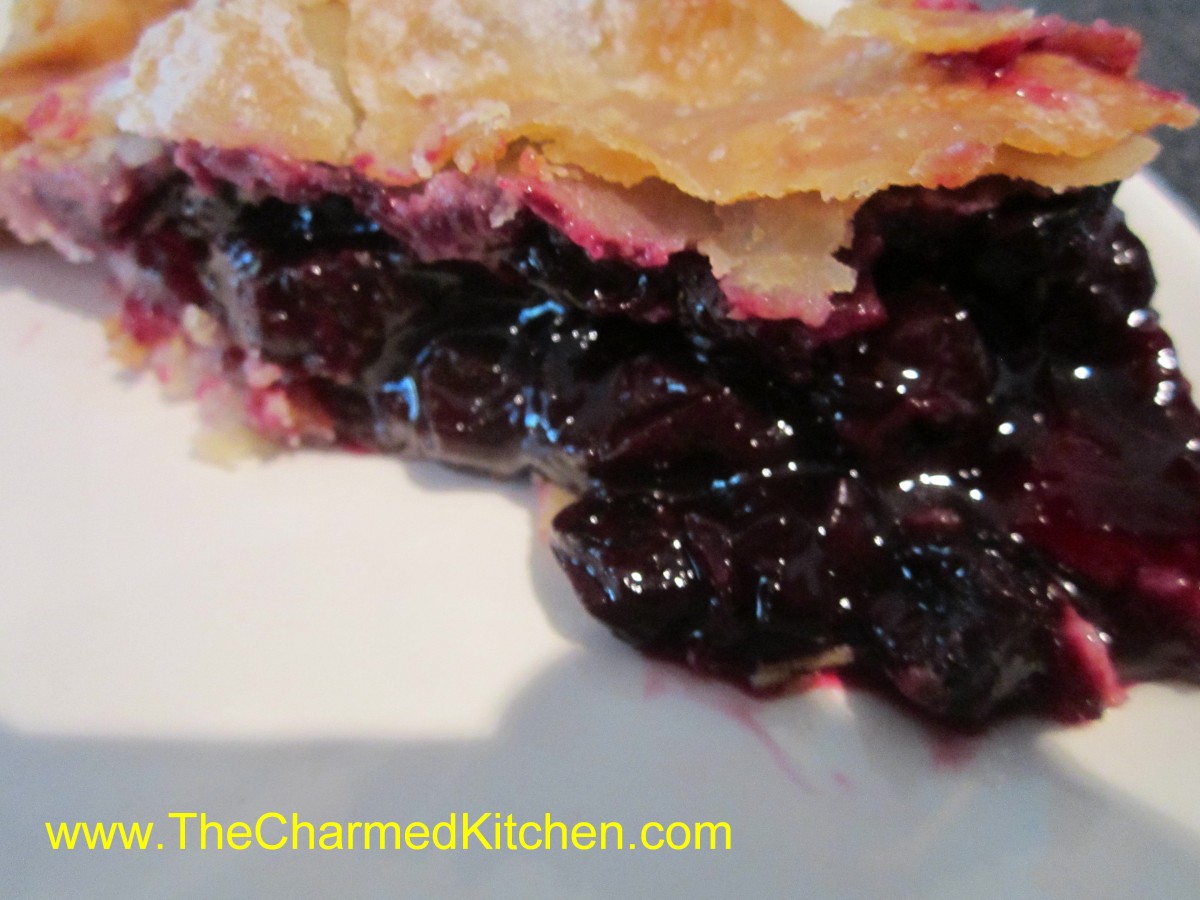
Blueberry Pie
March 14th is sometimes referred to as Pi day. It’s a math nerd kind of thing. 3.14 being the value of pi and March 14 is 3/14. I was explaining it to a friend last night. My friend’s response was that ANY day was Pie Day!! I had some blueberries in the freezer and decided maybe today was Pie Day after all.
You could certainly use fresh berries for this pie, but frozen was what I had. Also, since it is a snowy day today, baking a pie seemed like a nice way to spend the morning. My friend is home from work today. I think she will be happy when I invite her over to have some “Pi” Day blueberry pie. It is time to put on a pot of coffee, and make a call.
Blueberry Pie
Pastry for 2 crust pie- recipe- The crust recipe I used is at the bottom of the page
2 ½ T. cornstarch
1 c. sugar
3 c. fresh or frozen blueberries
1 T. lemon juice
1 T. butter
1 T. sugar, for sprinkling
Roll out half of the crust and place in 8 or 9-inch pie pan. You can roll out the top crust ahead of time, or even cut into strips for a lattice top. Cover remaining crust to keep it from drying out. In medium bowl mix cornstarch and sugar. Toss in berries and then sprinkle in the lemon juice. Allow to stand 15 minutes. If berries were frozen be sure they are not clumped together. Spoon mixture into prepared crust and dot with the butter. Top with the second crust or place strips on in a lattice design. If using a whole crust cut in decorative slits for ventilation. I used a tiny heart-shaped cutter for my pie. Moisten then crimp edges and shape decoratively or use a fork to seal. Place pie in lower half of hot oven. Bake in a preheated 425-degree oven for 15 minutes. Reduce heat to 375 and bake an additional 40-50 minutes or until crust is brown and juices begin to bubble through the slits. Cool a little before serving.
Flaky Pie Crust
2 c. flour
1 t. salt
3/4 c. butter, chilled – you can use coconut oil, lard or shortening
1 T. cider vinegar
4-5 T. cold water
Combine flour and salt and cut in butter. Toss in vinegar and water 1 tablespoon at a time until dough holds together. Use a fork to toss the ingredients together and as soon as the mixture holds together stop adding water. Makes 2. Chill well before using.
Amaretto Pear Blintzes with Candied Almonds
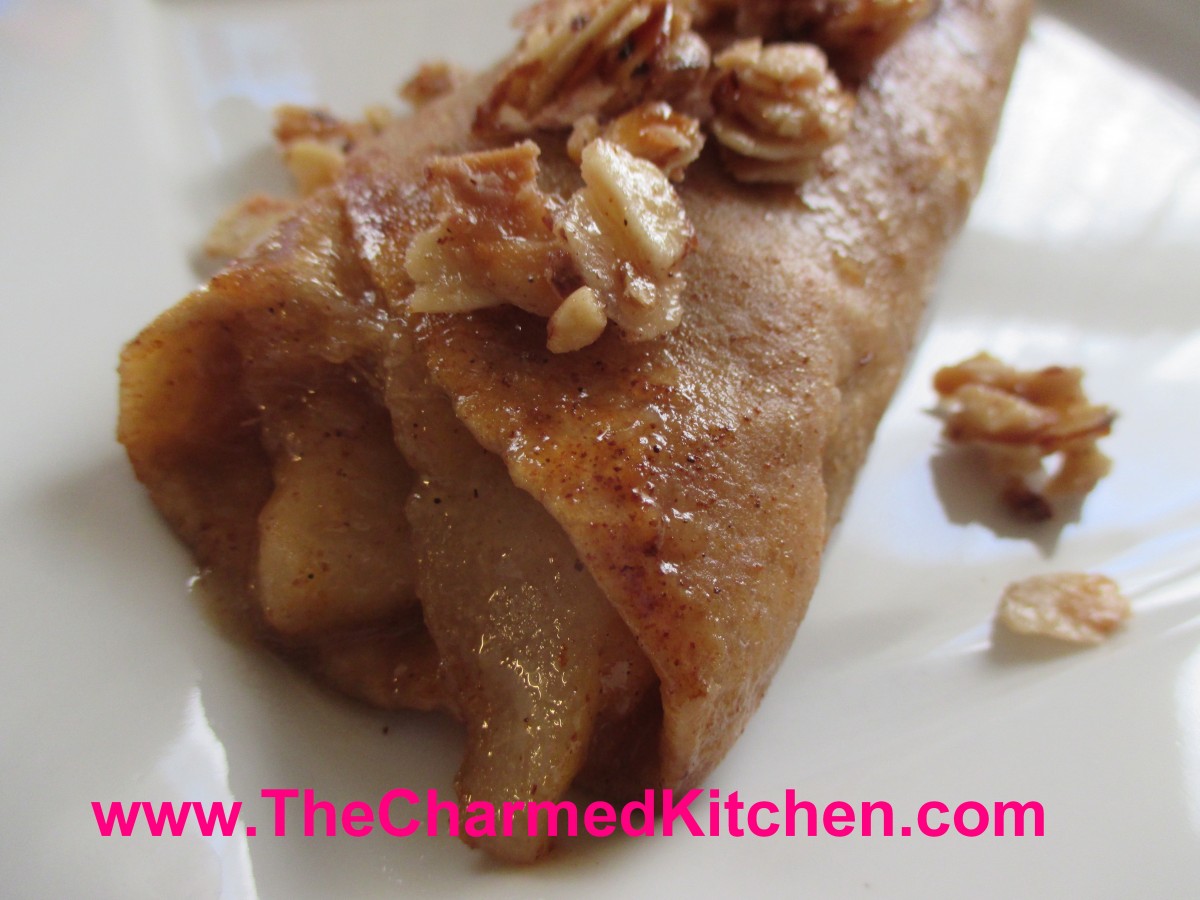
Amaretto Pear Blintz with Candied Almonds
I have a dear friend visiting from out of town. I wanted to make her a special dish for brunch today. I had some beautiful fresh pears and some tortillas, so I used them together. Since she likes all things almonds, I included them in the dish, too. I also added some Amaretto to the pears. Martha gave them two thumbs up. She would have said how much she liked them, but her mouth was full.
When she was able to speak, she said they reminded her of apple pie. In fact, she didn’t believe me at first, when I said they were pears. If you like the taste of homemade fruit pie, but don’t have the time to bake, these are a nice option. Because they are barely cooked, the pears retain some shape. In a pie, they tend to fall apart.
Since we had them for brunch, I left them plain, but these would make a great dessert topped with whipped cream or ice cream. Even a dusting of powdered sugar, would be nice. Simple and quite flavorful.
Amaretto Pear Blintzes with Candied Almonds
Blintzes:
4 (8-inch) flour tortillas, I used whole wheat
2 oz. milk
2 T. butter
Filling:
4 pears, peeled, cored and sliced
½ c. brown sugar
2 T. butter
2 T. Amaretto
1 t. cinnamon
1 t. vanilla
Pinch of salt
Almonds:
¾ c. sliced almonds
½ c. sugar
¼ c. water
½ t. cinnamon
Place tortillas in shallow dish and drizzle the milk over them. Try to get some milk on each of the tortillas to soften them. While the tortillas are softening, prepare the filling. In medium skillet, combine pears with the rest of the filling ingredients and bring to a simmer. Cook on low heat for 3-4 minutes. Set aside. Combine almonds with the sugar, water and cinnamon in medium skillet. Bring mixture to a boil, stirring often. Cook until liquid is evaporated, about 5 minutes. Pour almonds onto a baking sheet lined with a silicone baking sheet or foil. Spread out and allow nuts to cool.
Place butter in skillet and start to heat up the pan. While pan is heating, divide pear filling among the 4 tortillas. Place filling along center of tortilla and fold up edges over, to cover the filling. Heat the tortillas, seam side down, in the pan until golden, turning to toast evenly on both sides. Remove from pan and place on serving plate. Top with some of the candied almonds. Serves 4.


