Pickled Honey Glazed Western Ribs
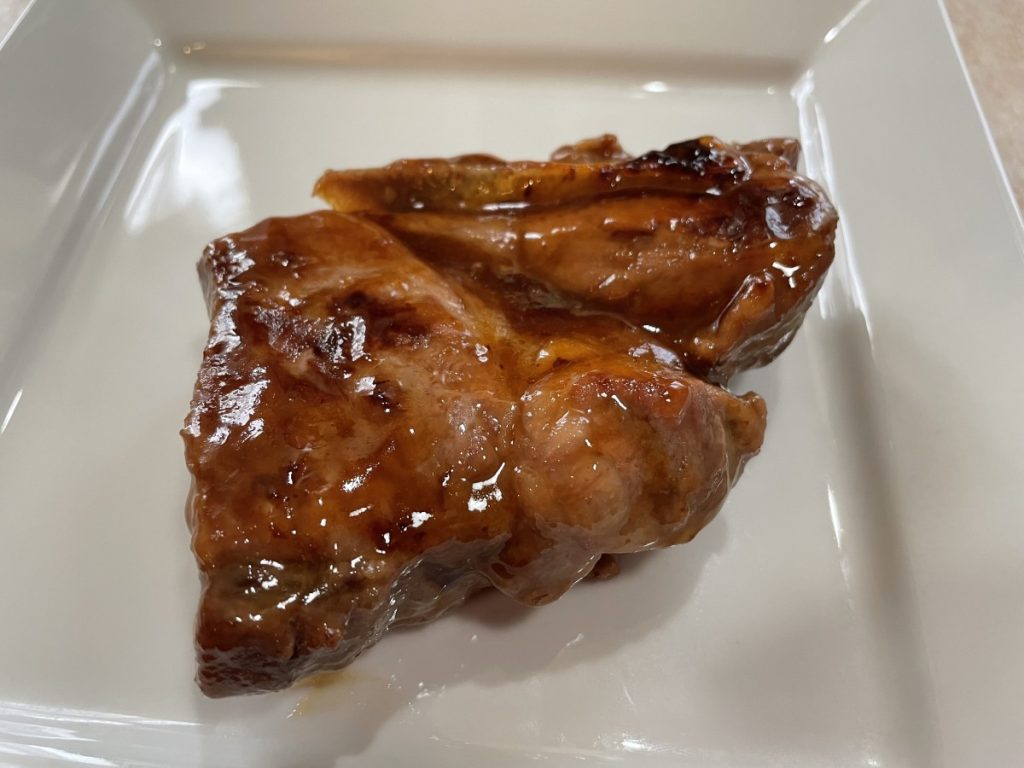
Western ribs are one of my favorite cuts of pork. They are meaty and have just enough fat to be tender. They are easy to cook, too. You can grill, broil, bake, saute or braise them. I am sure I am leaving a few methods out.
This time I decided to pickle mine, in a way. I brined the ribs in pickle juice. The vinegar and salt flavor the meat and make it more tender. When I say pickle juice, I mean just that. I save the brine from jars of pickles and store them in the fridge until ready to use. The pickle juice has so many uses. You can use it as a base for salad dressings, sauces, dips and marinades. You can add pickle juice to Bloody Marys, too. For this recipe I used dill (sour) pickle brine.
I placed the ribs in a container and poured pickle juice over them. I poked them with a fork and kept them, covered, in the fridge for 3 days. They were sauteed in a pan and finished with honey and seasonings. They were really good. Here is a more exact recipe. Enjoy!!
Pickled Honey Glazed Western Ribs
4 Western ribs, about 2 lbs.
1 c. pickle juice -from dill pickles, not sweet pickles
2 T. oil
salt and pepper
2-3 T. honey
1 t. hot sauce, optional, to taste
At least 2 days and up to 4 days before cooking the ribs place them in a bowl or dish and pour over the pickle juice. Pierce the ribs with a fork to help get the bring inside the meat. Try to pierce all over the ribs. Cover and store in fridge until ready to cook. Drain the ribs, pat dry and heat oil in a skillet. Season the ribs and saute in the pan. They are pretty thick cuts of meat. You want them to get some color on them and cook through. I started them on high heat and cooked them on each side 4-5 minutes, or until they were getting nice and golden. Then I turned the heat down and let them cook through, turning a time or two. I would say this took another 10 minutes total. I added the honey and hot sauce to the pan. Then I spooned the honey over them and turned the heat up to medium. I spooned the honey and pan juices over the ribs until they looked nice and glazed and the glaze was starting to brown without burning. I spooned some of the glaze over them, being careful to drain the fat out of the pan first. Serve with whatever sides you like. These are great with coleslaw. Serves 2-4.
Honey Glazed Western Ribs

Western ribs are one of my favorite cuts of pork. They are meaty and have just enough fat to be tender. They are easy to cook, too. You can grill, broil, bake, saute or braise them. I am sure I am leaving a few methods out.
This time I decided to pickle mine, in a way. I brined the ribs in pickle juice. The vinegar and salt flavor the meat and make it more tender. When I say pickle juice, I mean just that. I save the brine from jars of pickles and store them in the fridge until ready to use. The pickle juice has so many uses. You can use it as a base for salad dressings, sauces, dips and marinades. You can add pickle juice to Bloody Marys, too. For this recipe I used dill (sour) pickle brine.
I placed the ribs in a container and poured pickle juice over them. I poked them with a fork and kept them, covered, in the fridge for 3 days. They were sauteed in a pan and finished with honey and seasonings. They were really good. Here is a more exact recipe. Enjoy!!
Honey Glazed Western Ribs
4 Western ribs, about 2 lbs.
1 c. pickle juice -from dill pickles, not sweet pickles
2 T. oil
salt and pepper
2-3 T. honey
1 t. hot sauce, optional, to taste
At least 2 days and up to 4 days before cooking the ribs place them in a bowl or dish and pour over the pickle juice. Pierce the ribs with a fork to help get the bring inside the meat. Try to pierce all over the ribs. Cover and store in fridge until ready to cook. Drain the ribs, pat dry and heat oil in a skillet. Season the ribs and saute in the pan. They are pretty thick cuts of meat. You want them to get some color on them and cook through. I started them on high heat and cooked them on each side 4-5 minutes, or until they were getting nice and golden. Then I turned the heat down and let them cook through, turning a time or two. I would say this took another 10 minutes total. I added the honey and hot sauce to the pan. Then I spooned the honey over them and turned the heat up to medium. I spooned the honey and pan juices over the ribs until they looked nice and glazed and the glaze was starting to brown without burning. I spooned some of the glaze over them, being careful to drain the fat out of the pan first. Serve with whatever sides you like. These are great with coleslaw. Serves 2-4.
Candied Bacon
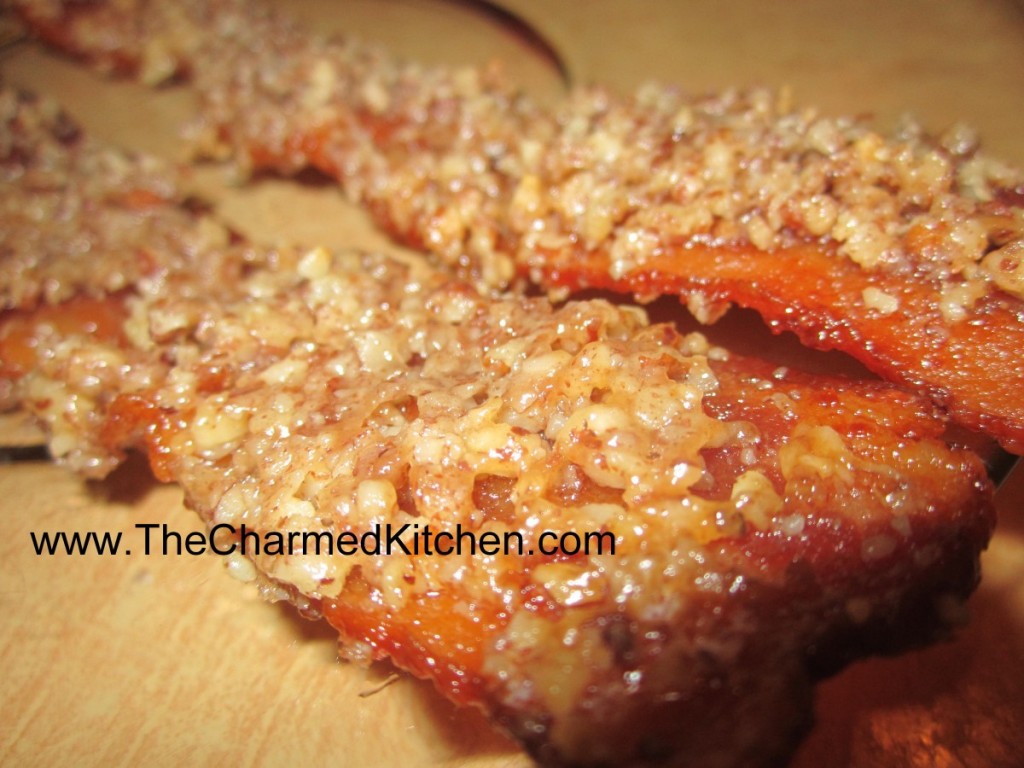
This candied bacon only has three ingredients- bacon, maple syrup and chopped nuts. The combination in sublime. Salty, sweet, smoky all in one crunchy bite. Friends and family love it!! Nice for dad on Father’s Day.
The bacon is baked, then coated with maple syrup and chopped nuts. It is returned to the oven, where it bakes until the bacon is crisp and the coating it toasted, almost caramelized. It gets crisper once it cools down.
You can make a spicier version by sprinkling with a little cayenne pepper or adding hot sauce to the maple syrup.
Candied Bacon
1 lb. bacon
3/4 c. – 1 c. maple syrup
3/4 c. – 1 c. crushed pecans (or any nuts you like! I like to leave some
larger pieces and then mix in some more finely ground)
Preheat oven to 350. Put bacon in baking pan and bake about halfway through (about 5-7 minutes or so). Drain most of the grease and allow to cool slightly. Coat each piece in syrup, roll in nuts and put back on pan. You may need more nuts as you go along, though it’s up to you how much to cover them. Bake another 7-9 minutes, until desired crispness. If you do like crisper bacon, just be sure to move the cooked bacon quickly off the baking sheet onto parchment paper, since the syrup will harden. Allow longer cooking times with thicker bacon.
Braised Lamb Shanks
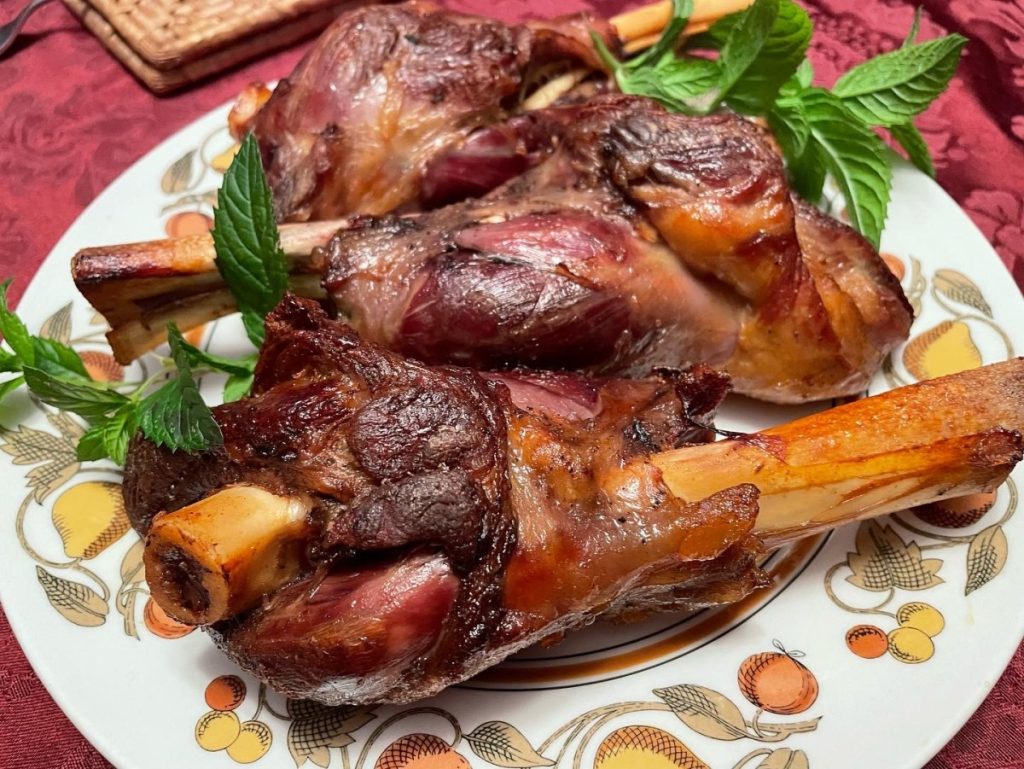
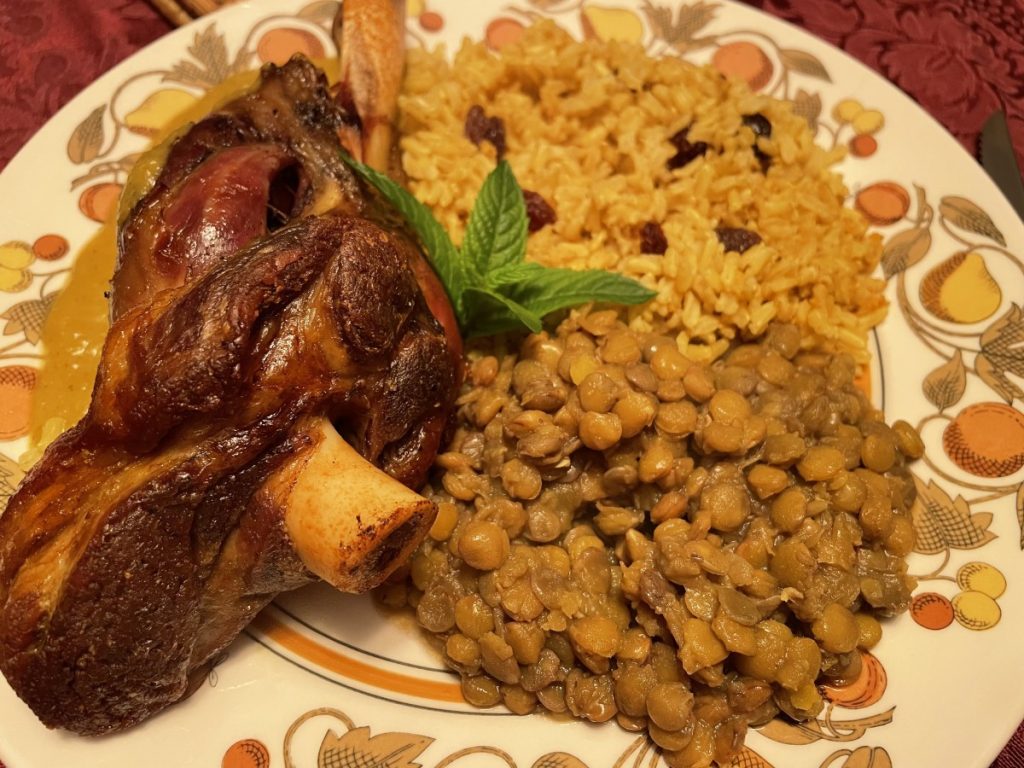
This might be one of my favorite meals. Braised lamb shanks are tender, full of flavor and easy to prepare. They are also reasonably priced. Because the shanks can be tough, they need a longer cook, with liquid, to get really tender. That is what braising is. They can be cooked faster in a pressure cooker, when time is an issue.
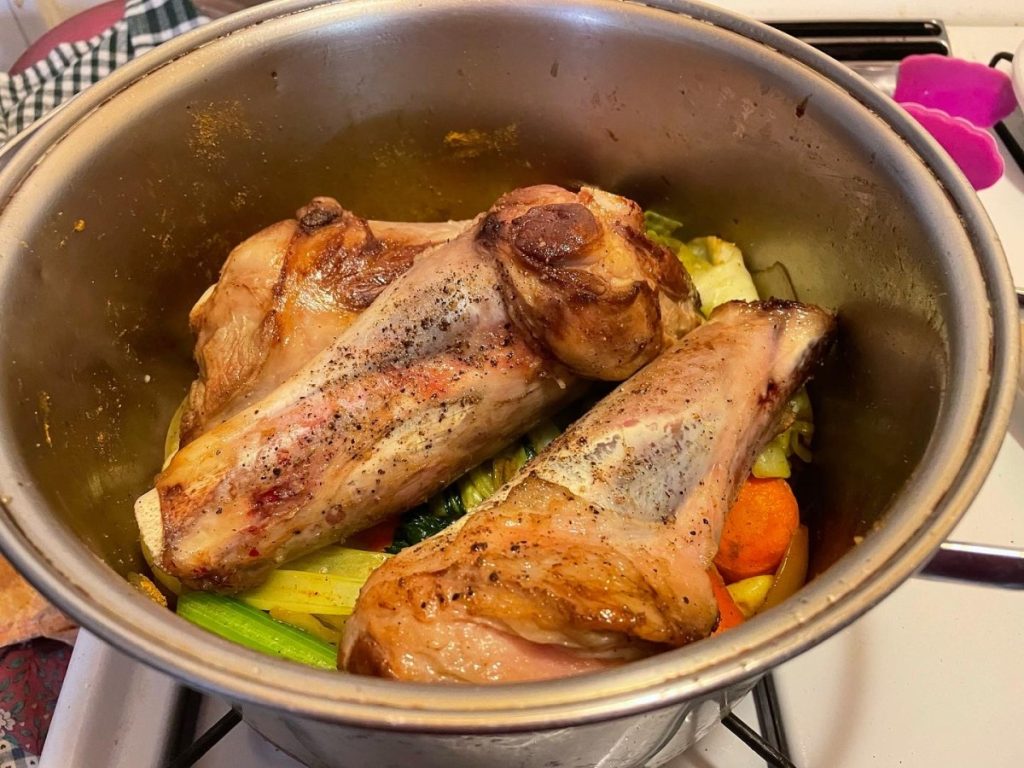
Recently a friend and I decided to make them for dinner. We ended up cooking them for about 2½ hours. They were perfectly tender. You can cook them longer, if you like. They really are simple to make. Yes, they take a while to cook, but once in the oven you don’t need to do anything but wait. We ended up using the cooking liquid to make a sauce. I just used an immersion blender to puree the veggies and cooking liquid. It tasted so good.
So here is the recipe for lamb shanks.
Braised Lamb Shanks
3 lamb shanks
2 T. oil
2 large onions, chopped
2 large carrots, chopped
1 rib celery, chopped
4-5 cloves of garlic, chopped
4 cups stock- lamb or beef preferred
½ c. sherry or red wine
2 T. curry powder
Salt and pepper
Cayenne pepper to taste
In Dutch oven brown the lamb shanks in oil until browned. Remove from the pan, add the vegetables and brown them for about five minutes. Return shanks to the pot. Add the stock and bring to a boil. Add sherry and seasonings. Place lid on pot and place in a preheated 350-degree oven for 2½- 3 hours. Check them after 90 minutes and add a little more stock, if needed. It is normal for some of the stock to cook down. I did not add more stock. Remove pan from the oven. Remove shanks and keep warm. Puree the vegetable mixture to make a gravy. Adjust seasonings. Serves 2-3.
Lamb in Greek Lemon/Egg Sauce
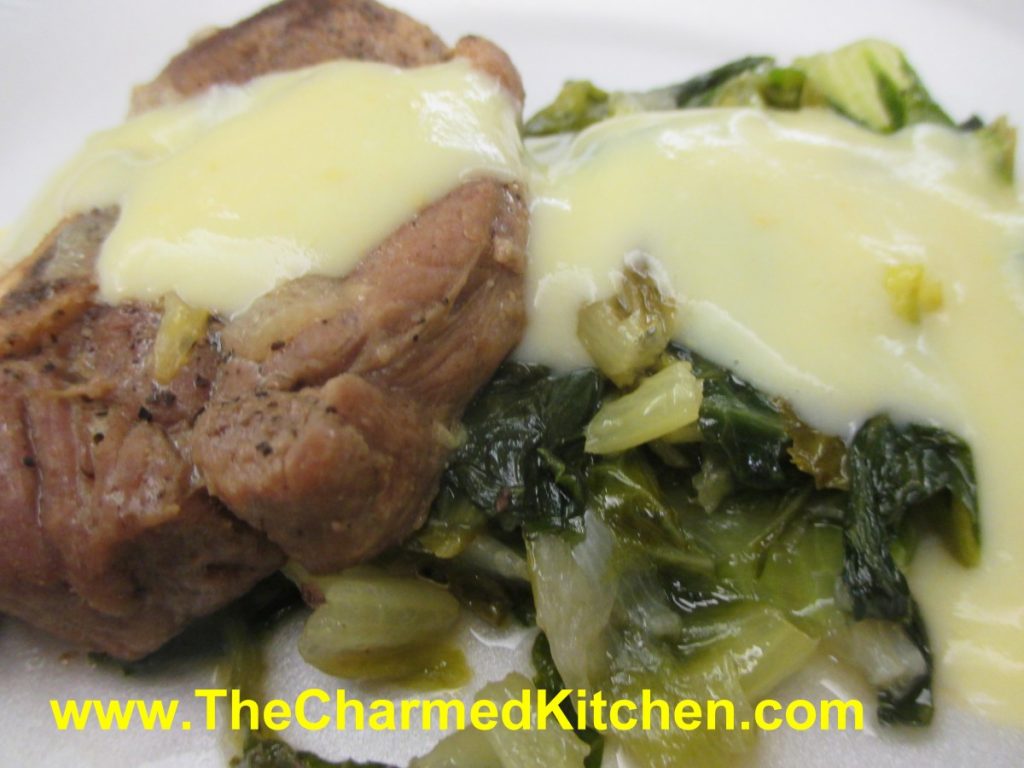
I am not sure which I love more in this recipe- the lamb that is cooked to tender perfection- or the Greek lemon egg sauce. Both are very special. I love lamb and have cooked it lots of different ways. This preparation will always be a favorite. This a great dish to serve for Easter dinner.
The recipe uses lamb shoulder, cooked with onions and Romaine lettuce- yes lettuce. The lamb is browned and then cooks gently until tender. The lettuce also cooks down and adds a nice green flavor to the dish. I have used lamb shoulder chops, and cooked them bone in. You could certainly use lamb shanks, if you prefer. Just allow enough time for the shanks to get tender.
The real magic is the lemon egg sauce, used to top the lamb once finished. It is creamy and has just the right amount of tang from the lemon juice.
If you are thinking of serving lamb for Easter, this would be a lovely recipe to use.
You can make this dish with pork or even chicken, but my favorite version is with lamb. I also use the lemon sauce with meat and rice stuffed zucchini. My dear friend Amy, had the dish on a trip to Greece and we made it often.
Fricassee of Lamb with Lemon Egg Sauce
2 1/2-3 lbs. lamb shoulder, or use pork
3 medium onions, chopped
2-3 heads romaine lettuce, washed and sliced thin
1/2 c. olive oil
Egg and Lemon Sauce -recipe follows
Cut the meat into serving pieces. Heat the oil in a pot and sauté the meat. Add salt, pepper, the onions, lettuce and a small amount of water. Cover the pot and let the fricassee simmer for about an hour. Prepare the egg and lemon sauce, pour it over the fricassee and serve.
Lemon and Egg Sauce
1-2 c. stock
2 eggs
juice of 1 lemon
flour, about 1-2 tablespoons, depending on how thick you want the sauce
Bring stock to the simmer. Beat eggs well. Mix the flour with the lemon juice.
Add to the eggs and keep beating. Add the hot broth slowly while you keep beating. Pour the egg and lemon sauce in the pot and bring to a simmer, stirring constantly. Makes 1-2 cups. For a thinner sauce eliminate the flour.
Chili Braised Oxtails
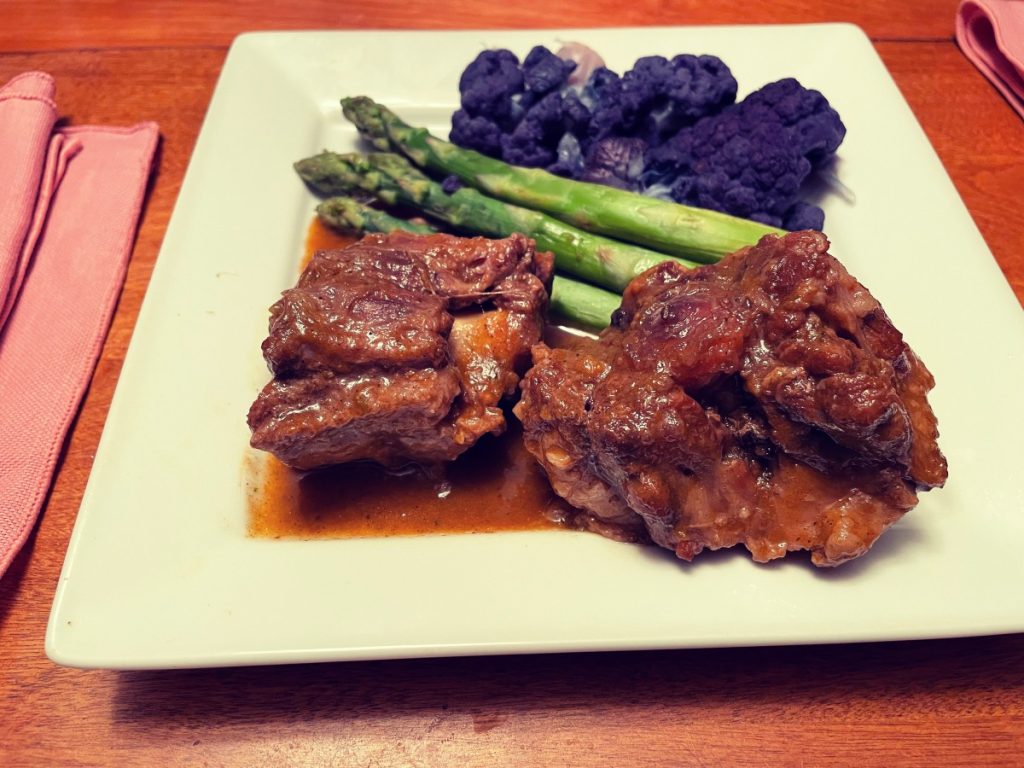
Oxtails will always remind me of the oxtail soup my mom used to make when I was a kid. It would simmer all day and smelled wonderful. I wanted to do something other than soup with these oxtails, so I decided to braise them instead.
Oxtails need a long, slow cook to get them really tender. Moist heat is the trick here. Soup is one way. Braising is another. Yes, you can also cook them in a pressure cooker to get the meat tender faster. I went more traditional though, and opted for a braise of several hours. While the cooking takes a bit of time, there really is nothing to do once the dish is moved to the oven. You just have to start them early enough. Longer cooking generally won’t hurt them. It just depends on how tender you want your oxtails to be.
Oxtails are pretty fatty and you want to trim off excess fat before cooking or your sauce will be greasy. My local butcher trims them for me, saving a step. It also means I am not paying for fat that I am going to cut off and throw away. Oxtails were once an inexpensive cut of meat, but that has changed in recent years. It pays to save where you can.
So here is the recipe. I had a friend try them and he really enjoyed them. I think you will, too.
Chili Braised Oxtails
3-4 lbs. oxtails, excess fat trimmed, if needed
2 T. oil
2 large onions, chopped
2 large carrots, chopped
1 rib celery, chopped
4-5 cloves of garlic, chopped
4 cups stock- beef preferred
½ c. sherry or red wine
¼ cup chili powder
Salt and pepper
Cayenne pepper to taste
In Dutch oven brown the oxtails in oil until browned. Remove from the pan, add the vegetables and brown them for about five minutes. Return shanks to the pot. Add the stock and bring to a boil. Add sherry and seasonings. Place lid on pot and place in a preheated 350-degree oven for 3-4 hours. Check them after 90 minutes and add a little more stock, if needed. It is normal for some of the stock to cook down. I did not need to add more stock. Remove pan from the oven. Remove oxtails and keep warm. Puree the vegetable mixture to make a gravy. Adjust seasonings. Serves 3-4.
City Chicken
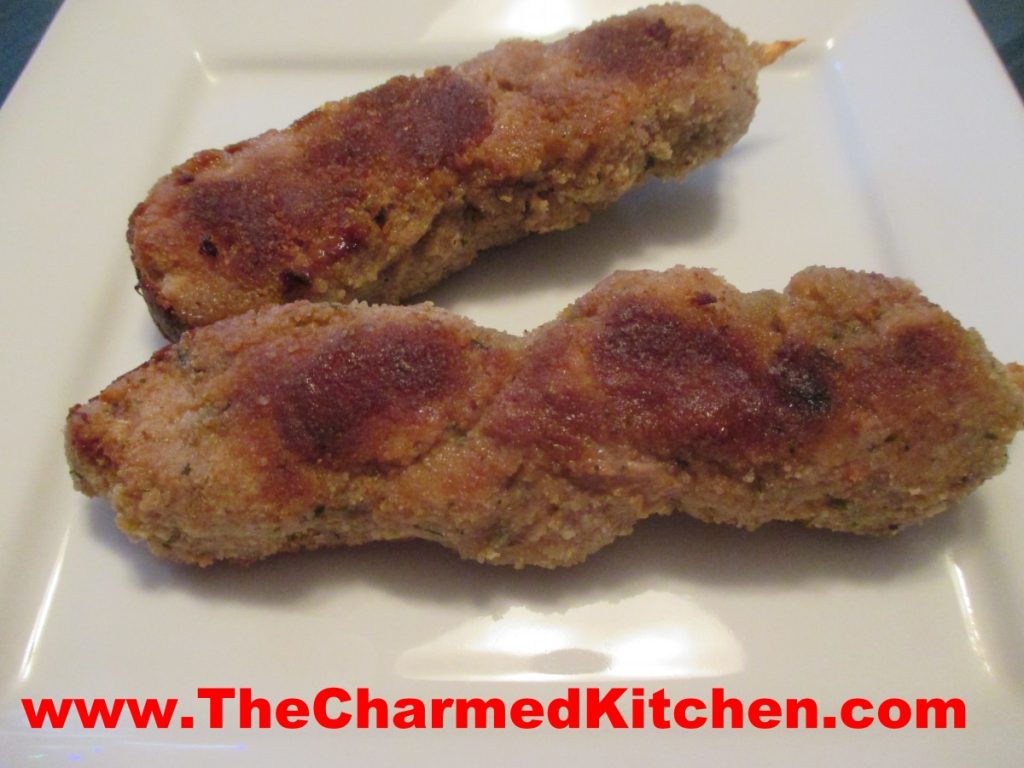
If you never had City Chicken, you don’t know what you are missing. Meat on a stick- always a good thing. But not just meat on a stick- breaded meat on a stick! If you like breaded pork chops, you should love City Chicken.
This is a dish I grew up with. When my Mom made City Chicken, I knew dinner was going to be special.
There is no chicken in the dish at all. Odd, but well, I didn’t name the dish, I just like eating it.
City Chicken is normally made with chunks of pork- or chunks of pork and veal- skewered on wooden sticks. I used pork. After skewering, the meat is dipped in seasoned flour, egg wash and then bread crumbs- or cracker crumbs.
You can just bake them, or brown in a little oil first, before baking- for a crispier coating. They also can be cooked in an air fryer or convection oven.
I didn’t have my Mom’s recipe, so I recreated it as I remembered it. So here is my recipe. A tasty dish, and also a trip down memory lane.
City Chicken
2 lbs. boneless pork – I use Western style ribs or pork loin
½ c. sherry – not cooking sherry
2 T. soy sauce
¾ c. flour
Salt and pepper
3 eggs
½ c. milk or half and half
2 T. chopped parsley
Hot sauce
½ t. garlic powder
1-2 c. bread crumbs
2 t. dried basil
2 t. dried oregano
½ t. dried thyme
Oil
6 –inch Wooden sticks or skewers
Cube pork into 1-inch cubes. Place in a bowl and add the sherry and soy sauce. Stir to combine, cover bowl and place in fridge. You can do this a couple of hours ahead or even a day ahead. You might not really need to do this step, but I like the flavor of the sherry, so I chose to marinade my pork in it before breading. Your choice, completely.
Take pork and skewer it onto wooden sticks. I used skewers that were a little thicker than what I normally use. Since they were long, I cut them in half before using. I ended up with 9.
Place flour in a bag with salt and pepper to taste. Add one pork skewer at a time to the flour, shaking to coat evenly. Place floured pork skewers on a tray. Once finished, combine eggs with the milk, parsley, hot sauce, garlic powder and a little more salt and pepper. Place bread crumbs in a bag with the basil, oregano and thyme. Shake to combine. Dip each floured skewer into the egg mixture, remove from egg mix and allow excess to drip off a little. Then place in the bag of bread crumbs, shaking to coat evenly. Repeat until all the city chicken is breaded.
Now I know I already asked you to wait to marinade the pork in the beginning. I am going to ask you to wait again. If you fry up the city chicken right away, the breading is likely to fall off. If you bread the city chicken early in the day- then leave it in the fridge at least a couple of hours before cooking it, the breading will stay on much better. I actually marinade a day ahead, in the morning. Then I bread them in the evening the night before. But even breading them a couple of hours before makes a big difference. Just keep in the fridge until you are ready to cook.
When ready to cook them- I know you were giving up hope we would ever get to this step- heat oil in a large skillet. You don’t need much oil- a few tablespoons, at most. Brown the city chicken on all sides in the hot oil. Transfer them to a baking dish, as you finish browning them. Place in a preheated 350-degree oven for about 30 minutes. Don’t bake them too long- you don’t want them to dry out. Pork has to reach a minimum internal temp of 145 F. Serves 6.
Appetizer Mini Meat Muffins
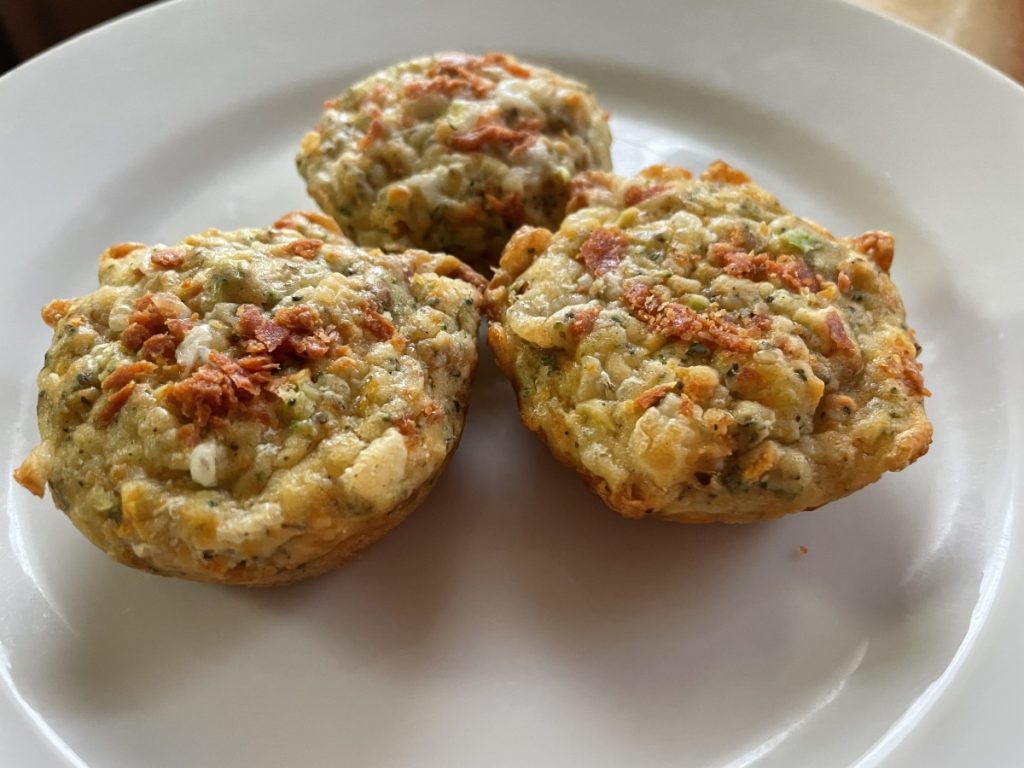
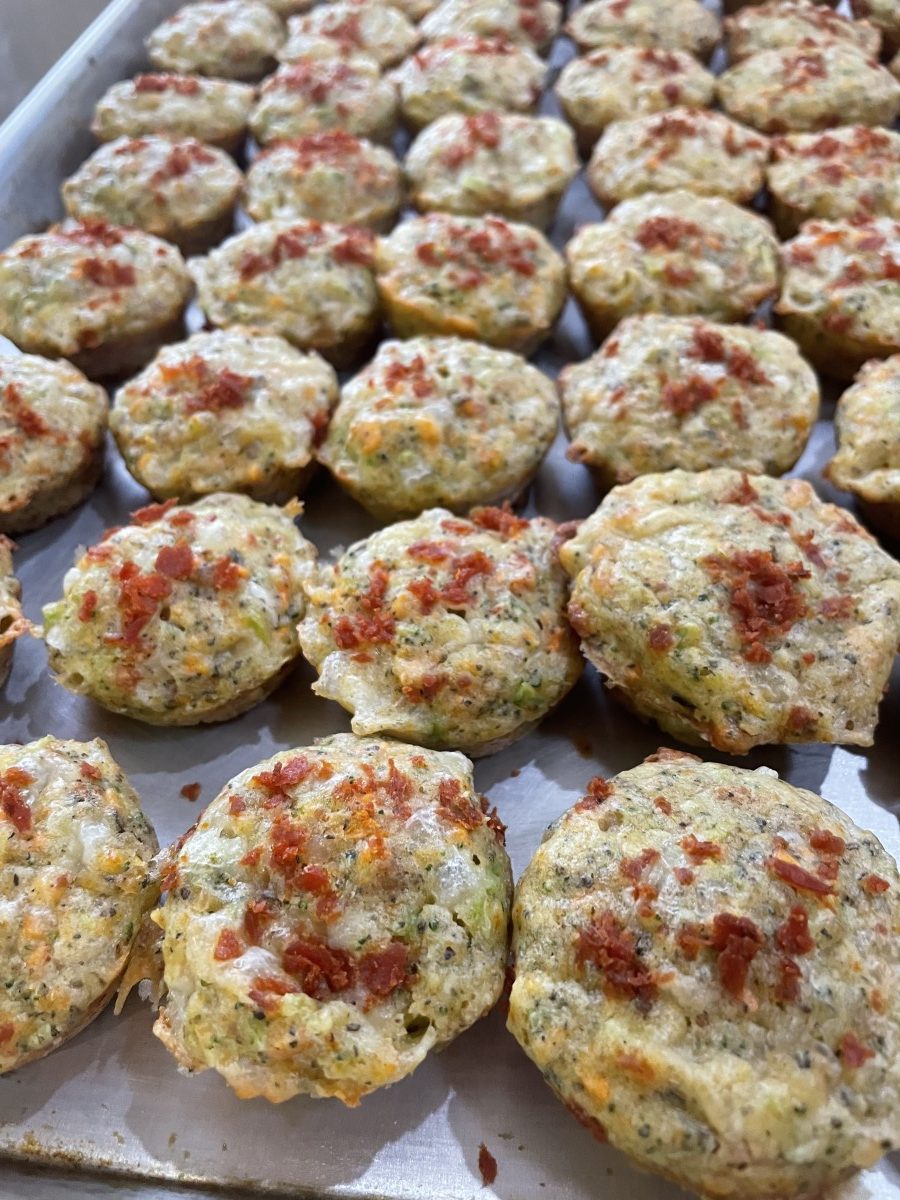
These muffins came about after a friend asked me if I could make a meat muffin. Something savory, rather than sweet. I had already made corn muffins that weren’t sweet, so it wasn’t a stretch to make other muffins that were also savory.
As I was playing around with the recipe I had some of my students try them in a recent cooking class. Everyone liked them. One woman suggested serving them with marinara sauce for dipping. I love that idea. I always wanted some sort of sauce to dip them in.
A nice bonus about these muffins is that they contain a fair amount of veggies. I declined to call them veggie muffins, though. I think calling them meat muffins or pizza muffins will get a few more people to try them. You can easily change up the seasonings, too. Maybe curry powder or even adding some fresh herbs. You can also use breakfast sausage. I used Italian sausage.
I did some looking around online and found several recipes that interested me. The recipe I ended up with is a combination of a couple of those recipes with some extras of my own. I hope you will give them a try. They freeze well, too. So you can make a batch, freeze them, and just take out at needed.
So here is the recipe.
Mini Meat Muffins – Pizza Version
3 eggs
¼ c. oil
1 c. milk
1 c. minced fresh broccoli, I pulsed in a food processor
½ c. grated carrot
½ c. minced green onion or shredded zucchini – either works
1 c. shredded mozzarella cheese
1 c. cooked, minced sausage- I used Italian sausage
¼ c. chopped pepperoni
1-2 T. pizza seasoning
1 T. tomato paste – I used 2 t. of tomato powder, but tomato paste is easier to find
1 t. baking powder
1 t. baking soda
½ t. salt
1½ c. flour: all purpose, spelt or whole wheat
extra cheese and pepperoni, if desired
Preheat oven to 350 degrees. Grease 48 mini muffin tins. Set aside. In medium bowl, combine the first 6 ingredients. Stir in cheese, sausage, pepperoni, pizza seasoning and tomato paste. Stir in remaining ingredients and use a cookie scoop to put batter in the prepared pans. Fill them pretty full, as they don’t rise much. You can top with a little more cheese or pepperoni, if you like. Bake 12-14 minutes, or until muffins spring back when pressed lightly in the middle. Serve warm or cold. Makes about 48.
