Cinnamon Pecan Crisps
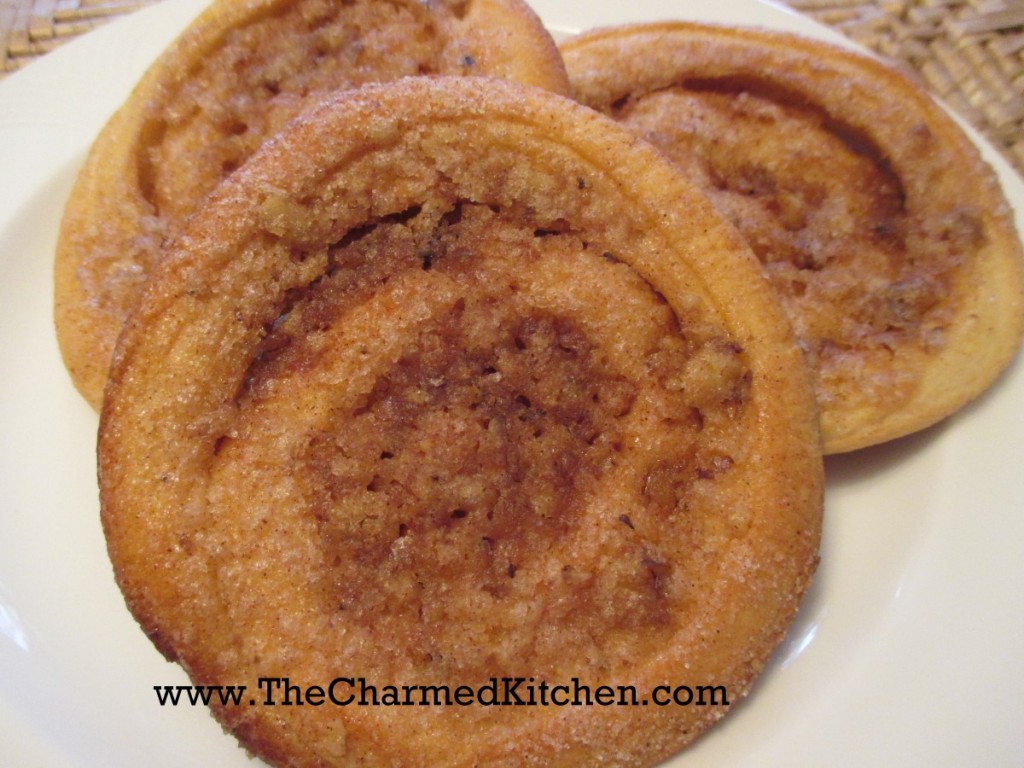
Imagine a cinnamon roll, but crispy. These pastries start out being made like a cinnamon roll, but then they are rolled flat, before baking, to create a crispy texture.
Reminds me of elephant ears. You know, those yummy fried treats from your local fair or carnival. If you are craving fair foods, why not make a batch of these? Unlike elephant ears you get at the fair, these are baked, not fried. They still give you the yummy cinnamon flavor and crispy texture of traditional elephant ears.
I serve them as they are, but you could top them with powdered sugar, a powdered sugar glaze, or a drizzle of melted chocolate.
I love them. I think you will, too.
Cinnamon Pecan Crisps
3½ – 4 c. flour
¼ c. sugar
1 pkt. Active dry yeast
1 t. salt
1¼ c. milk
¼ c. butter
1 egg
Filling:
½ c. brown sugar
½ c. sugar
¼ c. butter, melted
1 t. cinnamon
Topping:
¼ c. butter, melted
1 c. sugar
½ c. chopped pecans
1½ t. cinnamon
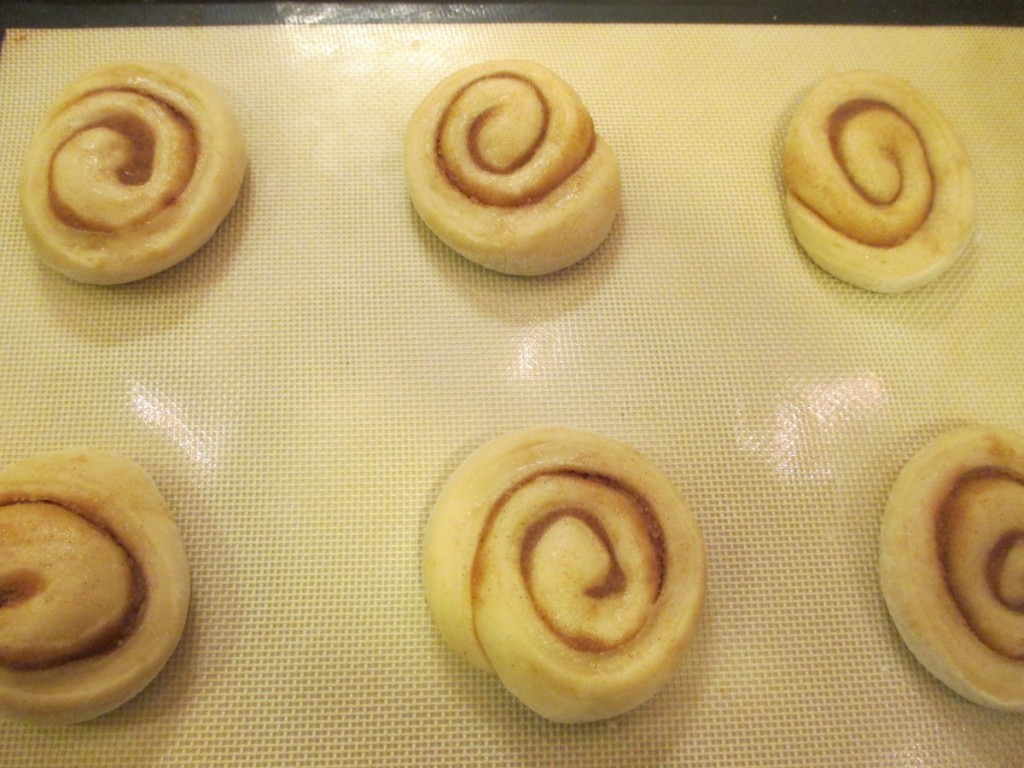
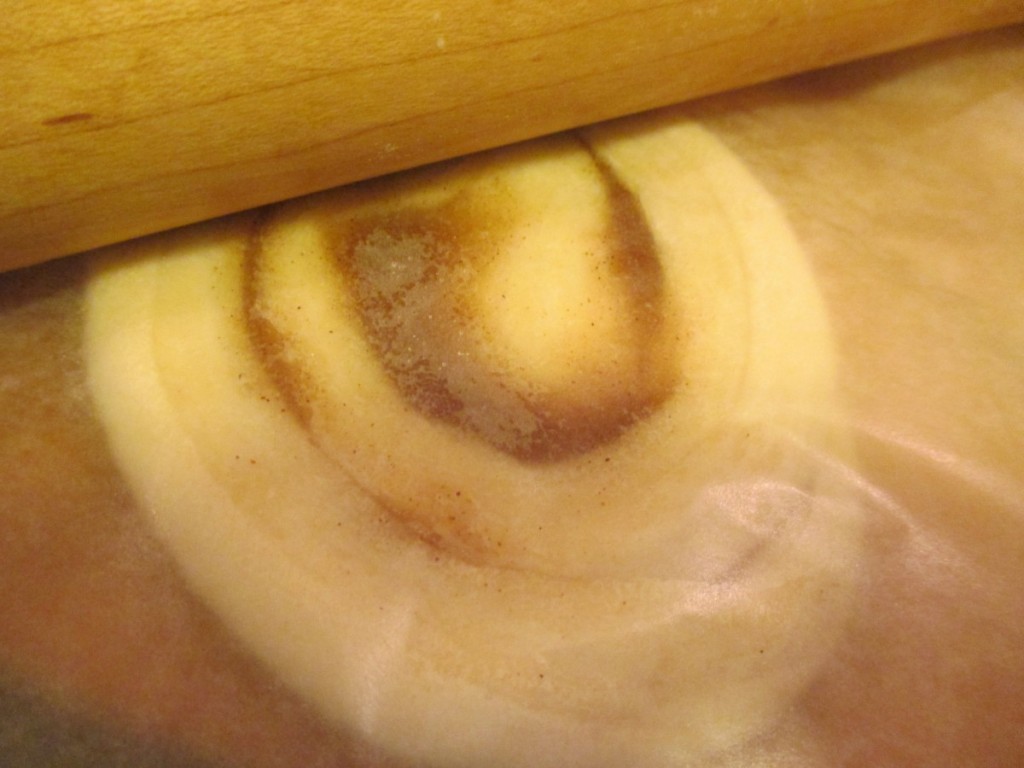
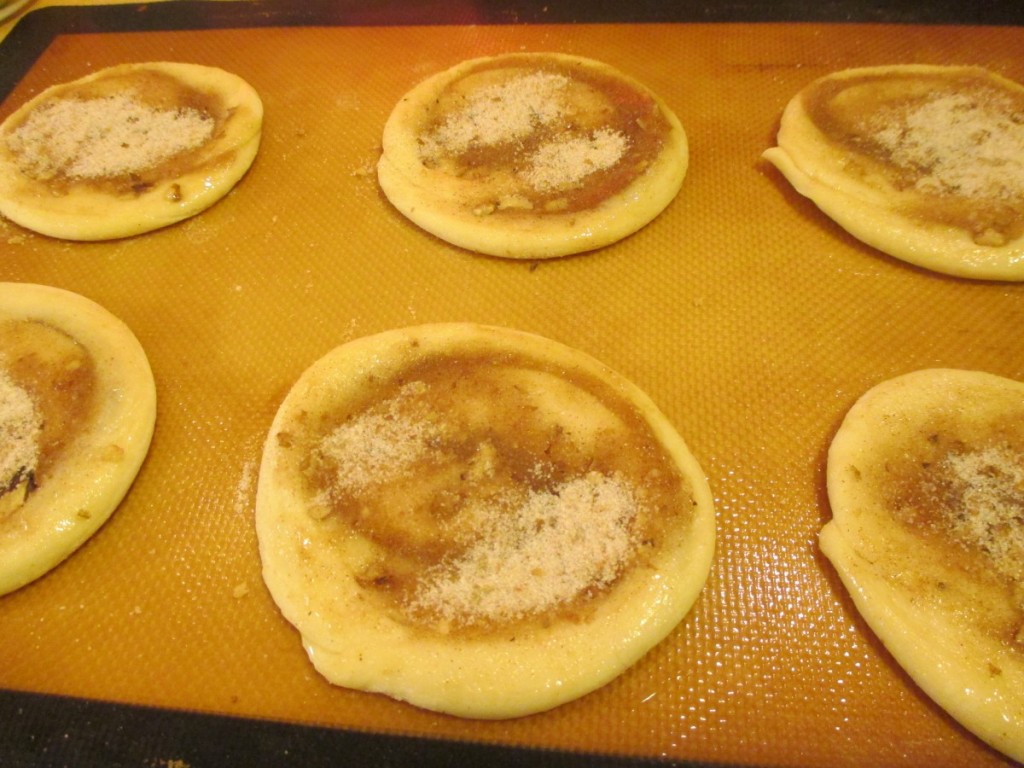
In mixing bowl combine 2 cups of the flour with the sugar, yeast and salt. Heat together the milk and butter until warm. Add to the flour mixture and beat for 3 minutes. Add another cup of flour and the egg and beat another 3 minutes. Gradually add enough of the flour to make a soft dough. Knead until dough is smooth- 3-5 minutes. Place dough in lightly oiled bowl and turn dough to coat in oil. Cover and let rise until doubled, about 1½ hours. Punch dough down and allow to rest 10 minutes. Meanwhile, prepare filling by combining sugars with cinnamon and stir in the melted butter. Divide dough in half. Roll one half into a square about 12 inches big. Let’s be honest here- rolling dough into a perfect square is pretty hard. Don’t freak out if it isn’t perfect, just shoot for sort of square. Spread half of the filling over the dough and roll it up. Slice the dough into 12 pieces. Prepare 2 baking sheets for these 12 pieces of dough. You’ll need 2 more for the rest of the dough. Line the baking sheet with parchment paper or a silicon baking sheet. Place 6 of the dough circles on each sheet- spacing them at least 3 inches apart. Flatten them to be about 3 inches across. I tuck the end under so they stay in a nice circle. Cover and let rise until doubled, about 30 minutes. Repeat this with the second half of the dough. You will end up with 4 baking sheets and 24 rolls in all. After the rolls have doubled preheat the oven to 400 degrees. Prepare the topping by combining the sugar, nuts and cinnamon in a bowl. Slide the parchment paper or silicone baking sheet off the cookie sheet and on to your work surface. Place a piece of wax paper over the rolls and roll then out pretty flat. Remove the wax paper and brush each of them with the butter and add a sprinkling of the sugar and pecan mixture to each one. I find a slightly rounded tablespoonful is about right. Put the wax paper back on the rolls and use a rolling pin to roll them again, pressing the nut mixture into them. Remove the wax paper. Repeat with the remaining rolls. I start baking the first 12 rolls while prepping the last 2 trays. It just saves me some time. Bake for 10-12 minutes. I put 2 in at a time and switch them halfway through the baking time. They should be a pretty golden brown color- top and bottom. Cool on a wire rack. Don’t be tempted to taste one when they are hot- the sugar will burn your mouth. Besides, they get crisper as they cool. Makes 24.
Peanut Soup
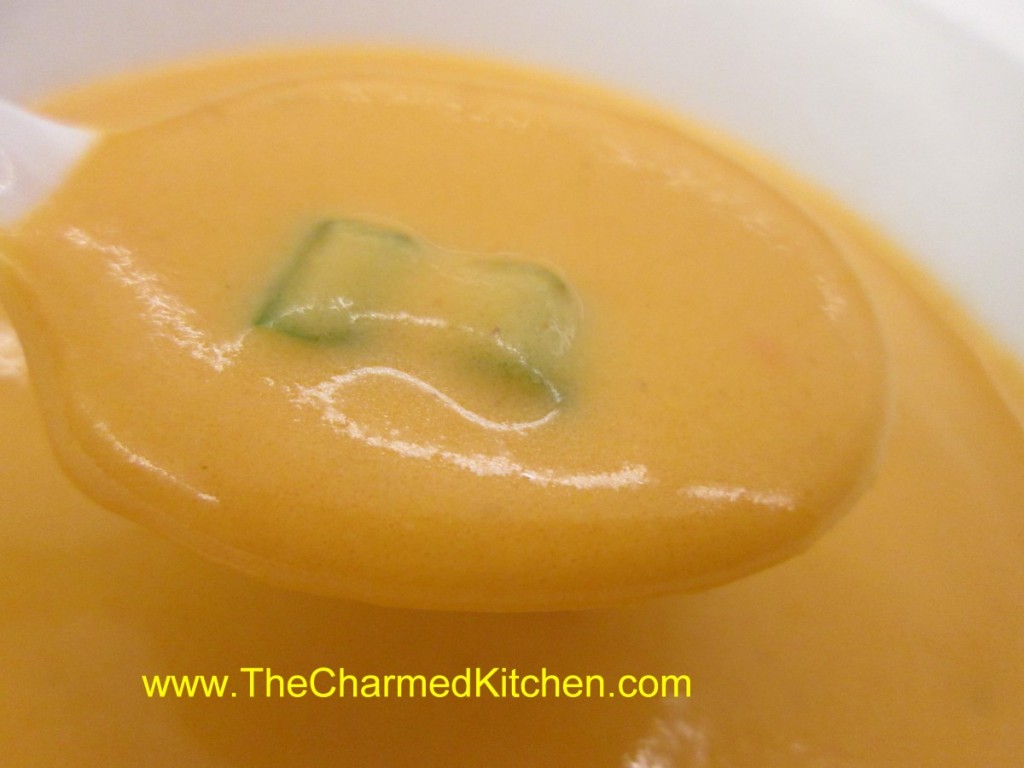
This is one of the easiest soups I make. It is also one of my favorites. It’s a rich soup with a creamy texture and just a hint of heat. You could make it spicier, of course. The recipe is very versatile. As written, the soup is vegan, but you could make it with a meat-based stock, if you prefer.
If your only experience with eating peanut butter is on a sandwich or in cookies, you might be surprised at just how good this soup tastes. I have made it with almond butter. If you don’t have peanut butter, the almond butter works fine. Other nut butters would also work. but I still prefer it made with peanut butter. It freezes well, too.
Peanut Soup
2 c. chopped onions
1 T. oil
cayenne pepper to taste
1 t. grated fresh ginger
1 c. chopped carrots
1 c. chopped sweet potatoes
1 c. chopped white potatoes
5 c. vegetable stock or water
1 c. tomato sauce
1 c. smooth peanut butter
1 T. sugar, optional
1 c. chopped green onions
Sauté onions in oil until tender. Add seasonings and carrots and sauté 3 minutes more. Add potatoes and stock and simmer until vegetables are tender. Puree soup in blender in batches until smooth. Return to pot and add tomato sauce and peanut butter. Add sugar if soup is not sweet enough. I never add the sugar, but some people do. Warm gently and serve with green onions on top. You could also top with chopped peanuts, for a little crunch. Serves 6-8.
A Trio of Mashed Potatoes
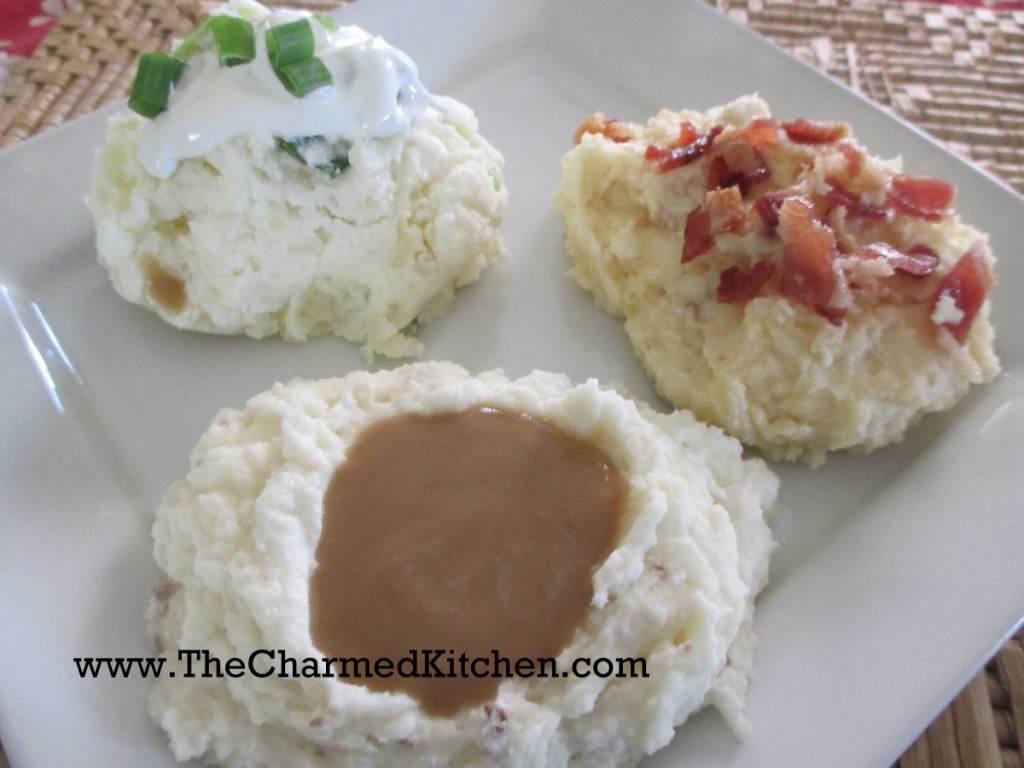
I am perfectly happy just mashing up potatoes and adding warm milk or cream and butter to them along with salt and pepper. Still, sometimes it is nice to switch things up a little. There are certainly countless variations for what you could add to mashed potatoes. If you are making mashed potatoes for Thanksgiving, and want to try something new, you might consider one of these recipes.
They are three of my favorites.
I can remember the first time my Mother added roasted garlic to mashed potatoes. They were so good. I think she added roasted garlic to them all the time after that.
Roasted Garlic Smashed Potatoes
6 cloves garlic, peeled
1/4 cup olive oil
3 lbs. potatoes, peeled and cubed
½ c. milk, warmed
¼ c. grated Parmesan cheese
2 tablespoons butter
½ t. salt
¼ t. ground black pepper
Preheat oven to 350 degrees. Place garlic cloves in a small baking dish. Drizzle with olive oil, cover, and bake 45 minutes, or until golden brown. Bring a large pot of lightly salted water to boil. Add potatoes, and cook until tender but firm. Drain, and transfer to a large mixing bowl. Place roasted garlic, milk, Parmesan cheese, and butter into the bowl with the potatoes. Season with salt and pepper. Mash to desired consistency.
Cheesy Bacon Smashed Potatoes
3 lbs. potatoes, peeled and cubed
½ c. milk or half and half, warmed
2 c. shredded cheese- I like cheddar
3 T. butter
12 oz. bacon, cooked, drained and crumbled
Salt and pepper to taste
Bring a large pot of lightly salted water to boil. Add potatoes, and cook until tender but firm. Drain, and transfer to a large mixing bowl. Place milk, cheese, and butter into the bowl with the potatoes. Season with salt and pepper. Mash to desired consistency. Stir in bacon, reserving some for the top.
Sour Cream and Green Onion Smashed Potatoes
3 lbs. potatoes, peeled and cubed
1 c. sour cream
3 T. butter
½ c. chopped green onions or chives
Salt and pepper to taste
Bring a large pot of lightly salted water to boil. Add potatoes, and cook until tender but firm. Drain, and transfer to a large mixing bowl. Place sour cream and butter into the bowl with the potatoes. Season with salt and pepper. Mash to desired consistency. Stir in green onions, reserving some for the top.
One more thing: A note about peeling. I still mostly peel potatoes that I am going to mash. My sister, Cindy, does not. She likes the flavor and texture the peel adds. Either is fine by me.
Uncle Art and the Giant Turkey
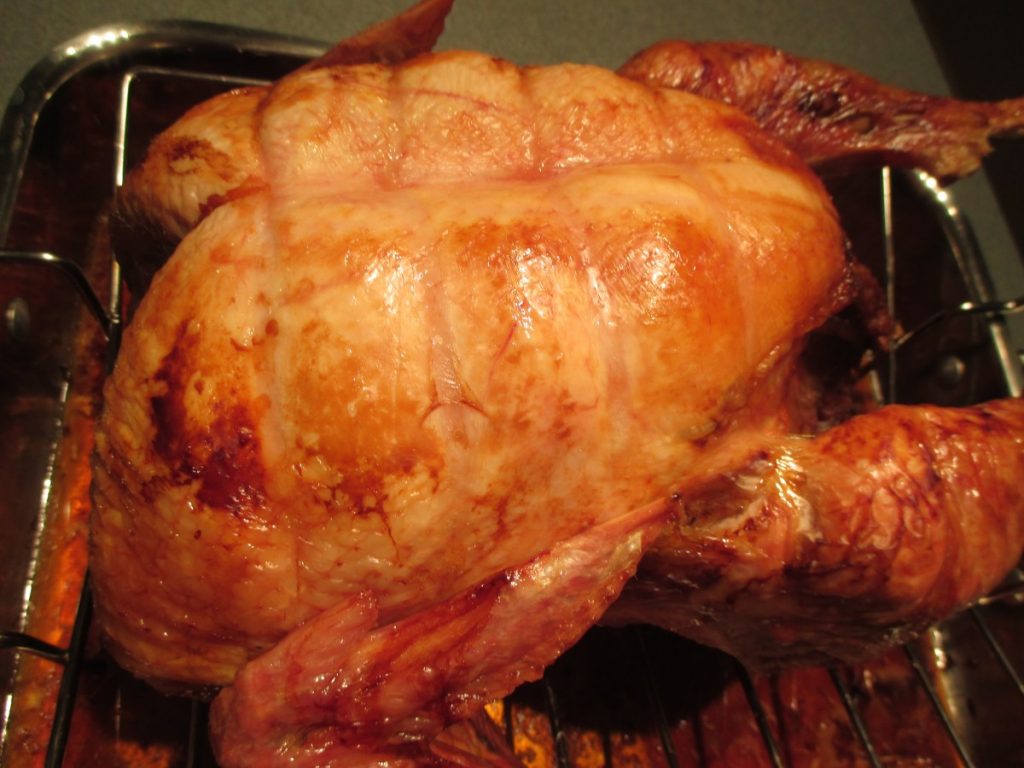
I posted this story before and had a request to post it again….so here it is….
Rather than posting a recipe today, I wanted to share a fun Thanksgiving memory with you. Through most of my younger life, Thanksgiving was spent with my family and my Aunt Tillie and Uncle Art’s family. My mother and my Aunt Tillie were sisters. They were as close and loving as sisters could be. We took turns at each others homes, and shared the cooking duties.
There was a friendly rivalry every year to come up with a special dessert or to have a new side dish. The biggest part of this challenge though, was to get a really big turkey. My mother was convinced that a big bird was tastier than two small ones. Aunt Tillie agreed. So every year it was the quest of the host family to score a really large turkey.
My mom and dad would go to the local butcher to order the bird weeks in advance. I am sure Tillie and Art did the same. They always seemed to end up around 25 pounds, give or take. My dad and uncle kept track. Last year was 26 pounds and 4 ounces, but two years before, closer to 27 pounds. I swear, these birds had to be part ostrich.
The ultimate goal was to get a 30 pounder. It had eluded them all, until one year. Uncle Art had found a new guy. A turkey guy, who promised him the 30 pound bird of his dreams. We knew days before the big day, that the really big bird dream was going to happen. Then my mom got a phone call from Aunt Tillie.
My uncle had picked up the beast. He proudly brought it home. He looked at it, lovingly at first. Then he looked again. This was not Uncle Art’s first turkey. He felt something was wrong. Remember, this was something they had all dreamed about finding. Finding it first was cause for bragging rights, for sure. He was convinced that he had been duped, that the bird fell short of its promised weight. He told my aunt about his suspicions and they weighed the bird. It was too big for their kitchen scale, so my uncle weighed himself on the bathroom scale and then weighed himself again, this time holding the turkey.
Uncle Art had been right. He was short at least a couple of pounds of the promised 30 pounds. He went back to the turkey guy, irate. The man was defensive at first, but weighed the bird again. It weighed in somewhere in the area of 28 pounds. The man gave him some money back and lacking a bigger bird, Uncle Art brought it back home.
As I recall it was a perfectly lovely bird, cooked to juicy perfection. To my Uncle Art it was both a failure and a success. On one hand, he had not gotten the 30 pound bird he was hoping for. He did, however, take pride in the fact that he spotted it. That in the world of turkeys, he could see the difference between a 28 pound and a 30 pound bird.
I believe, some years later, a 30 pound bird was found. The story that year, around the Thanksgiving dinner table, was not so much about the 30 pound bird before us, but about the one that nearly was.
I hope you all have a great day, spent with those you love. I also hope you make memories to make you smile, when some of those we love are no longer here. Love and best wishes to all.
Happy Thanksgiving.
Mom. Dinah Shore and the Upside Down Turkey

I thought I’d share how I came to roast my turkey breast side down. I must say, there are a number of ways to roast a turkey and have it come out nice and juicy.
I have no objection to any way you like to cook your bird including, but not limited to: frying, wrapped in bacon, cheesecloth wrapped, spatchcocked, sous vide etc. Stuffed, un-stuffed, brined are all OK by me, if that works for you. I have found over the years that cooking a turkey is a very personal decision, and folks get pretty passionate about how they cook their bird.
Many years ago a singer named Dinah Shore had a TV show, which my Mother really liked. Dinah, besides being a singer, liked to cook. She gave her turkey cooking tip one time on her show. She said she roasted her turkey breast side down for most of the time. The theory is that if the bird is breast side down the juices will flow into the breast- which eliminates the need to baste. It also slows down the cooking time for the breast- so it comes out cooked at the same time as the dark meat.
My Mother was intrigued, to say the least. She talked about it, a lot, leading up to Thanksgiving. We used to get a really big turkey and my Dad has his doubts about how easy turning over a hot, partially cooked turkey, would be. Mom was adamant. So it was that that Thanksgiving my Mom put her bird in the pan, on the rack, breast side down. She was excited and nervous at the same time.
Let’s face it- the turkey is the star of the meal and if it didn’t work it would be a disaster. But Mom trusted Dinah and they went ahead with this radical new plan. After about 3 hours of cooking, maybe a bit less, they managed to get the turkey turned over and returned it to the oven. Mom would look pensively through he oven window. I think giving birth was easier on her.
Well, in the end it worked out great. The bird was juicy and evenly cooked. No basting, so less work. She was delighted that she had held to her plan and had not been persuaded to cook it like before.
So every time I cook a turkey I cook it breast side down. How long I roast it that way depends on the size of the bird. Normally about 2 hours- because I am roasting a smaller turkey. I always remember my Mother when I cook it that way. I remember that first breast side down Thanksgiving and every one after that. Mom always was delighted- like the first time- and she always mentioned Dinah Shore.
Happy Thanksgiving to you all. May your turkey be juicy and most importantly, may you get to spend time with the people you love. I’ll be with family and I’ll think about my Mother and Father – and Dinah.
Recipes for Leftover Turkey
It is that time of year, when we find ourselves waking up to leftover turkey. Sometimes quite a lot of leftover turkey.
Of course, be sure to make stock from the carcass. Turkey sandwiches are always a favorite in my family.
There is a lot more you can make with the rest of the bird, though. Here are 10 fun and tasty ways to make the most of all that turkey.
I never get tired of turkey, but if your family does not feel the same way, these recipes could come in handy. Enjoy!!
Turkey Reuben Loaf
3 ¼ c. flour
1 T. sugar
1 t. salt
1 package quick-rising yeast
1 c. hot water
1 T. oil
¼ c. thousand island dressing*
8-10 oz. thin sliced turkey
4 oz. sliced Swiss cheese
1 c. sauerkraut, rinsed and squeezed dry
1 egg white, beaten
Caraway seeds
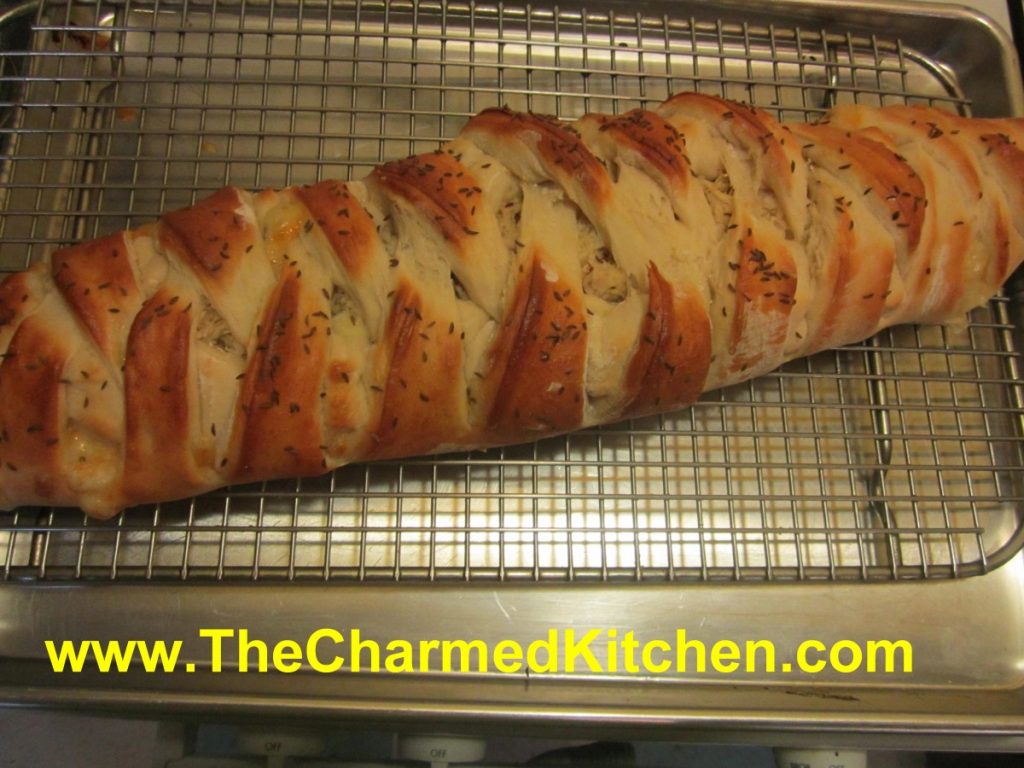
Set aside 1 cup of the flour. Combine remaining flour with the other dry ingredients in a medium bowl. Stir in water and oil and gradually stir in enough flour to make a soft dough. Turn onto lightly floured surface and knead until dough is smooth and elastic, about 5 minutes. Roll dough into a rectangle about 16 x 8. Spread dressing down center middle of dough. Top with meat slices, cheese and sauerkraut. Cut one-inch wide strips of dough from filling to edge on both sides. It will sort of look like fringe. Alternating sides, fold strips up and over the filling at an angle. Carefully lift loaf onto greased baking sheet and place at an angle. Cover with a towel and place sheet on top of a roasting pan half-filled with simmering water for 15 minutes. Brush with egg white and top with seeds. Bake in a preheated 400-degree for 20-25 minutes or until golden brown. Cool slightly before slicing. Serve warm and refrigerate leftovers.
* You can make your own Thousand Island Dressing by combining equal parts of ketchup, mayo and sweet pickle relish.
Note: The variations for this bread are almost endless. Some favorite combinations are ham and Swiss with mustard, roast beef and cheddar, chicken, broccoli and cheese, Spinach with ricotta or feta and onions, pizza, assorted fillings. You get the idea. Use your imagination and have fun. Just be careful not to overfill, or the bread will be hard to move, use fillings that aren’t too runny and always use cold fillings.
If you want to use regular yeast use warm, rather than hot water. Also, don’t let dough rise over boiling water. After kneading cover dough and let rise 45 minutes. Punch down and assemble as in original recipe. Cover with a towel and let rise until dough looks puffy, about 40 minutes. Bake as directed above. These breads can also be frozen.
Turkey Tetrazzini
2 T. butter or oil
1 c. chopped celery
4 oz. sliced mushrooms
4 T. flour
1 1/2 c. chicken or turkey stock
1 c. half and half or milk
1/4 c. sherry
2 c. cooked turkey, cubed
4-6 oz. broken spaghetti, cooked
salt and pepper to taste
bread crumbs
butter
Parmesan cheese- optional
Heat butter or oil in pot and add celery and cook 3 minutes. Add mushrooms and cook 3 minutes more. Stir in flour and mix well. Add stock, half and half and sherry bring to a simmer- stirring often. Stir in turkey and pasta. Adjust seasonings. Place mixture in oiled casserole and sprinkle the top with bread crumbs and drizzle a little melted butter over the top. Add Parmesan cheese, if you like. Place in a 350 degree oven and bake until bubbly- about 25 minutes. Serves 4.
Turkey Noodle Soup
Oil*
2 onions, sliced
4 carrots, peeled and sliced
4 ribs celery, sliced
4 qts. Turkey stock
4-5 c. turkey meat, cubed
1 c. chopped fresh parsley
Salt and pepper to taste
Hot pepper sauce to taste
1 lb. wide egg noodles, cooked
Heat oil in soup pot and cook onions until starting to brown. Add carrots and celery and cook a few minutes more. Add stock and meat and simmer, covered, until veggies are tender. Add parsley and simmer 15 minutes longer. Adjust seasonings. Warm noodles and serve on the side so everyone can add as many noodles to their soup as they like. Serves 8.
* Since I had freshly made stock I used a little fat from the stock to cook the onions.
Turkey Won Ton Soup
1½ lbs. cooked turkey, about
1 head bok choy
3 T. hoisin sauce
1 clove garlic, minced
24 won ton wrappers
2 qts. Turkey stock
1 t. ginger
1 t. hot pepper sauce
Chopped green onions
Sesame oil
I used dark meat from the turkey, mostly. I minced enough to give me a cup of meat. The rest I cut into thin strips. I then took stems from the bok choy and minced enough of them to make 1 cup. Combine the minced turkey with minced bok choy, the hoisin and the garlic. This is the filling for your won tons. Slice more of the bok choy- using mainly the leaves, into thin shreds. This will go into the soup later, along with the strips of turkey. You should have at least a couple of cups of the shredded bok choy, but more is OK, too. To make the won tons place one on your work surface and spoon a rounded teaspoon of the filling into the middle of it. Moisten edge with water, fold in half and press to seal. I used round wrappers, but square wrappers are fine, too. I like the round ones, labelled for dumplings, because they are a little thicker. I get them at a local Asian grocery store. Repeat with remaining won tons and fillings until done. Bring stock to a boil and add the ginger and hot sauce. Add the won tons to the simmering stock. Simmer gently for 3-4 minutes, stirring occasionally, then add the strips of turkey and the shredded bok choy greens. Cook about 5-6 minutes longer. Finish soup with chopped green onions and a drizzle of sesame oil. Serves 6-8.
Turkey Chili
1 large onion, chopped
2 T. oil
2 ribs celery, sliced
1 sweet pepper, seeded and chopped
2 cans cannellini beans, drained and rinsed
2 cans lima beans, drained and rinsed
1 can ( 4 oz.) chopped green chilies
3-4 c. cubed turkey
2-3 c. stock- turkey or chicken
3 T. chili powder, or to taste
1 T. cumin, or to taste
Generous dash of hot sauce
Salt and pepper to taste
Fresh chopped cilantro
Toppings: Pick what you like. Some good toppers are shredded cheese, chopped green onions, salsa, sour cream or tortilla chips
.
In soup pot cook onion in oil until golden brown. Add the celery, peppers and chilies and cook 5 more minutes. Add the rest of the ingredients, except cilantro and bring to a boil. Turn heat down to medium and simmer until flavors blend, about 30 minutes but longer is fine. I usually cook it covered for 15 to 20 minutes and then remove the lid so it can thicken. Add the cilantro right before serving. Ladle into soup bowls add add toppings of your choice. Serves 6.
Turkey Florentine
2 T. oil or butter
1 large leek, cleaned, trimmed and chopped
4 T. flour
1½ c. stock – turkey or chicken
24 oz. fresh spinach, washed
¾ c. half and half- you could use milk instead
3 c. cubed cooked turkey
Salt and pepper to taste
2 t. hot sauce- or to taste
1 c. shredded Pecorino/ Romano cheese, plus extra for sprinkling on top
Hot cooked pasta
In large skillet cook leeks in oil or butter over medium heat until tender. Stir in flour and cook until smooth, but not brown. Add the stock and cook until mixture starts to thicken. Add the spinach and continue cooking, stirring often until the spinach is wilted. The spinach cooks down a lot- you might have to add it a little at a time to have room in the pan for all of it. As soon as the spinach is wilted add the half and half and the turkey and cook until heated through and bubbly. You might need a little more stock or half and half if the sauce is too thick for your taste. Season with the salt and pepper and the hot sauce. Stir in the cheese. Serve over hot pasta. Serves 4-6.
Turkey with Herb Dumplings
1 turkey thigh, cut off the bone and cubed
1 large onion, chopped
2 ribs celery, chopped
4 carrots, peeled and chopped
3 potatoes, peeled and cut into chunks
4 c. turkey stock
4 T. flour
salt and pepper to taste
1 c. baking mix- like Bisquick- I make my own
1/2 c. milk
2 T. chopped green onion
1 T. chopped parsley
1 t. dried basil
In Dutch oven or large pot, brown turkey thigh. Add the vegetables and brown them, too, turning to prevent burning. Add stock, cover pot, and simmer until veggies are tender, about 20 minutes. Season with salt and pepper to taste. Combine flour with some cold water or more stock until smooth. Add to the pot and stir well. Mixture will thicken. Meanwhile combine baking mix with milk and herbs. Drop dumpling batter by tablespoonfuls over the turkey mixture in pot. Reduce heat to low, cover pot and cook until dumplings are cooked, about 20 minutes. To serve place some of the turkey and vegetables with sauce in serving bowls and top with dumplings. Serves 6.
Turkey Vegetable Soup
1 onion, chopped
oil
3 carrots, peeled and sliced
3 small potatoes. peeled and cubed
1 c. corn- cut from 1-2 ears
1 medium tomato, peeled and chopped
2 c. shredded cooked turkey *
3-4 cups turkey stock- or whatever you have and like
Fresh parsley and basil
salt and pepper to taste
dash of hot sauce
Heat oil in pot and cook onion until golden. Add carrots and cook a few more minutes. Add remaining vegetables, turkey and stock and simmer, covered, for 10 minutes- or until veggies are tender. Add herbs and simmer a few more minutes. Adjust seasoning and add hot sauce. Serves 2-3 for dinner.
*If you want to turn this into a vegetarian soup add vegetable stock and add a couple of cups of cooked beans. Kidney beans would work well.
Turkey Lo Mein
1 onion, chopped
2 T. oil
1 can sliced water chestnuts, drained
1/2 c. green peas- you could also use green beans
2 c. diced cooked turkey
8 oz. angel hair pasta -I use a very fine noodle I get at the Asian market
soy sauce to taste
Hoisen sauce or oyster sauce to taste- you could also use stir-fry sauce
sesame oil
chopped green onions
Heat water for pasta. Heat oil in skillet and cook onion until browned. Add water chestnuts and cook 1 minute longer. While onion is cooking cook pasta. Add peas to onion mixture and stir to combine. Add the turkey and heat through. Drain pasta and toss into turkey mixture. Season with soy sauce and what ever Asian sauce you have on hand. Drizzle with sesame oil and top with green onions. Serves 4.
Turkey With Tortellini
1 lb. cheese tortellini, cooked and drained
2-3 c. cubed cooked turkey
2-3 c. cooked broccoli, chopped
2 T. butter or oil
2 T. flour
1 c. half and half or milk, warmed
2 c. stewed tomatoes- I used my canned tomatoes- you could substitute a 14 oz. can of tomatoes
salt and pepper to taste
fresh chopped parsley
In bowl combine tortellini with turkey and broccoli and place and a lightly greased casserole. In saucepan melt butter and add flour whisking until smooth. If using oil just combine oil and flour in pan and whisk until smooth. Add half and half and cook, stirring often until thickened and bubbly. Add tomatoes and heat through. Season to taste. Puree sauce and pour over the turkey mixture. Sprinkle with the parsley. Bake in a 350 degree oven until heated through and lightly browned around the edges- about 40 minutes.
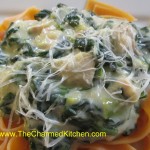
Turkey Florentine
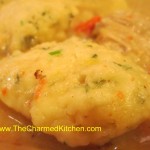
Turkey with Herb Dumplings
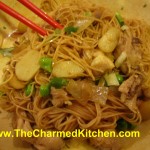
Turkey Lo Mein
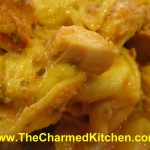
Turkey with Tortellini
Honey-Orange Glazed Sweet Potatoes

I will admit it – I am not a fan of really sweet, sweet potato dishes. Not unless it is a dessert. My Mom never served sweet potatoes with marshmallows, but they were still served “candied”. Sweet potatoes, sometimes canned, cooked in a glaze of brown sugar and butter. It was just what we did.
Then, one year, I grew my own sweet potatoes. Everything changed after that. I can still remember the joy of digging that first plant up. There they were, a cluster of beautiful sweet potatoes. I grew a lot of them that first year. I steamed them, baked them, made soup with them. Even had them for breakfast a few times.
My Mom was so pleased when I told her I was supplying them for her Thanksgiving dinner that year. I suggested we just cook them with a little butter, salt and pepper. They were so naturally sweet, that they surely, did not need to be candied.
Not everyone was so pleased with that choice. Clearly, how to prepare sweet potatoes evokes some of the same passion as how to cook the turkey. So for awhile, there were two competing dishes of sweet potatoes on the Thanksgiving table. As if there weren’t enough dishes to worry about- we now had to have 2 types of sweet potatoes.
I hope this dish might just bridge the gap between the two camps. A little sweet, but not overly sweet. The orange juice and honey enhance the sweet potatoes nicely. The sugared nuts are a fun addition, too.
Honey Orange Glazed Sweet Potatoes
4 T. butter
4-5 c. peeled and sliced sweet potatoes
1 c. fresh orange juice
Zest of 2 oranges
¼ c. honey
2 t. hot sauce, or to taste
Salt and pepper to taste
Fresh grated nutmeg
Sugared nuts- optional* recipe follows
Melt butter in large skillet. Add sweet potatoes and cook over medium heat, for 5- 8 minutes. Potatoes should start to turn a little golden. Add orange juice, honey and seasonings and turn heat down to low. Cook, uncovered, until potatoes are tender and liquid is evaporated, about 10 minutes. If you want more color on the sweet potatoes, turn the heat up a little once they are tender, and liquid is mostly gone. Serve with sugared nuts sprinkled on top, if you like. These can be made a day ahead and reheated.
*Sugared Nuts
4-5 c. nuts, I like walnuts or pecans
2 c. sugar
1 c. water
1 t. cinnamon
1 t. orange peel
1 t. salt, optional
Place all ingredients in heavy skillet and cook over medium heat, stirring often, until all the water disappears. Whatever liquid in the pan will be clinging to the nuts and syrupy. Dump nuts onto a large cookie sheet and break apart with a wooden spoon to prevent clumping. As nuts cool, stir once or twice to remove any remaining clumps, and to cool faster. Nuts will lose their glossy appearance and attain a sugary crust. If it looks like nut soup, you didn’t cook them long enough, and you must return all to the skillet and cook longer. As the nuts start to get drier during cooking, you can turn down the heat a little to prevent burning. Once you’ve made a few batches, though, you will get good at judging when to stop cooking. You can also make a spicy version by adding a teaspoon of cayenne pepper along with the other ingredients. Store in cool, dry place to keep nuts fresh longer.
Mushroom Dressing and Gravy – Vegan
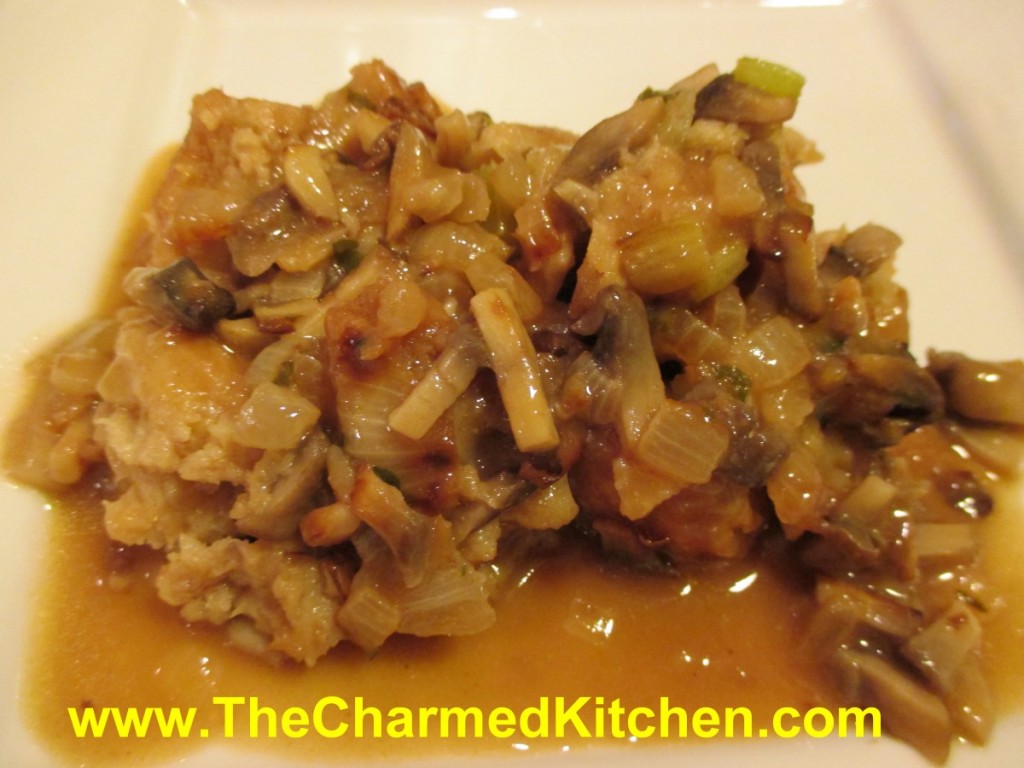
Not everyone at the Thanksgiving table will be eating turkey. If you are like me, you have friends and family who are vegetarians. That was the inspiration for this dish. Just because a person doesn’t eat meat, does not mean they can’t enjoy the other traditional foods of the holiday.
I’m not a fan of “fake meats”, so a simulation of turkey was not what I was going for. I wanted to make a dish that was normally part of the regular menu, but minus the meat.
This is a dish everyone can enjoy together. Thanksgiving is about bringing us together, after all. I used mushrooms as the base for both the dressing and the gravy. The end result is rich and very tasty.
Mushroom Dressing and Gravy – Vegan
The Gravy:
3 T. oil
2 onions, diced
1 lb. mushrooms, cleaned and chopped- try to use a couple of different types
¾ c. diced celery
¼ c. chopped parsley
1 t. oregano
½ t. thyme
4 T. flour
2 c. vegetable broth
2 T. balsamic vinegar
Hot sauce to taste
Salt and pepper to taste
In skillet, heat oil and cook onions until golden. Add mushrooms and celery and continue cooking until mushrooms also start to turn golden. Toss in the parsley and herbs. Remove about ¾ of the onion mixture and set aside- it will go in the dressing. In skillet, with the remaining onion mixture, add the flour and stir in. Cook over medium heat for a minute or two. Add the broth and bring to a low boil, stirring often, until thickened and bubbly. Add vinegar and hot sauce and season to taste with salt and pepper. You can let it simmer a few minutes longer, if you like it thicker. It cooks down quickly. Makes 2 cups.
The Dressing:
6 c. bread cubes, toasted
Reserved veggies from the gravy
½- 1 cup vegetable broth
2 T. oil
Extra parsley, if desired
Salt and pepper to taste
½ t. crumbled sage, optional
In medium bowl, combine the bread cubes with the veggies and stir to mix well. Pour the broth over the bread cubes, tossing to coat. Use more or less broth, depending on how moist you like the dressing. Drizzle in the oil and season to taste. Place in a casserole dish, cover and bake until heated through- about 30 minutes. Remove cover after 20 minutes if you like a crisper dressing.
Roasted Beet Salad
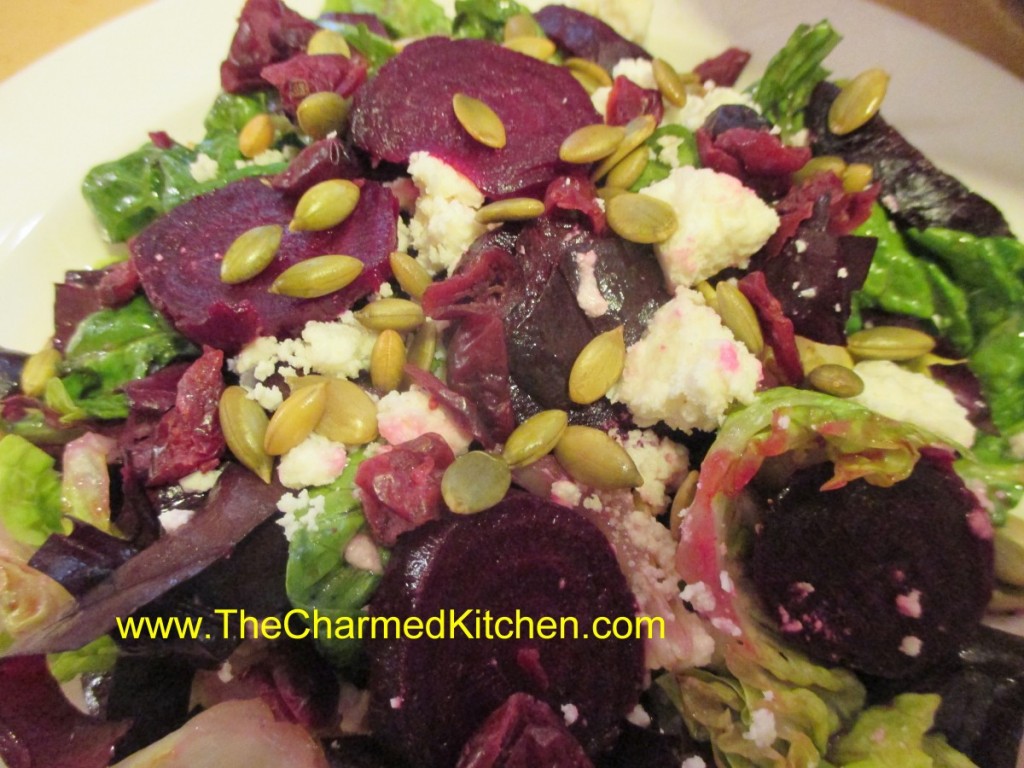
I picked up a couple of bunches of beets the other day. I wasn’t sure what I wanted to do with them at the time. They just looked so fresh. I decided to roast some, and then go from there.
To roast beets: just wash them and trim off the greens- leaving about an inch of the stems to reduce bleeding. The beet greens could be added to the salad.
Place beets in a roasting pan and drizzle with a little oil. I used avocado oil. Cover pan and place in a 350 degree oven for about 45 minutes. Smaller beets will be cooked in less time- about 35 minutes. Really large beets could take up to an hour. I always check by poking one of the beets with a fork. Let the beets cool a little and then remove the peels. I use a knife to do this. They come off quite easily.
I used three small beets to make this salad for lunch. I shared it with a neighbor.
Roasted Beet Salad
1 small head Bibb lettuce, washed and sliced into thin slices
2 c. spinach, torn into bite sized pieces
1/4 c. olive oil
3 T. red wine vinegar
2 t. sugar, optional
3 small roasted beets, peeled
1/2 c. crumbled feta cheese
1/4 c. hulled pumpkin seeds, toasted
1/4 c. dried cherries
coarse sea salt- I used pink salt
Place lettuce in a mixing bowl. Combine olive oil with vinegar and sugar, if using. Add salt and pepper to taste and toss over the greens. Slice beets. Divide greens on 2 salad plates. Arrange half of the beets on each salad and top with the rest of the ingredients. Sprinkle with a few grains of the sea salt and serve. Makes 2 luncheon salads.
