Category: Cooking

Blueberry Galette

Blueberry Galette

A galette is a cross between a pie and a tart. Rather than placing the crust in a pie pan, the crust is rolled out and the fruit is placed in the middle. The edges of the crust are folded over the fruit, leaving them exposed in the middle.  Galettes have a rustic charm. They are also easy to make.

I will be serving this for dessert later. It was one of those times that what I had on hand worked together perfectly. I had an open jar of blueberry pie filling and leftover kolachy dough. Made sense to use them together.

I used homemade blueberry pie filling, but you could use store-bought, if you prefer.

The ingredients are pretty simple, pie crust and pie filling. You’ll need enough pie crust dough for one pie and one cup of blueberry pie filling per galette. After I folded over the edges, I brushed them with a little milk and sprinkled the edges with sugar, to help the crust brown nicely.

Blueberry Galette

Crust for one pie- recipe follows

1 cup blueberry pie filling

milk

2-3 T. sugar

Roll out crust like you would for a pie, about a 10 or 12 inch circle. Place crust on a baking sheet. Spoon filling into the middle of the crust. Fold edges of the crust over the fruit filling, leaving about a three inch circle exposed in the middle. Brush crust with milk and sprinkle  with the sugar. Bake in a preheated 375 degree oven for 30 minutes, or until crust is golden brown. Remove to a rack to cool. Serves 4-6.

Blueberry Galette: ready to serve

Here is the recipe I used for the crust. It would make enough for about 3-4 galettes.  We used most of the dough for hand pies in cooking camp and I had leftover dough. It can be frozen, too.

Eva’s Kolachy Dough

3 c. flour

1 t. baking powder

½ t. salt

1 c. butter

3 eggs

2 pkts. Yeast

½ c. warm milk

In mixing bowl, combine flour with baking powder and salt. Cut butter into flour until mixture looks like coarse crumbs. Set aside. Place eggs in a small bowl and beat until smooth. In small bowl, dissolve yeast in warm milk. Add to egg mixture and stir to combine. Add egg mixture to flour mixture and stir until combined. If mixture is sticky add a small amount of flour. Roll dough out on floured board. Thinner the better, as this dough will puff some when baked. Unlike a traditional pie crust dough, this one does not need to be chilled. It is also very easy to roll out. Use about 1/3- 1/4 of this dough per galette. Extra dough can be frozen to use later.

A Trio of Bean Dips

Bean Dip

We made bean dip in cooking camp this week. The kids were not sure they would like it. Once they tasted it, they ate it all. we just served it with corn chips.

If you only use bean dip as an appetizer you are really missing out. Bean dip is often served with chips and veggies and it is always a hit. But, it can be used for a lot more than that.

Certainly in other Tex-Mex dishes like burritos or enchiladas.  I like to spread it on fresh tortillas and top with cheese, chopped peppers, onions and olives- then bake until hot and cheese has melted. Bean dip can also be spread inside pita bread and then the bread filled with sprouts or sliced veggies for a quick sandwich. You can also add the bean dip to hot cooked veggies like corn, green beans, or carrots, in place of, or in addition to, the butter. It also can be added to stir-fries for extra flavor or to soup as a thickener. I sometimes add it to chili, too. I often make a big batch and freeze some for later use.

As an added bonus, bean dips are a good source of protein.

I have a few recipes for bean dip, so I included them all. A friend requested a version without the tomatoes (salsa).

Saucy Bean Dip

2 cans kidney beans, drained and rinsed – you can use other beans
1 c. salsa, store bought or homemade
¼ c. olive oil
2 T. cider vinegar
2 t. chili powder
1 t. cumin
Healthy dash of hot sauce
Salt and pepper to taste

In food processor blend all ingredients until smooth. I usually start the beans first for 30 seconds or so and then add everything else. If you want it thinner you can add some extra oil. Makes 3 cups. Freezes well.

Bean Dip Recipe#2

Creamy Bean Dip

2 c. cooked beans (pinto, black or kidney preferred)

1 c. cottage cheese

2 T. sour cream

salt and pepper sauce to taste

1 t. each chili powder and cumin

1/2 t. each paprika and oregano

Combine all ingredients in a blender or processor until smooth. Adjust seasonings. Chill. Serve with taco chips or fresh veggies. Makes 3 cups.

Note: You can also spread on tortillas and top with salsa, cheese, peppers and olives for Mexican pizza. Just heat and eat.

Bean dip #3

Classic Bean Dip

2 c. cooked beans (kidney, black beans etc.) Drain if canned

½ c. chopped cilantro or parsley

3 cloves garlic

2 T. dried minced onions

2 T. oil, or a little more

juice of 1 lime

1 t. cumin

1 t. chili powder

1 t. oregano

½ t. paprika

½ t. red pepper flakes, or to taste

salt to taste

1 T. red or cider vinegar, optional

Place beans in food processor and start to run adding remaining ingredients and blending until smooth. If dip is too stiff add a little more vinegar or oil. Makes 2 ½ cups. Serve with tortillas or pita toasts.

Broccomoli- Broccoli Dip

Broccoli Dip, before we added tomatoes

This was a big hit at the cooking camp. The kids were excited to cook with broccoli, which made me happy. The dip is something I call “Broccomoli”. Basically similar ingredients of guacamole- except we use broccoli instead of avocados. Don’t get me wrong.  I love avocados, but “timing” them to be ripe when needed for parties makes me crazy. The broccoli dip is also easy to make and tastes good. Its always nice to have more appetizer recipes.

Broccoli Dip – Broccomoli

2 c. broccoli, cooked and drained

2 T. chopped onion

1 clove garlic, minced

½ c. sour cream or Greek yogurt – we used yogurt

3 T. mayonnaise

2 t. lemon juice

½ t. each paprika and cumin

Dash of hot sauce

Salt and pepper to taste

1 tomato, seeded and chopped, optional

Combine all ingredients in blender, except tomato, and blend until smooth. Chill. Stir tomato in before serving. Serve with tortilla chips or crackers.

Pretty Pops

Blue Pretty Pops

This easy to make treat is a sort of candy coated popcorn. We made some in cooking camps this week and the kids really enjoyed making it- and eating it.

The color and flavor source comes from boxes of flavored gelatin – Jell-o. Of course you can use what ever brand you like. The gelatin is melted together with a little butter and a little honey. Then popped popcorn is tossed with the mixture. Once it cools it be comes a candy coating.

Here is the recipe. Enjoy!

Pretty Pops

2 quarts popped popcorn

1/4 c. butter

2 t. honey

1 package (4 serving size) flavored gelatin, any flavor

Place popcorn in large bowl. Combine remaining ingredients in small saucepan and heat until margarine is melted. Stir until smooth and pour over popcorn, tossing to coat. Cool.

Note: you can make several batches of different flavors and then combine cooled popcorn for a colorful snack, party favor or gift.

Red Pretty Pops
Green Pretty Pops
Orange Pretty Pops

Natural Food Colors

8 Natural Food Colors- see note below for what they all are.

When we decorate cakes, cookies and the like, we can use any number of ingredients to tint an other wise white frosting. Lots of people use artificial colors. The little bottles found in most any grocery store. Or any number of gels, powders or tubes found in cake and candy making stores. I want to start by saying that its not my business whether you use natural or artificial colors in your cooking. I have a few bottles hanging around myself. This is just about looking at some other options out there.

People starting asking me when I used beet powder to tint frosting for a chocolate beet cake. So I began looking into what other colors I could create using more natural ingredients. My own mother had issues with a red food coloring. I know a few people that have issues with artificial colors. So what follows is what I have been doing and what I have come up with. Not all the answers and I am not a scientist. I’m just a cook and baker who likes to play around with new ingredients in the kitchen sometimes.

The Picture

Let’s start with what powders are in the picture at the top of this post. Starting with the bright blue on the lower left, then going up and around clockwise: Blue spirulina, beet, red cabbage, peas, turmeric, carrot, raspberry and green spirulina. I purchased the blue and green spirulina and the turmeric. The rest I dehydrated and then powdered in a spice (coffee) grinder.

So what colors will you get and how do you make them yourself?

Blue Spirulina:  Bright blue

Algae that people consume for various reasons, including the mineral content and other health reasons.

Green Spirulina: Forest green

Like blue version, an algae that people consume for various health benefits.

Turmeric :Yellow

The dried root of a tropical plant used in foods for both flavor and color. Sometimes used to make rice yellow to mimic the use of saffron.

Beet Powder: Pink to light red

Beets are cooked, sliced and placed in a dehydrator until rock hard. Then ground in a spice mill. I have seen beet powder sold so you don’t have to make it yourself.

Red Cabbage: Purple to light violet

Leaves are steamed until just soft, then dehydrated until crisp and powdered up.

Raspberry: Pinkish violet

Raspberries and rinsed, patted dry and dehydrated until crisp.

Peas: Light to bright green

Frozen peas are thawed, drained of excess water and dried until crisp. A note about the peas. They fell right through the holes in my dehydrator. Once I retrieved most of them, I lined the trays with parchment and started over.

Carrots: Orange

The carrots were peeled and sliced and steamed until pretty tender. When I left them in thick slices the first time I made them, they were harder to grind into a powder. The thin slices worked better in my spice mill.    

Final notes on colors. For green, you can also dehydrate spinach or other leafy greens. I dehydrate and powder up orange peels. Use them in recipes all the time for flavor. They too, will add orange color, but their flavor is pretty pronounced. I found the carrots were more subtle, but you can add some orange peels, if you have them.

Chocolate beet cake with beet tinted frosting

More information For any of the powders, its important that you keep them dry for long term storage. Nice airtight containers and cool conditions will help them to hold their color longer. This seems especially important with the carrot and pea powders. I store them in the fridge or freezer.

How much to use? That depends on what you are using for color and how intense you want the color to be. Blue spirulina is very blue and a little goes a long way. Carrot is a more subtle orange. Start with a very small amount on a spoon, mix it in and see where you stand. For beet powder I use maybe 1/2 teaspoon for 2 cups of frosting for a pretty pink color.

The question I got from a few people was taste. Will my frosting end up tasting of peas or cabbage? The answer is pretty much no, based on what I have used them for. Moderation is key though. If you want a super bright purple the cabbage might have a slight odor, rather than a flavor. it seems to dissipate over time.

You can also use black cocoa powder to create grey and even black in frostings and baked goods. It’s a very special Dutch process cocoa that is black rather than dark brown. It is what makes Oreos their distinct color. You should be able to find it at cake decorating stores. I buy mine online. Since chocolate is a flavor ingredient more that a coloring agent I didn’t include it in my list. In decorating red and black are the two hardest colors to achieve, even with artificial coloring. When I want black I often start with chocolate frosting and then add the black cocoa. Beet powder can give you red, if you use enough.

Well, that’s what I have so far in my use of natural foods coloring. I’m starting cooking camps and will have the kids use them this year to see what they come up with. More pics to follow soon.

Before you ask, Here is the link to the chocolate beet cake recipe. Its very popular.

https://thecharmedkitchen.com/2025/10/02/chocolate-beet-cake-11/

My Favorite Oatmeal Cookies

Oatmeal Cookies

I love a good raisin oatmeal cookie. Heck, I love cookies in general. It’s a classic and always popular. Like a lot of classics though, it can be fun to change things up a little. Sometimes you create a new classic.  We were making oatmeal cookies in cooking camp, so I wanted to add something the kids would like. I love raisins, but decided the kids might prefer them with something other than raisins.  I ended up using dried cherries and chocolate chips and the result was quite nice. The kids really loved them.

A new classic that I plan on making again.

 Oatmeal Cookies

3/4 c. butter

1 c. brown sugar

1/2 c. sugar

1 egg

1/4 c. water

1 t. vanilla

3 c. rolled oats

1 c. flour

1 t. salt

1/2 t. soda

1 c. dried cherries

1 c. chocolate chips

Preheat oven to 350-degrees. Beat together butter, sugars, egg, water and vanilla until smooth. Combine remaining ingredients and stir into butter mixture. Drop by rounded teaspoonfuls onto lightly greased baking sheet. I like to use a cookie scoop- it makes for uniform cookies and is faster than using a spoon. Bake for about 12-15 minutes. Makes about 5 dozen.

Note: You can add raisins or other dried fruits. I like cranberries. You can also add nuts or other chips. Macadamia nuts and white chocolate chips are a classic combination.

Soft Butter Cookies

Soft Butter Cookies

If you are looking for a truly tender cookie, this may be it. These cookies are so delicate, they just melt in your mouth!!

The secret ingredient might surprise you. It is oil. Yes, I know I said butter cookies – they also contain butter. But the combination of oil and butter makes them soft and delicate, even days after baking.

They also contain both granulated and powdered sugar. Not your typical cookie recipe, for sure.   This just may be my “go to” butter cookie recipe from now on.

You don’t have to chill the dough and they roll very easily, without sticking to your fingers. You could chill the dough, but let it warm up a little before rolling. The dough can also be made ahead and frozen- I tested it.

In camp the kidspressed the tops in colored sugars, nonpareils or sprinkles before baking. You can also bake them plain, then dip in melted chocolate and sprinkles or nuts after baking,

Soft Butter Cookies

1 c. butter

1 c. oil, I used avocado oil

1 c. sugar

1 c. powdered sugar

2 eggs

1 T. vanilla

1 t. baking soda

1 t. cream of tartar

½ t. salt

4 ½ c. flour id f dough is too soft, you might need to add a little more flour.

In mixing bowl, beat together butter, oil, sugars and vanilla. Once well blended, beat in eggs. Stir in the baking soda, cream of tartar and salt, then add the flour, mixing until well combined. Heat oven to 350 degrees. Roll dough into one inch balls and press tops of cookies in sprinkles or colored sugar, if desired. Place one inch apart on ungreased baking sheets. Bake for 12 minutes, or until light golden on bottom. Leave cookies on baking sheets 3 minutes before placing on cooling rack. Makes about 6 dozen cookies.

Snickerdoodles

Snickerdoodles

In cooking camp today,  we will be baking cookies, including Snickerdoodles. This is a recipe that has been around a long time and is still a favorite. The kids will really enjoy rolling the dough in cinnamon sugar, before baking.

The original recipe I had called for shortening, but I use butter instead,  and chill the dough. I prefer the taste of butter in cookies. Use what you prefer.

These are a great light dessert for summer and they travel well, too. A nice treat to bring to your next cookout, picnic or road trip.

Snickerdoodles can also be used to make awesome ice cream sandwiches.

Snickerdoodles

1 c. butter, softened
1 ½ c. sugar
2 eggs
2 ¾ c. flour
2 t. cream of tartar
1 t. baking soda
¼ t. salt
2 T. sugar
2 t. cinnamon

Mix butter, sugar and eggs. Combine next 4 ingredients and add to egg mixture. Chill dough at least a couple of hours. Combine sugar and cinnamon in shallow bowls. Roll dough in 1-inch balls and roll in cinnamon sugar. Place 2-inches apart on ungreased baking sheet and bake in a preheated 375 –degree oven for 9-11 minutes. Makes 6 dozen.

4th of July

So what is the 4th of July about? Cookouts and noisy celebrations abound, but what is it we are celebrating? We are celebrating revolution, protestors and people who fought their government.

We were a colony, ruled by a monarchy. Had it not been for those who saw injustice, and tried to fix it, we would be bowing to the king today. They were brave and very forward thinking.

Had the Revolutionary War gone the other way, they certainly would have been hung as traitors. I’m not sure how many of us today would be that brave.

So in your daily life, remember and honor the rebel. If you see an injustice, speak up. Do something to make this country better.

There is always room for improvement, after all. Think about the people who risked death to fight for the freedom we enjoy today. Life, liberty and the pursuit of happiness. Don’t ever take that for granted.

Posted in Cooking |

Homemade Blackberry Ice Cream

Blackberry Ice Cream

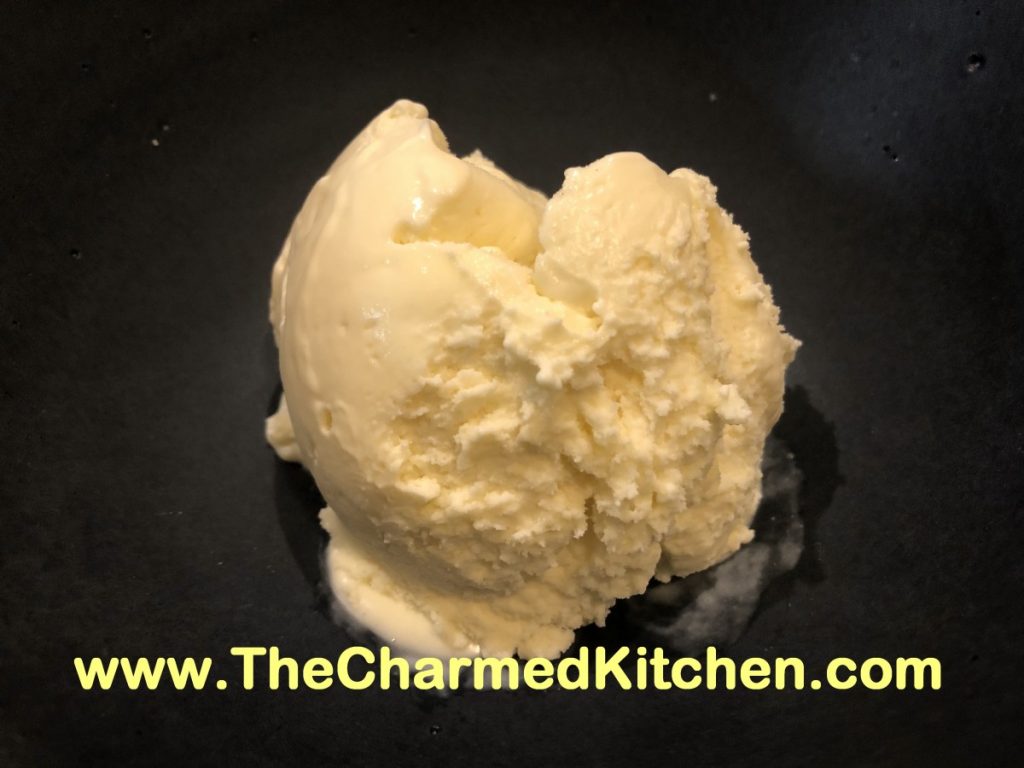
I am so happy with this ice cream. The flavor came out just right. The texture is super creamy and not too sweet. The chunks of blackberry add just the right amount of tartness. I love fruit based ice creams, but I never made blackberry ice cream before. I will be making it again, for sure.

I have had the inspiration to make a new recipe for all sorts of reasons. Sometimes creative reasons, or sometimes nostalgic feelings. This ice cream came about because of expiration dates. I had both heavy whipping cream and half and half that needed to be used up soon. I didn’t want to freeze them and I wasn’t going to waste them. Since I had a carton of blackberries in the fridge, it seemed only natural to make a blackberry ice cream. I don’t always add eggs to my ice cream, but I had a dozen eggs that needed to be used, too.

Whatever the motivation, this ice cream is one of my favorites. There is a little more work to making an egg-based custard ice cream. But the extra effort is worth it. The texture is so creamy.

With any fruit based ice cream, you don’t want to just put raw fruit in the mixture and freeze it. That will cause the fruit to get big ice crystals. Fruit can be cooked first, like I did with the berries in this recipe, or the fruit can be frozen, then thawed before being added to ice cream base.

So here is the recipe. I used an orange because I had an orange. I could see using a lemon instead, or perhaps lime. I left a little wiggle room on the amount of sugar you add to it. Before someone asks- yes- you can sweeten with honey, if you prefer. Just use a light hand. Honey is sweeter than sugar. Enjoy!!

Blackberry Ice Cream

6 oz. blackberries, washed

1 large orange

½ c. sugar

1½ c. half and half

1 c. heavy whipping cream

3 egg yolks

¾ c. sugar- or a little more or less to taste

1 t. vanilla

In medium saucepan, place the blackberries. Zest the orange and add the zest to the berries. Juice the orange and add the juice to the berries along with the ½ cup of sugar. Heat until mixture comes to a boil. Reduce heat and simmer until mixture starts to thicken, about 6-8 minutes. Stir occasionally. Don’t let it burn. Remove mixture to a bowl to cool down. You can use the same saucepan to heat the half and half and cream to a low boil. In a small bowl, beat together the egg yolks, sugar and vanilla. Add ½ cup of the hot cream mixture to the eggs, whisking in well. Add another ½ cup of the cream mixture, whisking again. Add one last ½ cup of the hot cream and again, whisk until smooth. Pour the egg mixture into the saucepan with the cream and while whisking, simmer until mixture starts to thicken and will coat the back of a spoon. This will take about 5 minutes. Don’t use too high a heat, or you will scramble your eggs. Mixture should reach 160 degrees to be sure eggs are cooked. Remove from heat, stir in reserved blackberry mixture. Pour mixture into a bowl. Allow ice cream base to cool down, then chill in fridge. Chilled mixture can be frozen in an ice cream maker once cold- in a few hours- or even the next day. Once mixture has been frozen in ice cream maker, place in a container and freeze until ready to serve. Makes about 5-6 cups of ice cream.