This is a great recipe for when you don’t have a lot of time, but still want a home cooked meal. This whole dinner can easily be made in under 30 minutes, but will taste like you spent a lot more time than that. By the time the pasta is cooked, you can have the sauce ready. Toss the pasta and sauce together and you’re good to go. I often make the more traditional version with linguine- but since I was out- fettuccine was our winner today. You have to be flexible with cooking, especially now.
I wanted to share this recipe because I figure a lot of people could have the ingredients in their pantries already. With access limited to stores, there are certain ingredients that I keep in my pantry. Canned proteins like clams, crab meat, salmon, tuna and assorted legumes all work well for me. Canned tomatoes, tomato sauce or marinara sauce are also staples at my house. Pasta is always in my pantry. I keep Parmesan or Asiago cheese around. I keep parsley and other herbs in my freezer, so I can have “fresh” herbs when needed.
So here is the recipe. Simple and tasty. Enjoy!!!
Fettuccine with Red Clam Sauce
1 T. oil 2 cloves garlic, minced 2 cans, 10 oz. each, whole clams, drained of about half of their liquid 1 c. finely chopped parsley 2-3 c. marinara sauce pepper to taste 1 lb. linguine Parmesan cheese, grated
Heat oil in large skillet and sauté garlic until tender. Add clams and parsley and cook over medium heat 5 minutes. Most of the liquid from the clams should cook off. Add marinara sauce and pepper and simmer 5 more minutes. Meanwhile prepare pasta al dente. Drain pasta and transfer to a large warm serving bowl. Toss with the sauce and sprinkle with cheese. Makes 6 servings.
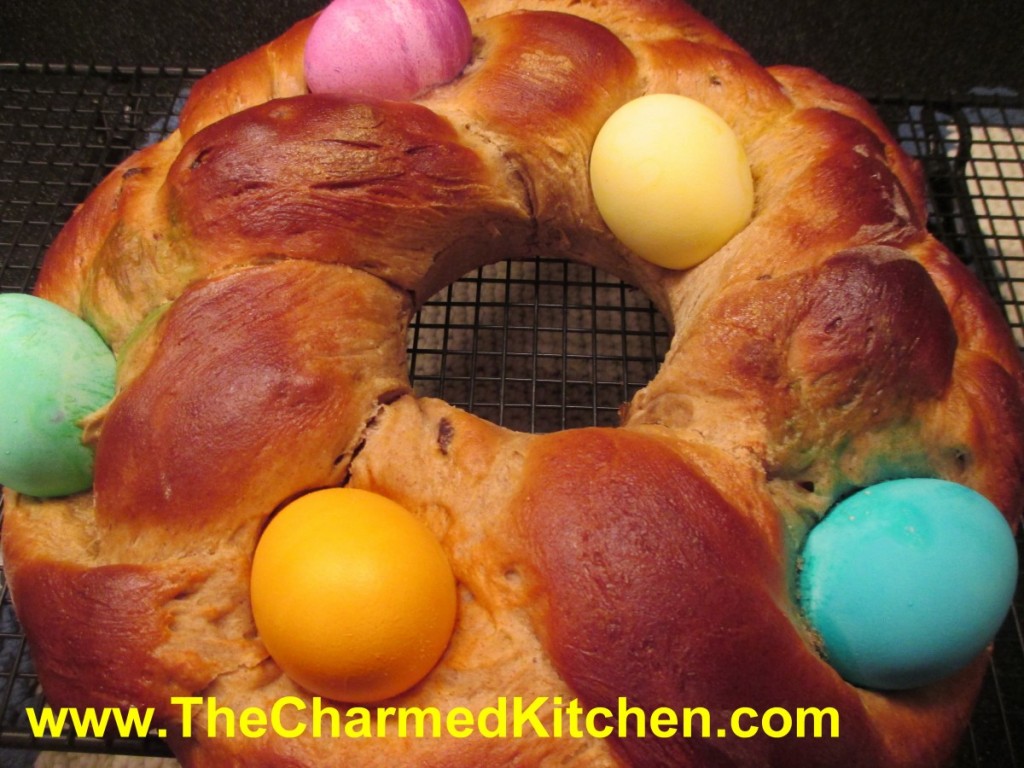
This Easter bread wreath, with eggs baked on top, is a fun bread to make for the holiday. It is a tradition in many families.
I hadn’t made one in a long time, and when I went to find my recipe, I couldn’t locate it. I decided to make a new recipe.
I wanted it to have a lot of flavor- something that would be fun served at a breakfast, brunch or with dinner, but not too sweet. I added spices and raisins, but I could see using other dried fruits.
I left it plain on top – but you could easily add a powdered sugar glaze. No, I did not hard cook the eggs first. They cook while the bread is baking. Saves a step, for sure.
The texture of the bread is really nice and the dough is richly spiced. I added mace, but if you don’t have any mace, add a little more nutmeg or allspice. Mace is a spice I would encourage you to try sometime.
So here is the recipe. Hope you like it as much as we did.
Cinnamon Raisin Easter Wreath Bread
4½ -5 c. flour
1 pkt. yeast
½ c. brown sugar
2 t. cinnamon
1 t. salt
½ t. allspice
½ t. nutmeg
½ t. mace
1 c. warm water
½ c. butter, melted
2 eggs
½ c. raisins
5-6 uncooked eggs, dyed if you like
Combine 2 cups flour, yeast, sugar, seasonings and salt in large bowl. Heat together water and butter until warm and add to flour mixture. Beat 2-3 minutes. Beat eggs and reserve 1 tablespoon of the eggs for brushing the top of the bread later. Add remaining eggs and another cup of flour to the bowl. Beat 4 minutes. Add the raisins and enough of the remaining flour to make a soft dough. Knead on a floured surface until smooth and elastic, but still soft. Place in oiled bowl turning to oil top. Note: I actually used my stand mixer, and just left the dough in the bowl to knead, and then covered it to rise. I was able to leave the dough a little sticky this way, using less flour. Cover and let rise until doubled, about 45 minutes. While dough is rising, prepare a pan. Grease a large baking sheet- or use a silicone baking mat. Grease a one cup oven-proof custard cup and place it upside down on the middle of the baking sheet. This will keep a “hole” in the middle of your wreath. If you don’t have a custard cup, you can use a metal one-cup measure instead. Punch dough down and divide in three pieces. Roll each piece into a 20-inch long rope. Braid the ropes together. Wrap the braid around the custard cup on the baking sheet and pinch ends together to keep the braid from coming apart. Cover and allow to rise until doubled (50-60 minutes). Just before baking, combine reserved egg with a little water and brush the wreath with the egg wash. Place 5 or 6 eggs on the top of the braid- being careful not to press down too hard. Bake in preheated 350-degree oven for 25 minutes. Cover bread with foil and bake 10-15 minutes longer, or until bread sounds hollow when tapped lightly. Here is the only tricky part. You have to remove the wreath, but not drop the glass custard cup in the middle. You can let the bread cool a few minutes before moving. I use a silicone baking sheet so I slide the whole thing off the baking sheet and onto a cooling rack. I use two large spatulas to lift the wreath up and leave the custard cup behind. If it doesn’t come right out, use a knife to loosen. Just lift the wreath up enough to slide the custard cup out. Let cool before serving- store leftovers in fridge – because of the eggs on top. Makes 1.
The first time I made this dish, it was sort of an accident. It was right after Easter, a few years ago. I was having dinner with friends, and I was in charge of making dessert. I had leftover hot cross buns, so I decided to re-purpose them into bread pudding. It is a great way to re-purpose something into a whole new dish.
The end result was really good. So good, that my friend Amy said it was one of the best desserts I had ever made. I now bake extra hot cross buns, just so I can make bread pudding from them.
You could use home made or store bought buns for this recipe. My recipe for hot cross buns is at the bottom of this post.
Amy’s Hot Cross Buns Bread Pudding
12 c. torn up hot cross buns- I used 8 buns
2 c. half and half
1 c. milk – I used almond milk
1 c. sugar- or less if you are using frosted buns
5 eggs
1 T. vanilla
1 T. cinnamon
Frosting:
1 c. powdered sugar
4 t. milk
In large mixing bowl place the torn up buns. Mix remaining ingredients and pour over the buns. Stir to moisten evenly. Spoon mixture into a buttered 9×13-inch pan. Bake in a preheated 350 degree oven for 35-40 minutes or until bread pudding is set and a little golden on top. While the bread pudding is baking combine powdered sugar with milk to make a frosting thin enough to drizzle. Let bread pudding cool 10 minutes and drizzle with frosting. Serves 8-10.
I get so many requests for this recipe, I
decided to post it again. This is a treat from my childhood. Rose
Dieglio was the mother of my best friend, Debbi. Rose made these every
year, and I loved them. Years later, she was kind enough to share her
recipe with me. I always make a bunch to hand out to friends and
family. It is a tradition I enjoy very much.
The dough is a type of cookie. You roll the dough out in pieces about
the size of eggs. Make an indent in the dough and press in a tinted
egg. The egg does not have to be cooked- it will cook when the biscotti
bakes.
The dough will be a little sticky. Just add some flour to your fingers when shaping the dough, if needed.
The original recipe calls for shortening. I make them with butter, instead. If you use butter in the dough- chill it before baking.
For years I made the biscotti with hard cooked eggs, that I dyed. My mom always asked if I needed to cook the eggs. She wondered if the eggs would cook during the baking process. So I tried it a few years ago. I placed a raw, un-decorated egg on one of the biscotti “nests” and baked it with the rest. What do you know? The egg cooked in the oven when the biscotti baked. The lesson here- always listen to Mom. Saves a whole step in making this recipe. Just be gentle when you press the eggs into the dough. They are raw eggs, after all.
Once baked, the biscotti can be topped with a powdered sugar glaze and sprinkles, if you like. Because they have hard cooked eggs in them, store in fridge after cooking.
Easter Egg Biscotti
1 c. shortening or butter- I use butter*
1 ½ c. sugar
4 eggs
5 t. baking powder
1 t. salt
2 t. vanilla
1 c. milk
6 c. flour
24-30 eggs, plain or dyed
Powdered sugar glaze
Preheat oven to 350 degrees. Cream together butter or shortening and
sugar. Beat in eggs. Add next 4 ingredients and blend until smooth. Stir
in flour 2 cups at a time. Dough should be pliable. If dough is too
sticky add a little more flour. Take a piece of dough about the size of a
large egg and place on a greased baking sheet. Indent middle slightly
and then place an egg in the center, pressing down slightly. It should
look like a nest. Continue with remaining dough allowing about 2-3
inches in between as they spread when baking. You can fit 6-8 on a large
baking sheet. Bake 20 –25 minutes or until browned on the bottom. Cool
on wire rack before drizzling with frosting. Makes 24-30. Store in
fridge.
* If using butter- chill dough a couple of hours before baking.
Sugar glaze
2 c. powdered sugar
2-3 T. milk or orange juice
1 t. vanilla
Food coloring, if desired
Mix together until smooth and of drizzling consistency.
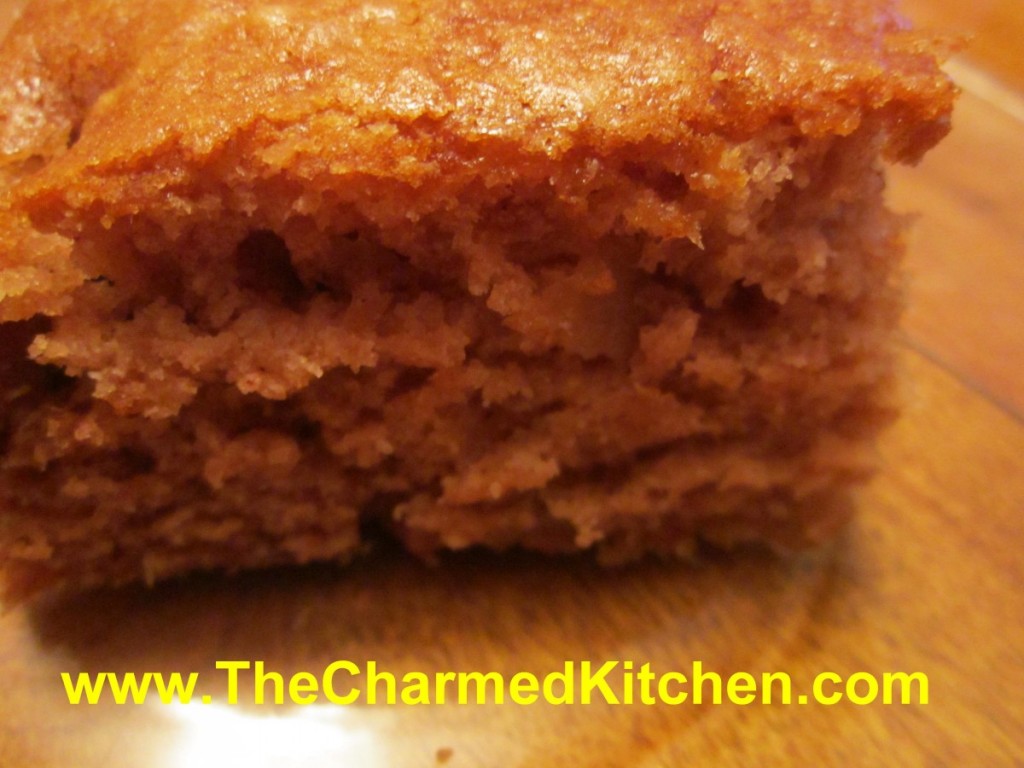
This cake is so simple to make and very tasty, too. You don’t have to limit yourself to just eating applesauce. You can also bake with it. This cake is a fun way to enjoy applesauce, homemade or store bought.
I used butter in the recipe, but if you used coconut oil instead, the recipe would be vegan. The spices work so well together. Sometimes simple is the best. Before someone asks, it is not a misprint, there are no eggs in the recipe.
I wish I remembered where this recipe came from. I have a piece of
flowered stationery, a little crinkled around the edges, creased from
being folded many times, with the recipe written on it. It is not my
handwriting. I would love to credit the source of this wonderful recipe.
Spiced Applesauce Cake
2 c. unsweetened applesauce
½ c. butter
2 c. sugar
3 c. flour
1 T. baking soda
½ t. salt
1 t. each cinnamon, allspice and nutmeg
¼ t. cloves
1 c. raisins or chopped nuts
Heat together applesauce and butter until butter melts. Cool down a
bit. Preheat oven 375 and grease 9×13-inch pan. Stir all ingredients
together bake 30 minutes. Cool in pan.
It’s funny when you think about it. People spend tons of money to
eradicate dandelions from their lawns, but will go to an upscale
restaurant and pay good money for a salad with mixed greens including
dandelions. Dandelions were not always considered a weed. In fact,
immigrants brought the seeds to America as a vegetable.
While the greens can be bitter, they can also be tamed when paired
with certain ingredients. Combining dandelions with tomatoes, vinegar,
cheese or other dairy products, and bread or cereal products will make
them less bitter when eaten.
Dandelions are packed with nutrients, and if you don’t spray your yard with herbicides, you can likely find them under your own feet. Free, tasty and nutritious. Sounds like a win all around.
The plant is pretty much edible from top to bottom. The leaves for
salads, soups and other dishes. The flowers are used for wine, jelly and
the “burger” recipe at the bottom of this page. I recently baked
dandelion flowers into muffins. The roots are roasted and used as a
substitute for coffee. If you haven’t eaten dandelions before my only
question is, what are you waiting for?
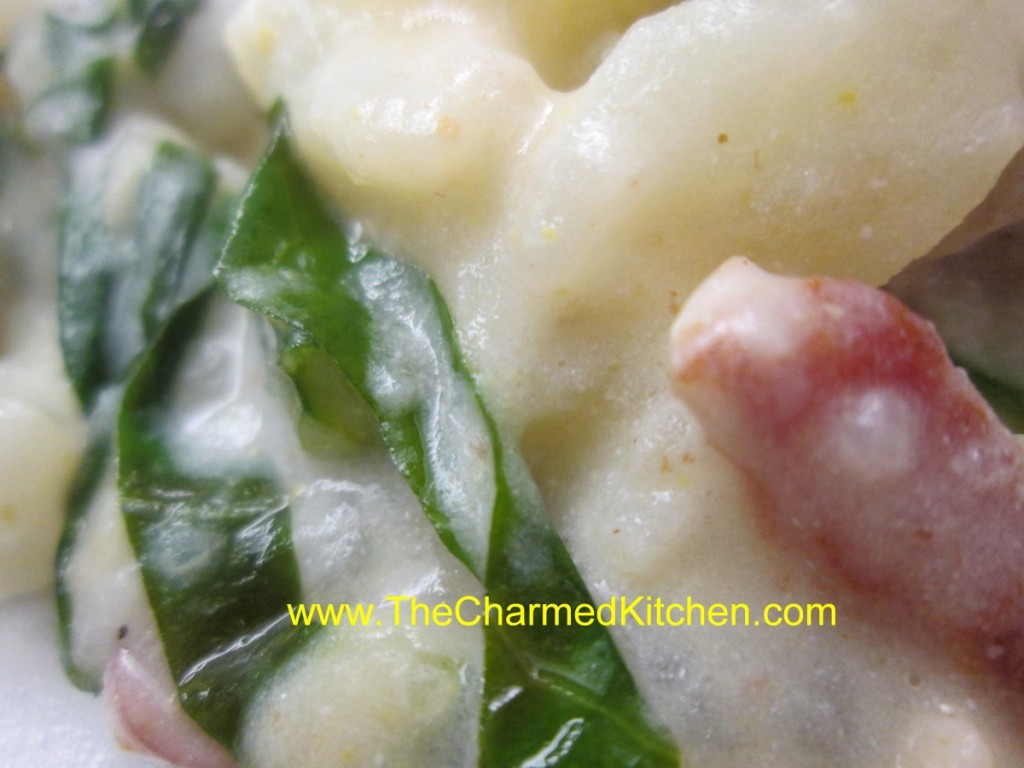
A classic dish using dandelions is dandelion gravy. Some versions use
bacon, others not. This one uses bacon, sour cream and is served with
boiled potatoes.
Dandelion Gravy
Dandelion Gravy
4 strips bacon
3 T. flour
1 c. water
1 lb. dandelion greens, washed and chopped
½ c. sour cream
1 T. sugar
1 T. vinegar
Salt and pepper to taste
Hot boiled or baked potatoes
Fresh chopped parsley, optional
Chop bacon and cook in skillet until crisp. Leave bacon in the pan.
Remove all but 3 tablespoons of the bacon fat and stir in the flour
until smooth. Add water and dandelion greens and cook over medium heat
until greens are tender- about 5- 10 minutes. Add more water if mixture
is too thick. Turn off heat. Combine sour cream with sugar and vinegar
and stir into dandelion mixture. Adjust seasonings. Spoon gravy over
potatoes.
Serves 4.
Note: If you want leave out the bacon instead add 3 tablespoons of oil to skillet along with the flour.
The next 2 recipes come from Dr. Peter Gail, my mentor and dearly
loved friend. I will always remember Peter when I cook with dandelions.
Dandelion Pita Pizza
Pita bread, toasted English muffin, or toasted bread
Spaghetti or pizza sauce
Fresh dandelion greens of any age, chopped fine
Grated cheese (any kind)
Cover bread with sauce, add chopped greens, top with cheese, and toast in oven until cheese
melts. For a more sophisticated treat, chopped dandelion greens may be sauteed in olive oil with
onions, mushrooms and several cloves of crushed garlic, and then spread on the pizza and topped
with cheese.
Dandy Burgers
1 cup dandelion flowers, green removed
½ cup flour, any kind
1/4 cup onions, chopped fine
½ tsp salt ½ tsp garlic powder 1/4 tsp thyme 1/4 tsp basil 1/4 tsp rosemary 1/8 tsp pepper enough milk to make thick batter. Peel dandelion flowers and put in 4 quart mixing bowl. Add onions and mix together. Blend flour and seasonings together, add to the flowers and onions, and blend thoroughly. Add milk slowly, blending it in until you have a thick batter. Heat olive oil in frying pan to cover bottom. Form batter into golf-ball-sized balls. Place in oil, and squash down flat to make a 2″ diameter patty. Fry till brown on both sides. Remove and serve on small rolls as you would hamburger sliders.
This post is dedicated in loving memory of Dr. Peter Gail
These rich rolls are a traditional at Easter. At least they are in my
house. The dough is rich and slightly sweet. The frosting on top adds
to their sweetness.
Hot cross buns can be served at breakfast, brunch or even as a dinner roll. I have served them with coffee, after dinner. So I guess they can be a dessert, too. If you have leftover hot cross buns, you can use them to make bread pudding. I do!
Because the dough is rich, they are slow to rise. If they aren’t jumping out of the pan after an hour or so, don’t worry. They do rise quite a lot in the oven.
After they cool a bit- pipe on the icing in the crisscross pattern that gives these rolls their name.
Hot Cross Buns
2/3 c. sugar
1 t. salt
2 packages active dry yeast
About 5 cups bread flour
1 ½ c. milk
½ c. butter
2 eggs
1 c. raisins
Icing
¾ c. powdered sugar
1 T. milk
In bowl combine sugar, salt, yeast and about 1 ½ c. flour. Heat
together milk and butter until very warm. Beat milk mixture into to
flour mixture and beat 2 minutes with electric mixer. Beat in 1 egg and 1
cup flour and beat 2 more minutes until batter thickens. Stir in
raisins and enough additional flour to make a soft dough. Turn dough
onto a floured surface and knead until smooth, about 10 minutes. Place
dough in greased bowl, turning to grease top, cover with a towel and
allow to rise in a draft free place until doubled in bulk, about 1 hour.
Place dough on floured surface and divide into 15 equal pieces. Cover
with towel and lest rest 15 minutes. Meanwhile grease a 9×13 inch pan.
Form dough into smooth balls and place in prepared pan. Cover and let
rise until doubled, about an hour. Preheat oven to 350 degrees. Beat
remaining egg. Cut a cross in each bun and brush with the egg. Bake for
25 minutes or until buns are golden. Remove buns to wire rack to cool 15
minutes. Make frosting, place in decorating bag and pipe onto buns.
Makes 15.
These cupcakes would make a great dessert for Easter- or any time. They are also a fun dessert for kids to make.
I started out by making a double batch of my classic white cupcakes- recipe follows.
I also made a double batch of white chocolate frosting. You could certainly make a vanilla buttercream, if you prefer.
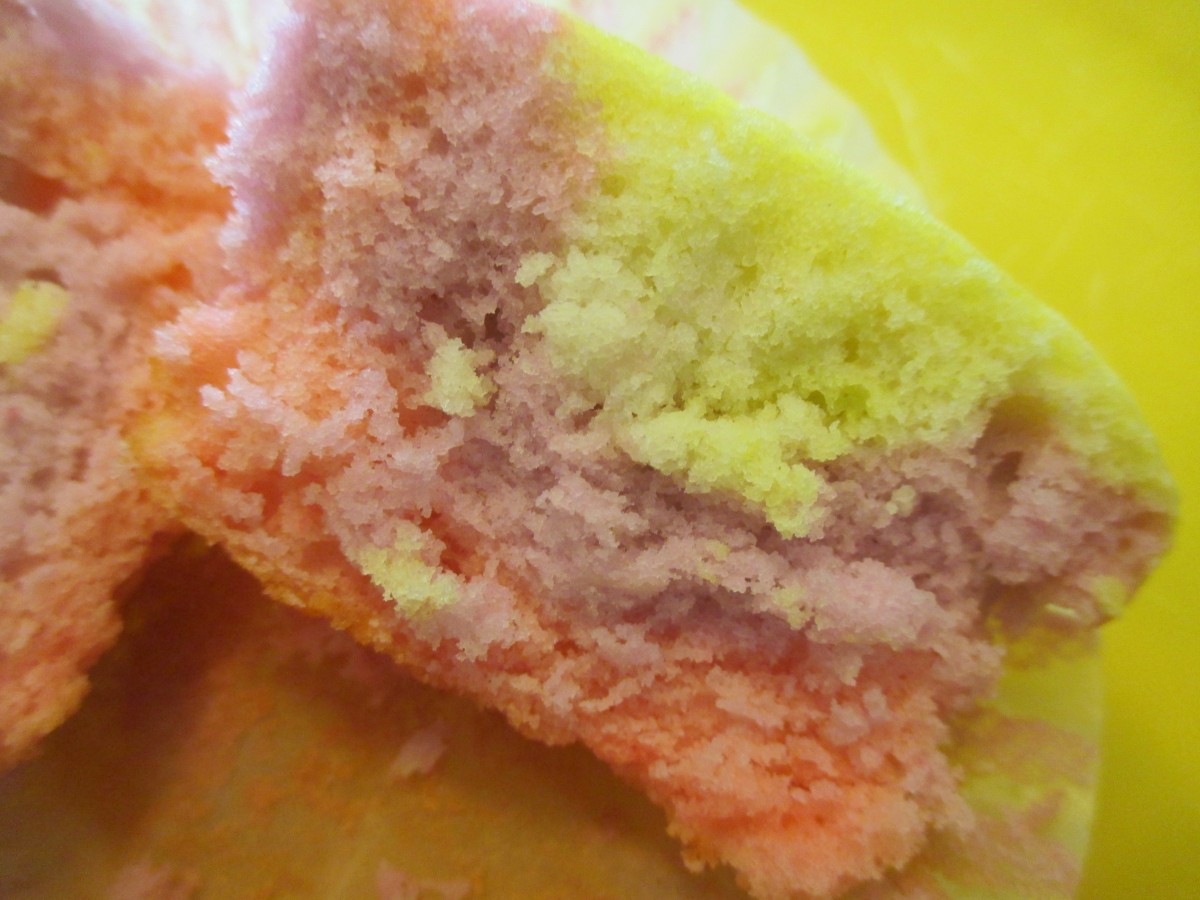
To add a little color to the cupcakes, I divided the batter into three bowls and tinted each of them a different pastel color.
As I filled the pans, I just added a spoonful of each of the tinted
batters in them. They came out really nice. I made three different
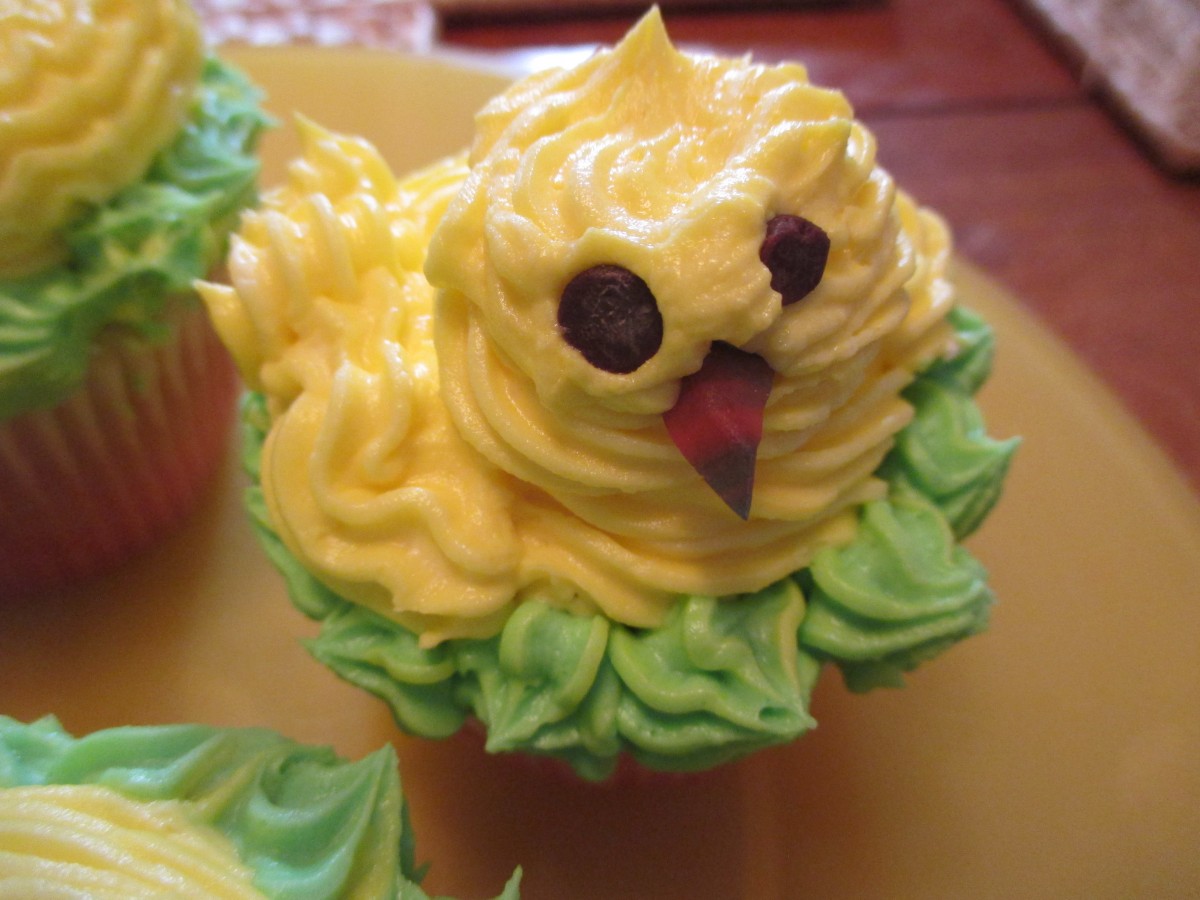
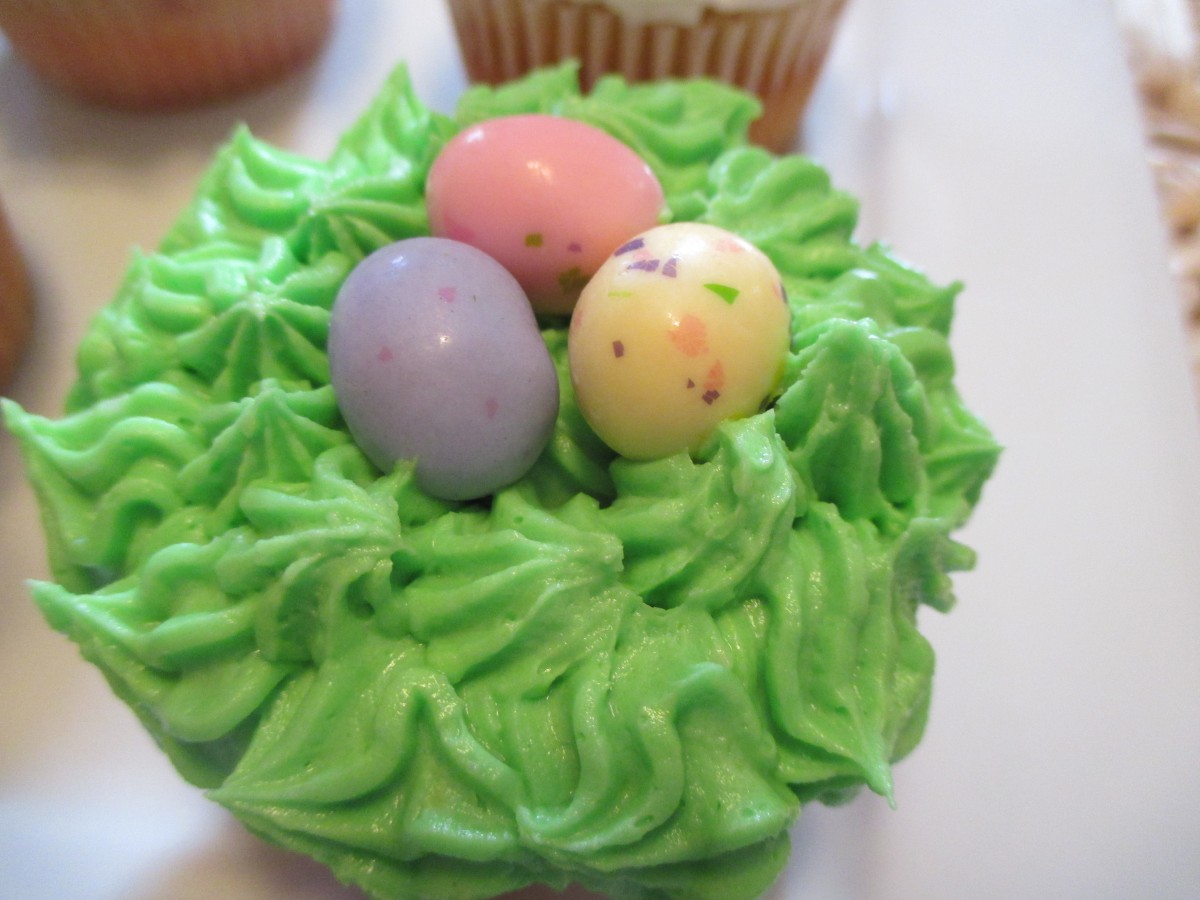
cupcakes: bunnies, chicks and nests.
Details on how to make each of them are listed below.
Classic White (Vanilla) Cupcakes
1 cup sugar
1/2 cup butter
2 eggs
2 teaspoons vanilla extract
1 1/2 cups all-purpose flour
1 3/4 teaspoons baking powder
1/2 cup milk
Preheat oven to 350 degrees. Line a muffin pan with 12 paper liners. In a
medium bowl, cream together the sugar and butter. Beat in the eggs, one
at a time, then stir in the vanilla. Combine flour and baking powder,
add to the creamed mixture and mix well. Finally stir in the milk until
batter is smooth. Pour or spoon batter into the prepared pan. Bake 20 to
25 minutes. Cupcakes are done when they springs back to the touch.
Makes 12.
White Chocolate Frosting
6 oz. white chocolate – if using bars, chop before melting
1 stick (4 oz.) cold butter, cut into cubes
1-2 c. powdered sugar
1 t. vanilla
Melt chocolate. I just melt mine in a microwave safe dish, but you
can use a double boiler. Let chocolate cool down a little. Beat butter
into the melted chocolate. Beat until smooth and then beat in the
powdered sugar and vanilla. Whip until frosting is smooth and fluffy. I
normally beat for 5 minutes or longer. If too thick, add a few drops of
water or milk. For this recipe, I made a double batch of frosting.
Bunnies
extra white chocolate
food coloring- pink or red
chocolate chips
pastel ( pink) M&M’s
Make bunny ears by melting some white chocolate and putting it in a
piping bag or bottle. On wax paper, make outline of the ears in white
chocolate and allow to cool/harden. Place a drop or two of pink or red
food coloring in a microwave safe bowl and add some white chocolate.
Melt in microwave, being careful not to burn the chocolate and stir
until it turns pink. Pipe the pink chocolate into the middle of the
ears. Allow to harden before peeling off of the was paper. Using a star
tip, pipe frosting on cupcake. I made three layers – to add height to
the cupcake. place ears on cupcake and add chips/candy for eyes and
mouth.
Chicks
Frosting tinted yellow and green
mini chocolate chips
fruit roll up
Using star tip, pipe the chick’s body onto the cupcake in yellow
frosting. Pipe on head and wings. Pipe green frosting around chick to
form a nest. Use mini chips for eyes and cut fruit roll up for beak.
Nests
Frosting tinted green
egg shapes malted milk balls- or you could use jelly beans
Pipe green frosting on cupcakes to make nests. Add three, or more, candies in the middle for eggs.
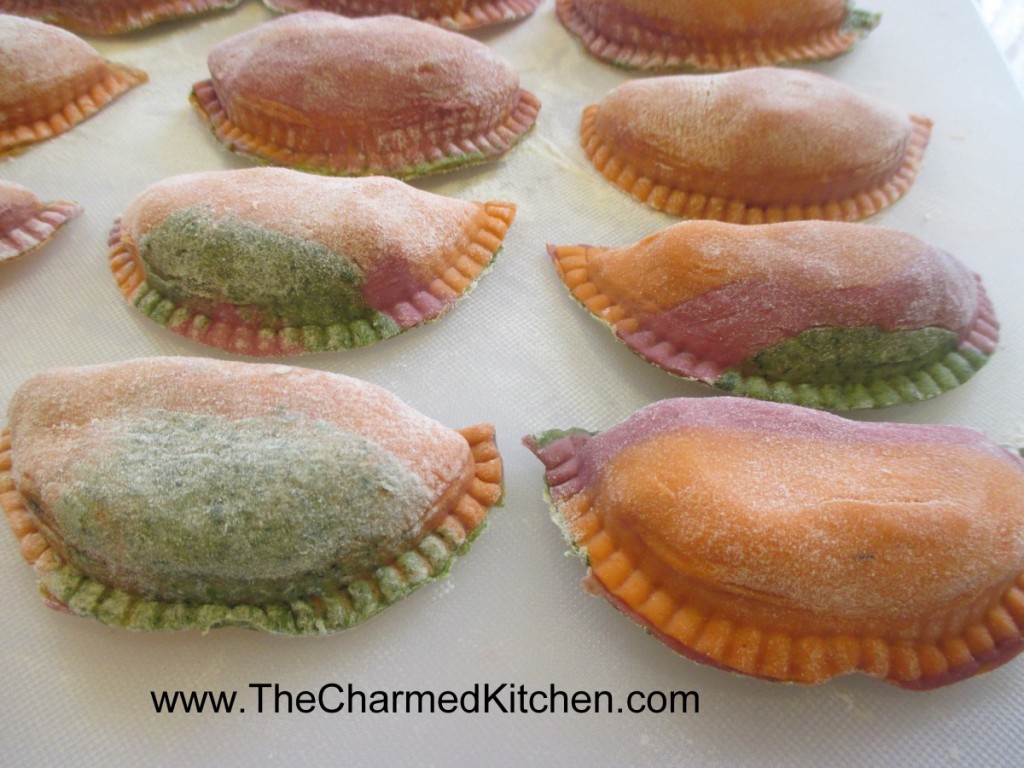
I enjoy making pasta with veggie- based dough. The colors are so pretty, and I love the way they taste. So, since it is almost Easter, I went a step further and used my veggie-based dough to make pierogi.
They remind me a little of Easter eggs. I used a potato and cheese filling, so that part is pretty traditional. The pierogi are also a nice choice for a meat-free dinner.
I served them with sauteed onions and sour cream. Here is the recipe for the pasta and the pierogi filling.
Rainbow Pierogi
All of the vegetable doughs were mixed using a food processor. If
you want to mix them by hand- puree the veggies first. Once the doughs
are made allow them to rest at least 30 minutes. Since veggie pasta
dough tends to be a little softer than traditional pasta- I actually
prefer to make them a day ahead and chill. Chilling the dough, even for
an hour, will help. The traditional pierogi dough was mixed in a stand
mixer.
To make the pierogi a little sturdier, you can also make regular
pierogi dough and mix a little of that dough in with the veggie-based
doughs.
When ready to roll out your dough, grab a hunk of each dough and press them together. If the the dough is a little sticky that will help. On a floured surface, roll out to the desired thickness. Folding and rolling a couple of times helps to mix up the color pasta better. I use a template to make my pierogi- but you can cut them out with any round cutter or even a glass or jar. Spoon filling of your choice on center of dough circle. Fold dough in half over filling and press edge with fork to seal. Wetting the edge of the dough will help the dough to stick. Don’t overfill or pierogi will split. Test a couple first to get the hang of it. Place a few at a time, into salted boiling water, and cook until they float. You can eat them as is, or brown cooked pierogi in butter, in a skillet. Serve with grilled onions and/or sour cream. We would often make a larger batch and then freeze them, uncooked, on wax paper-lined baking sheets. When frozen they would be transferred to a freezer bag or container. Place right from the freezer into boiling water when ready to use.
Carrot Pasta
1 c. flour
1/2 t. dried dill
1/3 c. carrot puree
1-2 T. water, if needed
Beet Pasta
1 c. flour
1/2 t. dill
1/3 c. beet puree
1-2 T. water, if needed
Spinach Pasta
2 c. flour
1 10 oz. package frozen spinach, cooked, drained, reserving some of the liquid
Mix this dough as for other pastas, but don’t be too quick to add
reserved liquid. While kneading you’ll get water out of the spinach. May
require more kneading and rolling than other pasta doughs. Be patient,
it’s worth the work.
Classic Pierogi Dough
2 c. flour
1 t. salt
½ c. water (you can also use half milk and half water)
1 egg
Mix all ingredients together and knead on floured surface until smooth.
Cover and let rest at least 15 minutes. Roll out thin and cut into
circles. Re-roll scraps. You should get between 20-30.
Pierogi Filling
1 lb. Potatoes, peeled and boiled 4 oz. cream cheese – normally I would use farmer’s cheese or cottage cheese, but cream cheese was what I had 1/2 c. shredded cheddar cheese 1/4 c. chopped sweet onion, optional salt and pepper to taste Mash potatoes with other ingredients and season to taste.
Focaccia is a wonderful Italian flat bread. Baked in a jellyroll pan, it is about an inch thick, and is often used in savory dishes with cheese and other toppings. It is also sometimes split to make sandwiches. When I make focaccia, I often add sauteed shallots, garlic and fresh rosemary.
This time I made a lightly sweetened version. It only has 1/2 cup of brown sugar in it total- but gets a lot of natural sweetness from the dried fruit and orange juice. Loaded with dry fruits it is a great dessert, but could also be served for breakfast or brunch. If you have some dried fruit you were looking to use in something- this is a great recipe for that.
It is moist, and has a wonderful flavor and texture. You can leave it plain once baked, or add a powdered sugar glaze.
In a bowl combine the fruit and orange juice and let stand 20
minutes. Drain fruit, reserving 1 cup of the liquid. Heat liquid until
it is lukewarm. In the bowl of an electric mixture combine yeast with
warm juice and sugar and let stand 5 minutes. Add flour, half the brown
sugar, seasonings and butter and mix until dough is well-mixed. Knead
dough with dough hook for 5 minutes, dough will be sticky. Add fruit and
mix until evenly blended. Transfer dough to floured work surface and
just roll around to coat with the flour. Place in oiled bowl, turning to
oil top. Cover with plastic wrap and place in a warm place to double,
about 11/2 hours.
Note: At this point, if you would rather, you can punch the dough
down and wrap it, then chill it overnight. Bring to room temperature
before continuing.
Press the dough into an oiled 15×10 inch jellyroll pan and let it
rise, loosely covered, for about 1 hour. Dimple the dough using your
fingertips and sprinkle with the remaining brown sugar. Bake in a
preheated 400-degree oven for about 30-35 minutes or until golden brown.
Can be served warm or at room temperature.
Note: The focaccia is just fine the way it is, but you can drizzle it
with a powdered sugar glaze, or dust with powdered sugar. It makes a
great breakfast dish, or the base for fruit shortcake,. If you wish to
use large pieces of fruit like apricots, pineapple or mangoes, dip
scissors in oil and use them to snip the fruit into smaller pieces. I
sometimes also add 1/2 c. chopped nuts to the dough when I add the
fruit.
Note: Any focaccia made with fruit, vegetables, meats or cheese
should be refrigerated. Also, baked focaccia can be wrapped well and
frozen for a couple of months. Just defrost in the wrapping and then
warm a little, if desired.