These are one of my favorite cookies. They are incredibly tender and crumbly. They make a great dessert for Chinese New Year.
The original recipe called for shortening. I used coconut oil instead, and was very happy with the results. You can use half butter, half coconut oil, if you prefer.
Here is the recipe.
Almond Cookies
2 c. flour
1 c. coconut oil- you can use half coconut oil, half
butter
1 t. salt
¾ c. sugar, plus
extra for topping the cookies
1 t. almond or vanilla extract
½ c. almonds
Place flour in medium bowl. Cut in coconut oil until mixture
looks like coarse crumbs. Add the remaining ingredients, except the almonds and
work with your hands until mixture holds together. Heat oven to 375. Form dough
into small balls- about an inch. Press tops of cookies in sugar and place on
ungreased baking sheet. Press an almond into the center of each cookie. Bake
until cookies are a little golden around the edges, 8-10 minutes. Cool a few
minutes before removing from the cookie sheet to finish cooling on a rack.
Makes about 3 dozen cookies.
I was lucky enough to get a couple of bunches of Swiss chard recently. Thanks, Dale. Swiss chard tastes like beet greens. I love chard. I steamed some of the greens and served them with salt and a drizzle of vinegar.
I still had more chard and decided to make little dumplings, or gnudi, with it. When done right, gnudi are tender and delicate. Kind of like gnocchi, but made without the potatoes.
I served mine tossed in butter and topped with fresh grated Parmesan cheese. If you are trying to get your family to eat more greens- try making these. You could also use spinach or other greens in place of the chard, if you prefer. When using greens like kale or collards, cook the greens a few minutes longer to be sure they will be tender.
Swiss Chard Gnudi
1 lb. Swiss chard, stem ends trimmed
1 c. whole milk ricotta
½ c. grated Parmesan cheese plus extra for sprinkling
¼ c. dried minced onion
1 egg
½ t. coarse salt
¼ t. fresh ground pepper
1/8 t. ground nutmeg
¾ c. flour, plus extra for rolling
Butter
Grated Parmesan cheese
Cut chard leaves from each side of center stem. Cook chard leaves in
large pot of boiling salted water until tender, about 3 minutes. Drain;
cool. Squeeze chard leaves until very dry; place in processor. Using
on/off turns, finely chop chard. Add ricotta, ½ cup Parmesan, onion,
egg, coarse salt, pepper, and nutmeg; process to blend. Transfer mixture
to medium bowl. Add ¾ cup flour; stir to blend. Cover and refrigerate
dough overnight.
Line rimmed baking sheet with parchment paper. Spoon some flour onto
large plate. Working in batches, drop heaping teaspoonfuls dumpling
dough (size of small walnuts) onto plate with flour to form about 36.
Using floured hands, gently shape each into 1 1/2-inch-long,
1/2-inch-thick oval. Tap off excess flour; transfer to prepared baking
sheet. They can be made 2 hours ahead. Cover and chill. Bring large wide
pot of salted water to boil. Slide dumplings into pot; cook until they
float to the top, about 4-5 minutes. They are very tender so remove from
water gently. Toss in butter and sprinkle with cheese. Serves 4.
Ghee, if you haven’t had it before, is a kind of clarified butter, often used in Indian cooking. You can buy it at stores that carry international foods, but it is easy to make. I had a lot of butter left over from holiday baking, so I used some to make ghee.
Ghee has a wonderful, toasted, nutty flavor and it can be used in
all sorts of dishes. You can add it to veggies or spread it on toast. I
love to add ghee to rice or pasta.
A wonderful bonus when using ghee, because the milk solids have been
removed, you can fry foods in it. It doesn’t burn quickly, like regular
butter.
Because the solids have been removed, you can store ghee at room
temperature. Although, it is recommended to use up home made ghee in a
month or so. For longer storage, you can pop it in the fridge, but you
don’t have to.
The difference between ghee and clarified butter is that ghee is
cooked longer, to develop a darker color and wonderful toasted flavor.
The longer cooking also removes any water in the butter, leaving just
the fat behind.
There are several methods for making ghee. Some suggest long, slow
cooking. Others a little more heat and less cooking time. I prefer the
latter. I am not the most patient person.
Here is how I made my ghee.
Start with a pound of unsalted butter. Place the butter in a heavy
bottomed, medium sized saucepan. Melt the butter over low heat. As soon
as the butter is melted, turn the heat up a bit- to medium. It will
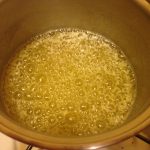
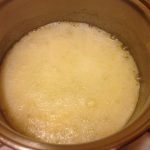
start to form foam on the top at this point. After a few minutes, the
foaming will stop. Turn up the heat a little more- not high heat, but a
little higher medium, if that makes sense. Watch for the second foam to
form on the top. This takes about 7-8 minutes. It will have turned a
pretty, golden color. At this point, your ghee is done. You’ll have to
strain it, to keep out the solids, which will have settled to the bottom
of the pan. I strained my ghee twice, through several layers of
cheesecloth. Be sure the container you are straining the ghee into is
heat proof- it is pretty hot at this point. I used a stainless steel
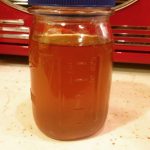
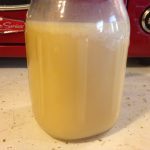
bowl, then transferred the ghee to a canning jar. You could also use a
fine mesh strainer, if you don’t have cheesecloth. Store in a container
with a tight fitting lid- you don’t want moisture to get to your ghee.
It will get more solid as it cools down.
One last thing. I used a stainless steel pot and the brown bits took a bit of scrubbing to get out of the pot. Small price to pay for your own ghee.
That’s all there is to it. Use within a month. Trust me, it never lasts that long around here!!
As part of my pantry challenge, I needed to defrost and inventory my freezer. I was so pleased to find a bag of hazelnuts I had forgotten about. I decided to use some of them to make biscotti.
These biscotti are the perfect treat to have with your morning cup of
coffee or tea. Crisp, but not too hard, they are studded with crunchy
hazelnuts and flavored with vanilla and orange peel. I like them just
the way they are, but you could dress them up with a drizzle of powdered
sugar glaze. You can also dip one end of each biscotti in melted
chocolate.
I don’t know why more people don’t make their own biscotti. They are
so easy to make, and you can flavor them to suit your own taste. Once
baked, store them in an air tight container. They stay crisp for weeks.
Assuming you don’t eat them first!
Biscotti get their distinctive, extra crunchy texture, from being
baked not once, but twice. The batter is spread on a cookie sheet and
baked until firm. Once cooled and little, the loaf is sliced and the
slices are returned to the oven to get baked until crisp and toasted. I
put the slices on a cooling rack, placed on the baking sheet, before the
second bake. That way, the biscotti toast on both sides evenly. No need
to turn them all over half-way through the second bake.
So here is the recipe. I hope if you haven’t made biscotti before, you give them a try.
Hazelnut Biscotti
3 c. flour
2 t. baking powder
1/2 t. salt
3 eggs
1 c sugar
1/4 c. butter, melted
1/4 c. olive oil
1 1/2 t. vanilla
1 t. grated orange peel
1 c. hazelnuts, toasted, peeled and chopped
Combine dry ingredients and set aside. Mix together eggs, sugar,
butter, oil, vanilla and peel. Beat until smooth and stir in flour
mixture and nuts. Grease a large baking sheet, oil your hands, and
place dough on sheet, forming into a 16×4-inch log. Bake at 325-degrees
until tester inserted in center comes out clean, about 30 minutes. Loaf
with spread a bit. Cool 15 minutes and leave oven on. Use serrated knife
to cut into 1/2 -inch thick slices. Place cooling rack on a baking
sheet. Place slices, cut side down, on cooling rack and return to oven
for 20-22 minutes. Cool. Makes about 24.
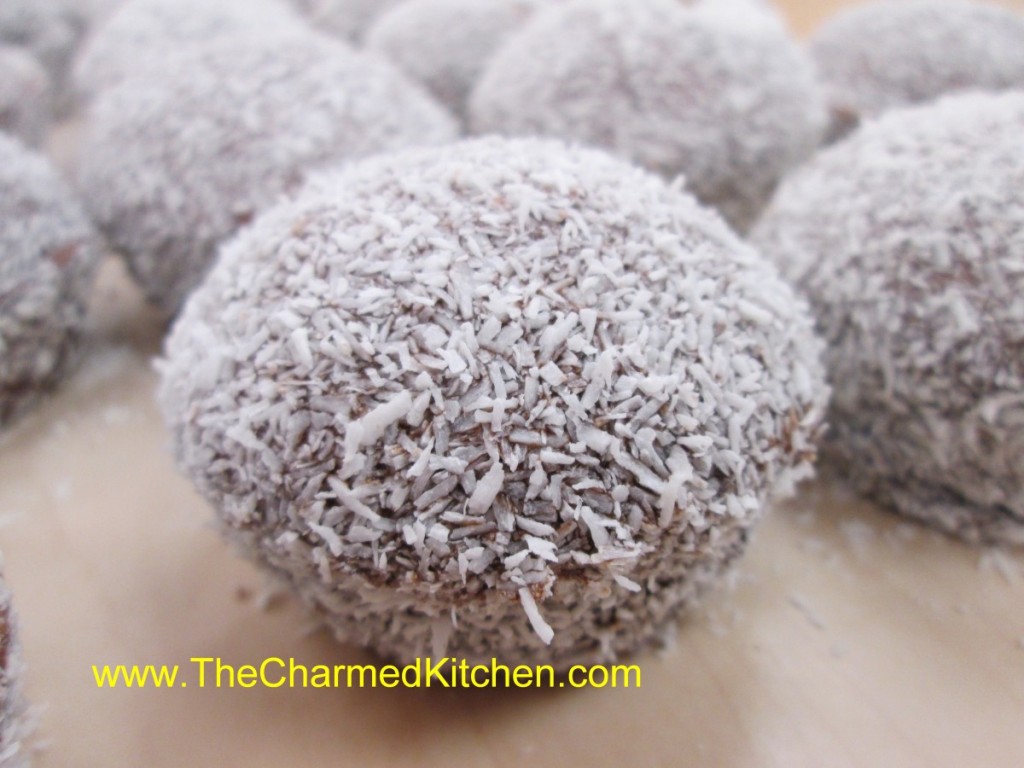
I have wonderful memories of my Aunt Josie making these for every family gathering. Aunt Josie cut the cake into squares. They were all perfectly even. I asked her how she did that. She told me that she used her cooling racks to get the lines even. She would set the cooling racks on her cake and use the wires as guides. So clever.
I never could seem to get them even, so I bake my cake in cupcake tins and call then snowballs. Whatever the shape, these little cakes are a favorite treat in my family.
In bakeries, you’ll find them in squares or rectangles. She shared her recipe with me a long time ago, and I am sharing it with you.
You can bake the batter in mini muffin pans or standard muffin pans.
It just depends on what size you want your snowballs to be. After the
cupcakes are baked, freeze them. The frozen cakes are dipped in a
chocolate sauce and then rolled in desiccated coconut.
Desiccated coconut is dried and unsweetened. It looks like coarse,
white bread crumbs. You can find it in stores that carry baking supplies
and at Asian markets. It is the same kind of coconut used to make
coconut shrimp.
Here is the recipe for making the “snowballs”. The recipe for the
cupcakes is listed below, as well. I just doubled my classic white
cupcake recipe, but you could use a box mix, if you prefer.
Aunt Josie’s Coconut Cake Squares aka “Snowballs”
1 white cake, prepared and frozen solid*
1 c. cocoa
1 1/4 c. sugar
2 c. water
1 t. vanilla
1 c. desiccated coconut (available at cake supply stores and some health food stores)
Cut frozen cake into small squares, or cake can be baked in regular
or mini cupcake tins. Keep cake frozen until ready to use. Meanwhile,
combine remaining ingredients, except coconut, in a medium saucepan.
Bring to a boil then simmer 5 minutes. Remove from heat and cool
completely.
Using toothpicks or fondue forks, dip frozen cake in sauce let drain a
few seconds, then roll in the coconut. Can be enjoyed right away or
frozen again for later use.
*If you make the cake in muffin tins you’ll get 24 cupcakes or about 60 mini cupcakes.
Classic White Cupcakes
1 cup sugar
1/2 cup butter
2 eggs
2 teaspoons vanilla extract
1 1/2 cups all-purpose flour
1 3/4 teaspoons baking powder
1/2 cup milk
Preheat oven to 350 degrees. Line a muffin pan with 12paper liners. In a medium bowl, cream together the sugar and butter. Beat in the eggs, one at a time, then stir in the vanilla. Combine flour and baking powder, add to the creamed mixture and mix well. Finally stir in the milk until batter is smooth. Pour or spoon batter into the prepared pan. Bake 20 to 25 minutes. Cupcakes are done when they springs back to the touch. Makes 12.
I bring my rosemary in for the winter, so I have fresh rosemary available all year long. On this chilly day, the thought of warm biscuits was too tempting.
I really enjoy baking with herbs. They
add so much flavor to both sweet and savory baked goods. I love these
rosemary biscuits. You can have have them ready for baking in just a few
minutes. One of life’s simple pleasures is enjoying homemade biscuits
warm from the oven.
Rosemary Biscuits
3 oz. cream cheese, cubed 1 ¾ c. biscuit mix, like Bisquick or Jiffy Mix, I use homemade, recipe follows ½ c. milk 2 t. minced fresh rosemary or ¾ t. dried
In mixing bowl cut cream cheese into biscuit mix until it resembles coarse crumbs. Stir in milk and rosemary and stir until soft dough forms. Turn dough onto lightly floured surface and knead until dough holds together, about ten times. Shape dough into a 6-inch square and cut into 4 3-inch squares. Cut each square in half diagonally and place on a lightly greased baking sheet. Bake in a preheated 400-degree oven for 10-12 minutes or until light brown. Makes 8.
Homemade Biscuit Mix
8 cups
sifted, all-purpose flour
1 c.
powdered milk
1 c.
powdered buttermilk
¼ c.
baking powder
1 T.
salt
2 c. shortening ( you can use butter or coconut oil, I use coconut oil)
Sift dry ingredients together 3 times. Cut in shortening to resemble cornmeal. Keep in an airtight container. Store in a cool dry place and use within six months. If making with butter, store in fridge.
I love a good oatmeal raisin cookie. Heck, I love cookies in general. It’s a classic and always popular. Like a lot of classics though, it can be fun to change things up a little. Sometimes you create a new classic. I had a request for oatmeal cookies, but with something other than raisins. I ended up using dried, sweetened cranberries and the result was quite nice. Moist cookies with just a touch of tartness from the cranberries. A new classic that I plan on making again.
Oatmeal Cranberry Cookies
3/4 c. butter
1 c. brown sugar
1/2 c. sugar
1 egg
1/4 c. water
1 t. vanilla
3 c. rolled oats
1 c. flour
1 t. salt
1/2 t. soda
1 c. dried sweetened cranberries
Preheat oven to 350-degrees. Beat together butter, sugars, egg, water
and vanilla until smooth. Combine remaining ingredients and stir into
butter mixture. Drop by rounded teaspoonfuls onto lightly greased baking
sheet. I use a cookie scoop- it makes for uniform cookies and is faster
than using a spoon. Bake for about 12-15 minutes. Makes about 5 dozen.
I decided to accept the pantry challenge at the beginning of the month. The challenge is to eat using only food you already have. No shopping for a month. I try to make it more interesting by having people over for dinner on a regular basis.
I had done a similar challenge a few years ago, so I was pretty confident. Two weeks in, I thought it was a good time to report on how things have been going.
As expected, I have enough food to eat so far. The challenge really gets interesting as I start to run out of some stuff later on. I have had to bake bread a couple of times. I like my homemade bread, so no complaints about that.
I did a clean out of both fridges. Found a few things I had forgotten about. I try to clean out the fridge every week. With the holidays, I few things were over looked. I had both whipping cream and half and half that was getting close to expiration. Froze them for now.
I have been making a real effort to not let any food go to waste. I had some celery, and I wanted to have it available for the whole month. I had already had it a while and I knew it would not keep to the end of the month. I dehydrated a lot of it. That way I can add it to soups later on and won’t waste any of it. I had more carrots that I thought. There was a big bag in the downstairs fridge I had forgotten about. I dehydrated some of the carrots, too.
I also wanted to use some things up from the freezer. I had gotten cranberries on sale after Thanksgiving and had popped them in the freezer. I decided to make cranberry juice and can it. I also took the leftover cranberry pulp, and made it into fruit roll ups. That dehydrator has been coming in handy.
I got a call yesterday from a friend about some free produce. A local charity group had an excess of donated produce and was giving it away. He sent me pics of piles of boxes of assorted veggies. I decided, since I wasn’t buying the food, it was okay, in the spirit of the challenge, to go get some of it. I picked up 4 butternut squash, 4 celery and 2 bunches of Swiss chard. I took a friend with me and she got some produce, too. About half of the celery is in the dehydrator now. It had seen better days and needed to be processed. I will be cooking up the chard later on today.
I am glad to see a little room in my freezer. I still need to get it defrosted and do a proper inventory. Even in the freezer, food does not last forever. I want to be sure to grab stuff from the back and use it first.
I suspect that a lot of food waste in our homes is from the fresh stuff, rather than the frozen or canned. I have onions and potatoes and I would like to have them keep until I want to use them. They have slightly different storage requirements, so I want to do what I can to keep them from going bad before I need them.
First off, don’t store onions and potatoes together. They both give off moisture and that can cause faster spoilage. Ideally, both should be stored where they are relatively dry and cool, with a few feet between them. Good air circulation is a plus, and keeping them in the dark helps, too. Potatoes will turn green if stored in the light and the green part can make you sick. Onions tend to sprout of they are exposed to light.
In the “old days” people had root cellars. Most of the people I know today don’t, so do the best you can to keep them cool. Areas near exterior basement walls tend to be cooler. An unfinished basement room would be a plus. You don’t want them as cold as a refrigerator, but cooler than normal room temps is the goal. The mesh bags onions often come in are a great way to keep the air circulating. You can hang the onion bags in a cool area of your basement. Potatoes can be wrapped in newspaper, or just placed in a single layer in a cardboard box.
Sweet potatoes are a different matter. They don’t like to be stored in a too cool place. When I grew a lot of sweet potatoes one year, I placed them in crates near my furnace in the basement. I put some newspapers in to keep them from touching each other. We enjoyed them all winter and only lost a few.
I look forward to the next couple of weeks and trying to come up with fun dishes to make with my stored foods.
I had a request from a friend, for more vegan baking recipes. I came up with these muffins, and thought I would share it.
The muffins came out moist and light. Baking powder and baking soda gave them plenty of “lift”. They rose beautifully.
I also have a lot of applesauce that I canned, so I am interested in
recipes using applesauce. I was happy to use some of it in these
muffins.
I added both raisins and walnuts for more texture and flavor. You
could omit them, or add different dried fruit or nuts. You can also
sprinkle a little cinnamon sugar on top of the muffins before baking, if
you like.
I used olive oil in this recipe. I like the way olive oil tastes in baked goods. It almost tastes like I used butter. The secret is to use a mild flavored olive oil. A strong olive oil will over power the muffins. Sometimes I use avocado oil, which has a very neutral flavor.
I kept these fairly simple. Here is the recipe. Enjoy!!
Applesauce Oatmeal Muffins
2 c. applesauce- I used homemade with cinnamon in it
1/2 c. oil
1 c. sugar
1 t. vanilla
2 c. flour Note: You can use all purpose, I used whole wheat pastry flour.
1 c. rolled oats
2 t. baking soda
2 t. cinnamon
1/2 t. baking powder
1 c. dried cranberries or raisins
1 c. chopped nuts
Preheat oven to 375 degrees. Line 24 muffin cups with paper liners or
grease lightly. Set aside. Combine applesauce with the oil and stir in
sugar and vanilla. Add flour, oats, soda, cinnamon and baking powder.
Stir to mix well. Stir in fruit and nuts. Spoon batter in to muffin
cups, filling just over half-full. Bake for 18-20 minutes or until
golden brown on top. Makes 24.
I had been cleaning out the freezer and found some berries from last
summer. I decided to use some of them to make these scones. Even when
the weather is chilly- berry scones make me think of warm summer days.
I used a combination of blueberries and blackberries, but
raspberries would work nicely, too. I was so pleased with how they came
out. They were a little crisp on the outside, but crumbly and tender on
the inside.
These scones aren’t too sweet. With scones, I think you can always
sweeten them up by serving them with jam, if you like. I had one for
breakfast this morning, and it was wonderful. Still warm from the oven.
They could also be used as a dessert- as the base for a shortcake.
Split the scones, add some sweetened berries, sweetened whipped cream or
ice cream as a filling. Top with whipped cream or more berries. A
simple, classic dessert.
The secret to a tender scone is to be gentle with the dough. Do not
mix it too much. As soon as the dough holds together, you are good to
go. I used an ice cream scoop to portion them out. If you are rolling
out scones, try to cut as many out at one time as possible. Each time
you re-roll scraps of dough- the scones become a little tougher.
Here is the recipe.
Mixed Berry Scones
2 c. flour
1/4 c. sugar
1 T. baking powder
¾ t. salt
6 T. chilled butter
1 ½ c. berries, fresh or frozen- do not thaw berries – I used blackberries and blueberries
1 t. lemon or orange zest
2 large eggs
1/3 c. heavy cream
Mix dry ingredients together in bowl and cut in butter to resemble
coarse crumbs. Toss in blueberries and zest. Beat together eggs and
cream and stir into flour mixture. Mix very gently to avoid bruising
berries. Use a small ice cream scoop to scoop out batter and place on
baking sheet. Place scoops about an inch apart. Press down slightly.
Brush with a little cream and sprinkle with a little extra sugar. Bake
in a preheated 400-degree oven for 20-22 minutes. Makes 15-18.