Part of my pantry challenge is using what I have on hand and not going to the store. I was defrosting my freezer and found local sweet corn I had frozen last summer. I wanted to make soup for lunch with friends, so I decided to use the frozen corn to make this chowder. I also had a pound of bacon, which gave the soup a wonderful smoky flavor. I cooked the bacon in the soup pot, allowing it to get pretty crisp. I removed as much of the fat as I could, but left the bacon in the pot. Then, when I cooked the onions and added the stock, all the little brown bits of bacon in the pot added even more flavor. I also had gotten a ham during the holidays, but hadn’t used it yet. I added some of the ham to the chowder, too. It came out great!! A perfect dish for a windy, rainy day.
Corn, Ham and Bacon Chowder
1 lb. bacon
1 onion, chopped
2 carrots, peeled and sliced
6 c. chicken stock
2 potatoes, peeled and cubed
6 c. corn – I used frozen corn
2 c. chopped ham
2 cups half and half or milk
¼ c. flour
Salt and pepper to taste
Hot sauce to taste
Fresh chopped parsley
Cut bacon in 1-inch pieces and fry in a Dutch oven until crisp. Tip pot and spoon out most of the fat. Add the onion and sauté until translucent. Add carrots and stock. Cover and simmer 10 minutes, then add the potatoes, corn and ham. Cover and simmer 15-20 minutes, or until potatoes are tender. In jar with a tight fitting lid, combine 1 cup of the half and half or milk with the flour. Put on the lid and shake until mixture is smooth. Stir into the pot along with the remaining half and half or milk and cook, stirring often until mixture thickens up. Adjust seasoning to taste. Stir in parsley and serve. Serves 6.
Did you ever find yourself in the middle of cooking, only to find you are missing an ingredient? Maybe its a baking ingredient that you don’t use that often, so you don’t keep on hand.
Cake flour is a good example. I don’t have that many recipes that call for cake flour, so I don’t keep it on hand. I don’t need to really. Did you know you can easily make your own cake flour? There are a couple of ways to “make” cake flour when needed.
Cake flour isn’t the only ingredient you can make at home. You might be surprised at some of the substitutes you have around already. There are lots of ways you can make what you need, or find something that will work just as well. Here is a collection of some substitute solutions I have accumulated over time. Helpful for the next time you reach for something only to find you are out of it.
Cake Flour
Rather than keeping cake flour on hand, you can add lib in a pinch. There are 2 ways to substitute.
For each cup of cake flour you can measure 1 cup of regular all purpose
flour and then just remove 2 table spoonfuls of the flour.
Some recipes also call to remove the 2 table spoons of regular flour
and replace them with 2 tablespoon of cornstarch. I’ve tried both
methods in baking and have had fine results either way. It is important
that you measure the flour correctly to begin with. Flour should always
be spooned into the measuring cup and then leveled off with a knife.
For a larger amount:
7 cups flour
1 c. cornstarch
Sift together and store until ready to use.
Self-Rising Flour
8 c. flour
5 T. Baking powder
2 T. sugar
1 T. salt
Combine all ingredients and store in an airtight container. Keeps for several months.
Cornstarch
To replace 1 tablespoon of cornstarch you could use:
2 tablespoons flour or 1 tablespoon arrowroot or 4 teaspoons quick cooking tapioca or 1 tablespoon potato starch
Light Brown Sugar
Combine 1 cup white sugar with 2 tablespoons of molasses. Note: for dark brown sugar increase molasses to 3 tablespoons.
Sweetened Condensed Milk
1 c. dry non-fat milk
2/3 c. sugar
1/2 c. boiling water
3 T. butter or margarine melted and hot
Combine all ingredients in a blender until smooth. Can be stored in
the fridge and used within 3 days. This is the same as 1 14 oz. can.
Baking Powder
To replace 1 teaspoon you could use 1/3 teaspoon baking soda plus 1/2 teaspoon cream of tartar
Pie Crust Mix
5 1/3 c. flour
1 T. salt
2 1/3 c. shortening, butter or lard
Sift together flour and salt, and then cut in shortening to resemble
coarse crumbs. Store in an airtight container until ready to use. To use
lightly measure 1 1/3 c. mix into a small bowl. Begin adding cold water
1 tablespoon at a time, using about 4-5 table spoons all together.
After each addition of water toss mixture with a fork and start to press
it together. As soon as dough will hold together without being sticky,
wrap in plastic wrap and chill about an hour. This will make 1 crust and
an entire batch will make about 6 crusts.
Biscuit Mix (like Bisquick)
8 c. flour
1 c. powdered milk
1 c. powdered buttermilk
1/4 c. baking powder
1 T. salt
1 ½ c. shortening*
In large bowl combine dry ingredients and mix well. Cut in shortening
until mixture resembles coarse crumbs. Store in a tightly closed
container and use in 1-2 months. Makes 10 cups.
* You can use butter or coconut oil in place of the shortening- but store mix in the fridge.
Biscuit Mix 2
10 c. flour
½ c. sugar
1/3 c. baking powder
1 T. salt
2 c. shortening
Mix dry ingredients well. Cut in shortening until it resembles coarse
crumbs. Store in an airtight container and use within 3 months. Makes
13 cups.
Aquafaba
Aquafaba is a meringue substitute, using the liquid from a can of garbanzo beans instead of egg whites. Handy for people allergic to eggs and for vegans, too. Not sure who figured this one out, but it is a fun and tasty substitute.
liquid from a can of garbanzo beans
2-3 t. cream of tartar
sugar to taste- granulated or powdered
1 t. vanilla – or other flavoring- optional
In mixing bowl, place liquid and cream of tartar and beat until
mixture looks foamy and thick. Sweeten with sugar, a few tablespoons at a
time until desired sweetness is achieved. The longer you whip, the
better this works. Whip for at least 10 minutes. Add flavoring, if
using. You can also add food coloring, if you like. Makes about 2 cups.
Store in fridge. For best results, place finished aquafaba in a
strainer and prop over a bowl until you are ready to use it. It seems to
hold up better this way. Any liquid that forms, will drip off into the
bowl below.
Taco Seasoning
4 t. onion powder
3 t. chili powder
1 t. cornstarch
1 t. garlic powder
1 t. cumin
½ t. oregano
1/8 t. cayenne pepper
Mix and store in a cool, dry place. This is the same as 1 packet of taco seasoning mix.
Homemade “Corn” Syrup
2 cups granulated sugar
3/4 cup Water
1/4 tsp. Cream of Tartar
dash of salt
Combine all in a large, heavy stainless steel pot. Stir and bring to a
boil. Reduce heat to a simmer and cover with lid for 3 to 4 minutes to
get the sugar crystals off the sides of the pan.
Uncover and cook to softball stage, 238 to 240 degree’s F. or when a
small amount is dropped into cold water and does not hold its shape;
stir constantly. Cook for another minute.
Cool and store in covered jar at room temperature, will keep well for 2 months at room temperature.
For dark corn syrup add 1/4 cup molasses
Chocolate Substitutions
To substitute cocoa for unsweetened chocolate in a recipe combine 3 tablespoons of cocoa and 1 tablespoon of fat.
Unsweetened chocolate can be turned into semi sweet chocolate by
adding 1 tablespoon of sugar to each melted ounce. Three ounces of
unsweetened chocolate and 3 tablespoons of sugar will equal 4 ounces of
semi sweet chocolate.
I have wonderful memories of my mother
making this bread. Whenever I make it, I think of her. It is a simple
egg bread, in many ways, but the braiding makes it look so pretty. You
can bake the bread in loaf pans, or on baking sheets. Both look great.
This is one of my favorite sandwich breads, but I also like it for
French toast. Challah is a nice option for bread in your holiday
stuffing (or dressing) and it makes great bread pudding.
Challah
2 c. hot water
1 T. each sugar, salt and oil
1 package active dry yeast
¼ c. warm water
About 8 cups flour
2 beaten eggs
Poppy or sesame seeds, optional
In large bowl combine hot water, salt, sugar and oil. Dissolve yeast
in warm water in small bowl and add to oil/water mix. Stir in 1 cup of
the flour and eggs, reserving 2 tablespoons of the eggs for later.
Gradually stir in enough of the flour to make soft dough. When dough
pulls away from sides of bowl remove to floured surface. Knead dough,
adding flour as necessary about 8-10 minutes. Dough should be smooth and
elastic. Place dough in a lightly greased bowl, turning to grease top,
cover with a towel and allow to rise in a warm, draft free place until
doubled, about 1 hour.
Punch dough down and divide into 8 equal pieces. Roll three of the
pieces into 12- inch ropes. Place in a greased 9×5-inch loaf pan. Take
one of the remaining pieces of dough and divide into thirds. Roll the
pieces into 3-nine inch ropes and place on top of the braid already in
the pan. Repeat with remaining dough and cover. Allow to rise until
doubled in bulk, about 1 hour. Preheat oven to 400 degrees. Brush loaves
with reserved eggs and sprinkle with sesame or poppy seeds, if desired.
Bake 40-45 minutes. When done loaves will be nicely browned and sound
hollow when tapped. Makes 2 loaves.
Note: Bread dough can also be placed on greased baking sheets instead of in loaf pans. The result will be longer and flatter loaves. I think they are very pretty.
Challah baked on a baking sheet, instead of loaf pans
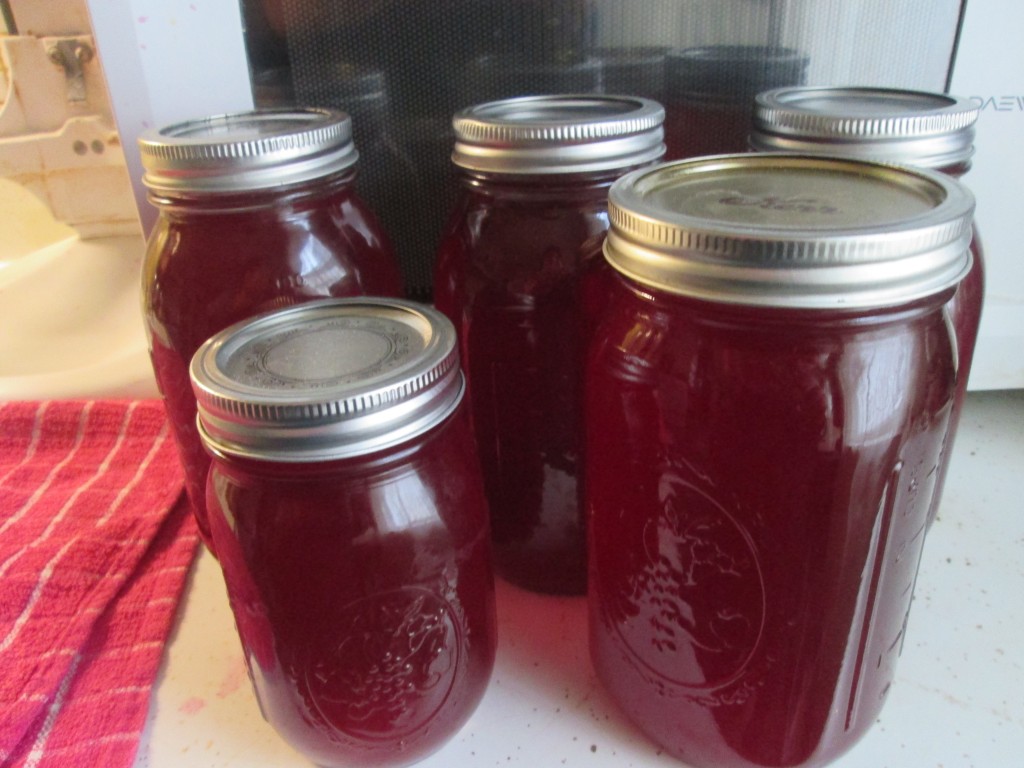
I bought quite a few bags of cranberries right after Thanksgiving. I popped them in the freezer to enjoy later. As part of my pantry challenge, I am trying to use the ingredients I already have, rather than go to the grocery store. I also did an inventory of my freezer. I wanted to get these cranberries out of my freezer and use them for something. I decided to make and can cranberry juice. I even used the leftover pulp (after I strained the juice) for cranberry fruit roll ups.
The juice came out great. So much better than store-bought. It was pretty easy, too.
I started with about 5 quarts of berries, which I had sorted out for bad ones, and rinsed. I measured them out and added an equal amount of water. I brought this mixture to a boil and let it cook until the berries starting popping. I strained the juice twice. First time through a fine strainer. Then I put the juice in the fridge overnight. This allowed the solids to settle to the bottom. The second time, I strained the juice through a strainer lined with cheesecloth.
I returned the juice to the pot and brought it up barely to a simmer (190 degrees). To sweeten it, I added less than a cup of sugar, which comes out to less than a 1/4 cup per quart of juice. Once the juice was up to a simmer, I ladled it into clean, hot quart canning jars. I filled them to about 1/4 inch from the top, wiped the rims and closed the jars. I also used the last of it to fill a pint jar. Processed in a boiling water bath for 15 minutes. Once the time was up, I turned off the heat and left the jars in the canner for five minutes before placing them on the counter to cool. Ended up with 5 quarts and 1 pint for my efforts.
After making cranberry juice I was left with a lot of pulp. I didn’t want to toss it, so I decided to make cranberry fruit roll ups with it. I mashed the pulp with a fork, then sweetened just a little- less than half a cup of sugar. I spread the mixture on plastic wrap placed on the trays of my dehydrator. I ended up with 8 of them. I dried them overnight. They should be pliable but not sticky to the touch when done. A friend stopped over yesterday and got a chance to taste one. She said she liked that the roll ups were not too sweet- they had a nice tartness to them. Once finished, I rolled them up in the plastic wrap and will store them in the fridge. Honestly, they aren’t going to be around long.
Winter is citrus season. Oranges and other citrus fruits are abundant this time of year. I love them. I love the tiny Mandarins, the big navels and the seedy, but oh so juicy, Temples. I am content to just peel and eat any of them, any time.
You can do a lot more with oranges than just eating them fresh or juicing them. Oranges can be added to both sweet and savory dishes. We use lemons and limes in cooking all the time, why not cook with oranges?
I have put together some of my favorite recipes using oranges. I’ve even including recipes to use the peels!! Enjoy!!
Orange Broiled Salmon
2 large oranges
4 (4 ounce) fillets salmon
1 teaspoon red wine vinegar
1/4 cup chopped green onions
1 teaspoon cracked black pepper
Preheat the oven’s broiler. Slice, peel, and pith
oranges; slice crosswise into 1/4 inch rounds. Season fillets with salt. Place
salmon fillets on broiling pan. Place the pan of fillets 4 to 6 inches from
heat. Cook for 15 minutes under the preheated broiler, or 10 minutes per inch
of thickness. Remove from broiler just before they are cooked through. Sprinkle
with vinegar. Arrange orange rounds on top. Sprinkle with green onions and
cracked black pepper. Broil 1 minute longer. Serves 4.
Orange Kissed Chicken
1 (4 pound) chicken, cut into pieces
1 tablespoon oil
3 onions, thinly sliced
1/2 cup chicken broth
1/3 cup orange juice
salt and pepper to taste
In a large skillet, heat oil over medium-high heat. Add
chicken pieces and sauté for 5 minutes, until lightly browned. Add onions and
sauté for 2 minutes more. Add juice, broth, salt and pepper. Stir all together.
Cover skillet and reduce heat to low. Let simmer for 45 minutes or until
chicken is cooked through and juices run clear. Serves 4.
Orange Vinaigrette
1/2 cup balsamic vinegar
2/3 cup extra virgin olive oil
1 orange, juiced
2 tablespoons orange zest
2 tablespoons coarse-grained mustard
In a medium bowl, whisk together the balsamic vinegar,
olive oil, orange juice, orange zest and mustard. Use immediately, or store in
the refrigerator for up to one week. Great on mixed greens or on chicken or
seafood salad.
Hot Cranberry-Orange Punch
2 quarts cranberry juice cocktail
3 cups orange juice
1/4 cup brown sugar
2 tablespoons fresh lemon juice
1 pinch salt
2 (3 inch) cinnamon sticks
In a 4 quart or larger slow cooker, combine the cranberry
juice, orange juice, white sugar, brown sugar, lemon juice, salt and cinnamon
sticks. Stir to dissolve sugar. Cook on high for 4 to 6 hours. Turn heat to low
and keep warm for serving. Or heat on stove in saucepan. Simmer, covered for 30
minutes before serving. Serves 10-12.
Orange Tea Bread
2 cups all-purpose flour
1-1/2 teaspoons baking powder
1 teaspoon baking soda
1/2 teaspoon salt
2/3 cup non-fat plain yogurt
2/3 cup sugar
2 large eggs (egg substitute optional)
3 tablespoons melted unsalted butter
1 tablespoon grated orange zest
SYRUP
1/2 cup orange juice
1/4 cup sugar
Preheat oven to 350 degrees. Grease an
8-1/2″x4-1/2″x2-5/8″ loaf pan. Line pan with wax paper or
parchment and set aside. Sift flour, baking powder, baking soda and salt into a
bowl. In a separate bowl, whisk together yogurt, sugar, eggs, butter and orange
zest. Add liquid ingredients to dry ingredients, and stir mixture until well
combined. Transfer batter to loaf pan, smoothing top, and bake in oven for 45
to 50 minutes, or until skewer inserted in middle comes out clean. While the
bread is baking, combine orange juice and sugar in a saucepan. Bring mixture to
a boil over moderate heat while stirring, and simmer for 1 minute. Keep syrup
warm. Make holes in top of bread with a thin wooden skewer and drizzle with
syrup. Let stand in pan until cool. Makes 1 loaf.
Whole Orange Liqueur
3 oranges, unpeeled, cut into wedges
½ lemon
3 whole cloves
3 cups vodka
1 c. sugar syrup
Combine fruit, cloves and vodka in jar. Vodka should cover fruit. Steep 10 days. Strain and filter. Add sugar syrup and mature 3-4 weeks. Makes 4 cups. Note: Sugar syrup is made from 1 cup of sugar and ½ cup of water. Bring to a boil, then cool. You will have 1 cup of syrup.
Orange Peel Liqueur
Peels only from 4 large oranges, scraped and cut into
chunks
3 cups vodka
1 c. sugar syrup, see note
Remove all traces of white from orange peels. Mix peels and vodka and steep 2-3 weeks. You can use more peels for stronger flavor. Strain and filter and add sugar syrup. Let mature a week. Makes 4 cups. Note: Sugar syrup is made from 1 cup of sugar and ½ cup of water. Bring to a boil, then cool. You will have 1 cup of syrup.
Orange Beef Sauce
1-1 ½ lbs. lean ground beef (turkey or chicken would also
work)
1 T. olive oil
1-2 garlic cloves, minced
½ c. chopped onion
¼ c. grated carrot
½ c. orange juice
1 c. beef, chicken or vegetable stock
½ t. caraway seeds
½ t. orange peel
1 T. brown sugar
1 T. vinegar
salt and pepper to taste
¼ c. water
2 T. cornstarch
Brown meat in oil until no longer pink. Drain and place
in Dutch oven with the vegetables Cook until onions are tender. Add remaining
ingredients, except water and cornstarch and simmer, covered, 30-60 minutes.
Five minutes before serving dissolve cornstarch in water and add to sauce to
thicken. Cook until sauce is thickened and bubbly. Serve over pasta.
Citrus Sugar
1 c. sugar
1 T. orange, lemon, lime or tangerine peel
1/2 t. cinnamon
1/2 t. nutmeg
1/8 t. allspice
Mix all ingredients and place in pie pan. Place in a
preheated 200 degree oven for 15 minutes, stirring every 5 minutes. Cool sugar
before storing in airtight jar or you can powder the sugar in a blender for 10
seconds or so before storing. Use in tea, on sugar cookies, on toast and bagels
or with fresh fruit and yogurt.
Note: you can also make a citrus mint variation by
combining sugar with citrus peel and 1 tablespoon dried mint leaves, omitting
other flavorings. This sugar is great in lemonades and iced teas.
Orange and Oatmeal Scones
2 1/2 cups flour
2 cups rolled oats
1 cup sugar
1 teaspoon salt
1 tablespoon baking powder
1/2 teaspoon baking soda
1/2 cup very cold, unsalted butter – cut into chunks
1 egg
1/2 cup orange juice
2 t. grated orange peel
1 cup raisins – plumped and well dried
Glaze
milk, sugar, orange zest
Line a large baking sheet with parchment paper (double
two sheets if you have them – one inside the other). Preheat oven to 425 F. In
a large bowl, place flour, oatmeal, sugar, salt, baking powder, baking soda and
mix together. Cut or rub in butter to make a mealy mixture. Stir in egg and
orange juice. Add orange peel and raisins. Mix to make a soft dough. Turn out
onto a lightly floured board and knead for a few minutes. Roll or pat out into
a thickness of 1/2 inch. Using a serrated cookie cutter cut into disks or
rounds. Brush with milk and sprinkle with sugar and orange zest. Bake until
nicely browned – about 14 minutes. Makes about 24.
Chocolate-Orange Scones
1 1/2 c.
baking mix, like Jiffy or Bisquick or homemade
1 T.
grated orange peel
3/4 c.
heavy cream
1/2 c.
milk chocolate chips or 3 oz. milk chocolate, chopped
Combine baking mix and orange peel in medium bowl. Stir in cream to make a soft dough that forms into a ball in the bowl. On floured surface gently knead in chocolate and press or roll dough to 3/4- inch thickness. Cut into 2 1/4 -inch rounds, re-rolling scraps. You should get 8. Place on and ungreased cookie sheet and bake in a preheated 425-degree oven for 8-10 minutes.
Double
chocolate version: Knead 3 tablespoons of cocoa into dough with the chocolate
chips.
Orange and Chocolate Mini Cheesecakes
8 chocolate graham
crackers
3 T. butter, melted
2 (8 oz.) cream cheese, softened
½ c. sugar
2 t. orange zest
2 t. vanilla
2 eggs
4 or 5 mandarin oranges
4 T. sugar
3 T. water
Line 12 muffin tins with paper liners. Set aside. Crush
graham crackers into crumbs- you should end up with about a cup of crumbs, or a
bit more. Place crumbs in small mixing bowl. Drizzle the melted butter over the
crumbs, and toss to distribute the butter evenly. Spoon a rounded tablespoon of
the crumb mixture into each of the paper lined muffin tins. Press firmly on the
crumb mixture. I used the bottom of a small glass to press the crumb mixture
down. Set aside. Beat together the cream cheese, sugar, zest and vanilla for 1
minute with electric mixer. Beat in the eggs until just mixed in. Divide this
mixture in the muffin tins, filling each 3/4 full. Bake 25 minutes at 325
degrees. While cheesecakes are baking, prepare oranges. Peel oranges and break
apart into segments (sections). You will need 36 segments in all. In small pan,
boil together sugar and water for two minutes. Place orange segments in a small
bowl and pour the sugar syrup over them, tossing gently to coat. Set aside to
cool down. Place three orange segments on top of each cooled down cheesecake.
Makes 12. Serves 6.
Candied Orange Peel
2 large oranges ( you can also use 1 grapefruit or 3
lemons)
¾ c. water
¾ c. sugar, plus extra for rolling
3 T. light corn syrup
Remove peel from fruit using a sharp knife. Try to get
the peel off in 4 pieces. Cut the peel into ¼-inch wide strips. Place peel in a
pot with cold water and bring to a boil. Boil 1 minute, drain and rinse under
cold water. Repeat process 2 more times. Return to pan with fresh water and
boil 15 minutes. Drain and pat dry. Bring ¾ c. water and ¾ c. sugar to boil in
sauce pan with the corn syrup. Boil 2-3 minutes and then add the peel. Simmer,
stirring occasionally until all but a spoonful of the syrup is left. This
should take about 10 minutes. On a wax-paper lined baking sheet sprinkle 1 cup
of sugar and arrange the peels on top of the sugar. Toss the peels around until
cooled adding more sugar if needed.
Place peels on a drying rack for 24 hours before storing. Once dried you
can also dip one end of the peels in dark chocolate. Makes ½ pound.
Dried Orange Zest
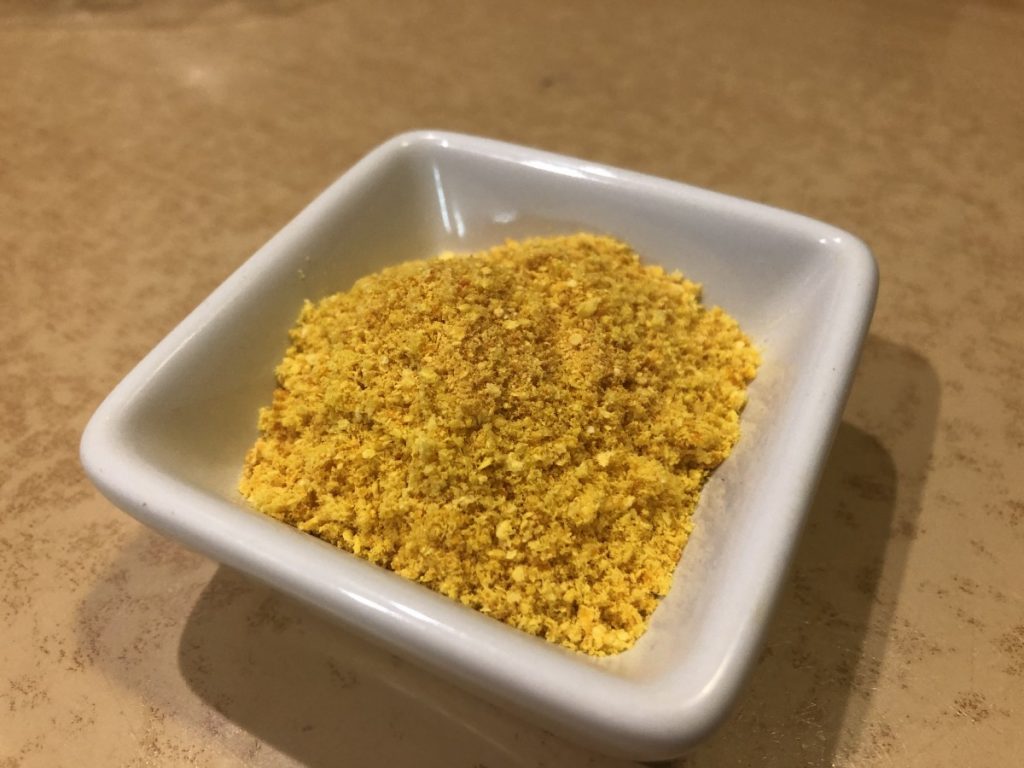
I love to use orange zest in a lot of recipes, but I don’t always have fresh oranges around to zest. I dry my own, so I always have orange zest handy. It’s easy to do. You don’t need a dehydrator, but you can use one, if you have one. You can save the entire peel from thin-skinned oranges, like mandarins or temple oranges. For oranges with a thick, white pith, use a peeler to remove the peel in strips- leaving as little of the white portion on them as possible. Place in a single layer in a basket. Air circulation helps them to dry faster. If you pile them up, you risk them getting moldy before they dry. Leave room for air circulation. You can also leave them on a tray in a single layer. When the peels are brittle, break into smaller pieces and grind into a powder. A spice/coffee mill works well. A blender works fine, too. I have tried to powder them up in several types of food processors and the peels seem to get wedged between the blades and the sides of the work bowl. Once they are powdered up, I use a fine strainer to get out any larger pieces. To be safe, just in case they aren’t completely dry, I put my zest in a freezer container and store in the freezer. The freezer helps the zest to retain its flavor and color longer, too. Better to use organic oranges, if you can.
Food
waste is a growing problem. Estimates are that American families throw out
$1,000-$3,000 of food every year. There are things you can do to reduce your
food waste. Here are some tips to waste less and save money on food.
Buy less. I know, duh. The problem is stores they are designed to get us to buy more. There are some tips to help you buy less. Don’t go to the store when you are hungry, which does work. Make a list. That also helps. Perhaps shop with cash! I know- so many people do not carry cash, but at least set a budget. If you don’t buy too much, you will automatically toss out less. If there is a special sale, only buy it if you can use it, store it, or keep it for later use. If you see a great price on chicken- and your family eats a lot of chicken- get it. Just don’t get more than you have room for in the freezer.
Avoid stocking up on highly perishable foods. There is only so much you can do with leaf lettuce. I have a friend who said she stopped buying bags of potatoes because they go bad before she can use them. In the old days, we had root cellars for storing things like potatoes, onions, cabbages etc. Most people don’t have root cellars anymore, so buy what you can use before your food goes bad.
Inventory your pantry at least once a year. Same for the freezer. Pull everything out and see what you have. Check expiration dates. Keep in mind that expiration dates on canned goods don’t mean a lot. Properly stored, canned foods are good a long time after the dates. You can at least move older stuff to the front. Maybe pull out some things and keep them handy, so you will use them.
Use as much of what you buy as possible. Potato peels, broccoli stems, carrot tops, pickle juice can all be used in creative ways. My mom used to save garlic and onion skins. She would put them in the red mesh bags that the onions came in. My dad kept the bag hanging in the garage. When he grilled, he would sprinkle some of the garlic and onion skins on the hot coals. They imparted a lovely flavor on the food he was grilling.
Be a seasonal shopper. When produce is in season it costs less, but foods like turkey and ham tend to cost less during the fall and winter holidays.
Grow a garden. Even a few herbs in a pot on a sunny windowsill can save you money. If you have room for a vegetable garden, even better. Be creative. You can plant lettuces in between flowers for an attractive and edible landscape. Depending on what you grow a vegetable garden can produce $4-5 per square foot over a season.
Preserve it. I know, you never canned and are afraid, but you can freeze and dehydrate produce when you have too much. Sauce can be frozen instead. Canning info is available from your local extension office or from the USDA. When you have fresh herbs, freeze what you can’t use and have them on hand whenever you like.
Convenience comes at a price. I am not suggesting you grind your own wheat for bread, but try to use fewer convenience foods when you can. Bake bread once in a while or buy regular carrots and peel them rather than using the more expensive baby carrots. Buy a head of romaine or other lettuce and wash it yourself. It costs much less than bagged salads.
Buy off-brands. Store brands item such as canned or frozen vegetables and fruits cost less and you will never know the difference. Same for items like flour, oatmeal, sugar, saltines, oil, jelly, olives, mustard and many more. If you just must have a certain brand of peanut butter, that’s fine, but at least try other brands once in a while.
Shop at discount stores. You may have to bag your own at stores like Aldi and Sav-a Lot but you will save money. That goes for Marc’s and Big Lots, too. They have smaller selections, so you might not find everything you need, but the savings can really add up.
Make a list. Impulse shopping and shopping hungry can add a lot of extras to your bill. Some people also find it helpful to use cash. If you only bring a certain amount with you, you are limited from going over budget.
Avoid frequent trips to the store. Stopping in can lead to impulse buying or overbuying. You’ll also save money on gas and time.
Be open to those unexpected bargains. Keeping in mind that it is no bargain if you can’t use it you can sometimes really save money on in-store specials.
Use the leftovers. Get creative with what’s in the fridge. Soups, stews and omelets can be a great way to use up bits of this and that. I often toss leftovers into a dinner salad. If you choose to freeze leftovers be sure to label and date them so it won’t turn into mystery food, shuffled around the freezer for a couple of years and then tossed.
Make your own convenience foods. When I had a big garden I would often drop off bags of peppers at Mom’s. She would make a batch of stuffed peppers and mashed potatoes and freeze her own frozen dinners for later use. I make my own chicken nuggets, cook and freeze them in smaller packages for later use. Not expensive and a lot better than anything you can buy.
Soup it up. Soups can be a great way to make food go farther, and be good for you, too. I sometimes think of the year as having 2 seasons-soup and salad. When it is cold I nearly always have a pot of soup going. In warmer weather I make many variations on salads.
Look in the cupboards. Try making soups, stews, skillet dinners and salads using at least a few items from the cupboard. This can save a trip to the store and keeps stored foods from getting pitched eventually.
Drink tap water: Bottled water costs a lot more than tap water and isn’t better for you. Try keeping a pitcher on ice in the fridge during the summer. I have had kids in cooking camps get confused when I tell them to get water from the sink.
Lose the soda: I know they taste good, but your family budget can get sipped up quickly. Try making lemonade, iced tea or even just water with a bit of lemon juice in it.
Mix it up: Use mix brownies or cake mix for family desserts rather than that stop at the bakery. It will save you a lot and makes the house smell good, too.
There is just something about homemade bread. I love the way the house smells when bread is baking. I decided to bake some spelt bread last night. It is one of my favorites. Besides, since I have challenged myself not to go to the grocery store for a month, if I didn’t bake it, I wouldn’t have it.
I always have at least a few people who ask me what spelt is.
Spelt flour is a close relative to wheat. I love cooking with it
because it is so easy to work with. It doesn’t require much, if any,
kneading when you make yeast bread out of it.
Spelt has a texture much closer to white flour in baking other
things, like muffins or biscuits. It does contain gluten, so it’s not an
answer for people with gluten issues.
For those who do cook with wheat, spelt provides whole grain
nutrition in a delicate, less heavy package. The bread I baked was so
easy to make and gives me all the taste and fiber of whole wheat bread
with less work.
Spelt flour is still tricky to find. Some larger grocery stores carry
it, but you might have to go to specialty markets. Bob’s Red Mill is my
usual source, so if your store carries their products, you should be
able to locate it.
Spelt Bread
3 ¼ c. spelt flour 1 pkt. Active dry yeast 1 c. water 1/3 c. honey ¼ c. oil 1 t. salt 1 egg Place 2 c. flour, yeast and salt in a medium bowl. Heat together water, honey and oil until warm (120-130 degrees) Add water mixture to spelt mixture and beat on low speed of electric mixer for 30 seconds, or until moistened. Add egg and beat on high 3 minutes. Stir in enough spelt to make a soft dough. Cover bowl with towel and allow to rise until doubled, about 1 hour. Grease a 9×5 inch loaf pan and use a rubber scraper to transfer dough into prepared pan. Cover and let rise until doubled, another hour. Bake in a pre-heated 375 degree oven for 25-30 minutes. Cover top with foil during last 10 minutes of baking. Bread is done when it sounds hollow when lightly tapped. Remove from pan and cool on wire rack. Makes 1 loaf.
There are several reasons we freeze foods. Safety is probably the biggest one. Frozen foods last a lot longer than most foods that aren’t frozen. Convenience is another reason. You can make a big batch of soup or chili, then freeze some to eat later. Freezing can also reduce food waste, by allowing you to keep something to use later, that might otherwise go bad before you can use it.
People always seem surprised at some of the foods that I freeze. I’ve been getting more questions lately, so I made a list of some things you can freeze- but maybe didn’t know you can freeze.
If you find something in the frozen food section at the store remember- if they can freeze it- you can freeze it. Part of my pantry challenge is to eat foods I already have, without going to the grocery store. My frozen foods are what really make this easier. Besides the typical meats and veggies, I have some fun ingredients to work with in my freezer. I can also extend the life of some of my foods by freezing them.
So here is a quick list that I came up with, in no particular order.
1. Eggs: While they keep for a pretty long time you can find yourself with more eggs than you can use. Crack the eggs and place them in ice cube trays or small containers- and freeze. No special instructions. Some people prefer to add a tablespoon of water to each egg. I have tried with and without water and both seemed fine. You can also freeze the yolks and whites separately. Add a little water to yolks when freezing them on their own. Don’t freeze eggs in their shells.
2. Avocados: This really prompted a lot of feedback. I posted a recipe for guacamole once and mentioned that you could freeze avocados. I got a lot of response to that. Most people said they never even considered freezing avocados. They freeze great. Frozen avocados work best used in dips and smoothies later. Don’t expect to slice them to top your salad after they were frozen, but they mash up great and would still work on toast. Just cut in half, remove the pit and scoop out the flesh. Dip in lemon juice and place in a freezer bag. Squeeze out any air and seal. You can also just mash them up before freezing. The lemon juice keeps their color better. You could use lime juice, if you like.
3. Pasta and Rice: Decided to lump these together since the
information for both is about the same. Easiest way is to just freeze
the pasta or rice in portion sized baggies. Thaw in fridge or microwave
when ready to use. This is a great way to eat more brown rice, at least
it works for me. Rice takes 15-20 minutes to cook. Brown rice takes
double that amount of time, at least. I cook up a big batch of brown
rice, portion it out and freeze it. Now I can grab a baggie whenever I
want. Same for pasta. Not so much the time it takes to cook as getting
out that water and getting it boiling. Or sometimes I just cook too much
pasta. Freezing the extra means I can have pasta when ever I want.
4. Milk: There are some problems with freezing milk. It will separate
so it won’t be quite like the fresh stuff you pour on your cereal, but
milk that was frozen is perfect for baking and cooking. I don’t drink
much milk. This way, rather than tossing milk, I can freeze the extra
and use it for cooking later on. Also easier than me trying to keep milk
on hand, when I rarely drink it.
5. Whole Grains/ Whole Grain Flours: This isn’t so much about whether you can
freeze them, but rather, why you should. All whole grains contain the
germ and bran, which contain fat. Over time, they can become rancid.
Don’t panic, doesn’t happen all that quickly, but if whole grains are
stored in a hot kitchen they will develop an off taste. Also depends on
how much you buy and how quickly you go through it. The last few bags of
brown rice I brought suggested refrigerating after opening the package.
If you don’t have the freezer space- store them as cool and dry as you
can and don’t buy more that you can use in 6-9 months, or so.
6. Cheeses: Yes, you can freeze cheese. Harder cheeses seem to hold up better. There will be textural changes, more noticeable in soft cheeses. If you have more cheese than you can use, freezing will extend its shelf life.
7. Crackers: Some of you are wondering- why freeze crackers? The answer – to keep them fresh and crisp long past the expiration date. I was at a bakery outlet store one time and one of the employees shared that tip with me. There was a great sale on crackers but I was worried they would get stale. She told me to freeze them, in the package. She also said to leave them in the package until they came up to room temp, when I wanted to use them. I left one pack out and froze the rest. Several months later opened the pack I had left out of the freezer- the crackers were stale. All of the packs I had frozen stayed crisp.
8. Cheesecake: Not sure why so many people ask me about cheesecake.
Does Sara Lee sound familiar? Yes, you can freeze cheesecake. I like to
freeze slices on a baking sheet, then wrap in plastic wrap after they
are frozen solid. Defrost with the wrapping loosened, but still on. Best
defrosted in the fridge for a few hours.
9. Grapes : A lot of people don’t realize that grapes can be frozen.
In fact, frozen grapes are one of my favorite hot weather snack foods.
Grapes, like berries, can be frozen by just placing clean fruit on a
baking sheet until they are solid. Then transfer to a freezer container
or freezer bag. You can eat them right out of the freezer- or use them
in cooking. I often make cobbler out of frozen grapes.
10. Baked Goods: Most baked goods freeze great. Cookies, cakes, pies.
I prefer to freeze pies unbaked- then bake when ready to use. Again,
think about some of the stuff you see in the freezer section at the
store. I like to take my cookie dough and shape it into balls. Freeze
the balls of dough on a baking sheet- then transfer to a freezer bag.
When I need a few cookies I take them right out of the freezer- place on
a baking sheet and bake- just add a few minutes to the baking time.
11. Soups, T.V.Dinners etc: Freezing meals is one of the best ways to
use your freezer. For one thing, you can freeze stuff before you get
sick of it. I know you LOVE your chili- but do you really want to eat
it all week? I bet not. By freezing it in portions that are practical
for you and your family, you can have chili when you want, without
having to make a fresh batch every time. Again, if Stouffer’s can freeze
it, you can freeze it. Mac and cheese, stuffed peppers, sliced turkey
with gravy and mashed potatoes. Have fun with it. A lot of people save
take out containers and use those. You can also buy containers that are
used over and over- so the cost isn’t so much over time. I make big
batches of vegetable soup- then puree it. I freeze it in both pint and
quart containers. Great for a quick lunch or if friends stop by. It can
be eaten as is, or you can add rice or pasta- you already have some in
the freezer!! I will sometimes use this soup as a of pasta sauce.
12. Breakfast Foods: Really this is a continuation of number 11. You can freeze waffles, pancakes, breakfast sandwiches, smoothies etc. Makes breakfast time a little easier and you will probably like your waffles better than most of what you can buy at the store. Will save you a lot of money, too.
!3. Lemons and Limes: If you are like me, I prefer to have fresh lemons and limes on hand for drinks and cooking. However, they can go bad before I get to using them. I hate to find a fuzzy lemon at the bottom of the fridge. You can freeze them a couple of different ways, depending on how you want to use them later. For adding to drinks later, just cut the fruit in wedges or slices. Place on a small tray and pop in the freezer until solid. Once frozen, remove the fruit from the tray and place in a freezer bag or container. Now they are easy to grab right out of the freezer to add to your favorite beverage. For use in cooking, I zest the fruit and place the zest in a freezer container. Then I juice the fruit and pour the juice in ice cube trays. Once frozen, I can pop out the lemon or lime juice cubes and place in a freezer bag or container. Now, when I want lemon or lime juice for a recipe, I just grab a cube or two.
Some Extra Freezing Info
When it comes to vegetables a general rule is that if it is a vegetable that you cook- then it is a vegetable you can freeze. Works most of the time- we don’t normally cook lettuce and it doesn’t freeze well. Most vegetable are blanched before freezing- that means placed in boiling water, then put in ice water, drained then frozen. This stops certain enzymes from working and keeps the veggies tasting fresher. Some veggies, like onions or peppers- don’t need blanching. You just cut them up- place on a baking sheet and place in freezer until solid, then transfer to a freezer container or bag.
Most fruits don’t get blanched- just washed, cut up if bigger fruits, and frozen. Some in syrup and some frozen “dry”.
High salt foods are not great for freezing. Think about it, we use salt to melt ice. Salty foods, like cured meats, don’t freeze well and will get an off flavor if frozen too long. Freeze them if you must- but use as soon as you can, within a few months, for best flavor.
Do you ever buy a bag of potatoes, only to toss half of them away because they got mushy? Maybe your onions starting sprouting well before you could go through the whole bag? I hate when that happens. An easy solution could be to dehydrate them.
I have dehydrating on my mind this week. I found myself with some extra produce and I didn’t want it to go to waste. I also started a challenge to not spend any money on food for the next month. That made not wasting food more important than ever.
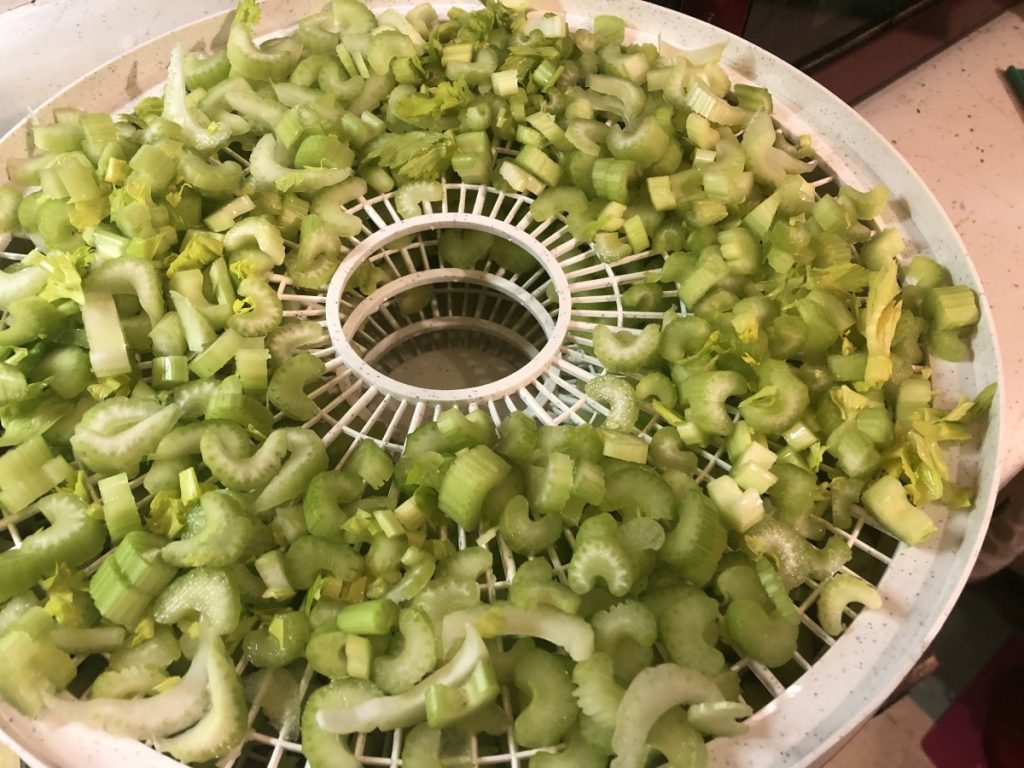
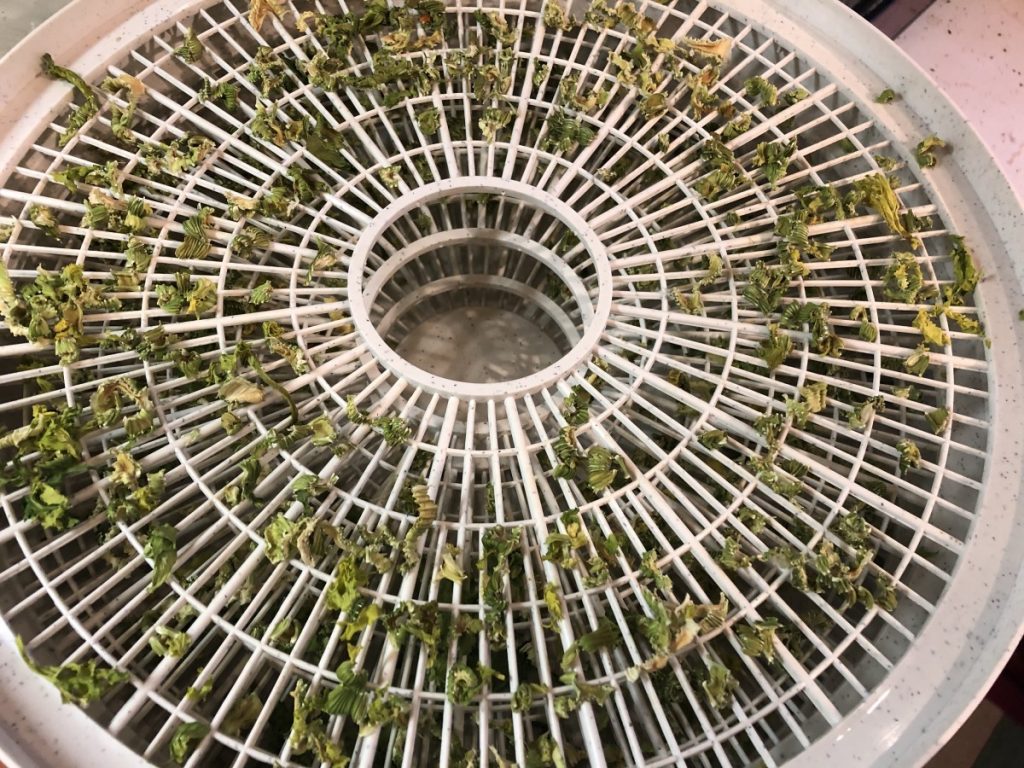
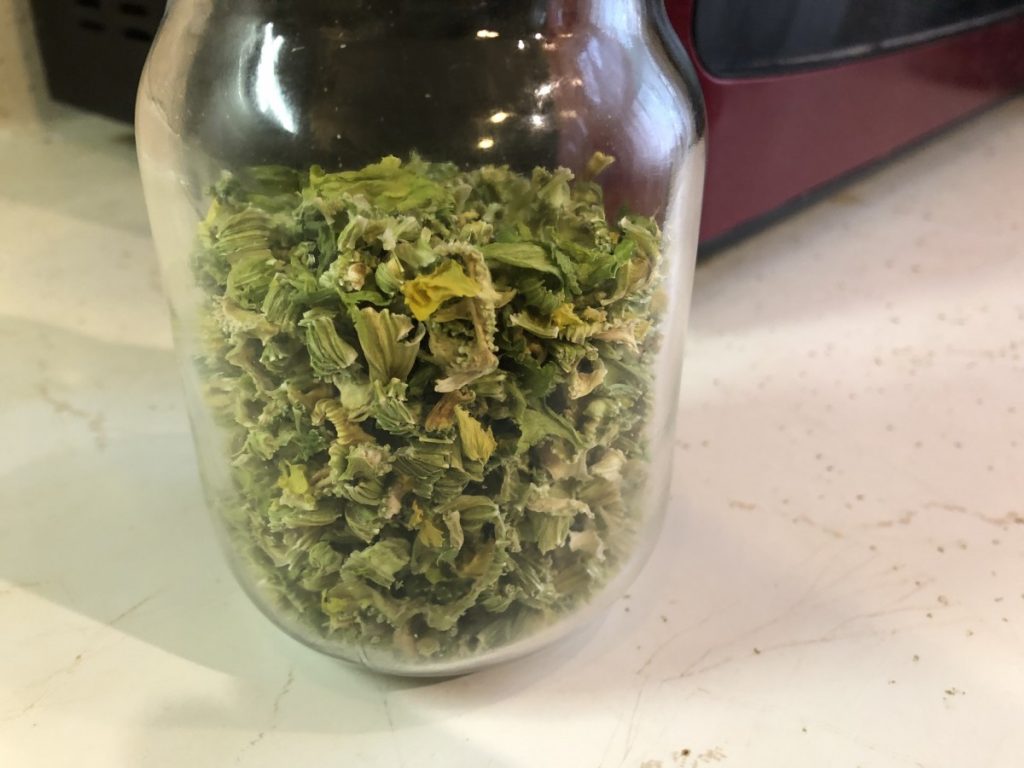
I started by dehydrating 2 large stalks of celery. I just washed them well, chopped them up and placed them on the dehydrator trays. They filled my dehydrator, but once dried, I had little more than a cup. I case you were wondering- an entire bunch of celery is a stalk- one individual piece of celery is called a rib. I can use my celery is soups, sauces and stews. I can also powder it up and use it in salad dressings, marinades, rubs and dips.
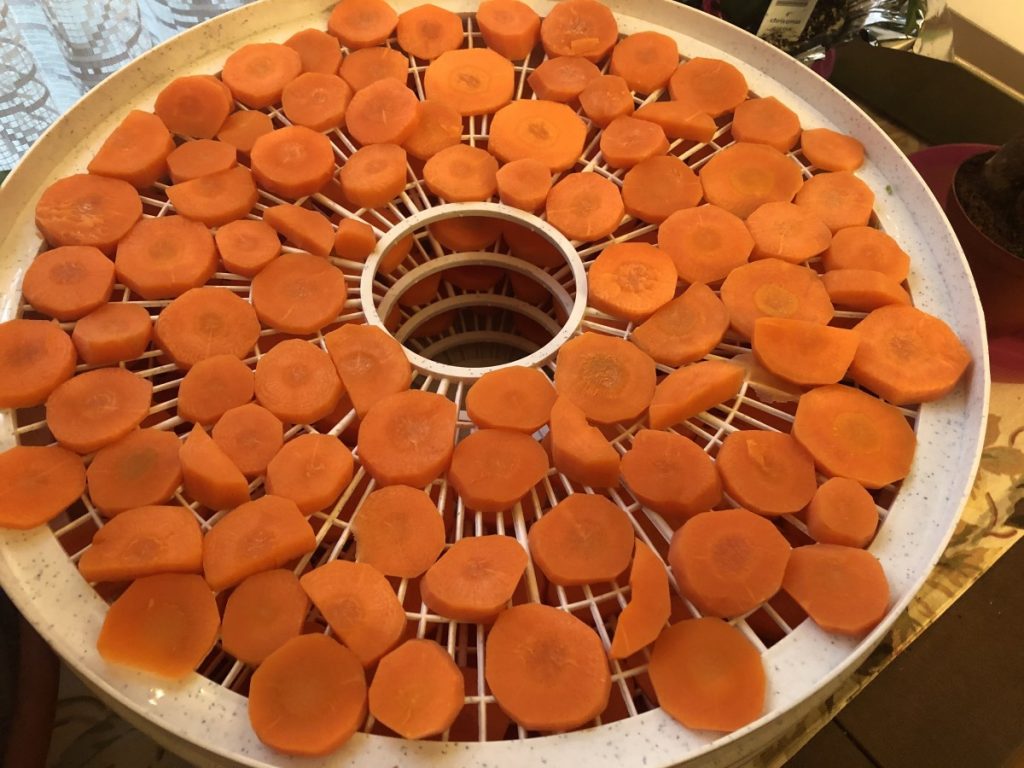
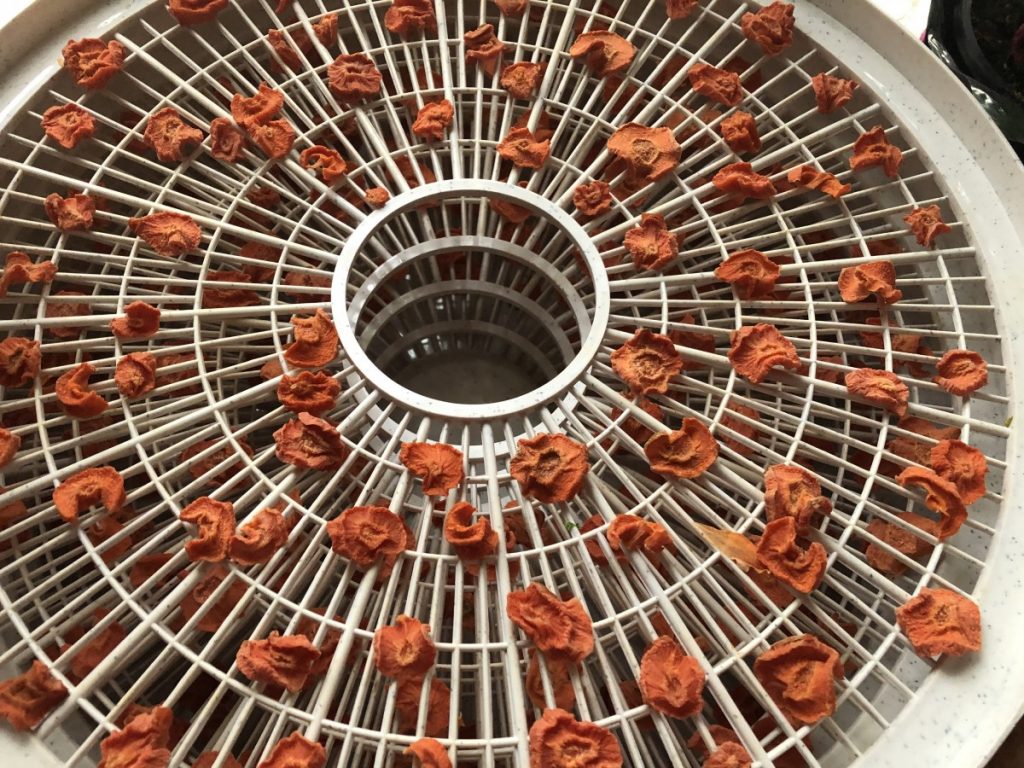
After dehydrating celery, I decided to dry some carrots. Unlike the celery, carrots needed to be blanched before dehydrating. That helps the carrots to hold their color better and gives you a better finished product. I peeled and sliced the carrots. Then I steamed them for about 6 minutes. Once cool enough to handle I placed the carrots in the dehydrator. Left them in over night and woke up to crispy carrot slices. These can also be added to soups, when making stock, stews, etc.
I preserve a lot of food by dehydrating it. Once you get over the initial investment in a dehydrator, the cost to dry food and to store dried food is pretty minimal. I got a very nice dehydrator for $30. Not a big investment at all.
Dried fruits are probably the most common home dried foods. Apples,
grapes, pineapple, strawberries and cherries are among my favorites. But
the dried vegetables are so useful and versatile, I enjoy them as much
as dried fruits. I think you will, too.
Drying Vegetables
Most vegetables should be dried at the lower range if you have an adjustable thermometer on your dehydrator-around 125-degrees. Important to know with vegetables, is that some of them need to be blanched first. Blanching is just steaming the vegetables for a few minutes and draining, if needed, before drying. Blanching kills certain enzymes, prevents browning and assures a better end product.
Vegetables that need blanching include green beans, cabbage, carrots,
potatoes, greens, winter squash, corn and beets; this is not a complete
list, but a good start.
Vegetables that do not require blanching include onions, celery,
mushrooms, peppers, tomatoes, spinach, zucchini, cucumbers and garlic
and also herbs.
Broccoli and cauliflower do not dehydrate well.
Tomatoes are probably the best vegetable to dry for the home gardener and cook. They are so easy to make and so tasty. Just cut plum tomatoes in half and scoop out the seeds. Lightly spray the trays with non-stick spray and place the tomatoes cut side up for the first 12 hours. Turn them over after that until they are dried. I like them pretty crispy, so I dry them thoroughly. Still, just to be safe, I keep them in the freezer to keep their color and flavor longer. After a year tomatoes will darken if stored at room temperature. Larger tomatoes can also be dried. Just cut them in slices and squeeze out the seeds. Cherry tomatoes are just cut in half and squeezed to get out the seeds. With small cherry tomatoes I just make a cut large enough to get out the seeds and leave them whole.
How do you use them?
Veggie chips-zucchini and cucumber slices can be used instead of chips in dip.
Powders- Tomatoes, celery, onion, pumpkin and garlic can all be
powdered and used to flavor soups, stews sauces, cheeses, dips and more.
I add powdered veggies to pasta dough. Mushroom powder is one of my
favorite ingredients.
Reconstituted as fresh- potatoes in casseroles are wonderful. Corn, onions and carrots all re-hydrate exceptionally well.
Dips- Peppers, onion and celery all add great flavor.
To thicken sauces- Shredded zucchini, peppers, onions, celery and tomatoes all work well this way. If you want a lower carb or gluten free alternative to thicken a sauce, dehydrated veggies, especially in powder form, work great.
Soups and Stews- almost any dried vegetable is used this way. Easy to just let them simmer together until tender and all their flavors will enrich your stock
Chowders- Corn and potatoes are great in these dishes
Dried vegetables are best stored in a cool, dry place- I often freeze or refrigerate them for best shelf life.
Vegetables in photo: Starting left with bright green and going clockwise: Celery, potatoes, red peppers, mushrooms, carrots, cucumbers, onions and tomatoes. In the center- mixed sweet peppers.
Part of the challenge of living off of just the food you already have- is knowing what food you actually have. I think I have a pretty good idea already. I inventory my pantry every year. I also have a freezer that needs to be manually defrosted a couple of times a year. That really helps me to stay on top of what I have and what I don’t have.
Even then, I sometimes get a surprise or two. I went through my pantry yesterday to do an inventory. I am sure there was a reason I bought garbanzo bean/fava bean flour. I don’t recall it at the moment, but there it was in my cupboard. It has now been moved to the front and will be used in some dish in the near future. Or perhaps a friend who uses it will speak up and take it off my hands.
I also started keeping “like” things together in my pantry. Canned fruits and jams together, condiments and olives in another area. Baking supplies all roughly in the same area. Helps to find things, but also to keep an eye on what you have plenty of, and what you need.
Expiration Dates
When you do an inventory, be sure to look at expiration dates. Move the older food to the front of the cupboard, so it will be used first. Expiration dates on canned goods are not the indicator of whether the food is still OK to eat. It will just let you know which can of black beans is older. A lot of factors will determine if the food is still safe.
First, the expiration dates on canned goods are kind of meaningless. Canned goods last for years and years (if properly stored). Manufacturers are required to put dates on canned goods- so they do. They use dates that are well before when the food might go bad.
Second, how the cans were stored is a much bigger factor in whether the food inside is still safe to eat. Cans stored in a damp basement, or a too hot garage are not going to last as long as canned goods stored in a cool, dry place. Rust on the outside of a can is a warning sign that the can has not been properly stored or is too old. Obviously, bulging cans should be disposed of.
Third, the food may still be safe to eat, but quality goes down over time. Think of expiration dates on cans, not so much as a date for when the food is unsafe, but a time when the food may start to lose some of its flavor and color. You can safely eat the can of peaches that “expired” six months ago, but they would be a little better looking if eaten sooner.
Taking Stock
Last year I had to replace my refrigerator. I cleaned out both the fridge the freezer while waiting for my new fridge to arrive. When I was cleaning out my freezer, I found a lot of ginger root. A whole lot of ginger root. Seems about every time I would go to the Asian grocery store, I bought more. Don’t get me wrong. I love ginger and use it frequently. But this was well over a pound of ginger. I haven’t bought any ginger all year- and I have used up quite a bit of my stash.
It’s a good idea to take stock, every now and then. Do an inventory of what is in your cupboards and in the freezer and fridge. It will help to reduce food waste in the long run. Use what you can, and donate what you won’t. If some things need to get tossed, then toss them. I hate food waste, but don’t want anyone to get sick from eating food that has been around too long.
My goal, as I go on the adventure to skip the grocery store for a month (or longer?) is to learn something more about how to reduce food waste. Maybe a better way to keep on top of the foods I have. Better ways to keep produce fresh, easier ways to keep an eye on the inventory. I will also need to get creative the longer the challenge continues.
More to come. Thanks for all the feedback on social media yesterday. This is going to be a lot of fun.