Cranberry Orange Scones

I make scones pretty often. There is nothing quite like the taste of fresh-baked scones. Plus, baking them makes the house smell wonderful.
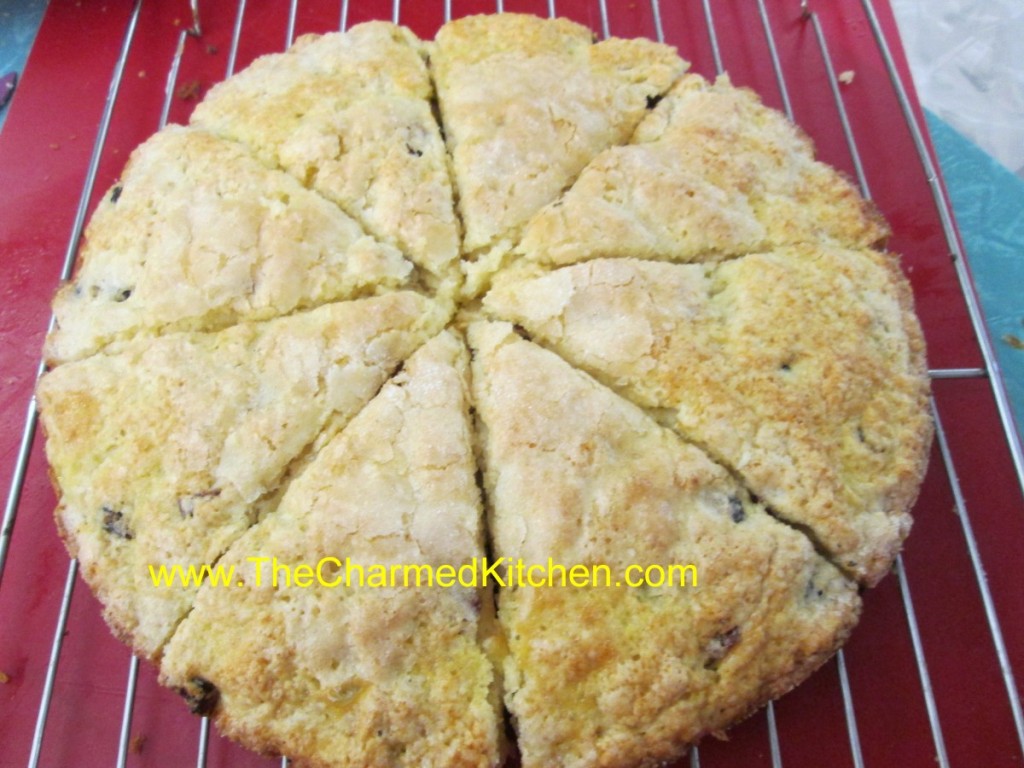
These scones are shaped by pressing the dough in a round cake pan, then cutting into wedges before baking.
They come out looking great and tasting great, too. If you don’t have buttermilk just add a little lemon juice to regular milk. I actually used half and half instead of milk, and added 1 tablespoon of lemon juice to the half and half. It worked great.
Perfect breakfast for this week. Serve warm with butter and jam.
Cranberry-Orange Scones
2 c. flour
4 T. sugar
2 t. baking powder
1 t. baking soda
1 t. grated orange peel
½ t. salt
¼ c. butter
1 c. dried cranberries
2/3 c. buttermilk
1 egg
Extra milk and sugar, for topping
Preheat oven to 425 degrees and lightly grease a baking sheet. Combine dry ingredients in medium bowl and cut in butter to resemble coarse crumbs. Stir in cranberries. Beat together milk and egg and add to flour mixture, stirring with fork until just coming together. Turn onto floured surface and knead 5-6 strokes or until ball of dough holds together. Transfer dough to prepared sheet and with floured hands, press dough into an eight-inch circle. I place dough in floured 8-inch cake pan, then invert onto the baking sheet- for a nice, even circle. With a sharp, floured knife cut dough into 8 wedges. Brush top of dough with a little extra milk, then sprinkle tops with a bit of sugar. Bake 14-16 minutes. Makes 8.
Dough can also be patted out on work surface and cut into circles or pressed into a square and cut into smaller squares.
Mom, Dinah Shore and the Upside Down Turkey

I thought I’d share how I came to roast my turkey breast side down. I must say, there are a number of ways to roast a turkey and have it come out nice and juicy.
I have no objection to any way you like to cook your bird including, but not limited to: frying, wrapped in bacon, cheesecloth wrapped, spatchcocked, sous vide etc. Stuffed, un-stuffed, brined are all OK by me, if that works for you. I have found over the years that cooking a turkey is a very personal decision, and folks get pretty passionate about how they cook their bird.
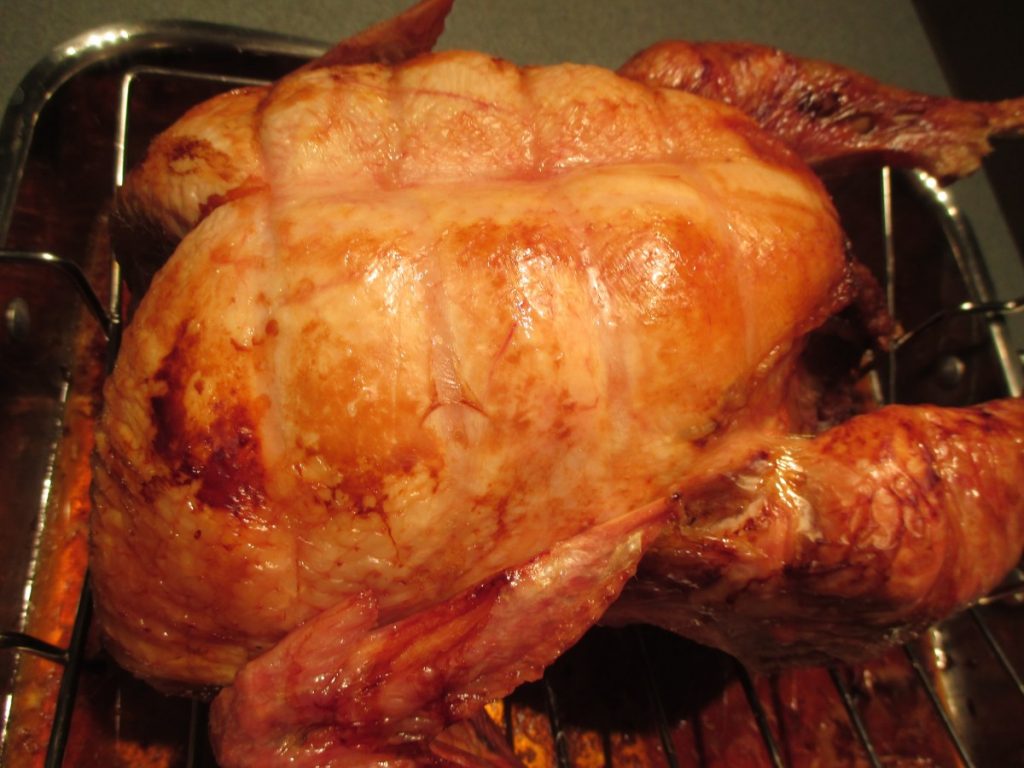
Many years ago a singer named Dinah Shore had a TV show, which my Mother really liked. Dinah, besides being a singer, liked to cook. She gave her turkey cooking tip one time on her show. She said she roasted her turkey breast side down for most of the time. The theory is that if the bird is breast side down the juices will flow into the breast- which eliminates the need to baste. It also slows down the cooking time for the breast- so it comes out cooked at the same time as the dark meat.
My Mother was intrigued, to say the least. She talked about it, a lot, leading up to Thanksgiving. We used to get a really big turkey and my Dad has his doubts about how easy turning over a hot, partially cooked turkey, would be. Mom was adamant. So it was that that Thanksgiving my Mom put her bird in the pan, on the rack, breast side down. She was excited and nervous at the same time.
Let’s face it- the turkey is the star of the meal and if it didn’t work it would be a disaster. But Mom trusted Dinah and they went ahead with this radical new plan. After about 3 hours of cooking, maybe a bit less, they managed to get the turkey turned over and returned it to the oven. Mom would look pensively through he oven window. I think giving birth was easier on her.
Well, in the end it worked out great. The bird was juicy and evenly cooked. No basting, so less work. She was delighted that she had held to her plan and had not been persuaded to cook it like before.
So every time I cook a turkey I cook it breast side down. How long I roast it that way depends on the size of the bird. Normally about 2 hours- because I am roasting a smaller turkey. I always remember my Mother when I cook it that way. I remember that first breast side down Thanksgiving and every one after that. Mom always was delighted- like the first time- and she always mentioned Dinah Shore.
Happy Thanksgiving to you all. May your turkey be juicy and most importantly, may you get to spend time with the people you love. I’ll be with family and I’ll think about my Mother and Father – and Dinah.
Cranberry-Raspberry Sauce

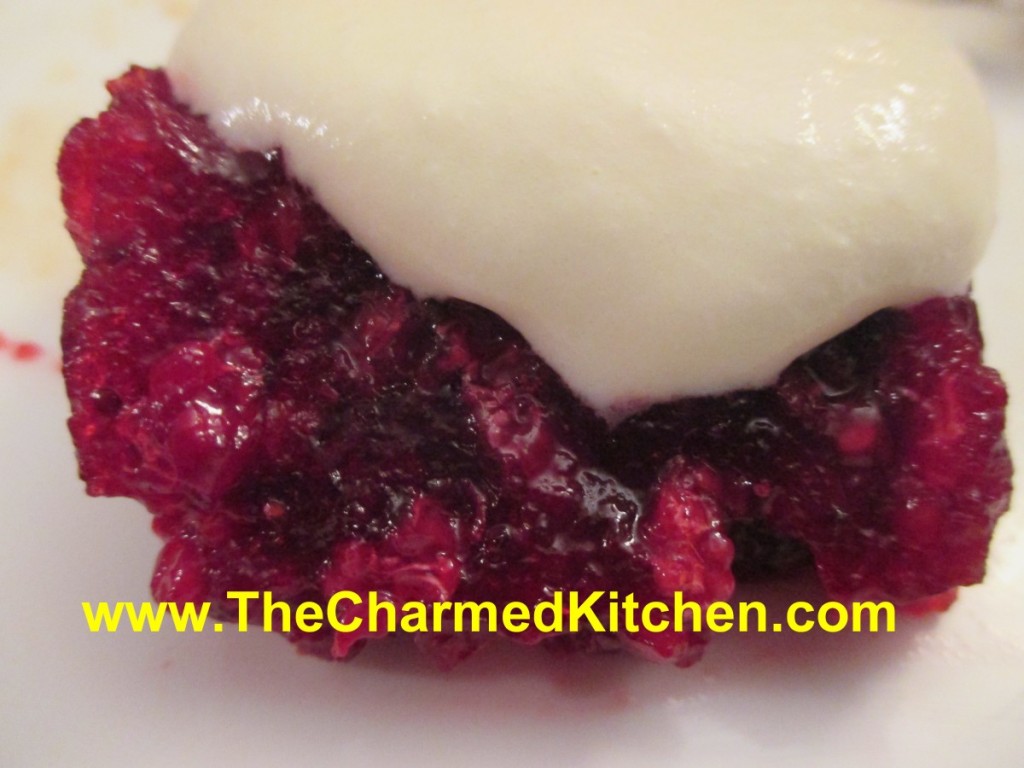
If you are looking for a fun and tasty variation for the usual cranberry sauce this Thanksgiving, I might suggest this cranberry and raspberry version.
The raspberries add a great flavor to the dish along with the cranberries and orange juice. My family has enjoyed versions of this sauce every Thanksgiving for as long as I can remember.
The real secret however, is the dressing. It is a creamy, slightly sweet topping, made with a fruit juice custard and whipped cream. It really changes the whole dish into something special.
This might be the first time people ask for seconds on cranberry sauce.
Cranberry-Raspberry Sauce
12 oz. cranberries, rinsed and picked over
1 c. orange juice
1 T. grated orange peel
½ c. sugar, or to taste
12 oz. raspberries, fresh or frozen ( thawed, if frozen)
Combine all ingredients, (except the raspberries) in a saucepan and cook, stirring often, over medium heat. Cook until the cranberries burst and mixture thickens, about 25 minutes, stirring more often as mixture thickens. Reduce heat as mixture thickens, to prevent scorching. Stir in the raspberries. Cool and chill. Makes about 3 cups. Serve with the dressing on the side.
Dressing
2 eggs
½ c. sugar
½ c orange juice
½ c. pineapple juice
2 T. flour
juice of half a lemon
1 c. whipping cream, whipped
Combine all ingredients, except whipped cream, in a saucepan and cook, stirring constantly, until thickened. Mixture should coat a spoon. Cool and chill. Fold cooled mixture into whipped cream. Serves 6-8.
Pumpkin Pancakes


These pancakes make a wonderful breakfast for Thanksgiving morning- or any morning for that matter.
I want to be honest with you from the start. I made these pancakes with cooked butternut squash and not pumpkin. They were terrific. Many winter squash can be used just like pumpkin in cooking. The problem is that when I post a recipe as “squash” instead of pumpkin, people get confused. Perhaps they are thinking summer squash, like zucchini. Maybe the word pumpkin just conjures up a clearer image.
The pancakes were really good, and isn’t that what matters?
I make my own baking mix, and that is what I used as the base for the pancakes. You can just buy a mix, like Jiffy or Bisquick, if you prefer. The pancakes are light and fluffy, with a nice “pumpkin” flavor. I had them with warmed maple syrup, but they would also be nice served with powdered sugar or perhaps a fresh berry syrup.
Pumpkin Pancakes
2 c. baking mix – like Bisquick or Jiffy Mix – I make my own*
3 T. brown sugar
2 t. cinnamon
1 t. nutmeg
1 1/2 c. evaporated milk
1 c. pureed pumpkin or winter squash
2 eggs, beaten
2 t. vanilla
Combine dry ingredients in mixing bowl and set aside. Whisk together wet ingredients and stir into dry ingredients. Lightly grease a skillet and cook over moderate heat. Use about 1/3 c. of batter per pancake. Turn when edges appear dry. Makes 16.
*Chef Pastry Mix/ Biscuit Mix
8 cups sifted, all-purpose flour
1 c. powdered milk
1 c. powdered buttermilk
¼ c. baking powder
1 T. salt
2 c. shortening, butter or coconut oil*
Sift dry ingredients together 3 times. Cut in shortening, butter or coconut oil to resemble cornmeal. Keep in an airtight container. Store in a cool dry place and use within six months.
* I use coconut oil and store in the fridge. If you use butter or coconut oil- you have to keep in the fridge.
Classic Cheesecake

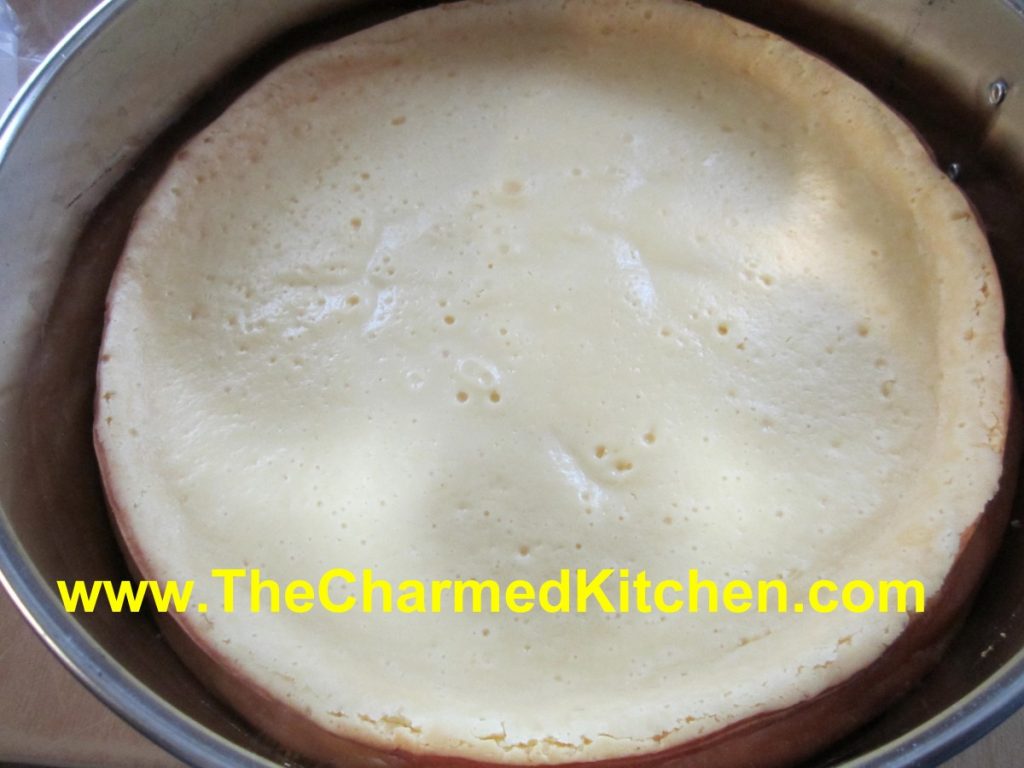
Cheesecake is one of the most popular desserts around, and for good reason. It is rich and satisfying in a way no other dessert can be. I make a lot of different cheesecake recipes, and this is one of my favorites. Simple to make, with all the creamy denseness you expect in a classic cheesecake. You can leave it plain to serve, or top with sour cream, as suggested in the directions, or top with fruit, preserves, shaved chocolate. Well, you get the idea. Have fun, get creative.
If you get cracks in your cheesecakes, try buttering the pan before baking. It will help to prevent the cheesecake from sticking to the pan, reducing cracks. Also, don’t over mix the eggs. Just stir them in.
Classic Cheesecake
1/3 c. butter
1 ¼ c. graham cracker crumbs
¼ c. sugar
2 (8oz.) packages cream cheese, softened
1 (14oz.) can sweetened condensed milk
3 eggs
¼ c. lemon juice
8 oz. sour cream
Preheat oven to 300-degrees. Combine butter, crumbs and sugar and press firmly into the bottom of a lightly buttered 9-inch springform pan. In a large mixing bowl beat cheese until fluffy. Gradually beat in milk. Stir in eggs and juice and mix well. Pour into prepared crust and bake 50-55 minutes or until set. Cool completely then spread sour cream over the top. You can omit the sour cream, or add different toppings.
Tips for a Better Cheesecake

I thought I’d share some tips with you for better cheesecake. Have you ever had a cheesecake crack? You did everything according to the directions and it comes out of the oven just fine and then- a crack. It happens a lot but it doesn’t have to. There is a simple solution.
I followed the rules, too. I did not over beat the eggs, sometimes I added a pan of water to the oven. There are recipes that call for leaving the cheesecake in the oven, with it turned off, to cool down slowly. All work sometimes- but then- a crack. You cover it up with pie filling or sour cream but it still bothers you- what did you do wrong?
I came upon the solution that has worked for me. It’s simple really. Cheesecakes puff up while baking and then as they cool down they deflate. They crack because they stick to the sides of the pan. As it shrinks it pulls on the cheesecake and a crack results.While cheesecake recipes almost never tell you to do this- I just spray the pan with a non-stick coating or brush with a little oil or melted butter. So simple. Every time I have done this the cheesecake puffs then shrinks while cooling and the result- no cracks.
Here are some more cheesecake baking tips.
- Let the cream cheese and eggs stand at room temperature for 30 minutes before using.
- Mix the ingredients until just mixed, don’t over mix as that also causes cheesecakes to puff up and then fall and crack.
- Use a springform pan so you can remove sides after baking.
- Either butter the sides of the springform pan or loosen the sides as soon as it comes out of the oven to prevent cracks as the cake cools.
- Place springform pan on baking sheet or pizza pan to catch any drips.
- Keep oven humid during cooking to reduce cracking. Just place a pan of water on a lower oven rack for recipes that are not already using a water bath.
- Let baked cheesecakes cool down slowly. Cool on a wire rack and remove sides when the recipes specifies.
- Test for doneness near the end of the baking period by gently shaking the cheesecake. When fully cooked a 1-inch section in the middle will jiggle slightly. This area will be 2 inches wide in a sour cream recipe. This soft spot will firm up after cooling down. Knife tests do not work on cheesecakes because the knife will cause the cake to crack and cakes including sour cream will always test undone even when fully cooked.
- Stored cooled cheesecake in the refrigerator covered with plastic wrap or an inverted bowl to prevent drying out and also to keep it from picking up odors. Cheesecake will keep for up to 3 days.
- To freeze, place the cooled whole cheesecake or cheesecake slices in the freezer unwrapped. Leave in until partly frozen and then wrap tightly in freezer wrap. Use within a month for best flavor. Thaw in the refrigerator. Loosen wrap, but keep cake covered during thaw.
Bonus Tip: Don’t be afraid to play around with recipes. You can interchange crust recipes or add fine chopped nuts to a crust. Experiment with flavorings. Try using mint, lemon, almond, chocolate and nut flavorings to add a little zing to a favorite recipe. You can also decorate your cheesecake with powdered sugar, cocoa, fruit, nuts, candies, shaved chocolate…
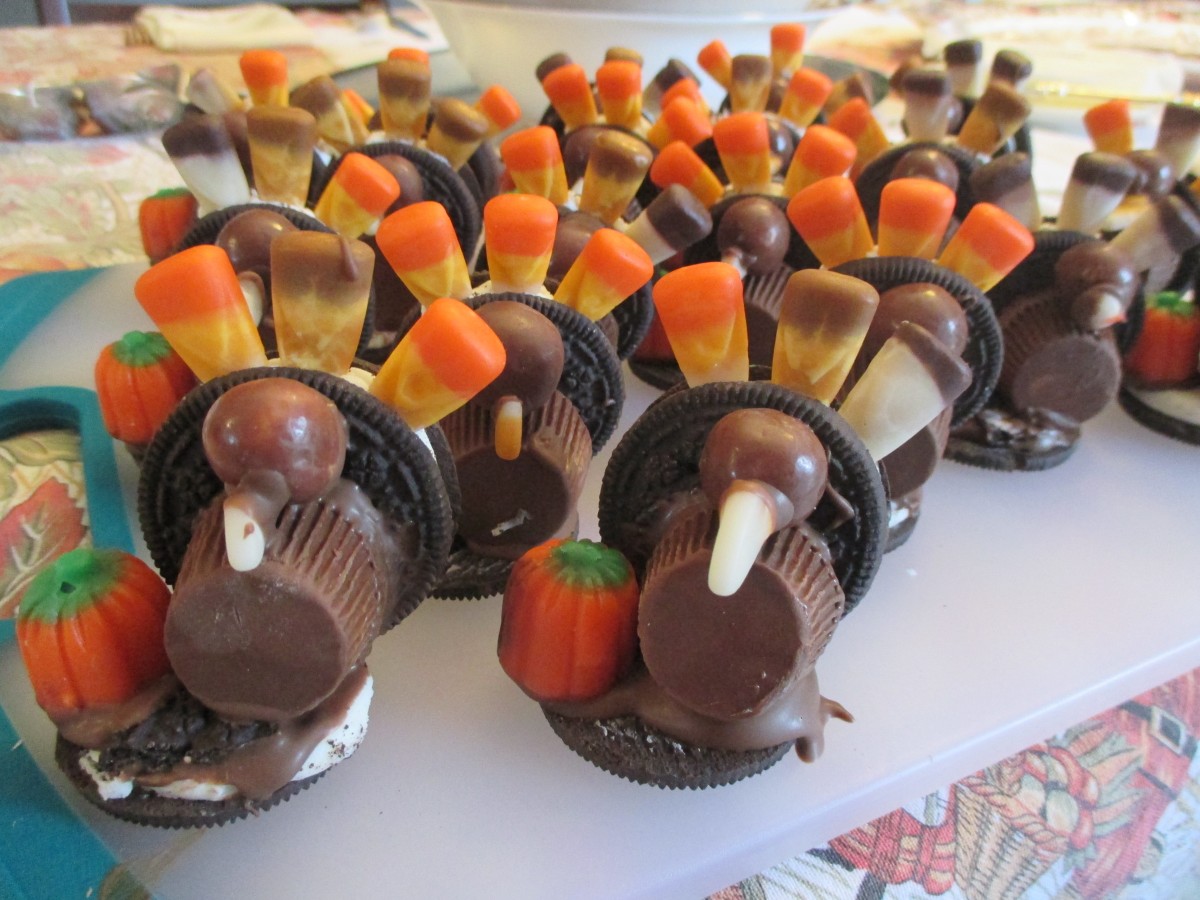
Candy Turkeys


Every year, I spend the day before Thanksgiving making some special treat or craft with my niece, Elia. One year we made these cookie “turkeys”. She liked making them so much we are making them again this year. They are really easy to make, and since there is no baking involved, you don’t tie up the oven if you need it for other things, like maybe a real turkey. Here are the ingredients you will need. We did them sort of assembly line fashion, because Elia wanted one for each person’s place at the table.
Candy Turkeys
chocolate sandwich cookies
candy corn
mini peanut butter cup
malted milk balls
candy pumpkins
melted chocolate
To start, place a cookie on your work surface. Affix a peanut butter cup, for the body. with a little melted chocolate. Place a malted milk ball on top of the peanut butter cup, using a little more melted chocolate to make the head. Once the chocolate hardens a little break off the tip of a candy corn and affix with chocolate to make the beak. Stick a few candy corn between the cookies- into the frosting layer- for the tail. Open up a cookie and use a little more chocolate to stand up your turkey on the frosting surface- Elia wanted them to be standing on snow. Or you can use a whole cookie, if you prefer. Place it off center, so you have room for your pumpkin. Let it harden for a minute, then add a candy pumpkin, using another drop of melted chocolate.

Elia hard at work
She made quite a few
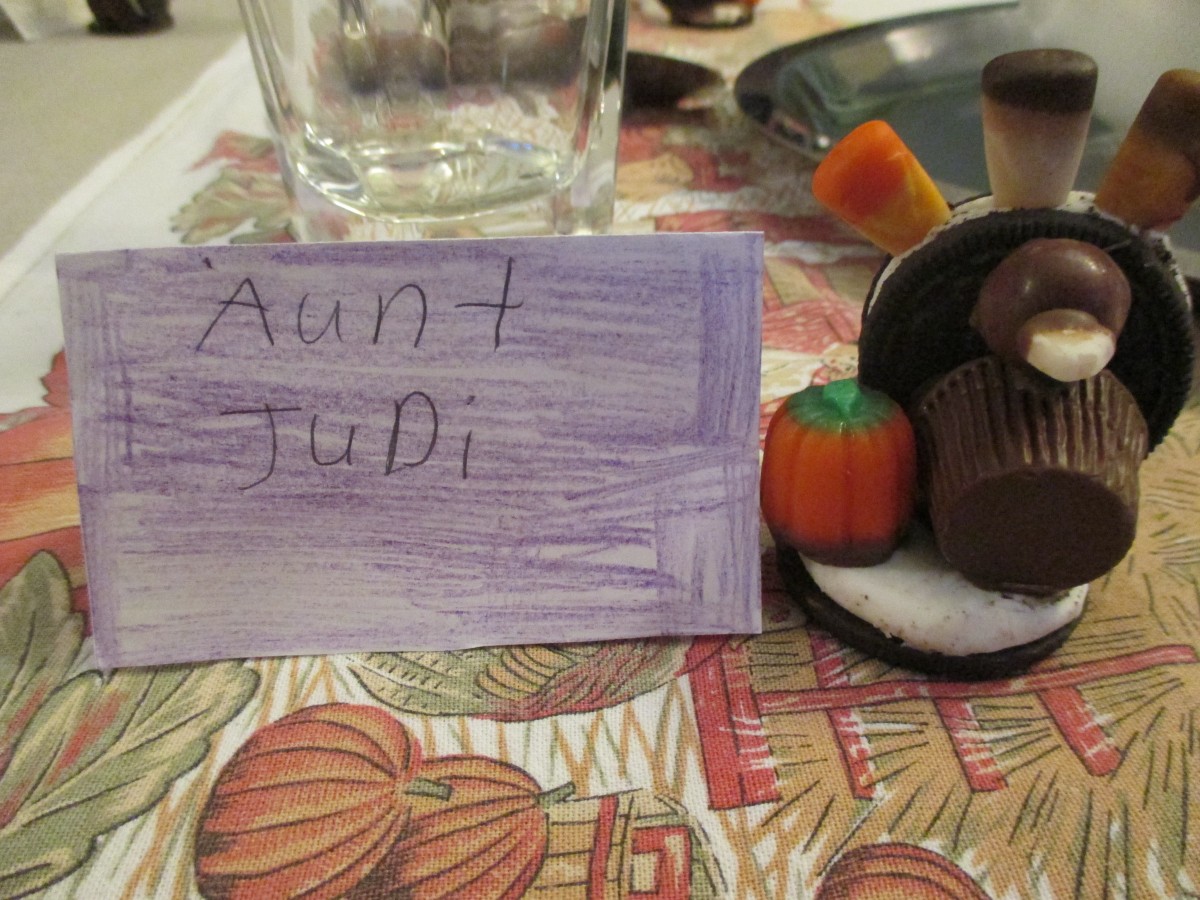
My place at the table
Mom’s Pumpkin Squares

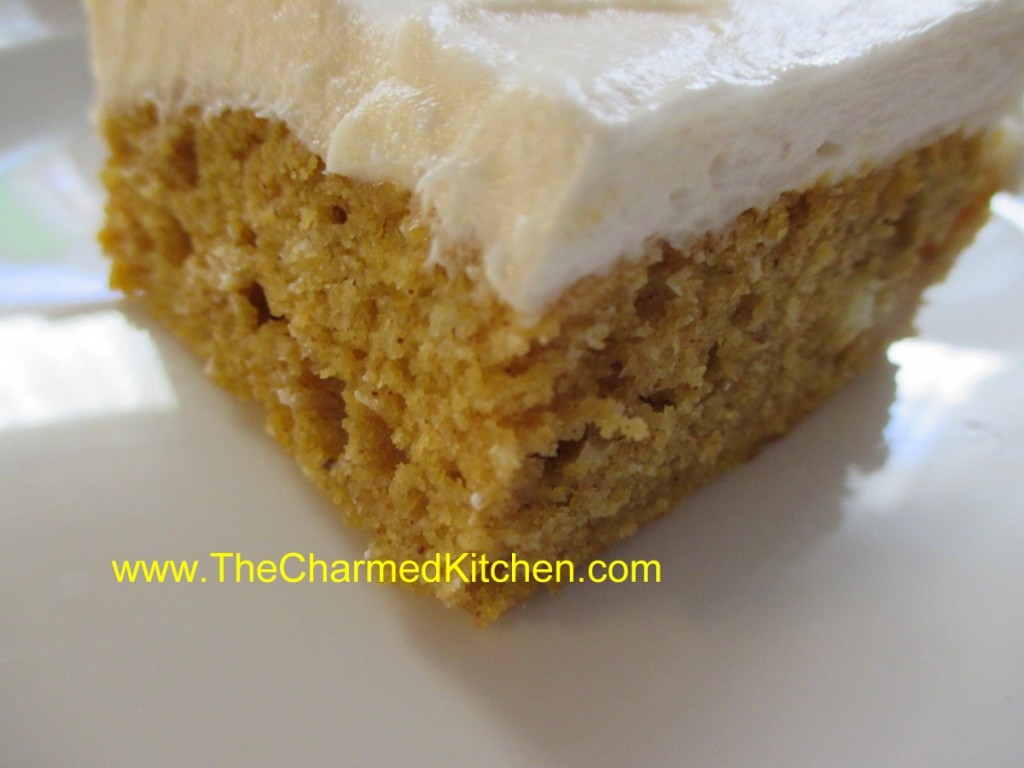
This recipe has been part of our family for years now. My mom made them for Thanksgiving every year- and I continue that tradition. Like my mom, I use fresh (or frozen) cooked pumpkin or winter squash. My mom didn’t care much for the taste of canned pumpkin. She would cut up the Halloween pumpkin, cook it, puree it and freeze it- so she could make pumpkin squares anytime she wanted.
The original recipe came from Bisquick, but it had 2 cups of sugar in it. My Mother’s sensibilities kicked in and she cut the sugar down to one cup. Great move on her part. The cake is still plenty sweet with less sugar.
It mixes and bakes up in no time. I normally top it with cream cheese frosting, but it would be good with a simple powdered sugar glaze, a buttercream frosting, or even just a dusting of powdered sugar mixed with a little cinnamon. It reminds me of a pumpkin roll, with out the rolling up part.
The texture is moist and tender and I think you’ll enjoy it as much as I do.
Pumpkin Squares
1 c. sugar
½ c. oil
16 oz. cooked pumpkin, canned, fresh (preferred) or frozen
4 eggs, beaten
2 c. biscuit mix (homemade or Bisquick or Jiffy Mix)
2 t. cinnamon
½ c. raisins, optional
Grease a jelly roll pan and set aside. Preheat oven to 350 degrees. Beat first 4 ingredients for 1 minute. Stir in mix, cinnamon and raisins. Pour in prepared pan and bake 25-30 minutes. Test for doneness with a toothpick. Cool and frost. Frosted cake must be kept refrigerated between servings.
Frosting
8 oz. cream cheese
2/3 c. butter
2 T. milk
2 t. vanilla
3 c. powdered sugar, or more
Beat together until smooth.
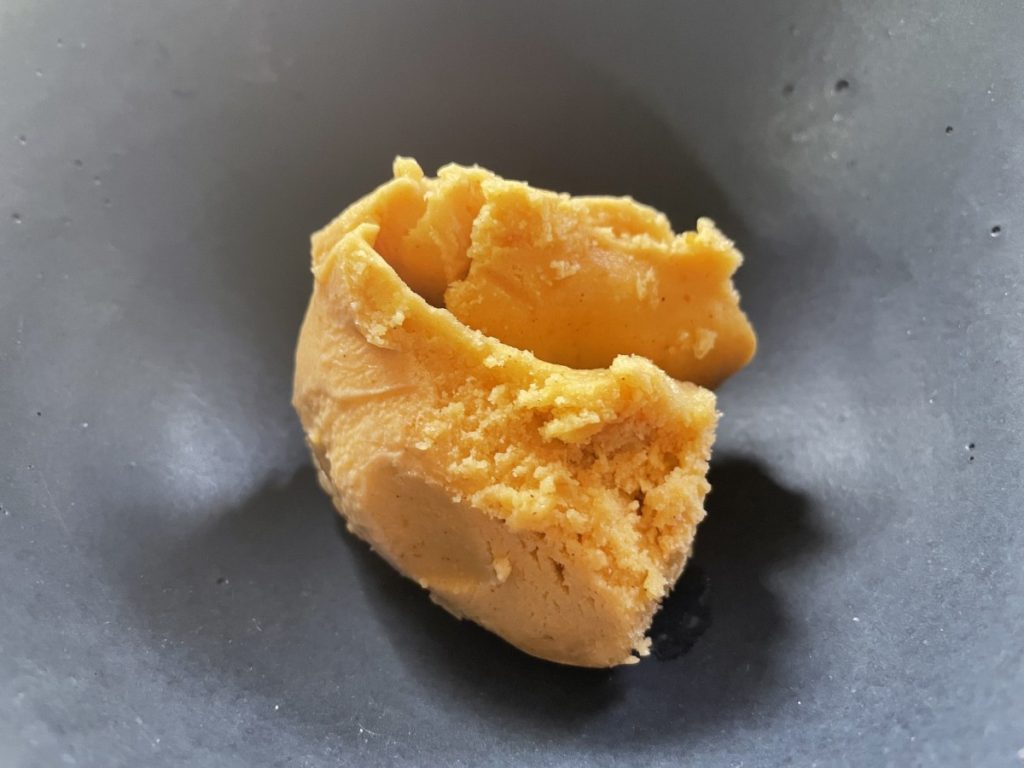
Malted Pumpkin Custard

This custard came about because my friend Joe brought me some malted ice cream one day. We started talking about malt. We wondered what malt was exactly and why did we like it so much.
Malt is a sprouted grain, usually barley, that is dried after it has sprouted. It had a unique flavor that is used in baking, beer making and desserts to name a few. For this recipe I used malted milk powder, which also contains some sugar and dairy.
You can also buy diastatic malt, which I use in bread baking and malt syrup. Let’s not forget how good malt vinegar is on fries.
So back to this recipe. I decided to make a custard base, using whole eggs. I like the texture of the final product. Plus, since I was using a fair amount of pumpkin, I liked the eggs for a little added fat in the recipe. The first time I made it, a couple of friends were over. I put it in the ice cream maker while we were having dinner. Both of them loved it. I knew I had to make it again.
I might have used more than a cup of pumpkin with the latest batch. I know it was at least a cup. It doesn’t matter a whole lot in the scheme of things, but the pumpkin flavor was more pronounced in the batch I made last night. I was fine with that.
I used pumpkin this time, but you can just as easily use other winter squash like butternut or Hubbard.
So here is the recipe. I think you’ll like it as much as we did.
Malted Pumpkin Custard
4 eggs
1 c. half and half
¾ c. sugar
1 c. cooked pumpkin puree – you can use other winter squash
½ c. malted milk powder
1 t. cinnamon
½ t. nutmeg
½ t. salt
In medium saucepan combine eggs, half and half and sugar. Whisk ingredients together. Cook over medium low heat, stirring constantly until mixture thickens and bubbles. Be careful not to scramble the eggs. If the mixture does get lumpy, you can press it through a fine strainer to remove lumps. Let the mixture cool down a little then stir in the remaining ingredients. You can add more or less seasonings according to your taste. When you freeze it, the flavors will be less pronounced. It will taste less sweet, too. Chill mixture several hours or overnight. Freeze using an ice cream maker for best results. Makes about 1 quart.
Cindy’s Rich Squash Rolls

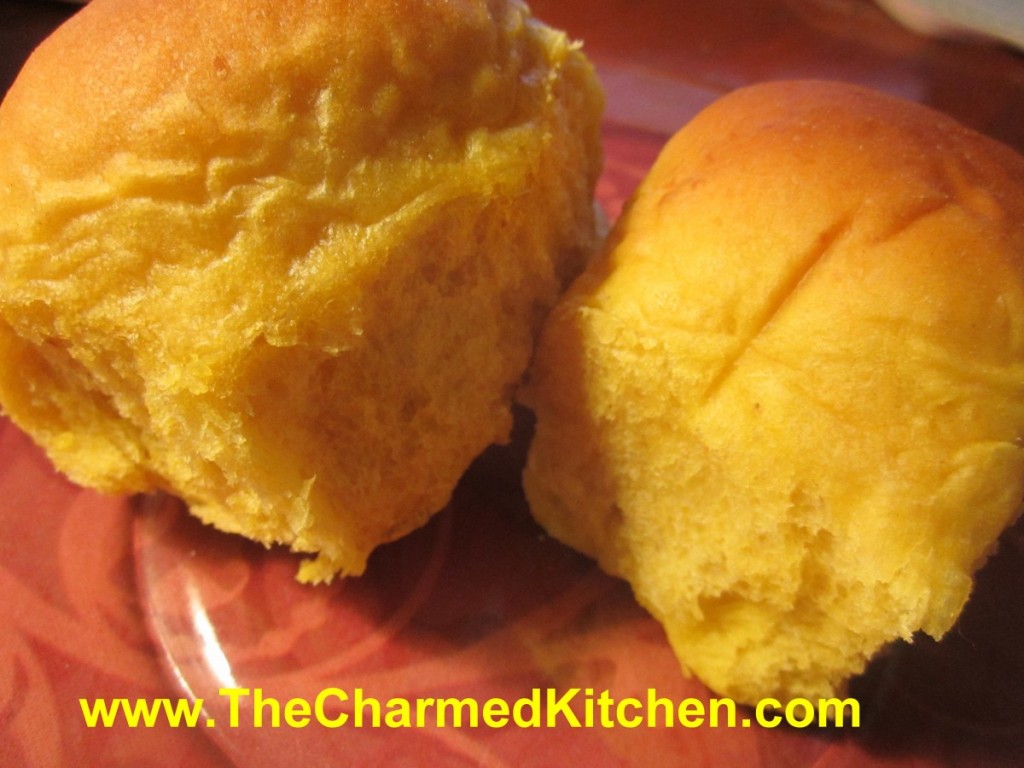
I love these dinner rolls. I think you will, too. The addition of squash is what makes them so special. The squash adds beautiful color to the rolls. It also creates a soft texture and an earthy sweetness.
These rolls are wonderful for any fall or winter dinner or holiday. They are especially nice for Thanksgiving.
We have them every Thanksgiving. My sister Cindy always makes them, and has been making them for years. They are rich, soft and sweet and make a perfect addition to the dinner table. Even with all the other foods at Thanksgiving dinner- you always save room for these dinner rolls.
While I use cooked butternut squash in mine, pumpkin could be used, as well as other winter squashes.
The recipe makes a pretty big batch. You can bake them, then freeze some for later use.
I love slicing them in half, and making mini turkey sandwiches with them the day after Thanksgiving.
Cindy’s Rich Squash Rolls
1 c. milk
4 T. butter
½ c. sugar
¼ c. brown sugar
1 t. salt
1 pkt. Yeast
4-5 c. flour
1 ½ c. cooked butternut squash, strained, or 1 (16oz.) can squash or pumpkin
2 eggs, room temperature
Scald milk and butter. Place sugar and salt in large bowl and pour in milk mixture. Cool to lukewarm. Add yeast and 2 cups of flour. Beat at medium speed with mixer for 2 minutes. Add squash and eggs and mix until smooth. Add flour gradually to form a stiff dough. Knead on floured board for 7-8 minutes. Place in a greased bowl, turning dough to coat evenly. Cover with a towel and allow to rise until doubled. Punch dough down and shape into rolls. Dough can be placed in a greased cake pan where they will touch each other as they rise making softer rolls. You can also place them in muffin tins, or shape into rolls and place on greased baking sheet for crispier rolls. Cover and let rise until doubled. Bake at 375 degrees for about 25 minutes. Butter tops while warm. Makes 2 ½ -3 dozen.
Variation: you can also add ½ t. ground nutmeg, 1-2 T. chopped chives, or 1T. parsley flakes for a little different flavor.


