Sweet Potato Salad
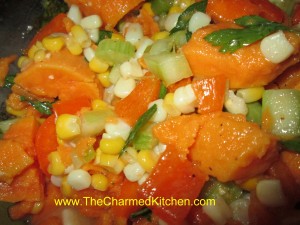
Since the Labor Day weekend is almost here I thought I would post one of my favorite salad recipes. The sweet potato salad is always a hit. It goes so well with grilled foods, too. I always make a double batch – it goes fast. The tricky part is not to overcook the sweet potatoes. They cook fast. Keep an eye on them and get the potatoes into cold water to stop the cooking once they are tender.
Sweet Potato Salad
3 large sweet potatoes
2 c. corn kernels, fresh off the cob preferred but frozen is O.K.
2 ribs celery, sliced
1 sweet onion, diced
1 c. sweet pepper, seeded and chopped
2-3 T. fresh parsley
1/3 c. oil
1 t. Dijon mustard
3 T. apple cider vinegar
1 T. lemon juice
1 clove garlic, minced
Salt and pepper to taste
½ c. cashews
In medium saucepan boil or steam potatoes until tender, about 20-25 minutes. Remove with slotted spoon and place in a large bowl of ice water. Add corn to saucepan and cook until just tender about 2-3 minutes. Drain corn and add to ice water with the potatoes. Once the vegetables have cooled down drain them and peel and cut the potatoes into bite-sized pieces. Place potatoes and corn in a mixing bowl with remaining vegetables. Combine remaining ingredients, except cashews, in a jar with a tight-fitting lid and shake well before pouring over the sweet potato mixture. Toss to blend and chill until ready to serve. Add cashews just before serving. Serves 6.
Cabbage with Apples and Pears
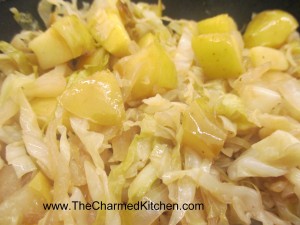
I really do like cabbage. I think it gets overshadowed by its botanical cousins like kale and broccoli. Cabbage is loaded with vitamins- including vitamin C – and is so versatile. I could eat cole slaw every day of the week. It also is great in salads, soups and casseroles. Since I was doing a class on cooking with apples and pears I decided to combine these three ingredients together in one dish. I went a little sweet and sour with this one, adding 2 different vinegars and a bit of sugar. You could certainly add bacon or perhaps some hot peppers for variation. I served it as is, but will often stir in some cooked noodles just before serving.
Sweet and Sour Cabbage- with Apples and Pears
2 T. oil
1 large onion, sliced thin
8 c. shredded cabbage
2 c. chopped apples and pears, peeled if desired
½ c. cider vinegar
2 T. balsamic vinegar
¼ sugar, or more to suit your taste
salt and pepper to taste
Sauté onion in oil until golden brown. Add cabbage and fruit and cook over medium high heat, stirring often until cabbage is wilted. Add remaining ingredients and cook until most of the liquid is evaporated. Adjust seasonings. Serves 4-6.
Note: You can serve this dish just as it is or you can add 8 oz. of cooked noodles when you add the vinegar for cabbage and noodles. Some people also like to make this dish with crumbled bacon or diced ham.
Pear Salad with Feta and Bacon
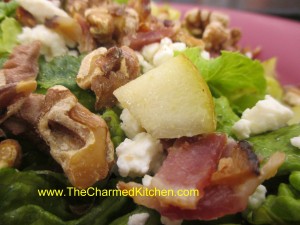
I made this salad for a cooking class the other day. It was, as always, well received. The sweetness of the pears with the salty cheese and smoky bacon work so well together. The addition of toasted nuts adds just that extra something that works in this dish. I used walnuts this time, but love this salad with pecans, too. Serve over greens for a great and easy meal.
Pear Salad with Feta and Bacon
8- 10 cups mixed salad greens, washed, dried and torn into bite-sized pieces
3 ripe pears, cored and sliced thin
¾ c. crumbled feta cheese
8 slices bacon, cooked and crumbled
½ c. toasted pecans, but other nuts can be used
5 T. cider vinegar
½ c. oil
Fresh chopped parsley
Salt and pepper to taste
In large bowl place greens. Add pears, feta bacon and pecans. Combine remaining ingredients in a jar with a tight-fitting lid and shake well. Toss over greens and divide into serving dishes. Serves 6-8.
Beet and Tomato Soup
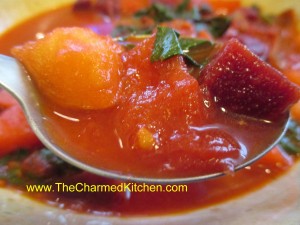
I had a bunch of fresh beets in my fridge and since it’s a little cool today I thought I’d make soup with them. I took inspiration from what I had on hand including onions, potatoes and tomatoes. Adding the tomatoes was a last minute decision and it worked out really well. The tomatoes added just the right amount of tartness/sweetness. I didn’t add the dollop of sour cream I would normally add. It would make a nice topper for the soup, though. Here is the recipe. It was a small bunch of beets so I just made a small batch of soup, but it could easily be doubled.
Beet and Tomato Soup
1 bunch beets, about 1 lb.
oil
1 onion, chopped
3-4 c. stock- I used chicken
1 potato, cubed
2-3 medium tomatoes, peeled and cubed
1 t. dill
salt and pepper to taste
Wash beets and trim leaving about 1 inch of the stem attached. Reserve greens. Place beets in a saucepan of boiling water and simmer for about 20 minutes. Remove beets and cool in cold water until you can handle them. While beets are cooling, cook onion in oil until tender. Peel and cube the beets. Add to the onions along with the stock, potatoes and tomatoes and cook until veggies are tender, about 15 minutes. Rinse and chop up about 1 cup of the beet greens and add them to the soup along with the dill. Cook until greens are tender, about 5 minutes. Adjust seasonings and serve. Serves 3-4.
Chocolate Covered Frozen Bananas
I found myself with some perfectly ripe bananas and I wanted to use them for a snack/dessert. I didn’t have much time so I decided to just slice them and freeze them. I melted some chocolate and dipped each banana slice in the chocolate then placed the slices on a baking sheet lined with wax paper. I had some home made granola so I sprinkled a little over the bananas for texture. These are a great snack for kids to make. Super easy and fast. Just popped them in the freezer and let them freeze for at least a few hours before serving. That is the only hard part of the recipe – waiting for them to freeze. You could also leave off the granola and decorate the slices with sprinkles, coconut or even a little coarse salt.
Ham and Swiss Calzones
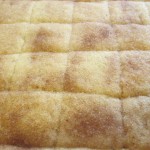
I wanted to make something for a friend who had done me a really big favor. I decided to make him these ham and Swiss cheese calzones. He is a really busy guy and I know he doesn’t always have time to cook. This was something he could take a long to work to reheat for later. All reports are they were greatly appreciated so I thought I’d share the recipe with you.
Ham and Swiss Calzones
4 c. flour
2 c. rye flour
2 T. sugar
2 t. salt
2 packages quick-rising yeast
2⅓ c. hot water
2 T. oil
2 lb. thin sliced ham- more or less
1 lb. sliced Swiss cheese
Thousand island dressing- recipe follows
1 egg , beaten
Set aside 2 cups of the all-purpose flour. Combine remaining flour with the other dry ingredients in a medium bowl. Stir in water and oil and gradually stir in enough flour to make a soft dough. Turn onto lightly floured surface and knead until dough is smooth and elastic, about 5 minutes. Cover dough and let rest 20 minutes. Divide dough into 12 pieces and roll one piece into a 8 -inch circle. In the middle of the dough place 1 1/2 ounces of the Swiss cheese, a spoonful of the dressing and 2-3 ounces of the ham. Brush the edge of the dough with water. Fold over the dough in half and press the edges to seal. Brush the edge again with water and roll the edge over again. It will give you a prettier look and seal the calzone better. Repeat with remaining dough and fillings. Place calzones on greased baking sheets- or on a baking sheet with a silicone liner or parchment paper liner. You will end up with 12 calzones in all. Only put 4 on one baking sheet. Cover and let rest 15 minutes while preheating the oven to 400 degrees. Before placing calzones in the oven brush with beaten egg and make a few slashes with a knife to help steam to escape while baking. I put 2 baking sheets in the oven at the same time and switch them halfway through baking. Bake in a preheated 400-degree for 20-25 minutes or until golden brown. If baking 2 at once switch them after 10 minutes or so. Cool slightly before eating. Serve warm and refrigerate leftovers. Makes 12.
If you want to use regular yeast use warm, rather than hot water. Also, allow a little more time for the dough to rise the first time, about 40 minutes. Everything else will work the same.
Thousand Island Dressing
Combine equal parts of ketchup, mayo and sweet pickle relish. You likely need at least a cup for this recipe. I made extra so the sandwiches could be dipped in extra dressing, if desired.
Asian Cabbage Salad
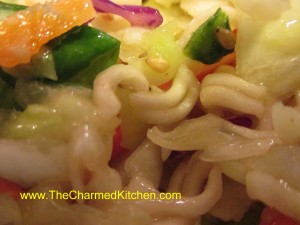
I’ve had this recipe for a long time. Having found myself with a bunch of ramen noodles I decided to make it for a cook out. I forgot just how much I liked it. It is simple to make. You just crumble up ramen noodles and place in a strainer. Pour over boiling water, let them drain and mix with the rest of the ingredients. It also calls for shredded cabbage, but you could cole slaw mix. I admit I am not a big fan of the seasoning packet, which is called for in the dressing. You can just leave it out and add a little extra salt. That’s what I did.
Asian Cabbage Salad
1 (3 oz.) package ramen style noodles
4 c. shredded cabbage, you could use cole slaw mix 2 c. baby spinach
4 green onions, sliced
2 T. sesame seeds
3 T. vinegar
2 T. sugar
2 T. oil
1/2 t. ground white pepper
1/4 t. salt
1/2 c. slivered almonds
Crush noodles slightly, place in colander. Pour boiling water over the noodles to soften slightly. Drain well. In mixing bowl combine the noodles, cabbage, onions and sesame seeds. For dressing in screw top jar combine seasoning packet from noodles* with remaining ingredients, except almonds. Put on lid and shake well to combine. Toss dressing over noodle mixture and refrigerate, covered, several hours or overnight. Toss in almonds just before serving. Makes 6-8 side dishes.
* If you don’t want to use the seasoning packet, just add some extra salt to the dressing or even some soy sauce to taste.
Corn Salad with Lemonade Mustard Dressing
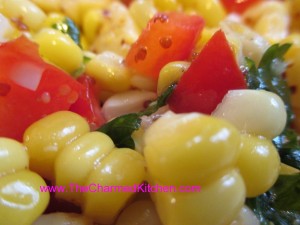
Continuing with my cooking with lemonade assignment I came up with a simple salad dressing. It’s only 4 ingredients and while I used it on this corn salad it would also be great tossed on a green salad or maybe a potato salad. I am always looking for new salad ideas. This is one I will be making again soon.
Corn Salad with Lemonade Mustard Dressing
6 c. cooked corn, off the cob
1 sweet pepper, seeded and chopped
1 small sweet onion, diced
½ c. chopped fresh parsley
1 recipe lemonade mustard dressing- recipe follows
Combine all ingredients in a bowl. Cover and chill at least an hour before serving. Serves 8.
Lemonade Mustard Dressing
½ c. oil
1/3 c. lemonade concentrate, thawed
2 T. whole grain mustard
1 t. hot pepper sauce, or to taste
1 t. salt, or to taste
Place all ingredients in a jar and shake to combine. Serve as a salad dressing on mixed greens or with assorted veggies.
