Cranberry Orange Scones
I make scones pretty often. There is nothing quite like the taste of fresh-baked scones. Plus, baking them makes the house smell wonderful.
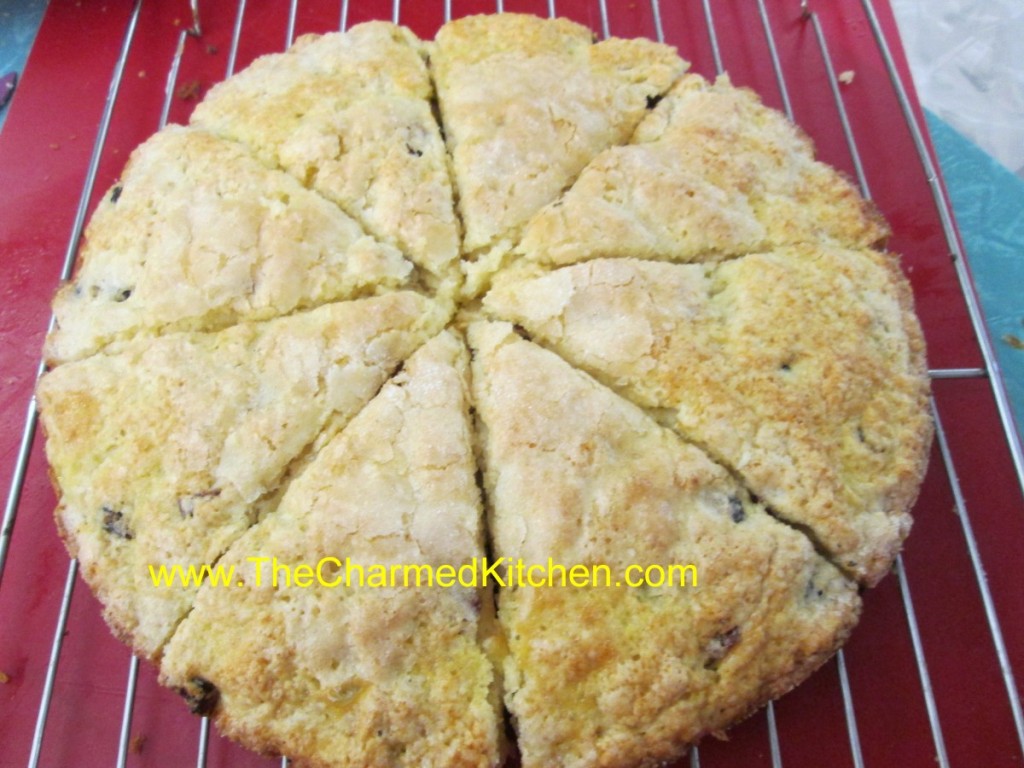
These scones are shaped by pressing the dough in a round cake pan, then cutting into wedges before baking.
They come out looking great and tasting great, too. If you don’t have buttermilk just add a little lemon juice to regular milk. I actually used half and half instead of milk, and added 1 tablespoon of lemon juice to the half and half. It worked great.
Perfect breakfast for this weekend. Serve warm with butter and jam.
Cranberry-Orange Scones
2 c. flour
4 T. sugar
2 t. baking powder
1 t. baking soda
1 t. grated orange peel
½ t. salt
¼ c. butter
1 c. dried cranberries
2/3 c. buttermilk
1 egg
Extra milk and sugar, for topping
Preheat oven to 425 degrees and lightly grease a baking sheet. Combine dry ingredients in medium bowl and cut in butter to resemble coarse crumbs. Stir in cranberries. Beat together milk and egg and add to flour mixture, stirring with fork until just coming together. Turn onto floured surface and knead 5-6 strokes or until ball of dough holds together. Transfer dough to prepared sheet and with floured hands, press dough into an eight-inch circle. I place dough in floured 8-inch cake pan, then invert onto the baking sheet- for a nice, even circle. With a sharp, floured knife cut dough into 8 wedges. Brush top of dough with a little extra milk, then sprinkle tops with a bit of sugar. Bake 14-16 minutes. Makes 8.
Dough can also be patted out on work surface and cut into circles or pressed into a square and cut into smaller squares.
Busha’s Sour Cream Coffee Cake
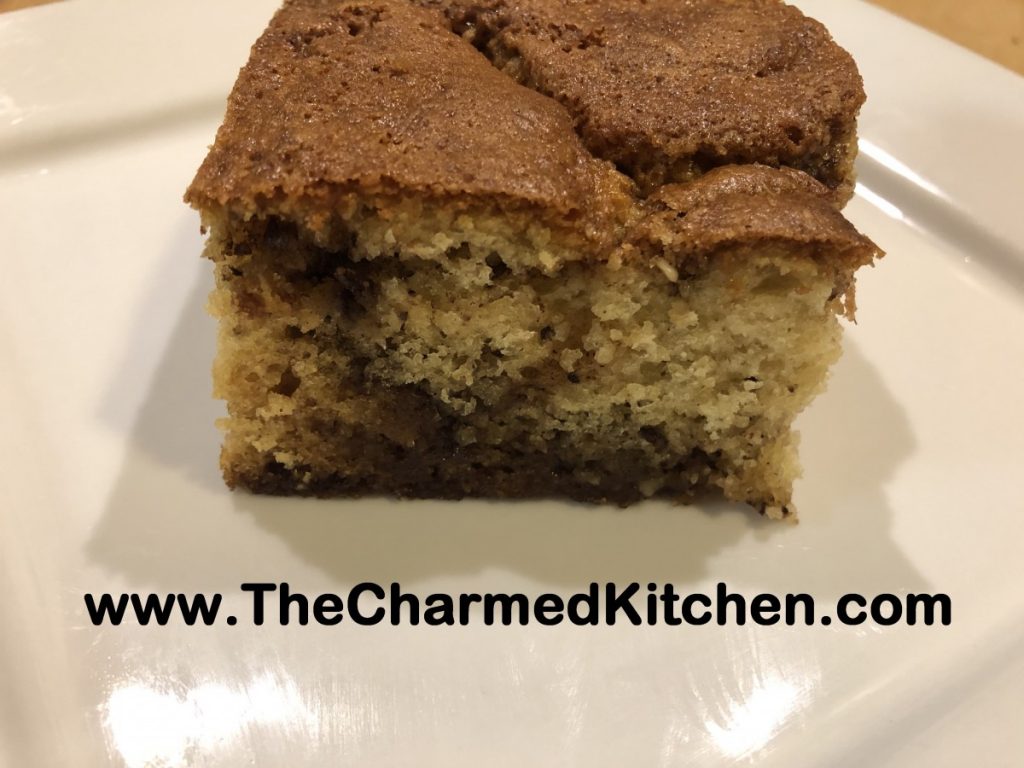
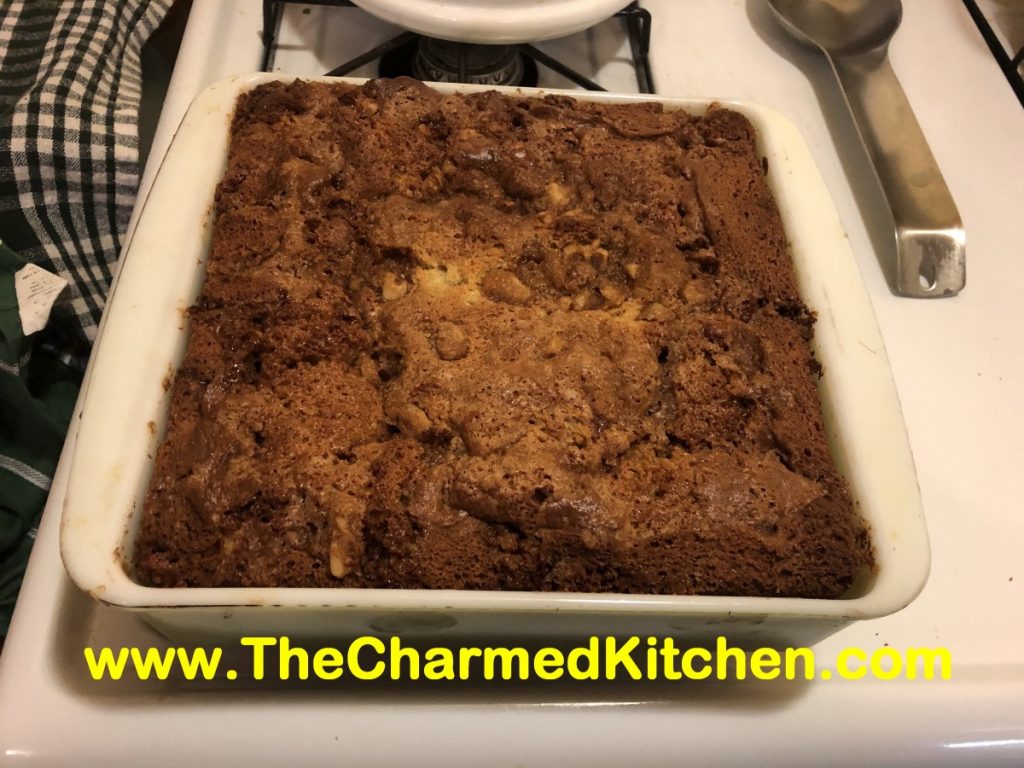
This is a rich, flavorful coffee cake. Sour cream helps to make the batter tender. Nuts, butter, brown sugar and cinnamon create a lovely filling that takes this cake to a whole different level. It is great with that morning cup of coffee or as dessert to end a lovely meal.
This was the first cake I can remember making from scratch with my Polish grandmother, my Busha. I was about 10 and I was spending the weekend with her. She didn’t have the recipe written down, so I wrote down the measurements and directions as we went. I still have that index card where I carefully wrote down everything. It will always be a sentimental favorite of mine.
She did use shortening in the batter. I use butter or coconut oil as a substitute. Use what suits you- the cake comes out just fine with any of those ingredients.
The filling always sinks to the bottom. That is why the pan is greased, then lined with wax paper. Makes it easier to get the cake out of the pan later.
So here is the recipe. Enjoy.
Busha’s Coffee Cake
1 c. light brown sugar
6 T. butter, softened
2 t. cinnamon
1 c. chopped nuts
3/4 c. sugar
1/2 c. butter, coconut oil or shortening
1 1/2 t. vanilla
3 eggs, room temperature
1 c. sour cream
2 c. flour
1 t. baking powder
1 t. baking soda
Mix first 4 ingredients together and set aside. Combine sugar and shortening until fluffy. Add vanilla and beat well. Beat in eggs one at a time. Stir in sour cream. Combine dry ingredients and add to egg mixture. Grease a tube pan or 9×9 inch square pan. Line bottom with wax paper. Pour half of batter in pan. Top with half of nut mixture, crumbling to spread evenly. Add remaining batter, spreading to smooth. Add remaining nut mixture and bake in a 350 degree oven for 45-50 minutes (tube pan), or 35-40 minutes (9×9 inch pan). Serves 10.
Recipes for Leftover Turkey
It is that time of year, when we find ourselves waking up to leftover turkey. Sometimes quite a lot of leftover turkey.
Of course, be sure to make stock from the carcass. Turkey sandwiches are always a favorite in my family.
There is a lot more you can make with the rest of the bird, though. Here are 10 fun and tasty ways to make the most of all that turkey.
I never get tired of turkey, but if your family does not feel the same way, these recipes could come in handy. Enjoy!!
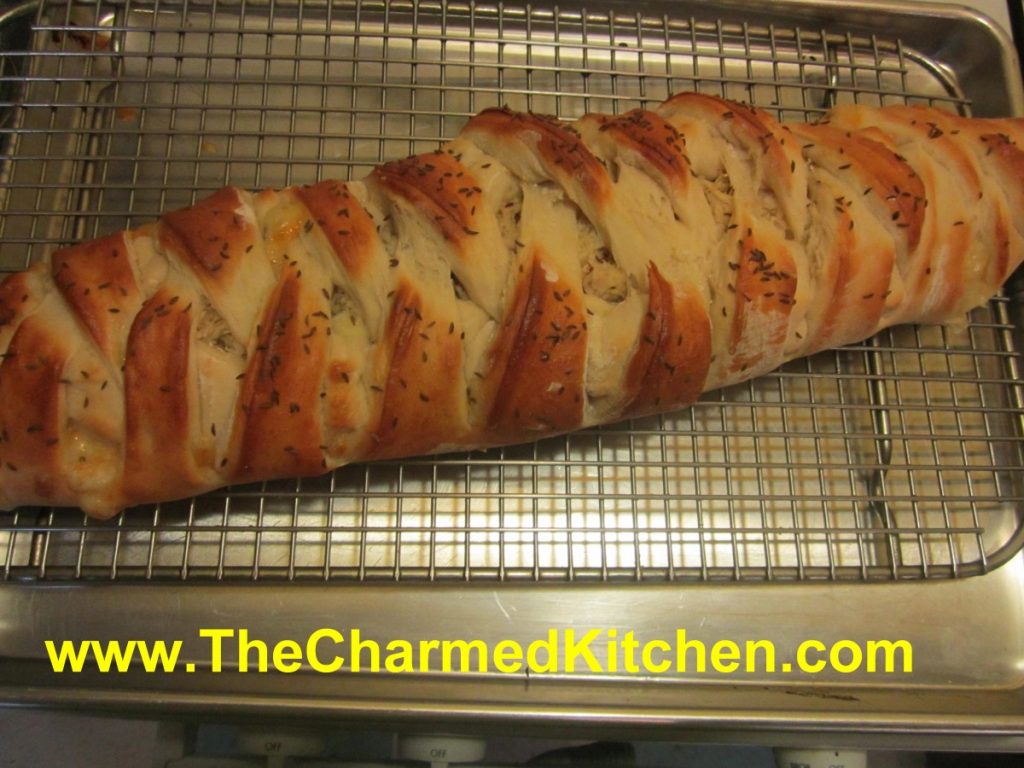
Turkey Reuben Loaf
3 ¼ c. flour
1 T. sugar
1 t. salt
1 package quick-rising yeast
1 c. hot water
1 T. oil
¼ c. thousand island dressing*
8-10 oz. thin sliced turkey
4 oz. sliced Swiss cheese
1 c. sauerkraut, rinsed and squeezed dry
1 egg white, beaten
Caraway seeds
Set aside 1 cup of the flour. Combine remaining flour with the other dry ingredients in a medium bowl. Stir in water and oil and gradually stir in enough flour to make a soft dough. Turn onto lightly floured surface and knead until dough is smooth and elastic, about 5 minutes. Roll dough into a rectangle about 16 x 8. Spread dressing down center middle of dough. Top with meat slices, cheese and sauerkraut. Cut one-inch wide strips of dough from filling to edge on both sides. It will sort of look like fringe. Alternating sides, fold strips up and over the filling at an angle. Carefully lift loaf onto greased baking sheet and place at an angle. Cover with a towel and place sheet on top of a roasting pan half-filled with simmering water for 15 minutes. Brush with egg white and top with seeds. Bake in a preheated 400-degree for 20-25 minutes or until golden brown. Cool slightly before slicing. Serve warm and refrigerate leftovers.
* You can make your own Thousand Island Dressing by combining equal parts of ketchup, mayo and sweet pickle relish.
Note: The variations for this bread are almost endless. Some favorite combinations are ham and Swiss with mustard, roast beef and cheddar, chicken, broccoli and cheese, Spinach with ricotta or feta and onions, pizza, assorted fillings. You get the idea. Use your imagination and have fun. Just be careful not to overfill, or the bread will be hard to move, use fillings that aren’t too runny and always use cold fillings.
If you want to use regular yeast use warm, rather than hot water. Also, don’t let dough rise over boiling water. After kneading cover dough and let rise 45 minutes. Punch down and assemble as in original recipe. Cover with a towel and let rise until dough looks puffy, about 40 minutes. Bake as directed above. These breads can also be frozen.
Turkey Tetrazzini
2 T. butter or oil
1 c. chopped celery
4 oz. sliced mushrooms
4 T. flour
1 1/2 c. chicken or turkey stock
1 c. half and half or milk
1/4 c. sherry
2 c. cooked turkey, cubed
4-6 oz. broken spaghetti, cooked
salt and pepper to taste
bread crumbs
butter
Parmesan cheese- optional
Heat butter or oil in pot and add celery and cook 3 minutes. Add mushrooms and cook 3 minutes more. Stir in flour and mix well. Add stock, half and half and sherry bring to a simmer- stirring often. Stir in turkey and pasta. Adjust seasonings. Place mixture in oiled casserole and sprinkle the top with bread crumbs and drizzle a little melted butter over the top. Add Parmesan cheese, if you like. Place in a 350 degree oven and bake until bubbly- about 25 minutes. Serves 4.
Turkey Noodle Soup
Oil*
2 onions, sliced
4 carrots, peeled and sliced
4 ribs celery, sliced
4 qts. Turkey stock
4-5 c. turkey meat, cubed
1 c. chopped fresh parsley
Salt and pepper to taste
Hot pepper sauce to taste
1 lb. wide egg noodles, cooked
Heat oil in soup pot and cook onions until starting to brown. Add carrots and celery and cook a few minutes more. Add stock and meat and simmer, covered, until veggies are tender. Add parsley and simmer 15 minutes longer. Adjust seasonings. Warm noodles and serve on the side so everyone can add as many noodles to their soup as they like. Serves 8.
* Since I had freshly made stock I used a little fat from the stock to cook the onions.
Turkey Won Ton Soup
1½ lbs. cooked turkey, about
1 head bok choy
3 T. hoisin sauce
1 clove garlic, minced
24 won ton wrappers
2 qts. Turkey stock
1 t. ginger
1 t. hot pepper sauce
Chopped green onions
Sesame oil
I used dark meat from the turkey, mostly. I minced enough to give me a cup of meat. The rest I cut into thin strips. I then took stems from the bok choy and minced enough of them to make 1 cup. Combine the minced turkey with minced bok choy, the hoisin and the garlic. This is the filling for your won tons. Slice more of the bok choy- using mainly the leaves, into thin shreds. This will go into the soup later, along with the strips of turkey. You should have at least a couple of cups of the shredded bok choy, but more is OK, too. To make the won tons place one on your work surface and spoon a rounded teaspoon of the filling into the middle of it. Moisten edge with water, fold in half and press to seal. I used round wrappers, but square wrappers are fine, too. I like the round ones, labelled for dumplings, because they are a little thicker. I get them at a local Asian grocery store. Repeat with remaining won tons and fillings until done. Bring stock to a boil and add the ginger and hot sauce. Add the won tons to the simmering stock. Simmer gently for 3-4 minutes, stirring occasionally, then add the strips of turkey and the shredded bok choy greens. Cook about 5-6 minutes longer. Finish soup with chopped green onions and a drizzle of sesame oil. Serves 6-8.
Turkey Chili
1 large onion, chopped
2 T. oil
2 ribs celery, sliced
1 sweet pepper, seeded and chopped
2 cans cannellini beans, drained and rinsed
2 cans lima beans, drained and rinsed
1 can ( 4 oz.) chopped green chilies
3-4 c. cubed turkey
2-3 c. stock- turkey or chicken
3 T. chili powder, or to taste
1 T. cumin, or to taste
Generous dash of hot sauce
Salt and pepper to taste
Fresh chopped cilantro
Toppings: Pick what you like. Some good toppers are shredded cheese, chopped green onions, salsa, sour cream or tortilla chips
.
In soup pot cook onion in oil until golden brown. Add the celery, peppers and chilies and cook 5 more minutes. Add the rest of the ingredients, except cilantro and bring to a boil. Turn heat down to medium and simmer until flavors blend, about 30 minutes but longer is fine. I usually cook it covered for 15 to 20 minutes and then remove the lid so it can thicken. Add the cilantro right before serving. Ladle into soup bowls add add toppings of your choice. Serves 6.
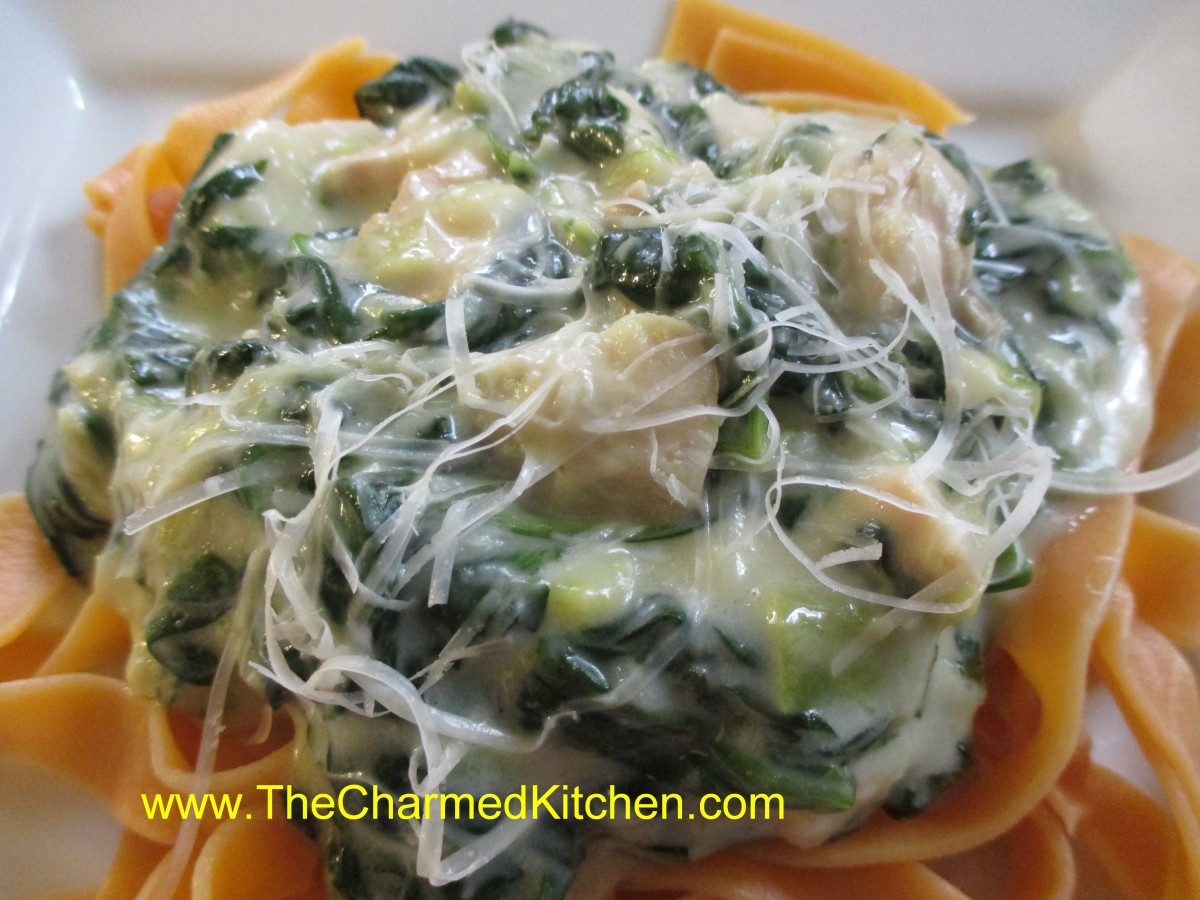
Turkey Florentine
2 T. oil or butter
1 large leek, cleaned, trimmed and chopped
4 T. flour
1½ c. stock – turkey or chicken
24 oz. fresh spinach, washed
¾ c. half and half- you could use milk instead
3 c. cubed cooked turkey
Salt and pepper to taste
2 t. hot sauce- or to taste
1 c. shredded Pecorino/ Romano cheese, plus extra for sprinkling on top
Hot cooked pasta
In large skillet cook leeks in oil or butter over medium heat until tender. Stir in flour and cook until smooth, but not brown. Add the stock and cook until mixture starts to thicken. Add the spinach and continue cooking, stirring often until the spinach is wilted. The spinach cooks down a lot- you might have to add it a little at a time to have room in the pan for all of it. As soon as the spinach is wilted add the half and half and the turkey and cook until heated through and bubbly. You might need a little more stock or half and half if the sauce is too thick for your taste. Season with the salt and pepper and the hot sauce. Stir in the cheese. Serve over hot pasta. Serves 4-6.
Turkey with Herb Dumplings
1 turkey thigh, cut off the bone and cubed
1 large onion, chopped
2 ribs celery, chopped
4 carrots, peeled and chopped
3 potatoes, peeled and cut into chunks
4 c. turkey stock
4 T. flour
salt and pepper to taste
1 c. baking mix- like Bisquick- I make my own
1/2 c. milk
2 T. chopped green onion
1 T. chopped parsley
1 t. dried basil
In Dutch oven or large pot, brown turkey thigh. Add the vegetables and brown them, too, turning to prevent burning. Add stock, cover pot, and simmer until veggies are tender, about 20 minutes. Season with salt and pepper to taste. Combine flour with some cold water or more stock until smooth. Add to the pot and stir well. Mixture will thicken. Meanwhile combine baking mix with milk and herbs. Drop dumpling batter by tablespoonfuls over the turkey mixture in pot. Reduce heat to low, cover pot and cook until dumplings are cooked, about 20 minutes. To serve place some of the turkey and vegetables with sauce in serving bowls and top with dumplings. Serves 6.
Turkey Vegetable Soup
1 onion, chopped
oil
3 carrots, peeled and sliced
3 small potatoes. peeled and cubed
1 c. corn- cut from 1-2 ears
1 medium tomato, peeled and chopped
2 c. shredded cooked turkey *
3-4 cups turkey stock- or whatever you have and like
Fresh parsley and basil
salt and pepper to taste
dash of hot sauce
Heat oil in pot and cook onion until golden. Add carrots and cook a few more minutes. Add remaining vegetables, turkey and stock and simmer, covered, for 10 minutes- or until veggies are tender. Add herbs and simmer a few more minutes. Adjust seasoning and add hot sauce. Serves 2-3 for dinner.
*If you want to turn this into a vegetarian soup add vegetable stock and add a couple of cups of cooked beans. Kidney beans would work well.
Turkey Lo Mein
1 onion, chopped
2 T. oil
1 can sliced water chestnuts, drained
1/2 c. green peas- you could also use green beans
2 c. diced cooked turkey
8 oz. angel hair pasta -I use a very fine noodle I get at the Asian market
soy sauce to taste
Hoisen sauce or oyster sauce to taste- you could also use stir-fry sauce
sesame oil
chopped green onions
Heat water for pasta. Heat oil in skillet and cook onion until browned. Add water chestnuts and cook 1 minute longer. While onion is cooking cook pasta. Add peas to onion mixture and stir to combine. Add the turkey and heat through. Drain pasta and toss into turkey mixture. Season with soy sauce and what ever Asian sauce you have on hand. Drizzle with sesame oil and top with green onions. Serves 4.
Turkey With Tortellini
1 lb. cheese tortellini, cooked and drained
2-3 c. cubed cooked turkey
2-3 c. cooked broccoli, chopped
2 T. butter or oil
2 T. flour
1 c. half and half or milk, warmed
2 c. stewed tomatoes- I used my canned tomatoes- you could substitute a 14 oz. can of tomatoes
salt and pepper to taste
fresh chopped parsley
In bowl combine tortellini with turkey and broccoli and place and a lightly greased casserole. In saucepan melt butter and add flour whisking until smooth. If using oil just combine oil and flour in pan and whisk until smooth. Add half and half and cook, stirring often until thickened and bubbly. Add tomatoes and heat through. Season to taste. Puree sauce and pour over the turkey mixture. Sprinkle with the parsley. Bake in a 350 degree oven until heated through and lightly browned around the edges- about 40 minutes.
Turkey Florentine

Turkey with Herb Dumplings

Turkey Lo Mein

Turkey with Tortellini
Uncle Art and the Giant Turkey

I posted this story last year and had a request to post it again….so here it is….
Rather than posting a recipe today, I wanted to share a fun Thanksgiving memory with you. Through most of my younger life, Thanksgiving was spent with my family and my Aunt Tillie and Uncle Art’s family. My mother and my Aunt Tillie were sisters. They were as close and loving as sisters could be. We took turns at each others homes, and shared the cooking duties.
There was a friendly rivalry every year to come up with a special dessert or to have a new side dish. The biggest part of this challenge though, was to get a really big turkey. My mother was convinced that a big bird was tastier than two small ones. Aunt Tillie agreed. So every year it was the quest of the host family to score a really large turkey.
My mom and dad would go to the local butcher to order the bird weeks in advance. I am sure Tillie and Art did the same. They always seemed to end up around 25 pounds, give or take. My dad and uncle kept track. Last year was 26 pounds and 4 ounces, but two years before, closer to 27 pounds. I swear, these birds had to be part ostrich.
The ultimate goal was to get a 30 pounder. It had eluded them all, until one year. Uncle Art had found a new guy. A turkey guy, who promised him the 30 pound bird of his dreams. We knew days before the big day, that the really big bird dream was going to happen. Then my mom got a phone call from Aunt Tillie.
My uncle had picked up the beast. He proudly brought it home. He looked at it, lovingly at first. Then he looked again. This was not Uncle Art’s first turkey. He felt something was wrong. Remember, this was something they had all dreamed about finding. Finding it first was cause for bragging rights, for sure. He was convinced that he had been duped, that the bird fell short of its promised weight. He told my aunt about his suspicions and they weighed the bird. It was too big for their kitchen scale, so my uncle weighed himself on the bathroom scale and then weighed himself again, this time holding the turkey.
Uncle Art had been right. He was short at least a couple of pounds of the promised 30 pounds. He went back to the turkey guy, irate. The man was defensive at first, but weighed the bird again. It weighed in somewhere in the area of 28 pounds. The man gave him some money back and lacking a bigger bird, Uncle Art brought it back home.
As I recall it was a perfectly lovely bird, cooked to juicy perfection. To my Uncle Art it was both a failure and a success. On one hand, he had not gotten the 30 pound bird he was hoping for. He did, however, take pride in the fact that he spotted it. That in the world of turkeys, he could see the difference between a 28 pound and a 30 pound bird.
I believe, some years later, a 30 pound bird was found. The story that year, around the Thanksgiving dinner table, was not so much about the 30 pound bird before us, but about the one that nearly was.
I hope you all have a great day, spent with those you love. I also hope you make memories to make you smile, when some of those we love are no longer here. Love and best wishes to all.
Happy Thanksgiving.
Mom, Dinah Shore, and the Upside Down Turkey
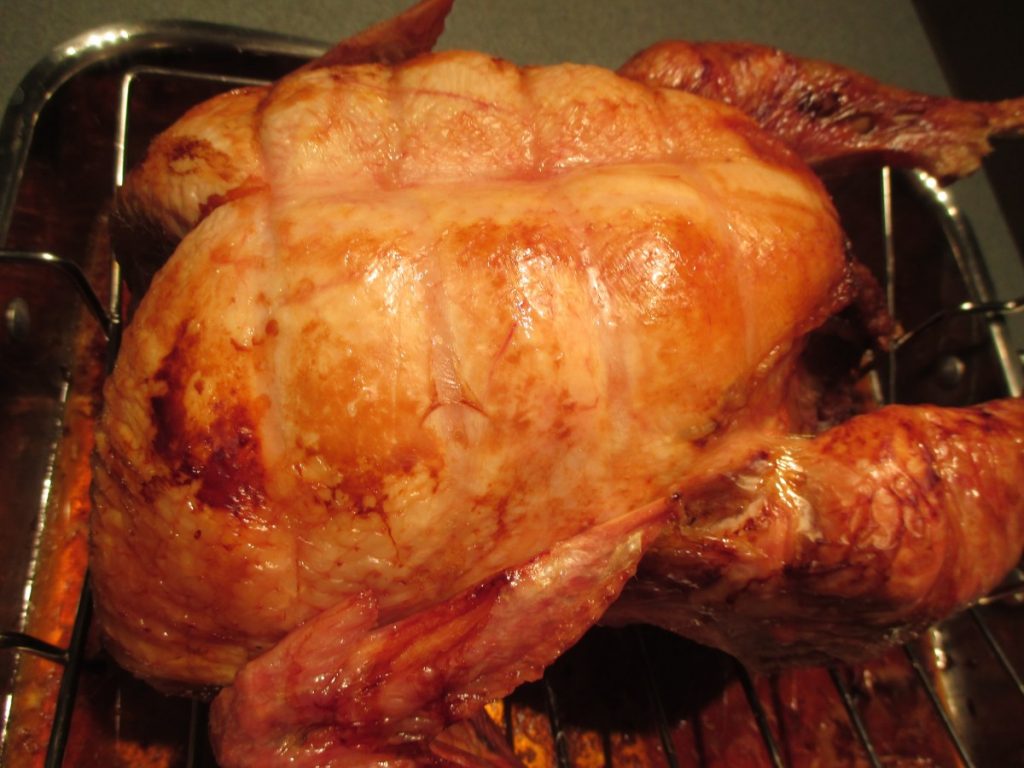
I thought I’d share how I came to roast my turkey breast side down. I must say, there are a number of ways to roast a turkey and have it come out nice and juicy.
I have no objection to any way you like to cook your bird including, but not limited to: frying, wrapped in bacon, cheesecloth wrapped, spatchcocked, sous vide etc. Stuffed, un-stuffed, brined are all OK by me, if that works for you. I have found over the years that cooking a turkey is a very personal decision, and folks get pretty passionate about how they cook their bird.
Many years ago a singer named Dinah Shore had a TV show, which my Mother really liked. Dinah, besides being a singer, liked to cook. She gave her turkey cooking tip one time on her show. She said she roasted her turkey breast side down for most of the time. The theory is that if the bird is breast side down the juices will flow into the breast- which eliminates the need to baste. It also slows down the cooking time for the breast- so it comes out cooked at the same time as the dark meat.
My Mother was intrigued, to say the least. She talked about it, a lot, leading up to Thanksgiving. We used to get a really big turkey and my Dad has his doubts about how easy turning over a hot, partially cooked turkey, would be. Mom was adamant. So it was that that Thanksgiving my Mom put her bird in the pan, on the rack, breast side down. She was excited and nervous at the same time.
Let’s face it- the turkey is the star of the meal and if it didn’t work it would be a disaster. But Mom trusted Dinah and they went ahead with this radical new plan. After about 3 hours of cooking, maybe a bit less, they managed to get the turkey turned over and returned it to the oven. Mom would look pensively through he oven window. I think giving birth was easier on her.
Well, in the end it worked out great. The bird was juicy and evenly cooked. No basting, so less work. She was delighted that she had held to her plan and had not been persuaded to cook it like before.
So every time I cook a turkey I cook it breast side down. How long I roast it that way depends on the size of the bird. Normally about 2 hours- because I am roasting a smaller turkey. I always remember my Mother when I cook it that way. I remember that first breast side down Thanksgiving and every one after that. Mom always was delighted- like the first time- and she always mentioned Dinah Shore.
Happy Thanksgiving to you all. May your turkey be juicy and most importantly, may you get to spend time with the people you love. I’ll be with family and I’ll think about my Mother and Father – and Dinah.
Rich Crescent Rolls

These soft rolls are a perfect addition to any dinner. They are rich, buttery and very tender. Homemade rolls and bread just always taste better than store bought. They are totally worth the time it takes to make them.
Another perk is the way your house smells when they are baking.
These should not be confused with croissants. Croissants are made over a period of time with the dough and butter being folded, rolled and chilled a number of times to create flaky layers.
These are a soft, slightly sweet yeast dough, shaped into crescent shapes. Of course, you can make them in different shapes, if you like. I just like the way the little crescents look.
They are brushed with melted butter before being rolled up into the crescents. I also like to brush them with melted butter when they come out of the oven.
These are great served warm, with butter. I admit to loving to dip them in gravy, too.
So here is the recipe.
Rich Crescent Rolls
¾ c. milk
½ c. each butter and sugar
1 t. salt
2 packages active dry yeast
½ c. warm water
4-5 c. flour
2 eggs
Extra melted butter for brushing on the rolls
Heat together milk and butter until warm. Stir in sugar and salt. Dissolve yeast in warm water and add to milk mixture with 2 cups of flour. Beat 3 minutes. Beat in eggs. Stir in flour until soft dough forms. Knead on floured surface until dough is smooth and elastic. Place in oiled bowl and cover. Let rise until doubled. Turn dough onto lightly floured surface and knead a few strokes. Divide into fourths and roll each into a circle. Divide circle into 8 pieces (in wedges like a pie) and brush with melted butter. Starting at wide end roll up loosely and place on greased baking sheet with point tucked under. Allow 2-3 inches between rolls and curve slightly into an arc, if desired. Cover with a towel and allow to rise in a warm place for an hour, or until nearly doubled. Bake in a preheated 375-degree oven for 12-15 minutes. Brush with melted butter, if you like. Serve warm. Makes 32.
Cindy’s Squash Pie

At first glance you would think my sister made a pumpkin pie. It looks like pumpkin pie. It also tastes a lot like pumpkin pie. When I was a kid, and tasted this pie for the first time, it was the first time I liked “pumpkin” pie
My sister has been making this squash pie recipe for years. I love it. It is part of our Thanksgiving tradition. Cindy made it clear, from the beginning, that she used cooked butternut squash for her pie and not pumpkin. She liked the flavor better. I can’t argue with her success. The pie is yummy.
Of course, you could use pumpkin or other winter squash, if you like. I use Hubbard sometimes. The recipe has the right mix of spices and just enough sugar without being too sweet. What ever squash you use, I am sure this pie will be a hit with your family, too.
Cindy’s Butternut Squash Pie
1 (9″) unbaked pie shell brushed with 1 egg white
2 eggs slightly beaten
1/2 cup brown sugar
1/4 cup white sugar
1 1/2 tsp cinnamon
1/2 tsp nutmeg
1/2 tsp ginger
1/4 tsp allspice
1/4 tsp cloves
1/2 tsp salt
1/2 tsp vanilla
2 cups (1 lb.) cooked, butternut squash (mashed or pureed)
3 Tbsp molasses
1 can evaporated milk (12 oz can)
Combine filling ingredients and pour into shell. Bake at 400 degrees for 55-60 min., or until custard tests done.
Cindy added: I find this to be a very generous recipe; could make 2 smaller pies or just bake the extra custard in a baking cup. I suppose it could be frozen and used in another recipe, but I’ve never tried to freeze the raw filling, so I don’t know.
This can be used with pumpkin, too.
Stuffing or Dressing?
This time of year, everyone seems to be planning for Thanksgiving. Most of that planning is around the dinner. There are people who make stuffing and those who make dressing. The difference between the two, is where you cook it.
When you stuff the bird, it is stuffing. Cooked outside of the turkey, it is dressing. Over the years I’ve had a lot of variations on both. My Mom always bought Pepperidge Farm stuffing mix as a base. The she added onions, celery, sausage and sometimes mushrooms. She also made a pretty darn good cornbread stuffing. I tend to use a good quality bread, often homemade, that I toast and combine with veggies and stock and then bake as dressing.
I love stuffing, too. The only problem is that by stuffing the bird you must increase the cooking time to be sure the stuffing has reached a safe internal temperature ( 165 degrees). I prefer to stuff smaller birds, like chicken, where the cooking time isn’t as long. We always had stuffing when I was little. Eventually Mom switched over to dressing to make it faster to cook the bird. Keep in mind, my family normally had turkeys that weighed over 25 pounds. The cooking time for a stuffed bird of that size is pretty long.
There are also people who add eggs to their stuffing/dressing. That wasn’t something I’ve done. It is something I need to try at some point. They swear by the moistness and texture of their recipe. I will admit to being intrigued. It reminds me of making bread pudding. I love the texture of bread pudding.
So how do you make your stuffing/dressing? Eggs, no eggs? In the bird or out? I love to hear what others are doing. I have my recipe, which I will share with you, but I am open to trying something new.
Dressing/Stuffing
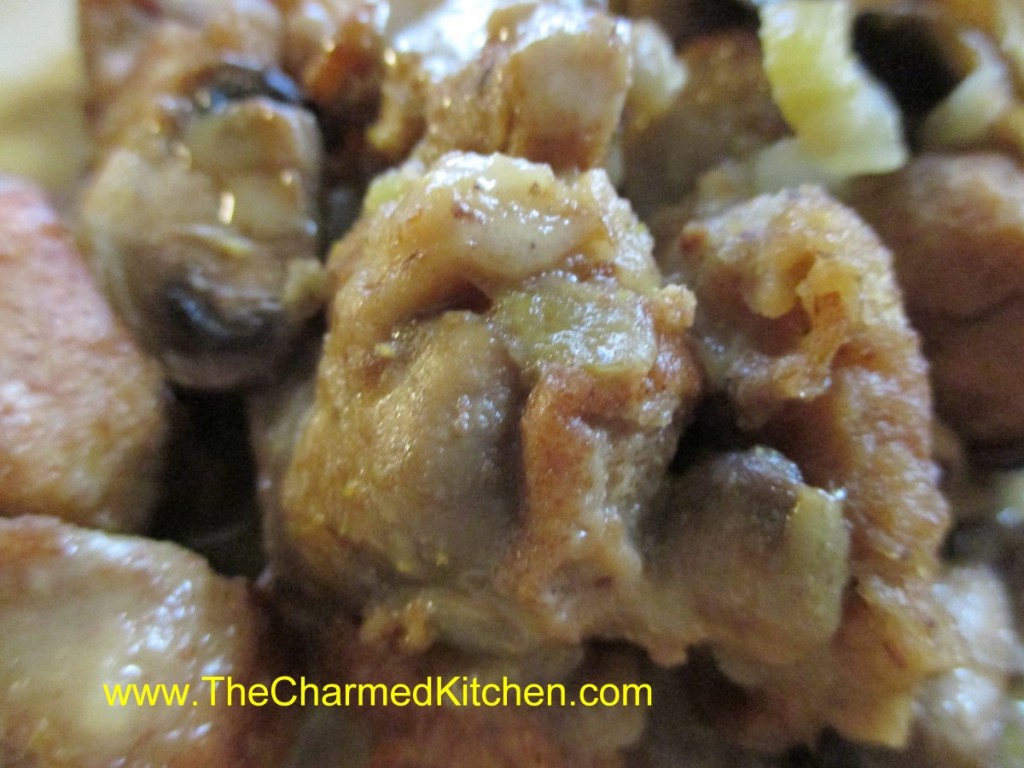
Basic Bread Stuffing/ Dressing
1 c. sliced mushrooms
¾ c. diced celery
3 T. minced onions
2 T. chopped parsley
4 T. butter or margarine
4-5 c. bread cubes
salt and pepper to taste
¼ – ½ c. turkey or chicken broth if making dressing
Sauté vegetables in butter until tender. Add bread and seasonings and toss to coat. Stuff into turkey just before cooking or add broth and place in covered casserole, cooking for 45 minutes to an hour at 350 degrees. When making stuffing allow ¾ c. per pound of turkey. You may want to stuff the bird and still make extra dressing for the next day. When making dressing be sure to cover the pan well to keep the dressing from drying out.
Variations:
Oyster dressing: Add 12 ounces of oysters, cooked in their own liquid for 3 minutes and drained to the stuffing. For the dressing you may want to reserve some of the cooking liquid and add it in place of turkey broth.
Cornbread Stuffing: Omit bread cubes and add 4-5 cups of cornbread crumbs.
Fruit Stuffing: Omit parsley and add 1 ½ c. chopped tart apples and ½ c. chopped prunes.
Sausage: Add 1 cup cooked and crumbled sausage
Of course there is always the prepared stuffing mixes on shelves everywhere. I make no judgements. Time is a precious commodity. If you are going to use Pepperidge Farm or any of the other dry mixes watch what liquid you use as the mixes tend to be saltier and adding broth could make them too salty. Also when you use pre-seasoned mixes, add the same vegetables you would have added to homemade for a better taste. My mom always uses the Pepperidge Farm stuffing mix and by the time she adds all of her little touches it tastes great.
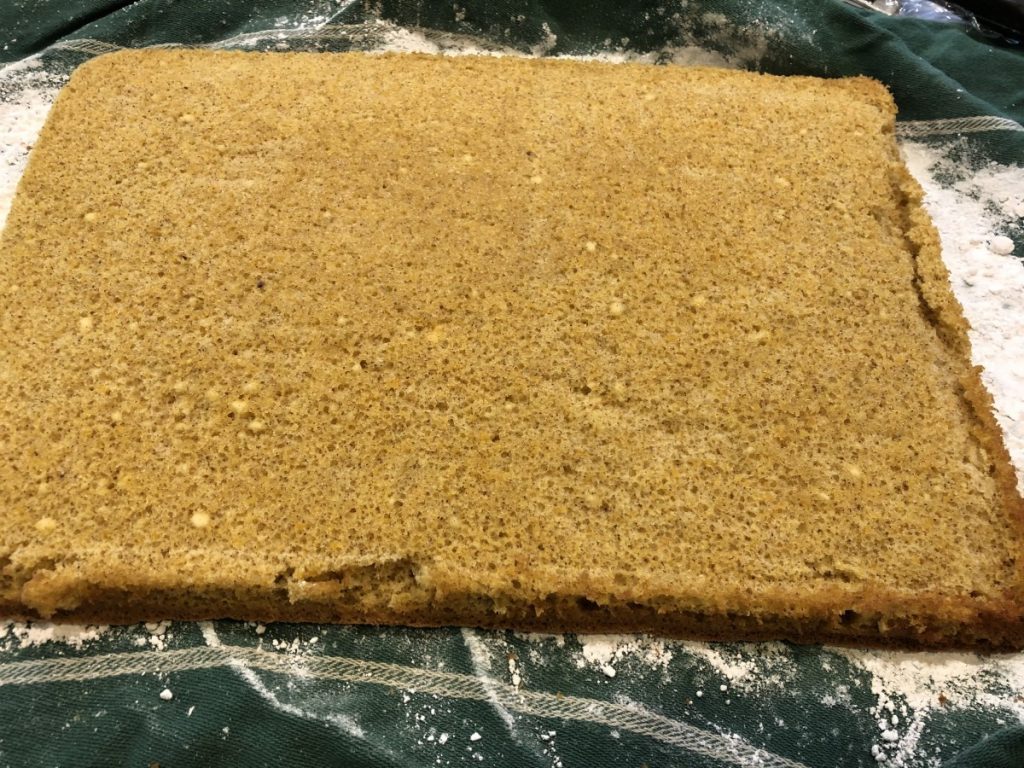
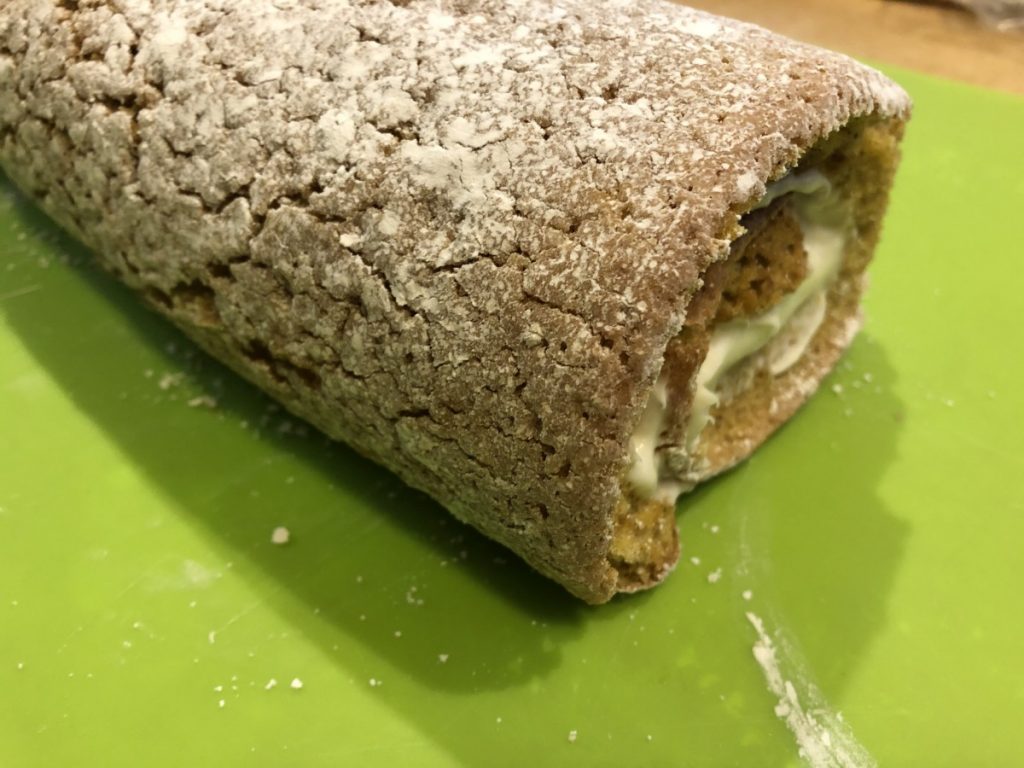
Pumpkin Cake Roll

This is one of my favorite desserts. A soft pumpkin cake, lightly spiced, rolled around a cream cheese filling. Not just tasty, it’s pretty, too.
I have several variations of this recipe and decided to make the “simple” one last night. It mixes up in no time and rolls up easily. I like the combination of spices, too. It also freezes well. You can make a couple of them and pop them in the freezer, so you always have dessert when needed. This recipe makes one cake, but can easily be doubled. These make nice gifts, too.
It is baked in a small jelly roll pan, the 10×15-inch size. Don’t freak out when you put the batter in the pan. It will fill it right up to the top. The cake doesn’t rise much, so it works.
Pumpkin Cake Roll
3 Eggs
1 cup Sugar
2/3 cup Pumpkin puree
1 teaspoon Lemon juice
3/4 cup All-purpose flour
1 teaspoon Baking powder
2 teaspoons Cinnamon
1 teaspoon Ginger
1/2 teaspoon Nutmeg
1/2 teaspoon Salt
Filling:
8 ounces Cream cheese — softened
4 tablespoons Butter
1 cup Powdered sugar
1/2 teaspoon Vanilla
In large bowl, combine eggs and sugar, beating with an electric mixer until thick and light yellow in color. Add pumpkin and lemon juice, mixing until blended. In separate bowl, combine flour, baking powder, spices and salt. Add to egg mixture, mixing well. Spread batter into greased and waxed-paper lined 10-by-15-inch jelly-roll pan.
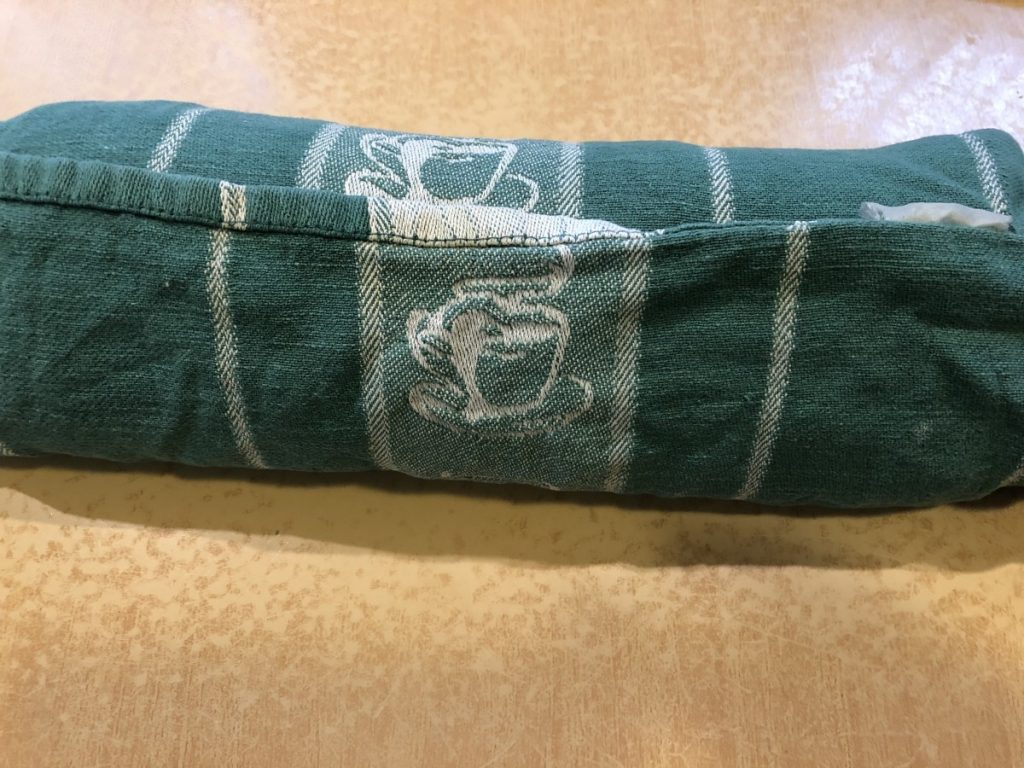
Bake at 350 ° for 15 minutes. Remove from oven. Cool for 15 minutes. Place cake on clean tea towel sprinkled liberally with powdered sugar. Peel off the wax paper. Cool 10 minutes longer. From 10- inch side, roll cake up in towel. Set aside. While cake is cooling in towel, prepare filling. Beat together cream cheese and butter; stir in powdered sugar and vanilla and blend until smooth. Unroll cake. Evenly spread filling over cake. Roll up cake (without the towel). Wrap in plastic wrap. Cover and chill at least 1 hour before serving. A serrated knife works best for slicing. Keep leftover cake refrigerated. This pumpkin roll freezes well. Serves 6-8.

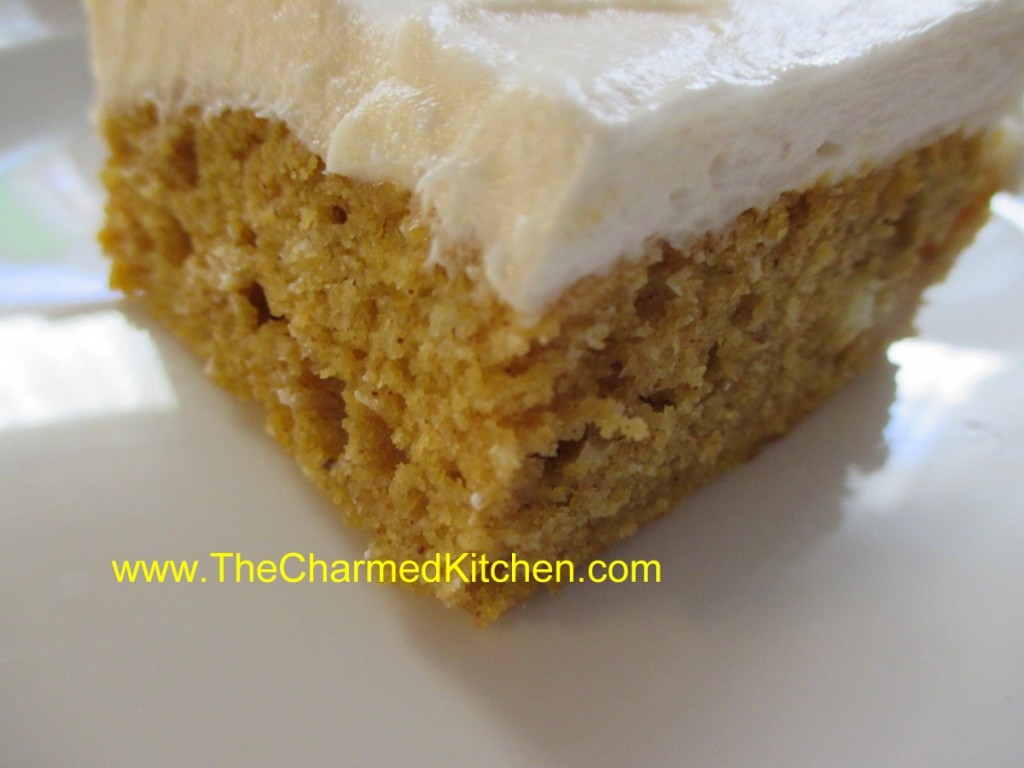
Mom’s Pumpkin Squares
This recipe has been part of our family for years now. My mom made them for Thanksgiving every year- and I continue that tradition. Like my mom, I use fresh (or frozen) cooked pumpkin or winter squash. My mom didn’t care much for the taste of canned pumpkin. She would cut up the Halloween pumpkin, cook it, puree it and freeze it- so she could make pumpkin squares anytime she wanted.
The original recipe came from Bisquick, but it had 2 cups of sugar in it. My Mother’s sensibilities kicked in and she cut the sugar down to one cup. Great move on her part. The cake is still plenty sweet with less sugar.
It mixes and bakes up in no time. I normally top it with cream cheese frosting, but it would be good with a simple powdered sugar glaze, a buttercream frosting, or even just a dusting of powdered sugar mixed with a little cinnamon.
The texture is moist and tender and I think you’ll enjoy it as much as I do.
Pumpkin Squares
1 c. sugar
½ c. oil
16 oz. cooked pumpkin, canned, fresh (preferred) or frozen
4 eggs, beaten
2 c. biscuit mix (homemade or Bisquick or Jiffy Mix)
2 t. cinnamon
½ c. raisins, optional
Grease a jelly roll pan and set aside. Preheat oven to 350 degrees. Beat first 4 ingredients for 1 minute. Stir in mix, cinnamon and raisins. Pour in prepared pan and bake 25-30 minutes. Test for doneness with a toothpick. Cool and frost. Frosted cake must be kept refrigerated between servings.
Frosting:
8 oz. cream cheese
2/3 c. butter
2 T. milk
2 t. vanilla
3 c. powdered sugar, or more
Beat together until smooth.


