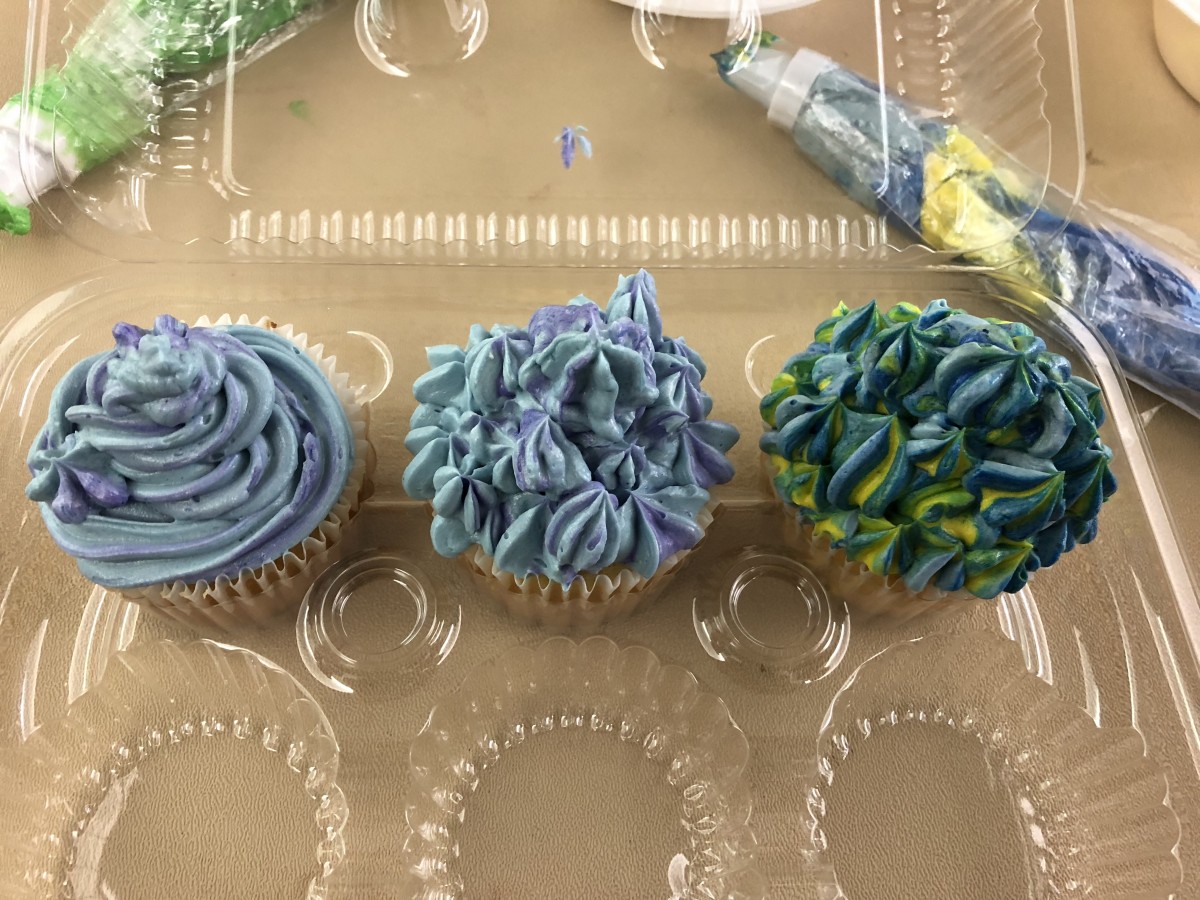
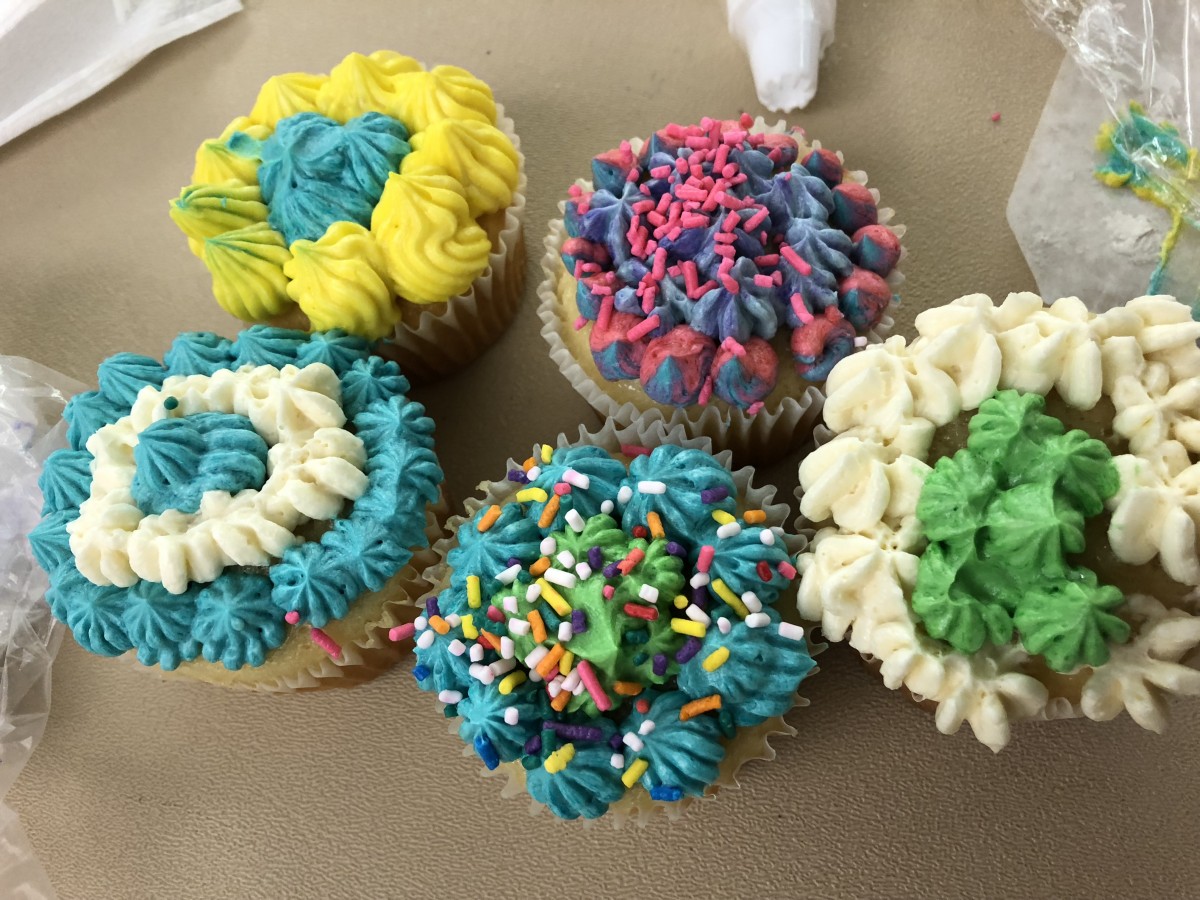
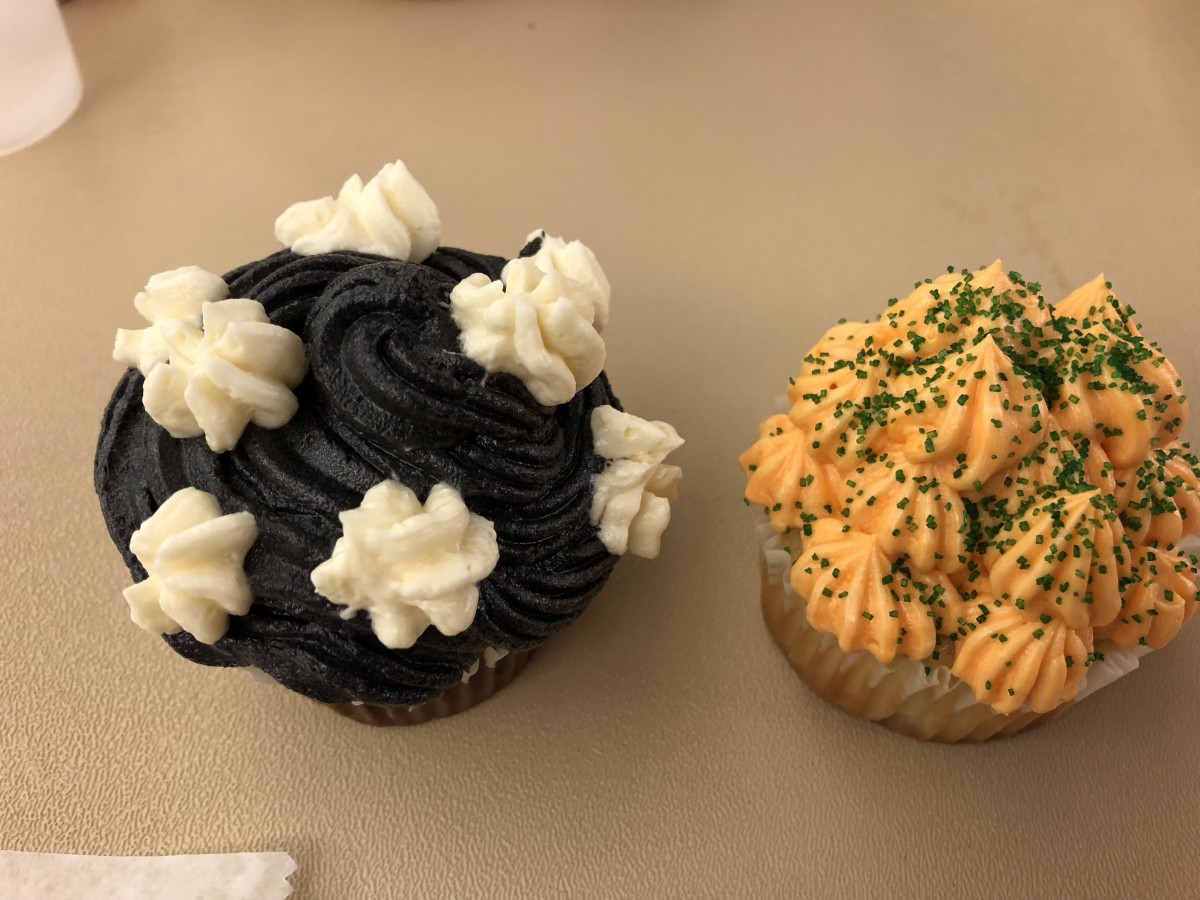
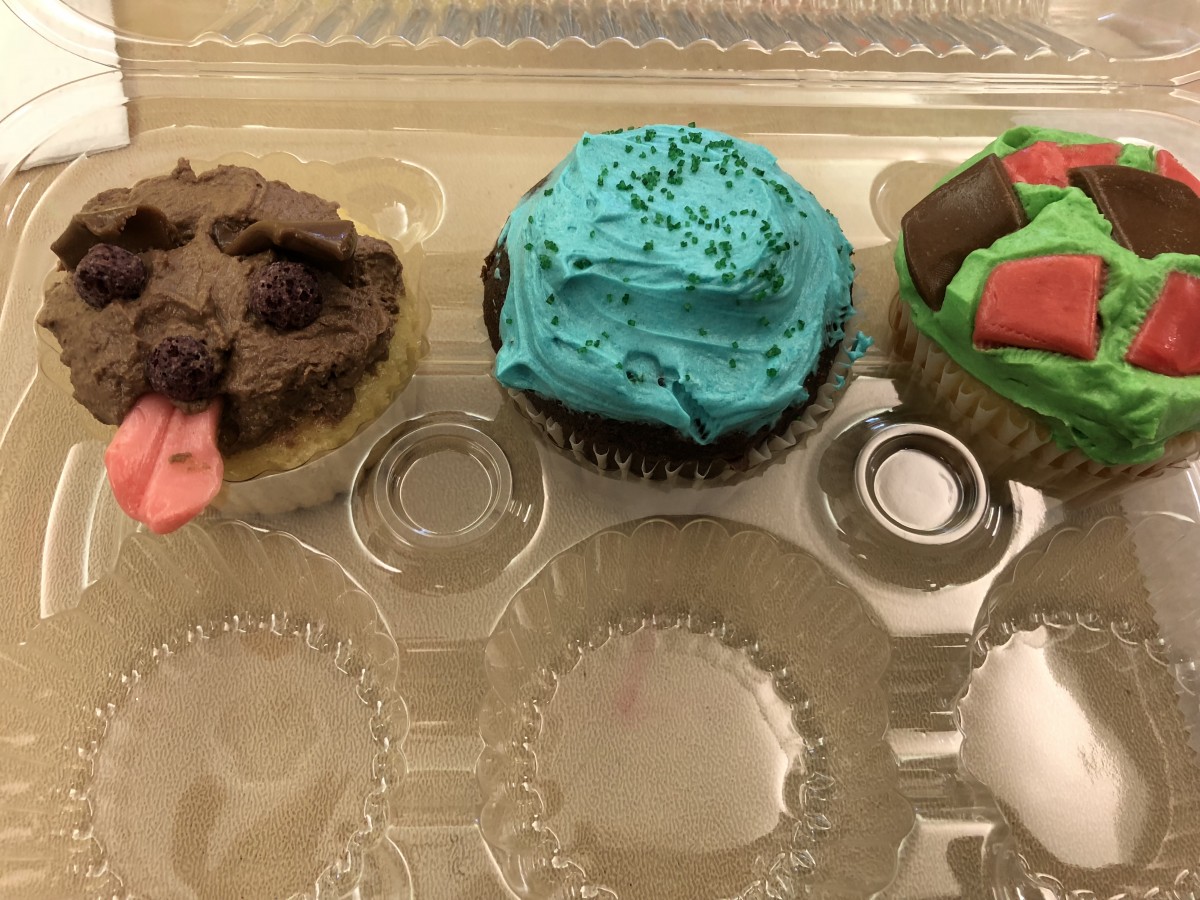
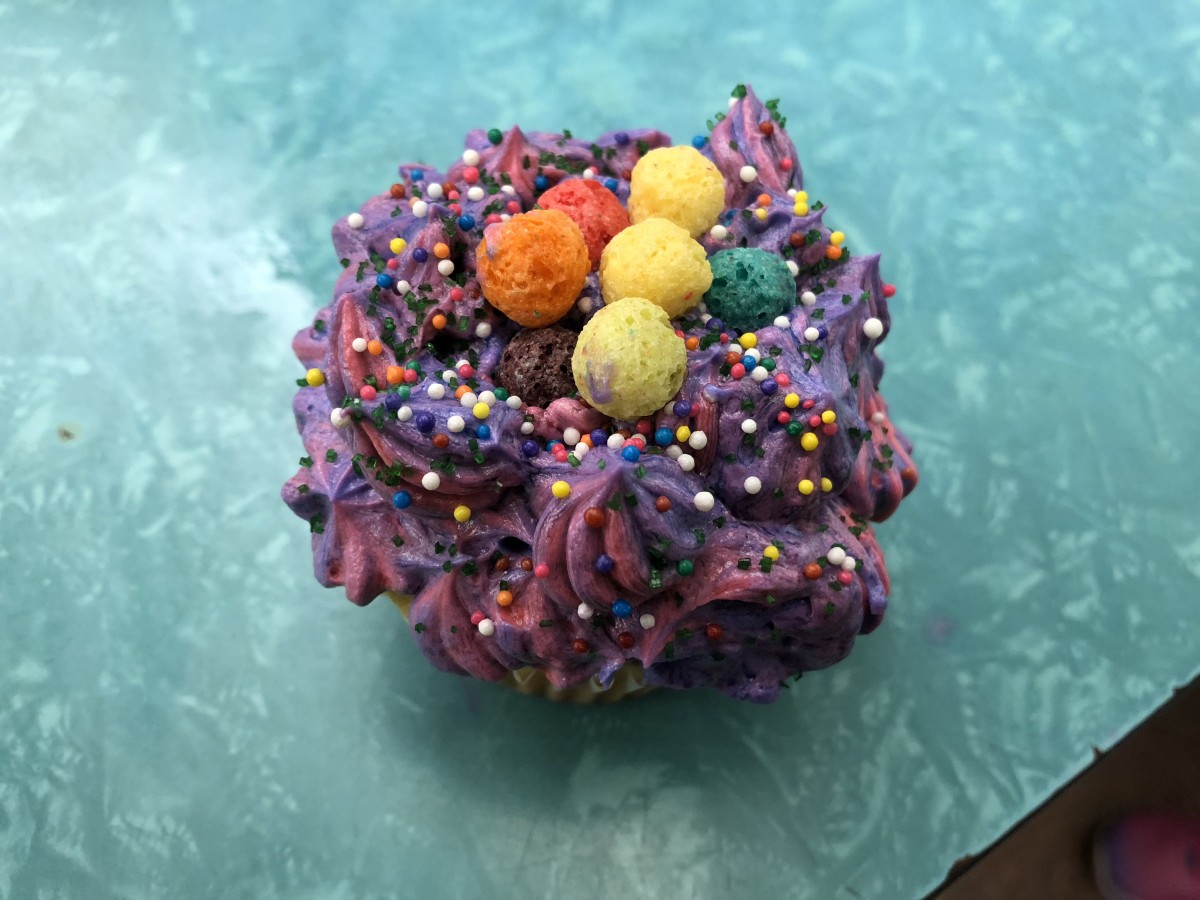
Cupcake Day in Camp
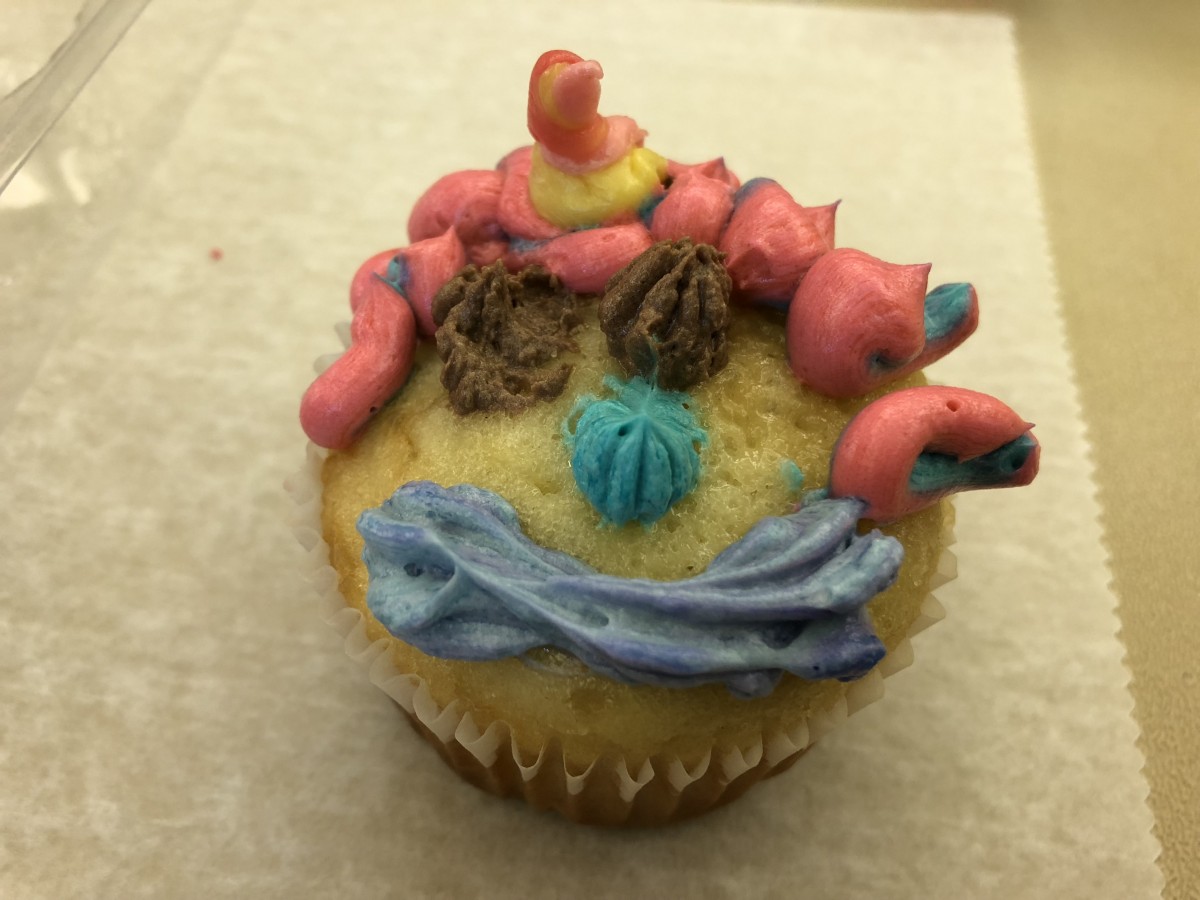
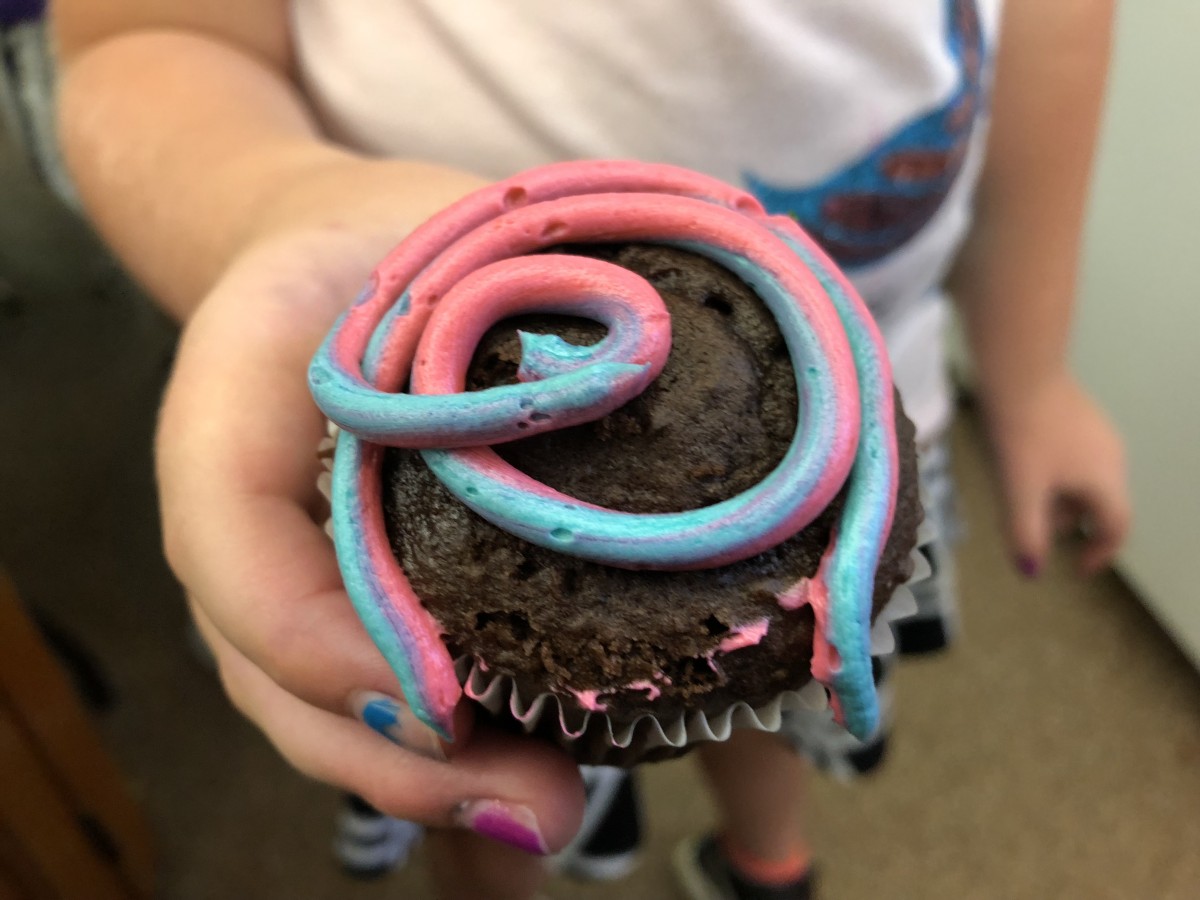
Unicorn Cupcake
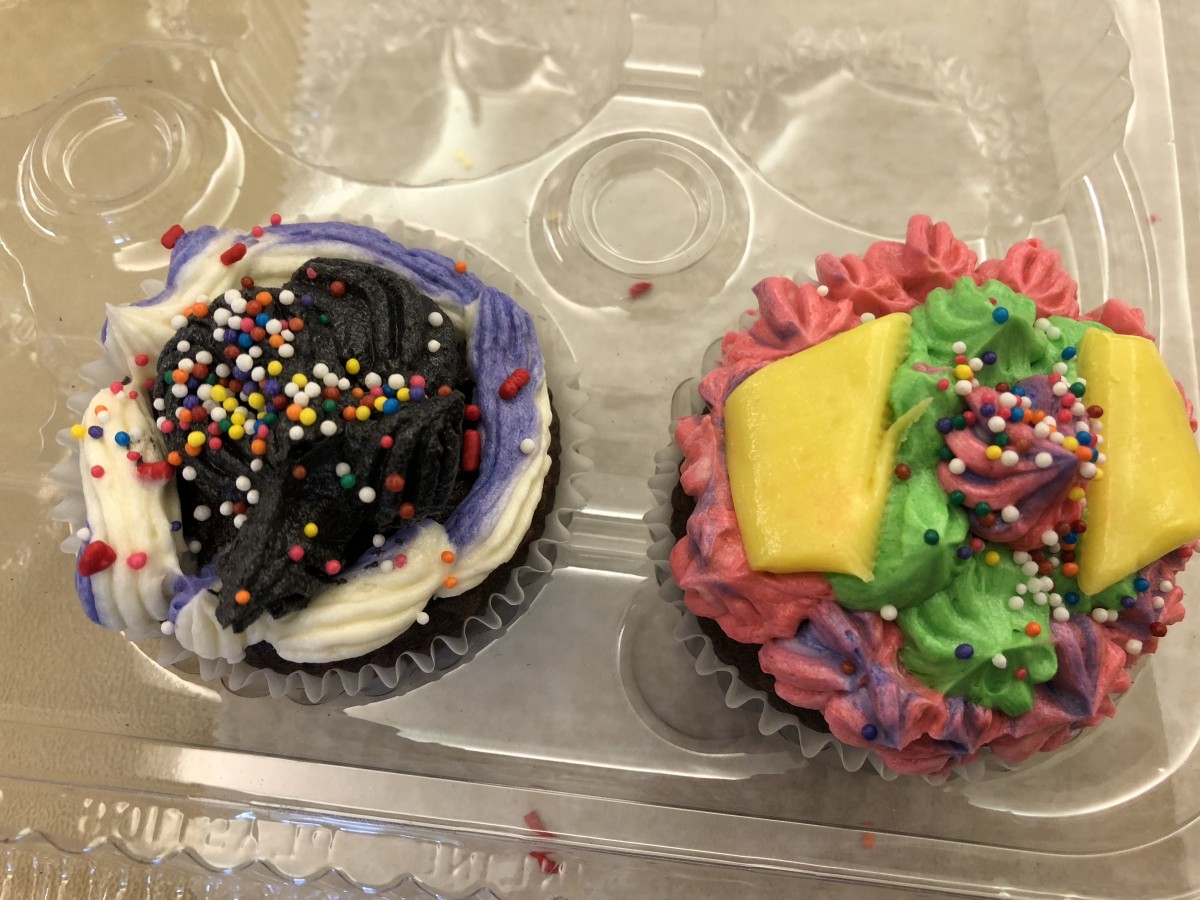
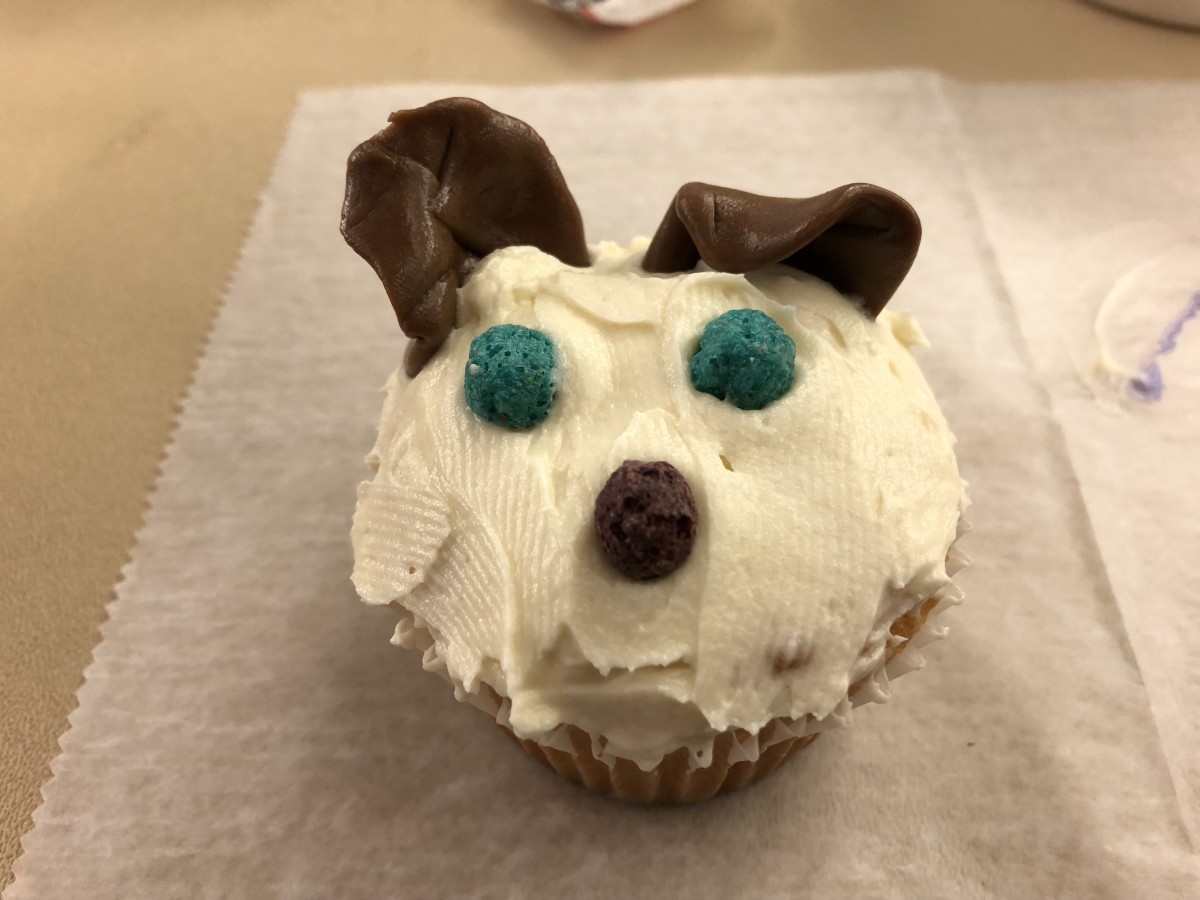
We had so many kids sign up for the cupcake class last week- we scheduled a second one today. The kids nailed it. So many beautiful cupcakes. I wish I had taken even more pictures.
We had all girls today. Another girl, whose father was teaching a computer camp, stopped to get something in the kitchen. The girls invited her to stay. She also got to decorate cupcakes. Such sweet, caring kids.
Peanut Butter Coconut Shortbread – Vegan!

Peanut Butter Coconut Shortbread
I knew I was going to be spending some time with my Goddaughter and I wanted to bake something for her. I actually made her great grandmother’s shortbread recipe. She always loved them. Did I mention that Gwen is vegan? So the pound of butter normally used in them was out.
I needed to change them, to make them work for her. Rather than using butter, I used a combination of crunchy peanut butter and coconut oil.
They came out just right, with the crumbly, dry texture of a traditional shortbread and the added flavor of the peanut butter, coconut and vanilla.
I used crunchy peanut butter- it was what I had. I like the bits of peanuts in the cookies. I could see adding a few more chopped peanuts the next time I make these cookies
Peanut Butter-Coconut Shortbread
1 c. sugar, plus 1/4 cup extra for sprinkling
1 c. peanut butter
1 c. coconut oil
4 c. flour
2 t. vanilla
Cream together sugar, peanut butter, coconut oil and vanilla. Stir in flour until mixture forms into a dough. Press into 9×13-inch baking dish. Sprinkle extra sugar over the cookies dough, and cut into squares. Bake in a 300 degree oven for an hour or until light brown around edges. Re-cut while warm. Makes 4 dozen.
Vanilla Cupcakes with White Chocolate Frosting
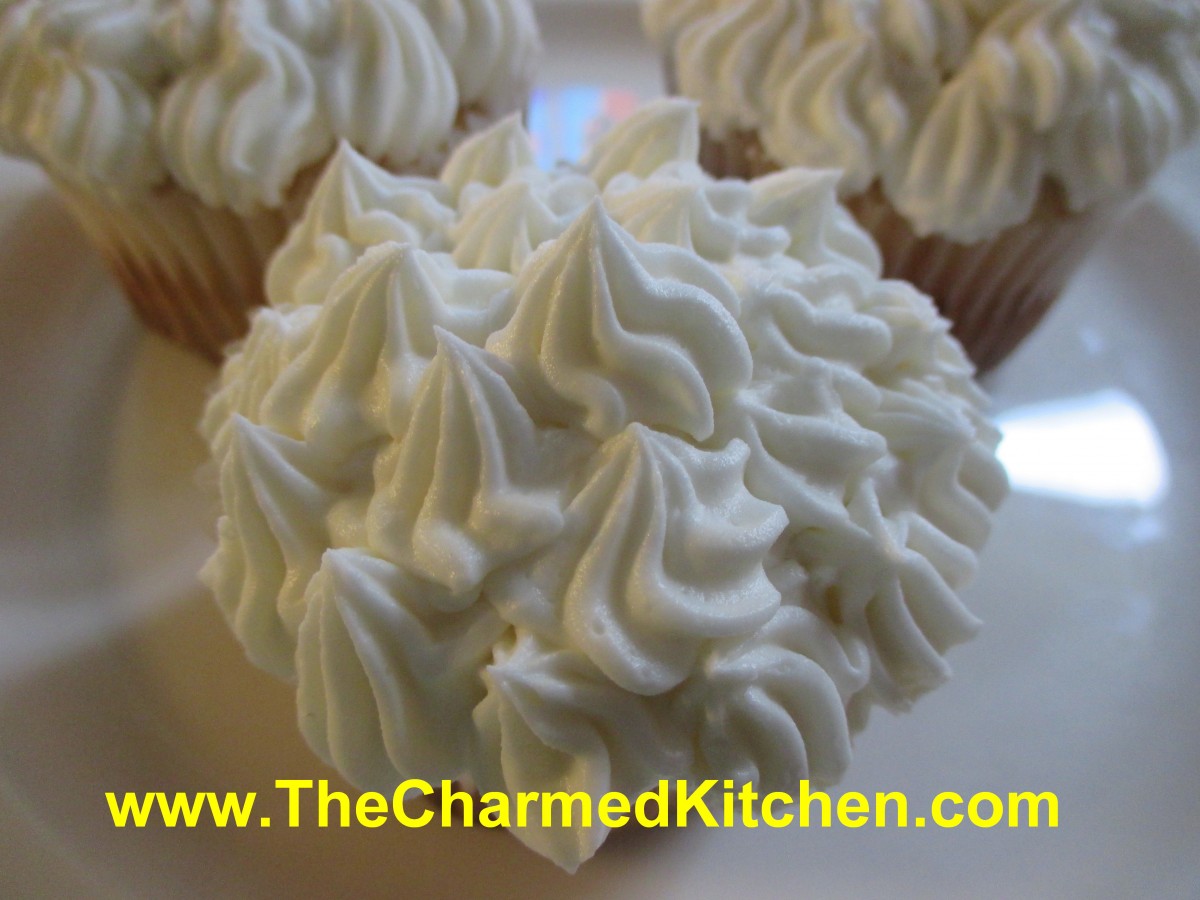
Vanilla Cupcake with White Chocolate Frosting
Tomorrow is another camp day- and another day of making cupcakes with kids. I am really looking forward to it. The kids always have a great time and get very creative.
I must admit to being a sucker for the classics. This cupcake is certainly a classic.
I normally top them with a vanilla buttercream, but decided to make a white chocolate frosting instead. Yes, I know white “chocolate” is not really chocolate. But when I say white chocolate, everyone knows what I am talking about.
I used a white chocolate bar- and broke it into pieces, before melting, but you could you use white chocolate chips instead. The frosting has a really nice flavor and fluffy texture, without being too sweet. These cupcakes are always a hit.
Classic White (Vanilla) Cupcakes
1 cup sugar
1/2 cup butter
2 eggs
2 teaspoons vanilla extract
1 1/2 cups all-purpose flour
1 3/4 teaspoons baking powder
1/2 cup milk
Preheat oven to 350 degrees. Line a muffin pan with 12paper liners. In a medium bowl, cream together the sugar and butter. Beat in the eggs, one at a time, then stir in the vanilla. Combine flour and baking powder, add to the creamed mixture and mix well. Finally stir in the milk until batter is smooth. Pour or spoon batter into the prepared pan. Bake 20 to 25 minutes. Cupcakes are done when they springs back to the touch. Makes12
White Chocolate Frosting
6 oz. white chocolate – if using bars, chop before melting
1 stick (4 oz.) cold butter, cut into cubes
1-2 c. powdered sugar
1 t. vanilla
Melt chocolate. I just melt mine in a microwave safe dish, but you can use a double boiler. Let chocolate cool down a little. Beat butter into the melted chocolate. Beat until smooth and then beat in the powdered sugar and vanilla. Whip until frosting is smooth and fluffy. I normally beat for 5 minutes or longer. If too thick, add a few drops of water or milk.
Martha’s Beets
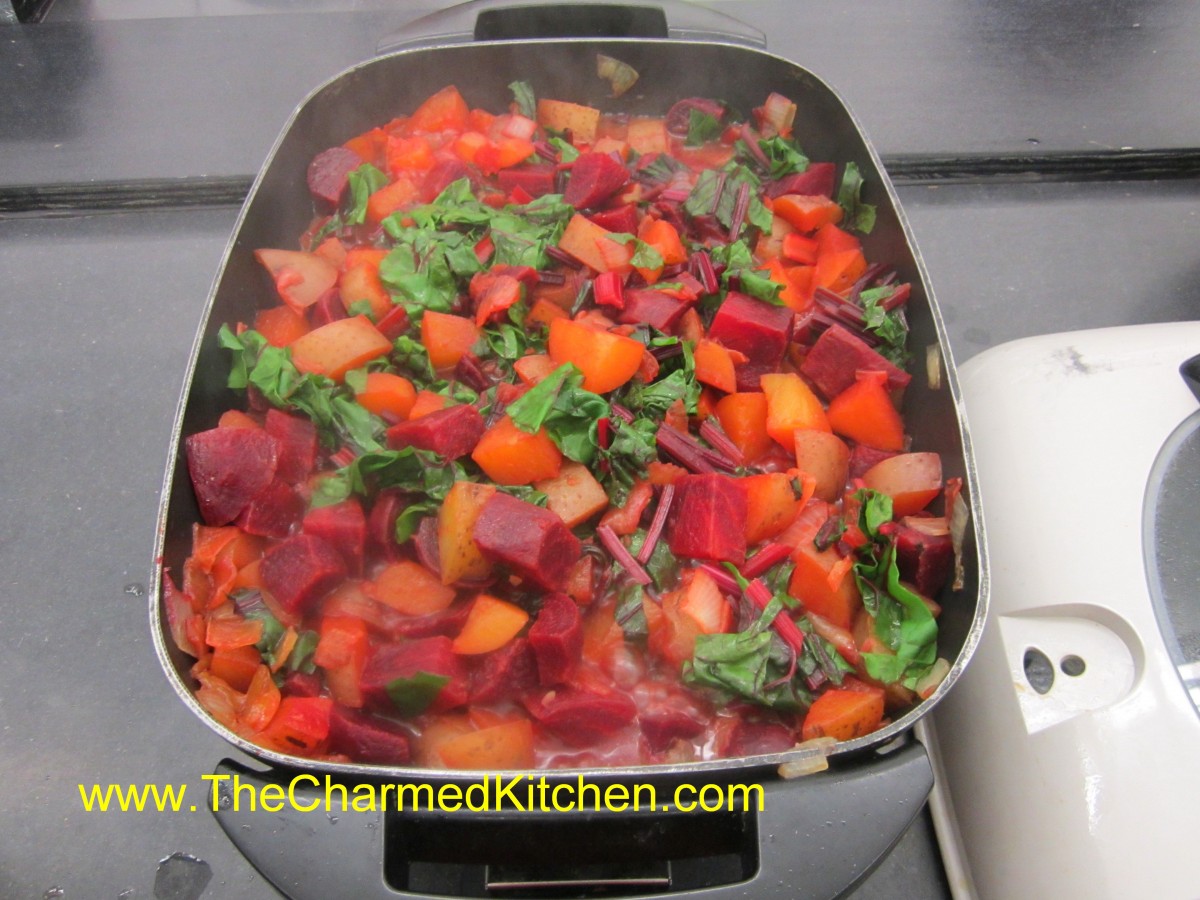
Martha’s Beets
I had picked up some beets from a local farmer the other day. I have made this dish many times and it seemed like a good time to make it again.
This is a recipe that my friend, Martha, made for us one chilly autumn afternoon. The amounts are random for a reason. Just use what you have- more or less – and let the flavors blend together gently.
I have been lucky enough to spend some time with Martha this week . She has been my best friend forever. She is one of the best people I have ever known. I feel truly blessed to have her in my life.
Full of earthiness and great fresh flavors it is always a favorite of mine. I always think of her, with great affection, when I make it. Love you, Martha. So glad we got together.
Martha’s Beets
Oil
2 Onions, chopped
Potatoes, cut in big chunks, peeled, if desired
1 bunch beets, with greens*
Chicken or vegetable stock
Parsley
Salt and pepper
Cook beets in boiling water for 20 minutes. Cool and slip off skins. Cut up larger beets, if desired. In large pot cook onions in oil until tender. Add potatoes and prepared beets with just enough stock to keep them from sticking. Cover and cook over medium-low heat until vegetables are tender. Meanwhile chop up the beet greens. Add them to the pot and stir in. Cover and continue cooking until greens are tender. Toss in fresh parsley and cook 5 minutes longer.
* If you can’t find beets with greens, or if you like more greens, you can also add red Swiss chard in place of the beet greens.
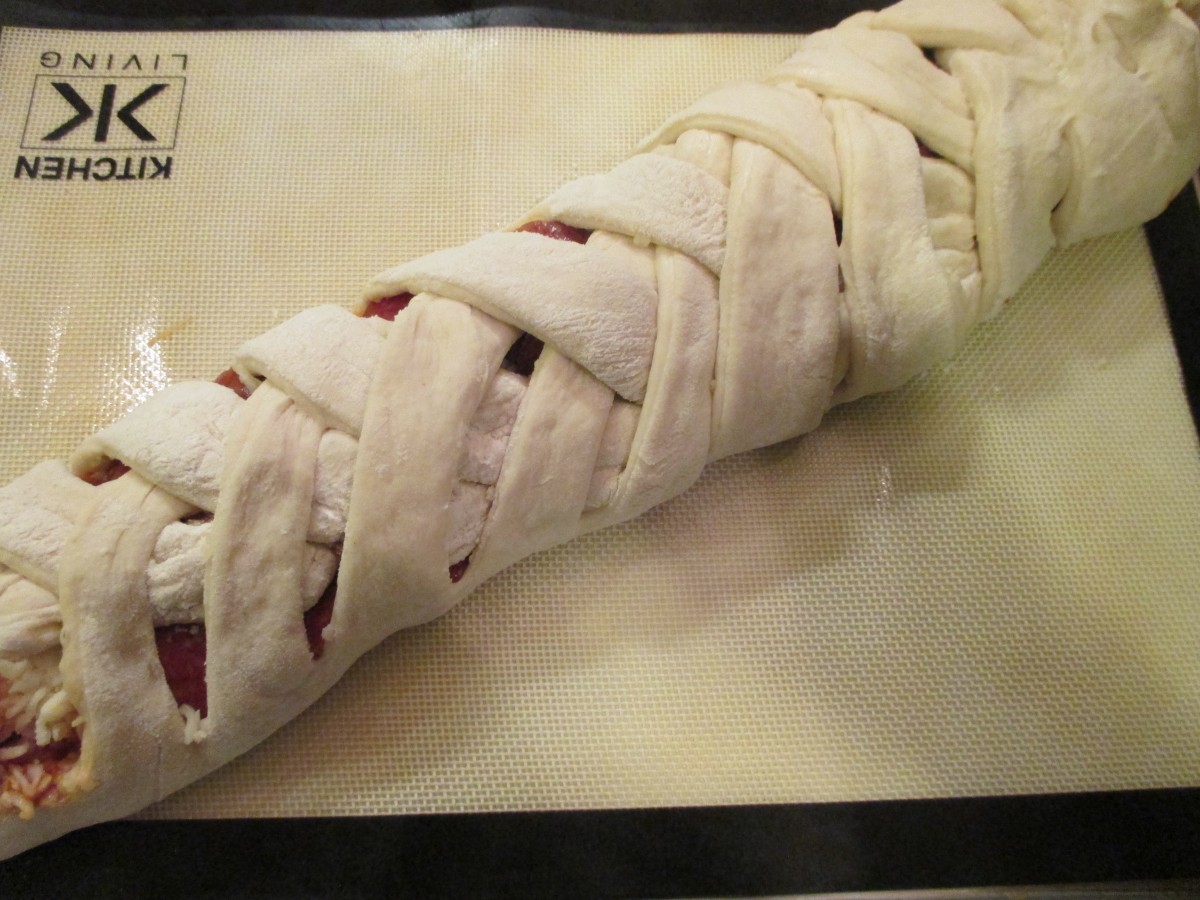
Pepperoni Pizza Bread

Pepperoni Pizza Bread
Today is my brother’s birthday. I won’t be able to see him for a few days, but I decided to post one of his favorite recipes, in his honor. These breads are kind of like Stromboli. You can fill them with all sorts of ingredients.
I have made them with Reuben sandwich fillings, spinach with cheese, and have even made a breakfast version with scrambled eggs, cheese and sausage.
This one just happens to be his favorite, so I will make him pepperoni pizza very soon. Pictured is a double batch- which makes two loaves.
Love you, Phil. Happy Birthday!!!
Here is the recipe for one loaf.
Pepperoni Pizza Bread
3 ¼ c. flour
1 T. sugar
1 t. salt
1 package quick-rising yeast
1 c. hot water
1 T. oil
Extra oil for brushing on the dough
1/2 c. marinara sauce
6 oz. mozzarella or provolone cheese
2 oz. sliced pepperoni, about
Set aside 1 cup of the flour. Combine remaining flour with the other dry ingredients in a medium bowl. Stir in water and oil and gradually stir in enough flour to make a soft dough. Turn onto lightly floured surface and knead until dough is smooth and elastic, about 5 minutes. Roll dough into a rectangle about 16 x 8. Brush with oil down center middle of dough. Top with sauce, cheese and pepperoni. Cut one-inch wide strips of dough from filling to edge on both sides. It will sort of look like fringe. Alternating sides, fold strips up and over the filling at an angle. Carefully lift loaf onto greased baking sheet and place at an angle. Cover with a towel and place sheet on top of a roasting pan half-filled with simmering water for 15 minutes. Bake in a preheated 400-degree for 20-25 minutes or until golden brown. Cool slightly before slicing. Serve warm and refrigerate leftovers. Makes one loaf.
Note: The variations for this bread are almost endless. Some favorite combinations are ham and Swiss with mustard, roast beef and cheddar, chicken, broccoli and cheese, spinach with ricotta or feta and onions, curried veggies. You get the idea. Use your imagination and have fun. Just be careful not to overfill, or the bread will be hard to move, use fillings that aren’t too runny and always use cold fillings.
If you want to use regular yeast, use warm, rather than hot water. After kneading cover dough and let rise 45 minutes. Punch down and assemble as in original recipe. Cover with a towel and let rise until dough looks puffy, about 40 minutes. Bake as directed above. These breads can also be frozen.
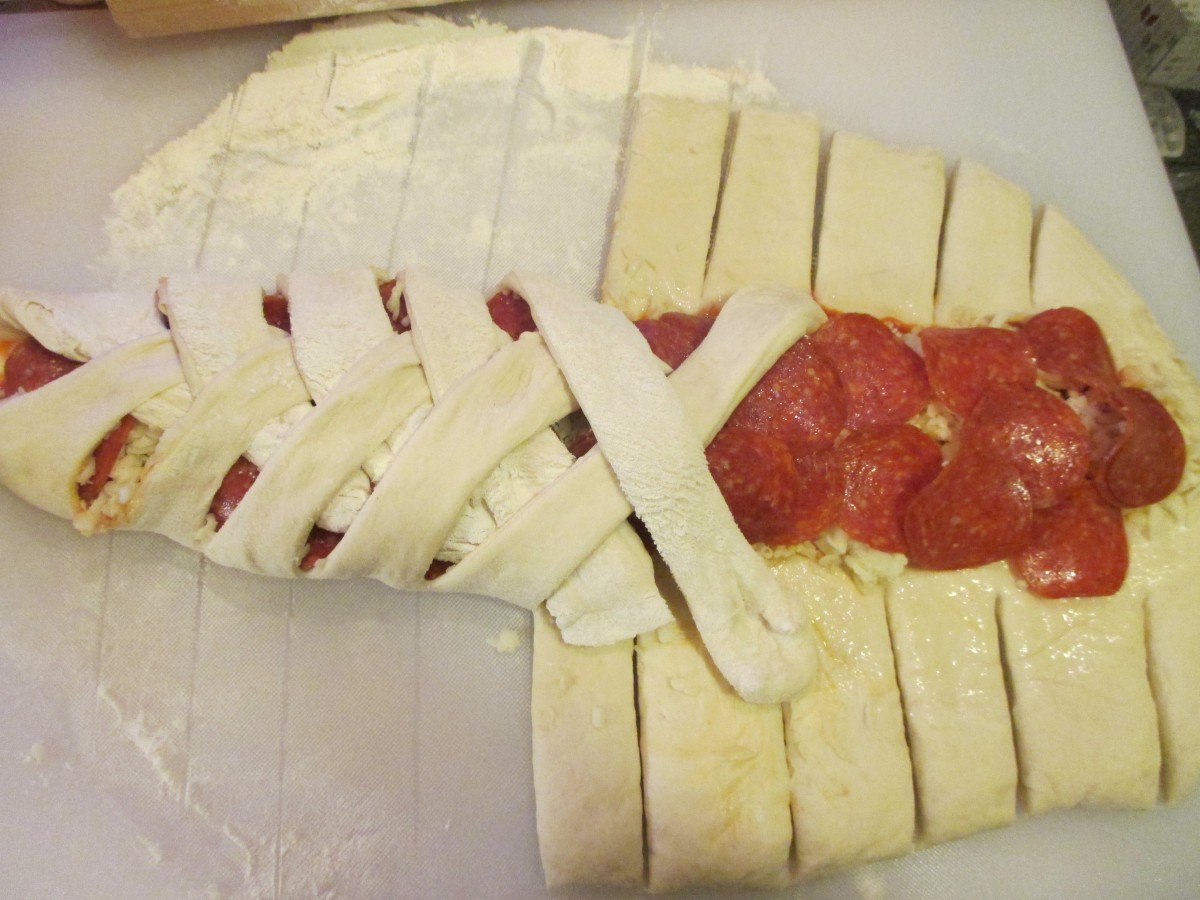
Cut strips of dough and fold over the filling
Transfer to baking sheet to rise.
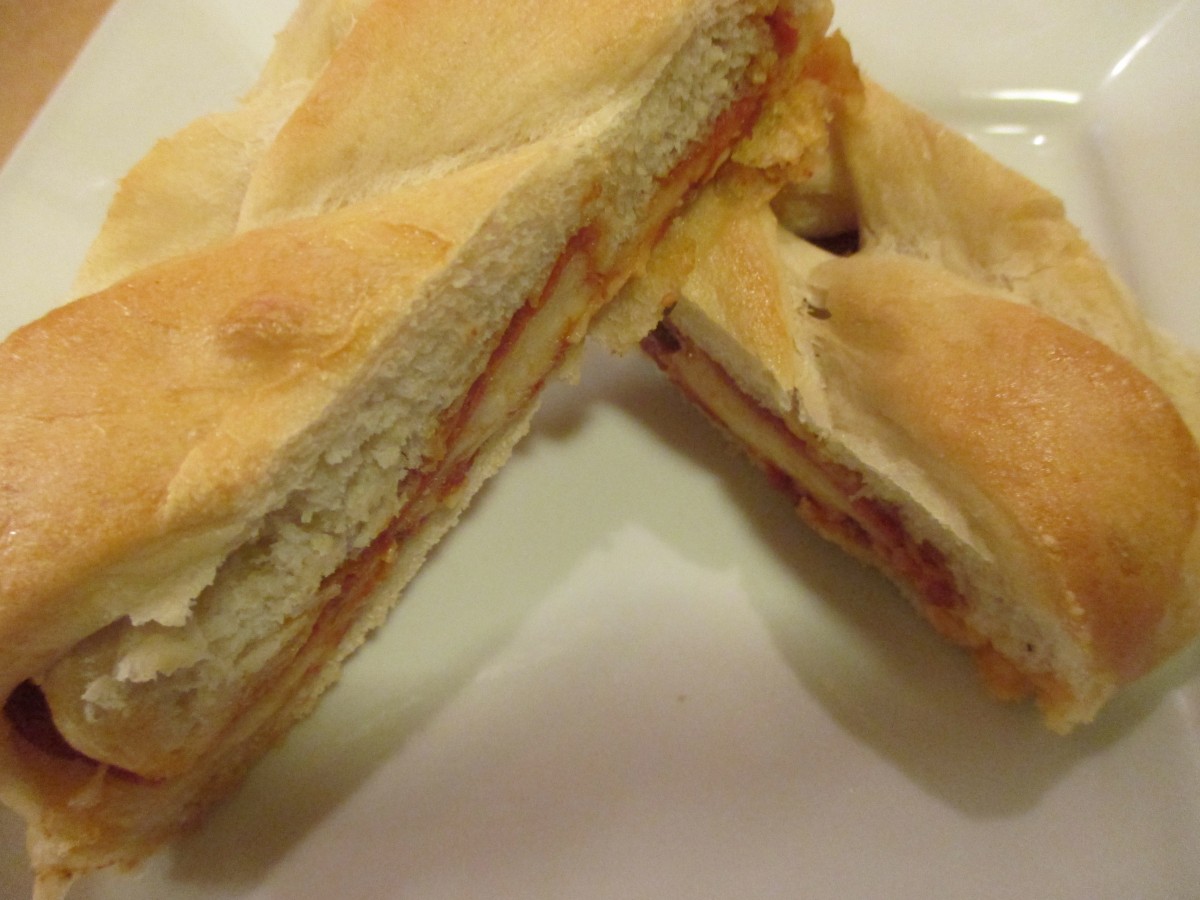
Cool a few minutes before slicing
Cherry Scones

Cherry Scones
Who doesn’t love cherry pie? I know I do. I got together for coffee with a couple of friends recently and I wanted to make something to have with our coffee. I used cherry pie filling as the base for these scones. My pie filling was homemade. Store bought cherry pie filling would work fine, too. They were just sweet enough and came out this beautiful pink color. They did remind me a little of cherry pie and summer. Nothing bad about that. The scones were great just as they were- but would also make a wonderful base for shortcake. I think with a scoop of ice cream or a bit of whipped cream, these scones would also make a nice dessert.
Cherry Scones
3 c. flour
1/4 c. sugar
1 T. baking powder
1 t. salt
1/2 c. cold butter
1 1/3 c. cherry pie filling
2 eggs
2 t. vanilla
Glaze:
2 c. powdered sugar
2 T. vanilla
water
Preheat oven to 400 degrees. Line 2 baking sheets with parchment paper or grease lightly. I have silicone baking mats so that is what I use. Set aside. In mixing bowl combine dry ingredients and cut in butter to resemble coarse crumbs. Combine pie filling with eggs and vanilla and stir to blend well. Add to dry ingredients and stir until mixed well. Mixture will be a stiff batter. Scoop 1/4 cup portions of batter onto the baking sheets- leaving a couple of inches between them. You will need both baking sheets. I used a 2 oz. ice cream scoop and got 22 scones. Bake for 15-17 minutes or until golden brown on the bottom. I switched my baking sheets about halfway through the baking. Remove to a cooling rack and make the glaze.
Combine the powdered sugar and vanilla in a small bowl and add enough water so the glaze is about the thickness of maple syrup, probably a couple of tablespoons. Dip the tops of each of the warm scones in the glaze and return to the cooling rack.
Blueberry Sweet Rolls
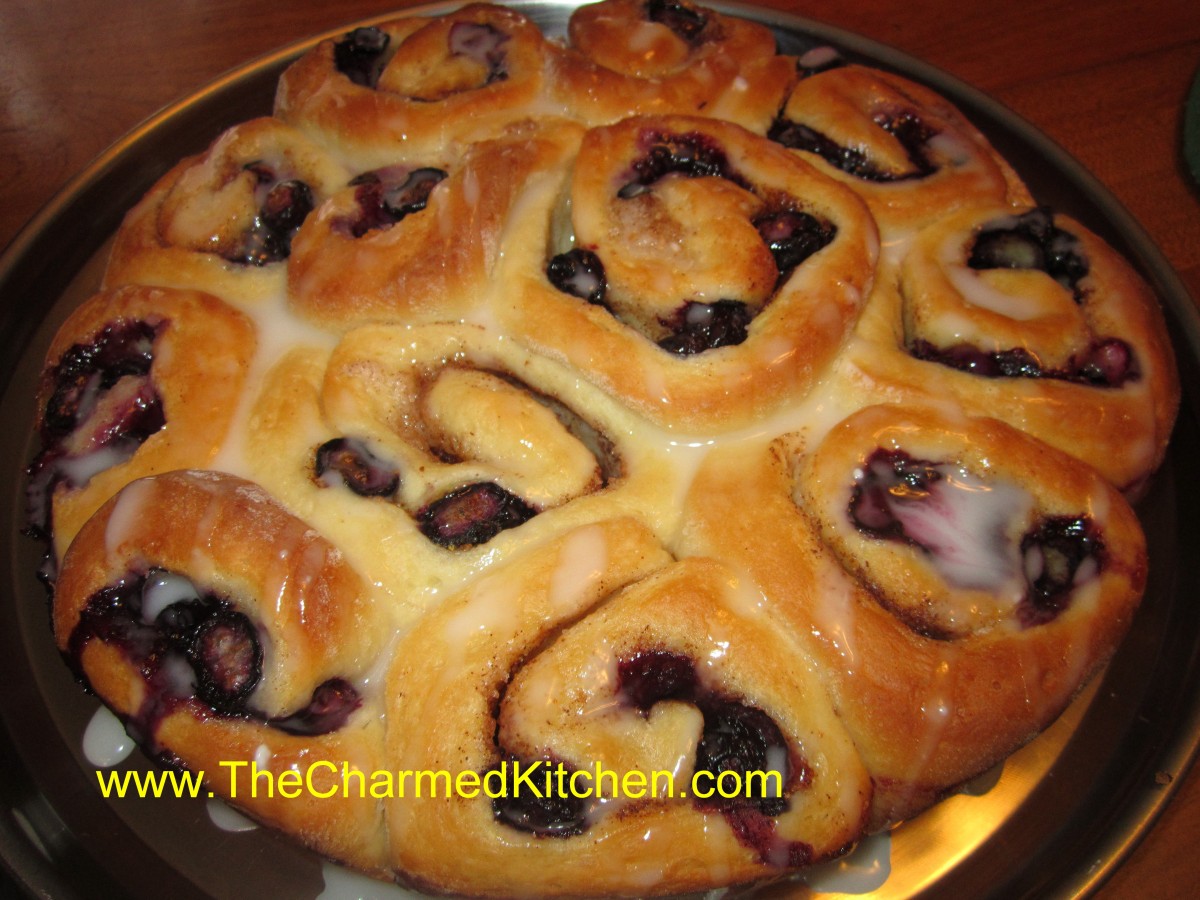
Blueberry Sweet Rolls
With blueberry season here, I had to make these rolls. These are a favorite recipe of mine. They are not too sweet, even with a powdered sugar glaze. Great for brunch or breakfast. Sweet enough to be dessert, too.
The base of the rolls is a rich, yeast dough. The dough is divided in half, rolled out, then brushed with butter. Then the dough is sprinkled with cinnamon sugar and topped with blueberries. The dough is rolled up, jelly roll fashion, then sliced into rolls.
The rolls are baked in 2 (9-inch) cake pans. The recipe makes 24 blueberry rolls.
I used fresh berries, but frozen work well, too. A good reason to buy extra berries and freeze them!!
Blueberry Sweet Rolls
3-3 1/2 c. bread flour
1 package active dry yeast
1 1/3 c. evaporated milk
6 T. butter
1/4 c. sugar
1 t. salt
1 egg
6 T. butter, melted
1/2 c. sugar
2 t. cinnamon
1 t. grated lemon or orange peel
2 c. fresh or frozen blueberries
In bowl combine 1 1/2 c. of the flour with the yeast, sugar and salt. Heat together the milk and 2T. of the butter until warm and add to the flour mixture, beating 2 minutes. Add egg and beat 2 minutes longer. By hand stir in enough of the remaining flour to make a soft dough. Turn dough onto a lightly floured surface and knead, adding flour as needed until dough becomes moderately stiff. Place in greased bowl, turning once to coat and cover. Allow to double in bulk, about 1 1/2 hours. Punch dough down, cover, and let rest 10 minutes. Divide dough in half. Roll each half into a 14×8 inch rectangle. Brush dough with the melted butter. Combine the remaining sugar, peel and cinnamon and sprinkle over the dough. Top with the blueberries and press the berries into the dough. Starting at the long side roll up dough jelly roll fashion and seal edge by pinching. Repeat with second roll. Cut each roll into 12 slices and place 12 rolls in greased 9 inch round pans. Cover pans and allow to rise until doubled, about 30 minutes. Bake in a 375 degree oven for 20-25 minutes. While rolls are warm, you can top with a powder sugar glaze, if desired. Makes 24.
Crock Pot Lambsquarters Quiche

Quiche in the crock pot
This recipe was inspired by a friend baking a pecan pie in crock pot. I was intrigued. It certainly would be cooler than turning on the oven. If it worked for pie, would it work for a quiche? I had to find out. I followed his directions as best I remembered them.
I started by spraying the inside of the crock pot with non- stick baking spray. I am sure I could have oiled it instead, or maybe rubbed it with butter. Then I placed the pie crust in- trying to fit it as best I could. It was pretty easy. I added the fillings like I normally would. I put on the lid and set it on high. I let the quiche bake for 90 minutes- then gave it a look. It was set, but the crust needed a little more time so I let it go another 30 minutes.
It worked!! A perfectly “baked” quiche in the crock pot.
OK- I can hear the question you want to ask-how do you get it out? We had errands to run so I turned it off and left it in the crock pot, uncovered, for an hour or so. It was still warm. I loosened the edges of the quiche. Then I removed the crock from the base. I placed my hand on the top of the quiche and turned the crock over. It came out right into my hand and I placed it on a serving plate. A little of the crust crumbled- but it mostly held together. Next time I might try 2 spatulas. I suppose I could have just sliced it right in the crock pot, too. Hindsight….
I made my quiche from lambsquarters. It’s a common weed, and tastes a lot like spinach. It is also growing all over my yard. You could certainly use spinach instead.
Lambsquarters Quiche
1 unbaked pie crust
3 c. shredded cheese, divided
2 T. flour
1 leek, white part only, sliced and sauteed in oil until tender
4-5 cups lambsquarters leaves, washed and steamed until wilted
3 eggs
1 c. milk or half and half
salt and pepper to taste
hot sauce to taste
For conventional cooking preheat oven to 400 degrees. Place crust in a 9-inch deep dish pie pan. Toss 2 cups of the cheese with the flour and place in pie crust. Add the leeks and lambsquarters. Combine eggs with milk and seasonings, beat until smooth and pour over the ingredients in the pie crust. Top with remaining cheese. Place on a baking sheet and bake 45 minutes to an hour. Check quiche for doneness by inserting a knife off center. If it is clean quiche is done. Serve 4-5.
Crock pot directions: Coat the inside of the crock pot with non- stick baking spray, butter or oil. Roll out pie crust and place in crock pot- crust should be at least 1-inch up the sides of the crock pot. Toss 2 cups of the cheese with the flour and place in pie crust. Add the leeks and lambsquarters. Combine eggs with milk and seasonings, beat until smooth and pour over the ingredients in the pie crust. Top with remaining cheese. Put the lid on the crock pot and set it on high. Let the quiche bake for 2 hours. Leave it in longer, if the crust is not brown enough.

Finished quiche, plated

Lambsquarters
Summer Tomato Salads

Marinated Tomato Salad
Tomato season is too short around here. I can never get enough of what my mom called “real tomatoes”. The first few tomatoes never make it in the house. Warm from the sun, they are too tempting. I just pick them right off the plant and eat them.
Then, I start to think about preserving some for after the season is over. So I start drying and canning tomatoes.
Sometimes, in the excitement of canning and dehydrating tomatoes, I find I haven’t remembered to eat enough of them fresh. So anxious to get as many as possible put away for winter, I have denied myself the pleasure of fresh, juicy, vine-ripened tomatoes.
Well, not this year. I have been having tomatoes with my eggs for breakfast, creamy tomato soup for lunch and plenty of tomato sandwiches and salads. I thought I would share a few of my favorite tomato salad recipes with you.
They are pretty simple. I think that is how it should be. When you have something as close to perfection as a ripe tomato, little more is needed.
Marinated Tomato Salad
3 large tomatoes, cut in wedges, or 2 pints cherry tomatoes, halved
1 T. olive oil
1 clove garlic, minced
2-3 basil leaves, cut into thin strips
2 T. balsamic vinegar
salt and pepper to taste
Combine ingredients and serve at room temperature. Serves 4-6.
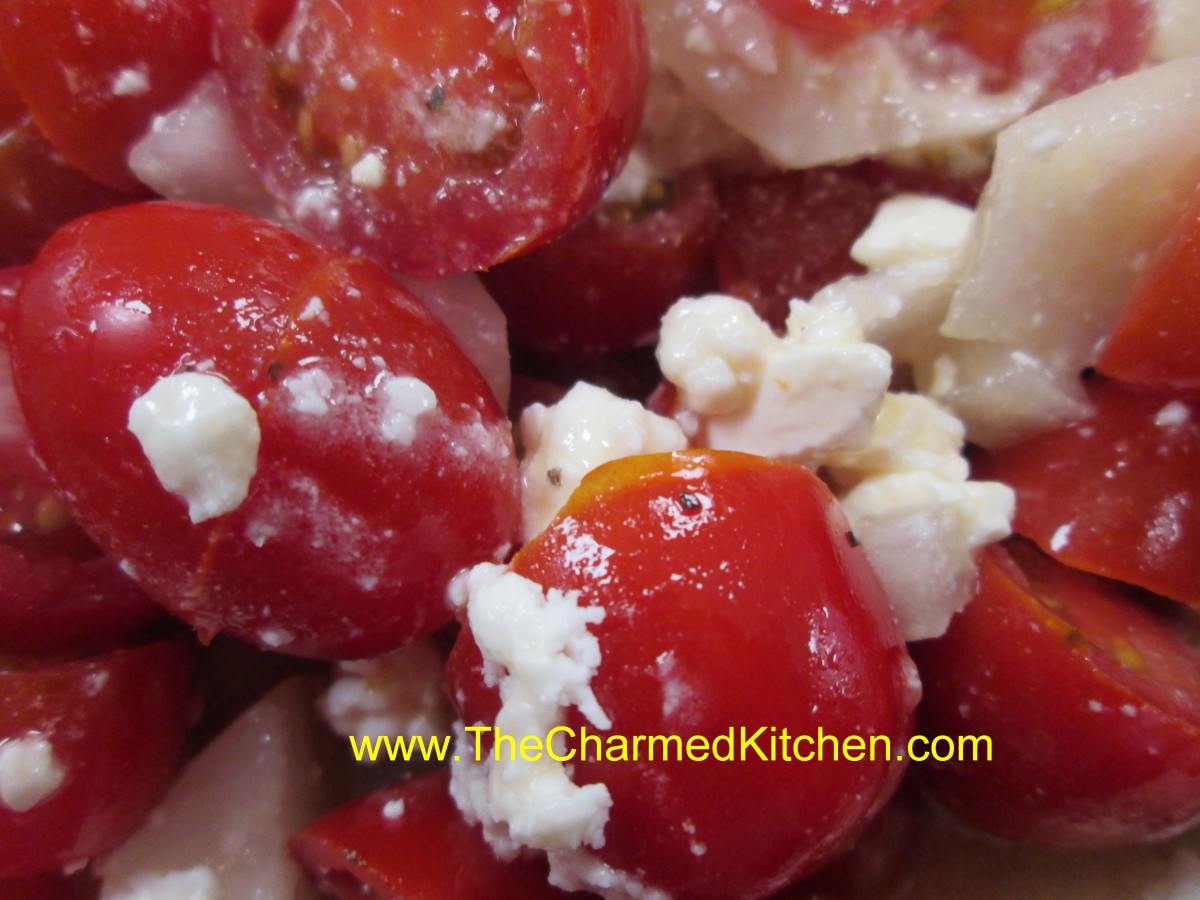
Tomato and Feta Salad
3 tablespoons crumbled feta cheese
12 cherry tomatoes, thinly sliced
1/2 sweet onion, diced
1 tablespoon olive oil -I used a lemon infused olive oil
1 tablespoon lemon juice
Salt and pepper to taste
In a bowl, mix the feta cheese, cherry tomatoes, onion, olive oil, and lemon juice. Add salt and pepper to taste. Serve immediately. Serves 2.
Warm Pasta Salad
1 lb. Plum tomatoes, chopped
1 medium sweet onion, chopped
4 oz. Fresh mushrooms, sliced
2 cloves garlic, minced
¼ c. fresh parsley, chopped
1 T. dried basil or 1/4 c. chopped fresh basil
1 T. capers, optional
1 t. dried oregano
½ c. olive oil
¼ c. red wine vinegar
3 T. balsamic vinegar
Dash of hot red pepper flakes
Salt to taste
1 lb. Uncooked pasta
Combine all ingredients, except pasta and chill overnight. Cook pasta, drain and toss with tomato mixture. Mixture should be served right away . Serves 6.
BLT Salad
6-8 slices bacon
2 slices rye bread
2 slices Swiss cheese
5 c. torn up lettuce or mixed greens
3 T. olive oil
2 T. apple cider vinegar
1 T. balsamic vinegar
Salt and fresh ground pepper
2-3 tomatoes, diced
Cook bacon until crisp. Remove from pan, drain and crumble. Remove most of the bacon grease from the pan. Make a sandwich with the rye bread and the Swiss cheese. Toast in the skillet over medium heat until golden brown and cheese is melted. Set aside. Place lettuce in bowl and toss with the oil to coat the leaves. Toss with the vinegars and season with salt and pepper to taste. Add the tomatoes and the bacon and toss. Cut the sandwich into cubes and place on the top of the salad. Serves 2.
Note: you can make two sandwiches if you want more bread and cheese in the salad.
Tomato Feta Salad
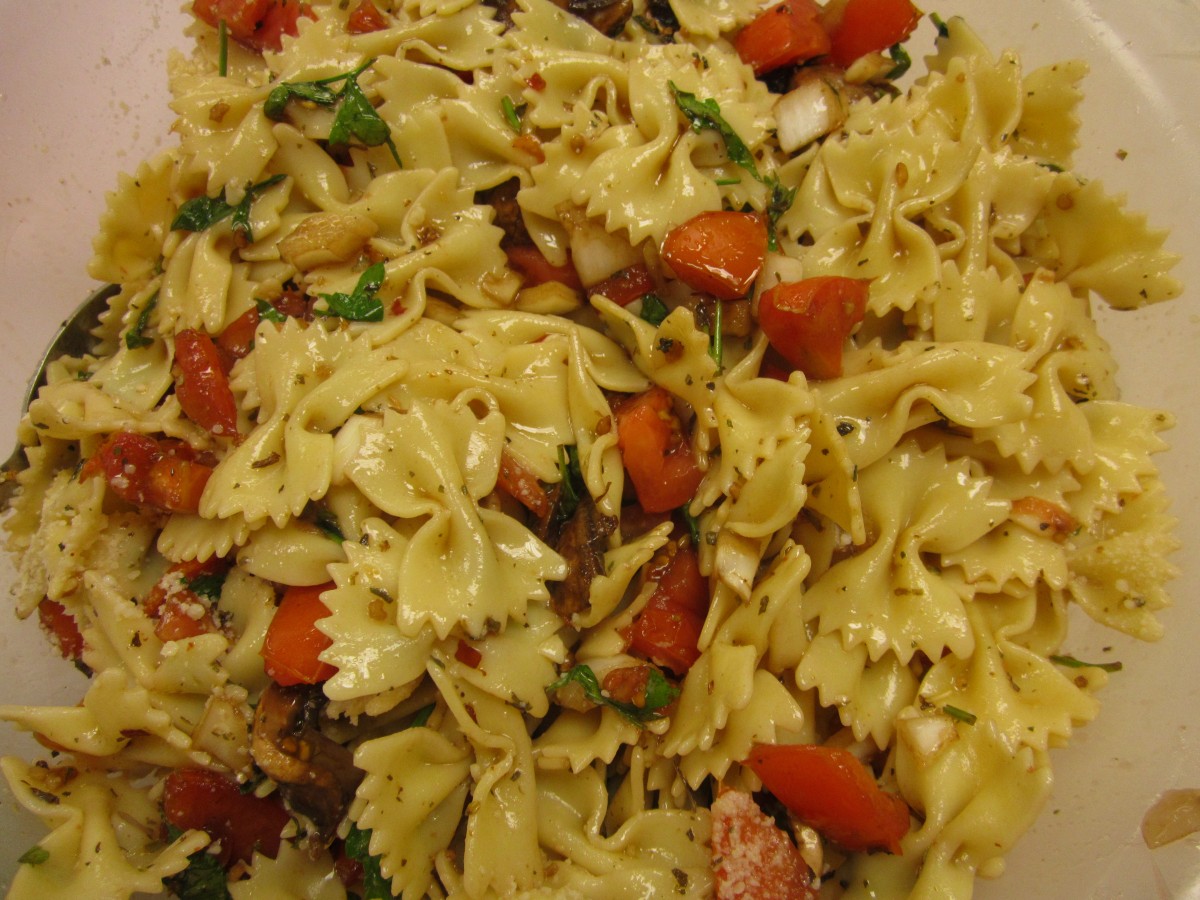
Warm Pasta Salad

BLT Salad
Cinnamon Vanilla Blueberry Jam
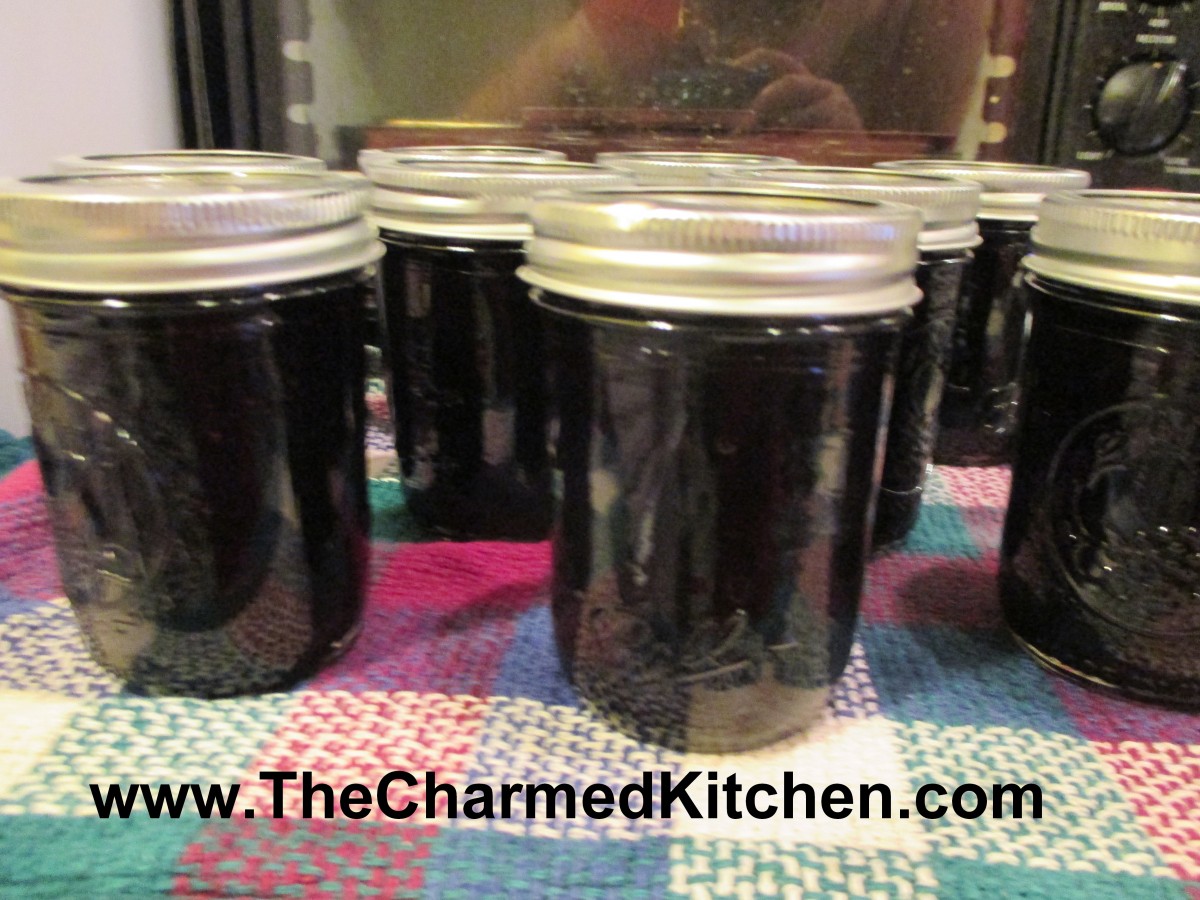
Cinnamon-Vanilla Blueberry Jam
It seems to be a great year for blueberries. The ones in my yard are starting to ripen, and I have more than ever before. So far, the netting is keeping birds and chipmunks away.
Prices at the market have been good, too. I have been eating berries, freezing berries and made some blueberry liqueur. I also wanted to make jam.
I often make blueberry jam with a little added vanilla, but decided to add cinnamon this time, as well. The result was so tasty.
I used the basic berry jam recipe from the Ball Blue Book, but I added both vanilla and a cinnamon in this batch. The flavors worked really well together. I am making more of this one, for sure. Enjoy.
Cinnamon- Vanilla Blueberry Jam
9 c. crushed blueberries
6 c. sugar
1 T. ground cinnamon
1 T. vanilla
Pick over berries getting any stems. Rinse , drain and crush. Place berries, sugar, cinnamon and vanilla in a large saucepan and heat slowly until sugar has melted. Bring up heat and cook over high heat, stirring often. Stir more as mixture thickens. It will take 20-30 minutes to get to the gel stage. To check for gel stage dip a metal spoon in blueberry mixture and hold it up sideways. Allow mixture to drip off and when two drops come together to form one larger drop- you are at gel stage. You can also use a candy thermometer. When the jam reaches 220 degrees- or 8 degrees over the temp of boiling water- you are at gel stage. Ladle hot jam into clean, hot jelly jars. Fill to within 1/4 inch of the top. Wipe rims and place on lids prepared according to directions on box. Screw lids comfortably tight. Place jars in boiling water bath with water at least 1-2 inches over the tops of the jars. Cover pot and start timing when water returns to the boil. Process 15 minutes. Remove jars to towel, cutting board or cooling rack in a draft-free location. Check seals once jars are cooled. Makes 8-10 jelly jars.
Source: Adapted from Ball Blue Book


