10 Plants You Might Not Know You Can Eat

I have posted this information before. I think it is information worth sharing again. You might have a fresh salad growing all around you, and not even know it.
A lot of people don’t realize how many common plants they can eat. I thought it might be fun to share a few of them with you. Some of these are plants we grow as landscape/ornamental plants. Others are more often thought of as “weeds”. All have one thing in common. They are edible.
Some you may already know. I hope I might show you a few edibles you didn’t know about before.
I tried to stick to plants that were easy to identify. If you are not sure what it is – don’t eat it. Don’t eat plants where pesticides have been sprayed, either.
With any luck, you have at least a few of these in your yard.
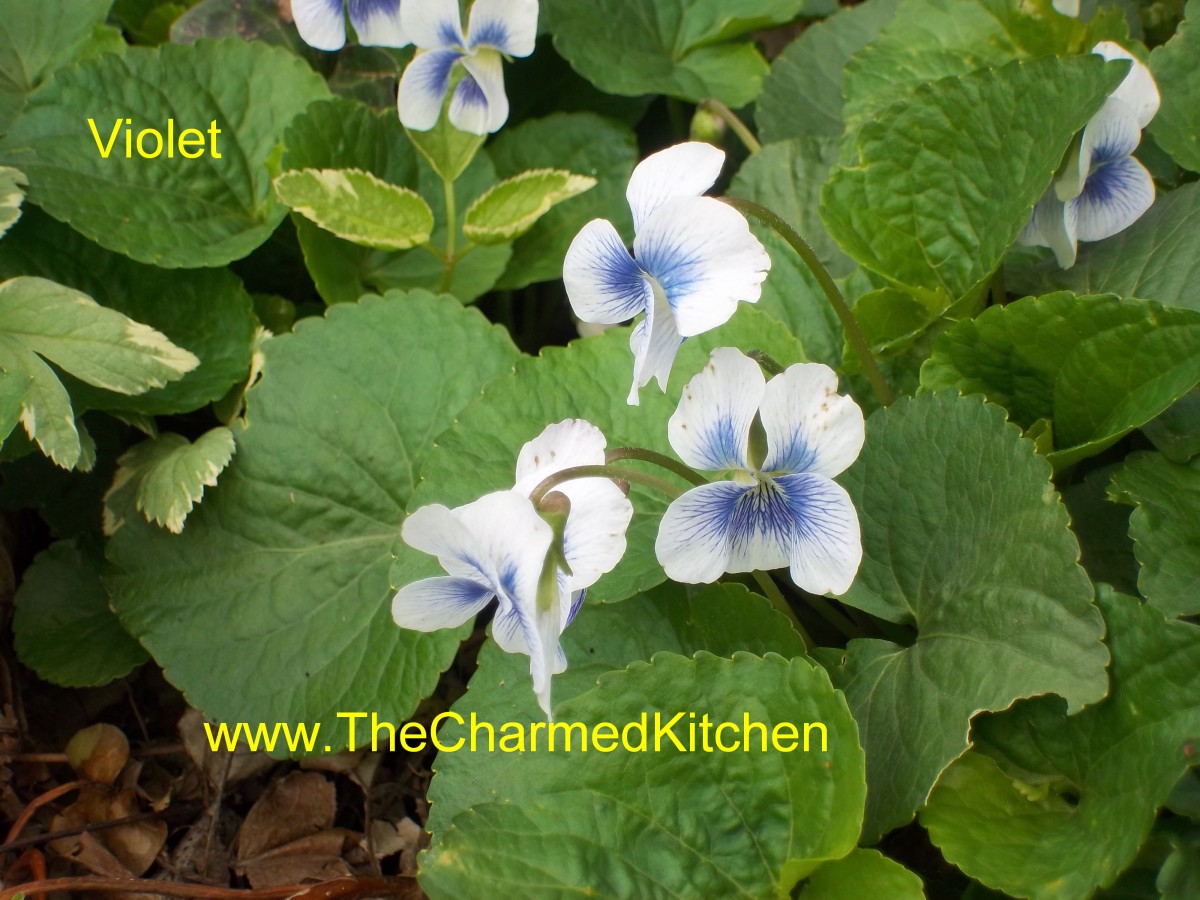
Violets: Violet flowers are edible and used to decorate pastries and to make jelly. Did you know you can also eat the leaves? They are mild flavored- especially when young- and are a great addition to salads. Violet leaves are also high in vitamin C.
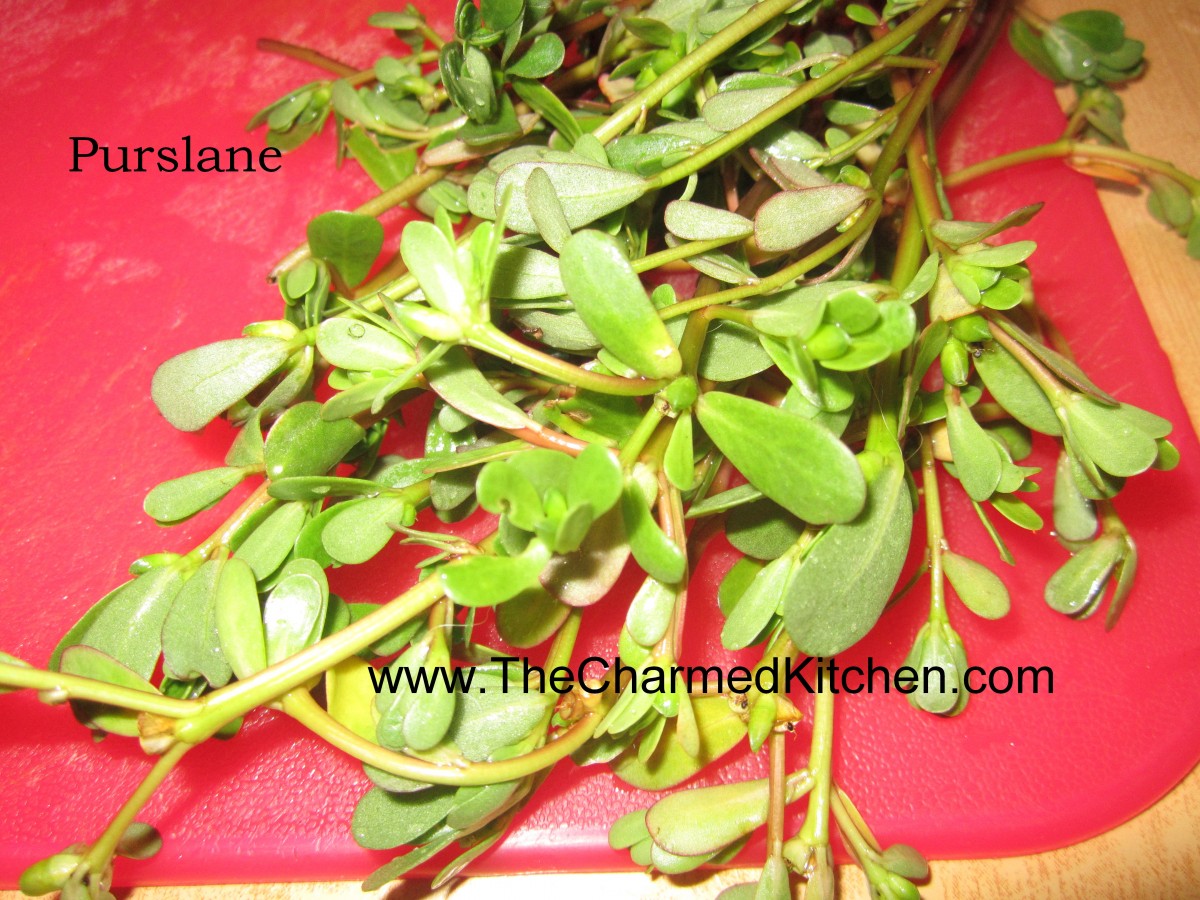
Purslane: The thick, fleshy leaves of purslane are easy to identify. Many vegetable gardeners make every effort to keep them out of their yards. Truth is, purslane is grown as a vegetable in many parts of the world. The leaves can be eaten raw in salads, can be cooked in a stir fry or just steamed as a fresh veggie. They can also be pickled. I make a salsa out of purslane leaves. They are crunchy with a slightly citrus flavor.
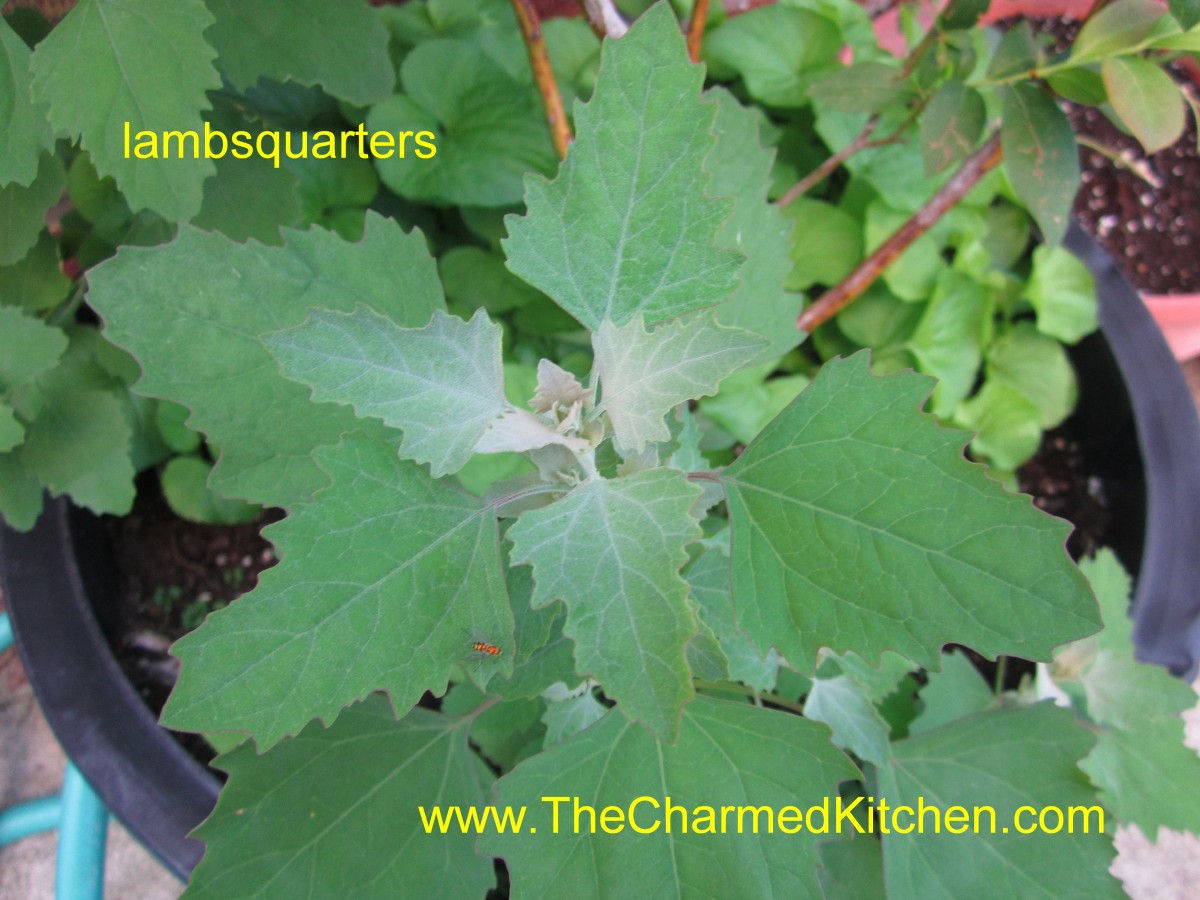
Lambsquarters: Lambsquarters are one of my favorites. They sprout all over my yard and in pots as soon as the weather warms up in the Spring. The leaves can be eaten raw when young or cooked as they mature. They taste just like spinach and are even better for you. Plants can get quite large and provide an easy harvest of nutritious greens.

Dandelions: We spend so much money trying to kill them. Sad because they are really a tasty green. Dandelions were brought to America by European immigrants as a vegetable. Their bitter greens can be an acquired taste. By combining the greens with certain foods you make them taste less bitter. Starchy foods like breads or potatoes, dairy products, tomatoes and vinegars all seem to tame the bitterness. Dandelion greens can be eaten cooked or raw. Flowers are used to make jelly and wine and can be added to baked goods.
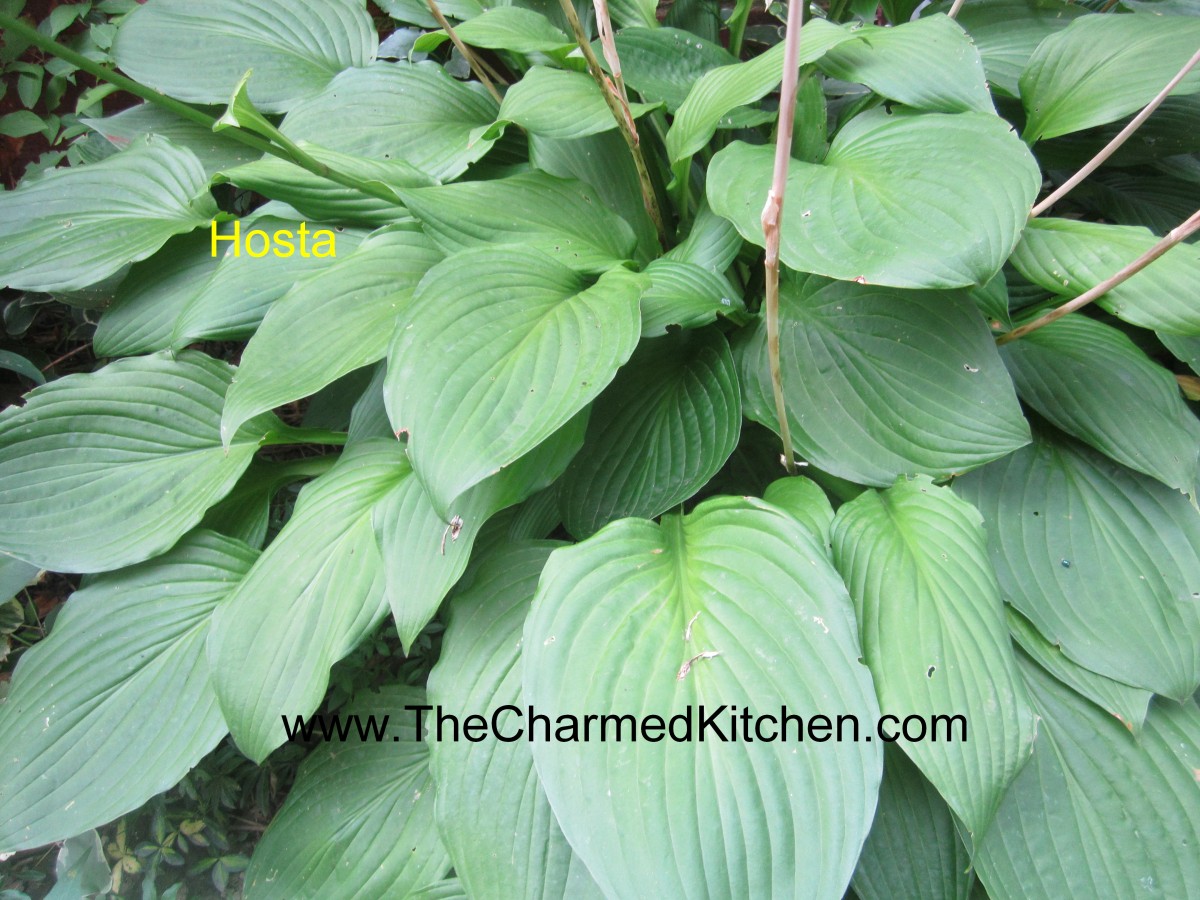
Hosta: If you can get to them before the deer do, you will be pleasantly surprised. Hosta leaves are quite mild flavored, similar to Bibb lettuce. I add them to salads and even serve them with dips. The older leaves get tough so pick young leaves.
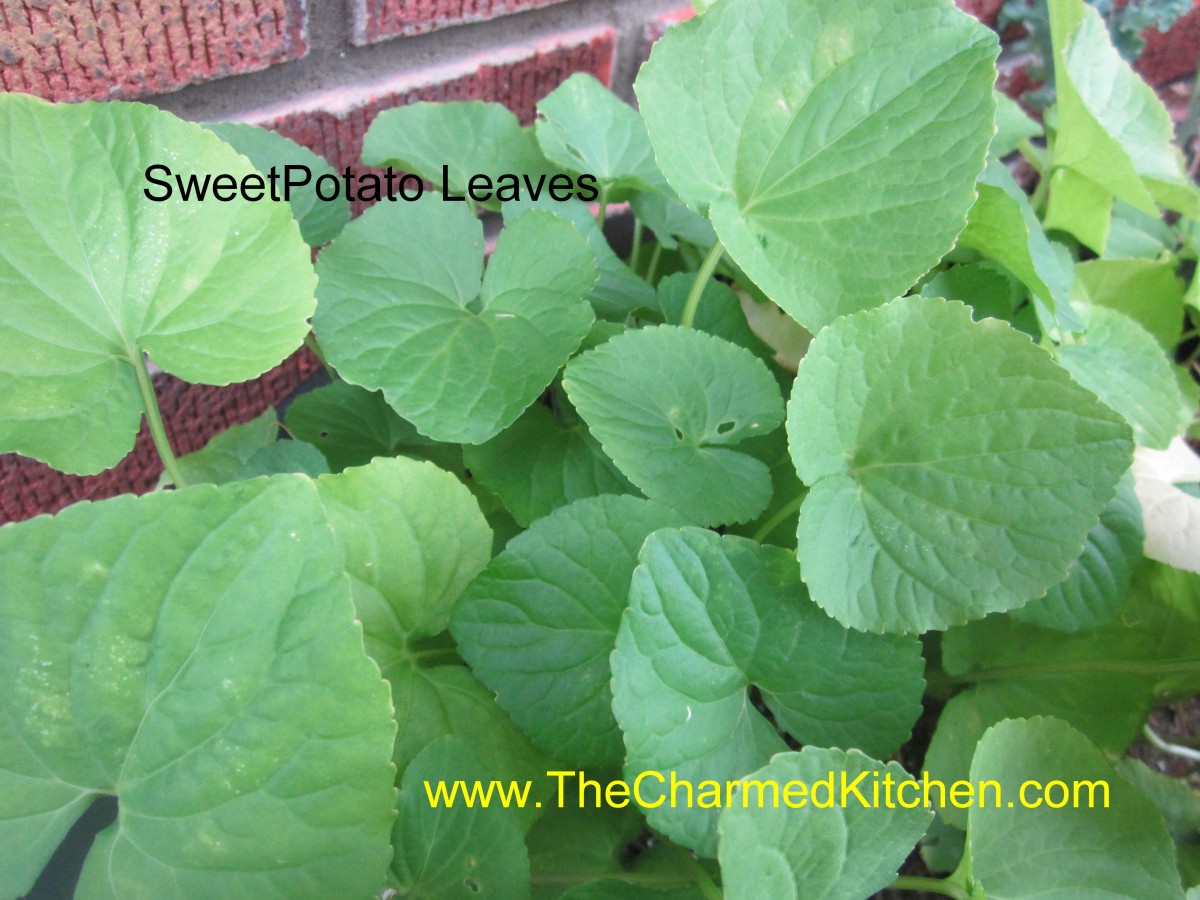
Sweet Potato Leaves: A friend from Hawaii first told me about eating sweet potato leaves. The leaves are pretty mild flavored. I normally eat them cooked although I have friends that eat them raw as well. You can eat the leaves of all sweet potatoes, including ornamental types.

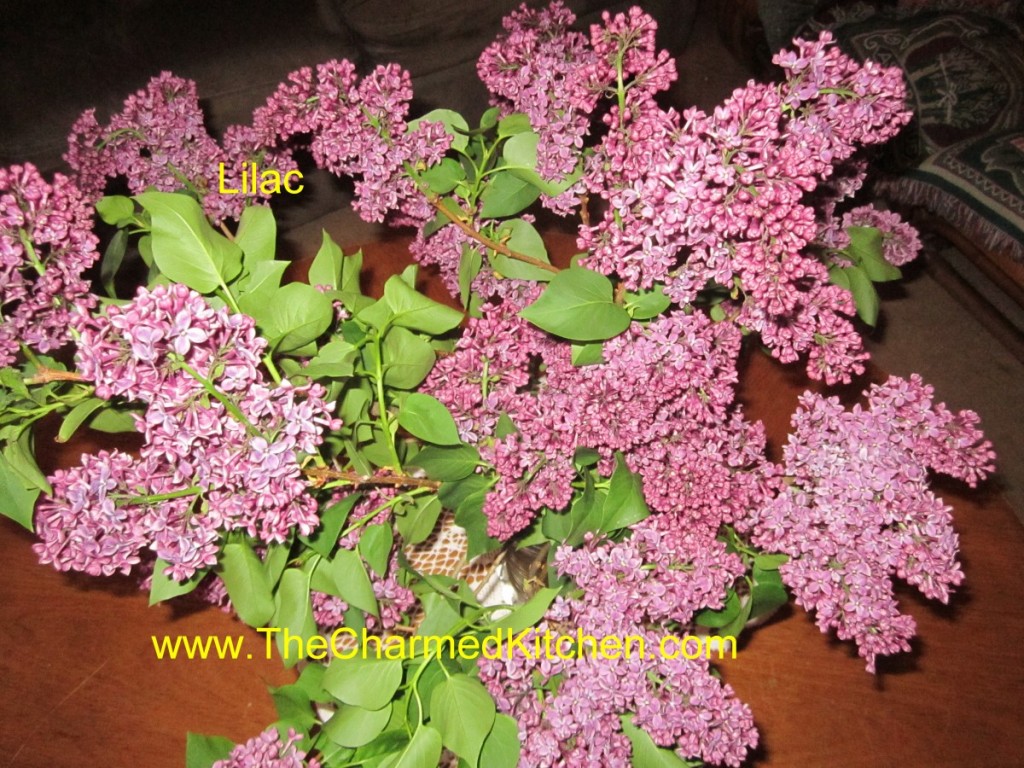
Lilac: Lilac flowers are fragrant and edible. I use them every year to make lilac infused vinegar. They have a nice spicy taste that works well in the vinegar. Blossoms can be added to salads, too. This year I also made lilac jelly.
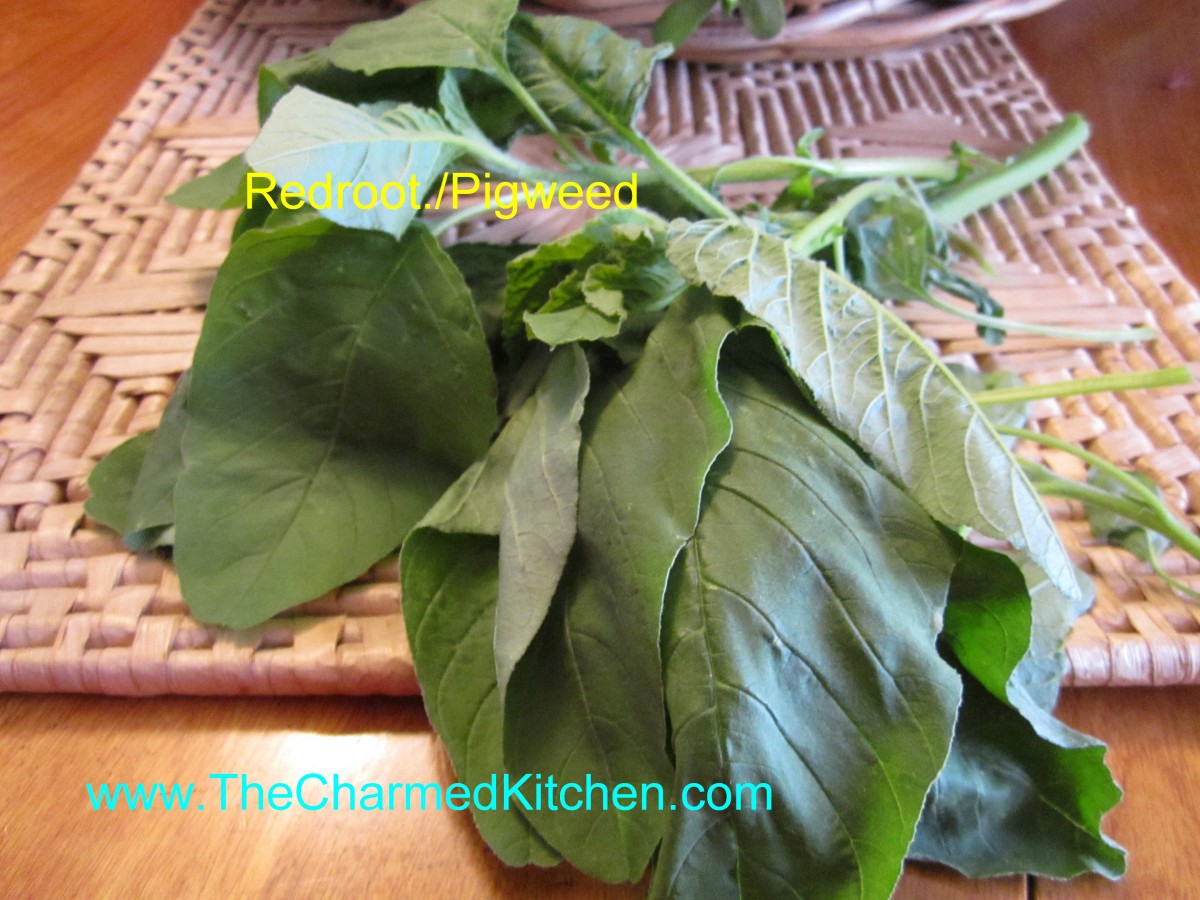
Redroot/Pigweed: This member of the amaranth family is distinguished by a reddish color to its roots. It has a spinach like flavor and can be cooked and used like spinach is any recipe. The plants can get several feet tall and often show up in places where the soil has been tilled.
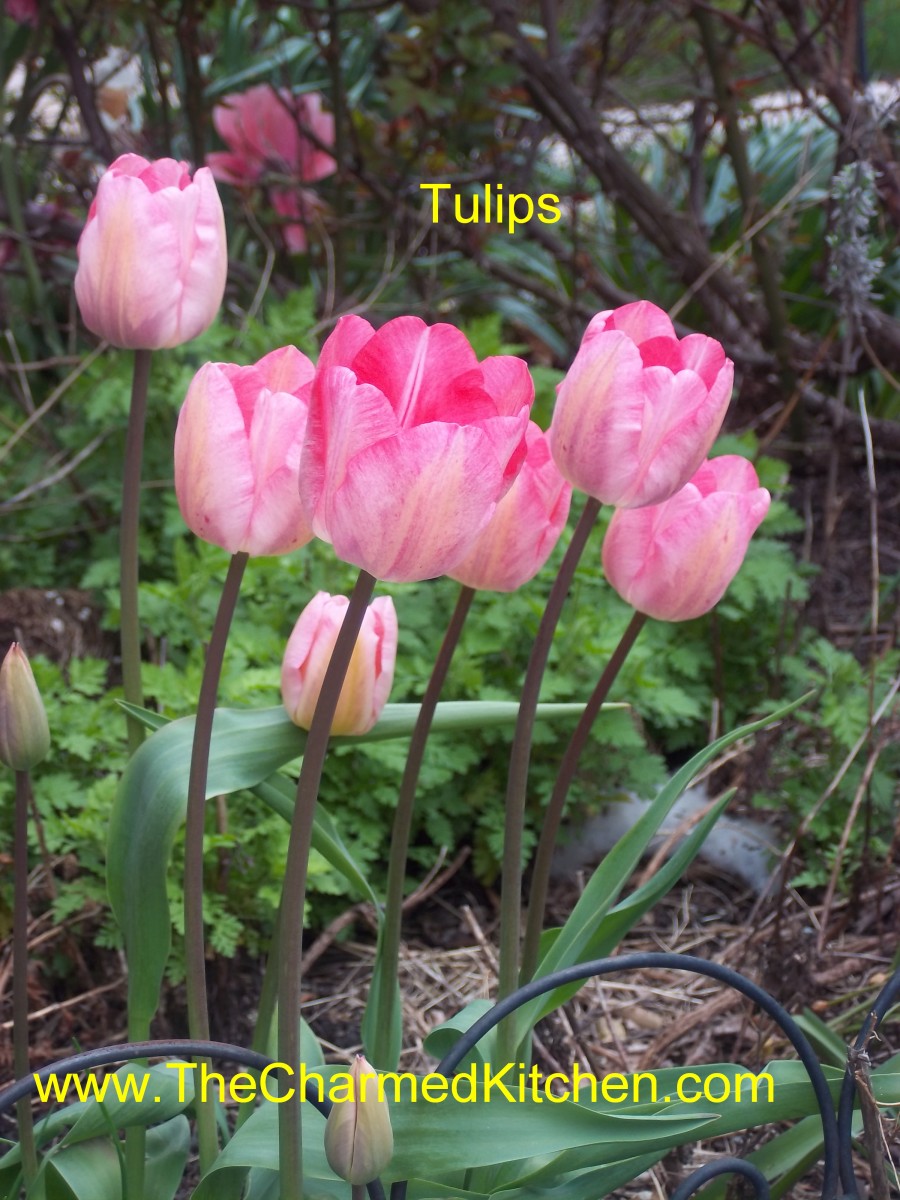
Tulips: Tulips are more than pretty, they are also quite tasty. The petals taste like a mild flavored lettuce and can add a beautiful touch to salads. The bulbs are also edible but only part of them. The inner yellow core has to be removed first. We rarely eat the bulbs because to do so would destroy the plant. The petals, however, can be harvested and eaten year after year without harming the plant.
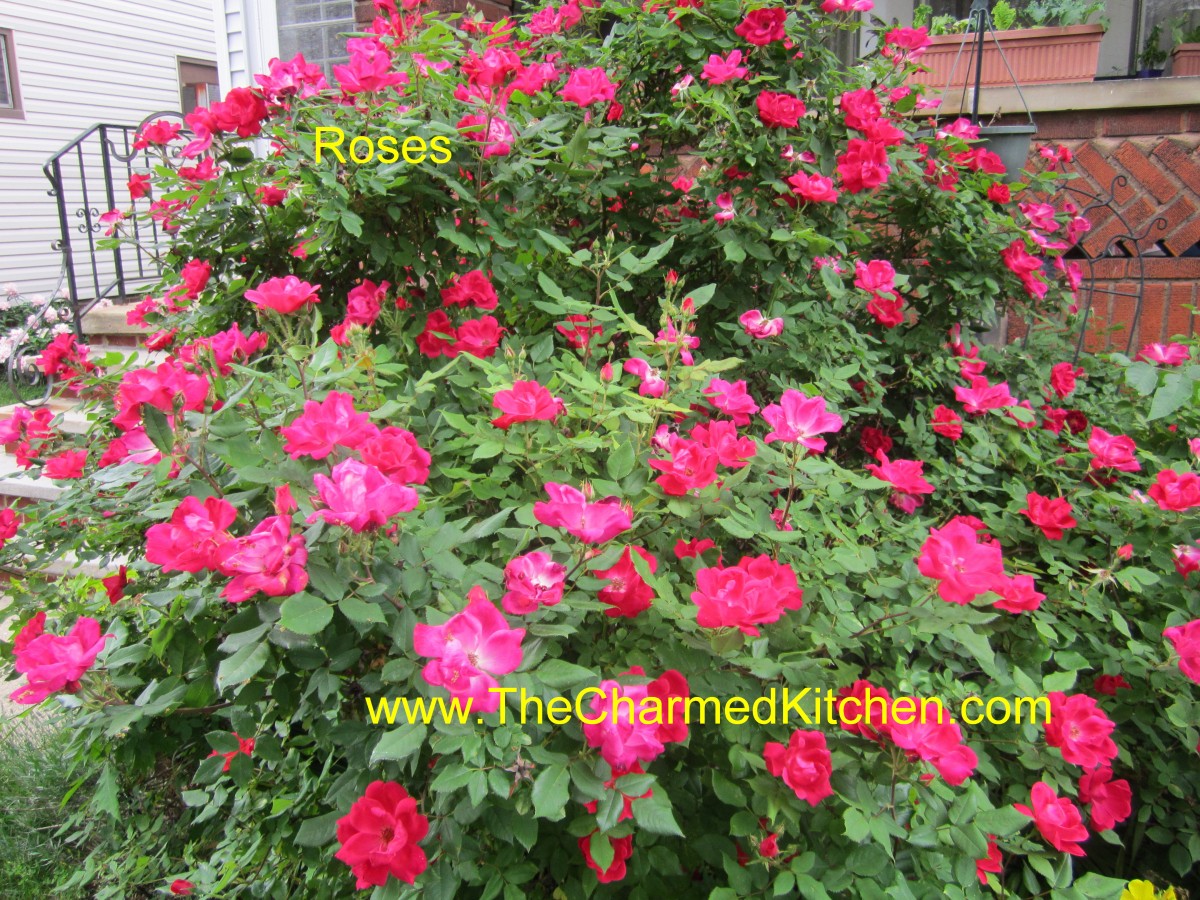
Roses: Rose petals have been used to make fragrances for a very long time. The petals are also edible and can be added to salads and used to make jelly, syrup and of course, rose water. The hips are also quite edible. Rose hips are the round balls that are left after the bloom is spent. They are full of vitamin C and can be cooked and used to make tea and jelly.
This is far from a complete list. Just a few things from my yard that I thought you might have, too.
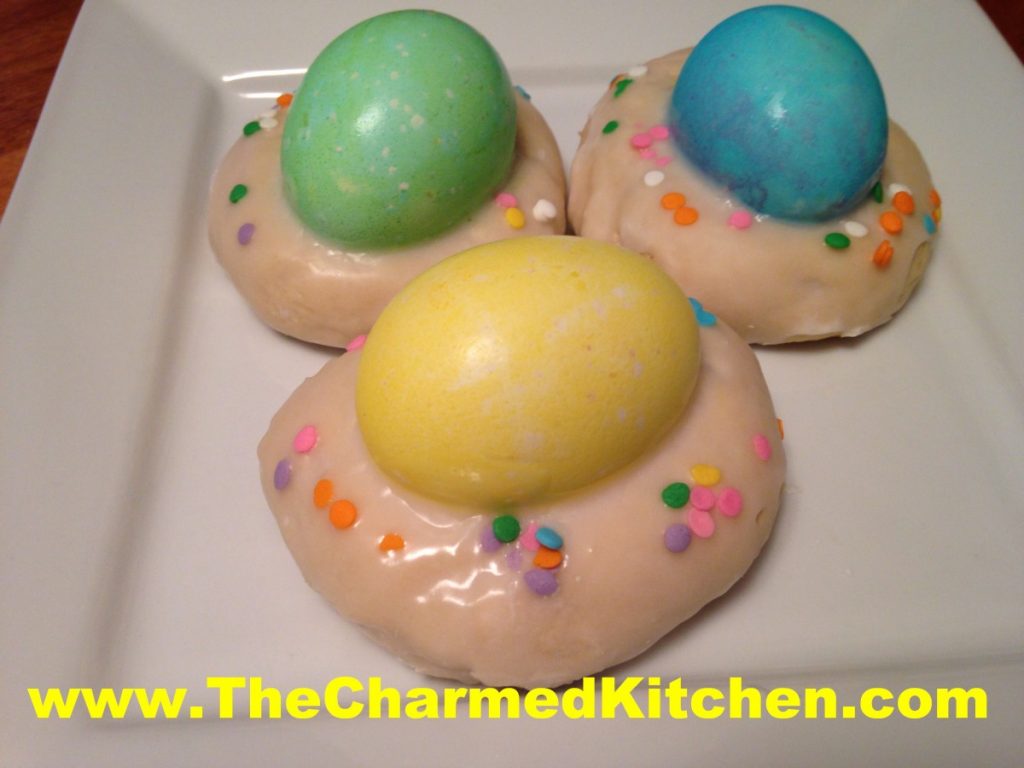
Chocolate Easter Egg Biscotti

After a friend mentioned that she would love my Easter Egg Biscotti even better if they were chocolate, I decided to try to make her some.
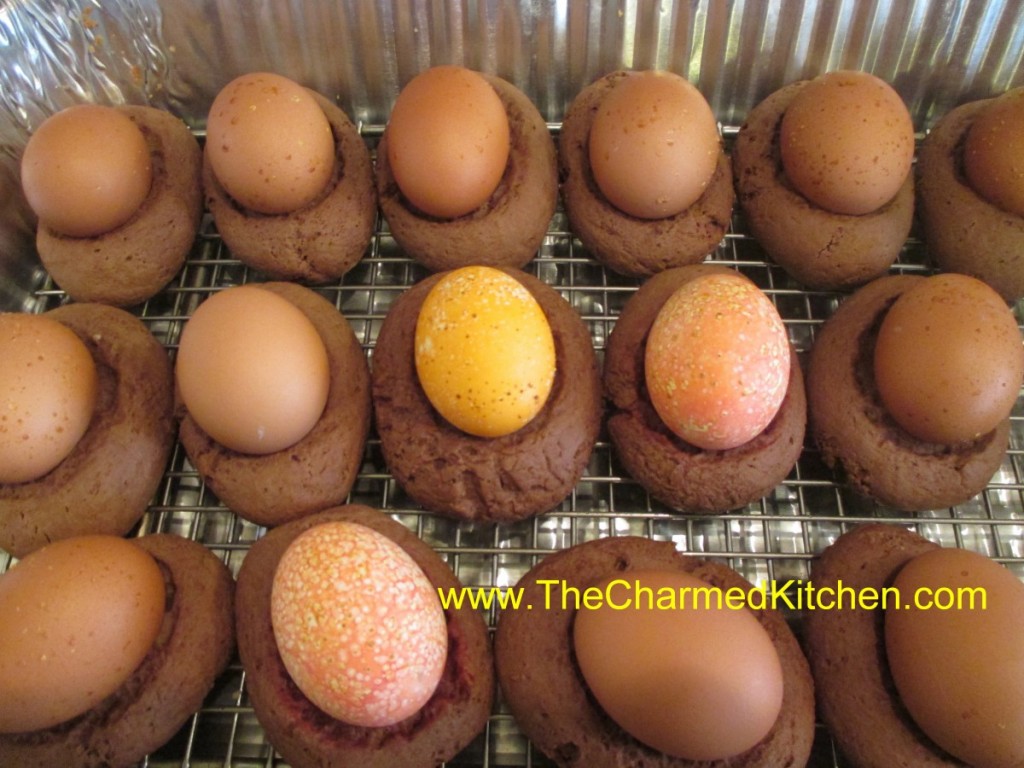
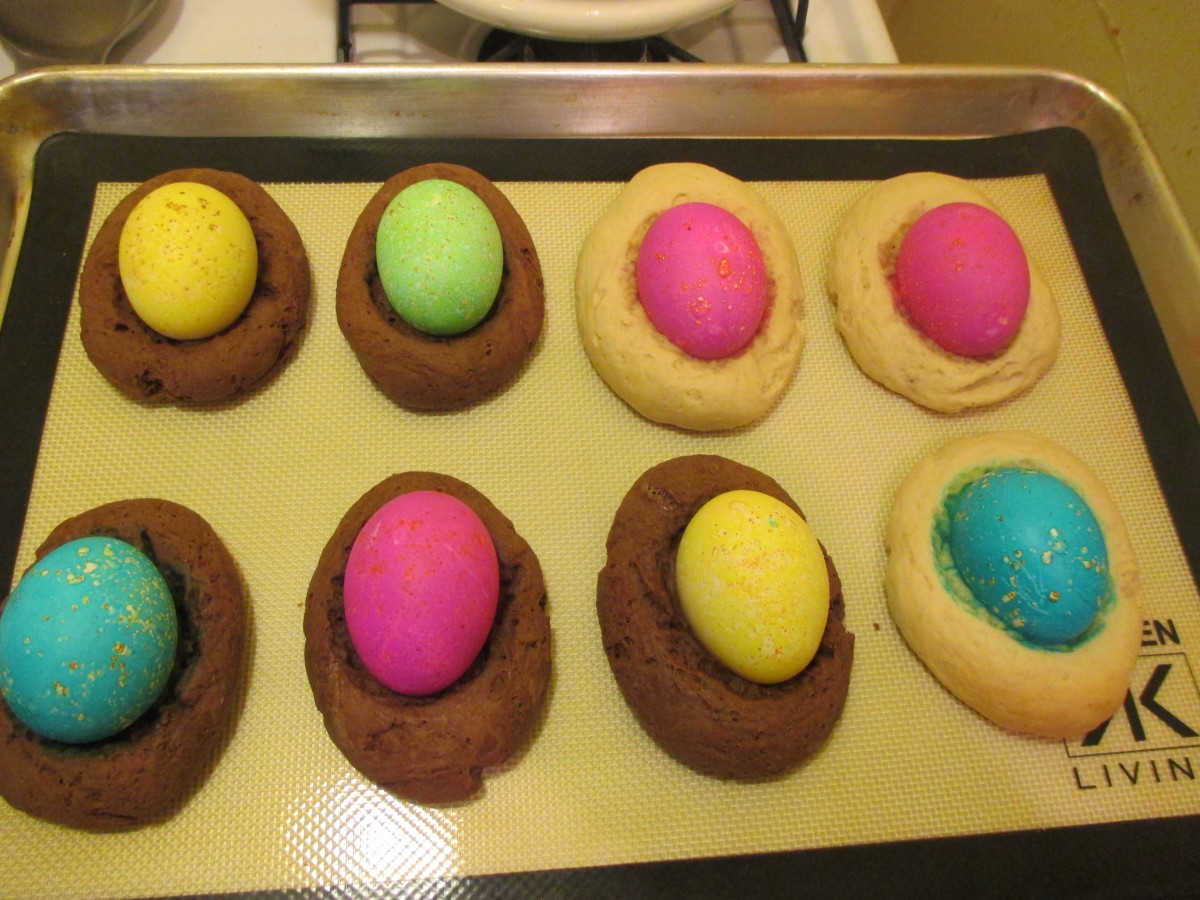
These biscotti are really just a big cookie, baked around an egg. Once cooled, I drizzle with a powdered sugar glaze. They are such a fun treat for Easter.
You don’t have to precook the eggs used in the middle. They will cook when the biscotti bake around them. If your eggs are already hard- cooked, that is fine, too. You can used dyed eggs or brown eggs.
This is the end result of my experiment. I used the original recipe, and added cocoa powder. Worked out really nice, so I thought I’d share them with you.
The original recipe came from the mother of a childhood friend. Rose made them with shortening. Over time I started making mine with butter, instead. The only change is, I chill the dough 30 minutes, or so, before using.
Chocolate Easter Egg Biscotti
1 c. shortening or butter – I use butter
1 ½ c. sugar
4 eggs
5 t. baking powder
1 t. salt
2 t. vanilla
1 c. milk
6 c. flour
¾ c. cocoa powder
24-30 eggs, plain or dyed
Powdered sugar glaze- recipe follows
Preheat oven to 350 degrees. Cream together shortening and sugar. Beat in eggs. Add next 4 ingredients and blend until smooth. Mix flour with cocoa. Stir in flour mixture 2 cups at a time. Dough should be pliable. If dough is too sticky add a little more flour. If using butter in the recipe, chill dough at this point. Take a piece of dough about the size of a large egg and roll until smooth. Place on a greased baking sheet. Indent middle slightly and then place an egg in the center, pressing down slightly. It should look like a nest. Continue with remaining dough allowing about 2-3 inches in between, as they will spread some. You can fit 6-8 on a large baking sheet. Bake 20 –25 minutes or until browned on the bottom. Cool on wire rack before drizzling with frosting. Makes 24-30. Store in the fridge.
Sugar glaze
2 c. powdered sugar
2-3 T. milk or orange juice
1 t. vanilla
Food coloring, if desired
Mix together until smooth and of drizzling consistency.
Hot Cross Buns Bread Pudding

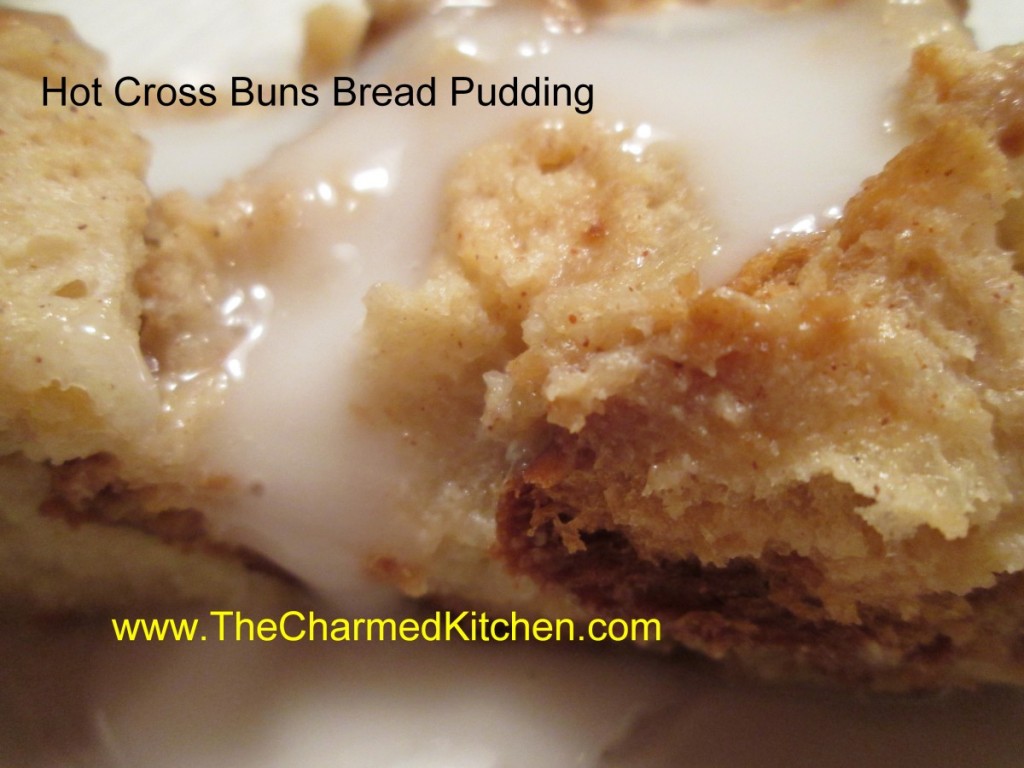
The first time I made this dish, it was sort of an accident. It was right after Easter, a few years ago. I was having dinner with friends, and I was in charge of making dessert. I had leftover hot cross buns, so I decided to re-purpose them into bread pudding. It is a great way to re-purpose something into a whole new dish.
The end result was really good. So good, that my friend Amy said it was one of the best desserts I had ever made. I now bake extra hot cross buns, just so I can make bread pudding from them.
You could use home made or store bought buns for this recipe. My recipe for hot cross buns is at the bottom of this post.
Hot Cross Buns Bread Pudding
12 c. torn up hot cross buns- I used 8 buns
2 c. half and half or milk
1 c. sugar- or less if you are using frosted buns
5 eggs
1 T. vanilla
1 T. cinnamon
Frosting:
1 c. powdered sugar
4 t. milk
In large mixing bowl place the torn up buns. Mix remaining ingredients and pour over the buns. Stir to moisten evenly. Spoon mixture into a buttered 9×13-inch pan. Bake in a preheated 350 degree oven for 35-40 minutes or until bread pudding is set and a little golden on top. While the bread pudding is baking combine powdered sugar with milk to make a frosting thin enough to drizzle. Let bread pudding cool 10 minutes and drizzle with frosting. Serves 8-10.
Hot Cross Buns
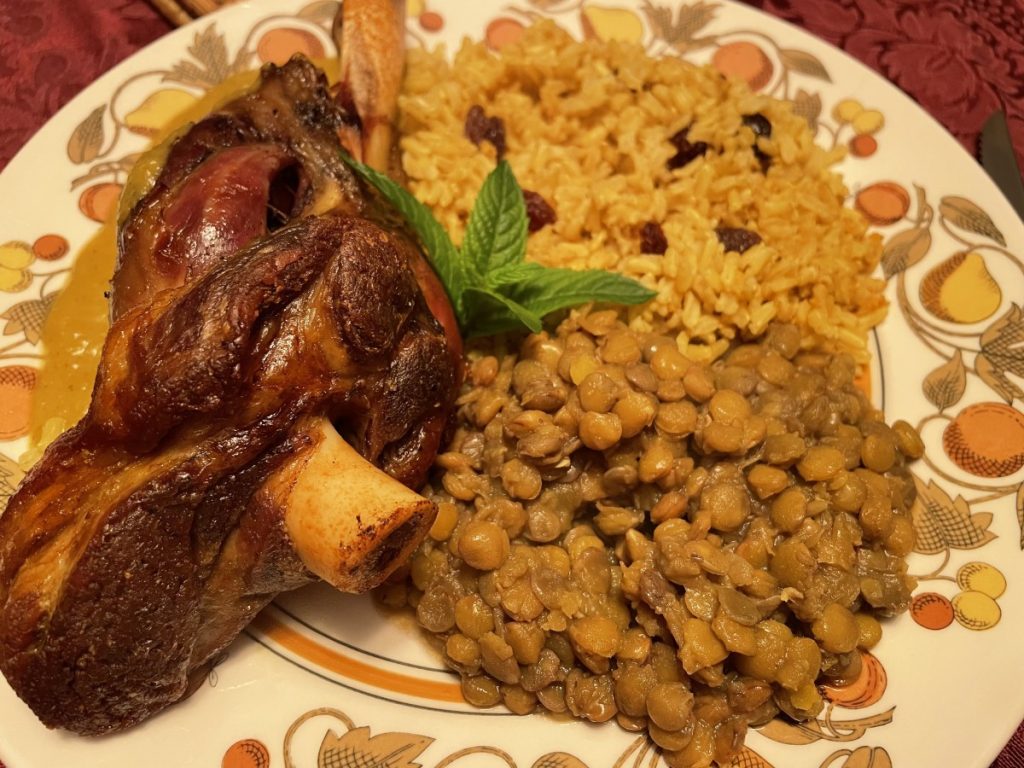
Braised Lamb Shanks

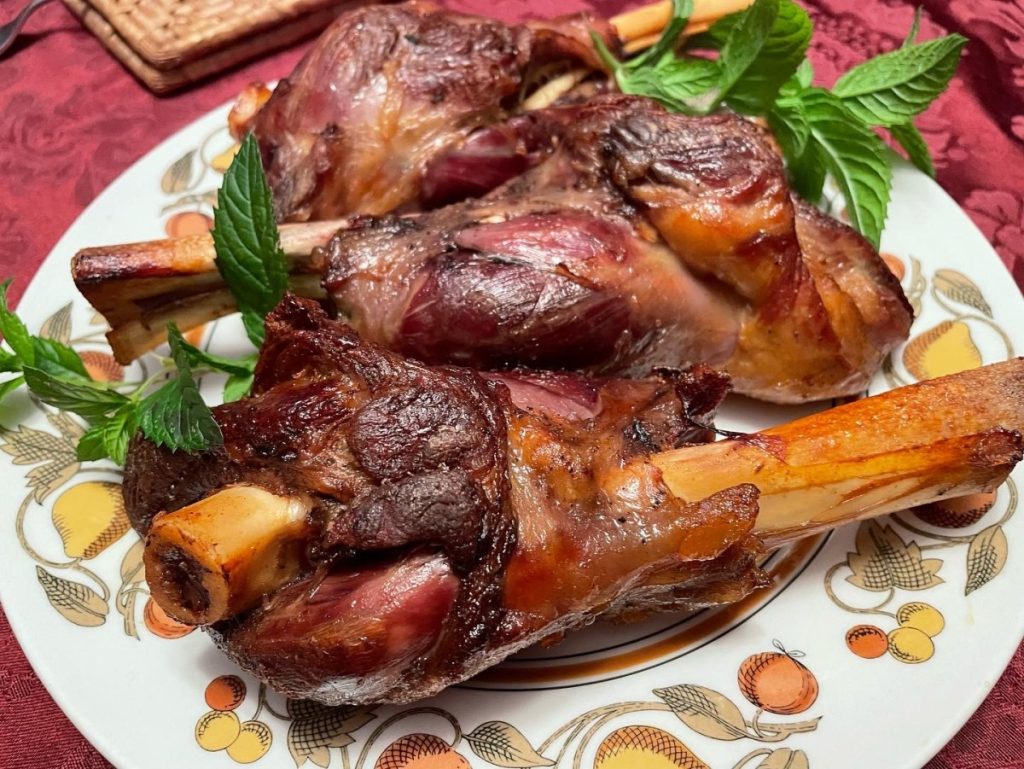
This might be one of my favorite meals. Braised lamb shanks are tender, full of flavor and easy to prepare. They are also reasonably priced. Because the shanks can be tough, they need a longer cook, with liquid, to get really tender. That is what braising is. They can be cooked faster in a pressure cooker, when time is an issue.
Recently a friend and I decided to make them for dinner. We ended up cooking them for about 2½ hours. They were perfectly tender. You can cook them longer, if you like. They really are simple to make. Yes, they take a while to cook, but once in the oven you don’t need to do anything but wait. We ended up using the cooking liquid to make a sauce. I just used an immersion blender to puree the veggies and cooking liquid. It tasted so good.
So here is the recipe for lamb shanks.
Braised Lamb Shanks
3 lamb shanks
2 T. oil
2 large onions, chopped
2 large carrots, chopped
1 rib celery, chopped
4-5 cloves of garlic, chopped
4 cups stock- lamb or beef preferred
½ c. sherry or red wine
2 T. curry powder
Salt and pepper
Cayenne pepper to taste
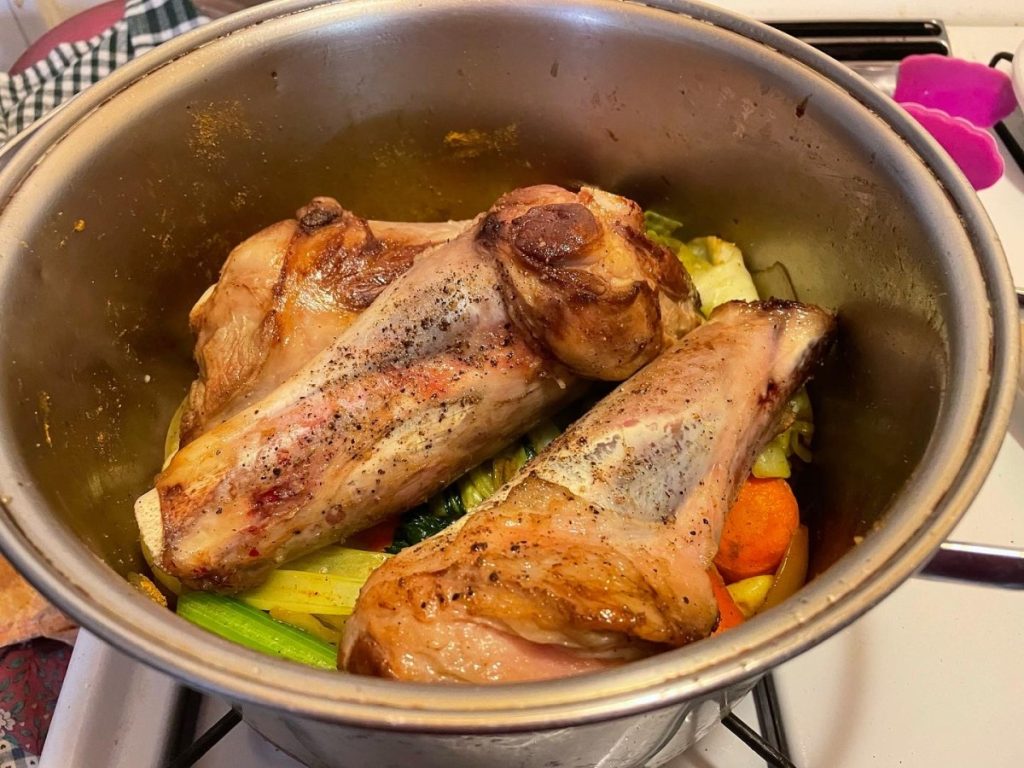
In Dutch oven brown the lamb shanks in oil until browned. Remove from the pan, add the vegetables and brown them for about five minutes. Return shanks to the pot. Add the stock and bring to a boil. Add sherry and seasonings. Place lid on pot and place in a preheated 350-degree oven for 2½- 3 hours. Check them after 90 minutes and add a little more stock, if needed. It is normal for some of the stock to cook down. I did not add more stock. Remove pan from the oven. Remove shanks and keep warm. Puree the vegetable mixture to make a gravy. Adjust seasonings. Serves 2-3.
Easter Egg Biscotti

I get so many requests for this recipe, I decided to post it again. This is a treat from my childhood. Rose Dieglio was the mother of my best friend, Debbi. Rose made these every year, and I loved them. Years later, she was kind enough to share her recipe with me. I always make a bunch to hand out to friends and family. It is a tradition I enjoy very much.
The dough is a type of cookie. You roll the dough out in pieces about the size of eggs. Make an indent in the dough and press in a tinted egg. The egg does not have to be cooked- it will cook when the biscotti bakes.
The dough will be a little sticky. Just add some flour to your fingers when shaping the dough, if needed.
The original recipe calls for shortening. I make them with butter, instead. If you use butter in the dough- chill it before baking.
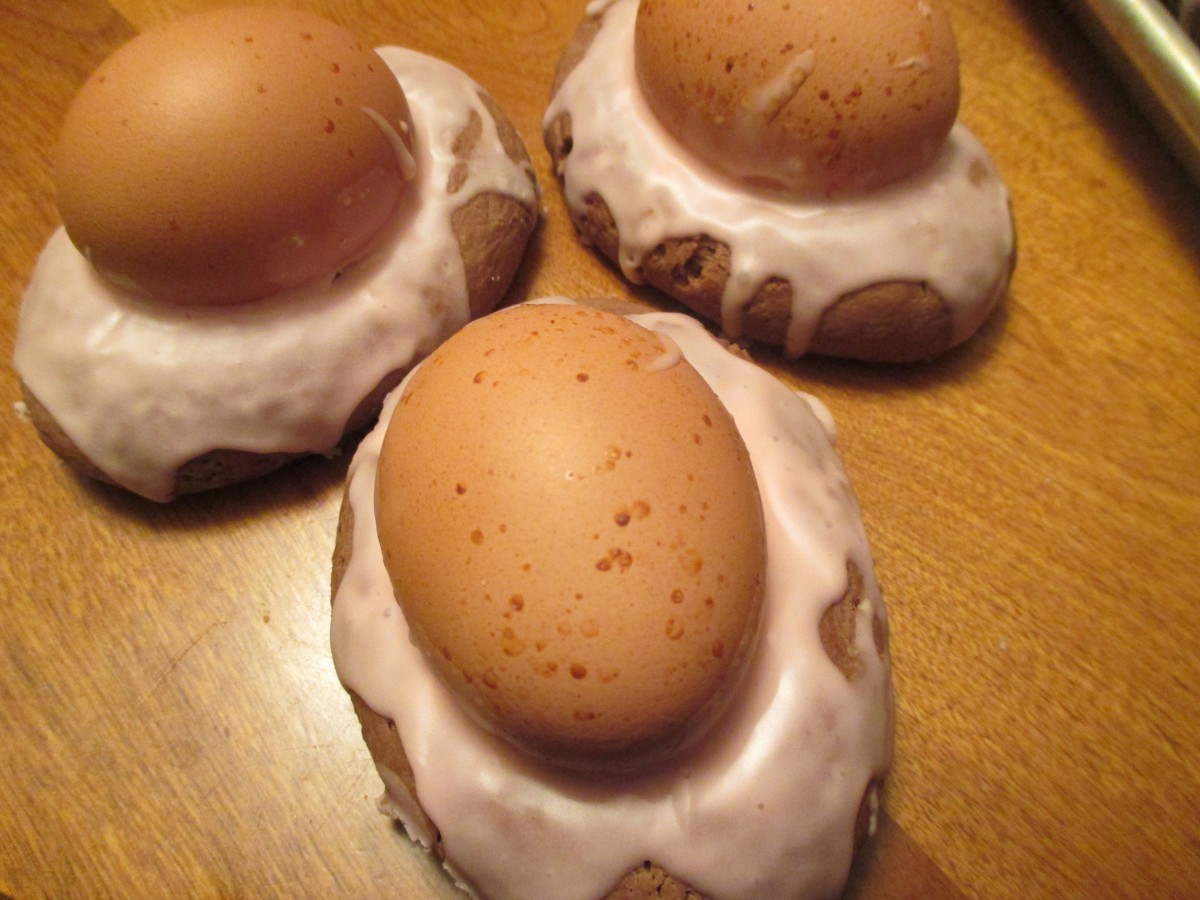
For years I made the biscotti with hard cooked eggs, that I dyed. My mom always asked if I needed to cook the eggs. She wondered if the eggs would cook during the baking process. So I tried it a few years ago. I placed a raw, un-decorated egg on one of the biscotti “nests” and baked it with the rest. What do you know? The egg cooked in the oven when the biscotti baked. The lesson here- always listen to Mom. Saves a whole step in making this recipe. Just be gentle when you press the eggs into the dough. They are raw eggs, after all.
Once baked, the biscotti can be topped with a powdered sugar glaze and sprinkles, if you like. Because they have hard cooked eggs in them, store in fridge after cooking.
Easter Egg Biscotti
1 c. shortening or butter- I use butter*
1 ½ c. sugar
4 eggs
5 t. baking powder
1 t. salt
2 t. vanilla
1 c. milk
6 c. flour
24-30 eggs, plain or dyed
Powdered sugar glaze
Preheat oven to 350 degrees. Cream together butter or shortening and sugar. Beat in eggs. Add next 4 ingredients and blend until smooth. Stir in flour 2 cups at a time. Dough should be pliable. If dough is too sticky add a little more flour. Take a piece of dough about the size of a large egg and place on a greased baking sheet. Indent middle slightly and then place an egg in the center, pressing down slightly. It should look like a nest. Continue with remaining dough allowing about 2-3 inches in between as they spread when baking. You can fit 6-8 on a large baking sheet. Bake 20 –25 minutes or until browned on the bottom. Cool on wire rack before drizzling with frosting. Makes 24-30. Store in fridge.
* If using butter- chill dough a couple of hours before baking.
Sugar glaze
2 c. powdered sugar
2-3 T. milk or orange juice
1 t. vanilla
Food coloring, if desired
Mix together until smooth and of drizzling consistency.

Cooling down
Lamb in Greek Lemon Egg Sauce

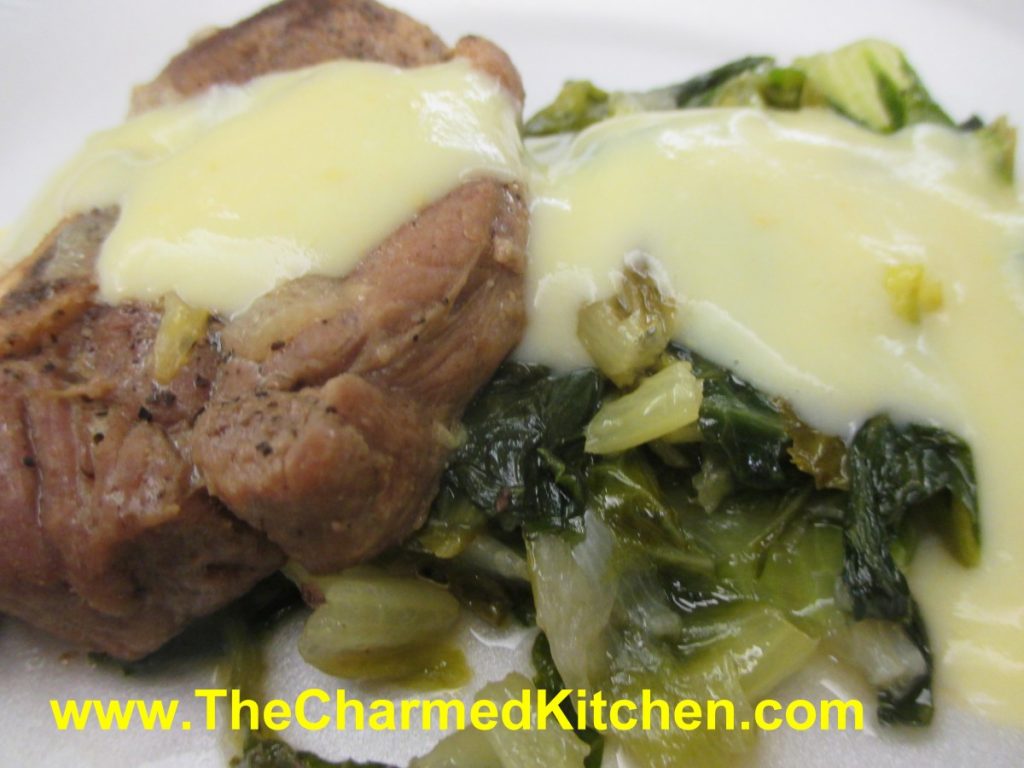
I am not sure which I love more in this recipe- the lamb that is cooked to tender perfection- or the Greek lemon egg sauce. Both are very special. I love lamb and have cooked it lots of different ways. This preparation will always be a favorite. This a great dish to serve for Easter dinner.
The recipe uses lamb shoulder, cooked with onions and Romaine lettuce- yes lettuce. The lamb is browned and then cooks gently until tender. The lettuce also cooks down and adds a nice green flavor to the dish. I have used lamb shoulder chops, and cooked them bone in. You could certainly use lamb shanks, if you prefer. Just allow enough time for the shanks to get tender.
The real magic is the lemon egg sauce, used to top the lamb once finished. It is creamy and has just the right amount of tang from the lemon juice.
If you are thinking of serving lamb for Easter, this would be a lovely recipe to use.
You can make this dish with pork or even chicken, but my favorite version is with lamb. I also use the lemon sauce with meat and rice stuffed zucchini. My dear friend Amy, had the dish on a trip to Greece and we made it often.
Fricassee of Lamb with Lemon Egg Sauce
2 1/2-3 lbs. lamb shoulder, or use pork
3 medium onions, chopped
2-3 heads romaine lettuce, washed and sliced thin
1/2 c. olive oil
Egg and Lemon Sauce -recipe follows
Cut the meat into serving pieces. Heat the oil in a pot and sauté the meat. Add salt, pepper, the onions, lettuce and a small amount of water. Cover the pot and let the fricassee simmer for about an hour. Prepare the egg and lemon sauce, pour it over the fricassee and serve.
Lemon and Egg Sauce
1-2 c. stock
2 eggs
juice of 1 lemon
flour, about 1-2 tablespoons, depending on how thick you want the sauce
Bring stock to the simmer. Beat eggs well. Mix the flour with the lemon juice.
Add to the eggs and keep beating. Add the hot broth slowly while you keep beating. Pour the egg and lemon sauce in the pot and bring to a simmer, stirring constantly. Makes 1-2 cups. For a thinner sauce eliminate the flour.
Easter Cupcakes

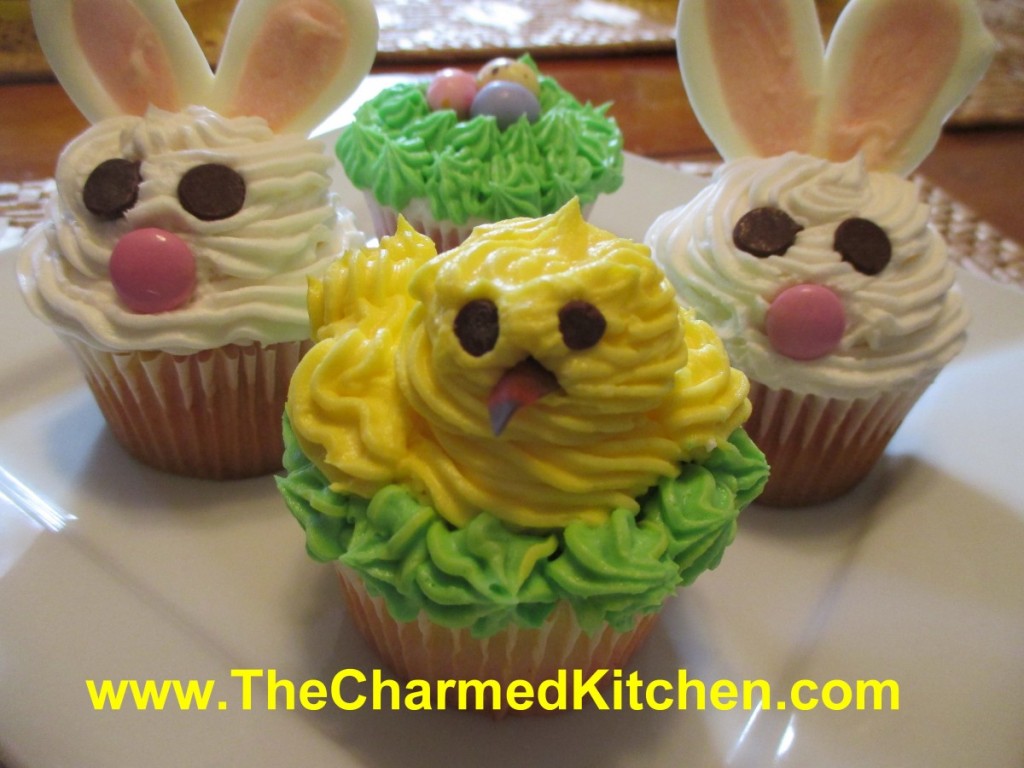
These cupcakes would make a great dessert for Easter- or any time. They are also a fun dessert for kids to make.
I started out by making a double batch of my classic white cupcakes- recipe follows. To add a little color to the cupcakes, I divided the batter into three bowls and tinted each of them a different pastel color.
As I filled the pans, I just added a spoonful of each of the tinted batters in them. They came out really nice.
I made three different cupcakes: bunnies, chicks and nests.
I also made a double batch of white chocolate frosting. You could certainly make a vanilla buttercream, if you prefer.
Details on how to make each of them are listed below.
Classic White (Vanilla) Cupcakes
1 cup sugar
1/2 cup butter
2 eggs
2 teaspoons vanilla extract
1 1/2 cups all-purpose flour
1 3/4 teaspoons baking powder
1/2 cup milk
Preheat oven to 350 degrees. Line a muffin pan with 12 paper liners. In a medium bowl, cream together the sugar and butter. Beat in the eggs, one at a time, then stir in the vanilla. Combine flour and baking powder, add to the creamed mixture and mix well. Finally stir in the milk until batter is smooth. Pour or spoon batter into the prepared pan. Bake 20 to 25 minutes. Cupcakes are done when they springs back to the touch. Makes 12.
White Chocolate Frosting
6 oz. white chocolate – if using bars, chop before melting
1 stick (4 oz.) cold butter, cut into cubes
1-2 c. powdered sugar
1 t. vanilla
Melt chocolate. I just melt mine in a microwave safe dish, but you can use a double boiler. Let chocolate cool down a little. Beat butter into the melted chocolate. Beat until smooth and then beat in the powdered sugar and vanilla. Whip until frosting is smooth and fluffy. I normally beat for 5 minutes or longer. If too thick, add a few drops of water or milk. For this recipe, I made a double batch of frosting.
Bunnies
extra white chocolate
food coloring- pink or red
chocolate chips
pastel ( pink) M&M’s
Make bunny ears by melting some white chocolate and putting it in a piping bag or bottle. On wax paper, make outline of the ears in white chocolate and allow to cool/harden. Place a drop or two of pink or red food coloring in a microwave safe bowl and add some white chocolate. Melt in microwave, being careful not to burn the chocolate and stir until it turns pink. Pipe the pink chocolate into the middle of the ears. Allow to harden before peeling off of the was paper. Using a star tip, pipe frosting on cupcake. I made three layers – to add height to the cupcake. place ears on cupcake and add chips/candy for eyes and mouth.
Chicks
Frosting tinted yellow and green
mini chocolate chips
fruit roll up
Using star tip, pipe the chick’s body onto the cupcake in yellow frosting. Pipe on head and wings. Pipe green frosting around chick to form a nest. Use mini chips for eyes and cut fruit roll up for beak.
Nests
Frosting tinted green
egg shapes malted milk balls- or you could use jelly beans
Pipe green frosting on cupcakes to make nests. Add three, or more, candies in the middle for eggs.

Piping pink filling in ears
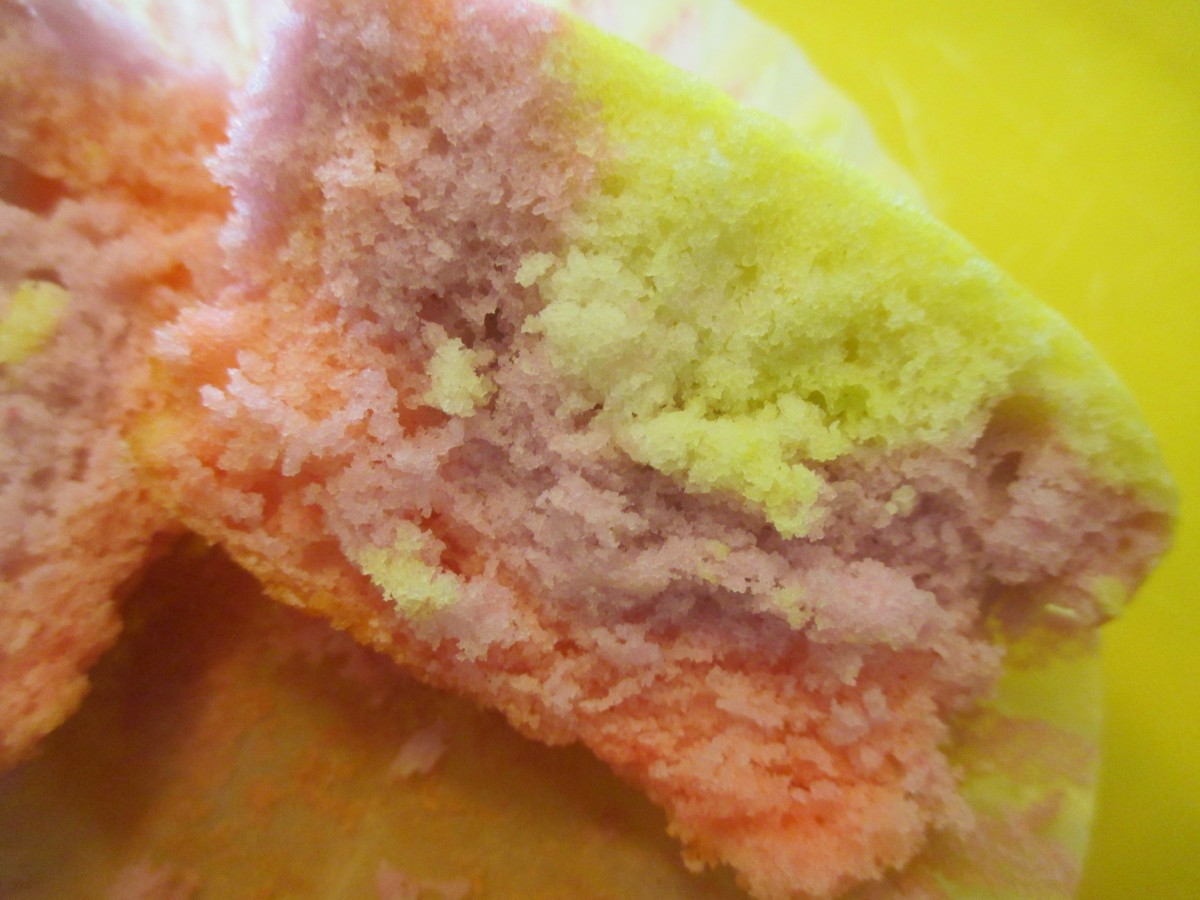
rainbow cupcake
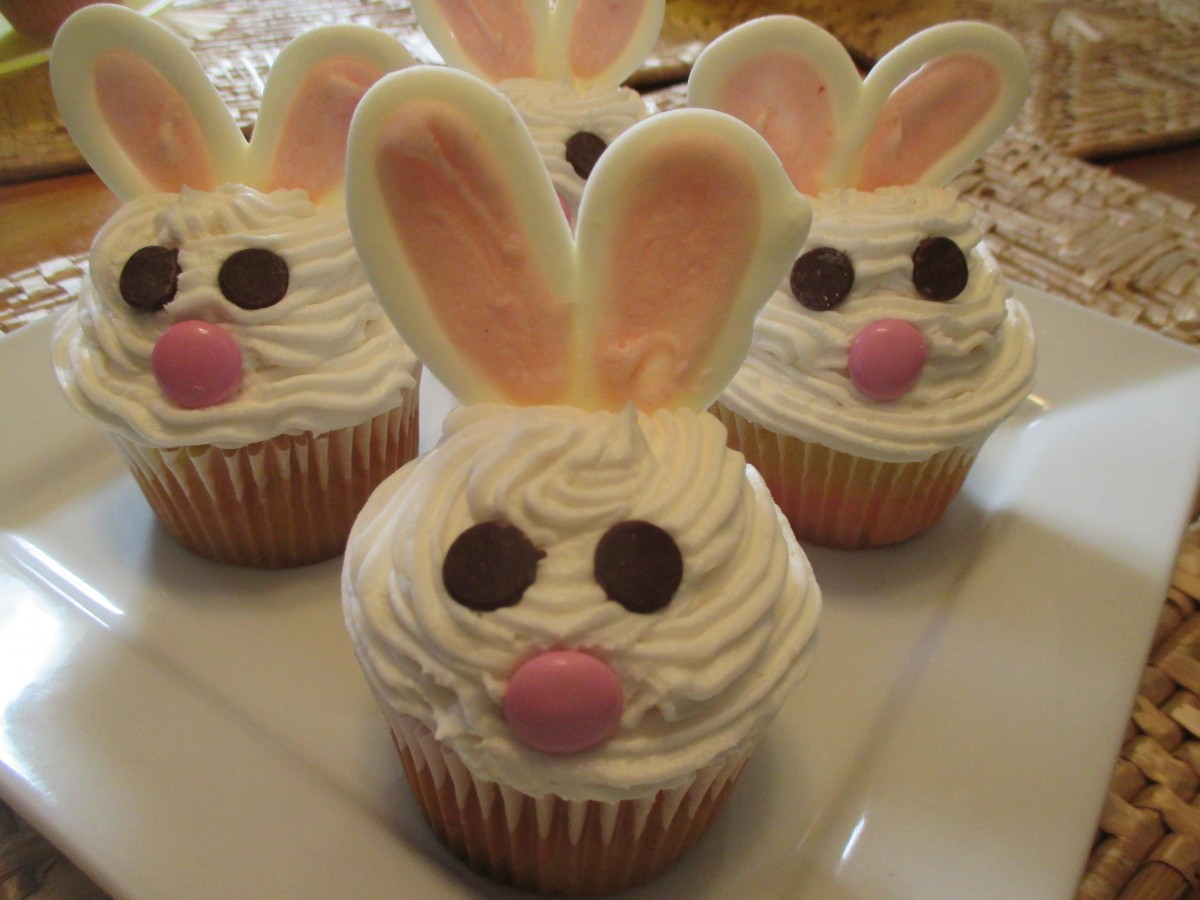
bunnies
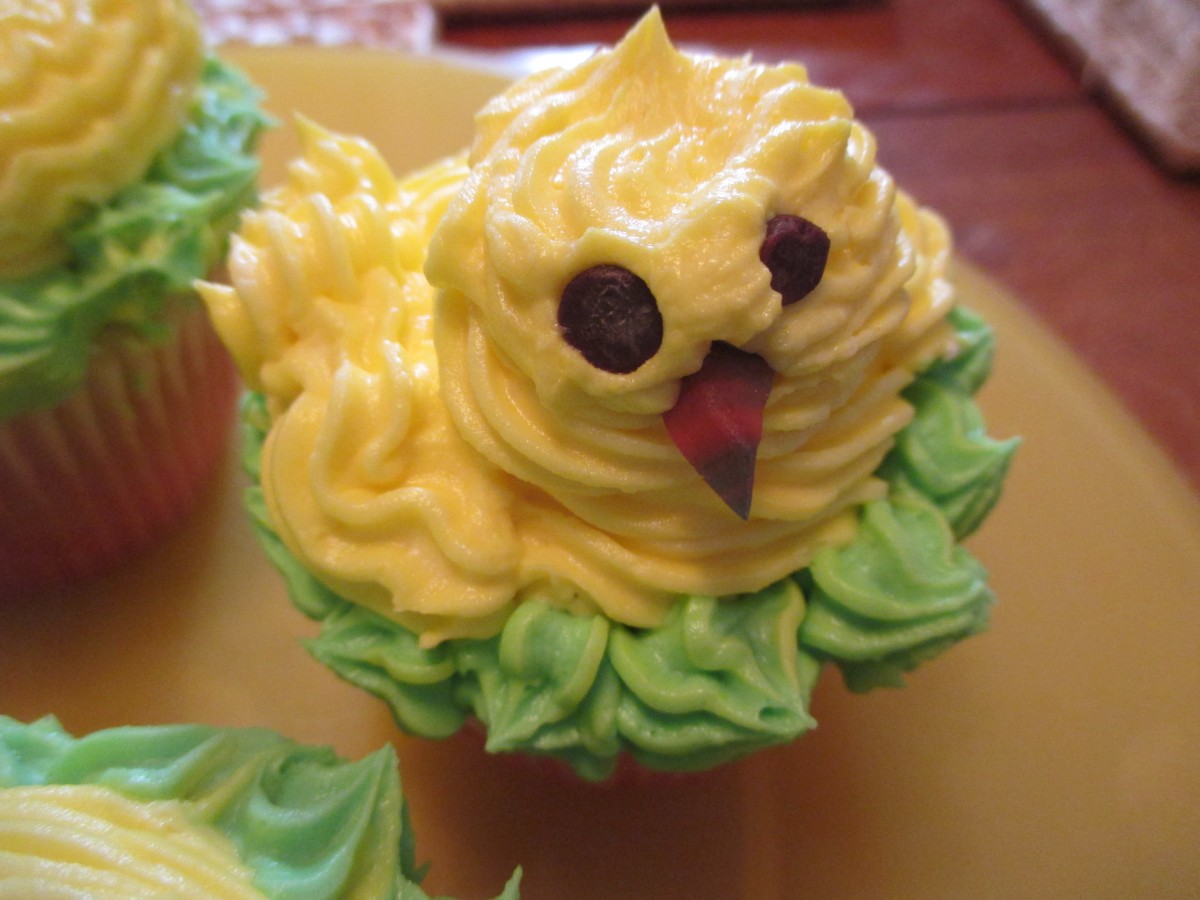
Chick cupcake
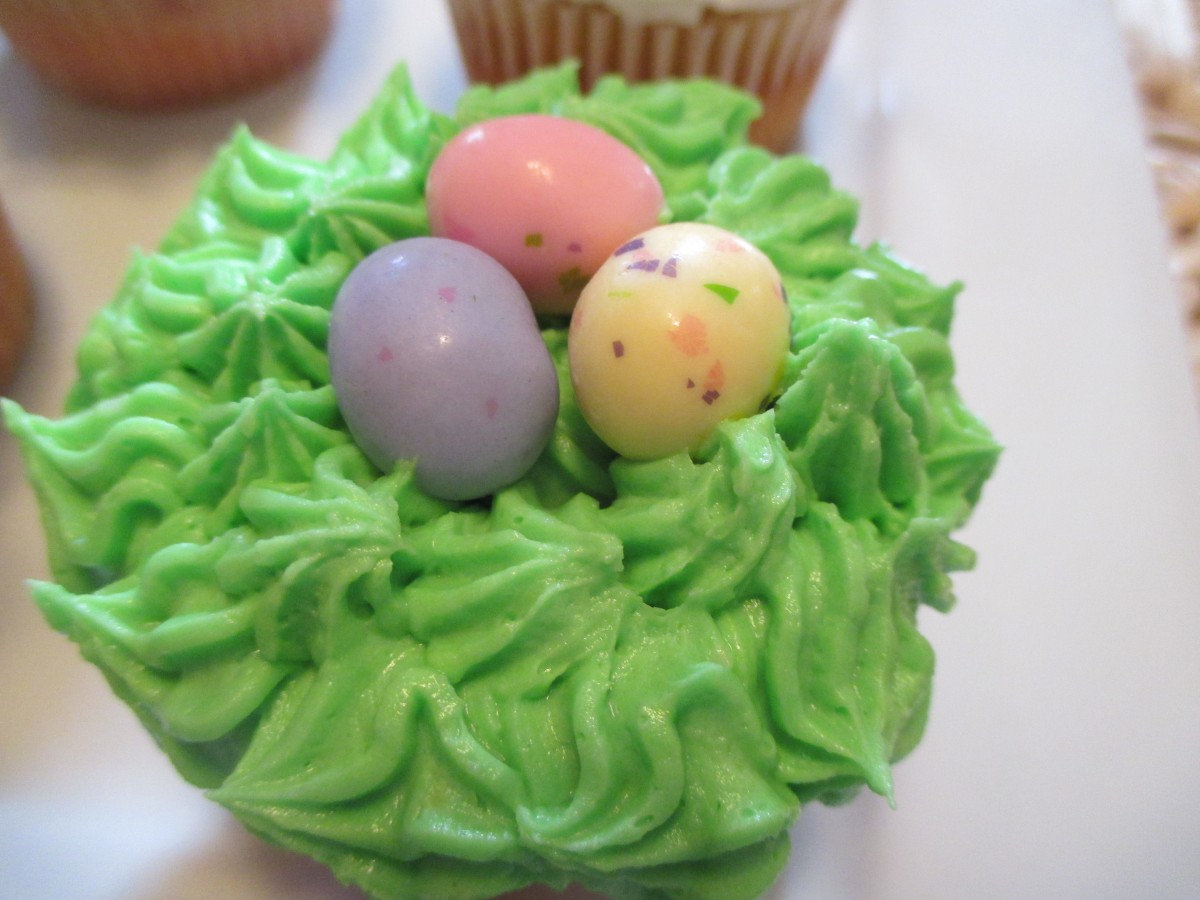
The nest cupcake
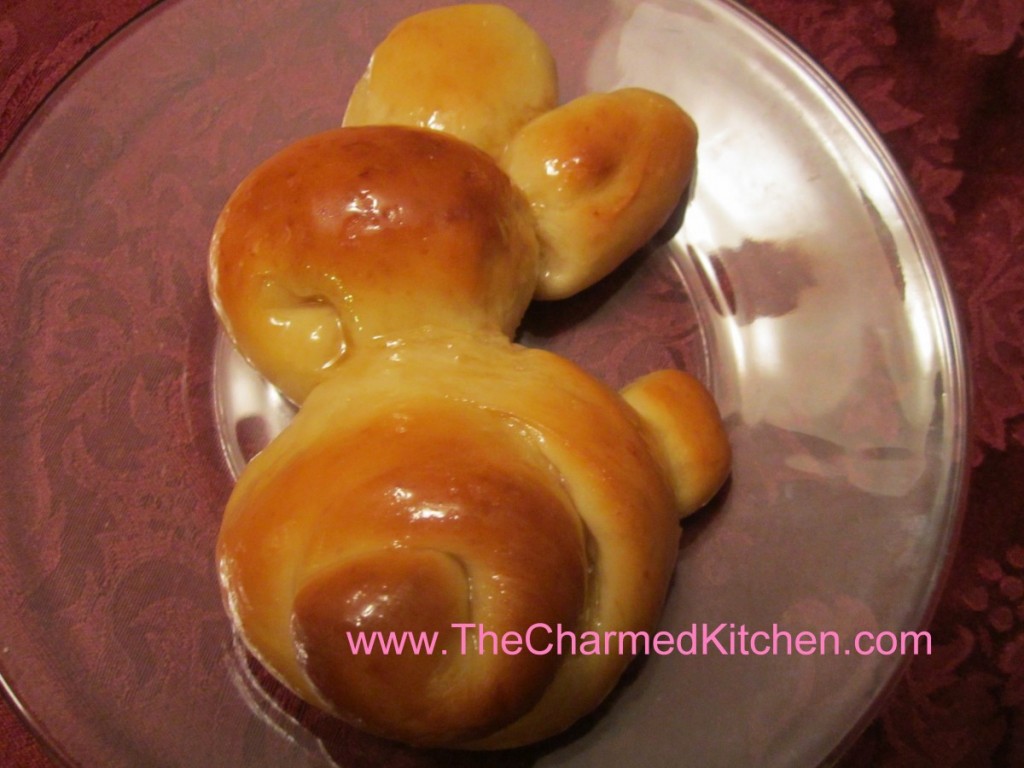
Honey Bunnies

If you are looking for a fun dish to serve for Easter, you might want to bake a batch of bunnies. These rolls can be served with Easter dinner, or with breakfast or brunch.
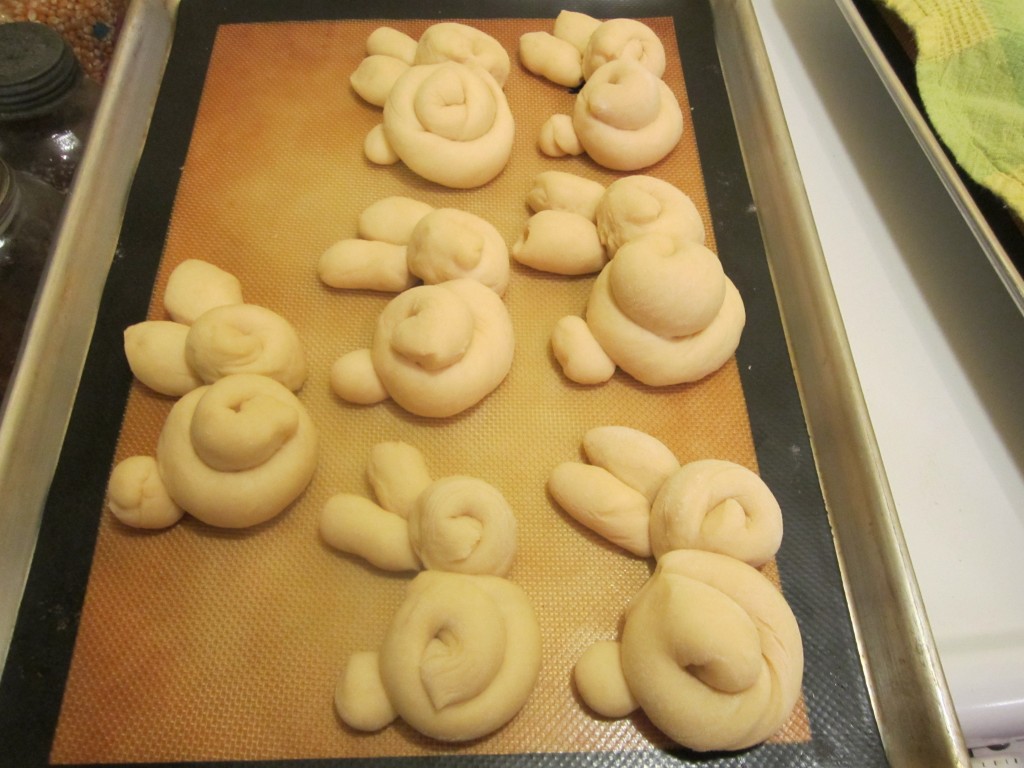
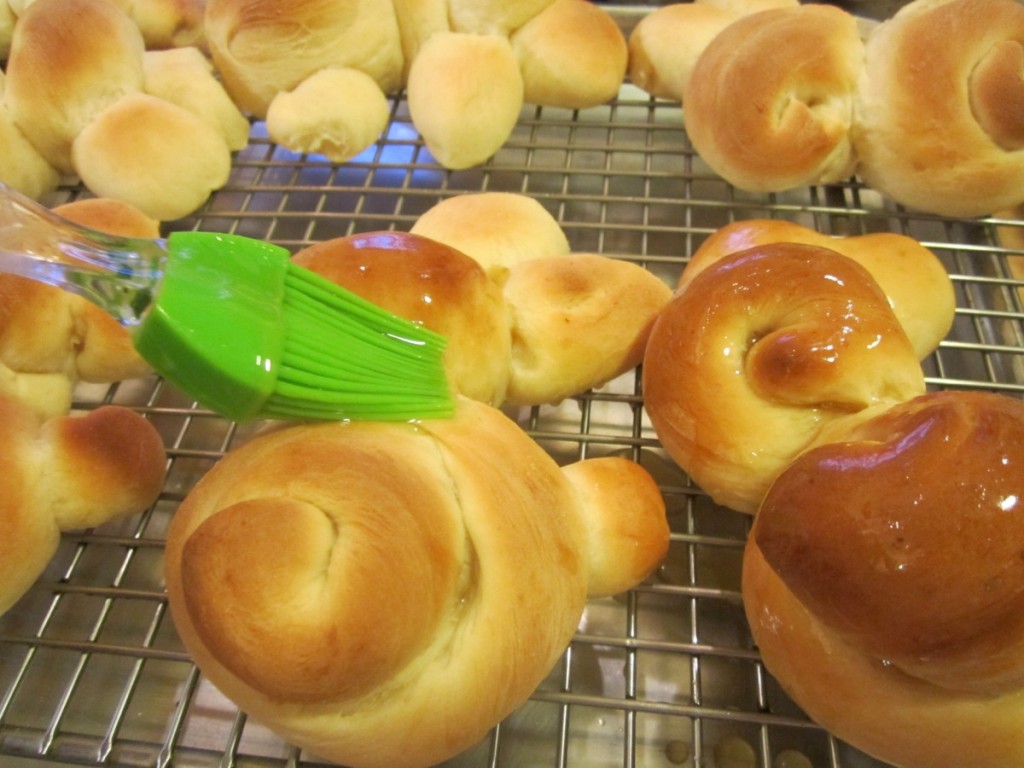
The honey-sweetened yeast dough is rolled into ropes, and then the ropes are formed into these bunny shapes. Once the rolls are baked, they are brushed with a mixture of warm honey and melted butter. This is a fun recipe to make with kids.
I make them every Easter. Sweet and so cute, they are sure to be a hit when you make them.
The dough is chilled before rolling, so you can mix up a batch in the evening- put in the fridge- then roll them out the next day. They are actually pretty easy to make.
You can add raisin “eyes”, if you like. It is an option.
Honey Bunnies
4-5 c. flour
2 packages yeast
1 t. salt
2/3 c. evaporated milk
½ c. each water, honey and butter
2 eggs
Raisins, optional
Honey glaze
1/2 c. honey and 1/4 c. butter heated together until warm.
In bowl combine 1 c. flour, yeast and salt. Heat together milk, water, honey and butter until very warm and beat into the flour mixture. Beat 2 minutes on high speed. Beat in 1 cup flour and eggs. Beat 2 more minutes, until batter thickens. Stir in enough flour to make a stiff batter and chill, covered with plastic wrap for 2-24 hours.
Place dough on lightly floured surface and divide into 15 equal pieces. Roll one piece of dough into a 20- inch rope. Cut rope into a 12- inch piece, a 5-inch piece and 3 one-inch pieces. Coil 12- inch piece to form body, five inch piece to form head and one inch pieces to form ears and tail. Place the body on greased cookie sheet and then place the head next to the body, making sure they are touching. Place ears and tail on the bunny, making sure they make good contact with the rest of the “bunny”. I tuck them under a little. Repeat with the remaining dough. Let rise, covered until doubled, about 25 minutes. Bake in a 375-degree oven for 12-15 minutes. Remove to cooling rack and brush with honey glaze. Place raisins on each to make eyes, if you like. Brush with additional glaze before serving, if desired. Makes 15 bunnies.
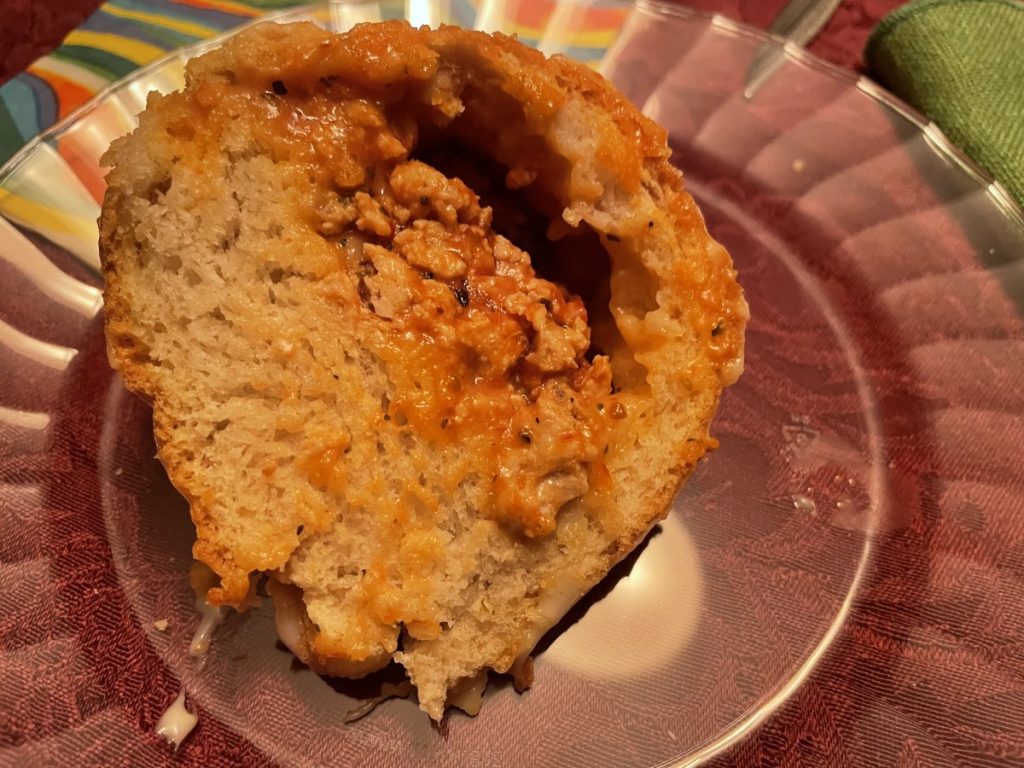
Not a Cake!!! April Fool’s Day Pizza

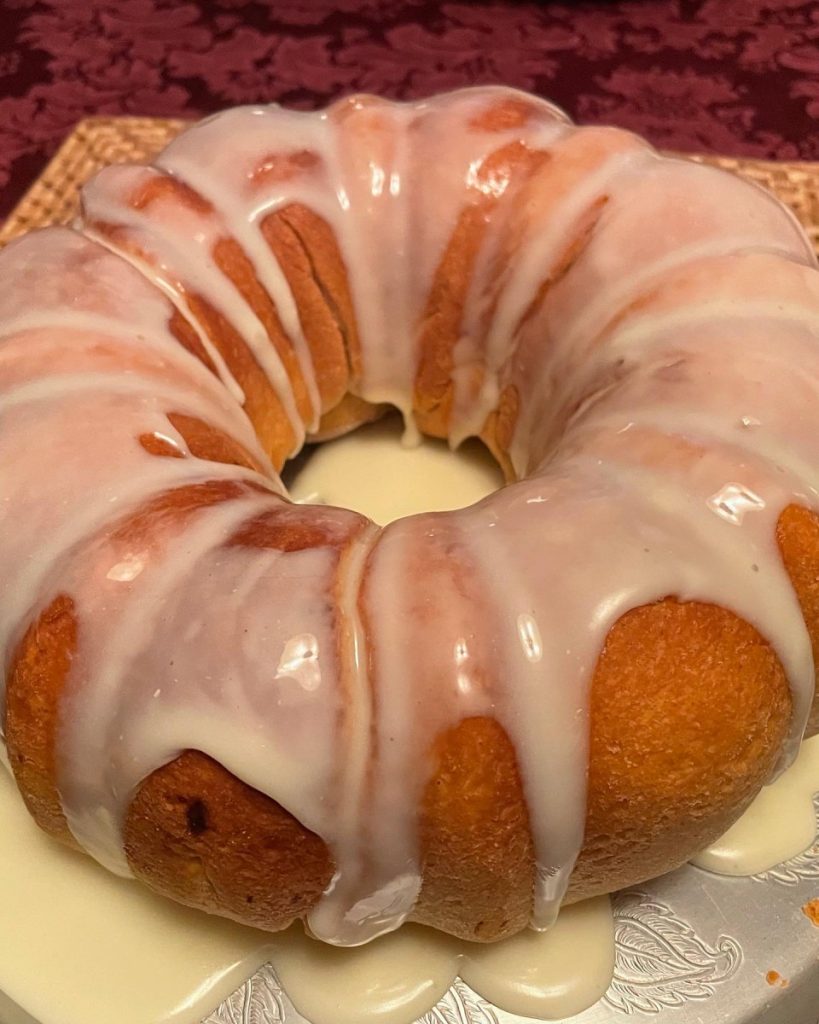
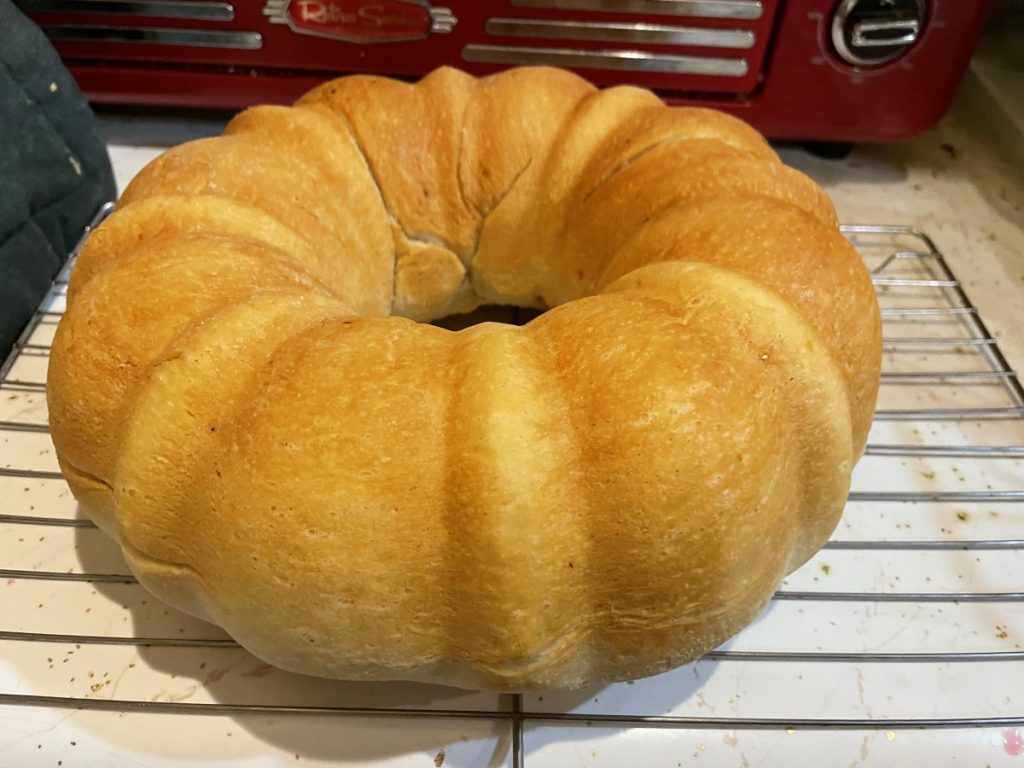
Last year, for April Fools’ Day and a friend’s birthday, a group of friends created a dinner made of food imposters. This may look like a Bundt cake, but it is actually a pizza bread. I made dough, rolled it out into a rectangle and added cheese, sauce and sausage. Then I sealed it up and put the dough in a greased Bundt pan. I let it rise and baked it.
When it came time to serve it, I warmed it in the oven and made a mozzarella “frosting”. To make it nice and smooth I combined hot water, milk and sodium citrate. I then added the cheese. I simmered it until the cheese melted. Sodium citrate helps to make cheese extra melty and smooth. I poured it over the “cake” and served it. It really was a lot of fun.
Hot Cross Buns

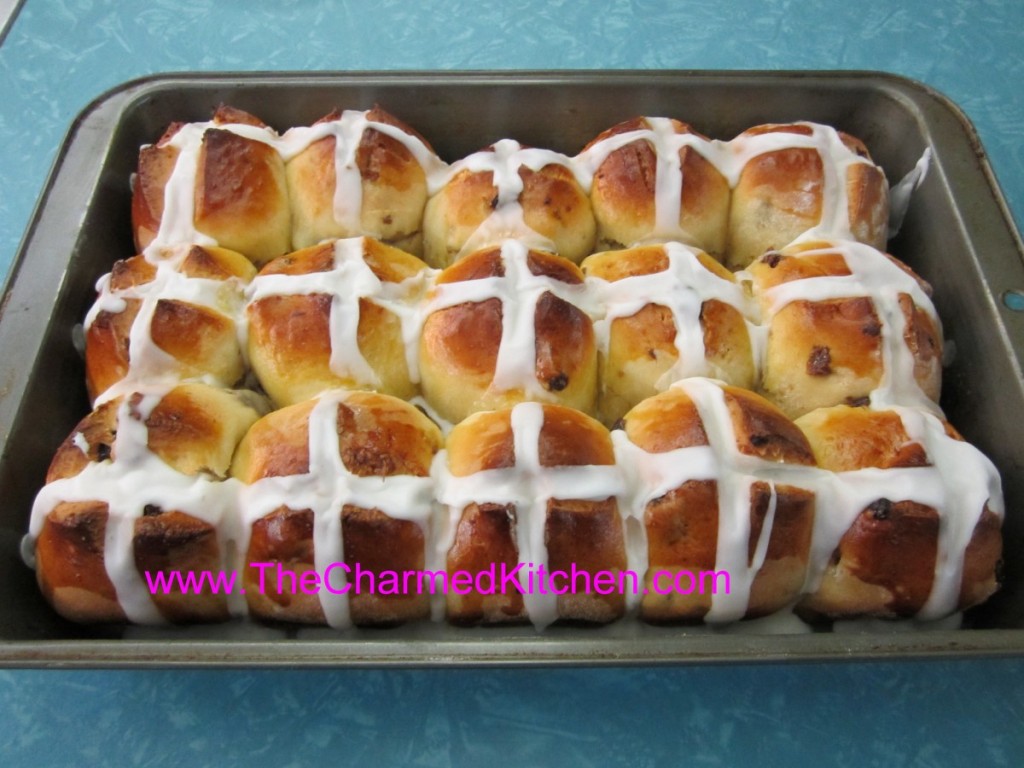
These rich rolls are a traditional at Easter. At least they are in my house. The dough is rich and slightly sweet. The frosting on top adds to their sweetness.
Hot cross buns can be served at breakfast, brunch or even as a dinner roll. I have served them with coffee, after dinner. So I guess they can be a dessert, too. If you have leftover hot cross buns, you can use them to make bread pudding. I do!
Because the dough is rich, they are slow to rise. If they aren’t jumping out of the pan after an hour or so, don’t worry. They do rise quite a lot in the oven.
After they cool a bit- pipe on the icing in the crisscross pattern that gives these rolls their name.
Hot Cross Buns
2/3 c. sugar
1 t. salt
2 packages active dry yeast
About 5 cups bread flour
1 ½ c. milk
½ c. butter
2 eggs
1 c. raisins
Icing
¾ c. powdered sugar
1 T. milk
In bowl combine sugar, salt, yeast and about 1 ½ c. flour. Heat together milk and butter until very warm. Beat milk mixture into to flour mixture and beat 2 minutes with electric mixer. Beat in 1 egg and 1 cup flour and beat 2 more minutes until batter thickens. Stir in raisins and enough additional flour to make a soft dough. Turn dough onto a floured surface and knead until smooth, about 10 minutes. Place dough in greased bowl, turning to grease top, cover with a towel and allow to rise in a draft free place until doubled in bulk, about 1 hour.
Place dough on floured surface and divide into 15 equal pieces. Cover with towel and lest rest 15 minutes. Meanwhile grease a 9×13 inch pan. Form dough into smooth balls and place in prepared pan. Cover and let rise until doubled, about an hour. Preheat oven to 350 degrees. Beat remaining egg. Cut a cross in each bun and brush with the egg. Bake for 25 minutes or until buns are golden. Remove buns to wire rack to cool 15 minutes. Make frosting, place in decorating bag and pipe onto buns. Makes 15.


