Snow People Cookies

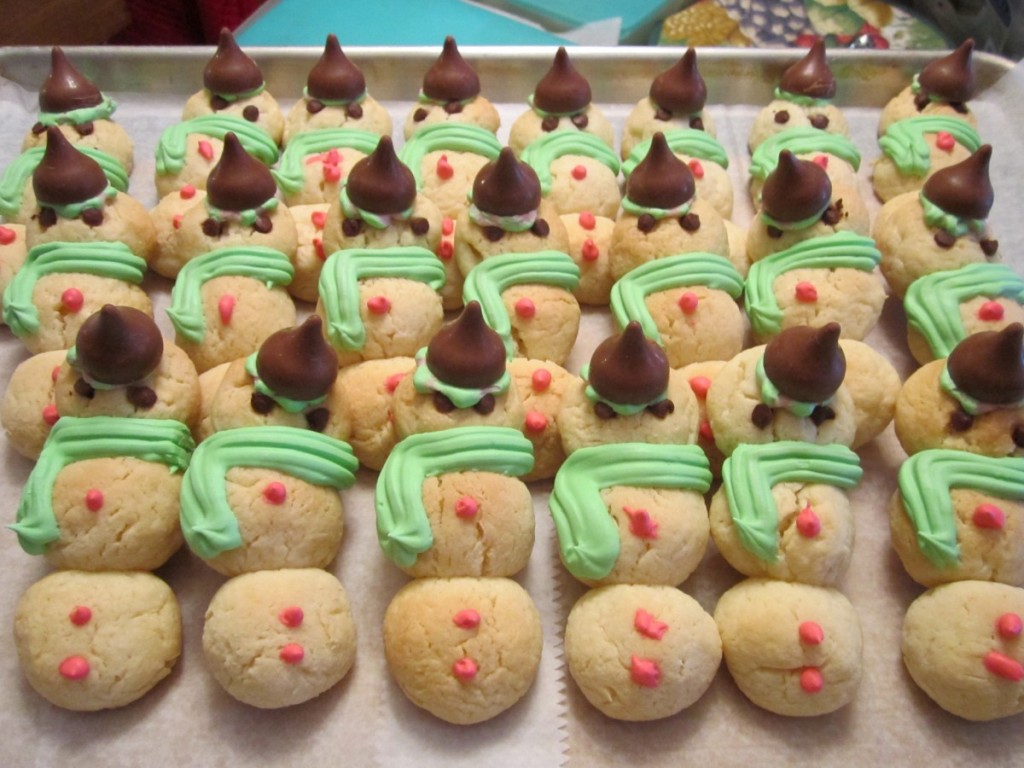
These cookies are adorable and fun to make. They also taste really good. They are a fun cookie for kids to make. The cookies are made from a rich, cream cheese dough. They stay soft in the middle, with a little crunch on the outside. They are even cuter if you use the candy-striped kisses available this time of year.
Snow People
Dough:
4 c. flour
1 t. baking powder
1 c. butter, softened
1 (8oz.) package cream cheese, softened
2 c. sugar
1 egg
1 t. vanilla
¼ t. almond extract
Decorations:
Mini chocolate chips or mini M&Ms
Kisses, whole, or mini peanut butter cups, halved
Frosting:
2 c. powdered sugar
Few drops green food coloring
Milk
Extra powdered sugar for sprinkling
Mix dry ingredients and set aside. Cream together butter and cream cheese until smooth. Beat in sugar until light and fluffy. Beat in egg and flavorings then stir in dry ingredients. Chill dough overnight. For each snow person rolls out 3 balls of dough, 1-inch, ¾-inch and ½-inch in diameter. Place balls in descending order on ungreased baking sheet. Press together lightly. Use 2 mini chocolate chips for eyes in smallest ball and use either chips or mini M&Ms for buttons (2 on largest ball and 1 in medium). You can also add a tiny dot of frosting once they are cooled for the buttons, too. Bake in a preheated 325-degree oven for about 18 minutes or until edges are firm and bottoms are lightly browned. Cool on baking sheet 1 minute then remove to rack to finish cooling. Combine powdered sugar with green food coloring and just enough milk to make a frosting that can be piped. Use a little dab of frosting to attach either a chocolate kiss (unwrapped) or half of a peanut butter cup as a hat. Pipe a small amount of frosting to form a scarf. Dust cookies with a little extra powdered sugar for snow when finished decorating. Makes about 48 cookies.
Lavender Vanilla Shortbread

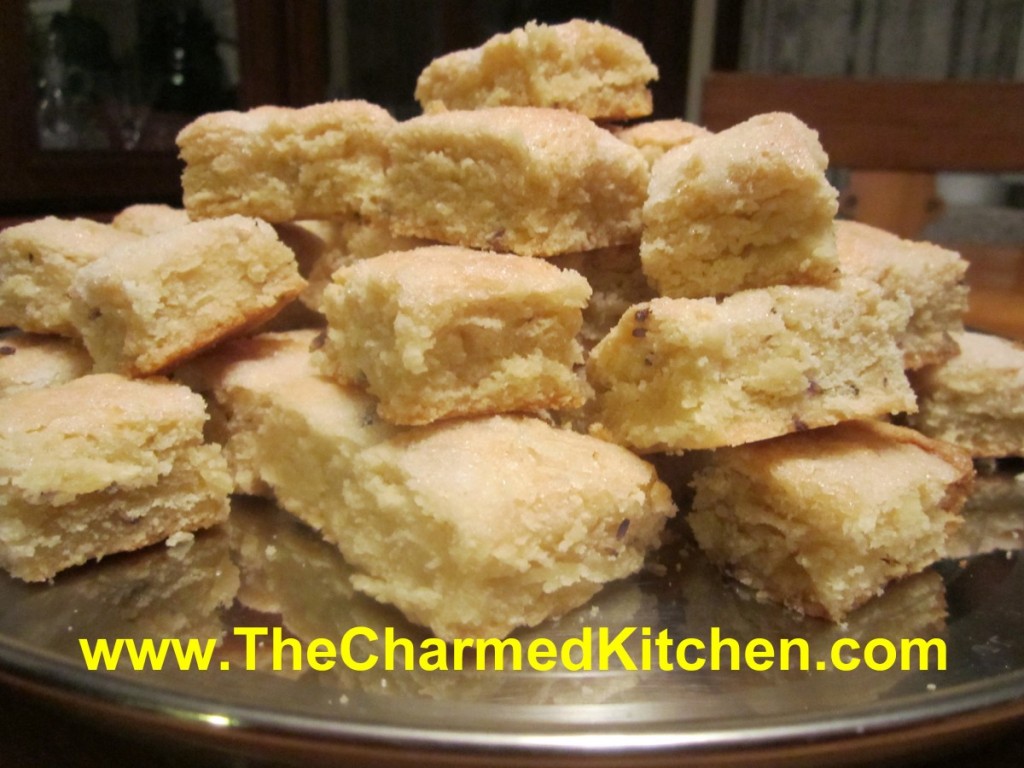
I really enjoy cooking with lavender. It goes well in savory dishes, but also in desserts and sweets. Seemed only natural to add some lavender to shortbread. It is one of my go-to recipes. This time I added some vanilla sugar, too. The combination of lavender and vanilla is one of my favorites. The slightly spicy flavor of the lavender blossoms pairs well with the sweeter, sort of floral flavor of the vanilla. If you don’t have vanilla sugar (directions follow), you can add 2 teaspoons of vanilla to the dough.
Lavender and Vanilla Shortbread
1 c. vanilla sugar, plus extra for sprinkling*
2 c. butter
4 c. flour
2-3 T. lavender blossoms
Cream together the one-cup of sugar and butter. Stir in the flour and lavender blossoms. Press mixture in to a greased 9×13 inch-baking dish. Cut or score into small squares, or on the diagonal for diamond shapes. Sprinkle with extra sugar and bake in a preheated 300-degree oven for 50-55 minutes or until lightly browned around the edges. Re-cut the squares as soon as you remove the shortbread from the oven. Cool before removing from pan. Make about 100 small squares.
* If you don’t have vanilla sugar just use granulated sugar and add 2 teaspoons of vanilla extract to the dough.
Making Vanilla Sugar
Some specialty stores sell vanilla sugar and it is expensive. I find it easy to just make my own. Vanilla sugar can be used in baking or to top desserts, in tea, and other drinks. I love to sprinkle vanilla sugar on sugar cookies and on muffins, too.
I buy vanilla beans by the pound online and use them in cooking and to make my own vanilla extract.
To make vanilla sugar just cut vanilla beans in half lengthwise and then into 1 inch pieces. Place granulated sugar in a jar and add the vanilla beans. Cover jar and shake once in awhile. The sugar is fragrant in about a week but will get stronger the longer it sits. I use one vanilla bean per cup of sugar. You can add more sugar to the jar as you use it. The beans will continue to flavor new sugar added to the jar for some time.
Phyllo Chocolate Fan Cookies

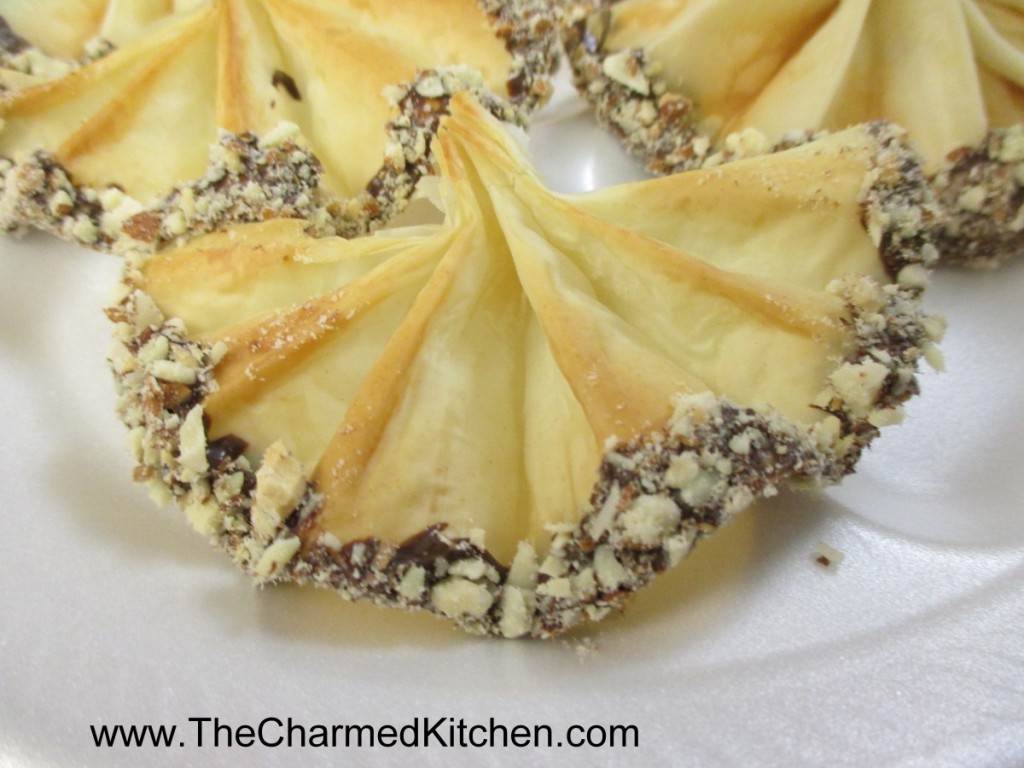
If you want a cookie that is really going to impress, you might want to make these Chocolate Fans. They are crisp, not too sweet, and tipped with chocolate and fine chopped nuts.
While they look difficult to make, they are actually quite easy. For starters, you don’t have to make dough. These are made with store bought phyllo dough.
Phyllo is found in the freezer section at the grocery store. Phyllo dough (also spelled filo) can be a little fussy. Be sure to keep extra dough covered with a damp towel so it won’t dry out and get brittle. It is best to work quickly when making these. We made these dipped in finely chopped toasted almonds. Other nuts could be used. You could also use white chocolate, if you prefer. I have even added a few sprinkles to the nuts for a pop of color.
Chocolate Fan Cookies
1 lb. phyllo dough, thawed
1 c. butter, melted
12-oz. chocolate chips
2 T. shortening- you can use coconut oil instead
1 c. finely chopped nuts or coconut, pistachios are extra nice
Remove phyllo from box, still rolled up and cut crosswise into 5-6 equal pieces.* Keep unused dough covered in a damp towel to prevent drying out. Take one piece of dough and open it up, cutting it in half crosswise. The dough pieces should end up about 3×7 inches or so. Take 1 sheet and brush very lightly with butter. Place another sheet on top and brush again with butter. Place third piece of dough on top but don’t butter again. Starting at short end begin to fold the dough in ¾ inch folds, accordion style. Pinch together at one end and fan out the dough at the other. It should look like a little fan. Place on ungreased baking sheet and repeat with remaining dough. Bake at 375 degrees for 5 minutes. Cool. Melt chocolate and shortening together in microwave or on top of double boiler. Stir to smooth. Dip tip of wide end of fans in melted chocolate and then in the nuts or coconut. Place on a rack to cool and harden. Makes about 65 fans. Can be frozen. You can also use white chocolate. Besides nuts or coconut, you can dip the fans in sprinkles or edible glitter.
*I buy frozen phyllo dough but there are two different sizes. Both are one pound boxes. One has one long roll of dough sheets. The other box has two rolls of phyllo pastry sheets. When using this size, you will cut each roll crosswise into three pieces. Directions in the original recipe above are for the longer roll of dough.
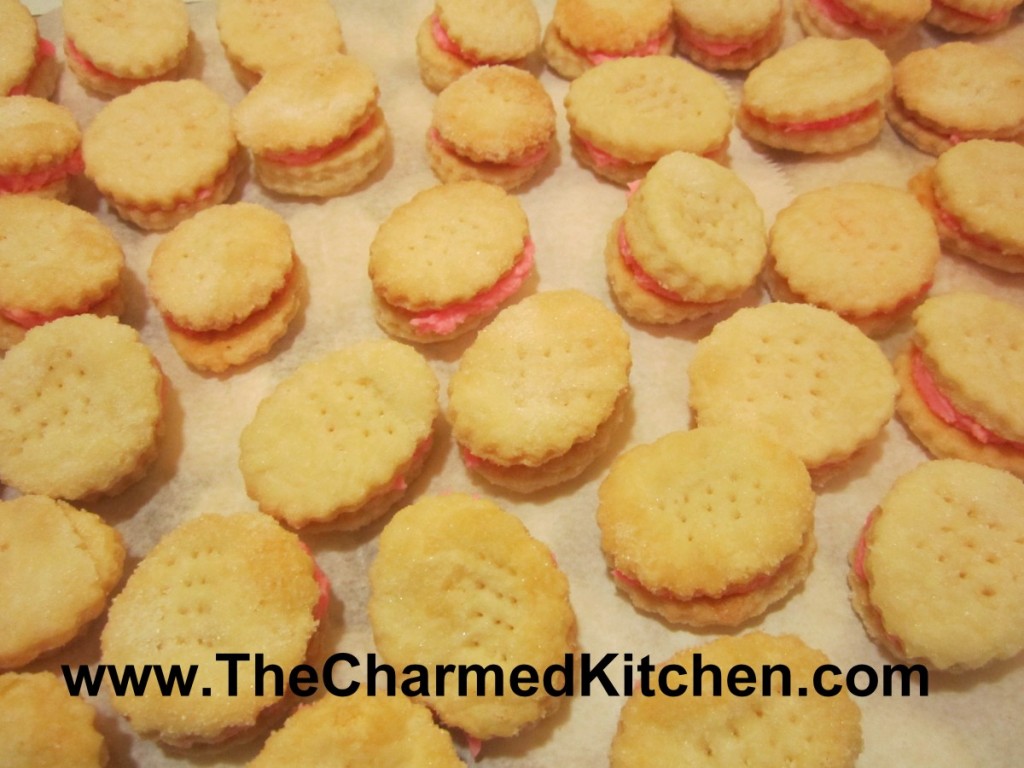
Cream Wafers

Cream Wafers are a little more work than most cookies, but they are worth it. They are the most requested cookies of all the ones I make. The secret is the dough, which contains no sugar. It is made from only three ingredients- flour, butter and heavy whipping cream.
When baked, they turn into flaky layers that melt in your mouth. Seriously, if you want to really impress this holiday season, show up at a party with these cookies.
Cream wafers are coated in sugar before baking. You can use tinted sugar, if you like. Once baked and cooled, they are made into little sandwich cookies, using a buttercream frosting. You can also tint the frosting if you like.
Because they puff when baking and become thicker, and you are using two of them to make the sandwich cookie, be sure to roll them out pretty thin.
Here is the recipe. Hope you enjoy!!
Cream Wafers
1 c. butter
1/3 c. heavy whipping cream
2 c. flour
extra fine or granulated sugar
Frosting:
¼ c. butter, softened
¾ c. powdered sugar
1 T. milk
1 t. vanilla
food coloring, if desired
Mix butter, cream and flour well. Wrap and chill at least an hour. Roll chilled dough 1/8 inch thick on lightly floured board. Cut out into 1½ inch rounds or even little hearts or stars. Transfer cookies to a sheet of wax paper heavily coated with extra fine or granulated sugar and coat both sides. Place on an ungreased baking sheet and prick each cookie 4 times with a fork. Bake at 375-degrees 7-9 minutes until lightly browned and puffy. Cool on rack. Mix frosting ingredients. Put 2 cookies together with frosting to make “sandwiches”.
Candied Orange Peels

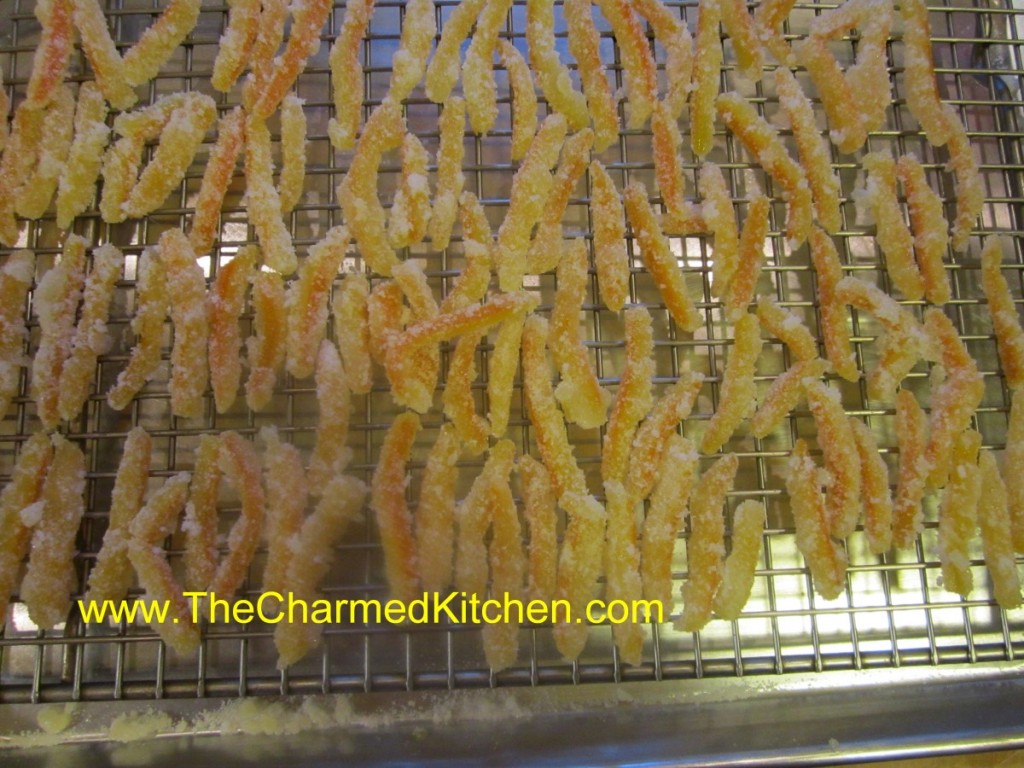
During the winter months, when citrus is in season, I find myself eating a lot of oranges. I also find myself with a lot of orange peels. I dry some and powder them up for use in baking and cooking. Another fun use for orange peels is to turn them into a candy.
Candied orange peels are pretty easy to make and a nifty way of turning something that might otherwise be discarded into something tasty. You can also candy other citrus peel this way like grapefruit and lemons. The same process can be used to make candied ginger.
Once finished, the candied peels can also be dipped in dark chocolate for a special treat.
They make a nice gift, too.
Candied Orange Peel
2 large oranges ( you can also use 1 grapefruit or 3 lemons)
or 1 lb. of ginger root*
¾ c. water
¾ c. sugar, plus extra for rolling
3 T. light corn syrup, optional
Remove peel from fruit using a sharp knife. Try to get the peel off in 4 pieces. Cut the peel into ¼-inch wide strips. Place peel in a pot with cold water and bring to a boil. Boil 1 minute, drain and rinse under cold water. Repeat process 2 more times. Return to pan with fresh water and boil 15 minutes. Drain and pat dry. Bring ¾ c. water and ¾ c. sugar to boil in sauce pan with the corn syrup. Boil 2-3 minutes and then add the peel. Simmer, stirring occasionally until all but a spoonful of the syrup is left. This should take about 10 minutes. On a wax-paper lined baking sheet sprinkle 1 cup of sugar and arrange the peels on top of the sugar. Toss the peels around until cooled adding more sugar if needed. Place peels on a drying rack for 24 hours before storing. Once dried you can also dip one end of the peels in dark chocolate. Makes ½ pound.
* If making the candied ginger root, peel and cut into 1/4- inch slices. Then cut the slices into 1/4-inch thick strips
Peanut Butter Thumbprint Cookies

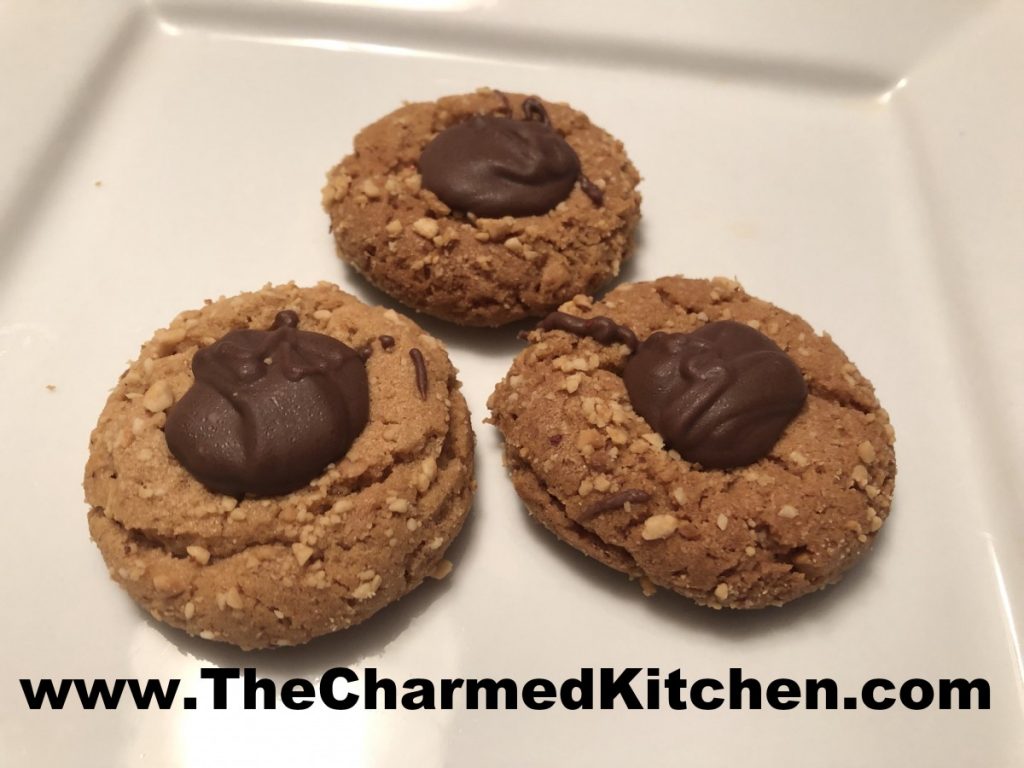
The combination of peanut butter and chocolate is a classic. This cookie brings those two flavors together perfectly. The cookie itself has a wonderful outer crunch, but is also tender and melts in your mouth. The addition of a dollop of chocolate finishes the cookie just right.
Of course, you could also use a spoonful of jam or jelly to fill in the cookies. Peanut butter and jelly are also a classic combo. No matter what filling you use, these thumbprint cookies are going to be a big hit.
Peanut Butter Thumbprints
1 c. butter, softened
2 c. packed light brown sugar
1 1/2 c. peanut butter (smooth or crunchy)
2 eggs
1 t. vanilla
2 1/2 c. flour
1 t. baking powder
1/2 t. baking soda
1 3/4 c. finely chopped unsalted, dry roasted peanuts
Melted chocolate, about 2 cups
In mixing bowl, cream together butter, sugar and peanut butter. Beat in eggs and vanilla. Combine flour with dry ingredients and mix into butter mixture. Stir in peanuts. Shape dough into 1-inch balls and place on ungreased baking sheets. Bake in a 350-degree oven for 8-10 minutes or until cookies are just set. Press thumb gently into the middle of each cookie and cool on rack. Spoon about a teaspoon of melted chocolate into each cookie. Makes about 8 dozen.
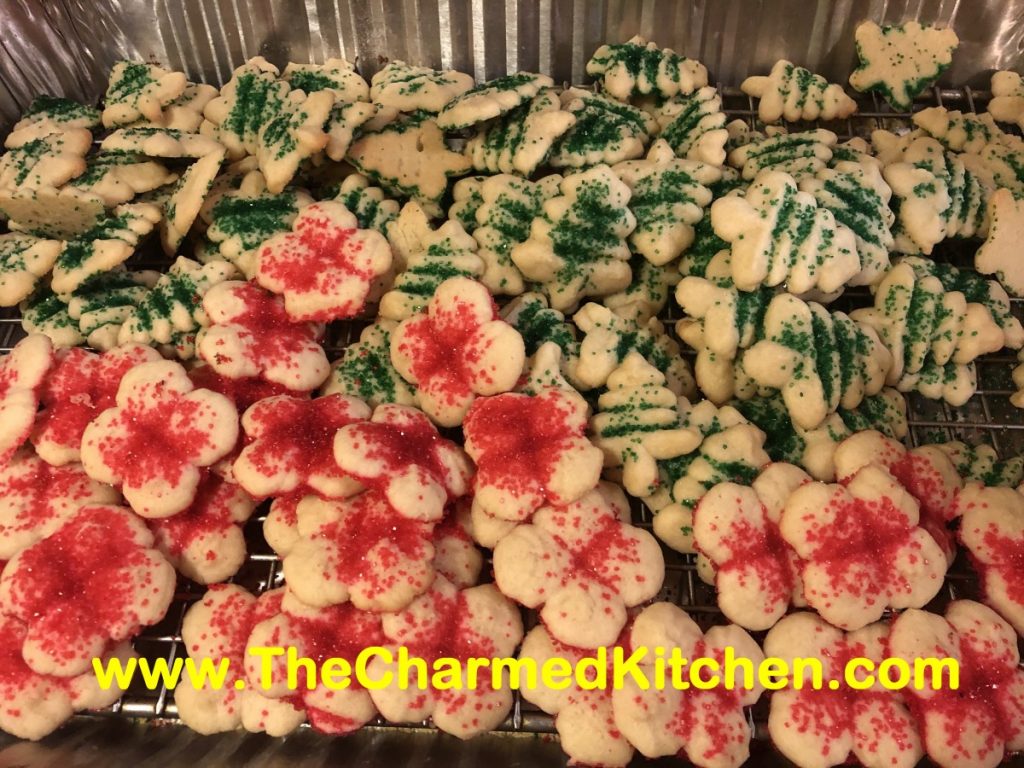
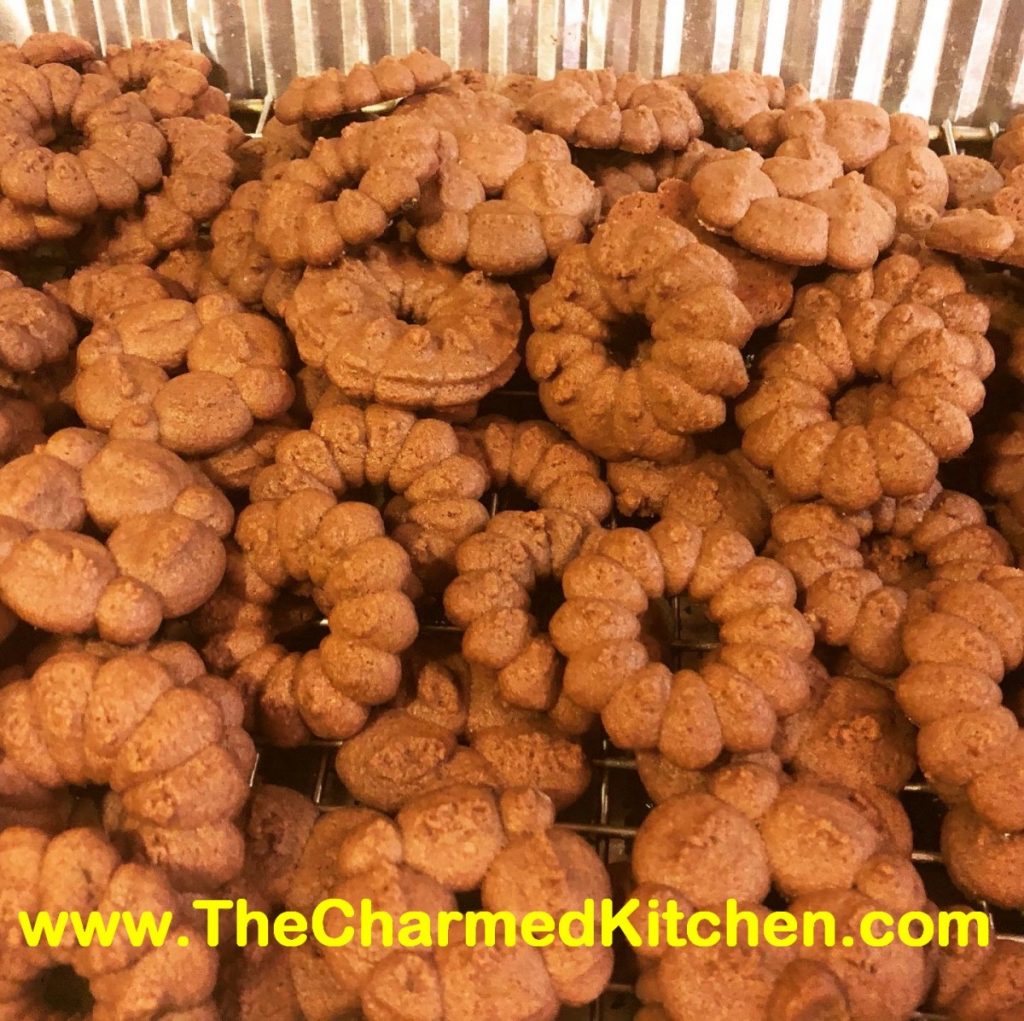
Spritz Cookies

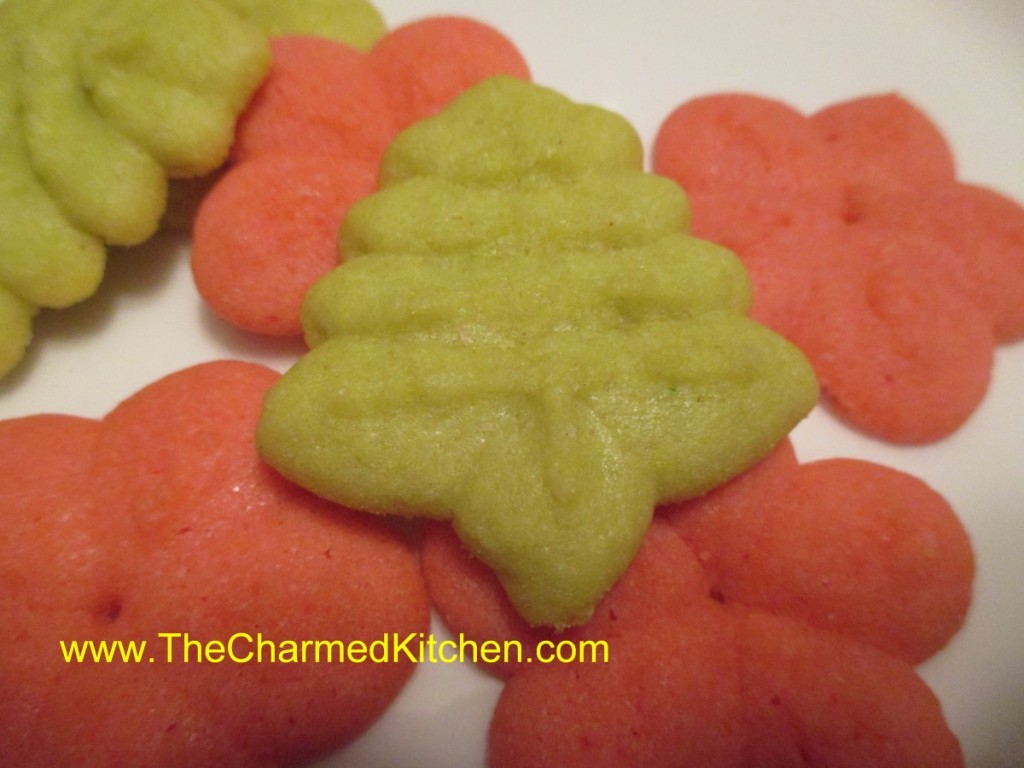
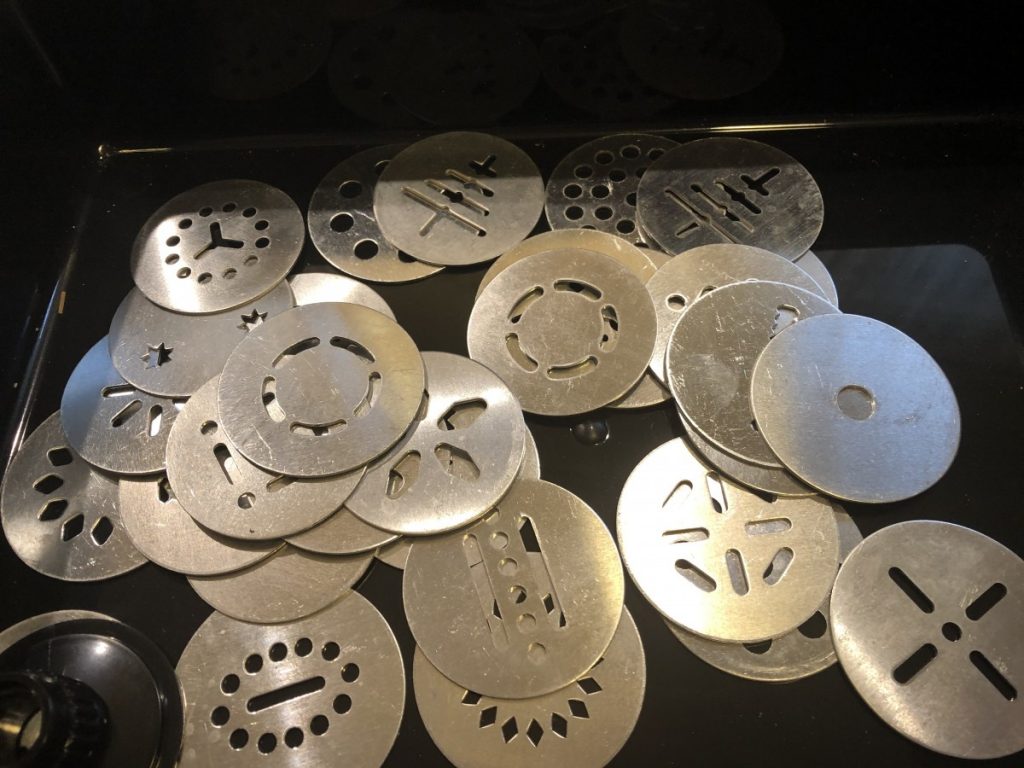
Spritz cookies are so fun to make. Delicate, tender and buttery, they are also so pretty. The dough is squeezed through a cookie press with different discs to produce a wide variety of shapes.
I have been making a lot of different variations of Spritz cookies in the last few days. I’ve also received a few messages from people who have issues with using their cookie presses.
Hope I can answer a few questions and make your Spritz cookies easier to create. The big problem is getting the dough to stick to the cookie sheet. There is a balance you need to get where there is enough friction to get the dough to stick, but not too much, so the cookies will release after baking.
I use silicone liners on my cookie sheets. Parchment paper works well. You can also squeeze the dough onto ungreased baking sheets. Hold the cookie press firmly down on the baking sheet. Click the ratchet once or twice and lift up. The dough, hopefully, will be on the sheet. Sometimes I can click 10 or 15 cookies with no problem, then get one that sticks. Just remove the excess dough from the end of the cookie press and start over. Little gaps or air pockets in the dough can cause that to happen.
The dough has to be soft enough to go through the press. Make the dough with room temperature butter and don’t chill the dough after mixing it. A good spritz dough should be soft, but easy to shape into a roll shape and put in the cookie press. It should not be dry or crumbly.
Within certain parameters, dough for Spritz cookies are all pretty similar. At least in that the texture is all pretty much the same. My classic recipe uses egg yolks. Some of the recipes I tried used whole eggs instead. Both variations produced tender, tasty cookies. Some have a little more or less sugar. Sweetness level is a personal preference.
You can vary them by adding different flavorings or extracts. You can’t add ingredients like nuts or chips because the dough would not go through the press. You can also tint the dough to produce colorful cookies.
So here are some of the Spritz cookies I have been making. Enjoy.
Classic Spritz Cookies
1 c. butter
1 c. sugar
3 egg yolks
2 t. vanilla
½ t. salt
2½ c. flour
In mixing bowl, beat together butter and sugar until fluffy. Beat in egg yolks. Stir in vanilla and salt. Tint dough, is desired. Add flour and stir until smooth. Using a cookie press with desired shape press cookies on to ungreased baking sheet. Leave about 1-inch between cookies. Bake in a preheated 375-degree oven for about 8-10 minutes- cookies should be a light golden color around the edges. Cool on a wire rack. Makes about 4-5 dozen.
Vanilla Spritz
1 c. butter, room temp
¾ c. sugar
1 egg
1 t. vanilla
1 t. almond extract
2¼ c. flour
½ t. salt
Mix butter and sugar until well mixed. Beat in egg and extracts. Stir flour and salt together in a medium bowl, then add to butter mixture. Mix well. Don’t chill dough. Place dough in cookie press and press dough onto parchment or silicone lined baking sheets. Bake in a preheated 350-degree oven for 8-10 minutes. Cookies should be lightly toasted on the edges. Cool on the baking sheet for a few minutes. Makes 6-7 dozen tiny cookies.
Chocolate Spritz
Make the Vanilla Spritz or Classic Spritz dough, but add 2 oz. of unsweetened chocolate (baking chocolate) melted, when you combine the butter and sugar.
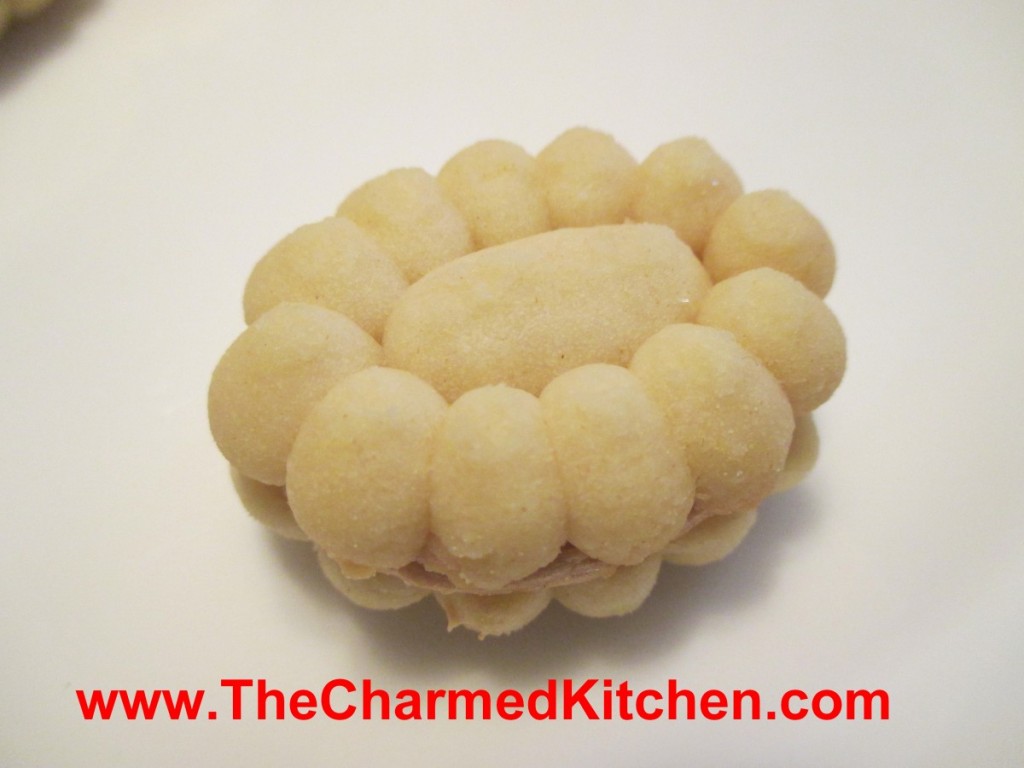
Viennese Shortbread with Coffee/Cinnamon Filling
1 c. butter
½ c. powdered sugar
½ t. vanilla
2 c. flour
¼ t. baking powder
Heat oven to 375-degrees. Cream together butter, sugar and vanilla. Blend in flour and baking powder. Using flower design of cookie press to make 1- inch cookies on ungreased baking sheet. Bake about 7 minutes, or until very lightly browned. Cool and then put two cookies together with coffee filling.
Note: You can make these cookies in almost any cookie press design that is symmetrical. I have made strips, trees and stars among others. Makes about 2 dozen double cookies.
Coffee/Cinnamon Filling
2/3 c. powdered sugar
2 T. butter, softened
1 t. instant coffee dissolved in 1 t. boiling water
1 t. cinnamon
Beat all ingredients together until smooth. Add a few drops of water if too dry.
Sugar Cookies – With Non- Royal Icing


These cut-out cookies are a classic, and always part of my holiday cookie baking. I will confess to having an enormous assortment of cookie cutters, so there is almost no end to the shapes I might use. This time of year I am making trees, stars, snowmen and more.
These cookies are crisp and sturdy enough to stand up to frosting, without being too hard. They also hold their shape well when baking.
I normally use royal icing to frost them, and an assortment of sprinkles and other candies. Royal icing is made with egg whites or powdered egg whites. The advantage over a butter cream, is that royal icing hardens, making the cookies easy to pack and stack. You don’t need much- just a thin layer. Tinting the frosting different colors is a big part of the fun. Depending on how much time you have, you can get really creative with decorating.
I tried a different frosting last year. Several friends had said they didn’t have, or couldn’t find, powdered egg whites and wondered if there was an alternative. There is. This one has just a few easy to find ingredients, and hardens up as nicely as royal icing, with a bit of a shine. The recipes for both icings follow the recipe for the cookies.
Sugar Cookies
1 c. butter
1 c. sugar
1 egg
1 t. vanilla
3 c. flour
2 t. baking powder
3 T. milk
Extra sugar for sprinkling, if desired
Beat butter and sugar until fluffy. Beat in egg and vanilla. Combine dry ingredients and add to butter mixture. Beat in milk. Heat oven to 375-degrees. Roll dough on lightly floured surface to about 1/3- inch thickness. Cut out with lightly floured cutters and sprinkle with sugar or colored sugar if you like and if you are not going to frost them. Bake on an ungreased baking sheet for 10-12 minutes. Cool on baking sheet 3 minutes before placing on wire rack to cool completely. Frost when cooled. Makes about 4 dozen.
Decorating your cookies:
You can use a buttercream frosting, if you like, however the topping I prefer is royal icing. Because royal icing contains egg whites it gets hard. Cookies have a smooth appearance and can be stacked. When making royal icing, use pasteurized egg whites or powdered egg whites. Raw egg whites pose a risk of salmonella.
You can also use colored sugar and sprinkles and mini chocolate chips for eyes.
Non-Royal Icing
4 c. powdered sugar 3 T. corn syrup 2 t. vanilla extract 1/3 c. lemon juice- about
Combine the first three ingredients then add the lemon juice, a little at a time until the icing gets to the consistency you want. You might need a little more. Stir until smooth and add food colorings, if you like. Spread or pipe out, allowing to dry before adding new layers of icing.
Royal Icing
1 lb. powdered sugar
½ t. cream of tartar
5¼ t. egg white powder
6 T. water
½ t. vanilla, optional
Assorted food coloring
In large mixing bowl combine dry ingredients and mix well. Add water and vanilla and beat until light and fluffy, about 10 minutes. Divide into small bowls and tint each batch as needed. Keep bowl covered with a damp towel while waiting to use so frosting will not dry out.
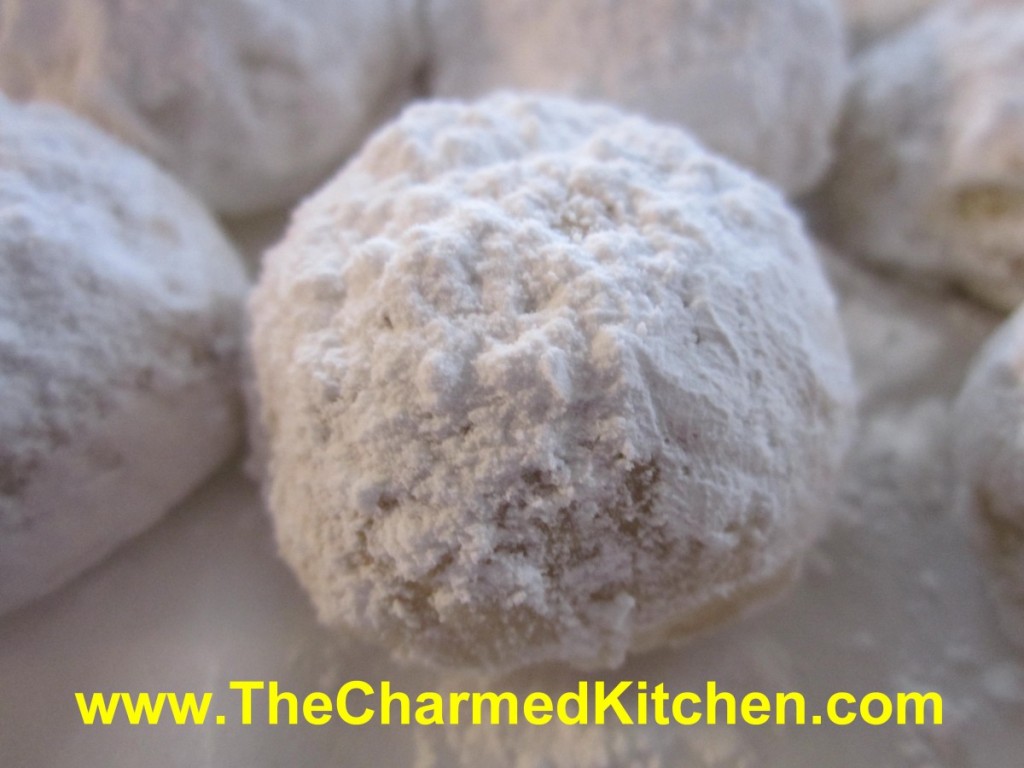
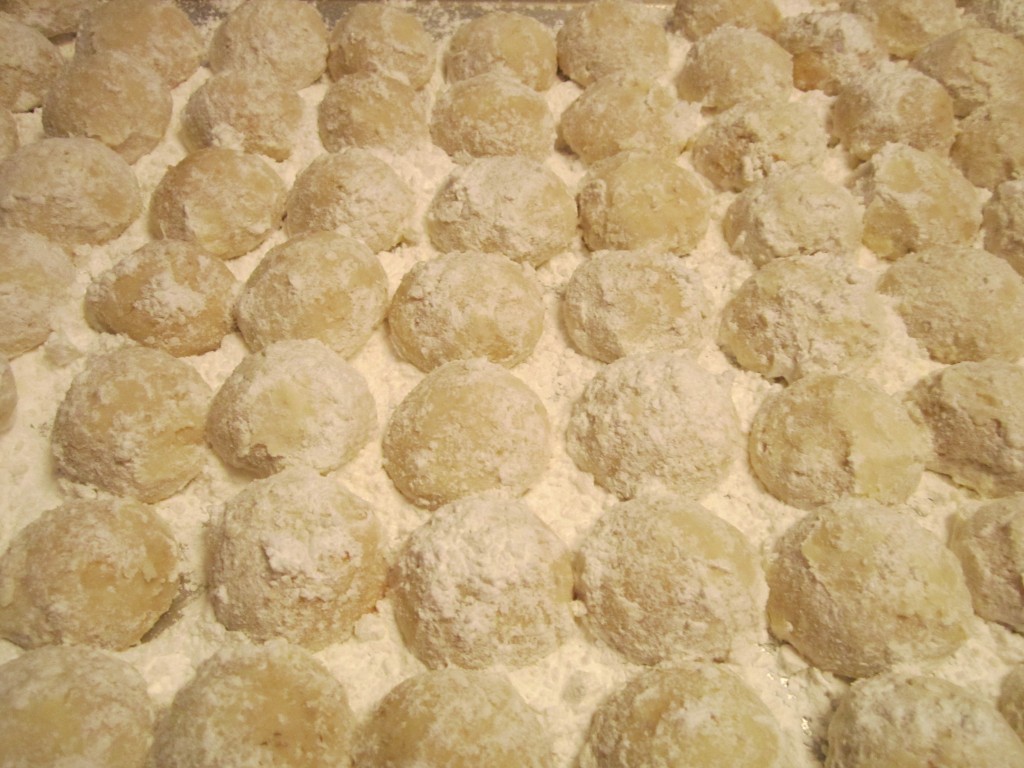
Russian Teacakes

This is the first cookie I can remember making with my Mother. She sat me down at the kitchen table with a pile of chilled dough. I think I was 7. She put a piece of wax paper on the table, then rolled out one small ball of dough. She told me to do what she had just done. Roll out the rest of the dough into little balls. I sat there and made one tiny dough ball after another, until I was done. I can’t make these cookies without thinking of her. A special memory, indeed. Wouldn’t seem like Christmas without them.
Russian Teacakes, also known as Mexican Wedding Cakes are a delicate nut-filled shortbread cookie coated in powdered sugar. The magic is created when the cookies, hot from the oven, are rolled in powdered sugar. The powdered sugar clings to the hot cookies and makes a sort of sweet coating. Once cooled, they are dusted with more powdered sugar. Whether you call them Russian Teacakes, Mexican Wedding Cakes, or as another friend always refers to them, butter balls, these cookies are a must for your holiday cookie baking.
Russian Teacakes
1 c. butter
½ c. powdered sugar, plus extra for coating
1 t. vanilla
2 ¼ c. flour
¼ t. salt
¾ c. finely chopped nuts, nearly ground
Mix butter, ½ cup sugar and vanilla well. Stir flour and salt together and then add to butter mixture. Mix well and stir in nuts. Wrap dough and chill. Heat oven to 375 degrees. Roll dough into 1-inch balls and place 1 inch apart on ungreased baking sheet. Bake 10-12 minutes. Cookies should be lightly browned on the bottom. While still warm, roll cookies in powdered sugar. Dust again with sugar once cooled. Makes about 4 dozen.
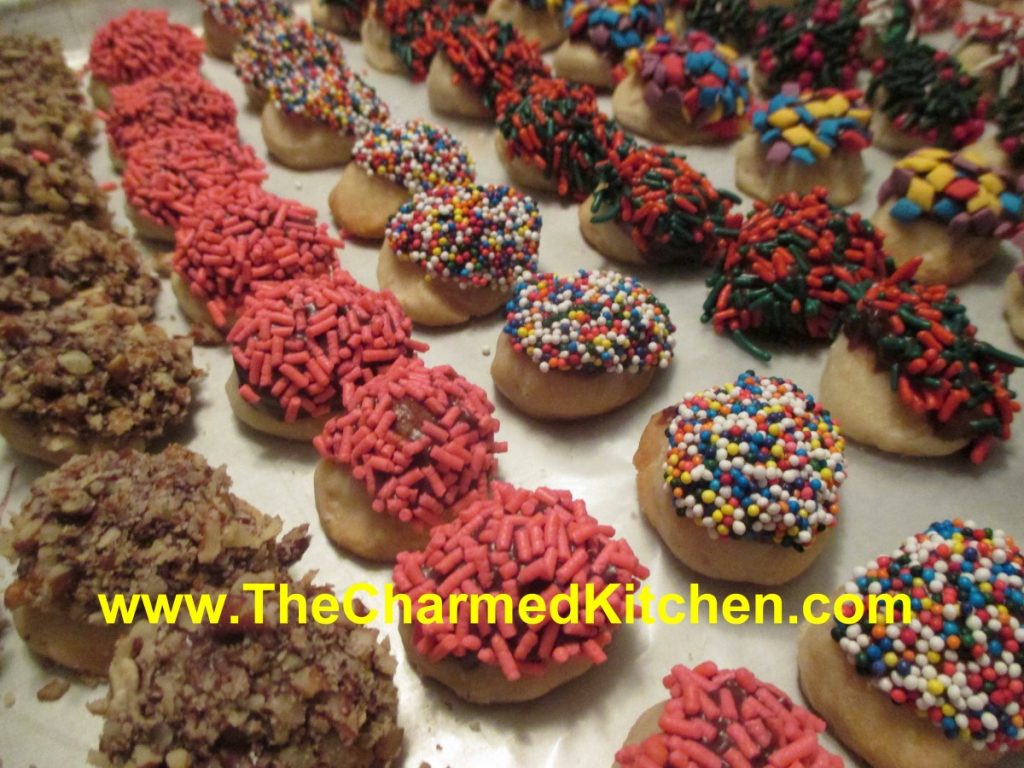
Cookie “Candies”

There are so many cookies I bake this time of year, I could never pick a favorite. There are some cookies that are a MUST bake, however.
These cookie-candies are one of them. They get their name because, once decorated, they look like little pieces of candy.
Under the sprinkles are rich and tasty oatmeal shortbread cookies. Shortbread cookies are always a favorite of mine. I think I make half a dozen varieties of shortbread.
The dough is easy to handle. You just shape small amounts into shapes like circles, squares and ovals. They hold their shape. Like most shortbread, they bake at a lower temperature than other cookies. They also bake a bit longer. They should be a little golden on the bottom when done.
After they are baked and cooled, the cookies are dipped in melted chocolate and then in assorted toppings. You can dip them in sprinkles, finely chopped nuts and coconut. Pretty and tasty.
Cookie-Candies
1 c. butter
¾ c. powdered sugar
1 T. vanilla
2 c. flour
½ c. rolled oats
½ c. chocolate chips
¼ c. milk
finely chopped nuts
assorted sprinkles
shredded coconut
Cream together butter, sugar and vanilla. Stir in flour and oats. Shape teaspoonfuls of the dough into different shapes like rounds, ovals, cones cubes etc. Try to make them look like little candies. They will hold their shape very well while baking. Bake in a 325- degree oven for 20-25 minutes on an ungreased baking sheet. Cool. In microwave safe dish combine chocolate and milk and melt. Dip tops of cookies in chocolate mixture and then in one of the toppings you have. Chocolate topping will harden up after a while. Makes about 4 dozen.


