Bacon Waffles for Dad

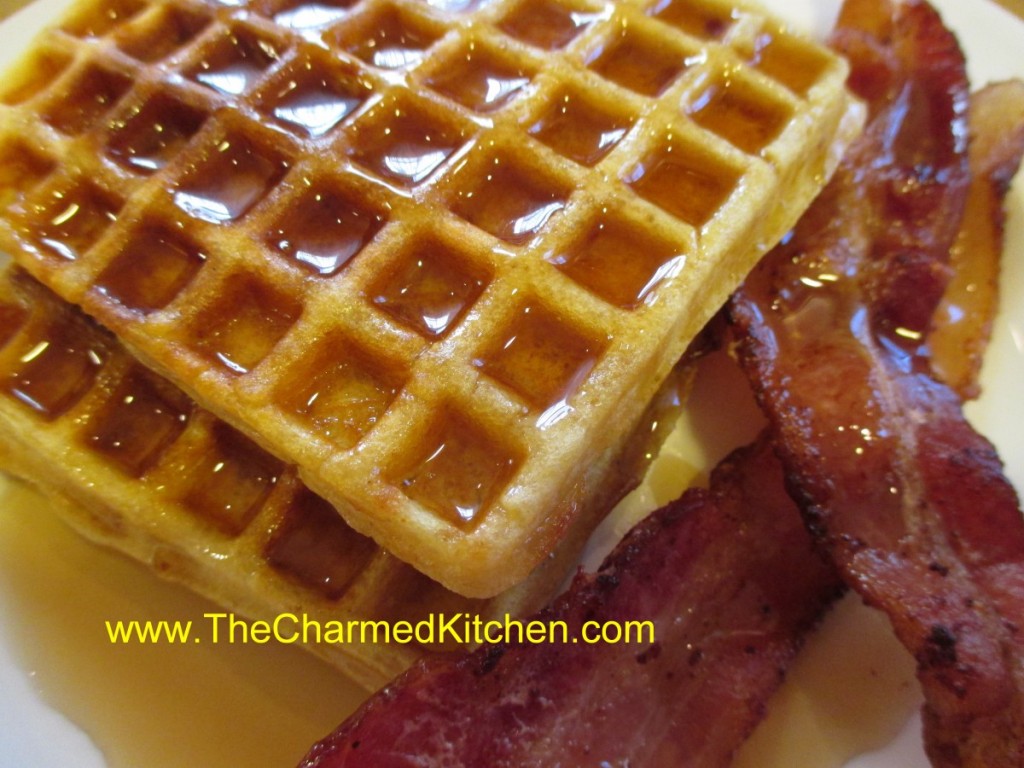
If you are looking for a special breakfast for Father’s Day, maybe dad would like some waffles. Even better, make him waffles with bacon inside them. Then serve your bacon waffles with extra bacon on the side!!!
For me, breakfast doesn’t get much better than waffles. Well, unless maybe you add bacon to the waffle batter.
Truth is, I don’t treat myself to waffles all that often, but if I am going to eat waffles, I go all out.
These are truly wonderful waffles. Light, crispy on the outside and studded with bacon. A drizzle of warm maple syrup and you are good to go.
So, if you are looking for a special treat for dad for breakfast, or lunch, or dinner or a snack… try these bacon waffles. You can thank me later.
Bacon Waffles
1 pound sliced bacon
1 3/4 cups all-purpose flour
1 tablespoon sugar
2 teaspoons baking powder
1/2 teaspoon salt
3 eggs, separated
1½ cups milk
¼ cup butter, melted
In a skillet, cook bacon until crisp. Drain; crumble and set aside. In a mixing bowl, combine the flour, sugar, baking powder and salt. Beat egg yolks, milk and butter; stir into dry ingredients until smooth. Beat egg whites until stiff peaks form; fold into batter. Add bacon. Before making each waffle, stir batter. Bake in a preheated waffle iron according to manufacturer’s directions until golden brown.
Chicken Marsala


I was talking to a friend recently about cooking with wine. We were discussing the different wines used in cooking. It got me to thinking. I realized I had not made Chicken Marsala in a long time. Too long.
I had most of the ingredients on hand. I picked up the mushrooms and I made it for dinner last night. The recipe is pretty simple. Fast, too. Nice when you don’t have a lot of time to cook. Best of all, it tastes really good. That is what’s important, after all.
I did want to take a minute to talk about cooking wines. When you are cooking with wine, never cook with cooking wines. I just confused you, didn’t I?
What I mean to say is don’t use wines that say they are cooking wines on the label- most often you’ll see cooking Marsala and cooking sherry, although there are others. In most grocery stores, cooking wines will be near the vinegars, not in the wine section of the store. They really are pretty awful. Let me explain.
During Prohibition, when alcohol was illegal in America, people still wanted to able to use wine in cooking. A compromise was reached and cooking spirits were born. What they all have in common is -salt. Yes, salt. Lots and lots of it, too. The idea was to make the wine too salty to drink, so no one would do anything other than cook with these wines.
Do yourself a favor and just go to the wine section of your favorite grocery store. They probably have Marsala and sherry as well. Even my local drug store carries Marsala.
For cooking, use a dry Marsala, not a sweet one. If you aren’t sure, ask someone in the wine department to help you. Same goes for sherry. Get a bottle that just says sherry, golden sherry or dry sherry. Cream sherry can be used in desserts, but is not great in savory dishes. Don’t be afraid to cook with wines more often. They add a wonderful flavor to lots of dishes.
So here is my version of Chicken Marsala. I often add more Marsala than the recipe calls for- no surprise there. Sometimes, if I want more sauce, I even add a little chicken stock. Last night, I just used the wine and cooked most of the liquid off. It made the sauce very intense in flavor. It ended up almost a glaze. I loved it. I also had garlic scapes and tossed a few of them in with the onions. They added a mild garlic flavor. Not traditional, but a nice touch.
Chicken Marsala
6 chicken breast halves or 8 thighs, boned, skinless, pounded thin
Oil, about ¼ cup
1 onion, chopped
8 oz. sliced mushrooms
Salt and pepper to taste
Flour
½ c. Marsala wine, or more to taste – I often add more
3-4 T. fresh chopped parsley
1 t. fresh chopped tarragon, optional
Heat 2 tablespoons of oil in skillet and cook onions until browned. Add mushrooms and cook 3 minutes longer. Meanwhile, season chicken with salt and pepper and dredge pieces in flour. Remove onion mixture from skillet and add more oil, if needed. Cook chicken until browned on both sides and barely cooked through. Add wine and vegetables and cook until sauce thickens, 5-7 minutes. Sprinkle with parsley and tarragon. Serve over rice or pasta. Serves 4-6.
Note: If you want more sauce, you can add more wine and some chicken stock- about ½ cup. Depends on how much sauce you like.
Strawberry Ice Cream

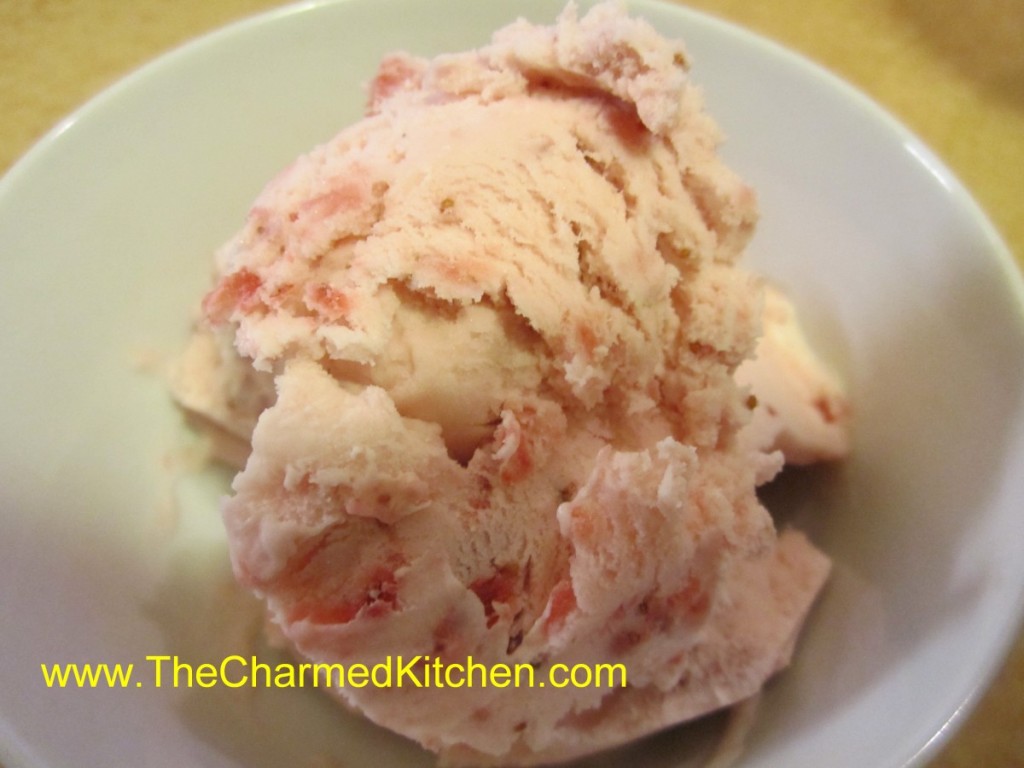
It is strawberry season around here, and I am loving it. Since the weather is warming up, I decided to make ice cream with some of the berries. Homemade ice cream is easy to make. When you make your own, you can adjust flavorings and sweetness level, too.
Studded with plenty of berries, this ice cream will put anything store-bought to shame. Feel free to add blueberries or raspberries, too. Sometimes I add other flavors, like lavender or mint.
Strawberry Ice Cream
2 c. chopped strawberries
1 c. sugar
1 T. vanilla
2 c. cream or half and half or a combination. You can also use some milk or even almond or rice milk.
Additional sugar to taste
Place strawberries, vanilla and sugar in saucepan and bring to a simmer, stirring occasionally. Remove from heat and chill. Combine chilled berry mixture with cream. Add additional sugar if you like. Remember that once it is frozen, the ice cream will not taste as sweet, so make this mixture a little sweeter than you want the final product to be. How much sugar you add varies with personal taste and how sweet the berries are. Place in an ice cream maker and process according to manufacturer’s directions. Once finished put in an air- tight container and place in freezer. Makes about 1 quart.
Homemade Strawberry Liqueur


This strawberry liqueur is like summer in a bottle. I make a lot of different liqueurs and strawberry is one of my absolute favorites. It is wonderful for sipping or over ice. It is also a fun addition to any number of cocktails. A friend adds it to ice cream with extra berries and blends it up for an adult strawberry milkshake.
With strawberries in season, this is the time of year to enjoy them. I have been eating strawberries in breakfasts, desserts, and salads.
I want to preserve some for later, too. I made strawberry jam and dehydrated some. I will also freeze some.
Another way to preserve strawberries, is by making a liqueur with them. It is pretty simple. Just combine berries with vodka and a small amount of powdered sugar. I use half gallon canning jars for this, but you could use any food safe container with a tight fitting lid.
Let the mixture steep long enough for the berries to infuse the alcohol with their flavor. You can sweeten it later on, or even leave it unsweetened, if you prefer. I like to sip the liqueur as is, or serve on the rocks with a splash of club soda.
Strawberry Liqueur
3 cups fresh strawberries, sliced
3 T. powdered sugar
3 c. vodka
1 c. simple syrup*
Sprinkle powdered sugar over berries and let dissolve. Pour over vodka and let steep 2 weeks. Crush berries and strain then filter. Add sugar syrup and mature 1 week. Makes 5 cups.
*Simple syrup is made from 1 cup of sugar and ½ cup of water. Bring to a boil, then cool. You will have 1 cup of syrup. You can sweeten your liqueur with honey, if you prefer. Watch when you substitute honey for sugar, as it is sweeter and stronger flavored. Better to use orange or clover honey. Add to suit your taste.
Fresh Peach Scones


I’ve really been in the mood to make scones lately. Since I had some beautiful peaches, I decided to use them in the batter.
They worked out even better than I had hoped. I added cinnamon, nutmeg and cloves into the dough, for a little extra flavor. Nicely complimented the sweetness of the peaches.
These are wonderful for breakfast, brunch or with tea or coffee. They would also make a nice base for shortcake. I could see them with berries and whipped cream for a perfect summer dessert.
I used a 2 oz. cookie scoop and got 25 scones. You could make them bigger, just increase the baking time a couple of minutes. I also placed only one baking sheet in the oven at a time. You could put both in at once, but reverse the rack you have them on- half way through baking- so they bake more evenly. Also, if both trays are in the oven at once, increase baking time a couple of minutes.
Fresh Peach Scones
3 cups flour
½ c. sugar
1 tablespoon baking powder
1 t. cinnamon
1 t. nutmeg
Pinch of cloves
½ t. salt
10 T. cold butter (1 stick plus two tablespoons)
¾ c. half and half or milk
1 egg
1½ t. vanilla
1½ c. peeled, chopped peaches – about 3-4 peaches
Glaze:
2 c. powdered sugar
About 2-3 T. half and half
1 t. vanilla
Preheat oven to 425. Line 2 baking sheets with parchment paper, or use silicone liners. In a bowl, place the dry ingredients and stir to mix. Cut in butter to resemble coarse crumbs. Make a well in the center and stir in half and half, vanilla and egg. Stir to make a soft dough. Fold in peaches. Use ice cream scoop to make scones, placing scoops of dough onto baking sheets. Bake until browned – 14-16 minutes. Cool on a rack. Make glaze and dip tops of scones in glaze or drizzle it over them. Makes 22-25 depending on size.
Peach Ice Cream- Recipe #2

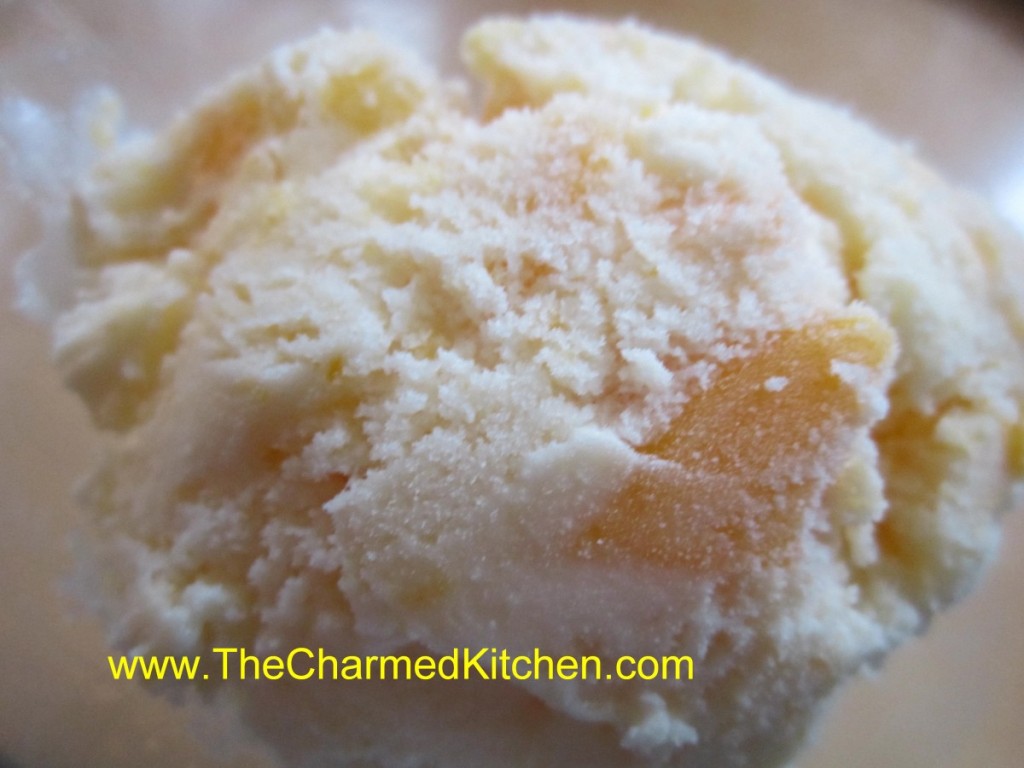
Yesterday I posted my peach ice cream recipe, using a custard ( egg ) base. Today, I thought I would post another recipe for peach ice cream, since I mentioned it in the post. In this recipe, only the peaches are cooked, to soften them up before freezing. The rest of the base is not. This recipe contains no eggs. The texture is lovely, but different from an egg-based ice cream. I just thought it would be nice to give you a couple of options.
Peaches are one of those fruits that make me think summer. We had a couple of peach trees in the backyard when I was growing up. I remember one year, my dad had to prop up the branches so they wouldn’t break under the weight of all those peaches. Homemade ice cream is all about summer, too. Fruit-studded ice cream seems like the perfect dessert for a warm summer day.
When using peaches in ice cream, you don’t want to just cut up the fruit and drop it in. If you do that, the peaches will form ice crystals and become quite hard, sort of like peachy ice cubes. Nobody want that in their ice cream. Better to cook the peaches first, like I did for the peaches in this recipe. That way, when you put them in the ice cream, they get frozen, but in a softer way. True of other fruits you might add to any ice cream recipe.
Homemade Peach Ice Cream
3-4 ripe peaches
2 c. half and half
1 c. sugar, or to taste
1 T. vanilla
1 T. orange zest
Peel and dice peaches. Cook in a small amount of water and a little sugar until tender. If you don’t precook the peaches they will be icy and hard in the ice cream. Cool and drain. In bowl combine half and half and sugar and stir until sugar is dissolved. Add remaining ingredients and stir well. Place in ice cream machine and process according to manufacturer’s directions. If you don’t have an ice cream maker place mixture in a shallow pan and freeze solid. Remove from freezer and allow to soften a little at room temperature then break up into chunks and place in a mixing bowl. Beat with a mixer until smooth and return to freezer. You can also process in a food processor. Makes 1 quart.
Peach Ice Cream-Custard Style

If there is a favorite summer treat for me- it is ice cream. I love to go to the local ice cream shop for a sundae or cone, and I love to make my own ice cream. When I found myself with a few extra peaches, I knew I wanted to use some of them to make ice cream. Peach ice cream is one of my absolute favorite flavors.
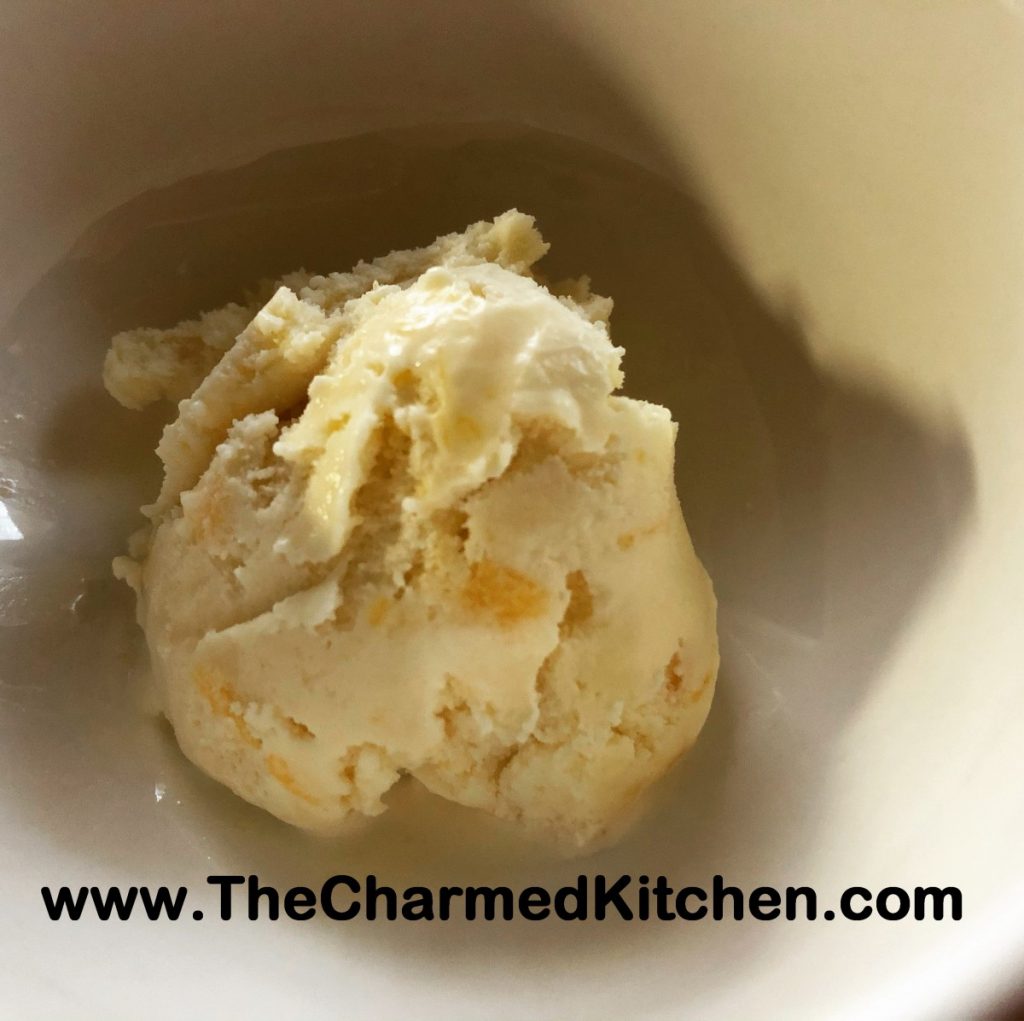
I have made peach ice cream before. I have posted the recipe before. This one is different because I made a custard base for my ice cream this time. A custard base just means that egg yolks, or eggs, are incorporated into the base of the ice cream. The base is heated up, so the eggs get cooked. In the other recipe, there are no eggs.
The custard base gives you a creamier end product. I wouldn’t say you have to make a custard based ice cream for it to be good. They are just different. The custard base is a bit more work, but still not a difficult recipe at all.
This peach ice cream came out so good. Really creamy. I had perfectly ripe peaches. They were a little small, so I used 5 of them in this batch of ice cream. I used a vegetable peeler to remove the skins. I think that the skins get tough once cooked. Leave them on, if you prefer. I cut them off the pits, being sure to save all the juices, too. Then I just diced the peaches up pretty small.
If I just dumped the raw peaches into the ice cream base and froze it, they would end up as hard peachy cubes. By cooking the peaches first, they stay softer in the ice cream. This is true of any fruit ice cream. Using fruit that had been frozen, then thawed, will also work. I added a little vanilla, too. Not enough to overpower the peaches, but to add another layer of flavor.
So here is the recipe. Enjoy!!
Peach Ice Cream- Custard Style
4-5 peaches- mine were small- I used 5
1½ c. half and half
1 c. heavy whipping cream
3 egg yolks
1 c. sugar or to taste
1 t. vanilla
Peel the peaches. Cut the peaches to remove the pits. Discard pits. Dice up the peaches over a bowl to catch all the juices. In medium saucepan, place the peaches with the peach juice, half and half and cream. Over medium low heat, bring up to a simmer. Stir every few minutes, to prevent scorching. Let the mixture cook a few minutes, to soften the peaches. In a small bowl, beat together the egg yolks, sugar and vanilla. Add ½ cup of the hot cream mixture to the eggs, whisking in well. Add another ½ cup of the cream mixture, whisking again. Add one last ½ cup of the hot cream and again, whisk until smooth. Pour the egg mixture into the saucepan with the cream and while whisking, simmer until mixture starts to thicken and will coat the back of a spoon. This will take about 5 minutes. Don’t use too high a heat, or you will scramble your eggs. Mixture should reach 160 degrees to be sure eggs are cooked. Remove from heat. Pour mixture into a bowl. Allow ice cream base to cool down, then chill in fridge. Chilled mixture can be frozen in an ice cream maker once cold- in a few hours- or even the next day. Once mixture has been frozen in ice cream maker, place in a container and freeze until ready to serve. Makes about 5-6 cups of ice cream.
Strawberry Sorbet

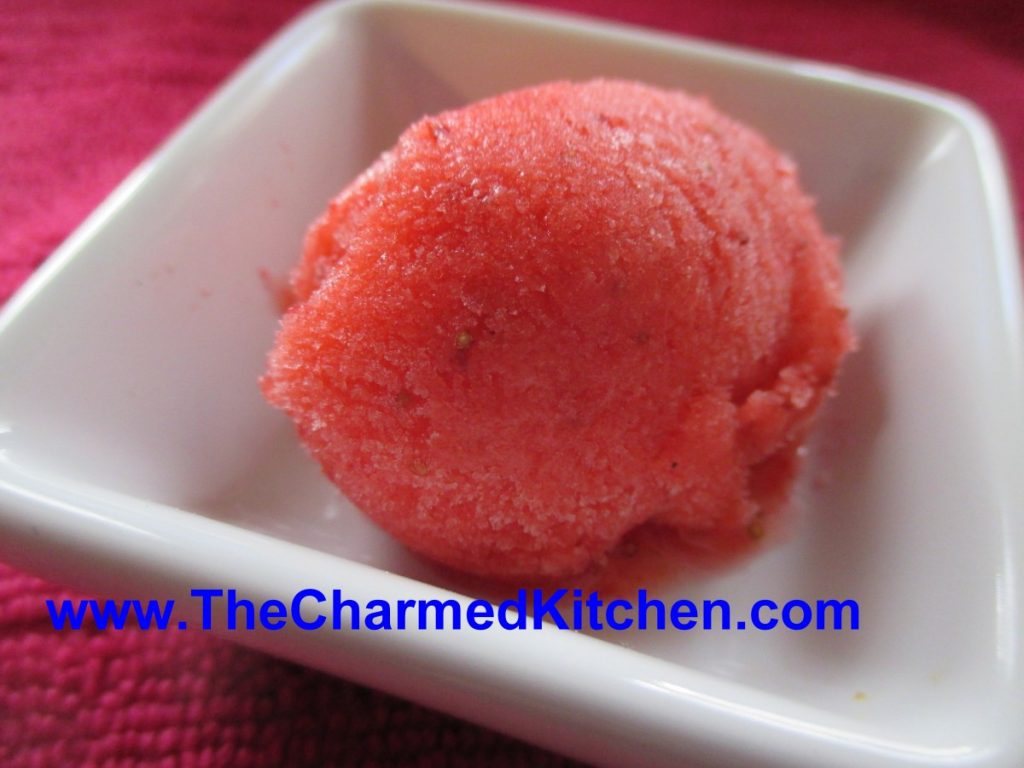
If you are looking for a versatile dessert, sorbets are a great option. Almost any fruit can be used, and you can sweeten, or not, to suit your own taste. If you start with frozen fruit, you can blend up your sorbet and serve it right away. Even better, if you can process and freeze it a couple of times.
You can play around with adding other flavors. I sometimes add fresh herbs, like mint or lavender. Extracts can be added, too.
Sorbets can be served on their own, with cake, or drizzled with chocolate sauce. I sometimes add a scoop of sorbet to a glass of lemonade or ice tea on a hot day. So refreshing. Sorbet can be a fun topper in cocktails, too. I sometimes combine a couple of fruits in one sorbet.
You can make the sorbet in an ice cream machine, if you have one, but you don’t need to. I don’t. It really is simple. As an added bonus, once your sorbet is made, you have it on hand whenever you need a dessert. The secret is to blend the sorbet a couple of times after it is frozen, if you can. Each time, the sorbet gets smoother and creamier. I use my food processor.
So here is the recipe for my strawberry sorbet. You can substitute any number of different fruits.
Strawberry Sorbet
1 1/2 lbs strawberries, fresh or frozen
1/2 c. sugar, or to taste – you could also sweeten with honey, if you prefer, or use no sweetener
1 T. lime or lemon juice
Wash and stem berries. Place in food processor with juice and blend until smooth. Sweeten to taste, stirring until sugar is dissolved. Place in a container with a lid and freeze. Once frozen, remove strawberry mix from freezer and sit it on the counter to soften a little bit. This is really the important part. You don’t want it to thaw, but you do want it soft just enough to break into chunks. Place chunks in food processor and blend it again. It will actually start to look a little creamy and lighter in color. You can serve it right away- or put it back in the freezer to serve later. At this point the sorbet is ready- but you can repeat the soften/process step once more, if you like, for even creamier sorbet. Makes 3-4 cups.
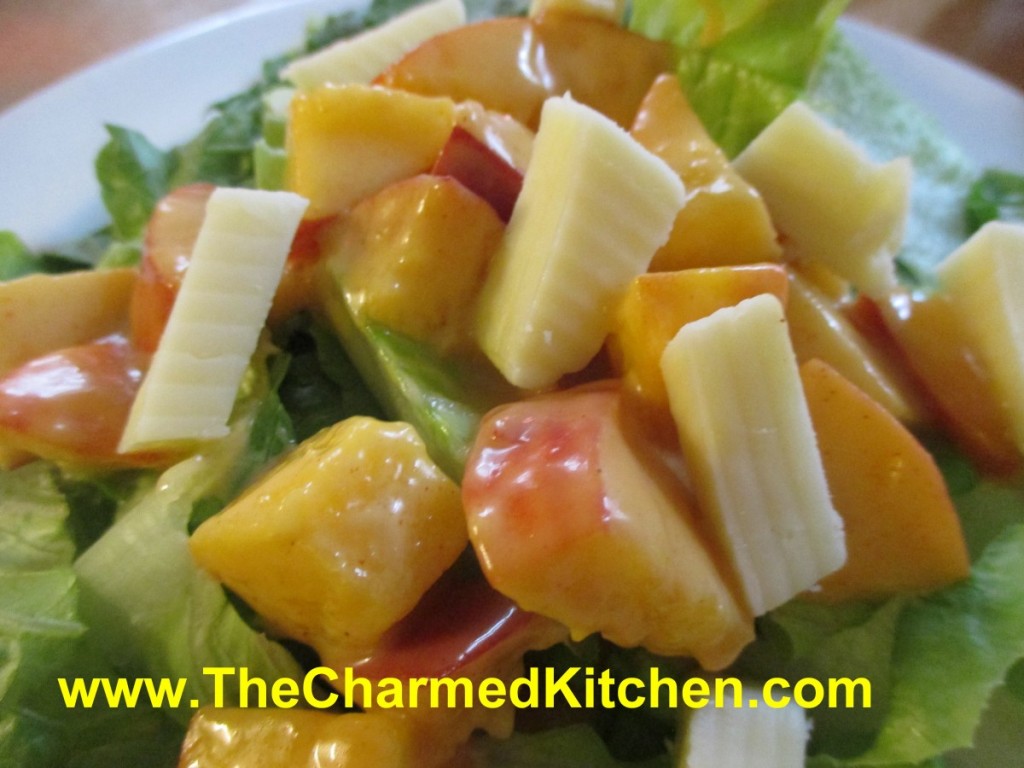
Peachy Chef Salad

When you think about cooking with peaches, don’t limit yourself to desserts and jam. Peaches can pair well with savory dishes, too. I often use peaches for glazes and sauces for meats.
In this dish, I paired peaches with traditional chef salad ingredients. I tossed the peaches in a homemade honey French dressing, then spooned them over the salad. The result was wonderful- and a great lunch or dinner option for hot weather.
You can top the salad with cheese, meats or both. I like to add some nuts, too. I topped the salad with sharp cheddar cheese and bacon. I really liked the combination of the sweet fruit with the smoky bacon. Use what you like- and what you have on hand.
A chef salad is a great way to use up that leftover grilled chicken or that open package of cheese. Add extra veggies, too, if you like. It also makes a wonderful meal when you don’t want to cook. Lovely, cool meal for a hot day.
Peachy Chef Salad
Honey French Dressing:
1/3 c. honey
1/4 c. white wine vinegar or cider vinegar
1 t. paprika
1 t. dry mustard
1/4 t. salt
1/2 c. olive oil
3 cups chopped peaches
Salad:
6 c. torn salad greens
12 oz. cooked chicken, turkey, ham etc, cut into strips
1 c. cubed cheese
1/2 c. cashews, optional
To make the dressing, in blender, combine first five ingredients and start running machine on high. Add oil in a slow stream until mixture becomes thickened. Pour into bowl and stir in peaches and chill, several hours if you can. When ready to serve arrange greens on one large platter or on smaller salad plates. Arrange meat and cheese on platter or plates. Spoon over the peach/dressing mixture, add cashews, then serve. Serves 4-6.
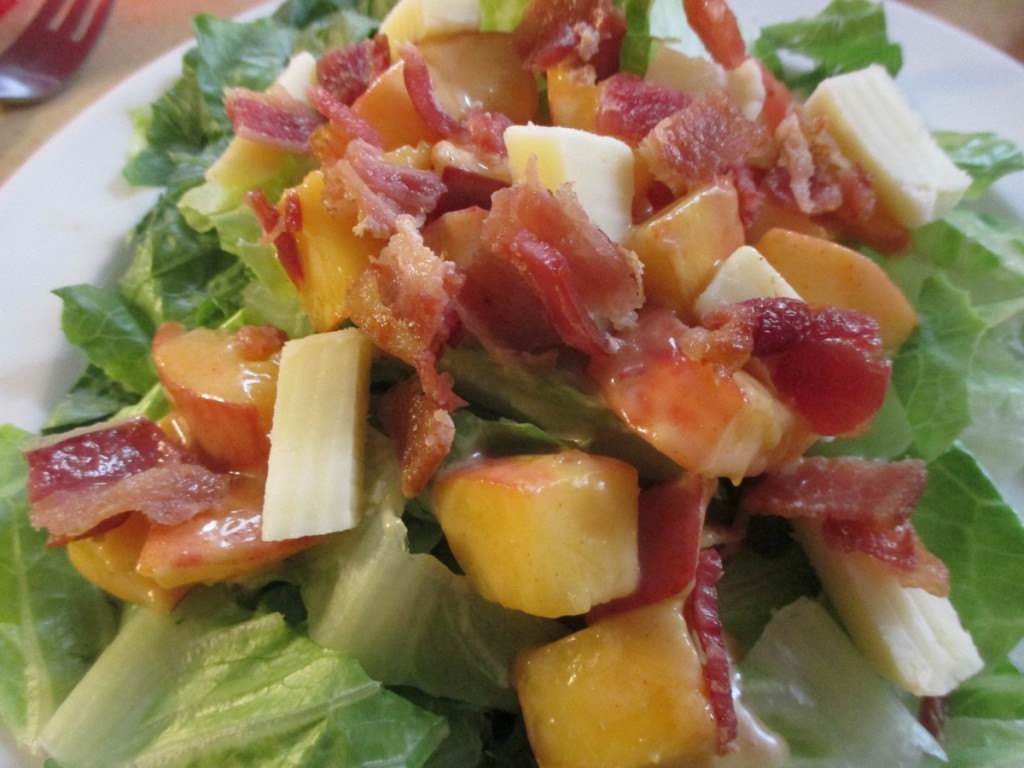
Salad topped with bacon and cheese
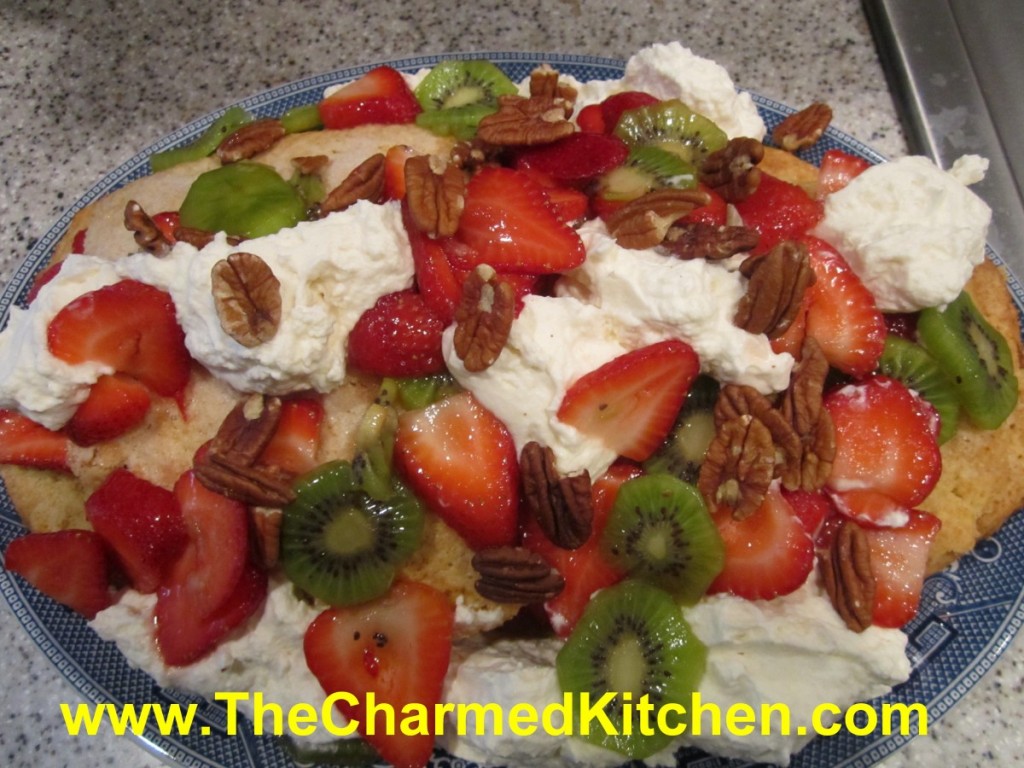
Giant Strawberry Shortcake

A couple of weeks ago, I posted a recipe for mini strawberry shortcakes. Now, we go to the other extreme. One giant shortcake.
Seriously, it is a fun way to make shortcake. You could make one for any special occasion or party.
This is a great dessert for a party, picnic or barbecue. Instead of making a bunch of individual shortcakes, make one really big one. It makes quite an impression.
When ready to serve it, just cut into slices, like cake or pie. I often serve this shortcake with ice cream on the side. Feel free to switch up which fruits you use. I used kiwi fruit with the strawberries, but you can add different fruits. Peaches would go well with the strawberries or blueberries. Just have fun and use fruit combinations you like. For the 4th of July, you could use a combination of strawberries, raspberries and blueberries.
Giant Strawberry Shortcake
1 egg
3/4 c. milk
1/2 t. lemon juice
2 c. flour
1/4 c. brown sugar
1 T. baking powder
1/2 stick cold butter plus 1 T. softened
1/2 c. plus 1 T. sugar
1 qt. strawberries, sliced thin
2 kiwi fruit, peeled and sliced thin
1/4 c. chopped nuts, toasted
whipped cream, optional
In small bowl combine egg, milk and lemon juice and set aside. In larger bowl combine the flour, brown sugar and baking powder. Cut in cold butter to resemble coarse crumbs. Add egg mixture and stir until mixture forms into a soft dough. Knead dough gently on a lightly floured surface about 10 times. On greased baking sheet pat dough into a 15×6-inch oval. Sprinkle dough with the 1 tablespoon of sugar and dot with the softened butter. Bake in a preheated 400 degree oven for 20-25 minutes, or until lightly golden. Place on wire rack to cool. Toss the berries with the remaining 1/2 cup of sugar. Allow to stand 30 minutes. Split the shortcake lengthwise and remove the top. Spoon over the half the berries and replace top of shortcake. Combine the kiwi with the remaining berries.Spoon over the remaining fruit and sprinkle with the nuts. Dot with whipped cream, if desired. Cut in wedges to serve. Serves 8.
Note: you can bake shortcake day ahead and prep the fruit day ahead, keeping it chilled and just assemble when ready to serve.


