Cindy’s Rich Squash Rolls

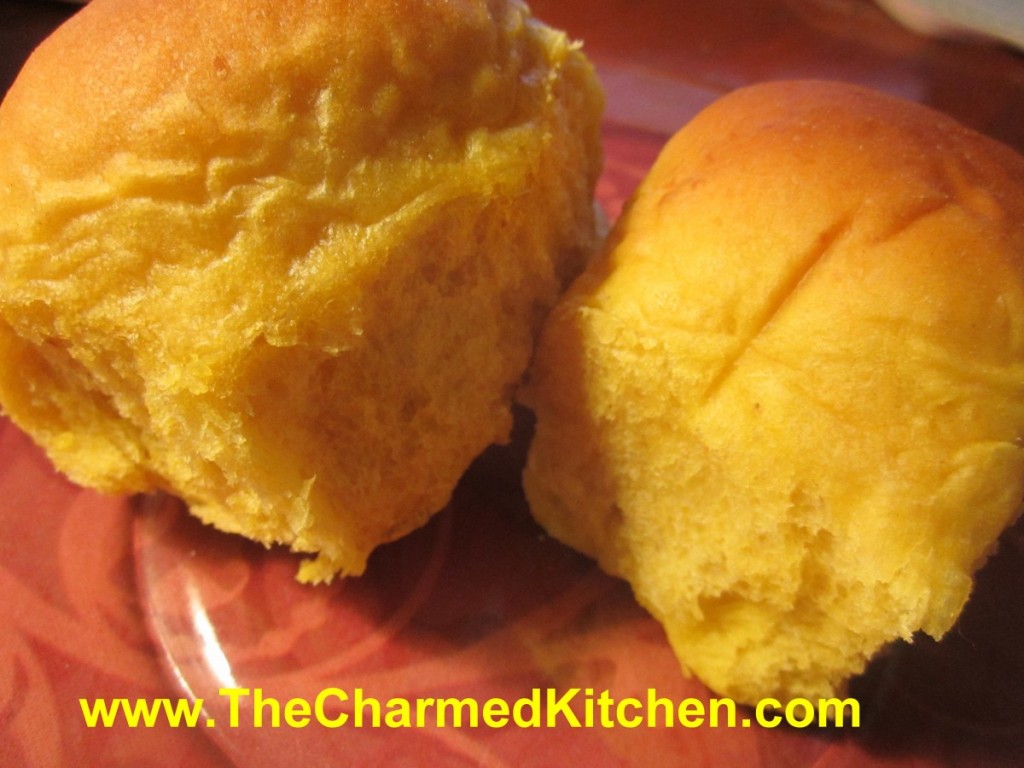
I love these dinner rolls. I think you will, too. The addition of squash is what makes them so special. The squash adds beautiful color to the rolls. It also creates a soft texture and an earthy sweetness.
These rolls are wonderful for any fall or winter dinner or holiday. They are especially nice for Thanksgiving.
We have them every Thanksgiving. My sister Cindy always makes them, and has been making them for years. They are rich, soft and sweet and make a perfect addition to the dinner table. Even with all the other foods at Thanksgiving dinner- you always save room for these dinner rolls.
While I use cooked butternut squash in mine, pumpkin could be used, as well as other winter squashes.
The recipe makes a pretty big batch. You can bake them, then freeze some for later use.
I love slicing them in half, and making mini turkey sandwiches with them the day after Thanksgiving.
Cindy’s Squash Rolls
1 c. milk
4 T. butter
½ c. sugar
¼ c. brown sugar
1 t. salt
1 pkt. Yeast
4-5 c. flour
1 ½ c. cooked butternut squash, strained, or 1 (16oz.) can squash or pumpkin
2 eggs, room temperature
Scald milk and butter. Place sugar and salt in large bowl and pour in milk mixture. Cool to lukewarm. Add yeast and 2 cups of flour. Beat at medium speed with mixer for 2 minutes. Add squash and eggs and mix until smooth. Add flour gradually to form a stiff dough. Knead on floured board for 7-8 minutes. Place in a greased bowl, turning dough to coat evenly. Cover with a towel and allow to rise until doubled. Punch dough down and shape into rolls. Dough can be placed in a greased cake pan where they will touch each other as they rise making softer rolls. You can also place them in muffin tins, or shape into rolls and place on greased baking sheet for crispier rolls. Cover and let rise until doubled. Bake at 375 degrees for about 25 minutes. Butter tops while warm. Makes 2 ½ -3 dozen.
Variation: you can also add ½ t. ground nutmeg, 1-2 T. chopped chives or 1 T. parsley flakes for a little different flavor.
Classic Pecan Pie

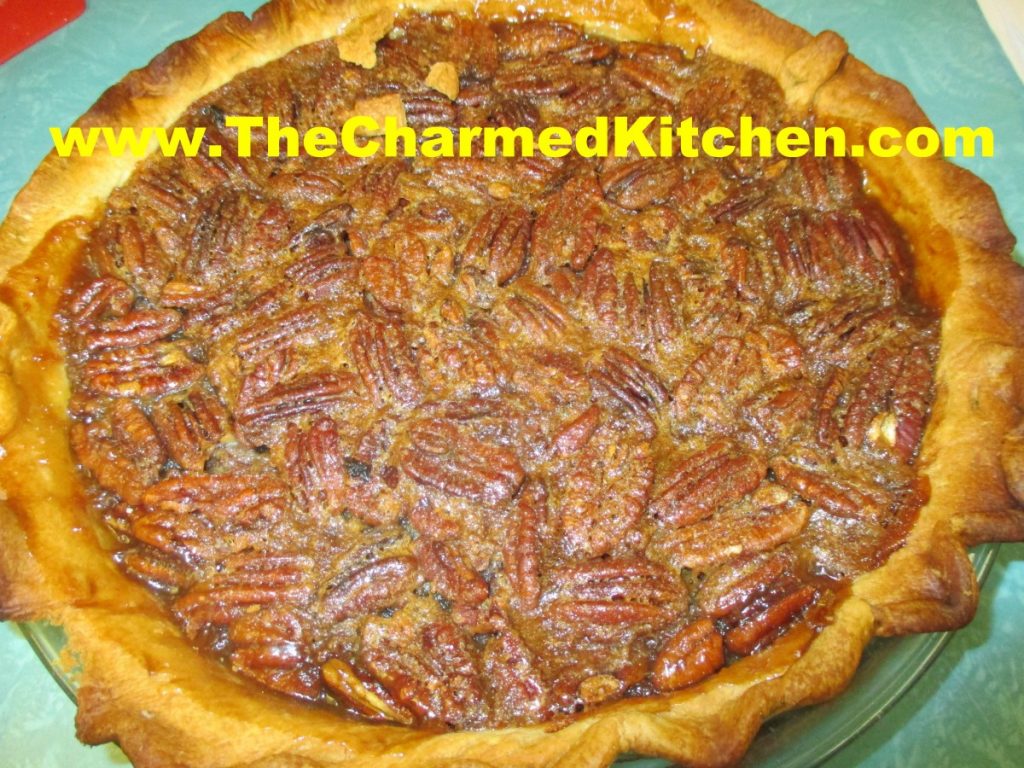
I love all sorts of pies. I would never want to pick just one favorite. If I had to pick, pecan would probably be it. The nuts, the sweet filling and the crispy crust all work so well together.
Served plain, or with a dollop of whipped cream, pecan pie just works for me. It is not a pie I make very often, so I think pecan pie always makes me thinks of the holidays. It was also a favorite of my Mom’s.
Here is the recipe. The crust recipe follows.
Classic Pecan Pie
3 eggs, slightly beaten
1 c. light or dark corn syrup
1 c. sugar
2 T. Butter, melted
1 t. vanilla
1½ c. pecans
1 unbaked 9-inch pastry crust
In medium mixing bowl beat together all ingredients, except the pecans until well mixed. Stir in nuts and pour into crust. Bake in a preheated 350 degree oven for 50-55 minutes or until knife inserted off center comes out clean. Makes 1.
Chocolate Pecan Pie Variation: The same recipe as above, but reduce sugar to 1/3 cup and add 4 oz. of German sweet chocolate or semi sweet chocolate, melted and cooled along with the eggs. This pie sometimes needs a little more time to bake-5 minutes or so.
Variations: You can experiment with other nuts. Try toasted, skinned hazelnuts, chopped coarsely or walnuts, slivered almonds or a combo.
You can use a store bought crust, but I prefer homemade. This is the crust recipe I normally use when I make pecan pie. It makes two crusts, so you can cut the recipe in half, freeze half of the dough, or just make 2 pies!!!
Half and Half Dough
This is a great crust for liquid fillings like custard type pies, pecan and pumpkin. For a sweet pie like pecan you can reduce the sugar in the crust by half.
¼ c. butter, room temp
½ c. shortening, room temp, or lard
¼ c. sugar
½ t. salt
2½ c. pastry or all purpose flour
1/8 t. baking powder
¼ c. milk
1 t. lemon juice
Cream together the first 4 ingredients until smooth. Mix together the flour and baking powder. Set aside. Combine milk with the juice and set aside. Stir ½ c. of the flour into butter mixture. Stir until smooth. Add a little of the milk, stirring until smooth. Add remaining ingredients alternately until finished. Dough will firm up once chilled. Chill at least 4 hours before using. Makes 2 crusts.
Cindy’s Butternut Squash Pie


At first glance you would think my sister made a pumpkin pie. It looks like pumpkin pie. It also tastes a lot like pumpkin pie. When I was a kid, and tasted this pie for the first time, it was the first time I liked “pumpkin” pie
My sister has been making this squash pie recipe for years. I love it. It is part of our Thanksgiving tradition. Cindy made it clear, from the beginning, that she used cooked butternut squash for her pie and not pumpkin. She liked the flavor better. I can’t argue with her success. The pie is yummy.
Of course, you could use pumpkin or other winter squash, if you like. I use Hubbard sometimes. The recipe has the right mix of spices and just enough sugar without being too sweet. What ever squash you use, I am sure this pie will be a hit with your family, too.
Cindy’s Butternut Squash Pie
1 (9″) unbaked pie shell brushed with 1 egg white
2 eggs slightly beaten
1/2 cup brown sugar
1/4 cup white sugar
1 1/2 tsp cinnamon
1/2 tsp nutmeg
1/2 tsp ginger
1/4 tsp allspice
1/4 tsp cloves
1/2 tsp salt
1/2 tsp vanilla
2 cups (1 lb.) cooked, butternut squash (mashed or pureed)
3 Tbsp molasses
1 can evaporated milk (12 oz can)
Combine filling ingredients and pour into shell. Bake at 400 degrees for 55-60 min., or until custard tests done.
Cindy added: I find this to be a very generous recipe; could make 2
smaller pies or just bake the extra custard in a baking cup. I suppose
it could be frozen and used in another recipe, but I’ve never tried to
freeze the raw filling, so I don’t know.
This can be used with pumpkin, too.
Sweet Potato and Herb Biscuits


These biscuits are a favorite of mine. They go great with a bowl of chili. They also would make a nice addition to your Thanksgiving table.
I like sweet potatoes any number of ways. Steamed, roasted, mashed. In this biscuit recipe, raw sweet potatoes are grated and added to the dough, along with some herbs. The biscuits come out tender, with great flavor and texture.
I enjoy them with a bit of butter, warm from the oven.
When you mix the dough, don’t be worried if it seems too dry. It takes a little bit of kneading to get the moisture out of the potatoes. The extra effort is worth it.
I cut them into triangles, but you can just form the dough into a log shape. Then, slice the dough for round biscuits. They taste wonderful, no matter the shape.
Sweet Potato and Herb Biscuits
2 1/4 c. flour
1 T. baking powder
1/2 t. grated lemon peel
1/4 t. each baking soda, dried basil and dried thyme
1 egg, beaten
1 1/2 c. shredded sweet potato, about 1 large
1/2 c. fine chopped green onions
1/2 c. sour cream
2T. butter, melted or olive oil
Stir together dry ingredients in large bowl and set aside. Combine remaining ingredients and add to flour mixture mixing until just blended. Turn onto lightly floured surface and knead a few times until dough just stays together. Dough will look too dry- but it will come together after you knead it. Press into an 8-inch square and cut into four squares.* Cross cut each square into four triangles. Place on greased baking sheet and bake in a preheated 425 degree oven for 20 minutes. Makes 16.
* I press the dough into a lightly floured 8×8-inch baking pan and then flip it out onto the work surface, before cutting. That way you’ll get nice, even edges.
Sweet Potato Puffs

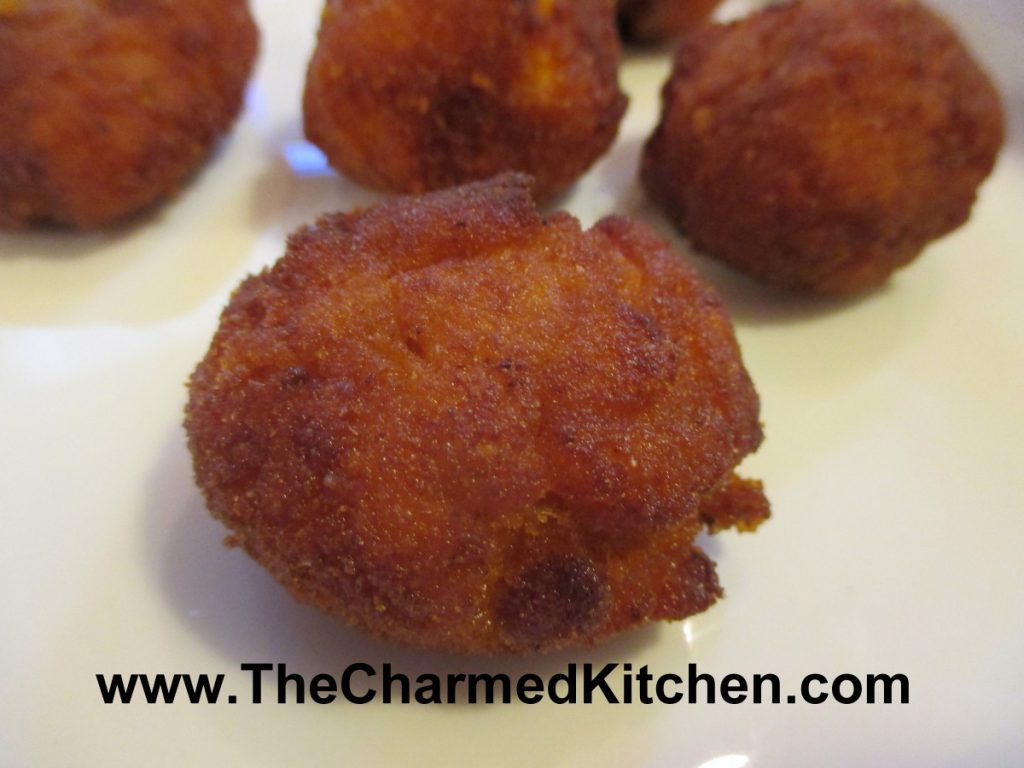
If you are looking for a new way to serve sweet potatoes, you might just want to try this recipe. Sweet potatoes are mashed, mixed with butter, eggs and spices, rolled in bread crumbs and fried. The end result is a delicate morsel that has a crunch on the outside- and creamy mashed sweet potatoes on the inside. They are addictive!!!
They make a great side dish, or can be served as an appetizer. While they are good hot, they maintain their crunch even after cooling down.
I first had a version of this recipe many years a go when a coworker made them and brought them to work. I recently found her original recipe, and added more seasonings to it. I love them as much now, as I did then.
The mixture, even after chilling, is soft. I placed spoonfuls of the mix in the breadcrumbs and rolled them gently into balls. The puffs are soft, even after frying, so remove carefully from the oil. You can fry up a batch in a few minutes, and serve right away. You can also cook them ahead of time, then reheat them before serving. I made my puffs into balls, but you could also flatten them a bit, more like the shape of a scallop.
This is a nice way to use up leftover cooked sweet potatoes, too.
So here is the recipe.
Sweet Potato Puffs
2 c. mashed, cooked sweet potatoes
3 T. softened butter
1 egg
3 T. chopped parsley, or 1 T. dried
½ t. salt
½ t. paprika
½ t. cumin
½ t. nutmeg
Hot sauce to taste
Dash of fresh ground pepper
Bread crumbs for rolling
Oil for frying
Combine sweet potatoes with butter and egg, stirring to mix well. Add seasonings and stir well. Chill mixture at least a couple of hours. Heat oil to 350 degrees. You should have at least a couple of inches of oil in the pan. Shape sweet potato mixture into 1-inch balls. Roll in crumbs and fry until golden brown. Drain on paper towels and serve. You can make a head of time, then just warm in the oven when ready to serve. They can also be fried and frozen for later use. These make a nice side dish or even can be served as an appetizer. They are very soft, even after frying, so remove from hot oil carefully.

Crunchy outside, soft and creamy inside
Mom’s Secret Ingredient Clam Chowder

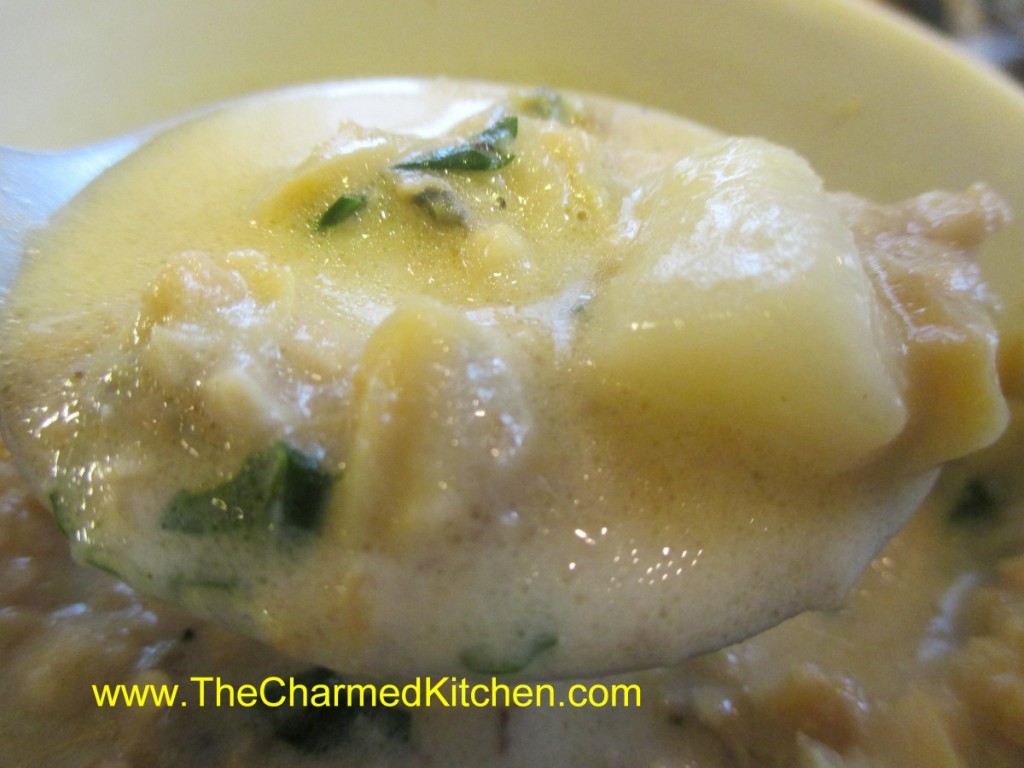
I thought I would finish up a week of Mom’s recipes with one of her stranger ones. I was talking with a cousin at a recent family clambake and she mentioned my Mom’s clam chowder. So here is the recipe, and the story of how she created this dish. Dedicated, with love, to my mother.
The mystery ingredient is in there because of my Uncle John. He was my Mother’s older brother and a real smart guy. One day he and my Mom were talking about clam chowder. My Mom had made a big pot of it. She was on a tight budget and was saying that she wished she could afford to put in a lot more clams. She didn’t use canned clams- she bought fresh ones and they cost a lot of money. She made a really good clam chowder.
My uncle wondered if she could add tripe to her chowder. He said that the texture was sort of like clams. Tripe didn’t have a strong flavor on its own and surely it would absorb the flavor of the clams. He said he thought they could put them in and no one would ever know. My mother thought about it and agreed, but said the tripe, normally cut in strips, would not look like clams.
She then figured out that if she put the tripe through her meat grinder on coarse, the tripe would look a lot more like clams and might just work.
She was pretty smart, too.
So the plan was hatched. The next time my Mom made clam chowder she got tripe, ground it and cooked it until tender. She then added it to her clam chowder and invited family over to try it. Everybody loved the chowder and a couple of people even commented on how many clams were in it. So there it is – the story of why I put tripe in my clam chowder. Unlike my Mother I use canned clams. And unlike her and my uncle, I do tell people what is in it, before they eat it.
Clam and Tripe Chowder
1 lb. tripe
oil
2 large onions, chopped
8 cups water or stock
2-3 cans clams, undrained
2-3 c. peeled and cubed potatoes – about 3-4 potatoes
1 (12 oz.) can evaporated milk- or 1 1/2 cups half and half or heavy cream
2 T. flour, optional
1/2 c. chopped fresh parsley
salt, pepper and hot pepper sauce to taste
When I bought the tripe at the store the package said it had been scalded. Not sure that matters but I figured I’d mention it. I took the tripe and ground it in my meat grinder. If you don’t have a meat grinder, you can cut the tripe up a bit and chop it up in a food processor. Pulse on and off until it is chopped up to the size you want. In soup pot heat the oil and cook the onion until tender. Add the tripe and the water or stock. Simmer, covered, until the tripe is tender, about 90 minutes. Some of the water cooked off, but that was fine with me. Add the clams and their liquid, season to taste and allow to simmer another 30 minutes or so. Add the potatoes and cook, covered, until the potatoes are tender, about 15 minutes. At this point you can add just the milk or you can add the milk and the flour- depending on how thick you like your chowder. If you are thickening it- place some of the milk in a jar with a tight fitting lid along with the flour. Put the lid on and shake well until flour is mixed into the milk and there are no lumps. Add to the chowder with the rest of the milk and the parsley. Bring to a gentle simmer and cook about 5-10 minutes longer. Stir from time to time so the chowder won’t burn. Adjust seasonings and serve. Serves 6-8.
Mom’s Kielbasa


I can remember my parents making homemade sausage. As a kid, I thought a lot of parents did that. I don’t think I really appreciated how special that was. When my parents got older, one of my cousins ( Jim) started making the sausage.
The sausage they made was kielbasa. Kielbasa is a Polish sausage. It was something we ate every Easter, Thanksgiving, Christmas. Well, you name a holiday, we would be eating kielbasa. Somewhere, there is even a film of my mom making kielbasa for Christmas. My dad was filming as my sister and brother watched. I wasn’t born yet.
Since I shared a lot of my Mom’s recipes this week, I thought it was time to share this one. I don’t know how many people would go to the bother of making their own sausage, but I am hoping even a few people will make the kielbasa. It is a way of her kind of living on.
So here is her recipe. Enjoy!!
A bit of work, but the end result is divine. Make and freeze or share with friends and family.
Irene’s Polish Sausage/ Kielbasa
10 lbs. Pork butts
5 T. salt
1 T. pepper
1 T. marjoram
1 t. thyme
2 cloves garlic or more to taste, minced
1 ½ c. water
Grind pork then combine with seasonings and water. The water helps the ingredients to blend. If you have a sausage maker, you can stuff the sausage into casings. Sausage can also be formed into patties or links. To cook sausages in casings, boil until cooked through. You can then serve them as is, on buns with bread or on a plate with mustard or ketchup and horseradish. You can also take boiled sausages and brown them in a skillet or under the broiler.
Patties and links made without casings can be pan fried until cooked through. You can add a little water and cover the pan allowing them to cook through without getting too brown. Without casings, they will fall apart in a big pot of boiling water. Sausages can be frozen cooked or uncooked, but uncooked is preferred.
Rich Dinner Rolls


Someone asked me recently for a recipe for an old-fashioned dinner roll. The sort of roll her mom would have served for Sunday dinners. I knew exactly which recipe I wanted to share with her.
These rolls are soft, a little sweet and very tender. Great served with any family meal. Perfect for Thanksgiving, too.
I hadn’t made these dinner rolls in a long time, so I made a batch last night. I always think that is a good idea. I wanted to be sure I had all my baking times right, before I shared the recipe. I am glad I did. I actually did make a small adjustment to the recipe.
So here is the recipe. A classic, simple dinner roll, just waiting for a pat of butter.
Rich Dinner Rolls
¾ c. milk
½ c. each butter and sugar
1 t. salt
2 packages active dry yeast
½ c. warm water
4-5 c. flour
2 eggs
Heat together milk and butter until warm. Stir in sugar and salt. Dissolve yeast in warm water and add to milk mixture with 2 cups of flour. Beat 3 minutes. Beat in eggs. Stir in flour until soft dough forms. Knead on floured surface until dough is smooth and elastic. Place in oiled bowl and cover. Let rise until doubled. This will take an hour, or a bit longer. Punch dough down and divide in 24-30 pieces. Shape each piece into a ball, making as smooth as possible. Place rolls into a greased baking pan ( 9×13 inch, or a bit larger) and cover until doubled, about 1 hour. Bake in a preheated 375-degree oven for 25-30 minutes, or until golden brown. Note: I used a glass pan, so I baked my rolls at 350. Brush with melted butter, if you like. Serve warm. Makes 24-30.

Mom’s Pumpkin Squares

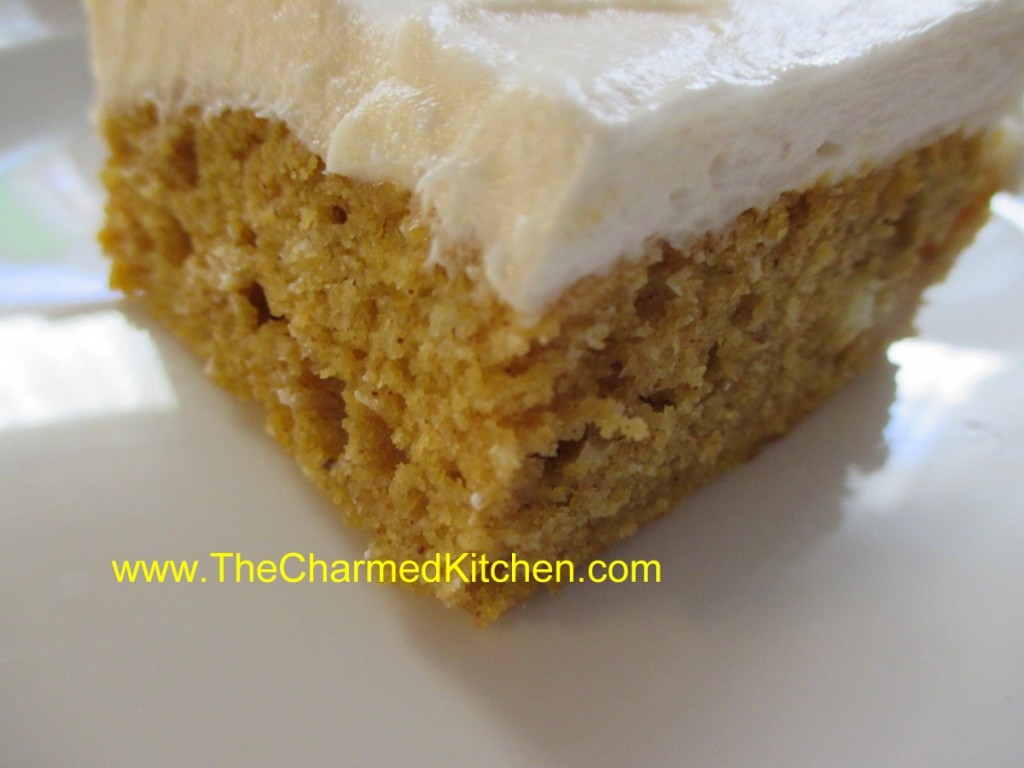
This recipe has been part of our family for years now. My mom made them for Thanksgiving every year- and I continue that tradition. Like my mom, I use fresh (or frozen) cooked pumpkin or winter squash. My mom didn’t care much for the taste of canned pumpkin. She would cut up the Halloween pumpkin, cook it, puree it and freeze it- so she could make pumpkin squares anytime she wanted.
The original recipe came from Bisquick, but it had 2 cups of sugar in it. My Mother’s sensibilities kicked in and she cut the sugar down to one cup. Great move on her part. The cake is still plenty sweet with less sugar.
It mixes and bakes up in no time. I normally top it with cream cheese frosting, but it would be good with a simple powdered sugar glaze, a buttercream frosting, or even just a dusting of powdered sugar mixed with a little cinnamon.
The texture is moist and tender and I think you’ll enjoy it as much as I do.
Pumpkin Squares
1 c. sugar
½ c. oil
16 oz. cooked pumpkin, canned, fresh (preferred) or frozen
4 eggs, beaten
2 c. biscuit mix (homemade or Bisquick or Jiffy Mix)
2 t. cinnamon
½ c. raisins, optional
Grease a jelly roll pan and set aside. Preheat oven to 350 degrees. Beat
first 4 ingredients for 1 minute. Stir in mix, cinnamon and raisins.
Pour in prepared pan and bake 25-30 minutes. Test for doneness with a
toothpick. Cool and frost. Frosted cake must be kept refrigerated
between servings.
Frosting:
8 oz. cream cheese
2/3 c. butter
2 T. milk
2 t. vanilla
3 c. powdered sugar, or more
Beat together until smooth.
Mom’s Duck Fat Bread


Today would be my Mom’s birthday. I still miss her. She was a great cook and I learned a lot from her. Here is the bread she was famous for in our family.
My Mom used to make this wonderful sweet bread. Made it for every family occasion. The recipe uses butter. She was a very frugal person. One day, she decided to render the skin from a duck she was using in soup. She would never just toss it. Too wasteful. Once it was cooled, the duck fat looked like butter. She was making her sweet bread and substituted the duck fat for the butter in the recipe. When my brother-in-law, Bob, tasted it he declared it was the best bread yet. My Mom told him what the secret ingredient was, and from that day on, we always called it duck fat bread, even when it was made with butter. Here is the recipe- wonderful even if made with plain old butter.
Mom’s Butter Coffeecake Braids aka Duck Fat Bread
4 1/2 c. flour
2 T. sugar
1 t. salt
½ c. butter or 1/2 c. cooled rendered duck fat
1 packet yeast
¼ c. warm water
2 t. sugar
1 c. evaporated milk
2 eggs, beaten
Combine flour with sugar and salt. Cut in butter or duck fat and set aside. Dissolve 2 teaspoons sugar in warm water. Dissolve yeast in warm water mixture and set aside. Allow to become bubbly, about 5 minutes. Combine milk with eggs. Stir in yeast mixture and add to flour mixture stirring well. Knead dough in bowl until smooth, about 10 minutes. Place on lightly floured surface and knead until smooth. Cover and let rise until doubled, about 1½ hours. Divide dough in half and then each half into thirds. Roll dough into ropes and braid three ropes together. Repeat with remaining 3 ropes. Place braids in 9×5 inch greased bread pans and cover with a towel. Place in a warm, draft-free place and allow to rise until doubled, about 1½ hours. Bake in a preheated 350 degree oven for 25 minutes. If you like glaze loaves while warm with a mix of powdered sugar, a little milk, butter, and vanilla. Toasted almonds or walnuts can be added, if desired. Makes 2 loaves.
Note: You can also refrigerate the dough after kneading it if you would prefer. Just place dough in an oiled bowl, cover with plastic wrap and chill overnight. Roll and shape dough into braids when cold from the fridge. Rise, covered, until doubled in bulk, about 2-3 hours. Bake as directed.
Note: You can also place loaves on a greased baking sheet for a longer, flatter bread rather than in loaf pan.


