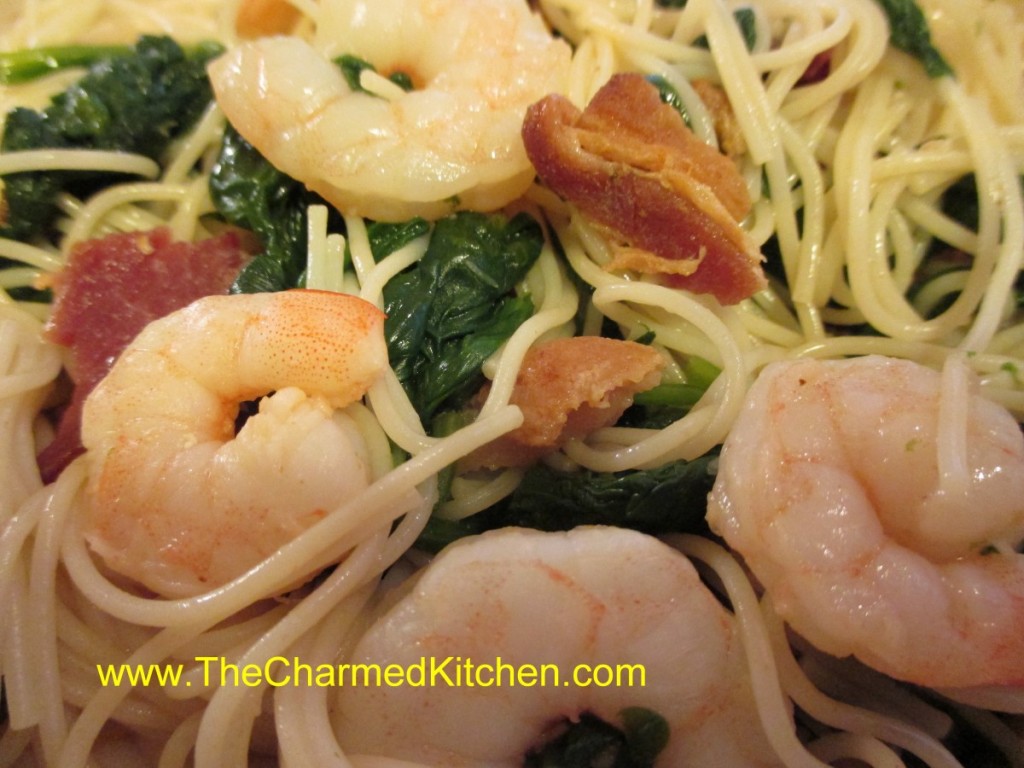
Shrimp and Bacon Spinach Salad

When I was a kid, my mom used to make a wilted salad. She would toss spinach with a hot dressing and then top the salad with hard cooked eggs and croutons. The dressing was made with some of the bacon fat, since there was always bacon in the salad, too. That was the inspiration for this salad.
I had planned to make a tossed salad with some fresh spinach, but something told me to go in another direction. Since I already had bacon and shrimp, I decided to just put them all together. With just a few extra ingredients tossed in, I ended up with a really good dinner. Sort of like those wilted salads my mom used to make.
I didn’t have a lot of time, so the fact that it was ready in about 15 minutes was nice, too. I put the pasta on to cook when I started cooking the bacon to save even more time.
Shrimp and Bacon Spinach Salad
3-4 slices bacon, cut into 1-inch pieces
2 shallots- or 1 small onion- chopped fine
2 cloves minced garlic
8 oz. fresh spinach
8 oz. raw shrimp, shelled and deveined
¼ c. sherry
¼ c. chopped parsley
½ t. grated ginger
½ t. red pepper flakes
Salt and pepper to taste
2 cups cooked pasta
Cook bacon in skillet until almost cooked. Add the shallots and cook
until shallots are just turning brown. Add garlic and cook 1 minute
longer. Add spinach and cook, stirring often, until spinach is wilted
down. Add shrimp and continue cooking until shrimp are just barely
cooked. Add sherry and seasonings and cook 2 minutes more. Toss with hot
pasta and serve. Serves 2.
Note: You can add some fresh Parmesan cheese when serving, if you like.
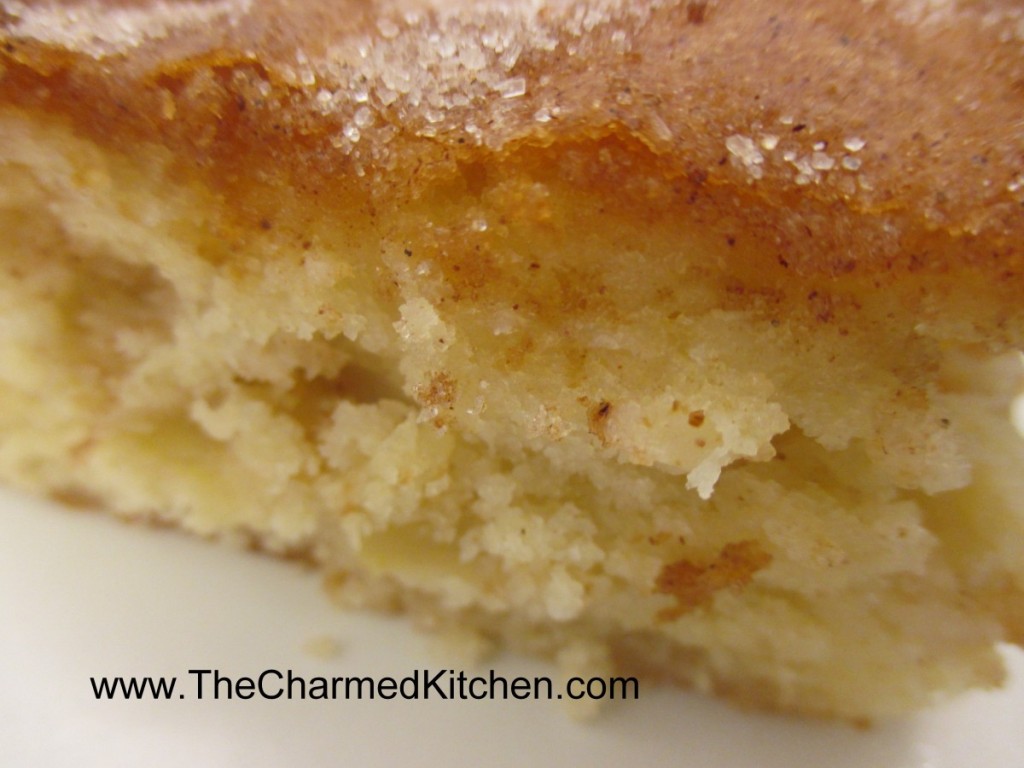
My Favorite Apple Cake

I have posted this cake recipe in the past. It truly is my favorite apple cake ever. I had a request for this recipe yesterday, so here it is. Seemed like a nice recipe to publish at the beginning of Autumn.
I’ve had this recipe since I was a kid. My Aunt Josie gave it to my mom. Not sure where she got, it but it has been a family favorite since we first made it. She called it Jewish Apple Cake. Not sure why. It’s just what we all called it.
It’s a simple recipe that comes out moist and flavorful. I normally bake it in a 13×9- inch pan but it can be baked in a Bundt pan. While the recipe calls for cinnamon sugar- I sometimes add a little fresh ground nutmeg, too. I also like to use olive oil or even avocado oil in this cake. It gives it a really nice flavor.
Almost any apple works in this recipe- except maybe Red Delicious. Perfect for dessert or even served with brunch. Who am I kidding? I would eat this cake for breakfast.
Note: The batter is really thick. Don’t think you’ve done something wrong.
Jewish Apple Cake
1 c. oil, I use olive oil or avocado oil
4 eggs
1 t. vanilla
1/3 c. orange or lemon juice
Combine above ingredients and set aside.
Mix together the following dry ingredients. Make a well and stir in egg mixture to make a stiff batter.
3 c. flour
2 c. sugar
3 t. baking powder
¼ t. salt
Mix ½ c. sugar and 2 t. cinnamon and set aside
Peel, core and slice 4 medium apples.
Grease a 9×13 inch pan or a Bundt pan. Preheat oven to 350-degrees.
Place ½ of batter in prepared pan. Arrange apple slices on batter and
sprinkle on ½ of the cinnamon mixture. Pour on remaining batter and
sprinkle with remaining sugar mixture.
Bake 45-50 minutes for 13×9-inch pan and 1 1/2 hours for Bundt. I find that sometimes it takes less than 90 minutes in a Bundt, so I check at an hour and 15 minutes.
Rich Crescent Rolls


I was doing a cooking camp with kids and they wanted to make croissants. I grew up with a father who was a baker. I have made traditional croissants. Yeast dough rolled out- then topped with a sheet of butter. Rolled, folded, chilled. Repeated many times to create those wonderful, flaky layers.
With time constraints, I ended up teaching the kids to make these rolls, instead. Not quite what you get in true croissants, but very tender and flaky, too. The secret is butter cut into flour- the same way you incorporate fat into biscuits or pie crust. Then a yeast/milk mixture is stirred in and a batter is created. It is chilled overnight and when rolled out, the dough is brushed with more butter and shaped into the crescent shape of traditional croissants. Really easy, compared to the original, and a pretty good roll, too.
Easy “Croissants”
1 package active dry yeast
1 c. very warm water
¾ c. evaporated milk
1 t. salt
1/3 c. sugar
1 egg
5 c. flour
4 T. melted butter, cooled
1 c. firm butter
Additional melted butter for brushing
1 egg beaten with 1 T. water
Dissolve yeast in water. Stir in milk, salt, sugar, egg and one cup
of flour. Beat into a smooth batter and stir in melted butter. Set
aside. With pastry blender cut firm butter into remaining flour until
particles are the size of small peas. Stir in milk mixture gently, until
all flour in moistened. Cover and refrigerate at least 4 hours.
Turn dough onto lightly floured surface and knead a few strokes. Divide
into fourths and roll each into a circle. Divide circle into 8 pieces
and brush with melted butter. Starting at wide end roll up loosely and
place on greased baking sheet with point tucked under. Allow 2-3 inched
between rolls and curve slightly into an arc, if desired. Cover with a
towel and allow to rise in a warm place for at least 2 hours or until
nearly doubled. Brush with egg wash just before baking. Bake in a
325-degree oven for 35 minutes or until golden. Brush again with butter.
Makes 32.
Note: You can add up to 2 cups of whole wheat flour in place of 2 cups of the white flour for whole wheat croissants. You can also brush the dough with fruit preserves instead of butter before rolling up, or you can sprinkle with chopped chocolate or cinnamon sugar and roll up.
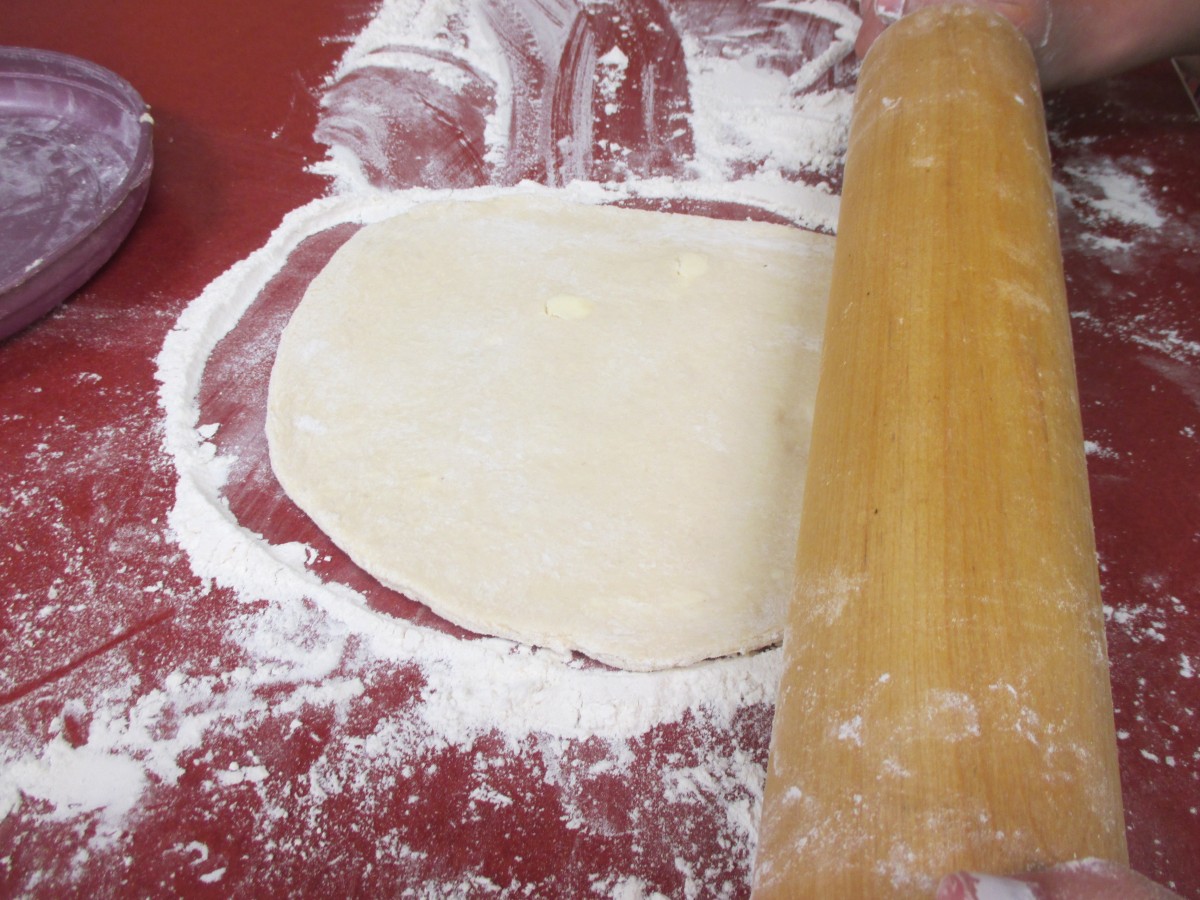
Roll dough into a circle
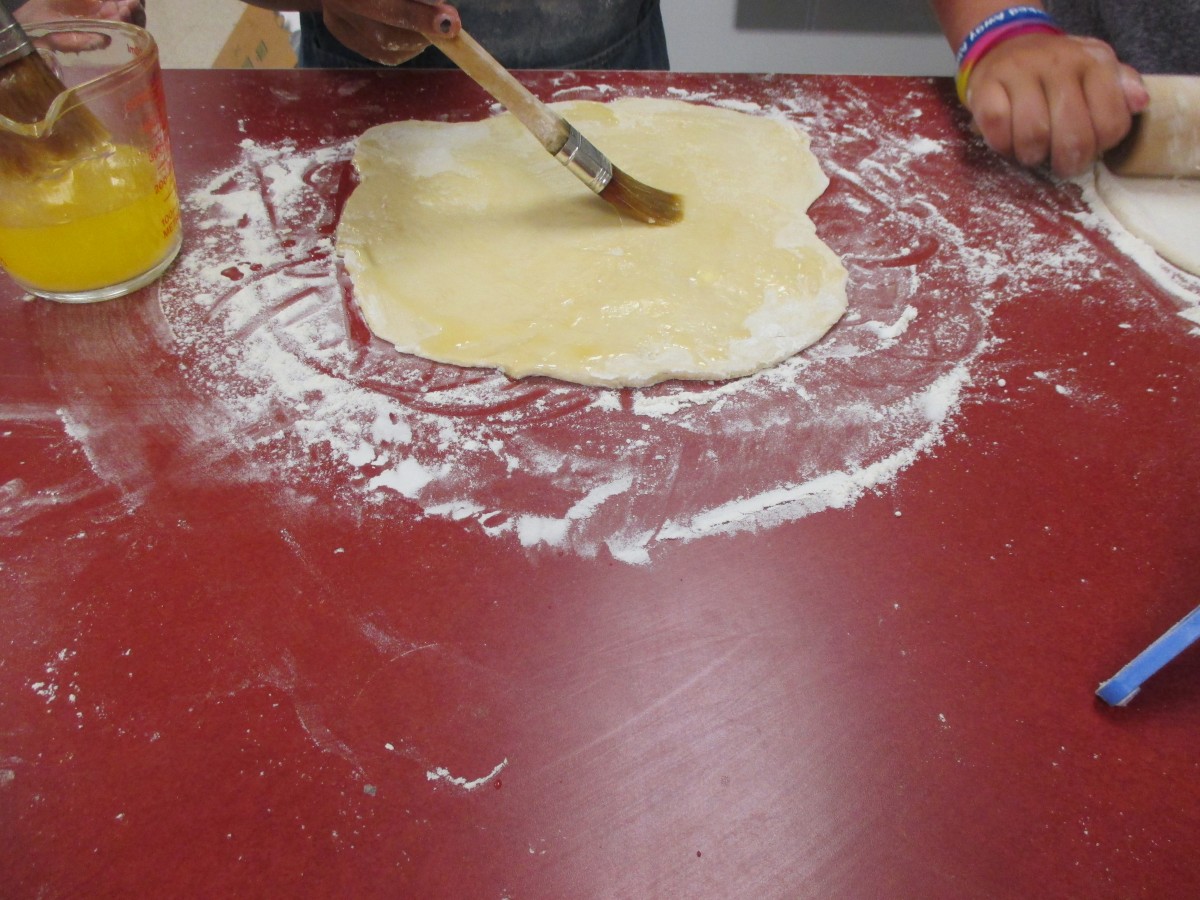
Brush with melted butter

Cut dough into wedges and roll up
Zucchini Quesadilla

Zucchini Quesadilla
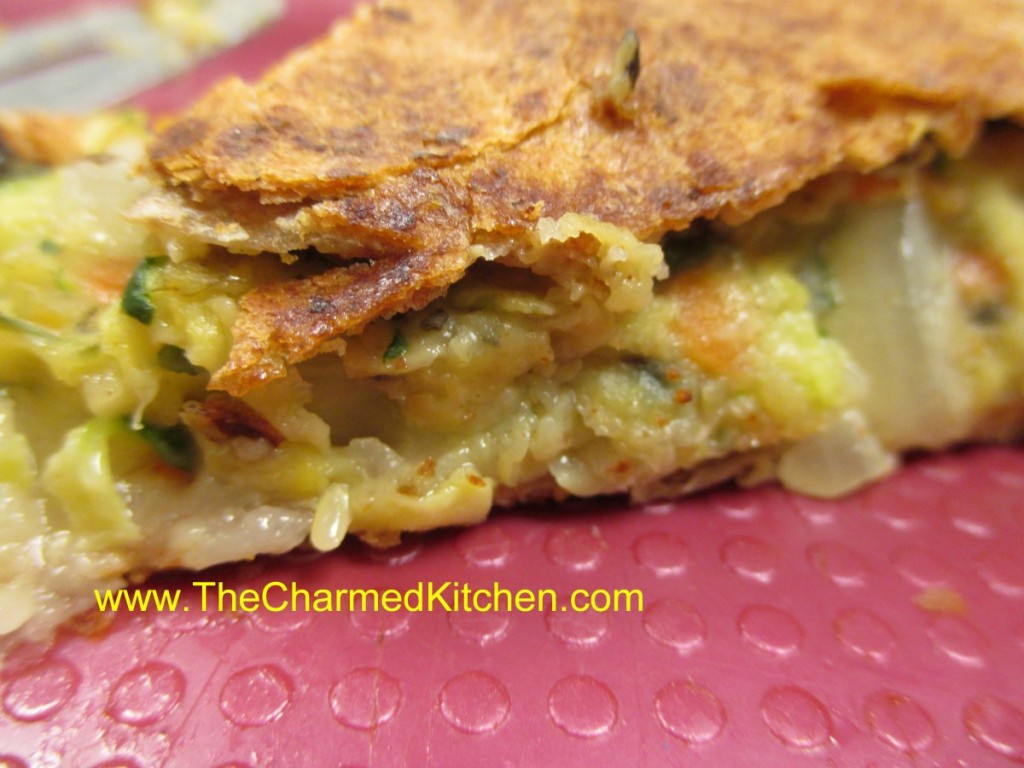
If you are looking for a fast and easy new way to prepare zucchini this dish really works well. Somewhere between a quesadilla and a frittata it can be a main dish, side dish, brunch dish or even a great breakfast. The hardest part is getting it turned over once it starts to set.
Don’t worry if it isn’t perfect. Once you sandwich it between two tortillas any mistakes are covered up. All cheesy and gooey in the middle, with crisp tortillas on the top and bottom, it might even get your kids to eat their veggies. You just cut it in wedges to serve.
Zucchini Quesadilla
2-3 c. shredded zucchini
2 eggs
1 medium onion, minced or grated
1 carrot, shredded
1/2 c. flour
2 t. dried basil or 2 T. fresh
2 t. dried parsley
1/2 t. salt, or to taste
1/2 t. chili powder
Oil
2 (10- inch) tortillas – I used whole wheat
1 c. shredded cheese, cheddar or Monterey Jack work well, but use what you like or have on hand.
Pepper confetti (finely minced sweet peppers, mixed colors if you can)
Salsa, optional
Combine first nine ingredients in bowl and set aside. Heat 10-inch skillet and add a small amount of oil. Pour in zucchini mixture and spread out evenly. Turn down heat to medium-low and cook until edges start to firm up and brown. With spatula turn over zucchini pancake and cook 3 minutes longer. It should be set. Place 1 tortilla on top of “pancake” and turn over again, so tortilla is in bottom of pan. Place cheese on top of pancake and place second tortilla on top of the cheese. Press down lightly. Cook a couple of minutes before turning again. Tortilla should be lightly browned. Cook long enough for the second tortilla to also brown. You can flip them back if to want to make them crispier. Remove to serving dish and sprinkle with the peppers. Cut into wedges and serve. Serve with salsa, if desired. You can also add a dollop or sour cream or some sliced ripe olives if you like.
Makes 2 luncheon servings or 4 appetizers. You can also make them ahead of time and keep them warm or reheat them in a 350-degree oven for about 15 minutes.
Variations: You can use 1-2 cups cooked mashed beans (kidney, black, chickpeas etc. in place of the zucchini, or even use cooked lentils.
Pink Velvet Cupcakes

Thought I would share this fun recipe for cupcakes, using beets. I already make a chocolate beet cake- which has red tones from the beets. I wanted a lighter texture for cupcakes, with more chocolate flavor, so I made some changes to the beet cake recipe and ended up with these cupcakes.
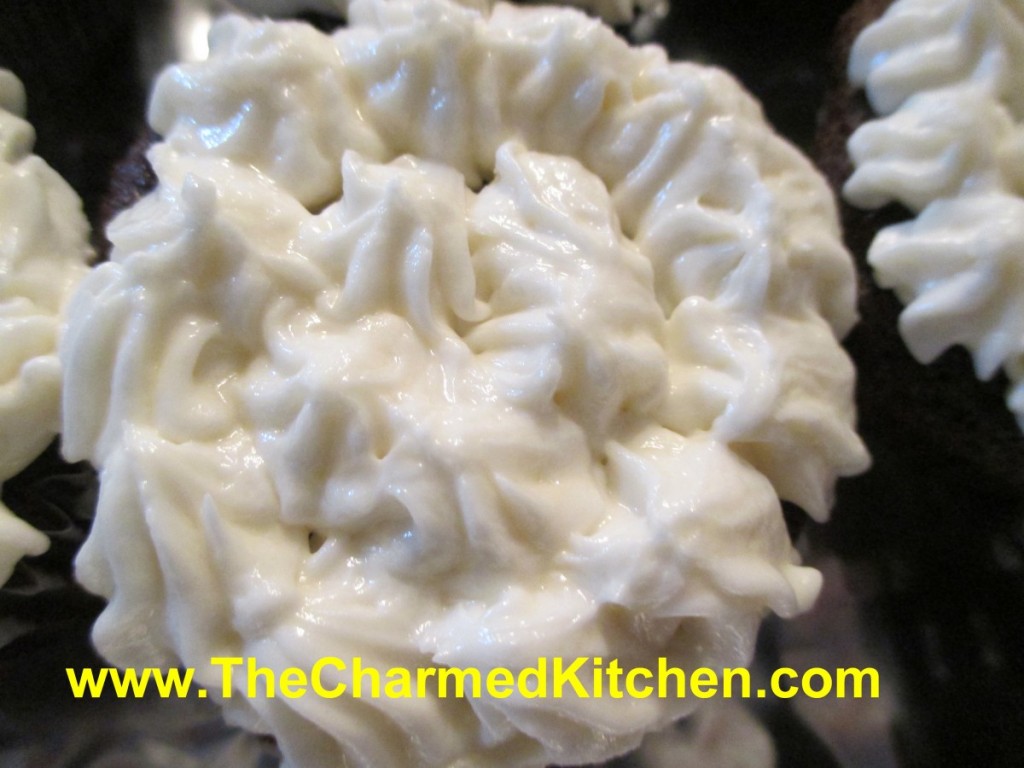
Rich, but light, with a very subtle blush of red. I decided to call them Pink Velvet. I topped them with cream cheese frosting, but a dusting of powdered sugar would work well, too, or a favorite buttercream.
Here is the recipe. I hope you will give them a try.
Pink Velvet Cupcakes (Chocolate Beet)
2 cups all-purpose flour
2 t. baking soda
½ t. salt
¾ c. cocoa powder
1 c. butter, softened
1½ c. sugar
3 large eggs
2 teaspoons vanilla
1½ cups grated cooked beets
Powdered sugar, optional
Preheat oven to 350°. Line 24-28 muffin tins with paper liners; set aside. Combine dry ingredients in a bowl; set aside. In a mixing bowl, combine the butter and sugar. Beat until light and fluffy. Beat in eggs one at a time, beating well after each addition. Beat in vanilla. Slowly beat in dry ingredients until well mixed; stir in beets. Spoon batter into prepared tins, filling about 2/3 full. Bake 18-20 minutes, or until cupcakes spring back when touched lightly or when toothpick, inserted into cupcakes , comes out clean. Cool before frosting. Makes 24-28.
Cream Cheese Frosting
8 oz. cream cheese, softened
1 stick, (½ cup butter) softened
2-3 c. confectioners’ sugar
1T. vanilla
Beat all ingredients together until smooth and fluffy. Store in the fridge.
Cinnamon Apple Cupcakes

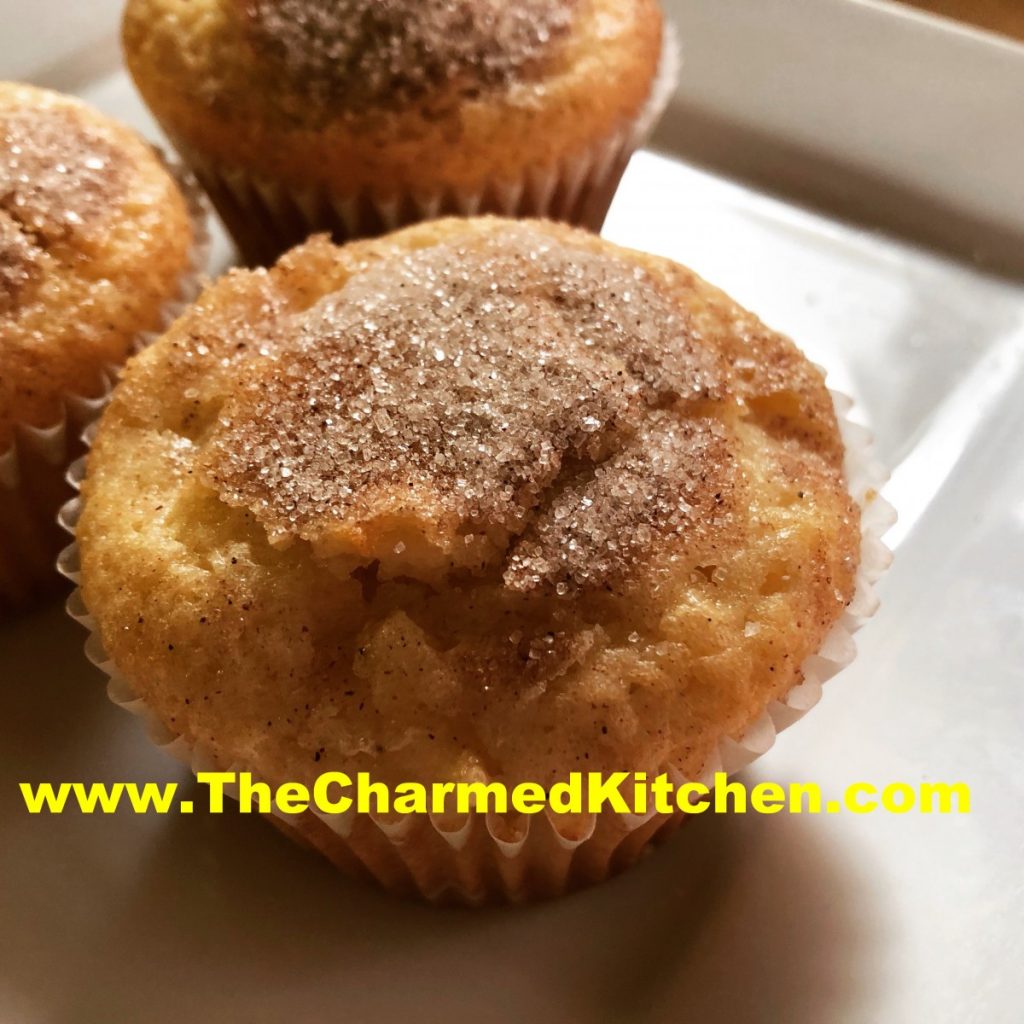
These tasty little cakes are actually a revision of a favorite apple cake recipe. I needed cupcakes, and made a few changes, so it would work in cupcake form. I was pretty happy with how they came out.
I sprinkled cinnamon sugar on top of the cupcakes right before baking. It worked fine. I thought I might try baking them plain on top next time- then dipping the tops in melted butter and cinnamon sugar after baking. I make French Breakfast Puff muffins that way, and it works well.
I also chose not to frost them. I could see using a cream cheese frosting, or perhaps a drizzle of caramel, if you like a sweeter dessert. These would also be great served with ice cream.
Cinnamon Apple Cupcakes
1 c. oil
4 eggs
1 t. vanilla
1/3 c. lemon juice
3 c. flour
2 c. sugar
3 t. baking powder
¼ t. salt
4 medium apples
Topping:
½ c. sugar
2 t. cinnamon
Preheat oven to 325. Combine oil, eggs, vanilla and lemon juice. Beat until smooth and set aside. In medium bowl, combine flour, sugar, baking powder and salt. Make a well in the middle and add the egg mixture. Beat by hand until smooth. Batter will be very thick. Peel, core and dice the apples. Add apples to the batter and stir until well blended. Line 24 muffin tins with paper liners- or grease. Spoon the batter into the muffin pans, filling almost to the top. Combine cinnamon and sugar and sprinkle over the tops of the cupcakes. Bake for 22-24 minutes, or until golden and toothpick, inserted in cupcakes comes out clean. Makes 24.
Homemade Caramel Apples

I did a program with kids yesterday, and we made these caramel apples. The kids loved them and I wanted to share the recipe. Making caramel apples is a wonderful childhood memory for me. Every Autumn, we would make a batch.
We used those little store bought caramels. I was often the one tasked with unwrapping them. I can remember unwrapping one after the other. It seemed to take forever.
I wanted to make my own caramel, so that is what I did with the kids. It is so much better than the store bought version.
Caramel is not that hard to make. You do need to keep an eye on it. Stir constantly. Just a hint, be sure your candy thermometer is really secure. Mine was a little slippy on the pan I was using. At one point the thermometer slid into the caramel. Not what you want to have happen!!!
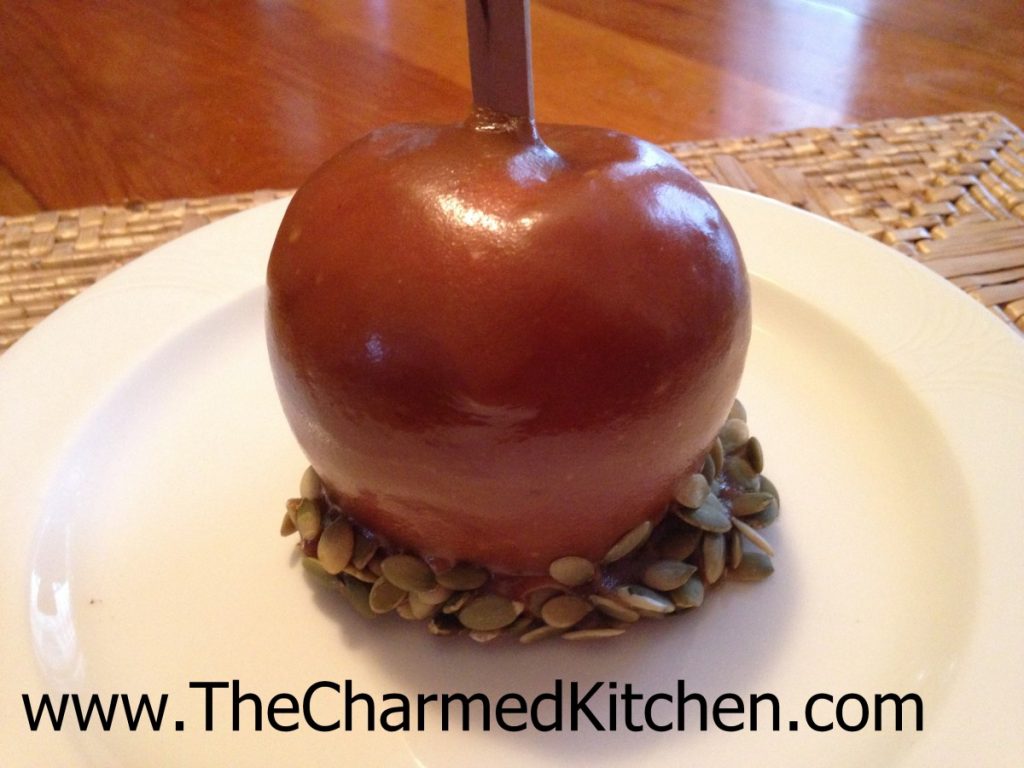
Once dipped in the caramel, you can dip the bottom of the apples in nuts, pumpkin seeds, sprinkles, cereal, or even popcorn.
Homemade Caramel Apples
1/2 c. butter, cut in cubes
2 c. packed brown sugar
1 c. corn syrup
pinch of salt
1 can sweetened condensed milk
2 t. vanilla
8-12 apples
chopped nuts, pumpkin seeds, cereal, sprinkles, popcorn for dipping the bottoms of the caramel apples, optional
In heavy saucepan combine the butter, sugar, syrup and salt. Bring mixture to a boil, stirring constantly. This will take about 10 minutes. Add milk and bring mixture up to 248 degrees. Remove from heat. Stir in vanilla. Place a Popsicle stick, skewer or chopstick down the center of each apple. Dip apples in the caramel, allowing excess to drip off- or not. Dip bottoms of apples into nuts, seeds or whatever ingredient you picked. Place on wax paper and allow to set up. If you don’t want to dip the bottoms in anything, place the dipped apples on lightly buttered wax paper. Cool before serving. Makes 8-12 caramel apples.
Note: You could also use pears in the recipe.
Homemade Vegetable Pasta

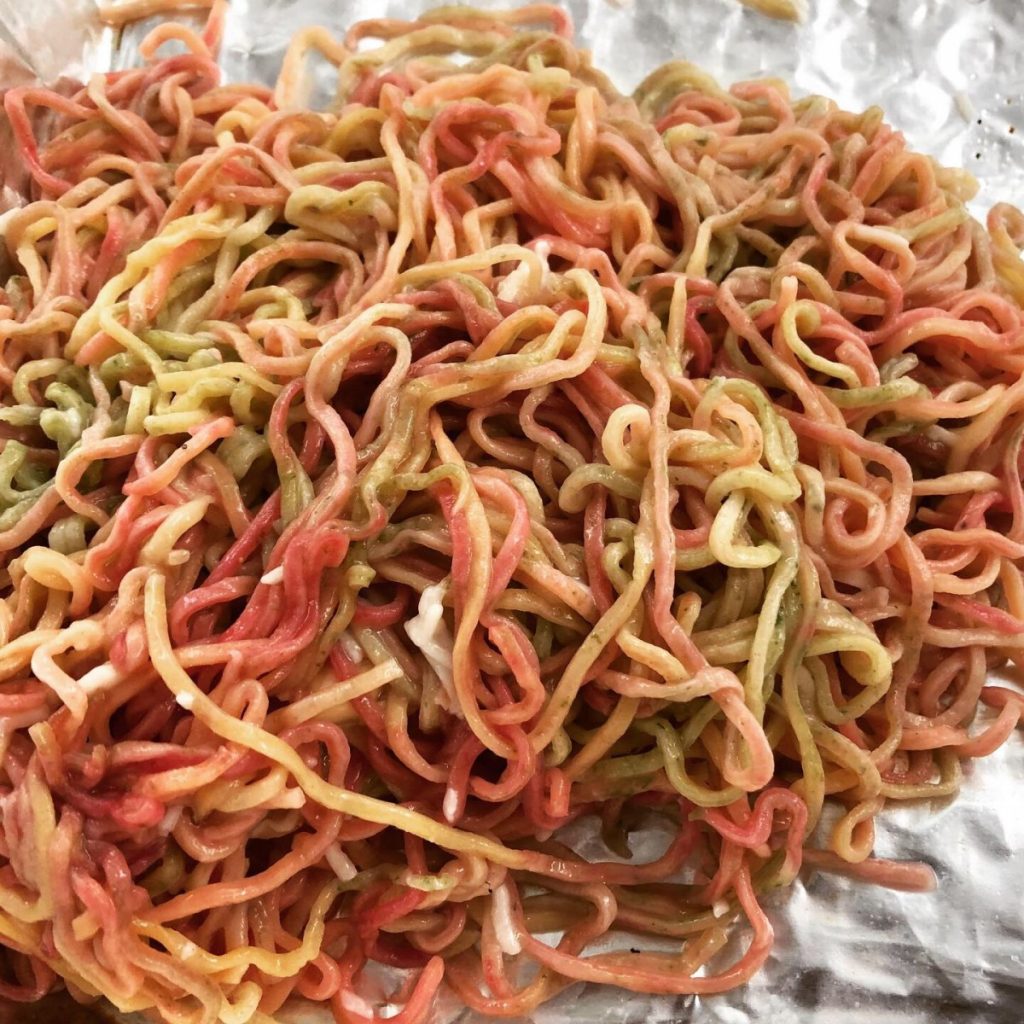
Homemade pasta is so much fun to make and the flavor is worth the extra effort. I taught a pasta making class last night. Everyone had a great time. We made several different veggie based pastas, including spinach, carrot and beet. The recipe is pretty simple. Cooked veggies and flour.
We combined the ingredients in a food processor, then let the dough rest before rolling. Once you are ready to roll out your pasta, the shape is up to you. You can hand roll the pasta, and cut into noodles. We used pasta makers to roll the dough, and then a cutting attachment for the angel hair pasta and linguine. Some dough was also used to make cheese stuffed ravioli, or combined with other pasta dough for more of a rainbow pasta.
We also had some egg based pasta dough and a parsley pasta dough.
Directions for mixing the dough is all the same- combine ingredients in a food processor and mix until dough forms into a ball. Allow to rest, covered, for 20 minutes, before rolling.
To cook fresh pasta, noodles are cooked in boiling, salted water for 1-2 minutes. Ravioli are cooked in boiling water for 3-5 minutes.
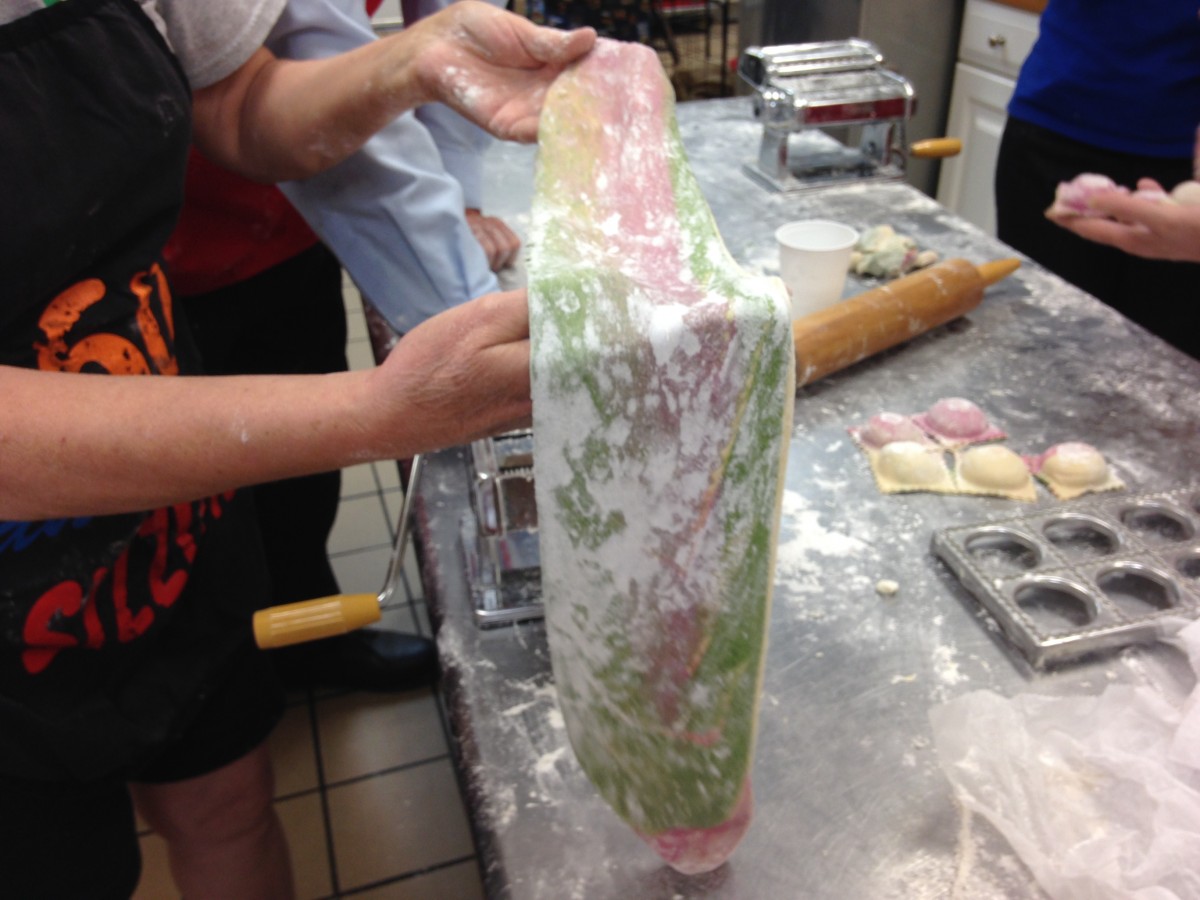
Mixed veggie pasta, ready to be cut

Spinach angel hair
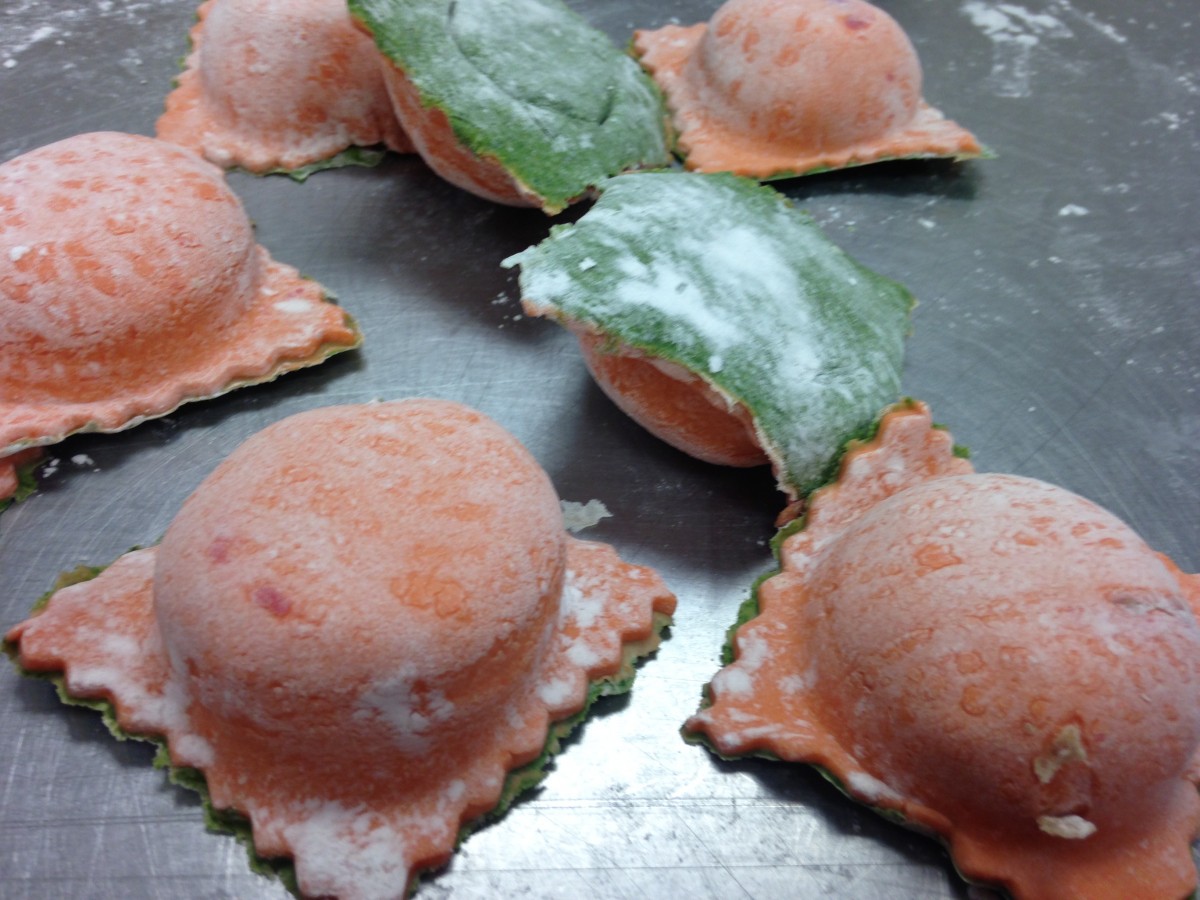
Carrot and Spinach Ravioli
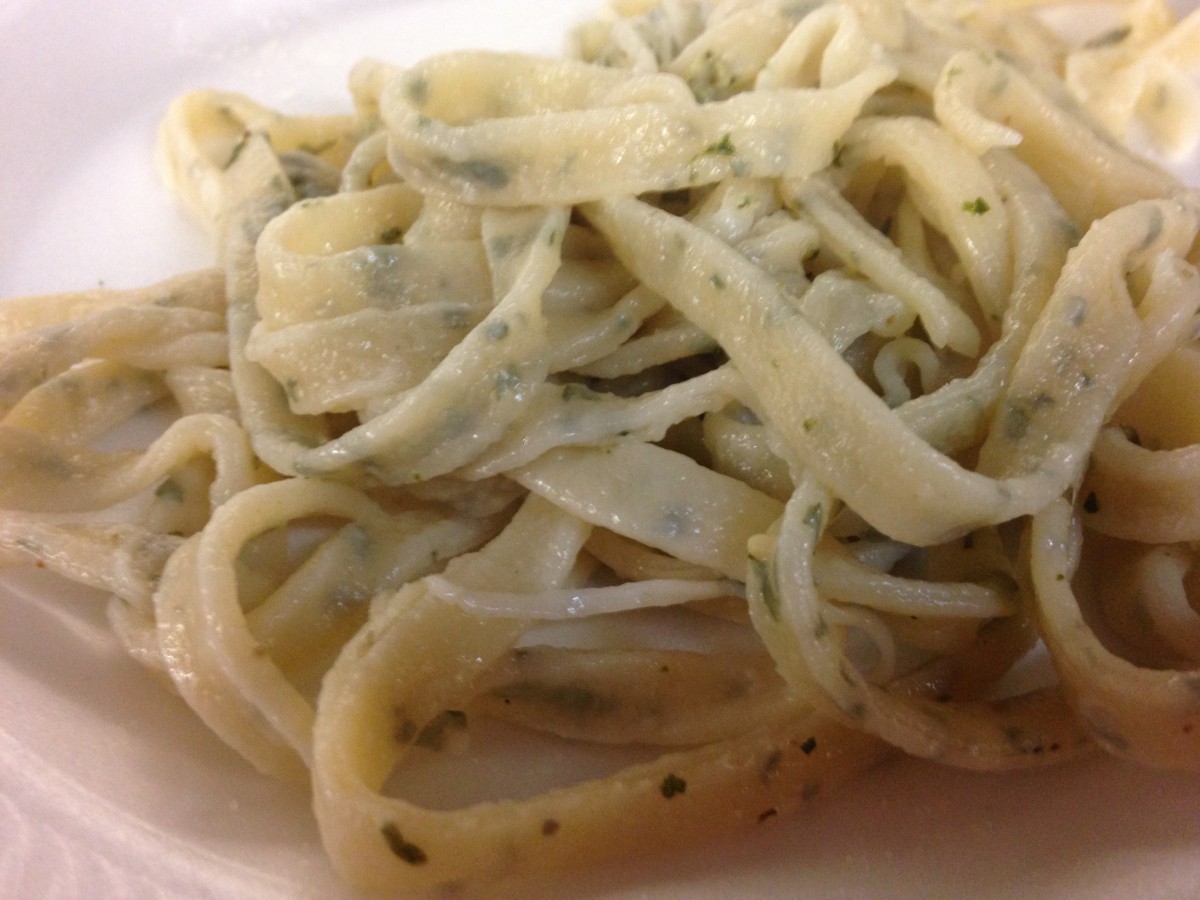
Parsley Linguine
Carrot Pasta
1 c. flour
1/3 c. cooked carrots
1-2 T. water, if needed
Beet Pasta
1 c. flour
1/3 c. cooked beets
1-2 T. water, if needed
Spinach Pasta
2 c. flour
1 10 oz. package frozen spinach, thawed, drained, reserving some of the liquid
Mix this dough as for other pastas, but don’t be too quick to add reserved liquid. While processing, you’ll get water out of the spinach. May require more kneading and rolling than other pasta dough. Be patient, it’s worth the work.
Parsley Pasta
1 c. flour
3 t. chopped fresh parsley
1 egg
1 T. oil, (optional)
2-4 T. water, if needed
Basic Pasta Dough
1 c. flour
1 egg
1 T. olive oil
1 T. water, if needed
Four Cheese Ravioli Filling
3 c. shredded mozzarella cheese
15 oz. whole milk ricotta cheese
8 oz. cream cheese
5 oz. shredded Parmesan cheese
Combine all ingredients and mix well. Chill until ready to use. This will fill dozens and dozens of ravioli. Extra filling can be frozen and used another time.
Carrot Pasta Sauce

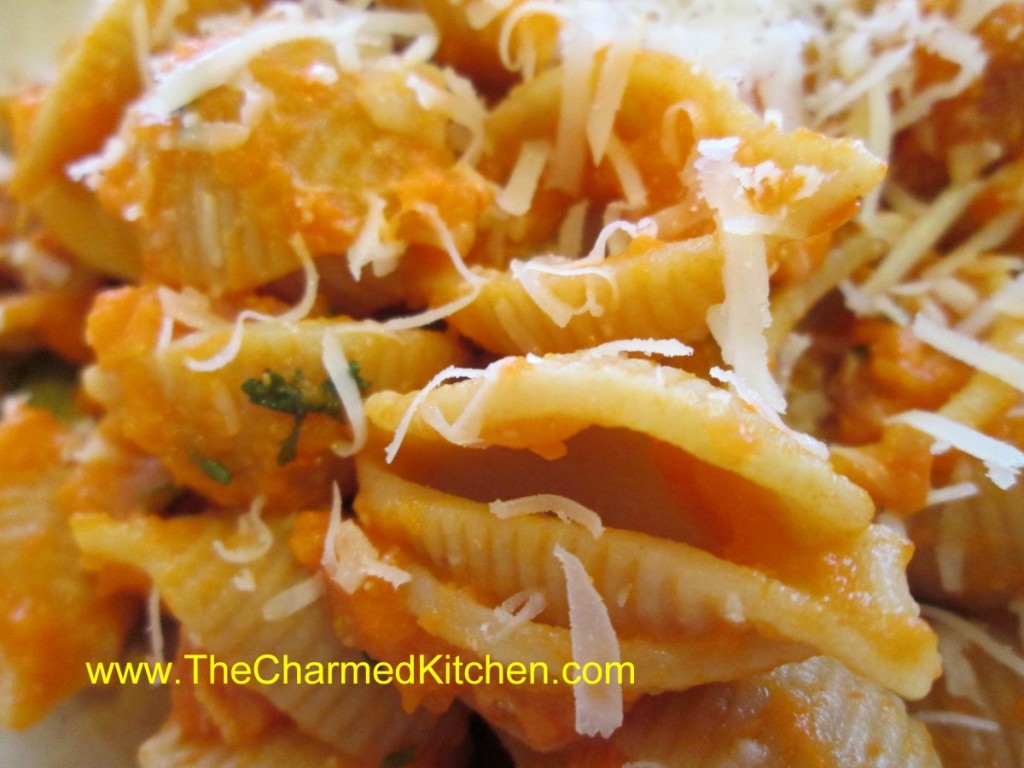
This pasta sauce is one of my favorites. Most people don’t think of carrots when they think of pasta sauce, but maybe they should. It tastes wonderful and looks pretty, too.
It’s a simple sauce that packs a lot of flavor.
The process is easy. Just cook carrots, with sauteed onions and garlic in stock, until the carrots are really tender. Most of the liquid cooks off. Puree, adding cream or half and half and some dill. Adjust seasonings and you are done!
I used chicken stock, but you could use a vegetable stock for a vegetarian version of this dish.
Toss the sauce with pasta, rice, or even with veggies or meats.
You might get kids to eat carrots, this way.
Here is the recipe. I hope you try it.
Carrot Pasta Sauce
1 T. oil
1 onion, chopped
1 garlic clove, minced
1 lb. carrots, peeled and sliced
2 c. chicken or vegetable stock
Salt and pepper to taste
1/2 c. cream, half and half or evaporated milk
1T. fresh dill or 1 t. dried
Hot cooked pasta
Sauté onion in oil until tender. Add garlic, carrots and stock and
cook until carrots are very tender. Much of the liquid should have
evaporated by then. Place mixture in blender and add cream or milk,
mixing until smooth. Add dill and adjust seasonings, tossing over hot
pasta to serve. I sometimes top with some shredded Parmesan cheese, too.
Variations: Use sweet potatoes, pumpkin, winter squash or even peas for different tastes.
Hot or Cold “Pink” Soup

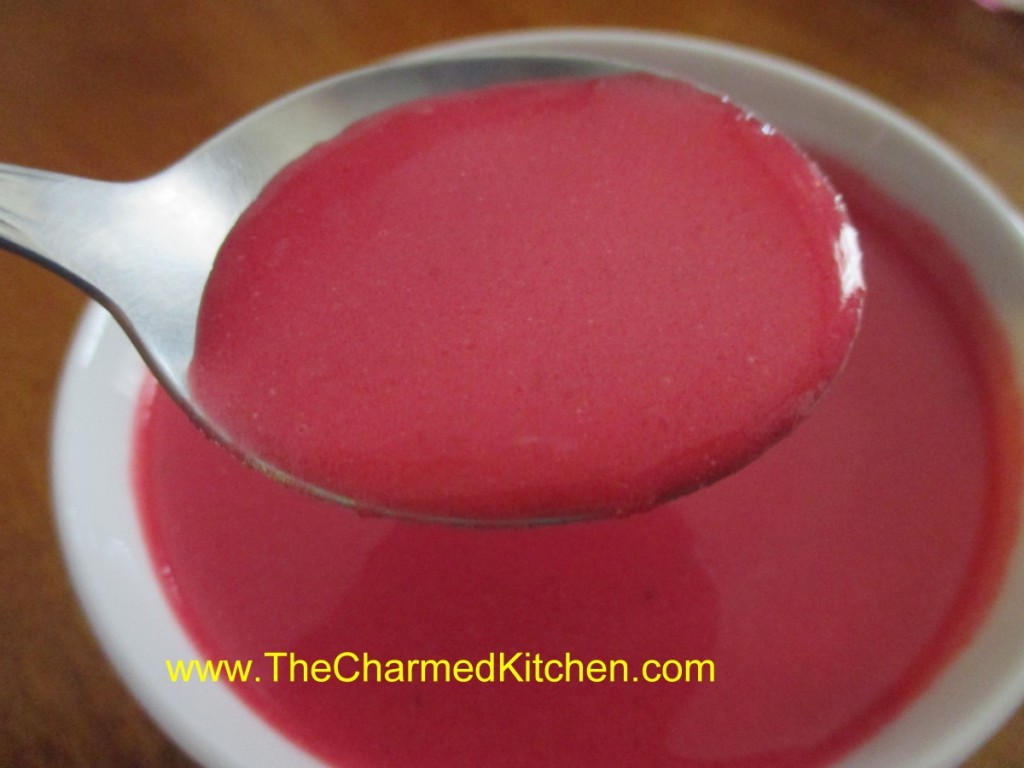
Since I had some fresh beets, I decided to make this soup. It is a favorite soup of mine – but perfect for this time of the year. One day we are wearing sweaters- the next day- we are the “sweaters”, so to speak. I am enjoying my soup warm and steamy one day- chilled the next.
That is one of the nice things about this recipe. This soup is good, what ever temperature you serve it.
It is also a pretty soup. The color is so beautiful. A friend came over and I offered her a bowl. When I set it down in front of her she said, “Wow, this is really pink soup.”
People seem to have strong opinions about beets. They either love them or hate them. I love them and I enjoy them in soups, salads, relishes, casseroles and more. The earthy flavor really appeals to me and the color is a delightful bonus. I added some extra veggies for more flavor and sour cream for a tart, creamy flavor and texture element. The result was a very tasty dish that is also sort of striking to look at.
Hot or Cold Beet Soup
6 or 7 small beets – or 3 large beets
2 T. olive oil
1 large onion, chopped
2 carrots, peeled and chopped
1 rib celery, chopped
3 medium potatoes, peeled and chopped
6 cups stock- I used chicken but vegetable stock or beef stock would also work
2 t. dill weed
salt and pepper to taste
1 c. sour cream- or a little more if you like
Cut beets off of their stems- leaving about 2 inches attached- this will reduce bleeding and retain more color in the beets. Place beets in a pot of water deep enough to cover them and cook until the beets are just getting tender, about 20 minutes – longer for larger beets. Remove and place in cold water. Once the beets are cool enough to handle trim off the stems and slip off the skins. Cut the beets into chunks and set aside. In soup pot heat the oil and cook the onion until tender. Add the carrots and beets and cook a few minutes longer. Add the rest of the vegetables, stock, dill and simmer, covered, until vegetables are very tender. This will take at least 30 minutes- but cooking longer is better- around an hour. Puree the soup. To add the sour cream place sour cream in a bowl and add a ladle full of the hot soup to the sour cream, whisking until smooth. Add another ladle or two of the soup and whisk again. Return sour cream mixture to the soup. By warming the sour cream gently you prevent it curdling. Adjust seasonings and serve right away, or refrigerate and serve cold. Serves 6-8. Freezes well.


