Maple Ginger Carrots


Maple Ginger Carrots
Later today, I am teaching a class on cooking with maple syrup. One of the dishes I am making are these carrots, glazed with maple syrup. Maple syrup adds natural sweetness and a unique flavor to foods. “Maple flavored” syrup just isn’t the same. You need the real thing.
Sometimes simple just works. These carrots are super simple – and the flavors work together well. I combined them with maple syrup, butter, ginger and some salt and pepper. I have made them for family and friends before and everyone loved them. It had become one of my “go to” recipes.
Maple Ginger Carrots
1 lb. carrots, peeled and sliced
1/4 c. water
4 T. butter
1/2 c. maple syrup
1 t. grated ginger
salt and pepper to taste
Place carrots in a pan with the water. Cover and cook over medium heat until carrots are almost tender. Add the butter and cook a few minutes more. Add remaining ingredients and cook, covered, until carrots are tender. Remove lid and cook until most of the liquid evaporates. Adjust seasonings and serve. Serves 4-6.
Creamy Carrot Soup


Creamy Carrot Soup
This soup is so easy to make and tastes great, too. The recipes only makes a couple of servings, which can also be a bonus.
I did a class this morning on cooking for one or two. If you have a smaller household, making a huge pot of soup can be a problem. I love homemade soup, but after a few days even the best soup can get boring. This recipe makes about 3 cups of soup, just enough for a couple of servings.
There are only a few ingredients: carrots, onion, stock, milk, nutmeg and green onions. Plus salt and pepper, to taste. I like to add a little hot sauce, too. You could add some fresh herbs, if you like. I sometimes add curry powder.
Start to finish the soup takes about 20 minutes to make, so nice when you are pressed for time.
Creamy Carrot Soup
1½ c. peeled, sliced carrots
1 medium onion, chopped
1 c. chicken broth- you could also use vegetable broth
1 c. milk
Salt and pepper to taste
Dash of nutmeg
Green onion or chopped chives for garnish, optional
In saucepan combine carrots with onion and broth and simmer, covered until vegetables are tender, about 15 minutes. Puree mixture and return to pan. Add remaining ingredients and heat through. Serve with chives or green onions sprinkled on top, if desired. Serves 2.
Eggplant Parmesan

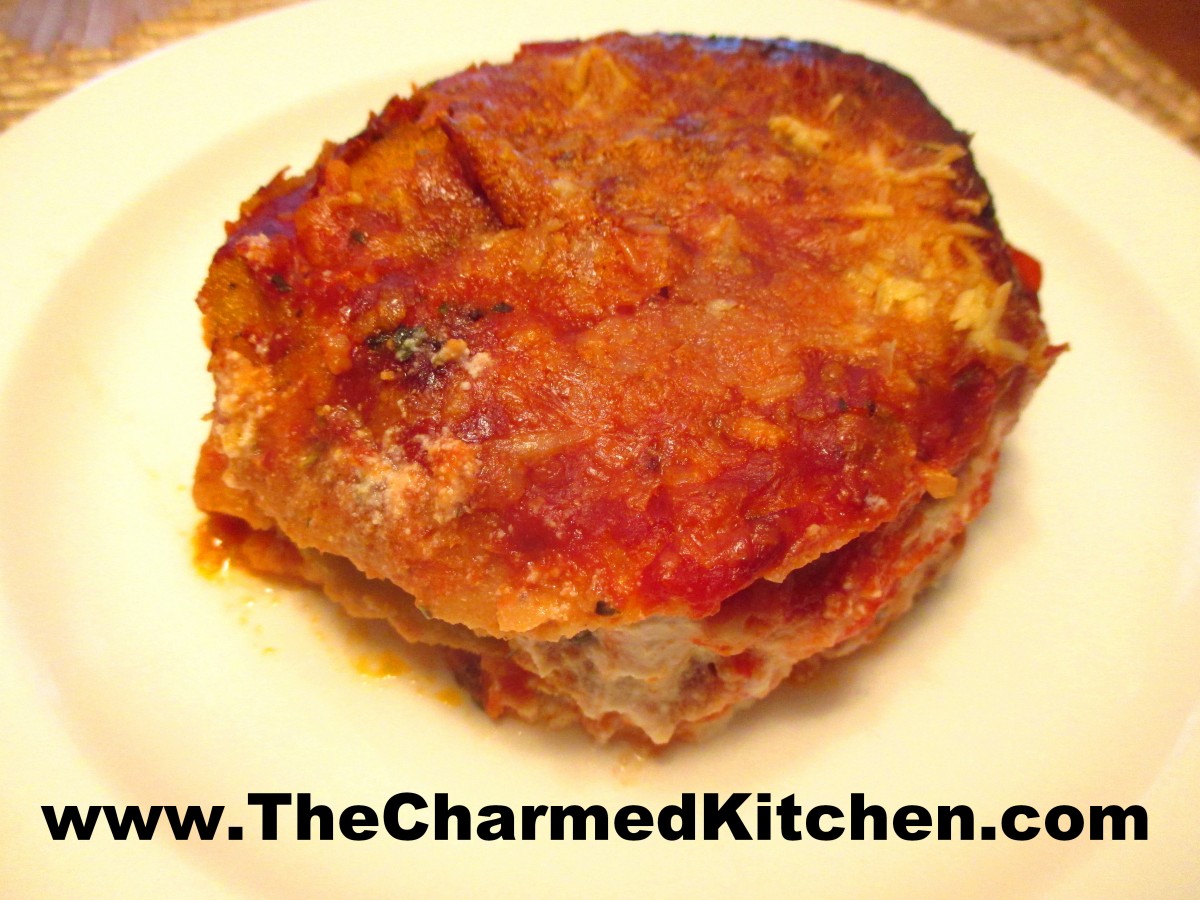
Eggplant Parmesan
I have been making this dish for a long time and it is always a family favorite. It is a cheesy and satisfying meatless meal, even for the die-hard meat lovers among us.
The recipe has changed over time. I used to just dredge the eggplant slices in flour before baking. It was still very good that way. My mom used to bread eggplant slices for my father, using bread crumbs. She would serve the eggplant with a little tomato sauce on top and sprinkled with mozzarella cheese. He loved them.
That is what first inspired me to bread the eggplant slices, rather than just using the flour dredge. I think the breaded eggplant slices stand up well to the other ingredients. They stay a little crunchier than the flour only version.
I also used to just use mozzarella cheese and the Parmesan. A friend said she added ricotta, like you would for a lasagna. I tried it and liked the addition of the ricotta. Now I make it that way all the time.
The biggest change might have been how I cook the eggplant before adding them to the rest of the ingredients. I used to pan fry the eggplant. Let me just say that eggplant soak up oil like a sponge. I remember making eggplant Parmesan for a group of 250 once and went through an enormous amount of oil. Now, I just place the breaded eggplant slices on a baking sheet and drizzle oil all over them, before baking them in the oven. I use a lot less oil that way. It is also a lot simpler than pan frying.
So here is my often revised recipe. I hope you like it.
Eggplant Parmesan
2 large eggplants
salt
flour
1 egg
½ c. half and half or milk
Pepper
1 T. Tuscan seasoning- recipe follows
About 2 c. of bread crumbs
oil
1 (15 oz.) container ricotta cheese
3 c. tomato sauce or marinara sauce
12 oz. mozzarella cheese
Parmesan cheese – you could also use Asiago or Romano cheese, if you prefer
Peel and slice eggplant about ¾ -inch thick. Place in a bowl and salt lightly. Allow eggplant to stand 30 minutes, then rinse and drain. Combine egg, half and half, pepper to taste, and half of the Tuscan seasoning in bowl. Whisk to combine. Set aside. Place bread crumbs in a shallow dish, set aside. Dredge eggplant slices in flour, dip each slice in egg wash, then dip in bread crumbs, turning to coat evenly. Place eggplant slices on a baking sheet lightly coated with oil. Once all the slices are in the pan, drizzle with a little more oil. Bake in a 400-degree oven, turning once until browned and tender, about 20 minutes. Drain. Place a small amount of sauce in the bottom of a casserole dish. Add a layer of eggplant slices. Combine ricotta with remaining Tuscan seasoning and spread over the eggplant. Top cheese with a little more sauce and another layer of eggplant. Top with mozzarella, remaining eggplant and remaining sauce. Sprinkle generously with Parmesan cheese and bake, uncovered in a 350-degree oven for about 40 minutes, or until bubbly and browned around the edges. Serves 6-8.
Tuscan Seasoning
½ c. dried basil
½ c. dried oregano
½ c. dried marjoram
3 T. dried minced onion
2 T. dried minced garlic
2 T. dried rosemary
2 T. dried parsley
1 t. crushed red pepper
Combine all. Store in a cool, dry place. Use for any number of recipes, from marinara sauce, to salad dressings.
Fried Catfish


Easy Fried Catfish
I love fried fish. I don’t make it at home that often. It is more of a treat around here than an every day meal. After dinner, I decided I might want to fry fish more often.
To thank two of my dear friends, who shoveled my sidewalk a few times this winter, I decided to have them over for dinner. I made fried catfish with cole slaw, cabbage and noodles, homemade fries and tiramisu for dessert.
I knew I wanted to make the fish. My friends and I often go to Friday fish fries this time of year and this was a Friday night, after all. I had some catfish and the big decision was going to be how to cook it. I toyed with the idea of baking it, but frying won out. Nothing quite as good as fried catfish in my mind.
This is going to be one of those recipes that is more narrative that exact amounts. I really am good about writing stuff out. I just can’t seem to locate my notes for this one- so I’ll share what I did as best I can remember. It is also so easy to fry fish. Don’t be scared to try. Fresh fried fish is such a treat.
I started with catfish fillets that were cut down into smaller pieces. The smaller size made them fast and easy to cook. It also made them fun to eat. we also had a lot of sides with this dinner, so you could just eat a couple, if you didn’t want a huge fillet.
I made a mixture of eggs, a little buttermilk, salt, pepper, garlic powder, parsley and hot sauce. I dipped the fish in this mixture and let it soak in there while I got the breadcrumbs ready. I had some bread crumbs made from plain bread, so I added a little paprika, dry parsley flakes and lemon peel to the crumbs.
I took the fish out of the egg wash a few pieces at a time and dropped them in the bread crumbs. I had the crumbs in a good sized bowl- but only filled about a quarter of the way with crumbs. I added the fish and sort of tossed it in the crumbs by shaking and tossing the bowl. Placed fish on a baking sheet. Once the fish were all coated in bread crumbs, I put the oil on to heat up.
I was using an electric pot with a thermometer so I knew when the oil reached 350. I wanted to fry the fish between 350 and 375 degrees. If you don’t have a pot with a thermometer you can tell if your oil has reached 350 degrees with the use of popcorn. Yes, popcorn. Just put in a kernel of popcorn when you start heating up the oil. Popcorn pops at 350 degrees. When the popcorn pops, you know the oil is ready.
I had a pan, lined with paper towels ready as I started to drop the pieces of fish, several at a time, into the hot oil. They were cooked in just a few minutes. I pulled them when they were golden brown. Allowed them to drain on paper towels in a warm oven while I cooked the rest of the fish.
I served the fish with lemon wedges and homemade tartar sauce- which is just sweet pickle relish and mayo. I sometimes add capers and a little mustard, too.
The fish was a big hit and I was happy to thank my very thoughtful friends.
As to the oil. You’ll have plenty left over. I let it cool and strained it out. Then I poured it in the bottle it came from. You can save it for your next frying project, but don’t use it again and again. Just a few times, then toss the rest. The flavor gets funky after a while.
Dandelions for Peter

 This post is dedicated to Dr. Peter Gail. Peter was passionate about edible wild plants and foraging. He taught me so much. I can’t ever look at dandelions the same way.
We said goodbye to him today. He will be missed by all who knew him. He was an amazing man. Brilliant mind, gentle heart. A devoted family man and a crusader for a cause. That cause was dandelions and other edible plants that most people see as weeds. He wanted people to stop poisoning their weeds and start harvesting them instead. He has inspired me in so many ways. I will miss him terribly.
So today, Peter, this post on dandelions is for you my sweet friend.
It’s funny when you think about it. People spend tons of money to eradicate dandelions from their lawns but will go to an upscale restaurant and pay good money for a salad with mixed greens including dandelions. Dandelions were not considered a weed at one time. In fact, immigrants brought the seeds to America as a vegetable. While the greens can be bitter they can also be tamed when paired with certain ingredients. Combining dandelions with tomatoes, vinegar, cheese or other dairy products and bread or cereal products will make them less bitter when eaten. They are also packed with nutrients and if you don’t spray your yard with herbicides you can likely find them under your own feet. Free, tasty and nutritious. Sounds like a win all around. The plant is pretty much edible from top to bottom. The leaves for salads, soups and other dishes. The flowers are used for wine, jelly and the “burger” recipe at the bottom of this page. The roots are roasted and used as a substitute for coffee. If you haven’t eaten dandelions before my only question is, what are you waiting for?
A classic dish using dandelions is dandelion gravy. Some versions use bacon, others not. This one uses bacon, sour cream and is served with boiled potatoes.
Dandelion Gravy
4 strips bacon
3 T. flour
1 c. water
1 lb. dandelion greens, washed and chopped
½ c. sour cream
1 T. sugar
1 T. vinegar
Salt and pepper to taste
Hot boiled or baked potatoes
Fresh chopped parsley, optional
Chop bacon and cook in skillet until crisp. Leave bacon in the pan. Remove all but 3 tablespoons of the bacon fat and stir in the flour until smooth. Add water and dandelion greens and cook over medium heat until greens are tender- about 5- 10 minutes. Add more water if mixture is too thick. Turn off heat. Combine sour cream with sugar and vinegar and stir into dandelion mixture. Adjust seasonings. Spoon gravy over potatoes.
Serves 4.
Note: If you want leave out the bacon instead add 3 tablespoons of oil to skillet along with the flour.
My friend, Mari Keating, sent met his recipe for a frittata.
Mari’s Dandelion Frittata
Mari Wrote: I sauteed greens in olive oil and garlic, poured scrambled eggs over, sprinkled with feta cheese, let it set over low heat, then popped it under the broiler to “poof” – an amazing frittata. Amounts are variable to taste, as is cheese used (or not). The greens are a wonderful addition to salads, raw or wilted with a hot vinaigrette and today I’m making dandelion pesto. Google abounds with recipes. My variation is that I use walnuts instead of pinenuts, because I’m cheap.
She said it was wonderful.
The next 2 recipes come from Dr. Peter Gail my mentor and dearly loved friend.
Dandelion Pita Pizza
Pita bread, toasted English muffin, or toasted bread
Spaghetti or pizza sauce
Fresh dandelion greens of any age, chopped fine
Grated cheese (any kind)
Cover bread with sauce, add chopped greens, top with cheese, and toast in oven until cheese
melts. For a more sophisticated treat, chopped dandelion greens may be sauted in olive oil with
onions, mushrooms and several cloves of crushed garlic, and then spread on the pizza and topped
with cheese.
Dandy Burgers
1 cup dandelion flowers, green removed
½ cup flour, any kind
1/4 cup onions, chopped fine
½ tsp salt
½ tsp garlic powder
1/4 tsp thyme
1/4 tsp basil
1/4 tsp rosemary
1/8 tsp pepper
enough milk to make thick batter.
Peel dandelion flowers and put in 4 quart mixing bowl. Add onions and mix together. Blend
flour and seasonings together, add to the flowers and onions, and blend thoroughly. Add milk
slowly, blending it in until you have a thick batter.
Heat Olive Oil in frying pan to cover bottom. Make batter into golf-ball-sized balls. Place in
oil, and squash down flat to make a 2″ diameter patty. Fry till brown on both sides. Remove and
serve on rolls as you would hamburger patties.

Vegetarian Bean Salad

Layered Bean Salad
When you hear green or yellow split peas- do you think of soup? You probably do. But when cooked until just tender, split peas make a great salad ingredient. I often just add some cooked split peas to a tossed salad. They add flavor, protein and a nice texture to salads. An added bonus is that split peas can be cooked from dry to tender in about 20 minutes. That makes them a great choice when time is tight.
This is one of my favorite salads using both green and yellow split peas. Fresh and colorful, it is a big hit with vegetarian and non-vegetarian friends. If some of you are looking for new meatless meals ideas, this one is a winner.
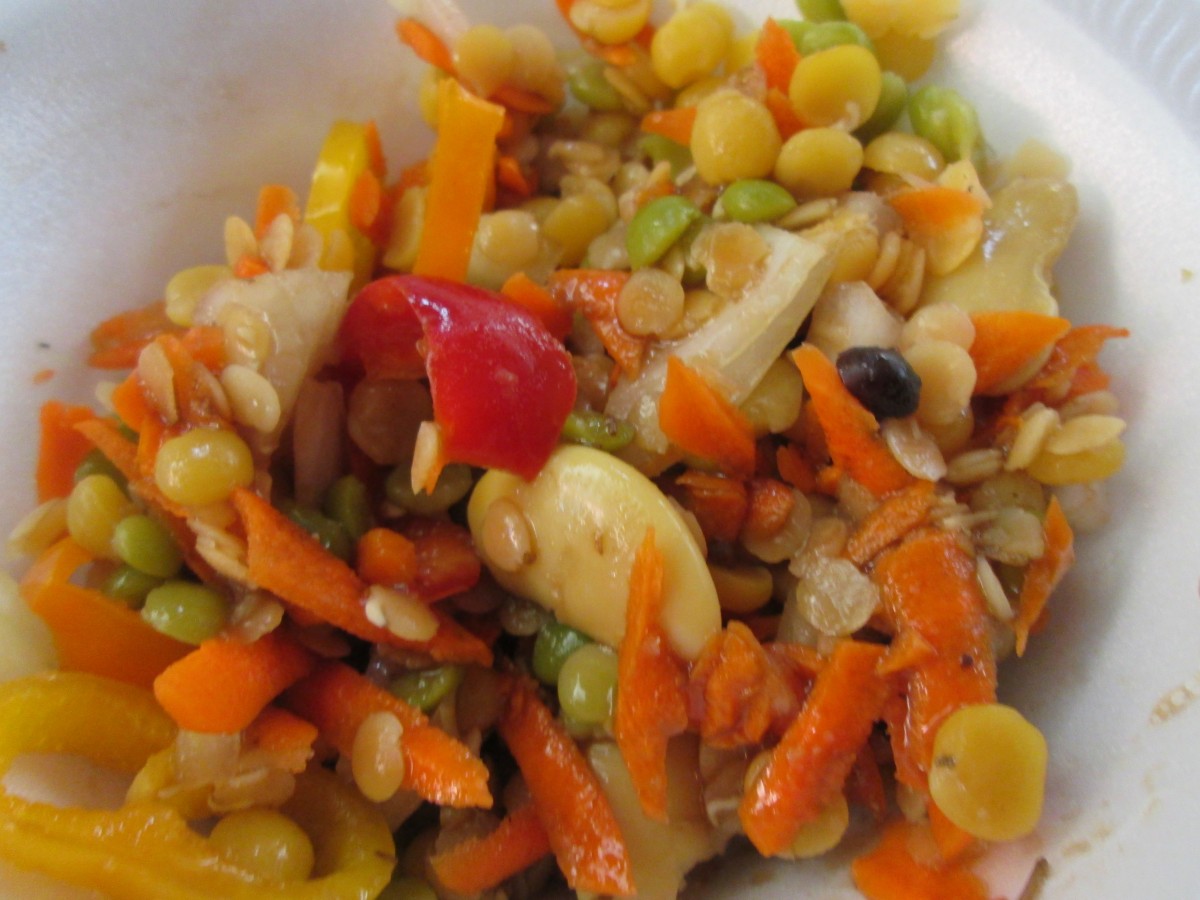
The salad uses both green and yellow split peas, along with black beans, butter beans, red lentils and assorted veggies. It is a great combination of colors and textures. It does make a lot, but you can easily cut the recipe in half.
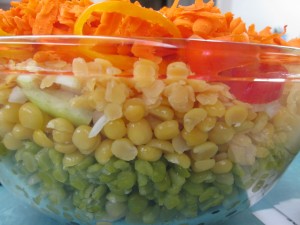
The dish was inspired by my nephew Danny’s love of sand art when he was a kid. The ingredients are layered in the bowl for a pretty presentation. It is also an homage to the layered salads I remember from my youth. I like this one a whole lot more.
Layered Bean Salad
1 c. each green split peas, yellow split peas and red lentils
1 can black beans, rinsed and drained
1 can butter beans, rinsed and drained
1 c. diced sweet onion
1 c. diced sweet pepper
1 c. grated carrot
Cook split peas and lentils separately just until tender. Split peas, both green and yellow will take 20 minutes. Red lentils will take about 8-10 minutes. Drain and rinse each under cold water when done and set aside until ready to use, or you can cook them a day ahead and keep chilled. Each will yield about 2 1/2 c. cooked.
In large glass bowl, place the following ingredients in this order.
Black beans, butter beans, green split peas. yellow split peas. onion, red lentils. carrots and peppers. Pour over dressing and chill several hours or overnight. Serve on a bed of greens.
Dressing *
1/2 c. oil
1/2 c. vinegar
1 (14 oz.) can diced tomatoes, undrained
2-3 T. sugar
1/2 c. parsley or cilantro
1 t. each chili powder, cumin and salt
dash hot sauce
Combine in a blender or food processor until smooth.
*Note: Any fresh or bottled dressing you like can be used. Balsamic works very well. I often serve it with homemade Italian dressing.
Gee, I Love Ghee


Homemade Ghee
Ghee, if you haven’t had it before, is a kind of clarified butter, often used in Indian cooking. You can buy it at stores that carry international foods, but it is easy to make.
Ghee has a wonderful, toasted, nutty flavor and it can be used in all sorts of dishes. You can add it to veggies or spread it on toast. I love to add ghee to rice or pasta.
The fun part, because the milk solids have been removed, you can fry foods in it. It doesn’t burn quickly, like regular butter.
Because the solids have been removed, you can store ghee at room temperature. Although, it is recommended to use up home made ghee in a month or so. For longer storage, you can pop it in the fridge, but you don’t have to.
The difference between ghee and clarified butter is that ghee is cooked longer, to develop a darker color and wonderful toasted flavor. The longer cooking also removes any water in the butter, leaving just the fat behind.
There are several methods for making ghee. Some suggest long, slow cooking. Others a little more heat and less cooking time. I prefer the latter. I am not the most patient person.
Here is how I made my ghee.
Start with a pound of unsalted butter. Place the butter in a heavy bottomed, medium sized saucepan. Melt the butter over low heat. As soon as the butter is melted, turn the heat up a bit- to medium. It will start to form foam on the top at this point. After a few minutes, the foaming will stop. Turn up the heat a little more- not high heat, but a little higher medium, if that makes sense. Watch for the second foam to form on the top. This takes about 7-8 minutes. It will have turned a pretty, golden color. At this point, your ghee is done. You’ll have to strain it, to keep out the solids, which will have settled to the bottom of the pan. I strained my ghee twice, through several layers of cheesecloth. Be sure the container you are straining the ghee into is heat proof- it is pretty hot at this point. I used a stainless steel bowl, then transferred the ghee to a canning jar. You could also use a fine mesh strainer, if you don’t have cheesecloth. Store in a container with a tight fitting lid- you don’t want moisture to get to your ghee. It will get more solid as it cools down.
One little thing. I used a stainless steel pot and the brown bits took a bit of scrubbing to get out of the pot. Small price to pay for your own ghee.
That’s all there is to it. Use within a month. Trust me, it never lasts that long around here!!
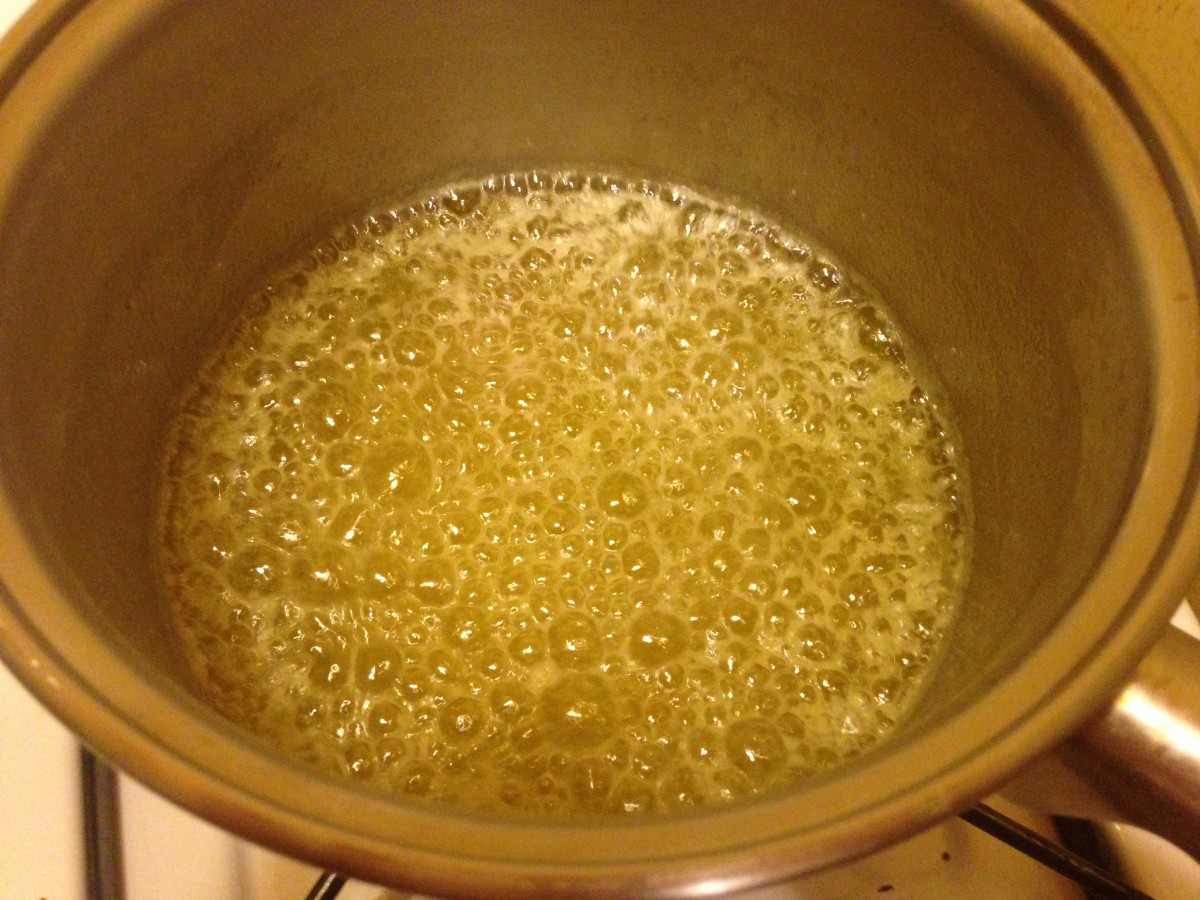
first foam

second foam

strained, still warm
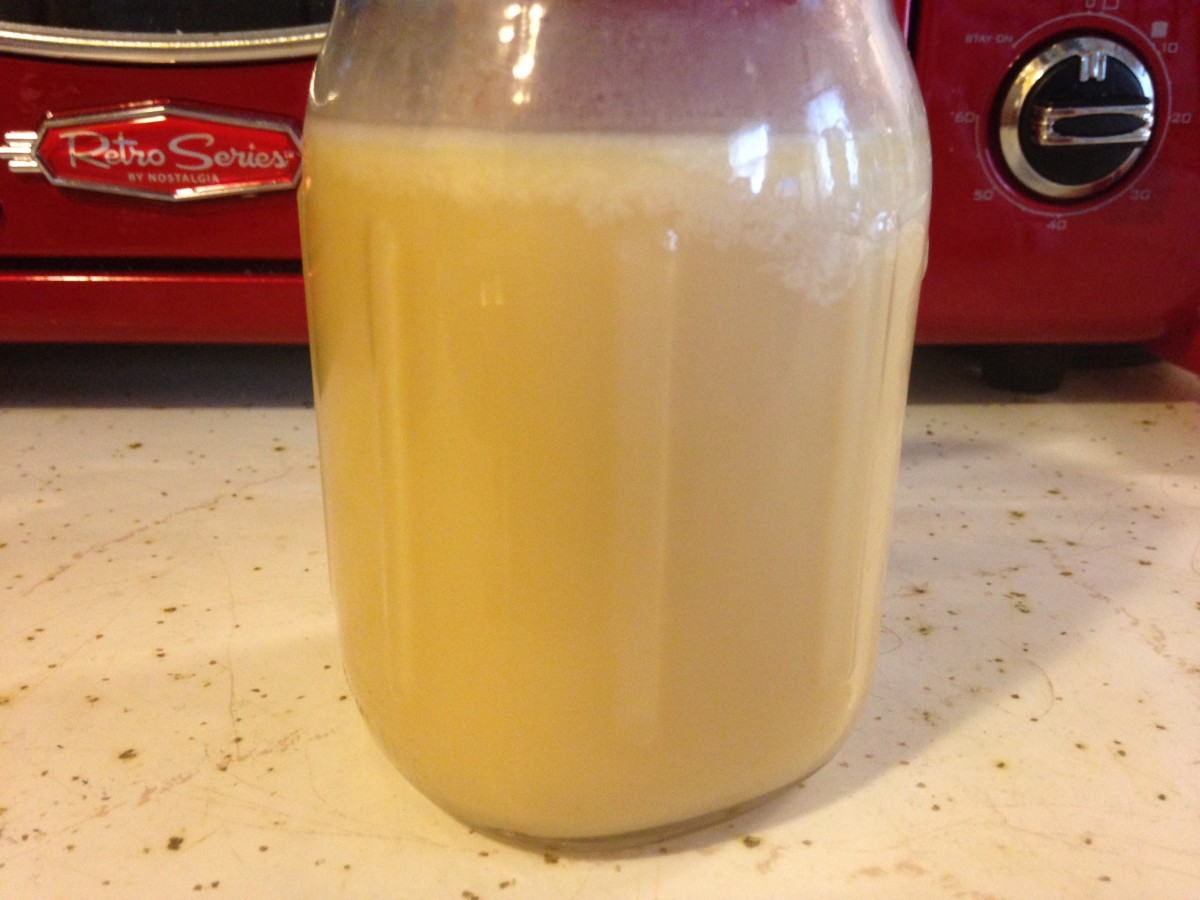
All cooled down
Very Berry Scones


Very Berry Scones
I had been cleaning out the freezer and found some berries from last summer. I decided to use some of them to make these scones. Even when the weather is chilly- berry scones make me think of warm summer days.
I used a combination of blueberries and blackberries, but raspberries would work nicely, too. I was so pleased with how they came out. They were a little crisp on the outside, but crumbly and tender on the inside.
These scones aren’t too sweet. With scones, I think you can always sweeten them up by serving them with jam, if you like. I had one for breakfast this morning, and it was wonderful. Still warm from the oven.
They could also be used as a dessert- as the base for a shortcake. Split the scones, add some sweetened berries, sweetened whipped cream or ice cream as a filling. Top with whipped cream or more berries. A simple, classic dessert.
The secret to a tender scone is to be gentle with the dough. Do not mix it too much. As soon as the dough holds together, you are good to go. I used an ice cream scoop to portion them out. If you are rolling out scones, try to cut as many out at one time as possible. Each time you re-roll scraps of dough- the scones become a little tougher.
Since I have more frozen berries, I think I will use some of them to turn the rest of my scones into berry shortcakes for dessert later today.
Here is the recipe.
Very Berry Scones
2 c. flour
1/4 c. sugar
1 T. baking powder
¾ t. salt
6 T. chilled butter
1 ½ c. berries, fresh or frozen- do not thaw berries – I used blackberries and blueberries
1 t. lemon or orange zest
2 large eggs
1/3 c. heavy cream
Mix dry ingredients together in bowl and cut in butter to resemble coarse crumbs. Toss in blueberries and zest. Beat together eggs and cream and stir into flour mixture. Mix very gently to avoid bruising berries. Use a small ice cream scoop to scoop out batter and place on baking sheet. Place scoops about an inch apart. Press down slightly. Brush with a little cream and sprinkle with a little extra sugar. Bake in a preheated 400-degree oven for 20-22 minutes. Makes 15-18.
Homemade Spinach Pasta


Homemade Spinach Pasta
I do enjoy making homemade pasta. This spinach pasta is one of my favorites. The flavor and color is so fresh. I normally use frozen spinach, but since I had a big bag of fresh spinach, I used it for my pasta.I just cooked the spinach, drained it and chopped it up.
Any time you are making fresh pasta with vegetables in the dough, you have to allow for that added moisture. Be patient when kneading the dough. You will likely have to knead the dough longer than an egg based pasta dough. It is worth the effort.
Spinach Pasta
2 c. flour, plus extra for rolling
1 (10 oz.) package frozen spinach, cooked, drained, reserving some of the liquid, or 12 oz. fresh spinach, cooked and chopped
Combine flour and spinach, kneading until dough is smooth and elastic. Mix this dough as for other pastas, but don’t be too quick to add reserved liquid. While kneading you’ll get water out of the spinach. May require more kneading and rolling than other pasta dough. Be patient, it’s worth the work. The finer the spinach is chopped, the better the dough will come together.
Add a little spinach liquid, if needed, to hold dough together. You may wish to mix the dough in a mixer or food processor. Cover dough and let rest 15-20 minutes before rolling. Under kneading your dough will result in coarse, crumbly pasta. This batch makes just under a pound of fresh pasta. Serves 3-4.
Roll dough out on well floured board or with a pasta machine until desired thickness in reached. Add flour as needed to prevent sticking. Cut into strips or whatever shapes are desired. You might want to let the noodles dry 1-hour or more before cooking, but this is not necessary. Pasta can be hung to dry or separated and allowed to dry flat on a table. When pasta is not hanging to dry it must be turned occasionally to dry evenly.
Cooking time varies with which pasta shape you make and how thick you cut your pasta. Most fresh pasta is cooked very quickly- a couple of minutes at most.
Although you may hear otherwise, homemade pasta, even when dried, should be frozen for long term storage. Storing at room temperature can lead to spoilage. Fresh pasta can also be stored in the refrigerator for a day or two.
Shrimp and Soba Noodle Salad

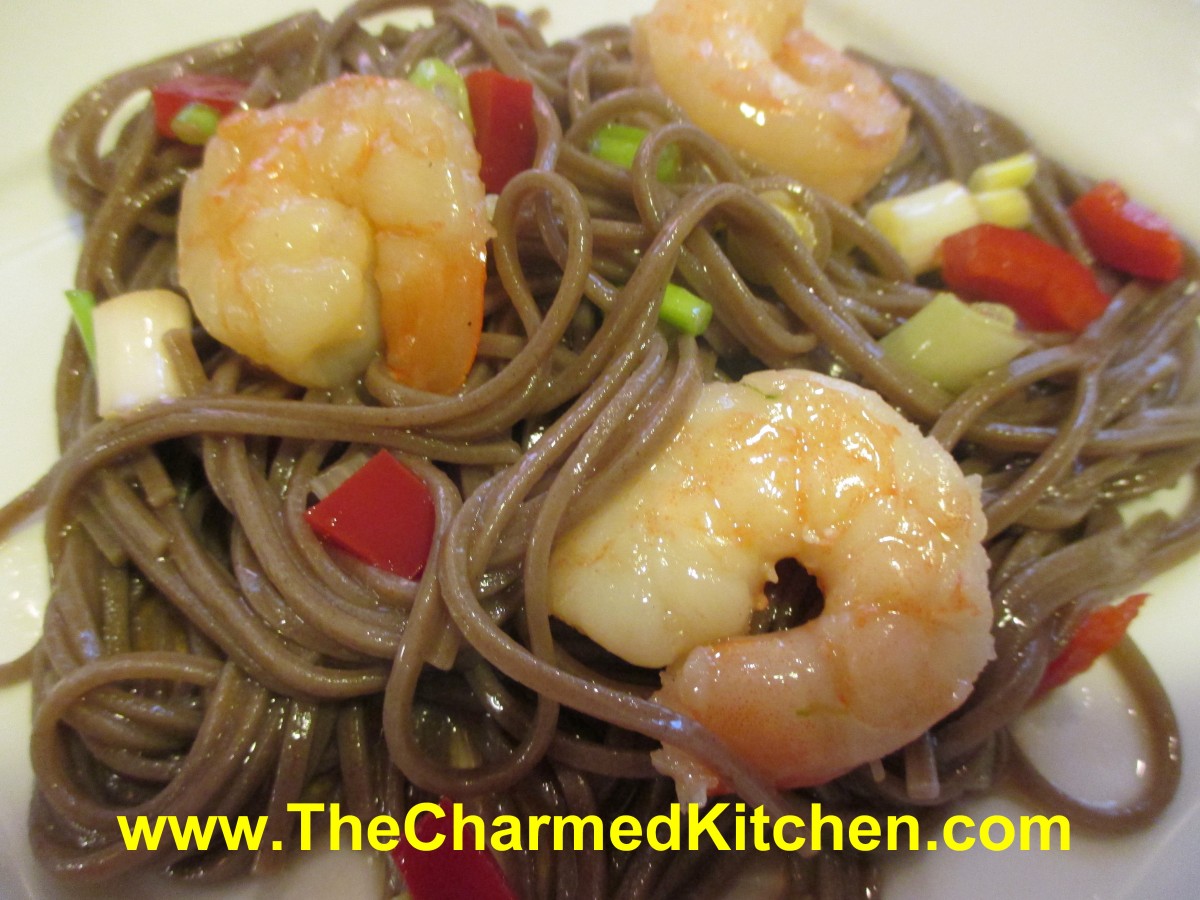
Shrimp and Soba Noodle Salad
Whenever I make soba noodles, I wonder why I don’t eat them more often. I really love their flavor.
Soba noodles are made from buckwheat flour. They have a wonderful, almost nutty flavor. I picked these up at a recent visit to the Asian market. You can find soba noodles in some grocery stores, too.
I have enjoyed soba noodles in cold salads, hot soups and stir fries. This time, I decided to use them in a salad that fell somewhere between hot and cold. It made a great meal for a rainy evening.
Warm Shrimp and Soba Noodle Salad
12 oz. soba (buckwheat) noodles
1 lb. raw shrimp, shelled and deveined
2 T. oil
2 cloves minced garlic
½ c. chopped sweet peppers
½ c. chopped green onions
Dressing:
¼ c. oil
2 T. Rice wine vinegar
1 t. sesame oil
1 t. soy sauce, or more to taste
1 t. hot sauce, or more to taste
1 t. ginger
In pot of boiling, salted water, cook noodles according to package directions. They only take a few minutes. Be careful not to overcook them. Drain and set aside. Heat a skillet and add the oil. Add the shrimp and garlic and stir fry until shrimp are just cooked through. Time will vary based on the size of the shrimp you are cooking. Place soba noodles in a bowl. Add the cooked shrimp and veggies. Make dressing by placing all dressing ingredients in a jar with a tight fitting lid. Shake until mixed well. Pour dressing over the noodle mixture and toss to coat evenly. Serve while still warm. Serves 4-5.


