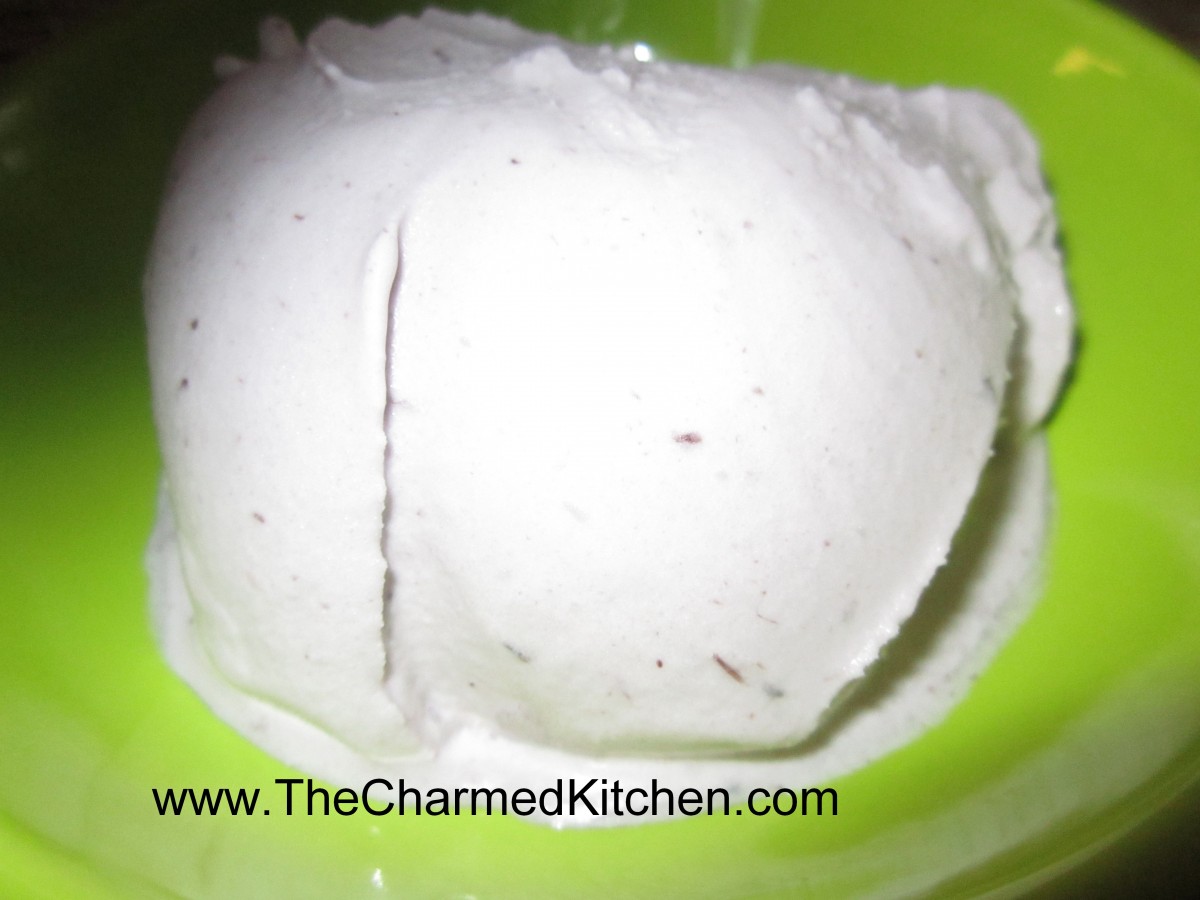
Homemade Chocolate Ice Cream

Homemade Chocolate Ice Cream
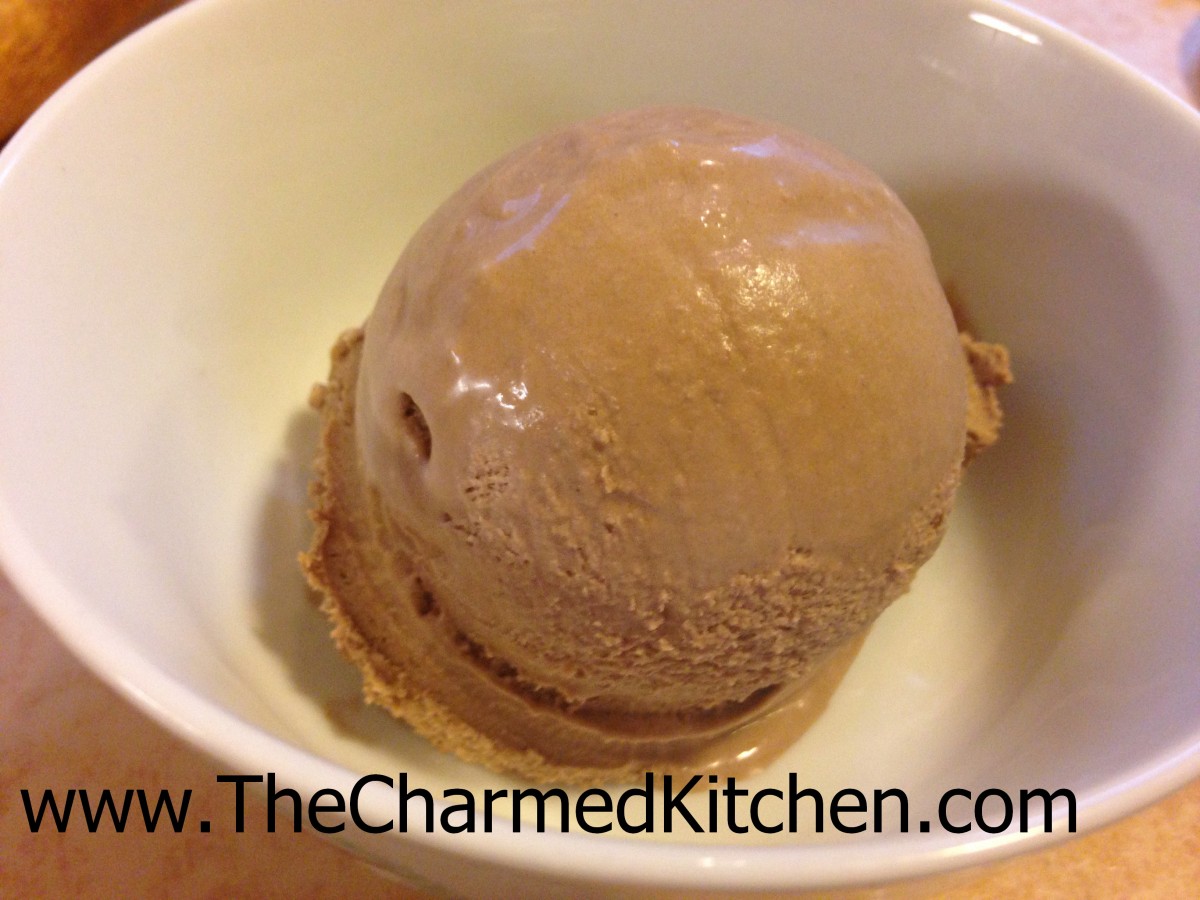
I love this ice cream. Smooth, creamy and full of chocolate flavor. What’s not to love? This is also the simplest ice cream recipe I have ever made. Seriously – the easiest.
For starters, you don’t need an ice cream maker. And the recipe is only two ingredients. You really can’t get easier than that.
This recipe came about because I hate to waste anything. I had a carton of heavy whipping cream that was getting close to it’s expiration date. I didn’t need it for anything, but didn’t want to waste it. I decided I could use it to make ice cream.
It was late and I was tired, so I wanted a quick fix. I put the whipping cream in my mixer and whipped it up. Once it got to stiff peaks, I started adding chocolate syrup. With the mixer still running, I kept adding syrup until the mixture was the color I wanted. I figured when it was the color of chocolate ice cream, I had added enough.
I put the mixture in a quart container, put on the lid and popped it in the freezer. It was a couple of days before I remembered it was in there. I gave it a taste. I was so pleased. It was very creamy and smooth.
So here is the recipe, although I guess I sort of already told you what to do.
Super Easy Homemade Chocolate Ice Cream
1 pint whipping cream
chocolate syrup to taste – I used around a half a cup- I think
Place whipping cream in a bowl and whip until stiff peaks form. With mixer running, add the syrup. Add until mixture is the color of chocolate ice cream. You can also give it a taste, to be sure. Place mixture in a container with a tight fitting lid and place in freezer. Freeze several hours before trying it. Makes 1 quart.
Very Blueberry Chef Salad

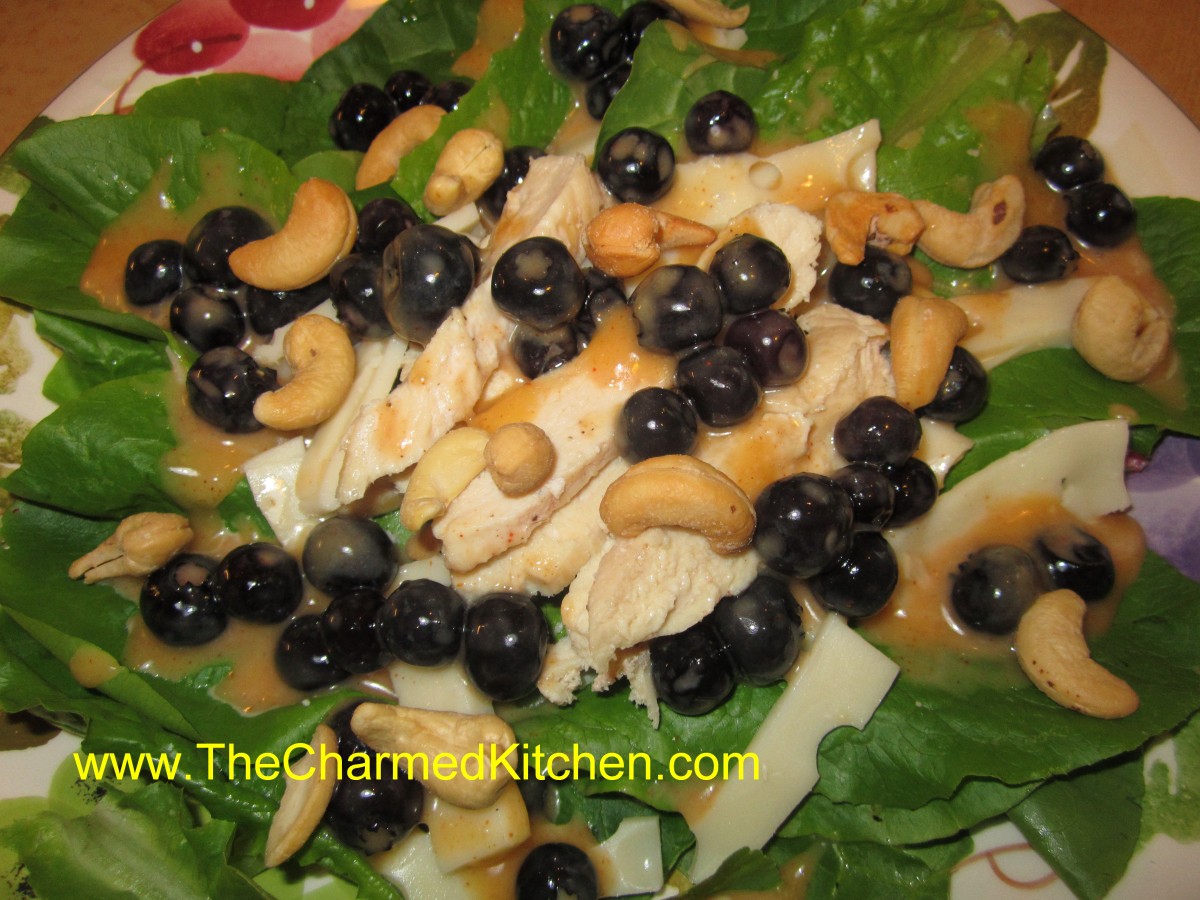
Blueberry Chef Salad
I have really been craving salads lately. I think it is the heat. Sometimes, just having a tossed salad to start dinner is enough. Other times- I want dinner to be the salad.
This is one of those salads that is a meal all on its own. Made with plenty of blueberries, it is one of my favorites. The dressing is a creamy honey French dressing which pairs beautifully with the berries.
I topped mine off with cashews, but you could add croutons if you prefer.
Blueberry Chef Salad
Dressing:
1/3 c. honey
1/4 c. white wine vinegar or cider vinegar
1 t. paprika
1 t. dry mustard
1/4 t. salt
1/2 c. olive oil
3 cups blueberries
Salad:
6 c. torn salad greens
12 oz. cooked chicken, turkey, ham etc, cut into strips
1 c. cubed cheese
1/2 c. cashews
In blender, combine first five ingredients and start running machine on high. Add oil in a slow stream until mixture becomes thickened. Pour into bowl and stir in berries and chill, several hours if you can. When ready to serve arrange greens on one large platter or on smaller salad plates. Arrange meat and cheese on platter or plates. Spoon over the dressing and cashews then serve. Serves 4-6.
Fresh Blueberry Sweet Rolls


Blueberry Sweet Rolls
With blueberry season here, I had to make these rolls. These are a favorite recipe of mine. You know they have to be good, if I was willing to bake on such a hot day. One perk of working with yeast dough on warm, humid days, is that the dough loves this weather. They rose quicker than ever.
These rolls are great for breakfast, but I think they make a pretty good dessert. Sweet, but not too sweet. Studded with plenty of berries, too. For dessert, I serve them with a scoop of ice cream or whipped cream.
Invited a neighbor over this morning for a cup of coffee- and surprised her with these. These rolls were just what we both needed. I sent her home with the rest.
Blueberry Sweet Rolls
3-3 1/2 c. bread flour
1 package active dry yeast
1 1/3 c. evaporated milk
6 T. butter
1/4 c. sugar
1 t. salt
1 egg
6 T. butter, melted
1/2 c. sugar
2 t. cinnamon
1 t. grated lemon or orange peel
2 c. fresh or frozen blueberries
In bowl combine 1 1/2 c. of the flour with the yeast, sugar and salt. Heat together the milk and 2T. of the butter until warm and add to the flour mixture, beating 2 minutes. Add egg and beat 2 minutes longer. By hand stir in enough of the remaining flour to make a soft dough. Turn dough onto a lightly floured surface and knead, adding flour as needed until dough becomes moderately stiff. Place in greased bowl, turning once to coat and cover. Allow to double in bulk, about 1 1/2 hours. Punch dough down, cover, and let rest 10 minutes. Divide dough in half. Roll each half into a 14×8 inch rectangle. Brush dough with the melted butter. Combine the remaining sugar, peel and cinnamon and sprinkle over the dough. Top with the blueberries and press the berries into the dough. Starting at the long side roll up dough jelly roll fashion and seal edge by pinching. Repeat with second roll. Cut each roll into 12 slices and place 12 rolls in greased 9 inch round pans. Cover pans and allow to rise until doubled, about 30 minutes. Bake in a 375 degree oven for 20-25 minutes. While rolls are warm, you can top with a powder sugar glaze, if desired. Makes 24.
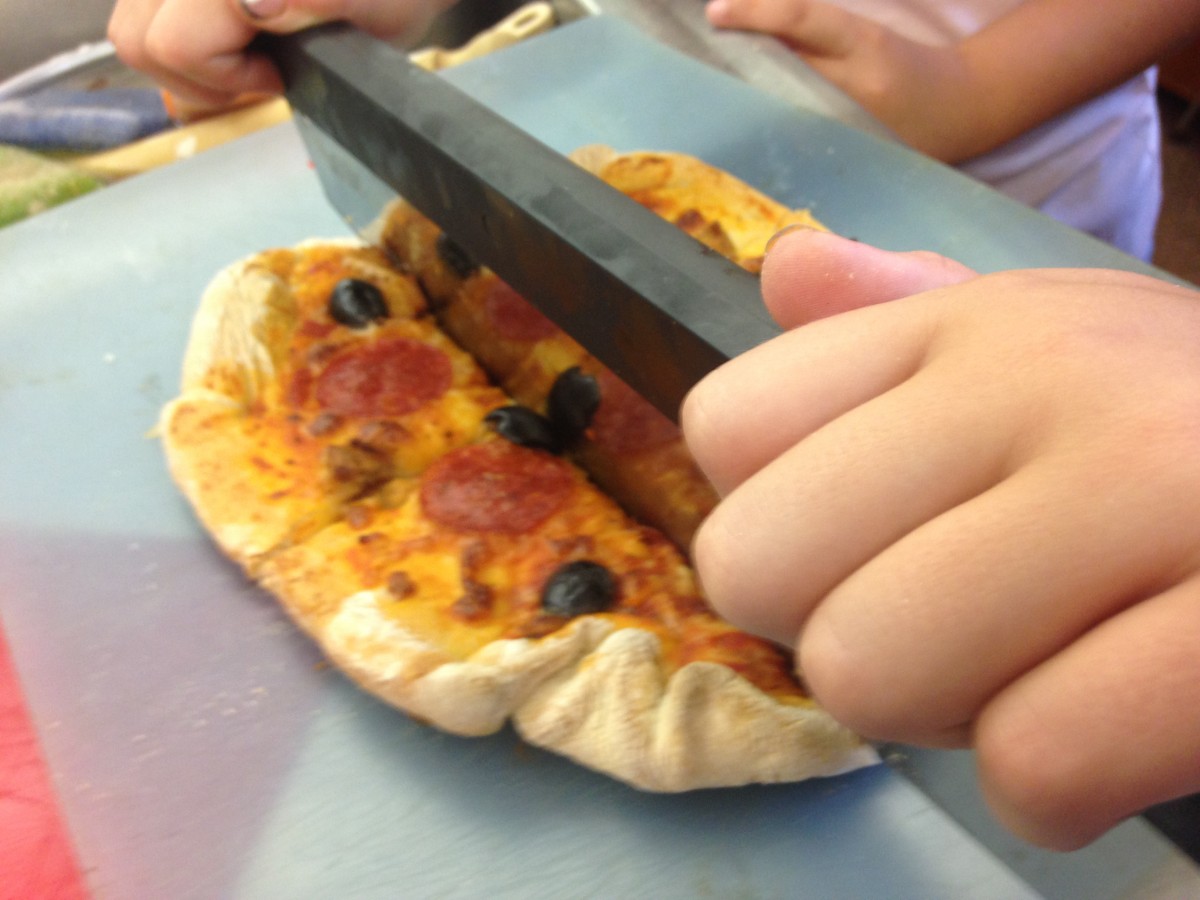
Homemade Pizza


Pizza!
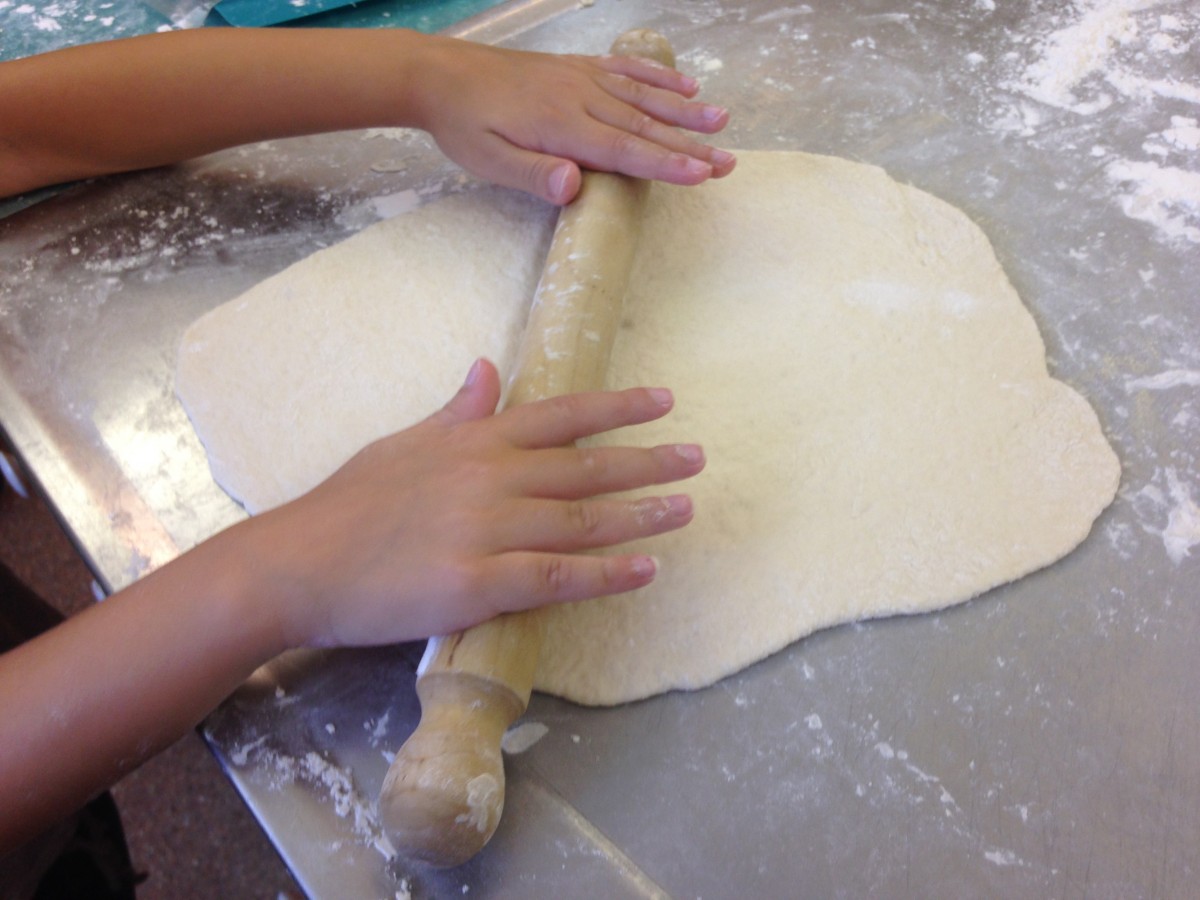
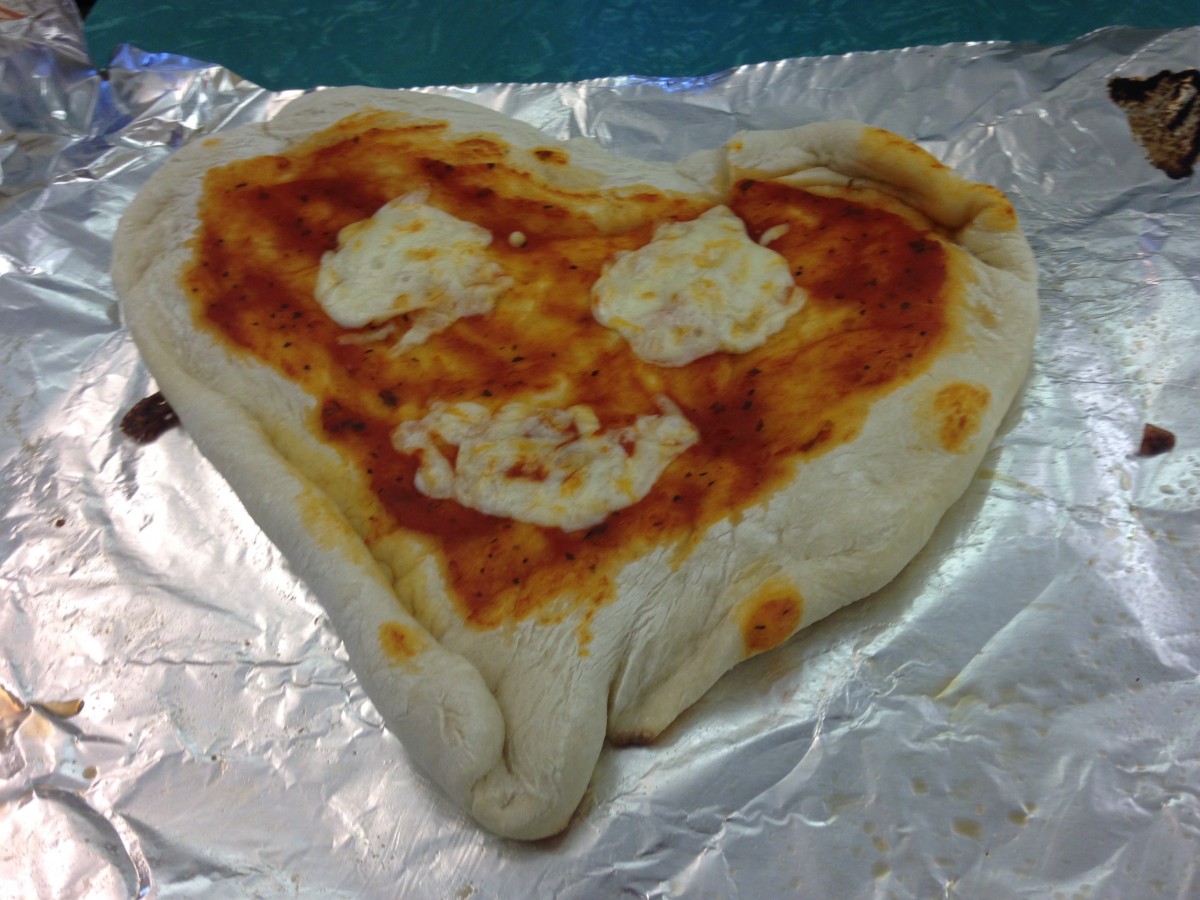
In camp yesterday, we made pizza. The kids ranged in age from 6-12 years old. They made their own dough, rolled it out, and added the toppings they liked. It was a great experience for them.
Homemade pizza is not difficult to make. We didn’t do anything fancy. We didn’t have a pizza oven or a pizza stone. I will admit that pizza from a pizza oven or even better, a wood burning oven, is hard to beat. But for home cooks, and families with kids, this is a great way to get them started in making pizza.
I gave them a quick lesson in rolling out the dough. They rolled it out themselves. I kept a hands-off approach and only assisted when a few used too little flour and their dough was sticky. It was very warm and humid in the kitchen.
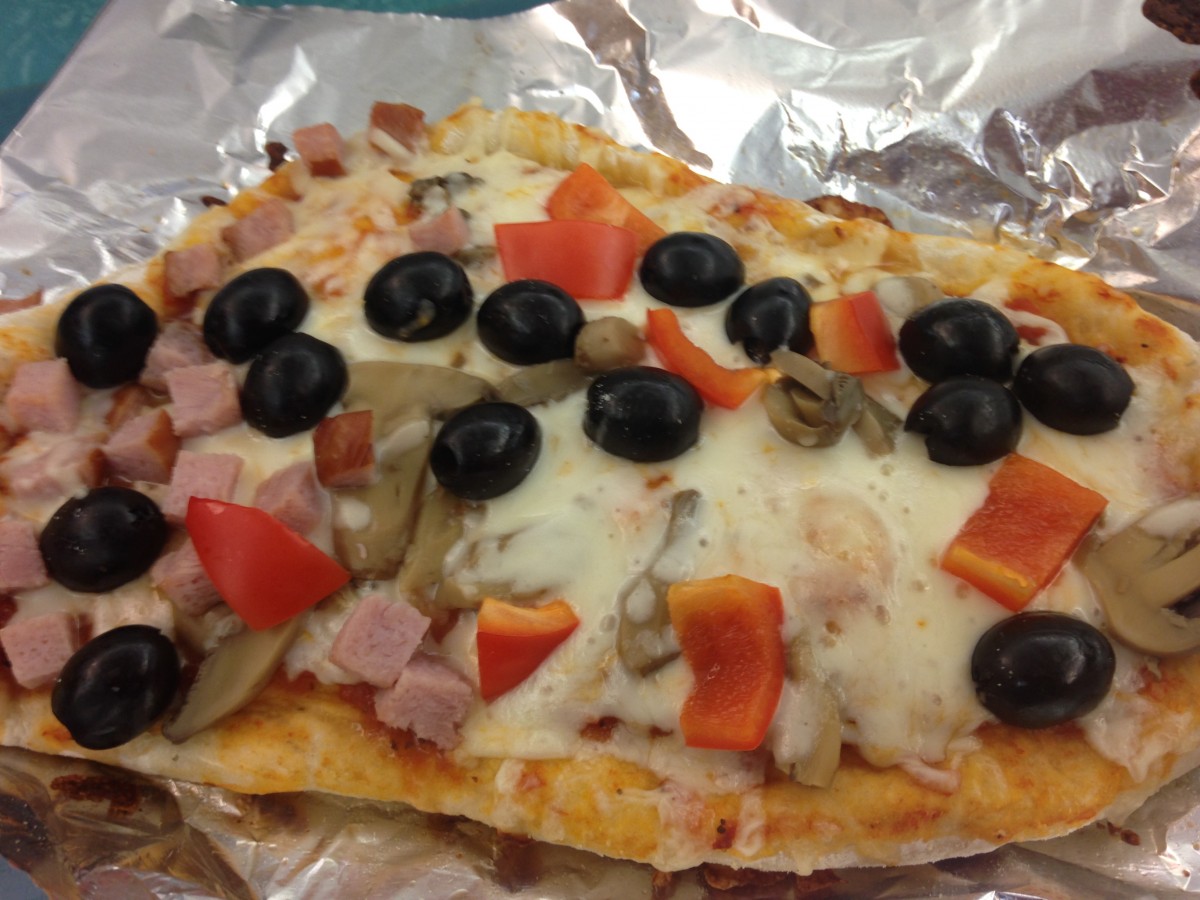
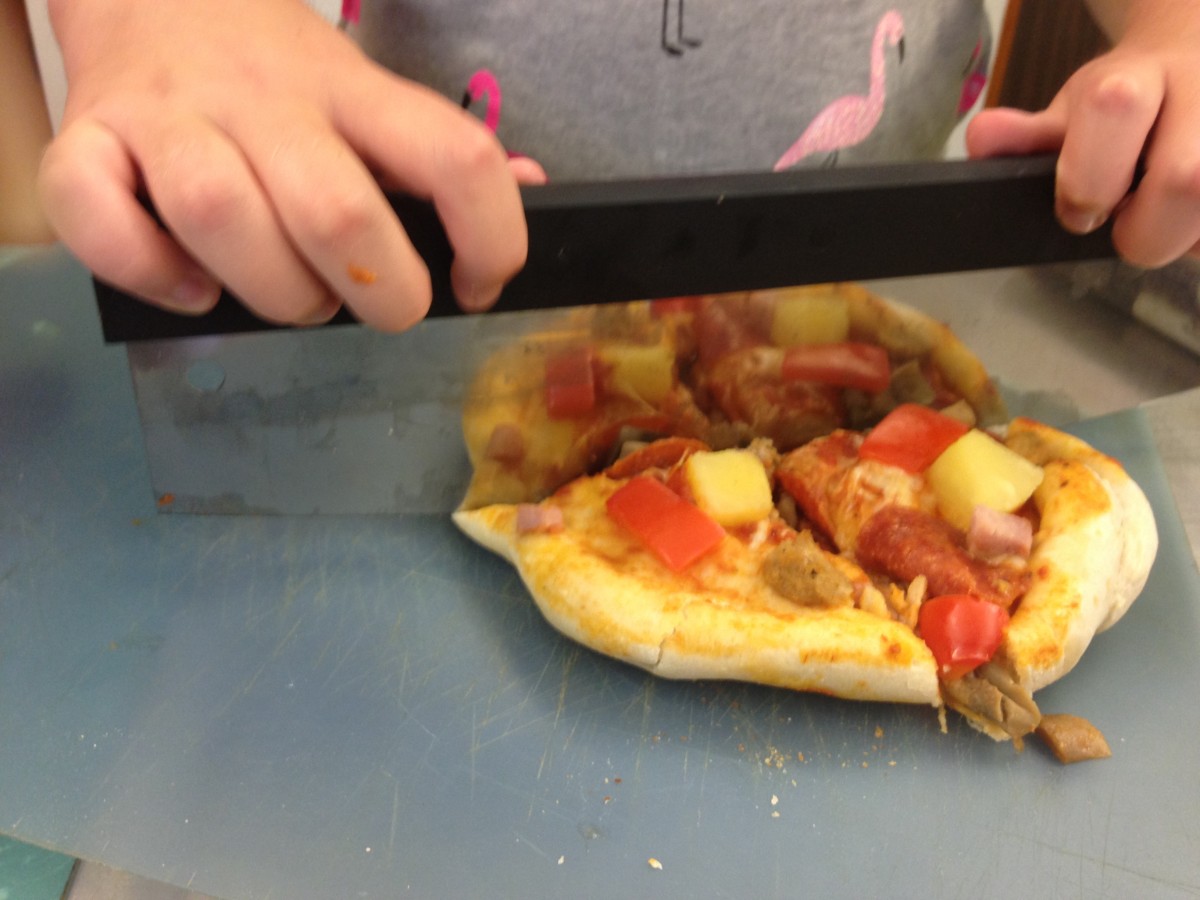
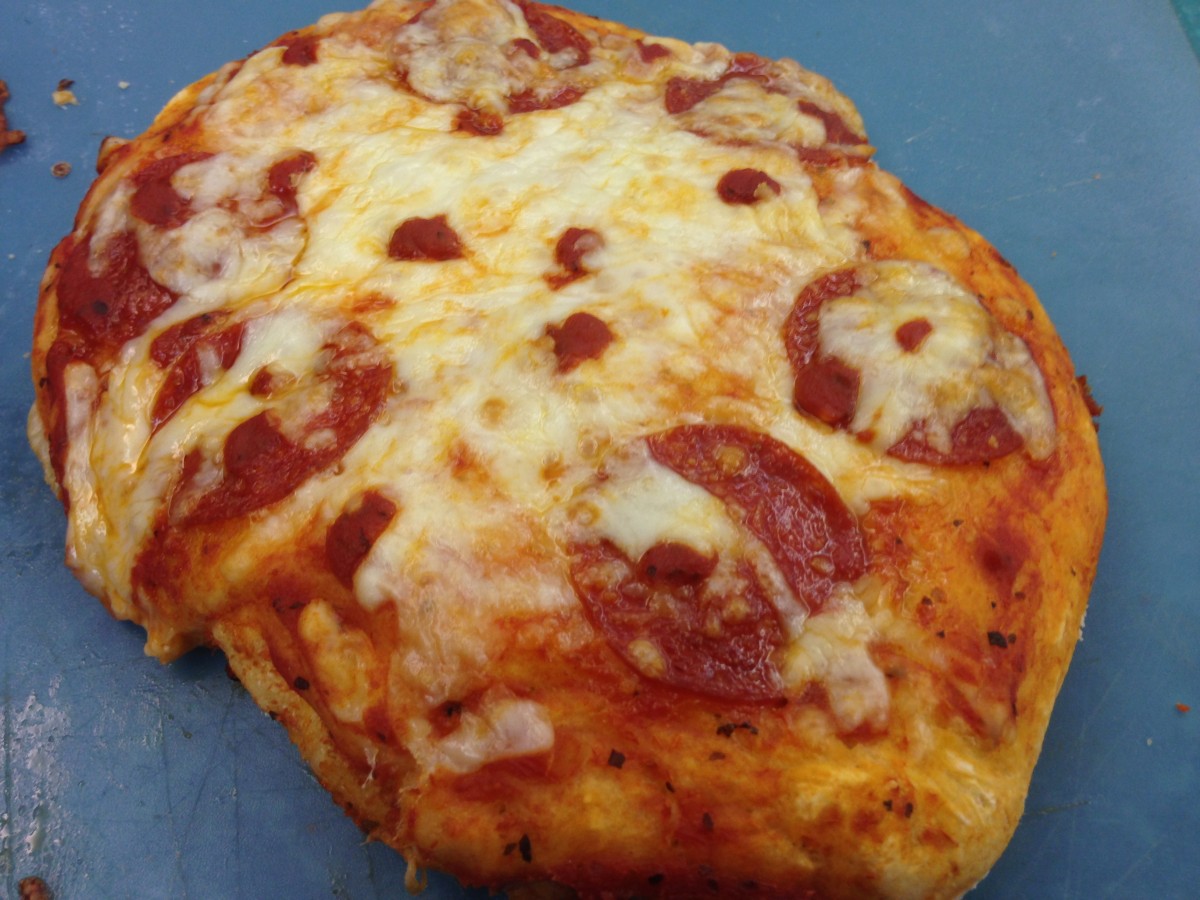
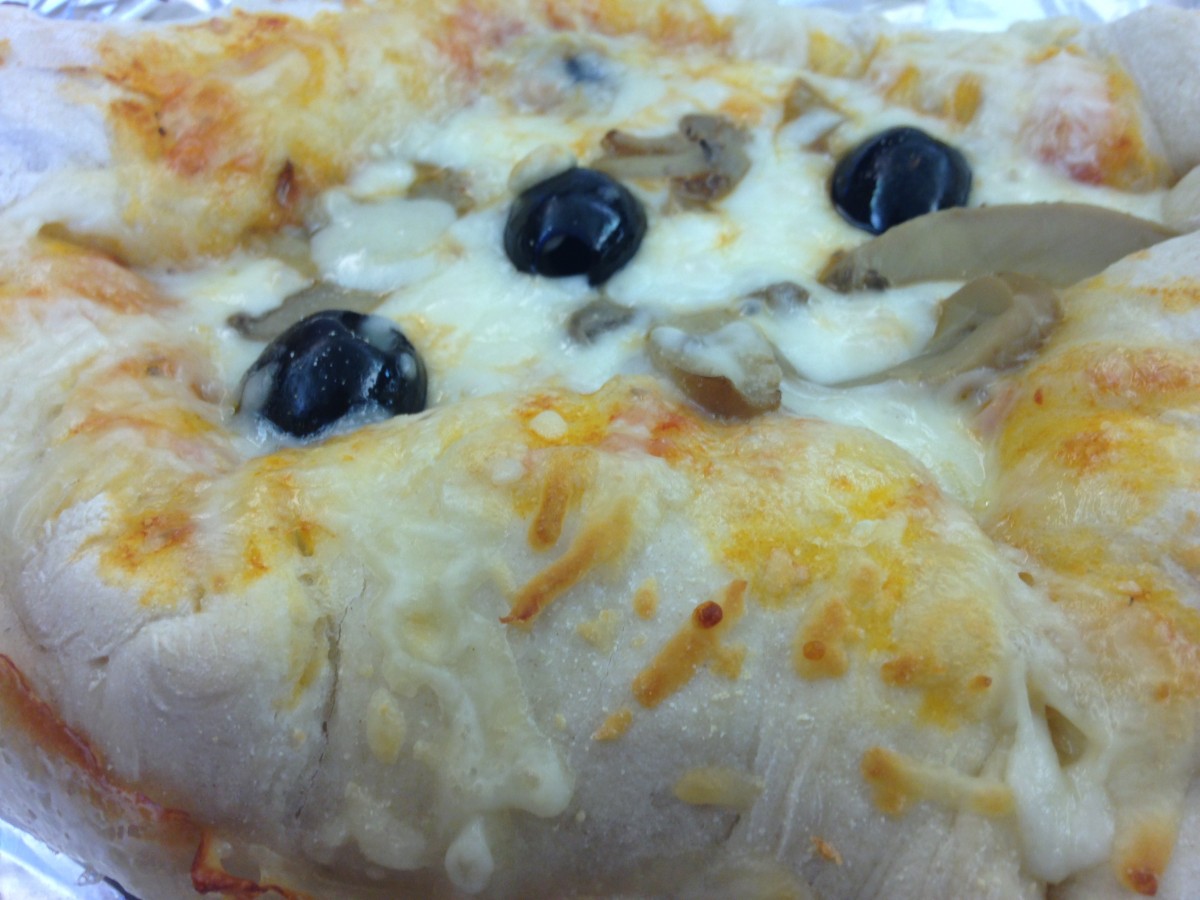
While they all got about the same amount of dough, pizzas ranged in size from a dinner plate, to the size of a baking sheet. Some only wanted sauce and cheese, others added a lot of toppings. Some were heart shaped, most were fairly round.
Were they perfect? Or the best pizza they ever had? I doubt it. But they made them on their own. Most wouldn’t even taste them – because they wanted to share their pizzas with their families. To me, that was the best part of the day. As parents and family came to pick them up – the kids all showed off their “pies”.
So here is the recipe we used. If you never made pizza at home- I encourage you to give it a try. Even better, find a kid to make the pizza with you.
Homemade Pizza
1 packet active dry yeast
1 t. sugar
1 2/3 c. warm water
4-4½ c. flour
2 t. salt
3 c. pizza sauce
16 oz. shredded mozzarella cheese
Cornmeal, optional
Assorted toppings. We had pepperoni, sausage, ham, mushrooms, sweet peppers, olives and pineapple
Combine yeast, sugar, salt and 3 cups of flour in mixing bowl. Add warm water and stir until smooth. Slowly start adding enough of the remaining flour to form a soft dough. The dough should start to come away from the sides of the bowl. Place dough on floured surface and knead until stretchy and smooth, about 10 minutes. Add more flour, if needed. Place in oiled bowl or plastic bag and cover. Let rise until doubled in bulk, about 45 minutes.
Punch dough down. Divide dough in half and roll each half into a 12-inch circle. Grease baking sheet and dust with a little cornmeal, if desired. Place half of the remaining ingredients on the dough and repeat with remaining half of dough. Add more toppings, if you like and bake in a preheated 450-degree oven for 13-15 minutes. Cool a few minutes before cutting. Makes 2 pizzas.
Mini Pizzas: You can also divide the dough into 8 equal pieces and roll them out into 6-inch rounds. Then let each person make their own pizza. Bake a few minutes less than the big pizzas.


Marshmallows

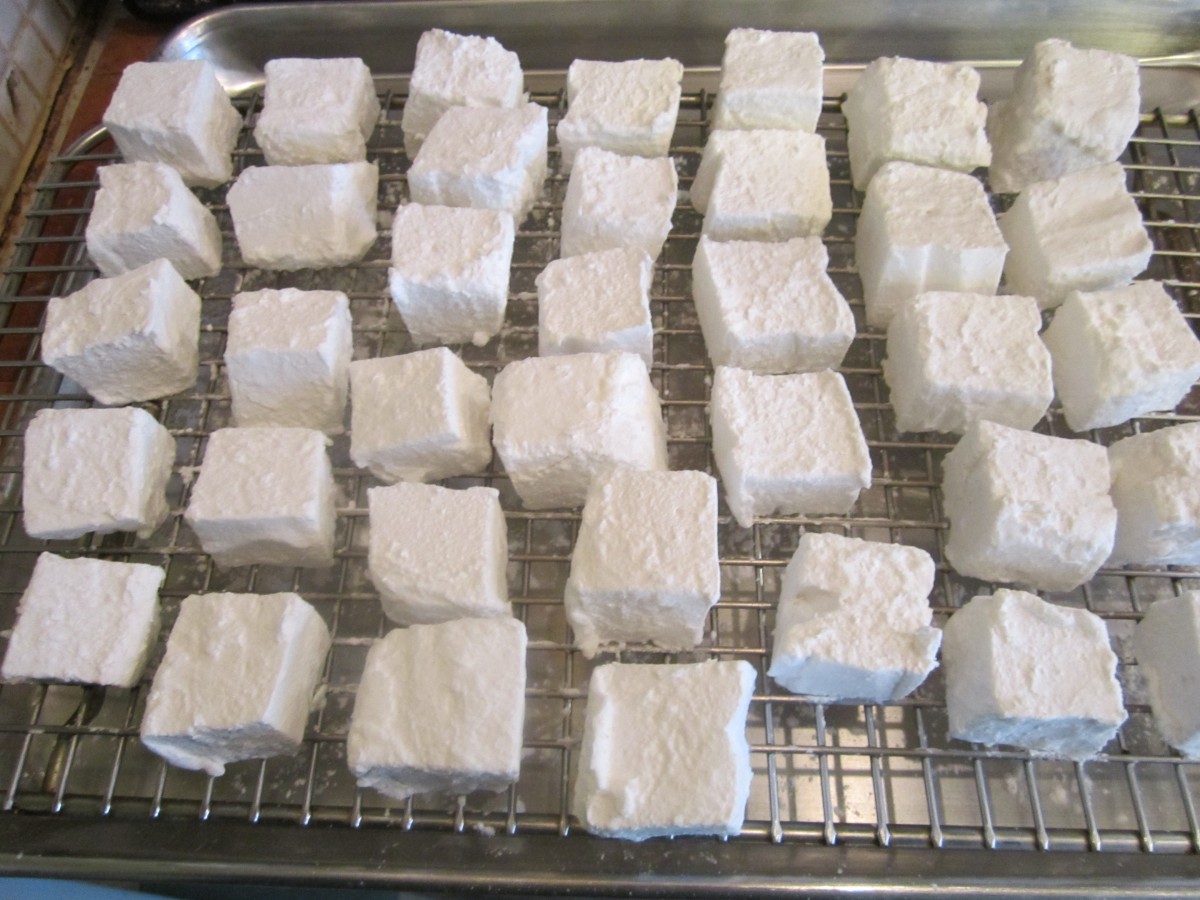
Freshly rolled marshmallows
Homemade marshmallows were a big hit in cooking camp. The kids were fascinated that this little bowl of ingredients would whip up so light and creamy- and sticky. I think that was part of the fun.
They all took turns holding the mixer. It does take 15 minutes of mixing to get the result you want. Use a stand mixer, if you can.
We made classic vanilla marshmallows today, but you can add different flavors and even colors, if you like. How fun to enjoy a S’mores made with homemade marshmallows.
As promised, here is the recipe for making marshmallows. I’ve used this recipe for ages. I like that it is super easy, and still gives you quality marshmallows. I’ve seen more complicated versions- but why make life harder than it already is?
Marshmallows
1/2 c. cornstarch
1/2 c. powdered sugar
small amount of butter
2 envelopes unflavored gelatin, or 6 sheets of gelatin*
1/2 c. granulated sugar
1/3 c. water
2/3 c. corn syrup
1/2 t. vanilla
Combine cornstarch and powdered sugar in a small bowl. Butter an 8x8x2 inch-baking pan. Sprinkle with some of the cornstarch mixture. Reserve the rest of the mixture for use later on. Combine the gelatin, granulated sugar and water in a small saucepan and cook over low heat, stirring constantly until gelatin is dissolved.** Pour gelatin mixture into a large bowl, adding the corn syrup and vanilla. Beat with an electric mixer on high speed for 15 minutes. Be precise on the timing. The mixture will be thick and fluffy, marshmallow cream, actually. Pour mixture into the prepared pan, spread evenly and refrigerate overnight. The next day, sift some of the reserved cornstarch mixture over the marshmallows. Sprinkle some more of the coating mixture on a work surface and turn the marshmallow out onto the prepared surface. Cut the marshmallows into 1-inch squares, coating as you go. The marshmallows are very sticky until completely coated. Allow to dry on a rack. Store in an airtight container for up to 3 weeks. Makes about 4 dozen candies.
You can swap out flavorings- using maybe mint or lemon in place of the vanilla. You can also add a few drops of food coloring, if you like. Oh, and when you are at the rolling the pieces around in the cornstarch and powdered sugar stage of the process- don’t wear black. You’ll thank me later for that.
* Note: 3 sheets of sheet gelatin= one packet (1 tablespoon) of powdered gelatin.
** Note: If you are using sheet gelatin place it in the pan with COLD water and stir until dissolved. Then add the sugar and just cook, over medium-low heat until just warm, stirring often. Don’t let the mixture get too hot or the gelatin will not work.

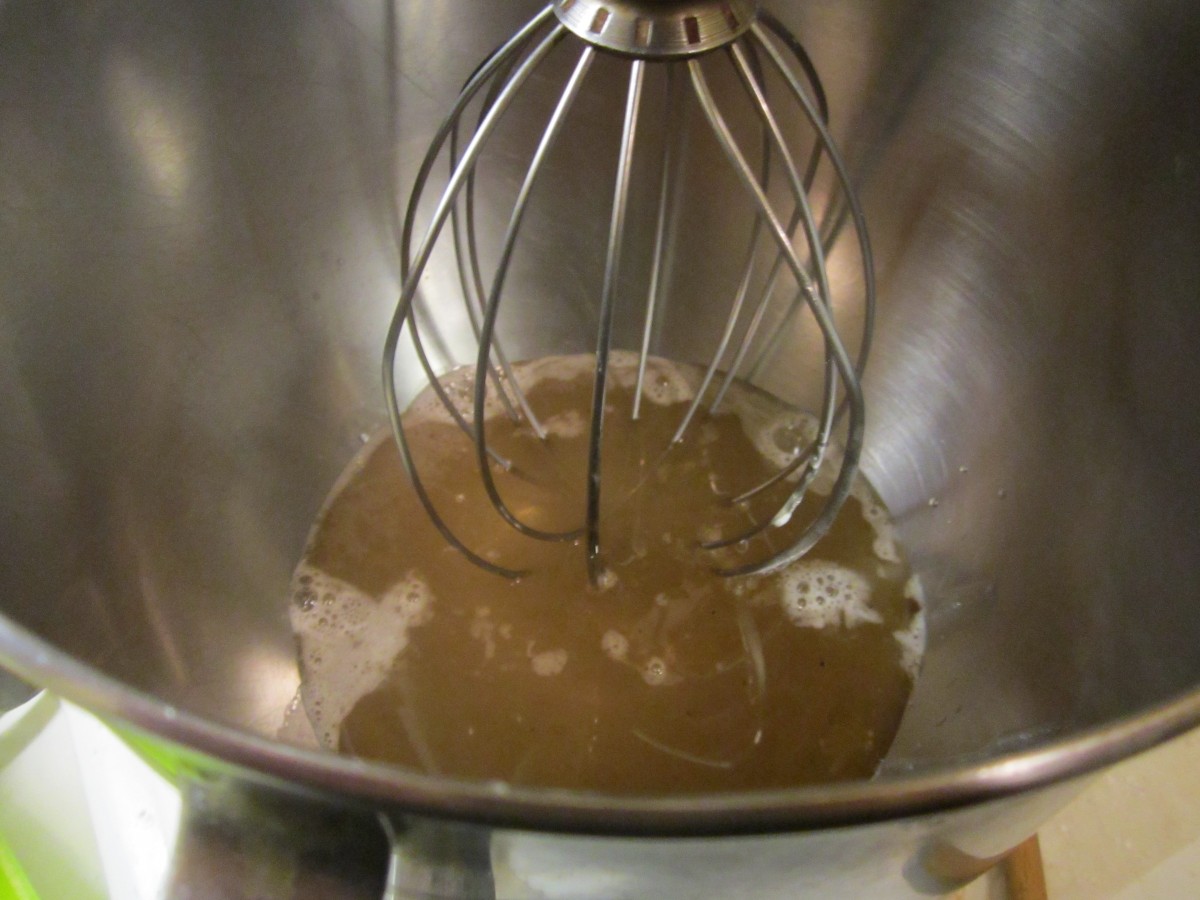
Dissolve gelatin in water

Cook with water and sugar until warm
Combine with remaining ingredients in mixer
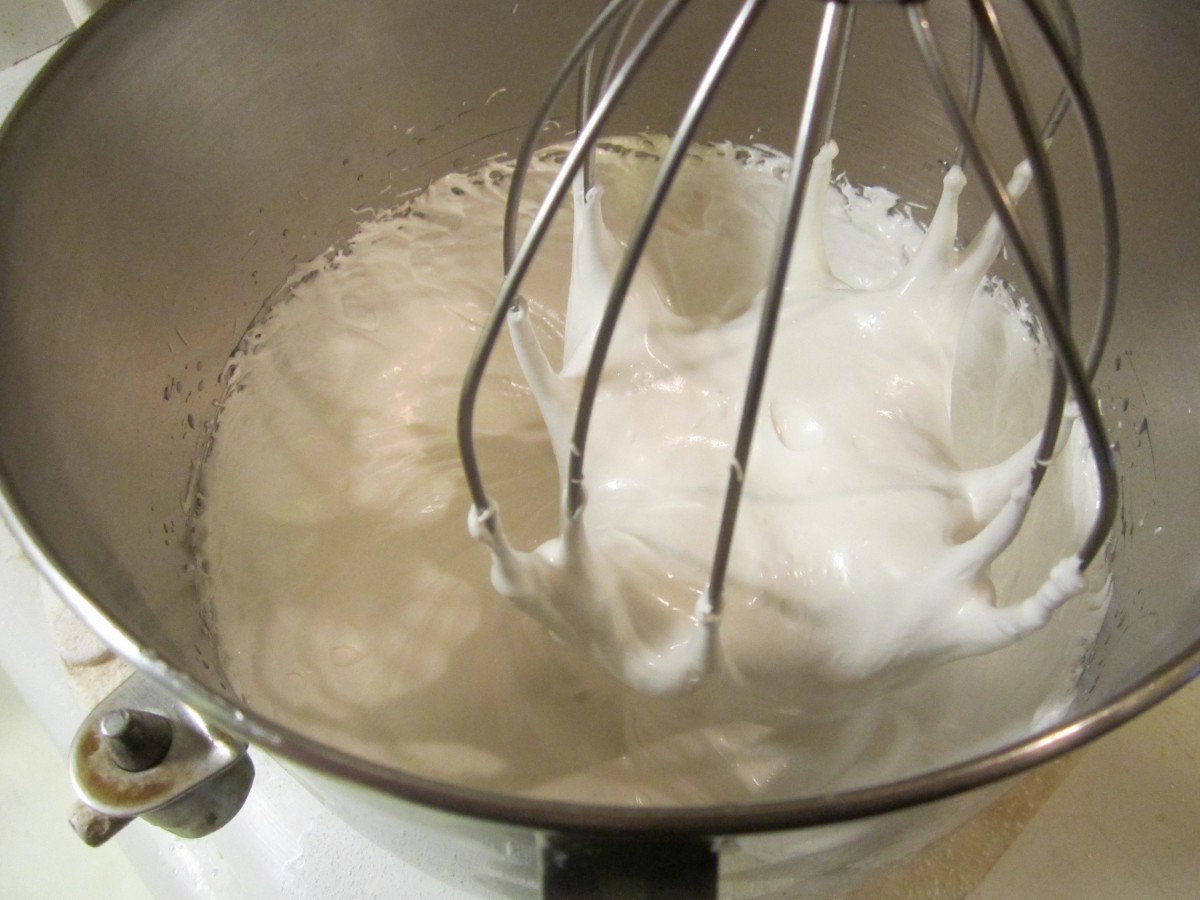
Mixture after 15 minutes of whipping

Spread in prepared pan and chill

Cut into squares

Roll in cornstarch/powdered sugar mixture
Spiced Cherries


Spiced Cherries
These cherries are so good, I am already wishing I had canned more of them. I was inspired by my cousin, Laurie, who needed spiced cherries for a recipe she wants to make.
I first thought about the spices I wanted to use. I didn’t want to overpower the cherries, but I wanted the spices to complement the flavor of the fruit. In the end I used cinnamon sticks, fennel seeds, fenugreek, cloves and some cracked black pepper.
Once I decided which spices I wanted to use, I steeped them in boiling water. Kind of like making tea. Then I strained out the spices and used the spiced water in the syrup for the cherries. I could just have added spices to the cherries when I canned them, but I didn’t want stuff in the jars I would need to strain out later. I also knew the spices would get more intense over time, if left in the jars. By making a tea and tasting it, I knew what level of spice I would have in the final product.
The spiced cherries can just be eaten, right out of the jar. They can also be drained and added to fruit salads or used to top desserts. You can also use them to bake with. They aren’t overly sweet.
Laurie is using them in some sort of chocolate cherry martini. Now that sounds good!!!
They would make nice gifts, too.
So here is my recipe for spiced cherries.
Spiced Cherries
7 (3-4 inch) cinnamon sticks
2 T. fennel seeds
2 T. fenugreek seeds
1 T. whole cloves
1 T. cracked black pepper
5 c. water
11 lbs. sweet cherries
3¼ c. sugar
Zest of 2 limes
Juice of 2 limes
Place spices in a large pot and turn heat on to medium. Toast spices in pot for about 4-5 minutes, stirring occasionally. You should be able to smell them. Watch so they don’t burn. Add the water to the spices, bring to a boil, and simmer for at least 15 minutes. Longer cooking is fine. Fill water bath canner with water and heat up water to a simmer. In the meantime, pit the cherries. You should end up with about 4½-5 quarts of pitted fruit. You can hold pitted cherries in a bowl of water with a little ascorbic acid in it, to prevent browning. Set aside. Remove the spiced water from the heat. Strain out the spices and discard them. Measure the spiced water and add enough fresh water to equal 5 cups. Return water to pot with the cherries (drained if they were in water), sugar, zest and lime juice. Bring mixture to a boil. Fill pint jars with cherries and cooking liquid, leaving ½-inch headspace. Wipe rims and screw on lids until fingertip tight. Place jars in water bath canner. Make sure the water covers the jars by 1-2 inches. Place lid on canner, and start timing when water returns to the boil. Process for 15 minutes. Remove jars from canner and place on a cooling rack or towel, in a draft free area. Once cooled, check the lids to make sure they are sealed. Remove bands and wipe down jars. Label and store. Makes about 9 pints.
Times and procedures all used NCHFP guidelines.
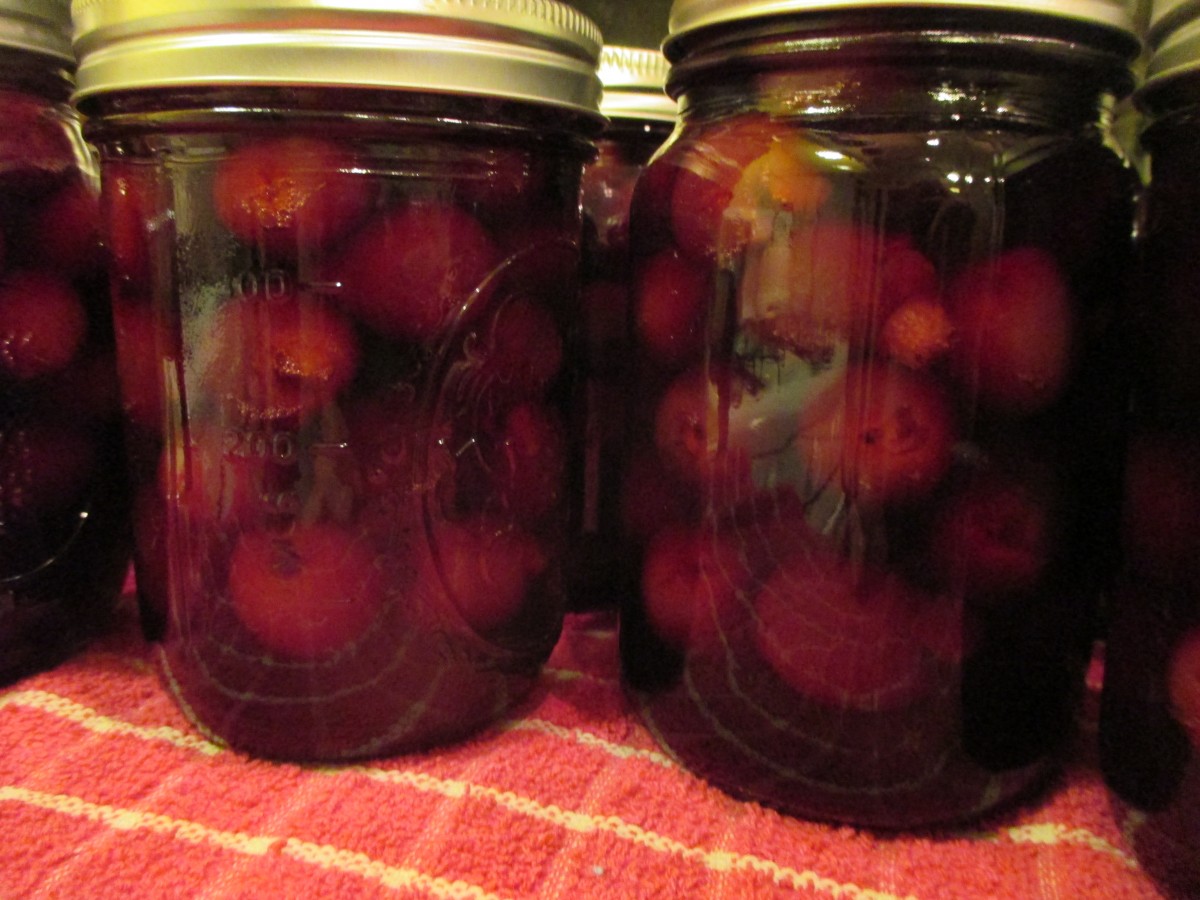
Jars cooling down
Three Simple Ways to Save Basil

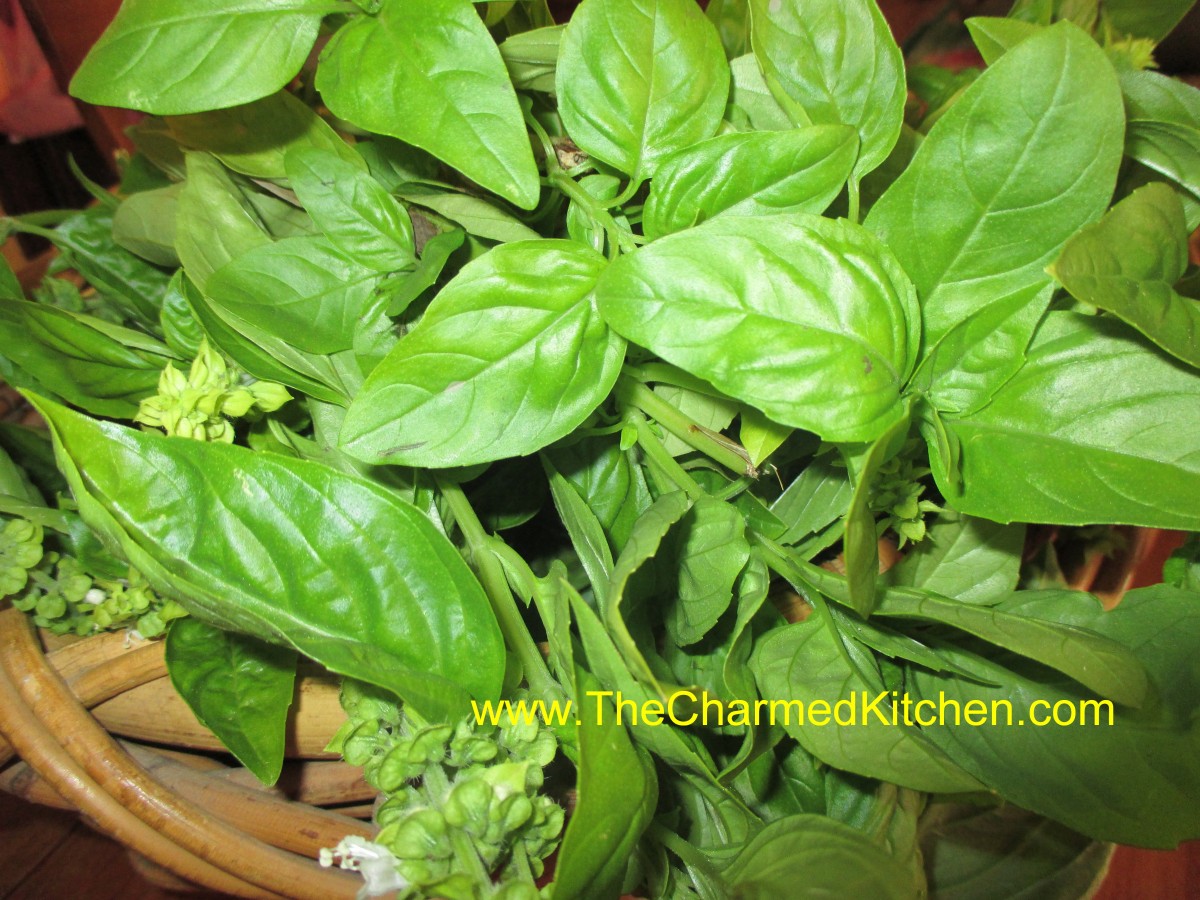
Fresh Basil
This time of year I am looking to preserve as many herbs as I can, to enjoy year round. Basil is one of my favorites. I grow, and use, a lot of it. I am doing a major harvest of basil today. Some will be frozen in olive oil, some dried, and some added to vinegar.
None of the preservation methods is difficult. Basil can be tricky to dry, though. Unlike a lot of herbs, basil does not air dry well. I have a dehydrator, but if you don’t have one, you can still dry your basil successfully. Believe it or not, you can dry basil, and other herbs, in a microwave. Directions follow.
So I am off to harvest my basil. One thing is sure- my house will smell really good today.
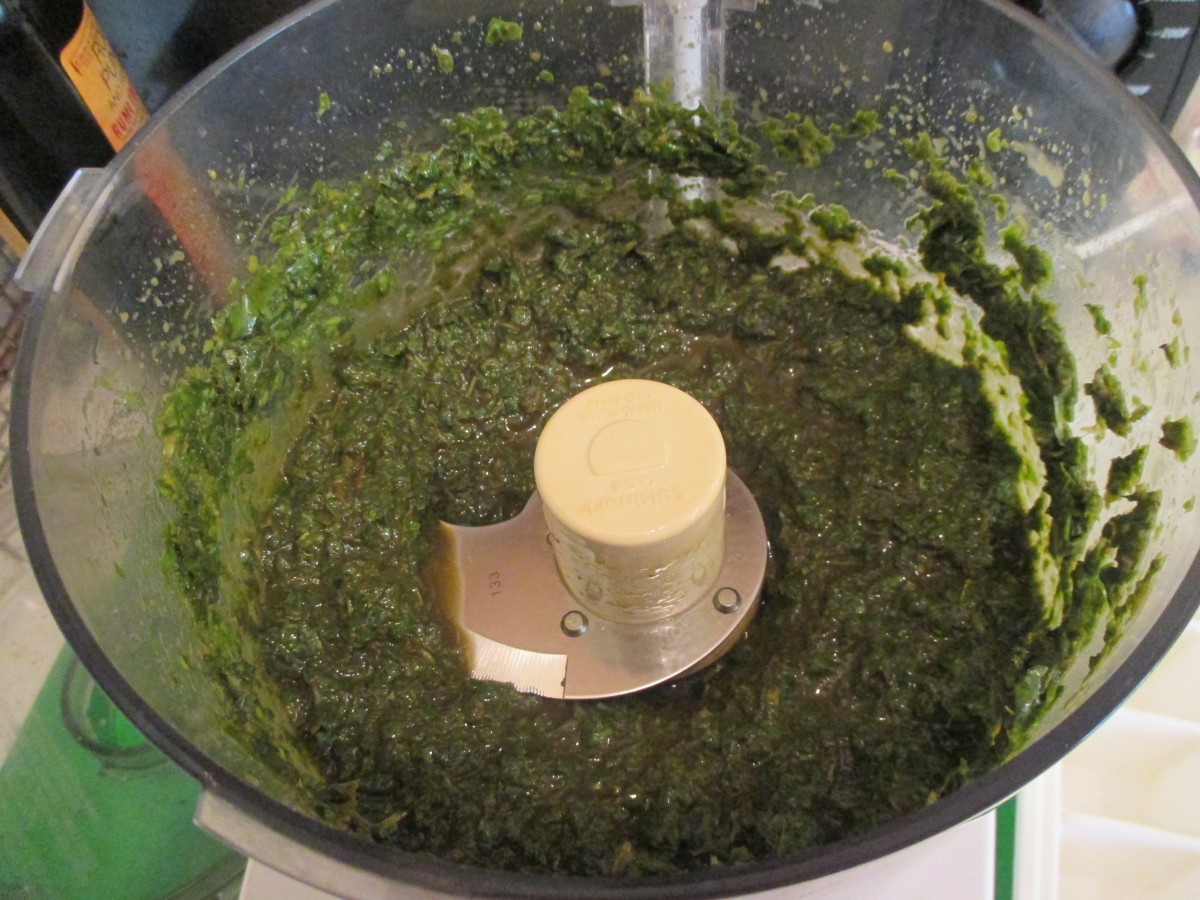
Freezing in Oil
To use basil in pesto sauce, dried just won’t do. You can easily freeze your basil in olive oil and have it ready whenever you want it. Just place clean basil leaves in a blender or food processor and add olive oil. It is important that you use olive oil because it freezes solid. While the machine is running pour in oil until basil is blended. I use very little oil for two reasons. It takes up less room in the freezer and I don’t need so much oil. I can add more oil when I use it, but this way if I am doing a big batch i don’t go through all my oil. Once the mixture is blended pour or spoon it into ice cube trays and freeze. Once frozen solid pop out the basil cubes and put in freezer bags and return to the freezer.You can also freeze chopped basil without the oil. I like it better in the oil, but I freeze other herbs by just chopping them up and freezing them.
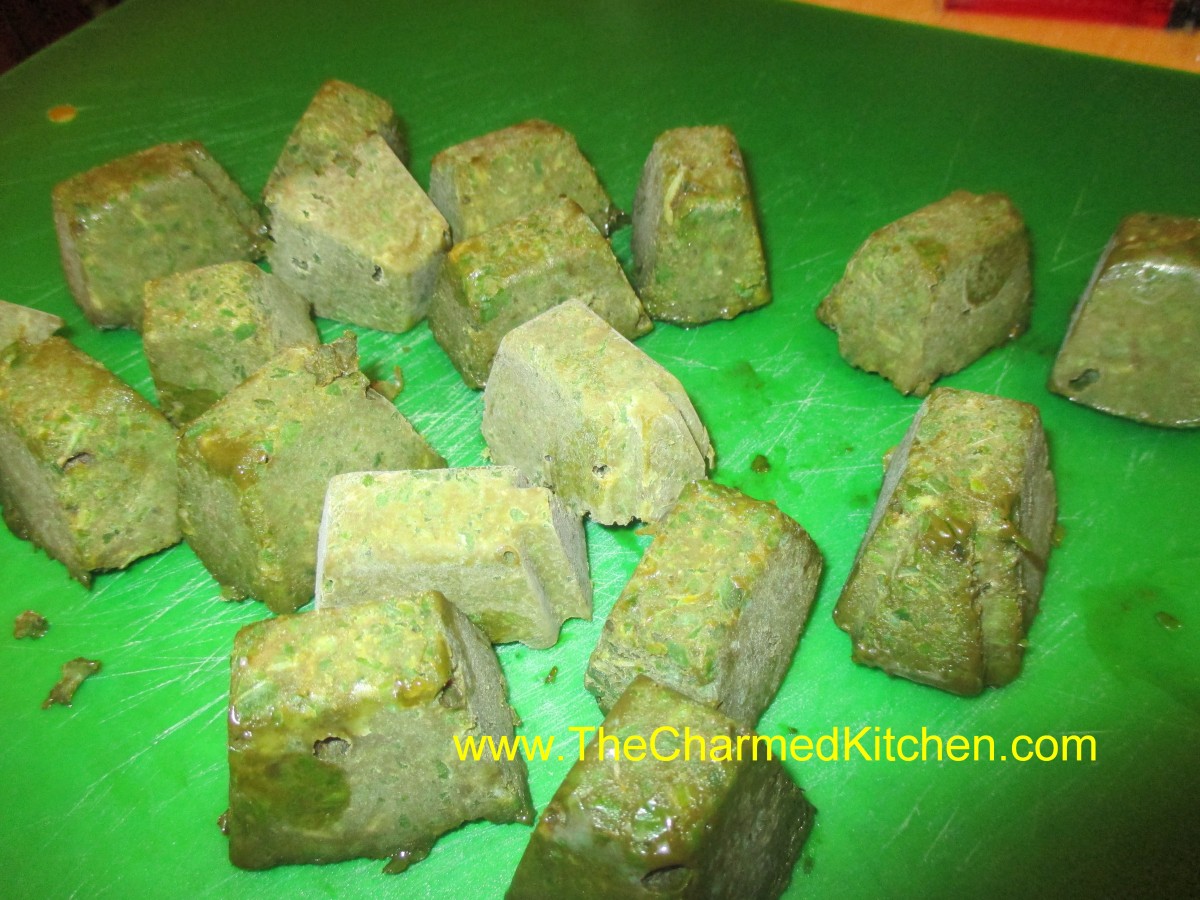
Frozen Basil Cubes
Process basil and olive oil until smooth
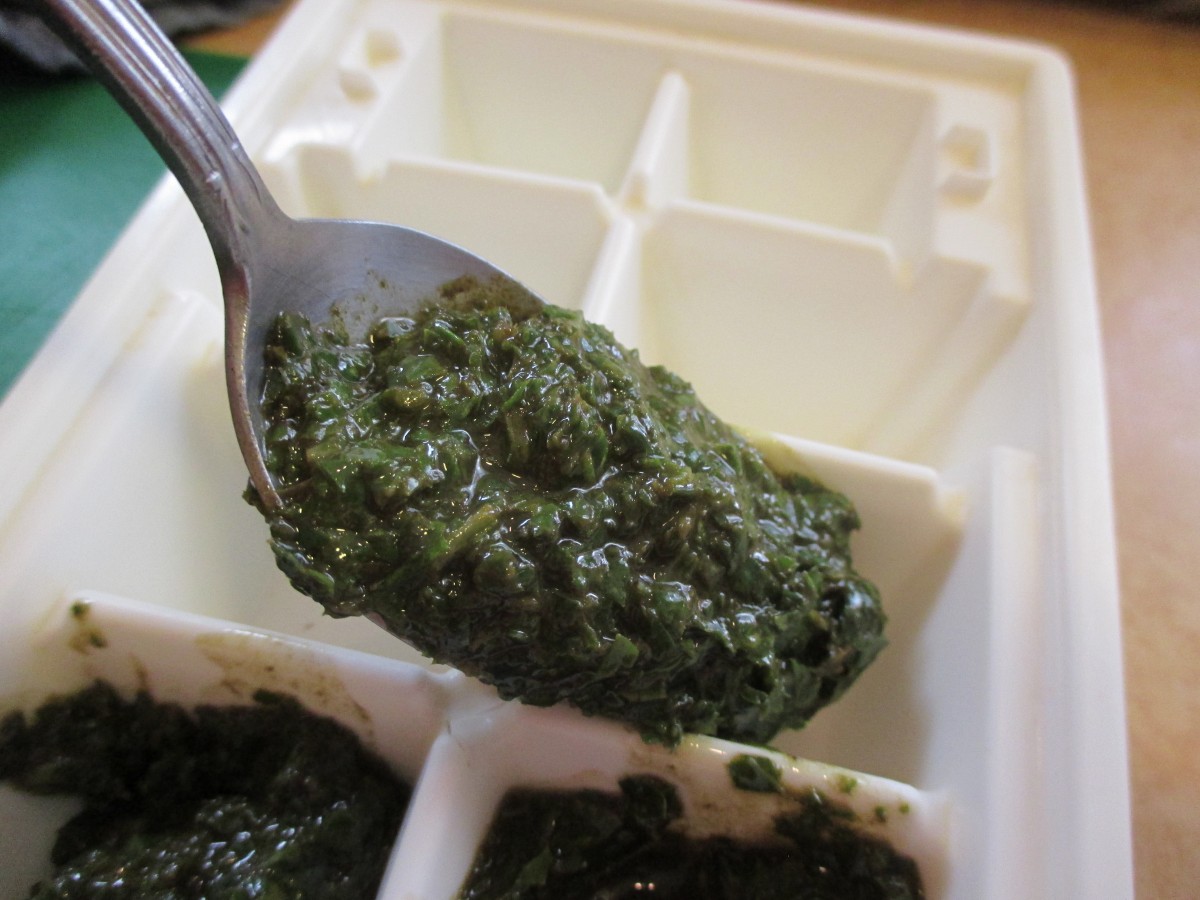
Spoon mixture into ice cube trays and freeze
Microwave Drying
If you don’t have a dehydrator you can dry herbs in your microwave. It only takes a couple of minutes per batch. Just place a handful of fresh, clean basil leaves in a linen-type kitchen towel. Fold the towel over the herbs and place in the microwave. Be sure to put a raw potato in with the herbs in the oven. If you only put the herbs in, it is like running the oven empty and can damage the microwave. Just put the potato off to the side. If you do several batches you will have a baked potato. ? If you have a turntable, just cook on high for 2 minutes. Check and see if they are dry- you might need a little more time. I need about 2 1/2 minutes in my microwave. Better to put them in for 15 more seconds at a time than to over dry them. If you don’t have a turntable microwave on high for a minute. After the first minute turn the herbs 1/4 turn and cook 15 seconds, turn again and cook another 15 seconds. Repeat four times in all. You can dry other herbs in the microwave. Small leaved herbs like thyme are done even faster. Remove the herbs from the oven and allow them to cool. check if they are dry enough and return, wrapped to cook longer if needed. Store in containers in a cool place.
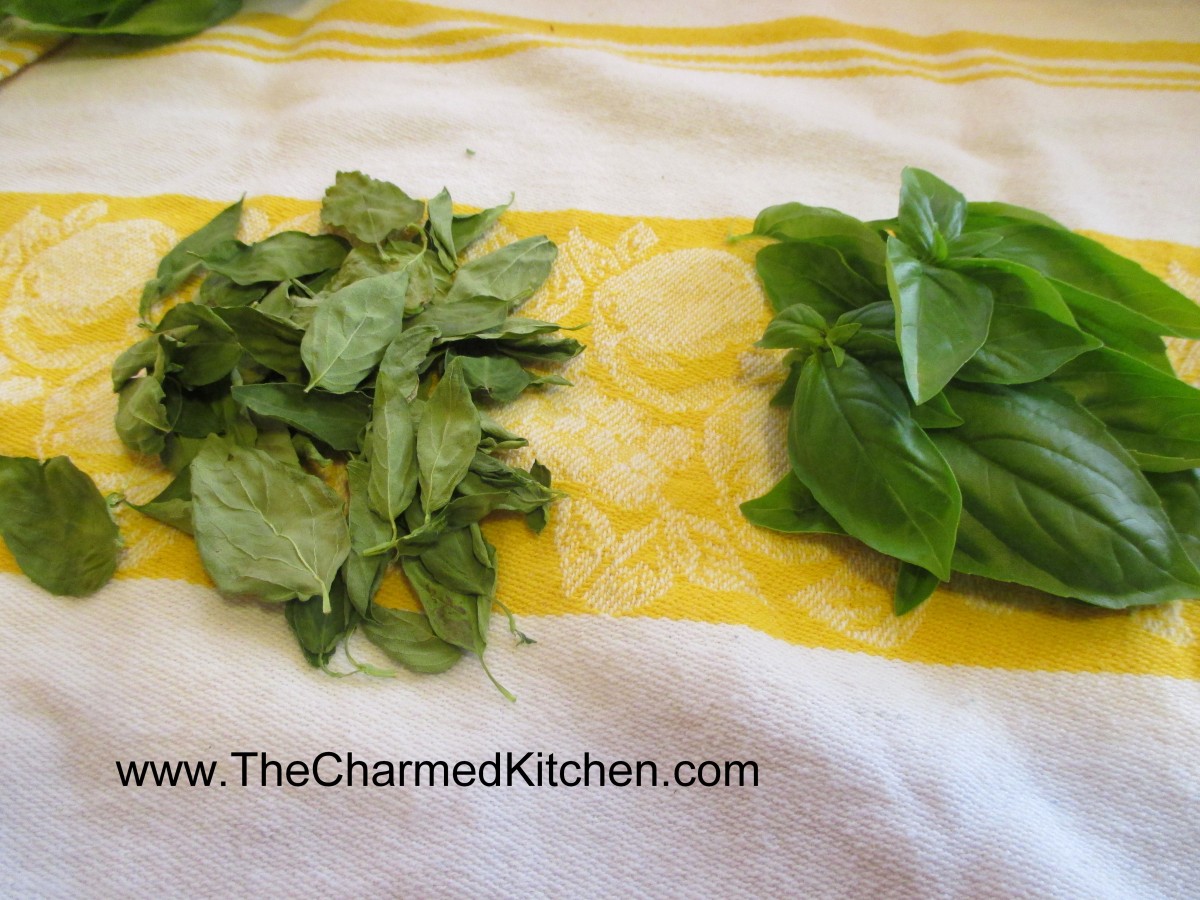
Microwave dried basil on the left and fresh basil on the right
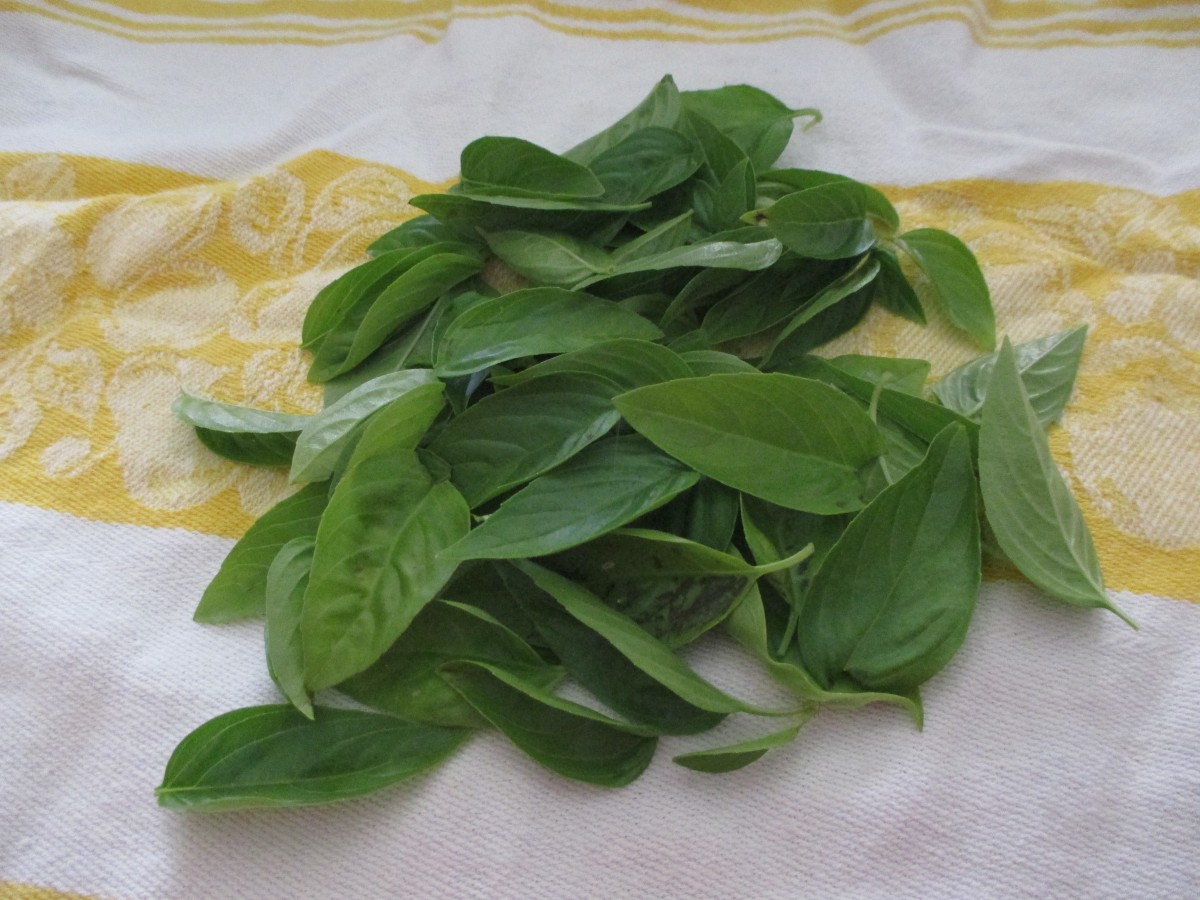
Place fresh basil on a towel and fold towel over the herbs
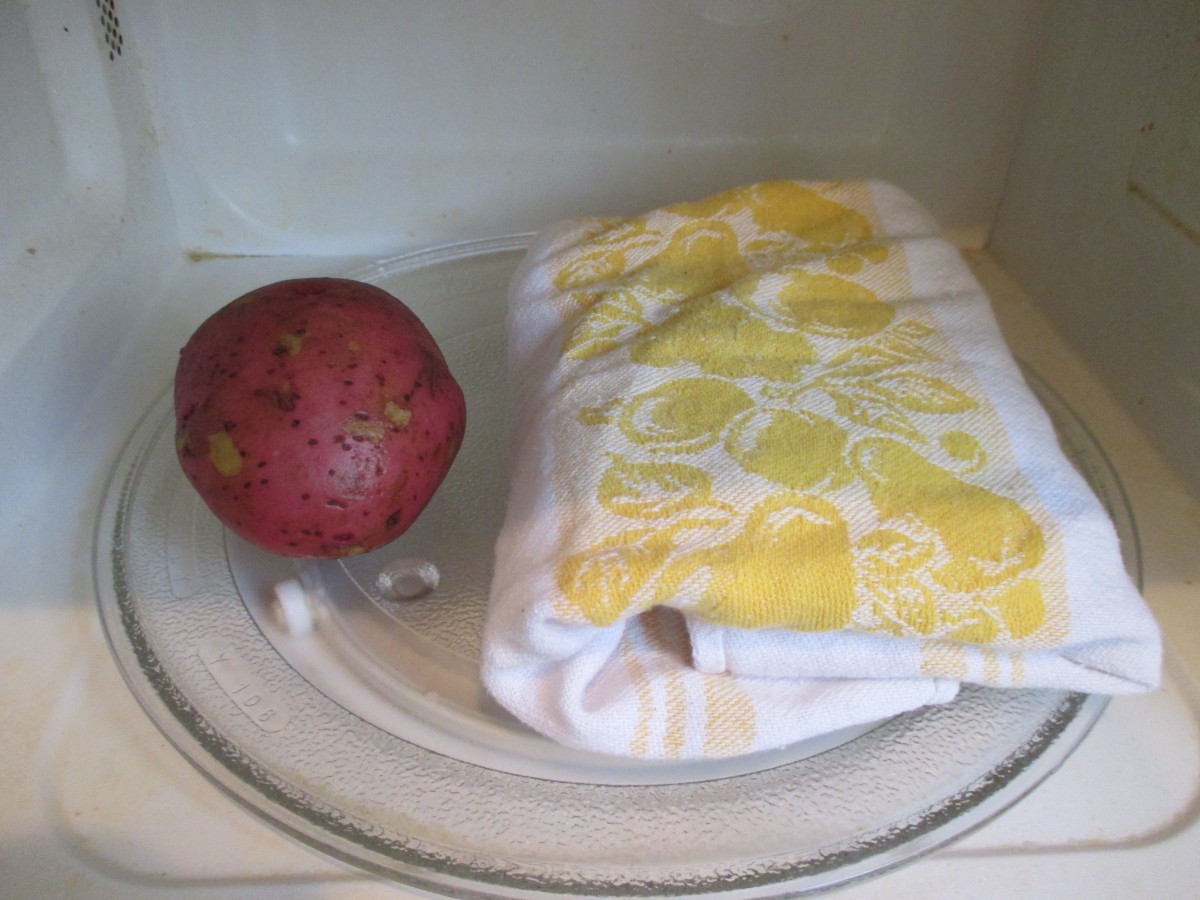
Place in microwave with a potato
All microwaves are different. Some will take longer and some even less time. Watch your herbs carefully. While I have never seen it happen I was told once that theoretically, they could catch on fire if left in too long. Urban legend perhaps, but just be careful.
Herb Vinegar
When I grow basil, I try to keep the blossoms pinched off. Better for leaf production. But by this time of year some are blooming. Rather than dumping the blossoms you can use them to flavor vinegar. Just snip off the blossoms and place them in a sterilized bottle or jar. Use several sprigs of basil flowers for every 2 cups of vinegar. Make sure the vinegar is at least 5% acidity. I like to use different vinegars for different herbs. I often use cider vinegar, red wine vinegar (for purple basil) and white wine vinegar. Leaves can be used, too. Vinegar should be heated up to 190 degrees- or just below the boiling point. Close up the jar and store in a cool place (50-70 degrees) for a couple of weeks. Before using strain out the herbs and filter- I use coffee filters or you could use cheese cloth. Store in a pretty bottle, if you have one. They can be kept for up to a year when stored in the fridge.
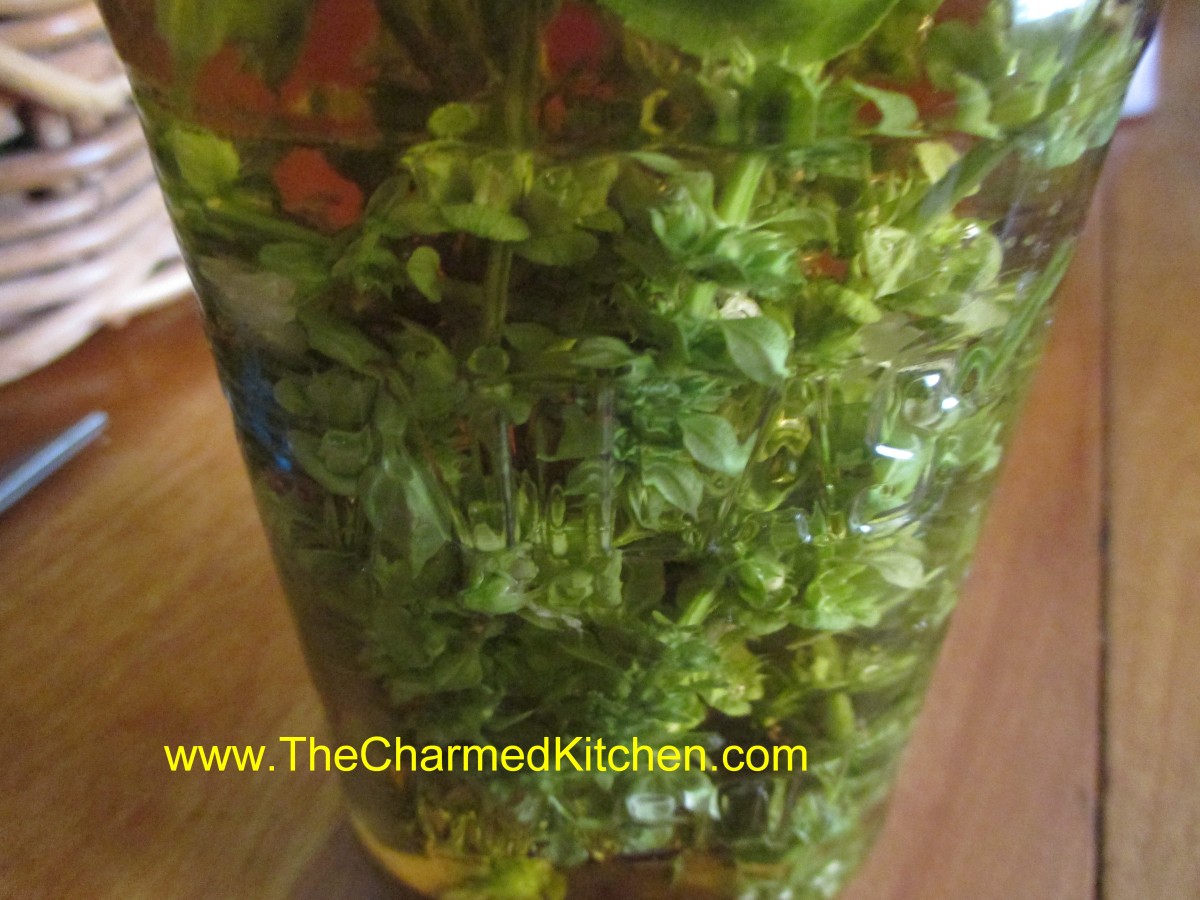
Basil blossoms in vinegar
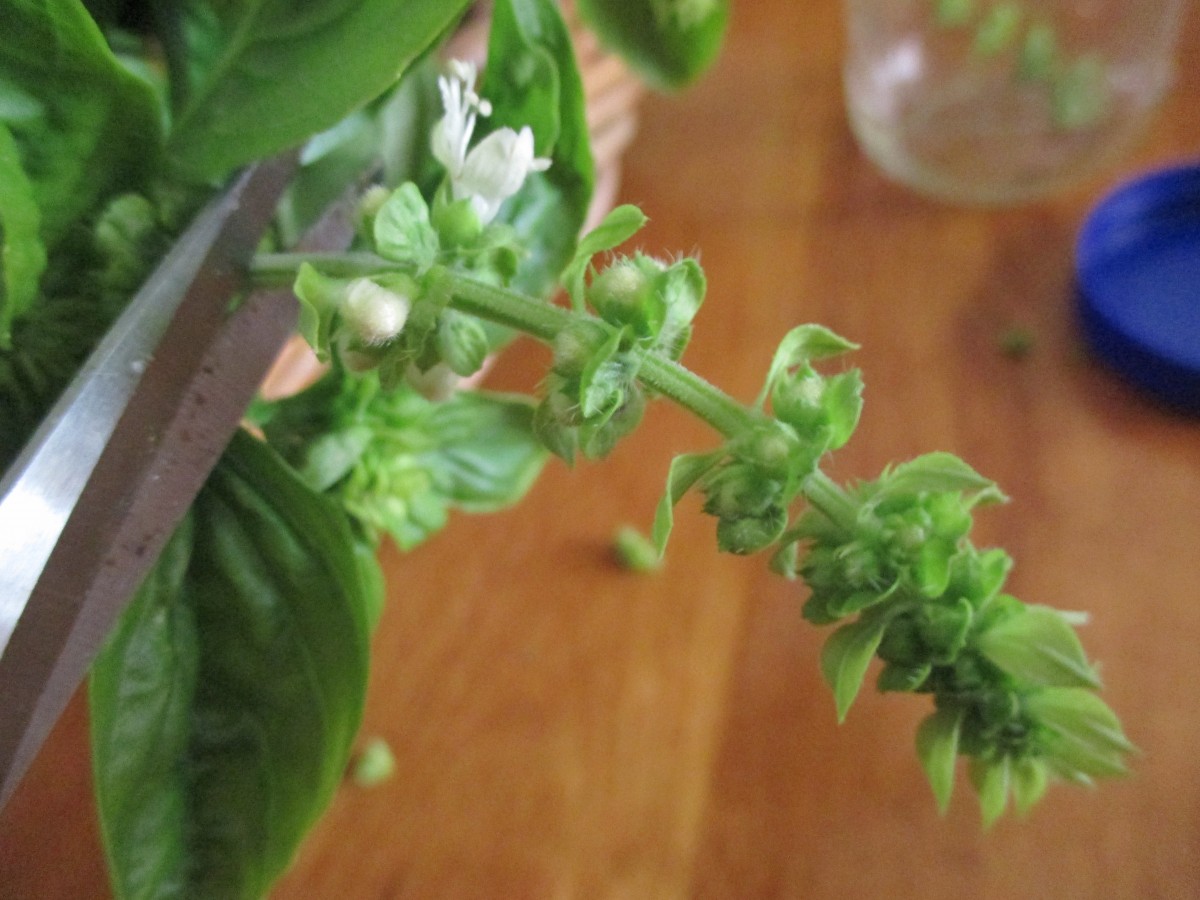
Snip off basil blossoms
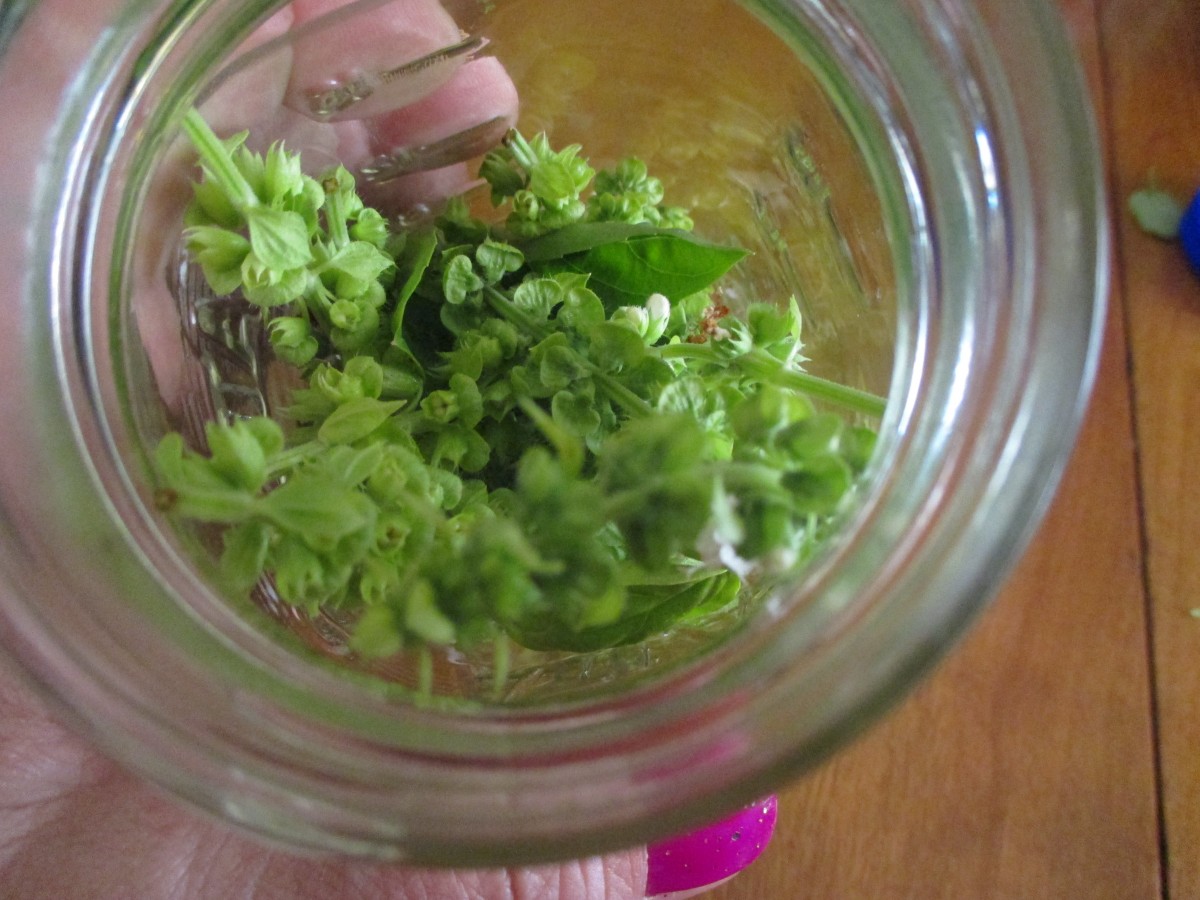
Place blossoms in a jar or bottle
Peachy Chef Salad


Peachy Chef Salad
When you think about cooking with peaches, don’t limit yourself to desserts and jam. Peaches can pair well with savory dishes, too. I often use peaches for glazes and sauces for meats.
In this dish, I paired peaches with traditional chef salad ingredients. I tossed the peaches in a homemade honey French dressing, then spooned them over the salad. The result was wonderful- and a great lunch or dinner option for hot weather.
You can top the salad with cheese, meats or both. I like to add some nuts, too. I made it for lunch today and topped the salad with sharp cheddar cheese and bacon. I really liked the combination of the sweet fruit with the smoky bacon. Use what you like- and what you have on hand. A chef salad is a great way to use up that leftover grilled chicken or that open package of cheese. Add extra veggies, too, if you like.
Peachy Chef Salad
Honey French Dressing:
1/3 c. honey
1/4 c. white wine vinegar or cider vinegar
1 t. paprika
1 t. dry mustard
1/4 t. salt
1/2 c. olive oil
3 cups chopped peaches
Salad:
6 c. torn salad greens
12 oz. cooked chicken, turkey, ham etc, cut into strips
1 c. cubed cheese
1/2 c. cashews, optional
To make the dressing, in blender, combine first five ingredients and start running machine on high. Add oil in a slow stream until mixture becomes thickened. Pour into bowl and stir in peaches and chill, several hours if you can. When ready to serve arrange greens on one large platter or on smaller salad plates. Arrange meat and cheese on platter or plates. Spoon over the peach/dressing mixture, add cashews, then serve. Serves 4-6.

Peachy Chef Salad with Cheese and Bacon
Homemade Peach Ice Cream


Homemade Peach Ice Cream
I love peaches. For me, peaches always mean summer. My peaches aren’t ripe yet, but I found some at a produce market recently. They were nearly ripe, so I put them in a brown paper bag to help them finish ripening. A few days later, I have a bunch of super tasty, juicy peaches.
Since it is going to be unseasonably warm for the next week, I decided to use some to make ice cream. I added some vanilla and orange zest for some extra flavor- but mostly just plenty of peaches.
Homemade Peach Ice Cream
3-4 ripe peaches
2 c. half and half
1 c. sugar, or to taste
1 T. vanilla
1 T. orange zest
Peel and dice peaches. Cook in a small amount of water and a little sugar until tender. If you don’t precook the peaches they will be icy and hard in the ice cream. Cool and drain. In bowl combine half and half and sugar and stir until sugar is dissolved. Add remaining ingredients and stir well. Place in ice cream machine and process according to manufacturer’s directions. If you don’t have an ice cream maker place mixture in a shallow pan and freeze solid. Remove from freezer and allow to soften a little at room temperature then break up into chunks and place in a mixing bowl. Beat with a mixer until smooth and return to freezer. Makes 1 quart.
Blueberry-Vanilla Ice Cream

Blueberry Vanilla Ice Cream
With a warm day ahead, I decided to make some blueberry ice cream. Whipped up a batch this morning. I look forward to having it for dessert later on. Heck, I just might have blueberry ice cream for dinner. While it is easier to make with an ice cream machine – you don’t have to have one for this recipe.
I had hoped to use my own berries in this ice cream. I planted some blueberry bushes a few years ago. Trying to actually harvest my blueberries has been a challenge.
The bushes had a lot of flowers on them this year. I’ve gotten enough to have a handful for breakfast a few times. The birds have enjoyed them, too. And did I mention the chipmunks? Chip and Dale really like blueberries. I’ve added netting to some and used a deterrent spray. Still, when I check them out in the morning and the chipmunks are still hanging around.
I can live with the critters eating some of my berries – but they are NOT getting any of my ice cream.
So here is the recipe. Enjoy!!
Blueberry-Vanilla Ice Cream
3 c. blueberries
1 c. sugar
1/4 c. water
2 T. fresh lemon juice
1 T. vanilla
1 c. heavy whipping cream
1 c. half and half
Combine berries with sugar and water in saucepan and bring to a boil. Cook, stirring often, for 5 minutes. Puree mixture and stir in lemon juice. Refrigerate until completely cool. Stir in the whipping cream and half and half and freeze in an ice cream maker according to the manufacturer’s instructions. Makes 6 cups.
Note: If you don’t have an ice cream maker, freeze in shallow trays and thaw a little before whipping with a hand mixer. Better if you re-freeze and whip again later. If you are lactose intolerant, you can use almond, rice or coconut milk in this recipe. Also feel free to add flavorings.


