Ratatouille Salad


Ratatouille Salad
I had all the ingredients for ratatouille, a lovely French vegetable stew. I had eggplant, tomatoes, summer squash, peppers, onions and fresh herbs. But I was in the mood for a salad. I decided to use the same ingredients that I would use for the ratatouille, but transform them into a salad. It came out quite nice. I could see serving it on toasted bread, or using it like a dip. It reminded me of caponata, in a way.
I decided to cook the eggplant and onion, but leave the rest of the vegetables raw. I also decided to leave the skin on the eggplant. I did not salt the eggplant beforehand. The eggplant was fresh and tender- I saw no need for peeling or salting, but you could do both, if you like.
I also always have roasted garlic on hand. I make a big batch and store in smaller containers in the freezer, until needed.The directions are after the recipe. If you don’t have roasted garlic, you could add several cloves of garlic, peeled and minced. I invited a neighbor to try it- and she ended up taking the rest home.
Ratatouille Salad
1 medium eggplant, cubed. I had about 3 cups of eggplant.
3 T. oil
½ t. salt
1 medium onion, sliced
2 T. roasted garlic*
½ c. red wine vinegar
1 med. zucchini, cut in matchstick pieces, about 3 cups
1 sweet pepper, seeded and diced
1½ c. diced fresh tomato, seeded, if desired
Dressing:
1/3 c. red wine vinegar
1/3 c. olive oil
2-3 T. honey, or to suit your taste
2 T. chopped parsley
1 t. chopped basil
2 t. thyme leaves
Hot sauce to taste
Salt and pepper to taste
In skillet, heat oil and saute eggplant until tender and just starting to brown. Season with salt. Remove from skillet and set in a mixing bowl. In same skillet, saute onion and cook until wilted and tender. Add the garlic and vinegar to the skillet and cook until most of the liquid has evaporated. While liquid is cooking down, place remaining veggies in mixing bowl with the eggplant. When most of the liquid is cooked off, place onion in mixing bowl with eggplant mixture. Combine dressing ingredients in a small bowl or jar and whisk to combine. Pour over the eggplant mixture and toss to coat. Adjust seasonings. Chill until ready to serve. Serves 6-8 as a side.
*Once you have roasted garlic on hand for cooking, you will wonder how you did without it before. I get large amounts of freshly peeled cloves. Place the peeled garlic cloves in a roasting pan and pour a generous amount of olive oil over the garlic. Cover tightly with foil and bake at 350 until garlic is tender and golden. This will take at least 30 minutes, but up to 40 minutes. It depends on how much garlic you are roasting at a time. Be careful not to burn it. Once cooled, place the garlic cloves, and oil, in small freezer containers. Store in freezer.
Beet Relish

Beet Relish
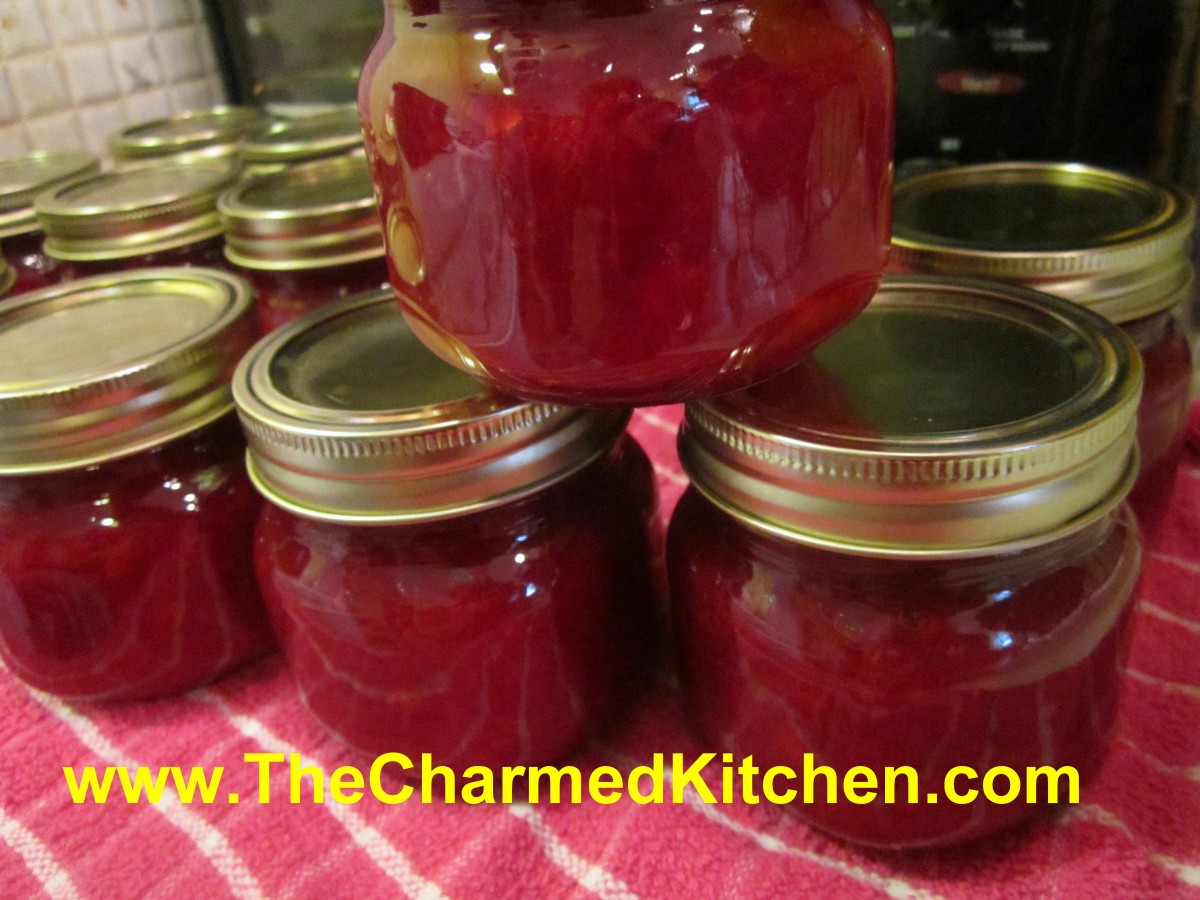
Beets are one of those foods that people either love- or hate. I love beets, and enjoy them in all sorts of dishes. One of my favorite beet recipes is this relish.
It is a great way to preserve beets to enjoy all year long. Beets are in season, and I thought I would share this recipe. I love this relish, and make several batches every year.
Beet relish is like a sweet pickle relish, only made with beets. You can add it to sandwiches or salads, and if you put some in your chicken or pasta salads, it turns them the nicest shade of pink. Yummy on a hot dog or hamburger, too.
I like to serve beet relish with cheeses and crusty bread as an appetizer. If you love beets like I do, you might want to try it.
While I have always made this relish with traditional, red beets, you can also make it with golden beets, if you prefer.
Beet Relish
1 qt. chopped cooked beets, about 12 medium
1 quart chopped cabbage, about 1 small head
1 c. chopped onion
1 c. chopped red sweet pepper
1 1/2 c. sugar
1 T. prepared horseradish
1 T. canning salt ( non-iodized)
3 c. vinegar, white or cider- I prefer cider vinegar
Combine all ingredients in a pot and bring to a boil. Simmer 10 minutes. Bring mixture to a boil. Pack hot relish into hot jars leaving 1/4 -inch head space. Seal jars and process in a boiling water bath 15 minutes. Yield about 10 half-pint jars.
Source: Ball Blue Book
Zucchini Bread Pudding

Zucchini Bread Pudding
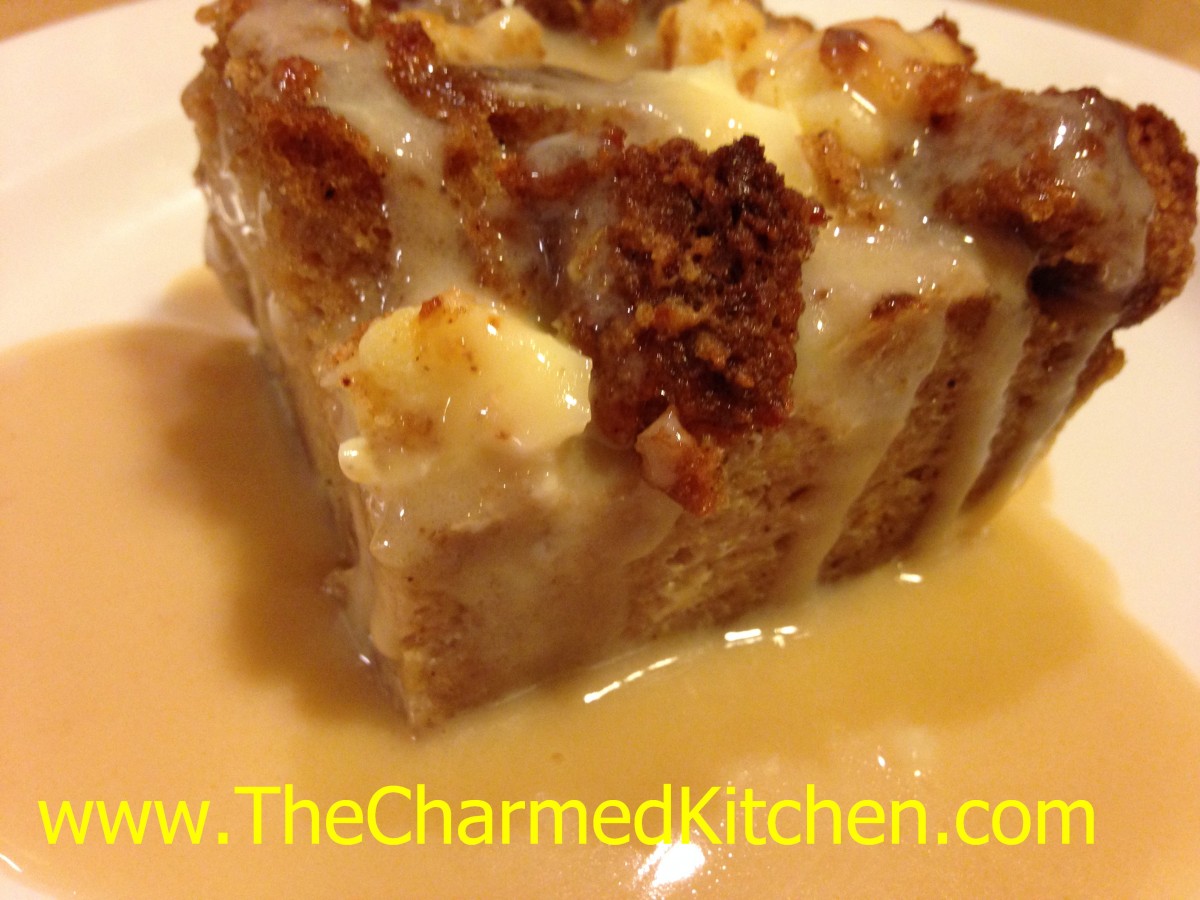
I had some extra zucchini bread and wanted to do something different with it. I ended up making this zucchini bread pudding. It came out even better than I thought it would. Rich, not too sweet. A simple, classic dessert.
I felt it needed some sort of topping or sauce. I made a vanilla caramel sauce to dress it up a little. It worked great. Ice cream or whipped cream would have worked, too.
I guess I should really call it a zucchini bread bread pudding. After all, it is bread pudding made from zucchini bread. My spell check hates it when I type the same word twice, so zucchini bread pudding it is.
I know this would also work with other quick breads, like pumpkin or banana bread.
So here is the recipe- for the bread pudding, the zucchini bread and the caramel sauce.
Zucchini Bread Bread Pudding
6-8 cups cubed zucchini bread- recipe follows
8 oz. cream cheese- cubed
2 c. half and half
3 eggs
1 T. vanilla
1 t. cinnamon
Vanilla Caramel sauce- recipe follows
Butter a 2-quart casserole. Preheat oven to 350 degrees. Place half the cubed zucchini bread in the prepared pan. Add half the cubed cream cheese, scattering over the bread. Repeat with remaining bread and cheese. In bowl, combine the remaining ingredients, beating until well mixed. Pour over the zucchini bread mixture. Place casserole in oven and bake for 30 minutes, or until bread pudding is set. Allow bread pudding to cool a little before serving. Serve with the vanilla caramel sauce or top with ice cream or whipped cream. Serves 8.
While often served warm, this bread pudding is tasty served chilled, too. Heck, I just had some for breakfast.
Zucchini Bread
3 c. flour
3 eggs
2 c. sugar
2 c. shredded zucchini
1 c. oil
1 c. chopped nuts or raisins
½ c. sour cream or strained yogurt
1 t. each vanilla, cinnamon, baking powder, salt and baking soda
Preheat oven to 350 degrees and grease 2 (9×5 inch) loaf pans. Set aside. Place flour in large bowl. Beat eggs and add with remaining ingredients to flour, mixing well and scraping bowl. Pour batter into prepared pans and bake 1 hour and 20 minutes, or until browned and toothpick in center emerges clean. Cool in pans on wire rack. Freezes well. Makes 2.
Vanilla Caramel Sauce
1 c. sugar
¼ c. water
4 T. butter
2 t. vanilla
¼ c. half and half
Pinch of salt
Combine sugar and water in a small saucepan. Bring to a boil and cook for about 3 minutes. Remove from the heat and add the remaining ingredients. Stir until smooth.
Homemade Granola

Easy Homemade Granola
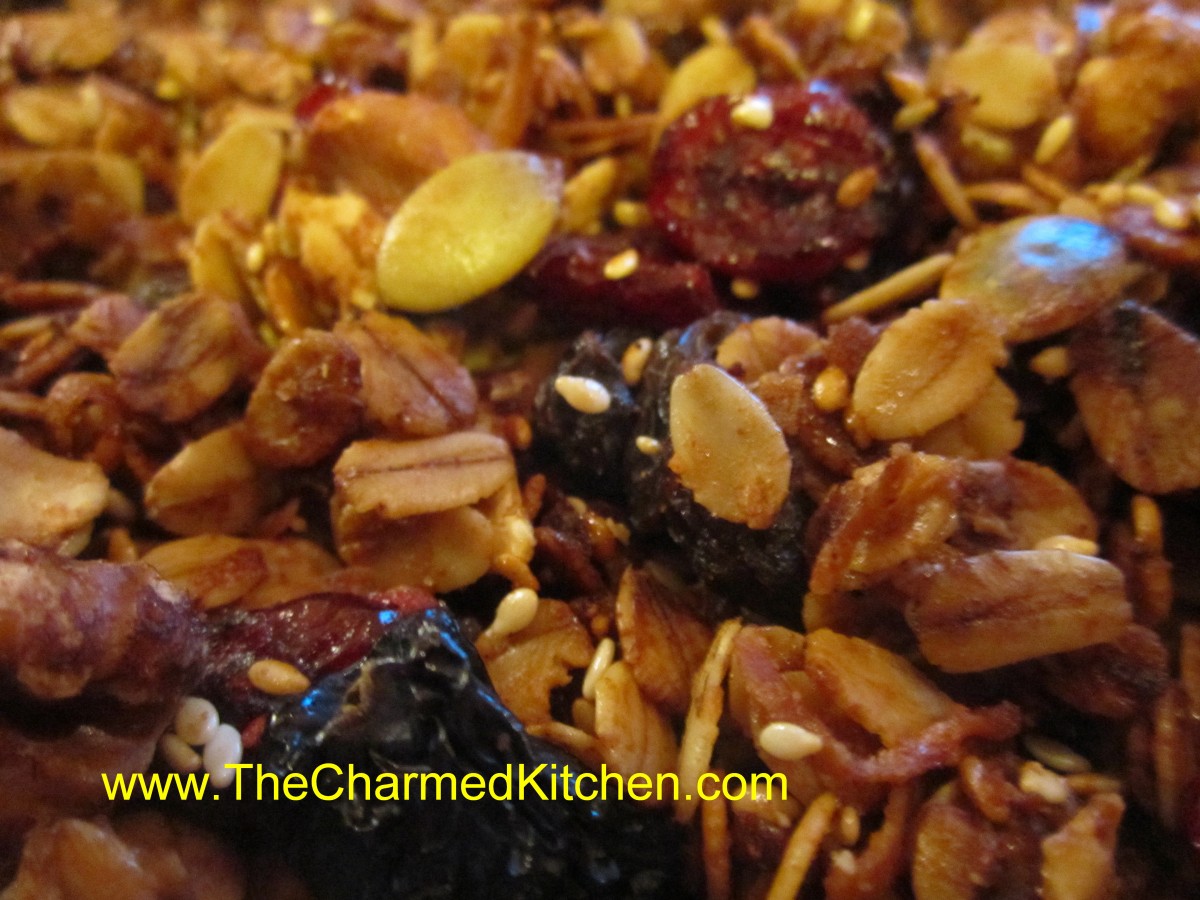
One of the advantages of making stuff from scratch, is that you get to control what goes in it. This is really true for granola. The stuff in the store is often full of way too much sugar for my taste. The base for granola is toasted oats, but after that you can get creative. I use plenty of nuts and seeds, sometimes coconut, and finish it off with an assortment of dried fruits.
I prefer my granola less sweet than most commercial brands. By making my own, I get to control what, and how much, sweeteners to add. For my granola, I use honey to sweeten it. You can more or less to suit your taste.
I know granola is most often thought of as a breakfast food, but it makes a great snack, and sprinkled on yogurt it can also be a tasty choice for lunch. Great to take along when hiking or road trips. I actually like to sprinkle granola on ice cream, too.
I was teaching a dehydrating class the other night and we made granola in class. I used dried fruits I had dehydrated earlier. For the version I made in class I used a combination of dried cherries, pineapple and strawberries and raisins. Use the fruits you like.
Easy Homemade Granola
3 c. rolled oats
1/4 -1/2 c. each of any of the following to equal 1-2 c. total
Sesame seeds, sunflower seeds, chia seeds, wheat germ, peanuts, pecans, almonds, hazel nuts, pumpkin seeds, walnuts, coconut… you get the idea. Don’t forget to chop up any big pieces.
1 t. cinnamon
1 t. orange peel
1/2 t. nutmeg
pinch of salt, optional
1/4 c. oil
1/4 c. honey- or add a little more if you like a sweeter granola
2 t. vanilla
Dried fruit to equal 1 -1 1/2 cups. Some choices could include: raisins, dried cranberries, cherries, pineapple, dates, figs, apricots, bananas, strawberries, blueberries etc. Cut up larger pieces.
In large bowl combine oats with seeds and nuts and toss well with seasonings. Heat together oil, honey and vanilla and pour over oat mixture, tossing to coat evenly. Spread on a cookie sheet and bake in a 300 degree oven for 30 minutes. Halfway through the baking time stir mixture so the edges won’t burn. Remove from oven and return to large bowl. Toss with the dried fruit and allow to cool before storing in an airtight container in a cool, dry place. Use in 1 month or store in freezer or fridge to keep longer. Makes 5-7 cups.
Dehydrating Vegetables


Dehydrated Vegetables
I have dehydrating on my mind this week. I taught a couple of dehydrating classes, and I bought a new dehydrator. Nothing like a new toy to get you excited about doing something.
I preserve a lot of food by dehydrating it. Once you get over the initial investment in a dehydrator, the cost to dry food and to store dried food is pretty minimal. I just got a very nice dehydrator for $30. Not a big investment at all.
Dried fruits are probably the most common home dried foods. Apples, grapes, pineapple, strawberries and cherries are among my favorites. But the dried vegetables are so useful and versatile, I enjoy them as much as dried fruits. I think you will, too.
Drying Vegetables
Most vegetables should be dried at the lower range if you have an adjustable thermometer on your dehydrator-around 125-degrees. The big thing to know with vegetables is that some of them need to be blanched first. Blanching is just steaming the vegetables for a few minutes and draining, if needed, before drying. Blanching kills certain enzymes, prevents browning and assures a better end product.
Vegetables that need blanching include green beans, cabbage, carrots, potatoes, greens, winter squash, corn and beets; this is not a complete list, but a good start.
Vegetables that do not require blanching include onions, celery, mushrooms, peppers, tomatoes, spinach, zucchini, cucumbers and garlic and also herbs.
Broccoli and cauliflower do not dehydrate well.
Tomatoes are probably the best vegetable to dry for the home gardener and cook. They are so easy to make and so tasty. Just cut plum tomatoes in half and scoop out the seeds. Lightly spray the trays with non-stick spray and place the tomatoes cut side up for the first 12 hours. Turn them over after that until they are dried. I like them pretty crispy, but keep them in the freezer to keep their color and flavor longer. After a year they will turn black if stored at room temperature. Larger tomatoes can also be dried. Just cut them in slices and squeeze out the seeds. Cherry tomatoes are just cut in half and squeezed to get out the seeds. With small cherry tomatoes I just make a cut large enough to get out the seeds and leave them whole.
How do I use them?
Veggie chips-zucchini and cucumber slices can be used instead of chips in dip.
Powders- Tomatoes, celery, onion, pumpkin and garlic can all be powdered and used to flavor soups, stews sauces, cheeses, dips and more. I add powdered veggies to pasta dough. Mushroom powder is one of my favorite ingredients.
Reconstituted as fresh- potatoes in casseroles are wonderful.
Dips- Peppers, onion and celery all add great flavor.
To thicken sauces- Shredded zucchini, peppers, onions celery and tomatoes all work well this way.
Soups and Stews- most any dried vegetable is most often used this way. Easy to just let them simmer together until tender and all their flavors will enrich your stock
Chowders- Corn and potatoes are great in these dishes
Dried vegetables are best stored in a cool, dry place- I often freeze them for best shelf life.
Vegetables in photo: Starting left with bright green and going clockwise: Celery, potatoes, red peppers, mushrooms, carrots, cucumbers, onions and tomatoes. In the center- mixed sweet peppers.
Peaches and Cream Crepes


Peaches and Cream Crepes
Peaches are such a natural addition to any summer dessert. I decided to use some of my fresh peaches in crepes. Crepes are a nice dessert any time of the year. I think especially nice in summer, using fresh, seasonal fruit.
The crepes were filled with peeled, sliced peaches that had been tossed with sugar ahead of time. The sugar softens the peaches a little. I also added some sweetened cream cheese and a little strawberry jam to the filling. My friends loved them.
They can be assembled ahead of time, and just kept chilled until ready to serve. Serve as is, with a dusting of powdered sugar or even a vanilla caramel drizzle- recipe follows.
Peaches and Cream Crepes
1 recipe basic crepes- recipe follows
2-3 peaches, pitted and sliced thin
¼ c. sugar
1 t. vanilla
1 t. cinnamon
8 oz. cream cheese, softened
¼ c. powdered sugar
Strawberry jam, optional
Make a batch of basic crepes and set aside until ready to use. Place sliced peaches in a bowl with sugar, vanilla and cinnamon and stir until sugar is dissolved. Best to do this at least a couple of hours before you want to use them. This softens the peaches and allows juices to come out of the peaches. You need the juices for the cream cheese. You can do this the day before, then just finish the cream cheese and assemble.
Place cream cheese in a bowl and start beating with an electric mixer. Drain juices off the peaches and add the juice to the cream cheese. Add the powdered sugar, too. Beat until cream cheese is fluffy.
To assemble the crepes: Place a crepe on work surface. Spread with some of the cream cheese. Along one side of the crepe place a small amount of strawberry jam, like a stripe. Place several slices of peach in a row, on top of the strawberry jam. Starting on the side of the crepe with the peaches gently roll up the crepe. Repeat with remaining ingredients. You will have 12. Serve as is, or you can top with powdered sugar, peach slices, warm jam, whipped or caramel sauce.
Basic Crepes
3/4 c. flour
1/8 t. salt
3 eggs, beaten
2 T. melted butter
3/4 c. milk, approximately
Butter or oil for pan
Beat together flour, salt and eggs until smooth. Stir in melted butter and then stir in milk until batter consistency is that of cream. Let stand for 30 minutes before using, or can be refrigerated, covered, overnight. Beat again, just before using.
Heat 6 or 7 inch skillet. Brush with butter or oil and pour in about 2 teaspoons of batter, tipping pan to cover bottom of pan completely with batter. Cook until edges start to brown, turn over and cook until lightly browned (about 2 minutes per side.)
Crepes can be made day ahead or even frozen between sheets of waxed paper and frozen. Makes 12.

Crepes with a vanilla caramel drizzle
Vanilla Caramel
I made a light caramel sauce for the crepes. I just put 1/4 cup of water in a small saucepan with a cup of sugar. Boiled it all together for about 3 minutes. Removed from the heat and added a teaspoon of vanilla, 4 tablespoons of butter and a 1/4 cup of half and half. Stirred until smooth, then added a pinch of salt, for extra flavor.
Peach Liqueur


Homemade Peach Liqueur
I like to think of making fruit liqueurs, as just one more type of food preservation. I make jams and jelly with seasonal fruit, so why not preserve some of summer’s bounty in alcohol?
Peach liqueur is one of my favorites. Pretty simple, really. Just combine peaches with vodka (or brandy) and allow the mixture to steep. After a week or two, strain it. After straining out the fruit, I also filter the liqueur through either coffee filters or cheesecloth to get it nice and clear.
Sweetening is optional. Unsweetened, it is called a Peach Eau de vie, which translates into water of life. Got to love the French!!! Sweetened, it is a liqueur.
Poured into pretty bottles, these liqueurs can make fun gifts, too.
Peach Liqueur
10 medium sized, ripe peaches
3 c. vodka or brandy
1 c. sugar syrup – optional – recipe follows*
Peel and pit peaches reserving only the fruit. Place in jar with the alcohol and steep at least a week, shaking several times. You can leave the fruit in for up to two weeks. Strain, squeezing out as much juice from the fruit as possible. Filter through cheesecloth, fine mesh strainer or coffee filters for a clearer product. Add sugar syrup, if desired, and mature 4-6 weeks. Makes 4 cups.
*Sweetening– Simple syrup is made from 1 cup of sugar and ½ cup of water. Bring to a boil, then cool. You will have 1 cup of syrup. Some recipes call for plain sugar and others for honey. Watch when you substitute honey for sugar, as it is sweeter and stronger flavored. Better to use orange or clover honey.
Spiced Chocolate Zucchini Cupcakes


Spiced Chocolate Zucchini Cupcakes
Ah, that time of year when there are more zucchini than people in the country. I read that once. That in August, there are more zucchini than people. I am inclined to believe that. I didn’t even grow zucchini this year and I have a bumper crop!!! Thanks to my cousin Laurie, I have an abundant supply of beautiful summer squash.
So, I have started cooking with them…..
These are wonderfully spiced, moist cupcakes. Instead of frosting them, I decided to top them with melted butter and cinnamon sugar. It’s something I’ve done with muffins, in the past. I didn’t see why I couldn’t do the same thing with cupcakes.
I am glad I did. The flavor was great and I didn’t miss the frosting at all. These were packed up for a short road trip. It has been very warm, and the frosting would have melted. Of course, you can frost them, if you prefer.
Spiced Chocolate Zucchini Cupcakes
2 cups all-purpose flour
1 t. baking soda
½ t. salt
1 t. cinnamon
½ t. nutmeg
Pinch of cloves
¼ c. unsweetened cocoa
½ cup butter, softened
½ cup olive oil
1½ c. sugar
2 eggs
½ c. buttermilk
1½ t. vanilla
2½ c. grated zucchini
1 cup chocolate chips
Topping:
½ c. butter, melted
½ c. sugar
2 t. cinnamon
Preheat oven to 325 degrees. Grease and flour 24 muffin cups or use paper liners. Mix together the dry ingredients. Set aside. In a large bowl, cream together the butter, olive oil and sugar until light and fluffy. Beat in the eggs one at a time, then stir in the buttermilk and vanilla. Beat in the flour mixture, just until incorporated. Stir in the grated zucchini and chocolate chips. Pour batter into prepared pans. Bake for 25 to 30 minutes, or until the top of the cupcakes spring back when lightly pressed. Cool in pans over a wire rack for at least 10 minutes or until cool enough to handle. Dip top of cupcakes in melted butter, then dip in the cinnamon sugar. Place on rack to finish cooling off. Makes 24.
Giant Zucchini Bread


Zucchini Bread
Let me be clear. The bread is normal size- the zucchini are giant. Even the most diligent of gardeners will have a few zucchini get away from them. Zucchini seem to go from too small to gigantic in the blink of an eye. My cousin Laurie just brought me a big bag of really big zucchini.
This time of year I get a lot of questions about overgrown zucchini. People seem to think there is nothing you can do with them. That’s not true. Oh you may want to give up the idea of thin slices of squash, lightly sauteed in oil, but don’t toss them. Even older squash can be eaten in all sorts of ways.
You can determine if the skin is too tough to eat by trying to pierce it with a fingernail. If you can easily poke the skin- it is tender enough to eat. If it isn’t, just peel before using. Cut the zucchini in half lengthwise and look at the seed cavity. If the middle looks spongy, hollow or if the seeds are developing scoop out the middle and discard. The remaining zucchini can be cubed or sliced and added to stews, soups, stir fries and all sorts of dishes.
One of my favorite things to make with the bigger zucchini, is zucchini bread. I shred up a whole zucchini and portion it out in amounts I will need for my bread. I freeze what I won’t be using that day. It is really nice in the dead of winter to be able to make zucchini bread. Here is the recipe I use. It is a favorite and makes 2 loaves, which is a bonus.
Zucchini Bread
3 c. flour
3 eggs
2 c. sugar, I use less
2 c. shredded zucchini
1 c. oil
1 c. chopped nuts or raisins, optional
½ c. sour cream or Greek yogurt
1 t. each vanilla, cinnamon, salt and baking soda
Preheat oven to 350 degrees and grease 2 (9×5 inch) loaf pans. Set aside. Place flour in large bowl. Beat eggs and add with remaining ingredients to flour, mixing well and scraping bowl. Pour batter into prepared pans and bake 1 hour , or until browned and toothpick in center emerges clean. Cool in pans on wire rack. Freezes well. Makes 2 .
Mushroom Lovers Pasta

Mushroom Lovers Pasta
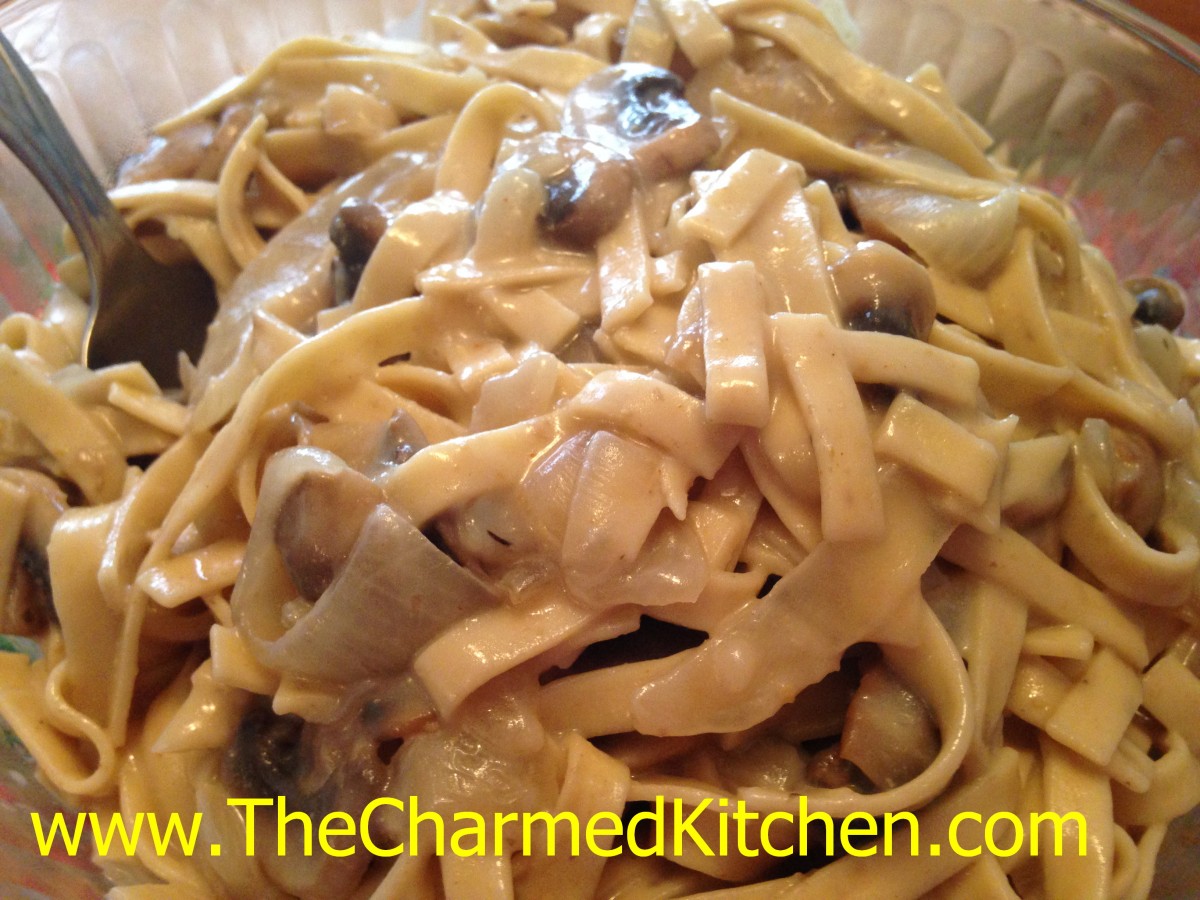
It would be hard to fit more mushrooms into this dish. I started by making fresh pasta and included mushroom powder in the dough. Then I sauteed up onions, garlic and a pound of fresh mushrooms for the sauce. My dinner guest loved it, and so did I.
Start by making the pasta dough. It has to rest before rolling. It will only take a couple of minutes to cook. I rolled and cut the pasta, then set it aside. Once my sauce was ready, I boiled the pasta and added it to the sauce.
I think the only thing I forgot, was to dust the top of the dish with mushroom powder before serving. I served it as a side dish, but it could easily be a main dish. I used a combination of button and Crimini mushrooms. Use what mushrooms you like.
So, we will start with the recipe for the mushroom pasta.
Mushroom Pasta
3 c. flour, more if using electric pasta machine. See note.
½ c. mushroom powder- made from dried mushrooms*
1½ t. salt
4 eggs
Water, as needed
Mix flour, mushroom powder and salt. Stir in eggs, kneading until dough is smooth and elastic. Dough will be very stiff. Add a little water, as needed, to hold dough together. You may wish to mix the dough in a mixer or food processor. Cover dough and let rest at least 15-20 minutes before rolling. Under kneading your dough will result in coarse, crumbly pasta. This batch makes about 1 pound. Serves 4-6.
Roll dough out on a well-floured board or with a pasta machine until desired thickness in reached. Add flour as needed to prevent sticking. Cut into strips or whatever shapes are desired. You might want to let the noodles dry 1-hour or more before cooking, but this is not necessary. Pasta can be hung to dry or separated and allowed to dry flat on a table. When pasta is not hanging to dry it must be turned occasionally to dry evenly. Although you may hear otherwise, homemade pasta, even when dried, should be frozen for long term storage. Storing at room temperature can lead to spoilage. Fresh pasta can also be stored in the refrigerator for a day or two.
Cooking fresh pasta happens quickly. For most noodles you are looking at 2-3 minutes at the most. Thicker cuts and ravioli would take a little longer. Watch it carefully. Drain after cooking, and toss with your favorite sauce.
Mushroom powder
*You might be tempted to powder up some store bought dried mushrooms. I would advise against that. Commercially dried mushrooms have not been washed before drying, so you might get dirt in your mushroom powder. I clean my mushrooms thoroughly before dehydrating.
Note: All electric pasta machines vary slightly and you should use their recipes as much as possible. Still, for most models, adding 1/4 c. flour for each cup in a hand rolled recipe works the best. Also recipes that contain seeds and vegetables may clog an electric pasta maker. Follow your manufacturer’s instructions.
The Mushroom Sauce
3 T. oil- I used avocado, but olive oil would be nice, too
3 c. sliced onions
4-5 cloves garlic, minced
1 lb. fresh mushrooms, washed and sliced
4 T. flour
1 c. chicken stock, or a bit more
1 c. half and half
salt and pepper to taste
2 t. fresh thyme leaves
Heat oil in a very large skillet and saute onions until golden. add the garlic and cook another minute. add the mushroom and cook until mushroom are tender. Mushrooms have a lot of water in them. Don’t freak if you start to get some in your pan. Add flour and stir until smooth. Stir in stock, half and half and seasonings. Reduce heat and simmer until mixture is thickened and bubbly. You might want a little more stock, if you like a thinner sauce. remember, the pasta will absorb some of the liquid, too.
Cook mushroom pasta. I only boiled mine for a minute, then drained it and added it to the mushroom sauce. Toss the pasta and sauce together. Keep on low heat for a minute or two before serving. Serves 4-6.


