Frozen Mocha Cheesecake

 This is a great dessert when you don’t want to cook. Usually think of it as a Summer dessert but with all the warm weather lately it seemed like a good idea. I am having friends for dinner tonight and needed a dessert. Since I haven’t been going to the grocery store I have to use what I have. Back in January I froze whipping cream left over from the holidays. You aren’t really supposed to do that and I don’t recommend it but I thought it would be better then tossing it. For the recipe the cream has to be whipped. That’s the problem with freezing whipping cream. It breaks apart and won’t whip up. I decided to try anyway. It did sort of whip. The flavor and texture were fine but the volume left a lot to be desired. So I decided to change the method for making the cheesecake. I whipped the cream as best I could then beat in the cream cheese and eventually the sweetened condensed milk. It worked! Since I assume you’ll be using fresh whipping cream just follow the recipe as written.
Frozen Mocha Cheesecake
1 ¼ c. chocolate cookie crumbs
¼ c. sugar
¼ c. butter or margarine, softened
8 oz. cream cheese
1 (14oz.) can sweetened condensed milk
2/3 c. chocolate syrup
2 T. instant coffee crystals
1 t. hot water
1 c. whipping cream, whipped
Combine crumbs, sugar and butter and press into 9-inch springform pan. Chill. Beat cheese until fluffy and beat in milk. Stir in syrup and dissolve coffee in water. Add to cheese mixture and fold in whipped cream. Pour into prepared crust and freeze until solid, at least 6 hours. Garnish with additional cookie crumbs if you like or with shaved chocolate. Keep leftovers frozen and use within a week for best flavor.
The Challenge: What’s for Lunch?

 First day of Spring and 80 days into my challenge of not going to the grocery store means being creative and resourceful. I was out planting peas today and decided to see just what was ready for harvest. I have really been been missing fresh greens. Sure, I have been sprouting seeds for fresh greens- but in between harvests just now.
My harvest today consists of Swiss chard that has weathered our mild Winter, ramps, fennel greens, dandelion greens that are very tiny, but also less bitter at this stage, violet leaves, one violet flower and chives. Pretty decent haul for March in Cleveland! It will only get better.
I thought of what Dr. Peter Gail taught me years ago about Spring tonics. Not to be confused with gin and tonic, Spring tonics were made from the first edible greens in the Spring. Prized by people in cold climates they signaled the start of a new year and thus fresh vegetables. They were also full of nutrients that had been lacking during the winter. Our ancestors would crave them and I understand why. I can’t say that I have been lacking too much this winter but fresh greens sure sound good about now.
Makes me also think about how much of what I grow is not edible. Inspired by Mari Keating and her group Food, Not Lawns. Their goal is to plant completely, or nearly completely edible landscapes. Sounding better to me everyday. Happy Spring!!
The Sinister Garden

 Did you know that daffodils are poisonous? They are.
I am always encouraging people to forage. There are so many common plants that are both edible and tasty. As the new season starts I also want to be a little cautionary. As much as there are common plants out there that can nourish you there are also common plants that are dangerous and even deadly.
Be sure you know what the plant is. If you can’t identify it for sure find someone who can. Your local Extension office can help.
There are also plants where some parts are edible and others not -like tomatoes. Tomatoes are wonderfully edible but the foliage on tomato plants is poisonous. There are also plants that are only edible in certain stages of growth or when prepared a certain way. If you aren’t sure- don’t eat it!!!!
While this is not meant to be a complete list here are some plants you should watch out for. Even more true if you have small children or pets that might ingest them. Some are quite toxic, others might cause skin irritations etc.
Some Poisonous Plants
Bryony (Bryonia): all parts are poisonous, Boxwood (Buxus),: contact with the sap may irritate skin, Christmas rose, Lenten rose, hellebore (Helleborus): all parts may cause severe discomfort if ingested and the sap may irritate skin, Clematis, old man’s beard, virgin’s bower (Clematis): all parts are poisonous, causing mouth pain if eaten and minor brief skin irritation, Columbine (Aquilegia): contact with the sap may irritate skin, Comfrey (Symphytum): roots and leaves may cause severe discomfort if eaten and leaves may irritate skin, Daffodil (Narcissus): bulbs toxic if eaten in large quantities; skin may be irritated by handling bulbs, flowers and stems Elder (Sambucus): all parts may cause severe discomfort if ingested and the leaves may irritate skin, False acacia (Robinia preudocacia): all parts may cause severe discomfort if eaten, Foxglove (Digitalis): all parts may cause severe discomfort if ingested and the leaves may irritate skin, Ivy (Hedera): all parts may cause discomfort if eaten and the sap or airborne hairs may aggravate allergies and irritate skin Juniper (Juniperus): contact with foliage may irritate skin allergies, Lobelia (Lobelia): the sap may irritate skin, Lily of the valley (Convallaria majalis): seeds can cause stomach upset, Lords and ladies (Arum): all parts may cause severe discomfort if ingested and the sap may irritate skin, Lupine (Lupinus): the seeds may cause severe discomfort if ingested, Mountain laurel (Kalmia): all parts may cause severe discomfort if eaten, Potato, potato vine, false Jerusalem cherry, eggplant (Solanum): toxic compounds causing weakness and confusion are concentrated in stems, leaves, sprouts and fruits. They are increased by exposure to light, damage and age. Levels are kept low in food varieties and the compounds are mostly destroyed by cooking. Privet (Ligustrum): all parts may cause severe discomfort if eaten, Rhubarb (Rheum): leaves may cause discomfort if ingested. Use only the leaf stalk in recipes. Windflower (Anenome): contact with the sap may irritate skin, Wisteria (Wisteria): all parts may cause severe discomfort if ingested
Some Poisonous Flowers
Aconite, Anemone, Anthurium, Atamasco Lily, Autumn Crocus, Azalea, Baneberry, Black Locust, Bloodroot, Boxwood, Burning Bush, Buttercup, Butterfly Weed, Caladium, , Carolina Jasmine, Castor Bean, Cherry Laurel, Chinaberry, Christmas Rose, Clematis, Daffodil, Deadly Nightshade, Death Camas, Delphinium, Dogbane, Dumbcane, Elephant Ears, False Hellebore, Four O’clock, Foxglove, Gloriosa Lily, Golden Chain Tree, Goldenseal, Heavenly Bamboo, Henbane, Horse Chestnut, Horse Nettle, Hyacinth, Hyacinth Bean, Hydrangea, Iris, Ivy, Jack-in-the-Pulpit, Jerusalem Cherry, Jessamine, Jetbead, Jimsonweed, Jonquil, Kentucky Coffee Tree, Lantana, Larkspur, Leopard’s Bane, Lily of the Valley, Lobelia, Marsh Marigold, May Apple, Mescal Bean, Mistletoe, Morning Glory, Mountain Laurel, Nightshade, Oleander, Periwinkle, Philodendron, Pittosporum, Poison Hemlock, Potato, Privet, Rhododendron, Rock Poppy, Schefflera, Spring Adonis, Spurge, Star of Bethlehem, Sweet Pea, Tobacco, Trumpet Flower, Water Hemlock, Wild Cherry, Wisteria, Yellow Allamanda, Yellow Oleander
Liquid Pumpkin and Scones

 I got an email from a cousin in Columbus who had some issues with her scones. Marianne said they always come out heavy. I sent her some tips and found myself in the mood to make scones. I would have made one of my regular recipes this morning but yesterday afternoon I was cleaning the backroom. I had stored a couple of pumpkins there and checked on them frequently. Normally I keep the heat off in that room and the door shut so they store well. The recent string of warm days had changed things. When I went to check on them the big one was perfect but the smaller one had literally liquified!!! It put me in mind of an incident that had happened to a coworker years ago- but since it involved a dead body I’ll spare you the details. I scooped up the pumpkin goo and checked on the small Hubbard squash that was also stored there. It was perfectly fine so I decided to cook it up and freeze it. Had some for dinner and froze the rest but decided to make scones with the rest. The result was a batch of super yummy scones. So in a way it all worked out quite well. I had not planned on making pumpkin scones at all but because of the liquid pumpkin I decided to cook the Hubbard squash which inspired me to make these scones.
Sat outside this morning with a friend and had some. Still have a lot so call if you want a few. Here is the recipe along with the tips I shared with Marianne.
Pumpkin Scones
4 c. all purpose flour
1/2 c. sugar
1 T. baking powder
1 t. each salt, cinnamon, allspice, nutmeg and ginger
1/2 t. cloves
1 1/2 sticks cold butter
1 c. cooked pumpkin or winter squash
3 oz. milk
2 eggs
Vanilla glaze
2 c. powdered sugar
1 t. vanilla
4-6 T. milk
Cinnamon Glaze
2 c. powdered sugar
2 t. cinnamon
4 T. milk
Preheat oven to 400. Lightly grease 2 baking sheets or line them with parchment paper. Set aside. Combine flour with sugar, baking powder and spices and stir to blend. Cut in butter until the mixture looks like coarse crumbs. Combine pumpkin or squash with the milk and eggs and stir into the flour mixture. Stir until well mixed. Dough should be just a little sticky. Use an ice cream scoop to scoop dough onto the prepared baking sheets- leaving a couple of inches between them. Hint: If you spray a little non-stick spray on the cookie scoop first the dough will pop out easier. Bake for 15 minutes or until scones are browned on the bottom and just getting golden on the top. If you want to put both baking sheets in the oven at the same time- switch them half way through the baking time and allow a few extra minutes. Remove scones to cooling rack. Meanwhile make both glazes by combining ingredients and stirring until smooth. Drizzle with the vanilla glaze while still warm and allow scones to cool and glaze to harden before drizzling with the cinnamon glaze. Makes about 20-30 depending on the size of the scoop you use.
My hints to Marianne:
Use all purpose flour- NOT unbleached as it will make a tougher scone.
Make sure your baking powder is fresh. The test is to put 2-3 tablespoons of boiling water is a cup. Add 2 teaspoons of baking powder. It should bubble like crazy for a few seconds. No bubbles means that your baking powder is too old.
Don’t over mix the dough. Often scone and biscuit recipes call for kneading dough . Unlike yeast doughs which you knead a lot to develop the gluten, biscuit and scone doughs should be kneaded only until the dough just holds together. You can also use the drop biscuit method like I did with the pumpkin scones to avoid kneading altogether.
Measure the flour carefully by spooning it into the cup and leveling off. Scooping the flour into the measuring cup might result in too much flour and heavy scones.
Well, I hope some of you try this recipe It is really good- or stop by for a few to eat and take home. 🙂

Scones ready to be baked

Fresh from the oven
Irish Soda Bread

This is a great recipe for St. Patrick’s Day – or any other day for that matter. Mine is in the oven now. Easy to make it will go great with lunch or dinner.
Irish Soda Bread
2 c. flour
½ t. each baking powder and baking soda
¼ t. salt
2 T. butter or margarine
¾ c. raisins
1 egg. Beaten
1 c. buttermilk
Preheat oven to 400 degrees. Dust a baking sheet with a little flour. Combine dry ingredients in bowl and cut in butter to resemble coarse crumbs. Add raisins. Combine egg and milk and set 2 tablespoons of this mixture aside. Add remaining milk mixture to flour mixture and combine just until dough forms into a ball. Place on baking sheet, brush with reserved egg mixture and cut a crisscross on top of loaf. Bake about 25 minutes or until bread sounds hollow. Makes 1.
Bacon- Wrapped Water Chestnuts
I got a request from my nephew today for this recipe. Here it is Danny Morgner. Enjoy!!
Bacon-Wrapped Water Chestnuts
20 slices bacon cut in half
40 water chestnuts, whole
Hot sauce
Maple syrup
Brown sugar
Roll ½ a slice of bacon around water chestnut and place rolls in a baking dish. Cook in a 400 degree oven for 20 minutes or until rolls are well-browned. Remove from pan and drain on paper towels. Return rolls to baking dish. Drizzle with maple syrup and sprinkle with brown sugar and hot sauce. Return to oven and bake until caramelized. Makes 40.
Homemade Pomegranate Jelly

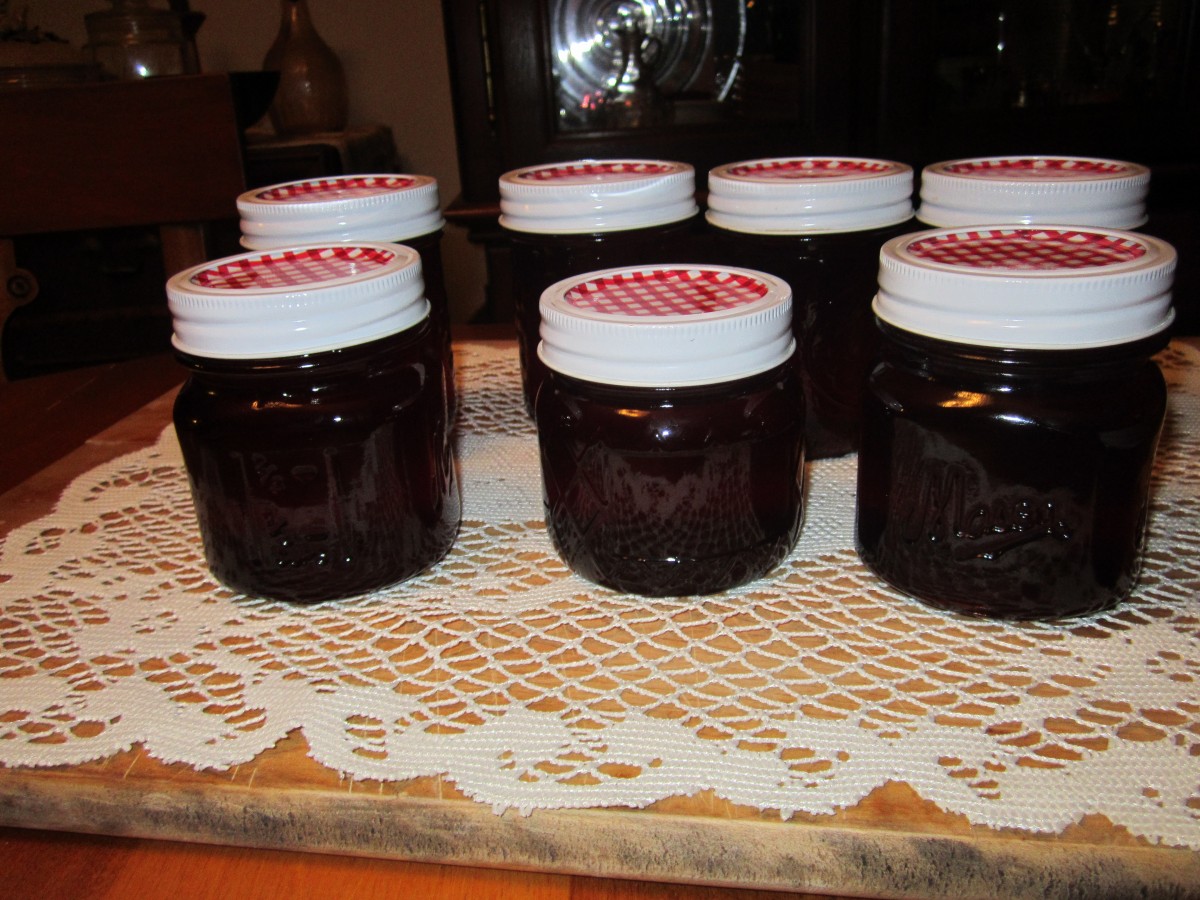
Pomegranate Jelly
I had a bottle of pomegranate juice that I hadn’t used. Decided to turn it into jelly. Haven’t canned anything in a couple of months so it was fun. Of course I didn’t think about the fact that I am out of bread. Going to bake some now so I’ll be able to enjoy my pomegranate jelly on toast for breakfast. 🙂
Pomegranate Jelly
5 c. pomegranate juice
1/4 c. lemon juice
1 box powdered pectin
5 c. granulated sugar
6-7 jelly jars with lids
Prepare canning jars. Wash jars in hot soapy water. Rinse well and keep warm until ready to use. Prepare lids according to package directions. Get a large pot of water boiling for processing the jelly. Measure pomegranate juice and lemon juice into a 6-quart pan. Add pectin, stir and place over high heat. Bring to a boil, stirring constantly to prevent scorching. Cook until mixture reaches a full rolling boil, that cannot be stirred down, and add sugar. Return to a boil and boil hard for exactly 2 minutes. Remove from heat. Let stand for a minute and skim off foam. Ladle hot jelly into jars to 1/2″ of the top. Wipe rims clean. Screw on 2-piece lids. Place the jelly jars, not touching, on a rack in pot of boiling water. If you don’t have a rack for the bottom of the pot place a towel in the pot just before putting in the jars. The jars cannot sit directly on the bottom of the pot. The water should cover the top of the jars by at least an inch. Cover pot and start timing when water returns to a boil. Boil for 10 minutes and then remove from the water. Let the jars cool. Check seals, the lids should be sucked down (you’ll hear a popping noise as the jelly cools). Yield – 6-7 cups.
* source – Ball canning recipe but I added the lemon juice to hold the color better.
Dinner Tonight: Sweet and Spicy Asian Pasta

 The further I get into the challenge of not going to the grocery store the more creative I have to get. Tonight for dinner I cooked whole wheat linguine and served it with vegetables in a sweet and spicy Asian sauce. I used carrots that I have had stored in green bags in the fridge for months. They are from Blue Pike Farm and Carl gave them to me last Fall. They are still looking good, although some have just started to sprout. I also have fresh onions and had some peas and sweet peppers in the freezer. All in all a pretty tasty dish.
Sweet and Spicy Asian Pasta
6 oz. dry whole wheat linguine
2 T. oil
1 onion, sliced
2 c. sliced carrots
1 sweet pepper, seeded and chopped
1 c. peas, fresh or frozen
2-3 T. rice vinegar
1 T. vegetarian oyster flavored sauce
1 T. hoisen sauce
1 T. honey
Soy sauce to taste
hot sauce to taste
Cook pasta according to package directions. Drain cooked pasta and set aside.While pasta is cooking heat oil in wok and stir fry onions over high heat until wilted. Add carrots and stir fry about 3 more minutes. Add peppers and peas and stir fry 3 more minutes. Add vinegar, seasonings and pasta and cook until heated through, about 3 minutes. Serves 2-3
The Challenge: Making Brown Sugar


Just into the 11th week of not going to the grocery store. While I have enough to eat I find myself running out of some basic stuff. Today it was brown sugar. It’s not that big a deal. Brown sugar is relatively easy to make at home if you have 2 ingredients, granulated sugar and molasses. Just put white sugar in a bowl- a few cups at a time is easier to work with. Add about 1 tablespoon of molasses per cup of sugar to start and blend together. It will take a few minutes. I used a flat wooden spoon and kept pressing the mixture against the side of the bowl. After a few minutes it was a nice light brown color. Then you can decide if you want the sugar a little darker. Just add a little more molasses and mix well before each new addition until the sugar is the color you want.
This is also handy if you are cooking something that calls for dark brown sugar and you only have light brown sugar. Just add a little molasses to light brown sugar and mix well. You can also turn dark brown sugar into light brown sugar by adding granulated sugar and mixing well.
Store brown sugar in a tightly sealed container to keep it from drying out.
Cooking with Winter Squash-Dumplings

Since I have not been going to the store I must work with what I already have. I decided to cook up and freeze one of my winter squashes since I have freezer space. They keep a long time but it more convenient to have some cooked squash on hand. I used something called a neck pumpkin that was given to me last Fall by Carl Skalak from Blue Pike Farm. Thanks, Carl! It looks like a butternut squash but with a much longer neck. The taste is similar to butternut squash.
Pumpkin can be used interchangeably with winter squash although some pumpkins are sweeter than others. Some pumpkins are more ornamental and best used for decorations.
Washed the squash. Cut the neck into big chunks. Gee, sounds like the scene from a horror movie. I then cut the chunks in half lengthwise and placed them cut side down in a baking dish with about an inch of water in it. Baked it at 350 until tender- about 45 minutes. Use a fork to test for “doneness”. The end of the squash that contains the seeds was much wider. I cut it in half and scooped out the seeds. Placed it cut side down in baking dish and cooked like the rest of the squash. Once cool enough to handle I scooped out the flesh and ran it through a food mill. A processor would also work. The squash puree was really watery so I placed it in a strainer, over a bowl and put it in the fridge overnight to drain. This morning I froze a few packages of the squash and cooked with the rest. I made a yummy pumpkin bread with dried cherries and decided to make dumplings with the rest. I measured as I went. The result was pretty tasty. I browned the cooked dumplings in butter but wanted a sauce so I tossed them in a carrot pasta sauce- recipe follows.
Pumpkin (Squash) Dumplings
1 1/2 c. cooked squash or pumpkin
2 eggs
2 T. oil
2 cups flour
1/4 t. grated nutmeg
salt to taste
Combine squash and eggs and beat until smooth. Stir in remaining ingredients until smooth. The result will be a thick batter. Let batter rest 10 minutes. Bring a large pot of water to a boil and drop batter by teaspoonfuls into the water. Dumplings will sink to the bottom and then surface.Allow to cook 3-5 minutes after they start to float. Drain and either brown in butter or toss with your favorite sauce.


Carrot Sauce
1 T. oil
1 onion, chopped
1 garlic clove, minced
1 lb. carrots, peeled and sliced
2 c. chicken or vegetable stock
Salt and pepper to taste
1/2 c. cream, half and half or evaporated milk
1-T. fresh dill or 1 t. dried
Sauté onion in oil until tender. Add garlic, carrots and stock and cook until carrots are very tender. Much of the liquid should have evaporated by then. Place mixture in blender and add cream or milk, mixing until smooth. Add dill and adjust seasonings, tossing over hot pasta to serve.


