A Trio of Pasta Sauces

These sauce were created for a Halloween themed dinner with friends. The idea was to come up with some sauces that would taste good, but also be fun colors for Halloween. Unconventional for sure. In the interest of full disclosure, I have made the carrot sauce many times before. I’ve made a pea pasta sauce before, but it had been years. The cauliflower sauce was created as a pureed soup initially, but I decided I liked it more as a sauce. I’ve recreated the recipes as closely as I can remember what I did on the pea and cauliflower sauces.
Ideal thickness of a sauce is always a bit subjective. I try to allow for how much stock evaporates and I try to make it clear that you can add more stock or even cream, if that works better for you. But it also about how thick a sauce you prefer. So while I wrote down what I did, feel free to edit to suit your taste. As an added note, all of these sauces freeze well.
My guests enjoyed the sauces and combining them with the different color pasta options that night (multicolored spaetzle and squid ink pasta). It made for a fun and playful dinner.
So here are the recipes. Boo!
Carrot Pasta Sauce
1 T. oil
1 onion, chopped
1 garlic clove, minced
1 lb. carrots, peeled and sliced
2 c. chicken or vegetable stock
Salt and pepper to taste
½ c. cream, half and half or evaporated milk
1T. fresh parsley or 1 t. dried
Sauté onion in oil until tender. Add garlic, carrots and stock and cook until carrots are very tender. Much of the liquid should have evaporated by then. Place mixture in blender and add cream or milk, mixing until smooth. Add dill and adjust seasonings, tossing over hot pasta to serve.
Purple Cauliflower Pasta Sauce
2 T. oil
1 medium onion, chopped
1 rib celery, sliced
4-6 cups of cauliflower flowerets
2 c. chicken or vegetable stock
½ c. red wine vinegar
Salt and pepper to taste
Hot sauce to taste
In pot, sauté onion and celery in oil until tender and onion is getting a little color on it. Add cauliflower, stock and vinegar and simmer, uncovered, until cauliflower is very tender, about 10-15 minutes. Puree mixture and adjust seasonings. You might need to add a little more stock if the sauce gets too thick. Serve over hot pasta.
Green Pea Pasta Sauce
1 T. oil
1 onion, chopped
2 cloves garlic, peeled and chopped
2 c. green peas, thawed
1 c. chicken or vegetable stock
Salt and pepper to taste
½ c. cream, half and half or evaporated milk
1T. fresh mint or 1 t. dried
Sauté onion in oil until tender. Add garlic, peas and stock and bring to a boil. Cook, uncovered, 5 minutes. Much of the liquid should have evaporated by then. Place mixture in blender and add cream or milk, mixing until smooth. Add mint and adjust seasonings, tossing over hot pasta to serve.
Cheesy “Spider”

For a recent party with friends I made this cheese ball. Fun for any Halloween party and easy to make. I started with extra sharp cheddar, a little feta and cream cheese. I rolled the cheese ball in chopped nuts and black sesame seeds and chilled it. I made the “legs” out of strips of puff pastry. I used homemade puff pastry, but store bought is perfectly fine. I cut out 9 strips- allowing for breakage- and folded each strip into a v shape. They were baked until crisp and set aside. Everything can be made a day or two ahead. Then, just assemble when ready to serve. I had some extra pastry dough so I cut it out with a small pumpkin shaped cookie cutter, baked the m, and served with the cheese ball.
Everyone loved the spider and I would certainly make this one again. Fun for adults or kids.
“Spider” Cheese Ball
1 sheet puff pastry
12 oz. sharp cheddar
8 oz. cream cheese
3 oz. feta cheese
Fine chopped nuts and black sesame seeds
2 candy eyes, optional
Preheat oven to 375 degrees. Roll out puff pastry and cut 9-10 (1/2 inch wide) strips. Bend strips into v-shapes. I made a couple extra to allow for breakage. Place on an ungreased baking sheet and bake until light brown, about 8 -10 minutes. Set aside. In medium bowl, combine the cheeses and farm into a ball. On a plate or in a shallow dish place finely chopped nuts and seeds. I had just over ½ cup total. Roll ball around to coat evenly, lightly pressing seed mixture in to the cheese ball. Wrap in plastic wrap and chill until ready to serve. When ready to serve, place cheese ball on a serving platter. Starting at the back of the cheese ball gently press one end of a puff pastry strip to look like a spider leg. Repeat until the “spider” has 8 legs. Add eyes, if you are using them. Serve with crackers.
Note: You should have leftover pastry. I cut mine into small pumpkin shapes. I baked them and served with the cheese ball.
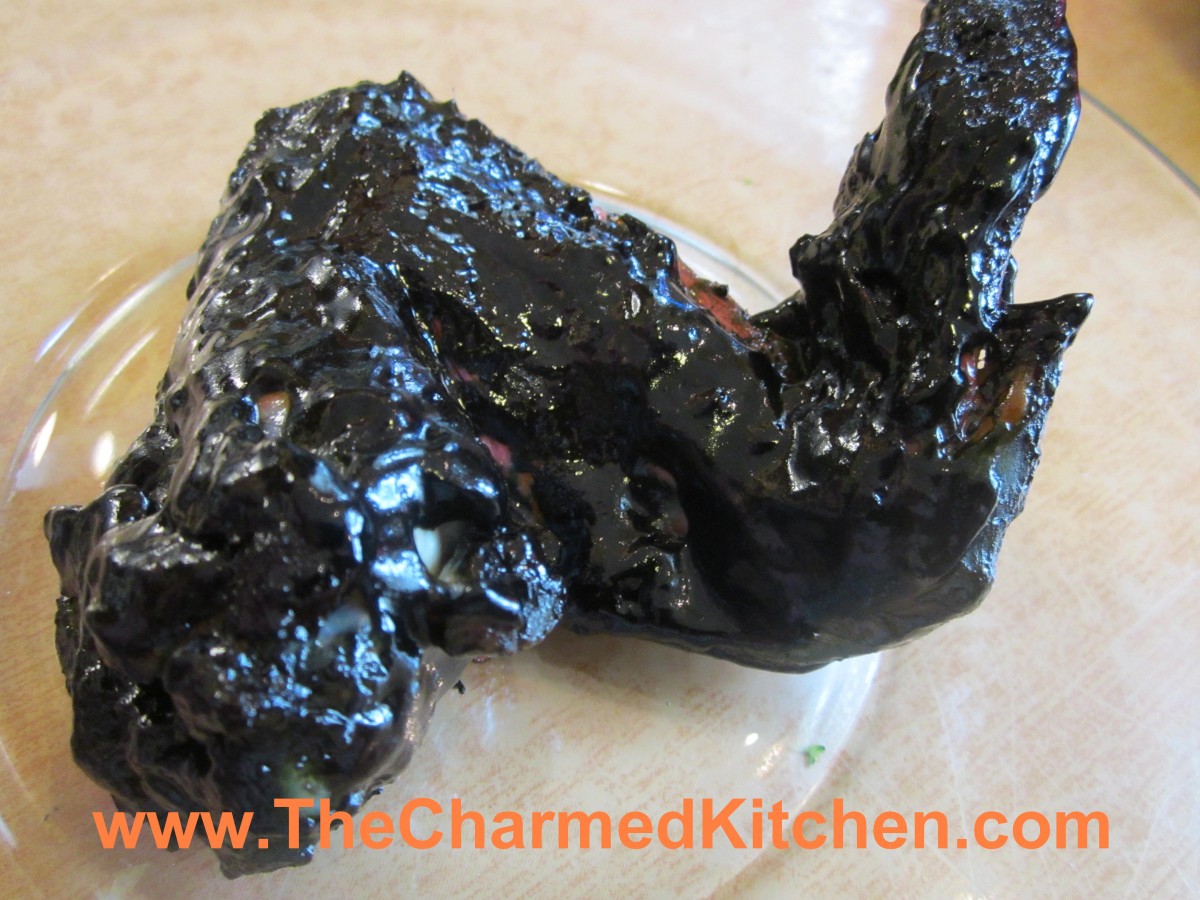
Bat Wings

With Halloween fast approaching I thought I’d share this recipe for bat wings. OK, not really bat wings, but you already knew that. I just add black food coloring to barbecue sauce and use it to color chicken wings. You could also use black cocoa powder to make the sauce black.
I made a batch for a Halloween party a few years ago and someone actually asked if they were real bat wings.
A word of warning- when you use black food coloring it will transfer to you. No matter how careful you are when you eat the wings, you’ll end up with purple fingers. Also, for the best effect, keep the wings intact- no trimming off of the tips. You can separate the drums before serving, if you like. Makes eating a little easier. They look pretty cool when set out on the table. Creepy- but very tasty.
Bat Wings
2-3 lbs. whole chicken wings
salt and pepper
1 c. barbecue sauce- store bought or home made
black food coloring- handle carefully- it stains
Place chicken wings in a roasting pan, season with salt and pepper and bake in a preheated 400 degree oven for 30 minutes. Meanwhile in medium bowl combine sauce with food coloring. Add just a little black food coloring at a time. Too much will alter the flavor of the food. Remove wings from the oven and dip them in the bowl of sauce. Turn to coat. Place wings on a clean baking sheet and return to the oven. Bake an addition 45 minutes. You can baste them with additional sauce during the baking, if you like. Place on a serving platter and provide plenty of napkins.
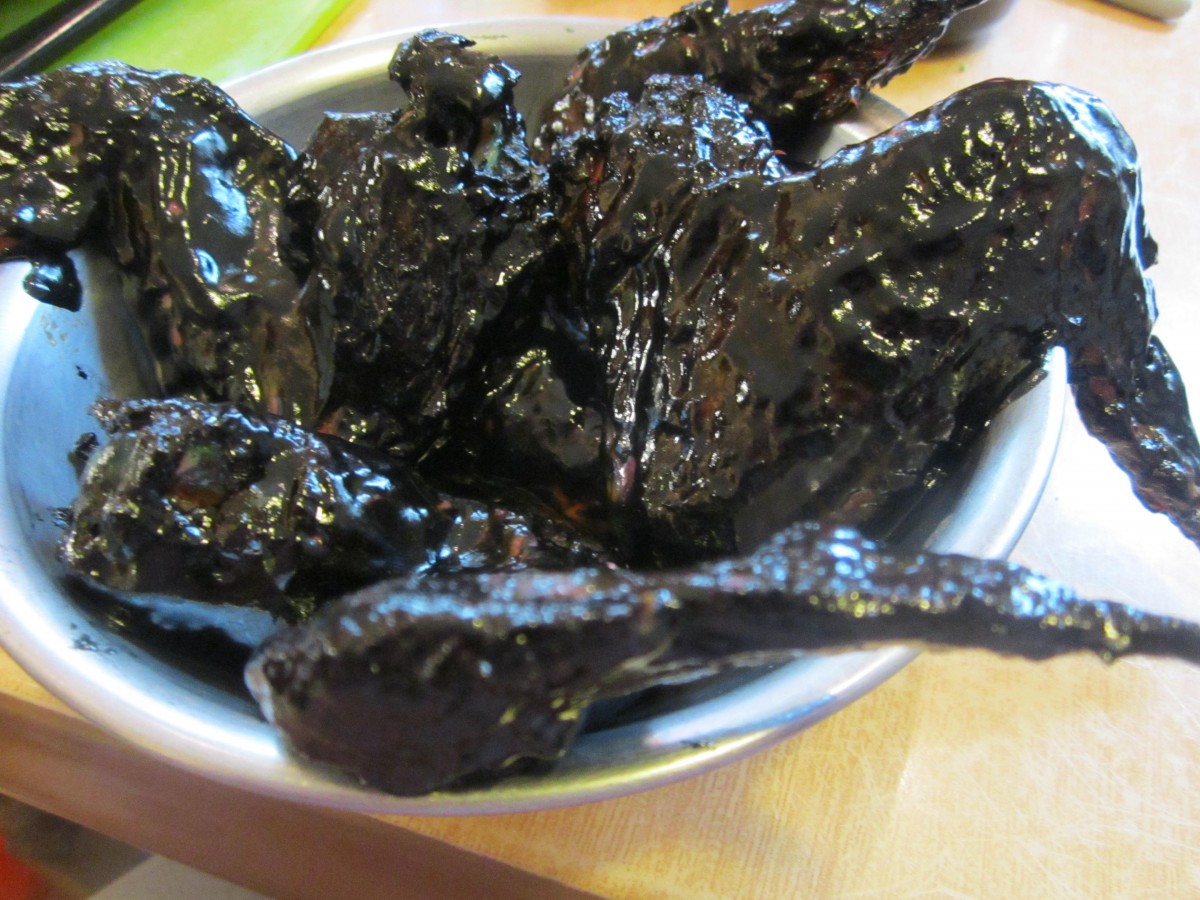
A pile of “bat” wings
Candy Spiders
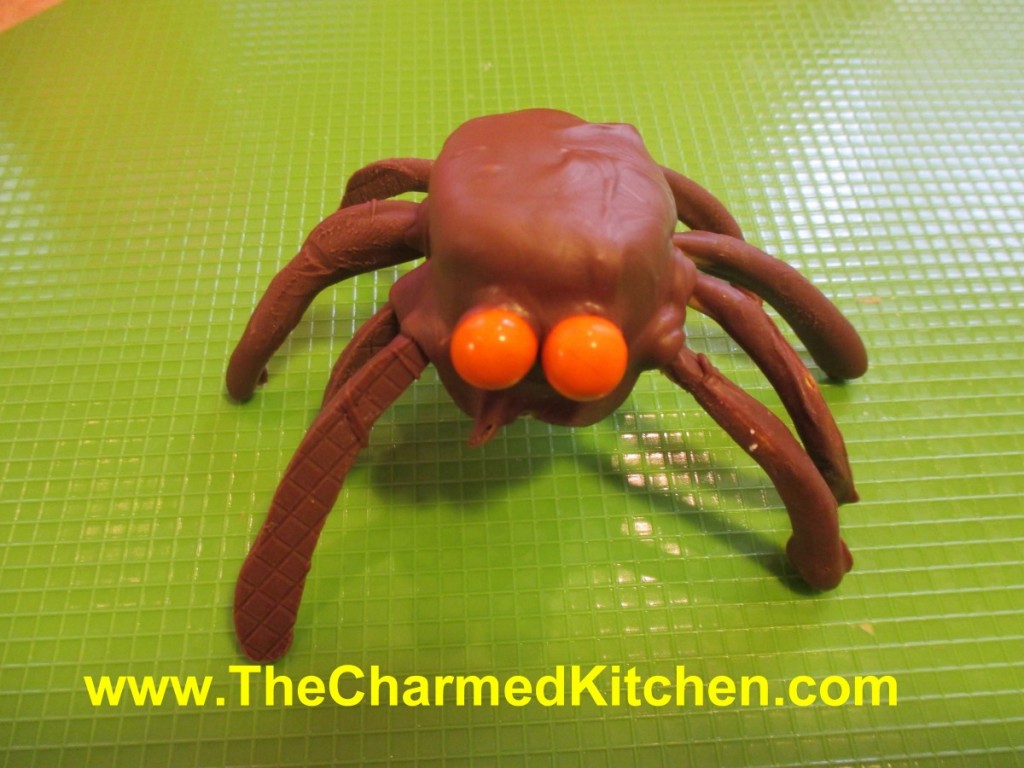
If you are looking for a quick spooky decoration/treat idea, you might want to make some candy spiders. These are about the size of a tarantula. Super simple, and kids can make them, too. You only need a few ingredients.
The body is made from marshmallows, the legs are chow mein noodles and the eyes are small candies. Sixlets work well. You can also use candy eyes. I kind of like the way the Sixlets look.
I used melting chocolate, but you can use any kind of chocolate you like. To start, melt some chocolate. Dip the chow mein noodles in the chocolate and tap gently to remove excess. I leave one end un-dipped to make it easier to stick in the marshmallow later. Allow to harden up before going to the next step. I set them on a flexible cutting board, but wax paper is good, too. You have to peel them off later, a flexible surface is best. You’ll need 8 for each spider- so be sure to make enough. Allow for breakage. Set a marshmallow flat side down and poke 4 holes in each side, 8 total. I used a bamboo skewer. Stick a noodle “leg” in each hole. Spoon chocolate over the marshmallow until coated. Whatever drips off can be re-melted and used again. While the chocolate is still soft, press 2 candy eyes into place. Hold them for a minute to be sure they are secure. Now, you can decorate cakes with them, use them on a dessert tray- or just eat them.
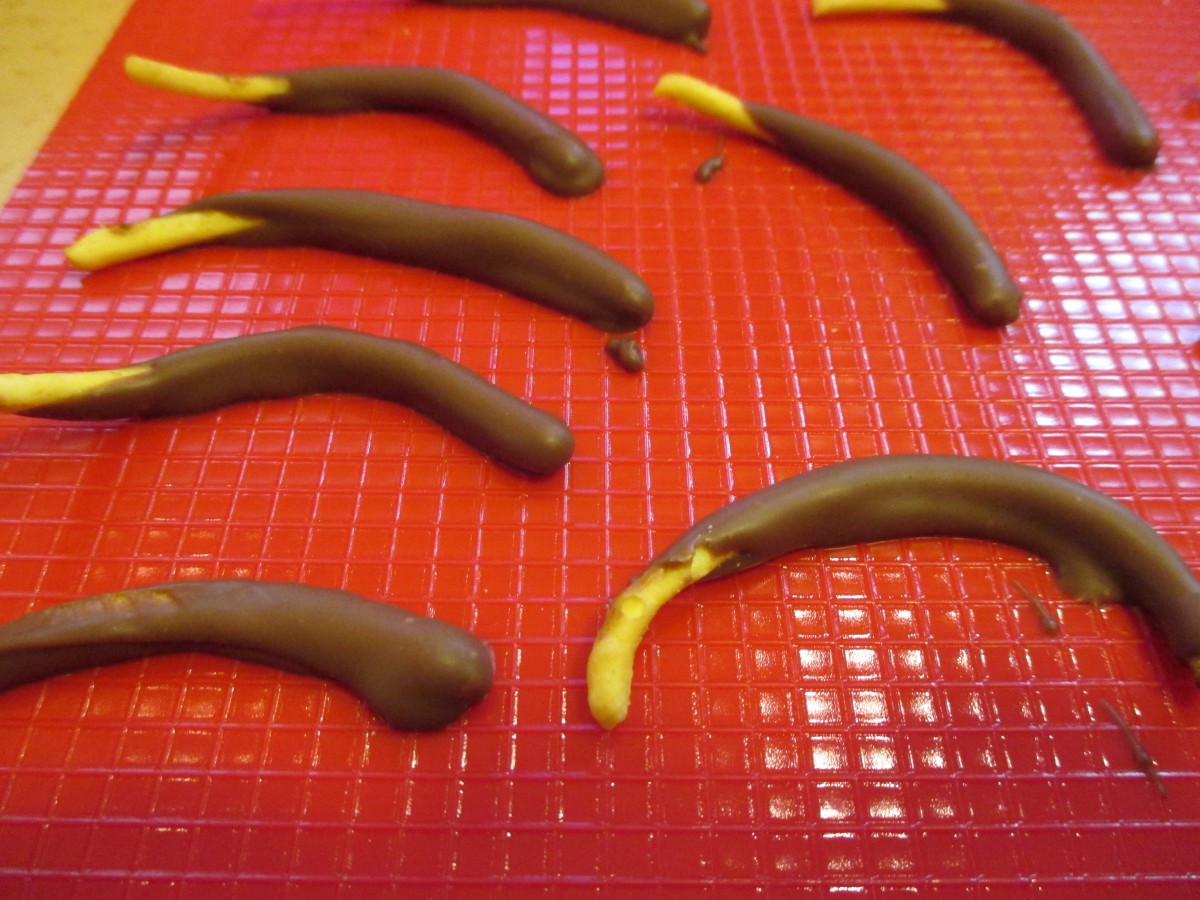
Chow mein noodle legs

Insert legs into marshmallow
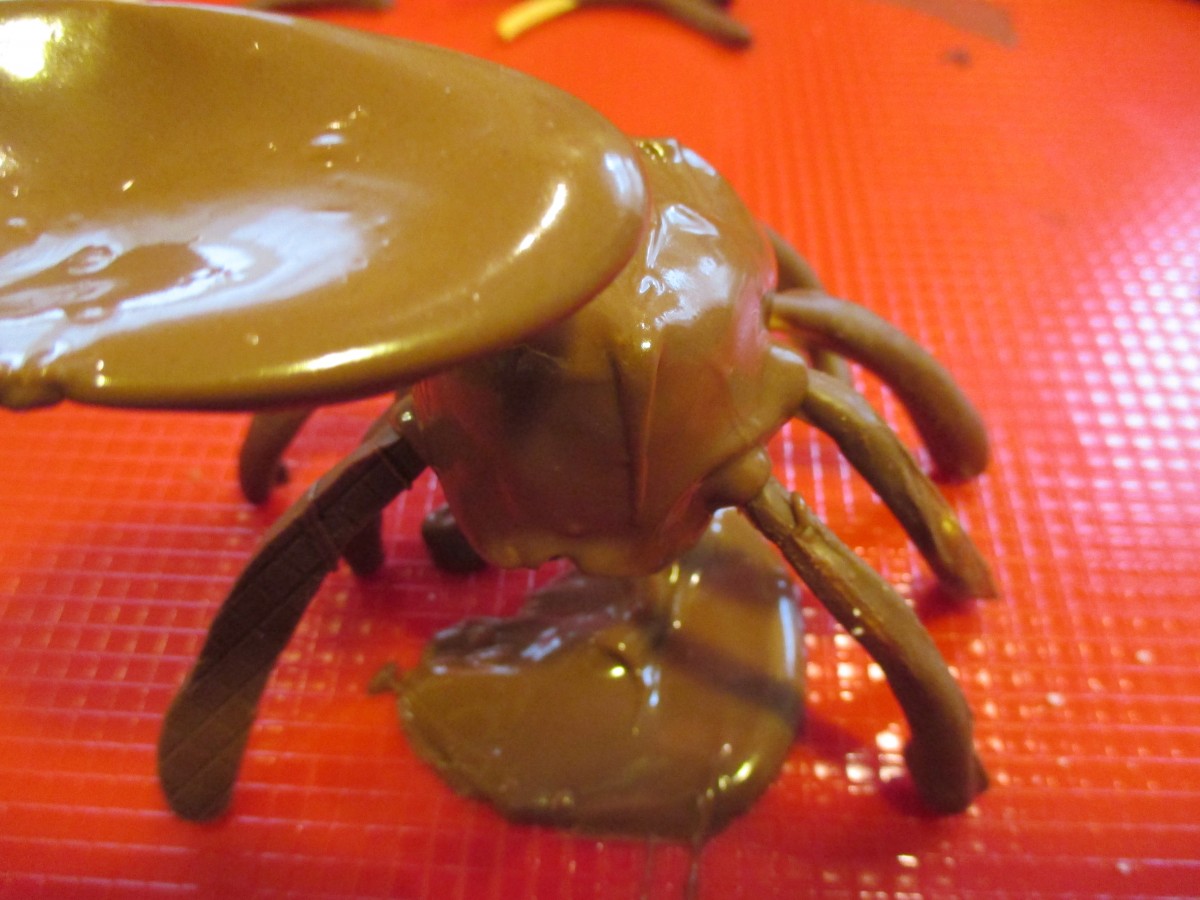
Spoon chocolate over the marshmallow to cover it.
Candy Spiders
If you are looking for a quick spooky decoration/treat idea, you might want to make some candy spiders. These are about the size of a tarantula. Super simple, and kids can make them, too. You only need a few ingredients.
The body is made from marshmallows, the legs are chow mein noodles and the eyes are small candies. Sixlets work well.
I used melting chocolate, but you can use any kind of chocolate you like. To start, melt some chocolate. Dip the chow mein noodles in the chocolate and tap gently to remove excess. I leave one end un-dipped to make it easier to stick in the marshmallow later. Allow to harden up before going to the next step. I set them on a flexible cutting board, but wax paper is good, too. You have to peel them off later, a flexible surface is best. You’ll need 8 for each spider- so be sure to make enough. Allow for breakage. Set a marshmallow flat side down and poke 4 holes in each side, 8 total. I used a bamboo skewer. Stick a noodle “leg” in each hole. Spoon chocolate over the marshmallow until coated. Whatever drips off can be re-melted and used again. While the chocolate is still soft, press 2 candy eyes into place. Hold them for a minute to be sure they are secure. Now, you can decorate cakes with them, use them on a dessert tray- or just eat them.
Chow mein noodle legs
Insert legs into marshmallow
Spoon chocolate over the marshmallow to cover it.
Halloween Sushi
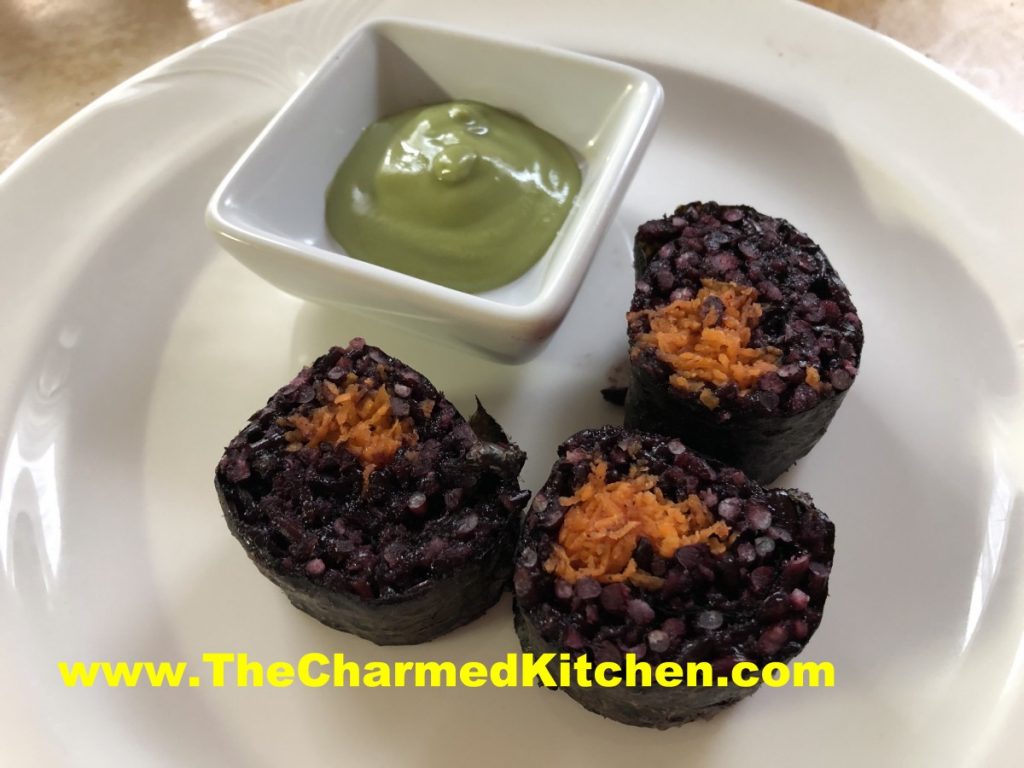
When I make sushi, I often use brown or black sticky (sweet) rice. I actually prefer the texture over the white rice. It occurred to me that the black sticky rice might make fun sushi for Halloween. I find black sweet rice at my local Asian grocery store. That is also where I get nori, rolling mats and wasabi.
To add a pop of color, I finely shredded carrots and added them to the sushi roll, too. The black rice actually cooks to a dark purple color. The color combination is fun for Halloween.
You’ll need a rolling mat, but beyond that, not a lot of special equipment is needed. I served my sushi with wasabi. You could serve with pickled ginger, too. Here is the recipe and directions.
“Spooky” Sushi
To make the rice:
4 c. black sweet rice, uncooked
4 c. water, or a little more
1 recipe Sushi Su, recipe follows
finely shredded carrots
In strainer, rinse the rice repeatedly with cold water until the water runs clear. Place rice in microwave safe container with the 4 cups of cold water. Cover container with a lid and place in microwave. I use a large Pyrex casserole dish that has a lid. Cook 20 minutes. Check for doneness and add a little more water, if needed. Cook another 10-15 minutes. Don’t stir the rice. Black rice takes longer to cook than white sushi rice. You want it to be cooked, but not mushy. Cooking times vary by microwave. Remove from the microwave once cooked and let stand, covered, for 10 minutes. Place rice in a large, cool bowl and pour on the Sushi Su, tossing in. Fan rice while tossing to give it a shiny look. Makes enough for 8 rolls.
Sushi Su:
1/2 cup rice vinegar
4 T. sugar
1/2 t. salt
msg, optional
Combine all and set aside until ready to use. You can also buy a dry powder of Sushi Su and you can use that instead. It is a 2.65 oz. packet.
Assembling Sushi
Place a sheet of nori ( dried seaweed sheets) on mat and spread about 1 cup of the rice over the nori, leaving about 1-2 inches empty on the far side. Place fillings in a strip a little off center away from the side with no rice. Start rolling up the mat using it to press the sushi roll and keeping the fillings in the nori. Once rolled, press the mat once more to seal and make the fillings stick together. Wetting the edge of the nori with a little water can also make the sushi stick better. Slice each piece using a sharp knife dipped in water.
Wrapping the sushi takes practice. Don’t be discouraged if the first few are a little less that perfect, Still, with a little practice it gets pretty easy. Just be careful not to overfill the rolls as it makes the job harder
“Bat” Wings
With Halloween fast approaching, I thought I’d share this recipe for bat wings. OK, not really bat wings, but you already knew that. I add black food coloring to barbecue sauce and use it to color chicken wings.
I made a batch for a Halloween party a few years ago and someone actually asked if there were real bat wings. A word of warning- when you use black food coloring it will transfer to you. No matter how careful you are when you eat the wings, you’ll end up with purple fingers. Also, for the best effect keep the wings intact- no trimming off of the tips. They look pretty cool when set out on the table. Creepy- but very tasty.
Bat Wings
2-3 lbs. whole chicken wings
salt and pepper
1 c. barbecue sauce- store bought or home made
black food coloring- handle carefully- it stains
Place chicken wings in a roasting pan, season with salt and pepper and bake in a preheated 400 degree oven for 30 minutes. Meanwhile in medium bowl combine sauce with food coloring. Add just a little black food coloring at a time. Too much will alter the flavor of the food. Remove wings from the oven and dip them in the bowl of sauce. Turn to coat. Place wings on a clean baking sheet and return to the oven. Bake an addition 45 minutes. You can baste them with additional sauce during the baking, if you like. Place on a serving platter and provide plenty of napkins.

Halloween Candy Mini Cheesecakes

Kit Kat Mini Cheesecake
Sometimes you end up with leftover Halloween candy. It’s very cold here today, so I doubt there will be as many kids out as usual. I am sure some of you will have leftover candy.
You could just eat the candy- or you can transform it into a dessert.
The idea I came up with was mini cheesecakes. I’ve made them before, so I used my recipe, and just folded in crushed candy bars. Once the cheesecakes cool they deflate a little, so I also added some crushed candy bars to the top to make them look nice.
Only change from the original recipe was a slight decrease in sugar to compensate for the extra sweetness of the candy. I used what I had, but I am sure a lot of different candy bars would work. I used a small food processor to really crush up the candy bars. I made 2 batches, one with cookies and cream candy bars and the other with Kit Kat bars.
Halloween Candy Mini Cheesecakes
12 vanilla wafers
2 (8 oz.) cream cheese, softened
1/3 c. sugar
2 t. vanilla
2 eggs
2/3 c. crushed candy bars plus 1/4 c. crushed candy bar, for topping
Line 12 muffin tins with paper liners. Place 1 wafer in each. Beat together remaining ingredients (except candy) for 1 minute with electric mixer. Fold in candy. Divide this mixture in the muffin tins, filling each 3/4 full. Bake 25 minutes at 325 degrees. Cool and decorate with extra crushed candy. Makes 12. These can be frozen.
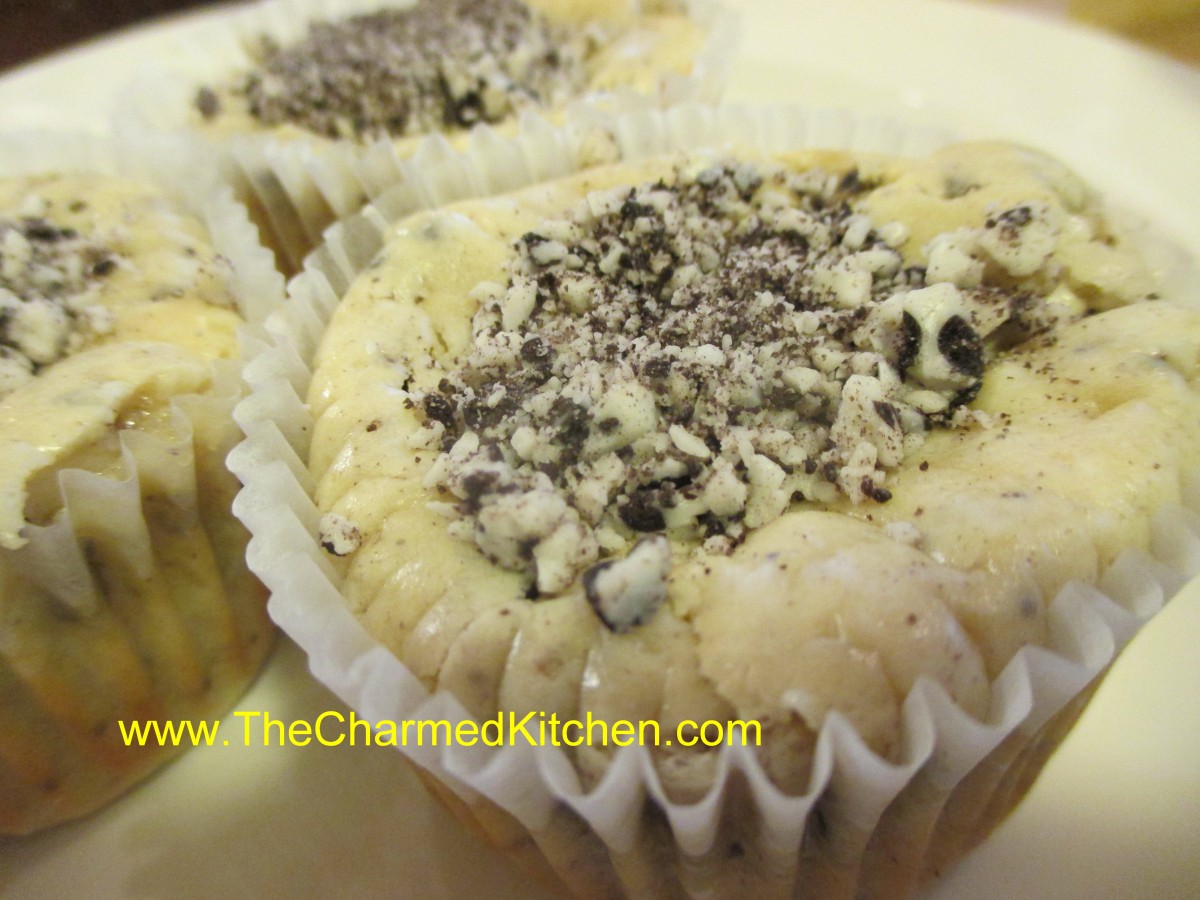
Cookies and Cream Mini Cheesecakes

Leftovers
Vampire Chasers- Cheesy Garlic Toast

Vampire Chasers
If you are concerned about keeping away vampires this Halloween, you might want to make this recipe for cheesy garlic toast. Garlic is widely accepted as a repellent for vampires- and a lot less messy than a stake through the heart.
This is one of my favorite appetizers. I make them a few times a year, but they are extra fun to serve at a Halloween party.
A mixture of garlic and onions are cooked in butter, then spread over the bread slices. That would be plenty for most garlic bread- but you take it up a notch with a cheesy/ mayo mix on top. Baked for just a few minutes- these are always a hit. They can be served as an appetizer, or as a side with dinner.
Vampire Chasers
1 French baguette, cut into 3/4 inch diagonal slices
1 large minced onion
8 cloves minced garlic
1/4 cup butter
2 cups shredded mozzarella cheese
1/2 cup grated Parmesan cheese
1 cup mayonnaise
Slice the French baguettes diagonally into 3/4 inch slices. In a medium skillet, over medium heat, melt the butter. Combine the onions and garlic in the skillet. Cook and stir until tender. Set aside to cool. In a mixing bowl, combine the mozzarella cheese, Parmesan cheese and mayonnaise. On a cookie sheet, arrange the French bread slices in a single layer. Spread the onion and garlic mixture on the bread slices. Spread the cheese and mayonnaise mixture over the onion and garlic mixture on the bread slices. Bake in a 400 degree oven for 10 minutes or broil about 5 minutes, until the cheese is bubbly and slightly browned. Serve immediately.
“Bat” Wings
Bat “Wings”
With Halloween fast approaching I thought I’d share this recipe for bat wings. OK, not really bat wings, but you already knew that. I just add black food coloring to barbecue sauce and use it to color chicken wings.
I made a batch for a Halloween party a few years ago and someone actually asked if there were real bat wings. A word of warning- when you use black food coloring it will transfer to you. No matter how careful you are when you eat the wings, you’ll end up with purple fingers. Also, for the best effect keep the wings intact- no trimming off of the tips. They look pretty cool when set out on the table. Creepy- but very tasty.
Bat Wings
2-3 lbs. whole chicken wings
salt and pepper
1 c. barbecue sauce- store bought or home made
black food coloring- handle carefully- it stains
Place chicken wings in a roasting pan, season with salt and pepper and bake in a preheated 400 degree oven for 30 minutes. Meanwhile in medium bowl combine sauce with food coloring. Add just a little black food coloring at a time. Too much will alter the flavor of the food. Remove wings from the oven and dip them in the bowl of sauce. Turn to coat. Place wings on a clean baking sheet and return to the oven. Bake an addition 45 minutes. You can baste them with additional sauce during the baking, if you like. Place on a serving platter and provide plenty of napkins.
A pile of “bat” wings


