If you are looking for appetizers for the Super Bowl, you might want to make Crab Rangoons. These tasty bundles of crabby/ cheesy goodness are so simple to make. Because they are small- I don’t use a lot of oil to deep fry them. Just a couple of cups of oil in a small saucepan- fry a few at a time and you are done in no time at all. Of course, if you have a big crowd over for the game, you might want to use a bigger pot, with more oil. A wok works well for frying them, too.
Crab Rangoons
1 can (6 oz.) crab meat,drained well
1 (8 oz.) package cream cheese
1 t. horseradish
dash of hot sauce
wonton wrappers
oil for frying
Combine crab meat with cream cheese, horseradish and hot sauce. Place a wonton wrapper on work surface and place a teaspoonful of the crab filling in the middle. Fold 2 corners in to just touch. Take one of the remaining corners and roll up into a tiny roll. Dampen edge with a little water to affix. Repeat with remaining filling. You should get a several dozen. Pour 1-inch of oil into a small saucepan and heat to 350 degrees. Fry rangoons a few at a time until golden and drain on paper toweling. Keep warm in 300-degree oven until ready to serve- but best served right after you make them. Serve with Sweet and Sour Sauce.
This is one of my favorite scone recipes. Pineapple gives them a
wonderful flavor, then they are topped with a crunchy cinnamon and nut
combination. What’s not to love?
I am always surprised when someone tells me they don’t like scones.
Often, the comment is that they are too dry. My reply is that you
haven’t had a good scone.
Good scones are slightly crisp on the outside and tender on the
inside. These scones never disappoint. These are great served warm from
the oven, topped with jam.
Pineapple Scones
3 c. flour
1/3 c. sugar
1 T. baking powder
½ t. salt
¾ c. butter
1 (8 oz.) can crushed pineapple in juice, un-drained
milk
3 T. chopped nuts
1 T. sugar
½ t. cinnamon
In medium bowl mix together dry ingredients and cut in butter to
resemble coarse crumbs. Stir in pineapple and stir until dough starts to
hold together. Place dough on lightly floured surface and knead 10-12
strokes until dough holds together, but is tender and soft. When you
first start to mix this dough- you might think there is something wrong-
that you need to add more liquid. Be patient. There is a lot of
moisture in the pineapple and as you mix the dough it WILL come
together. Roll or press dough ½ inch thick and cut out with 2-2 ½ inch
biscuit cutter. Place on ungreased baking sheet. Re-roll scraps and cut
out remaining dough. Brush scone with milk. Combine remaining
ingredients and sprinkle over scones. Bake in a preheated 400-degree
oven for about 15 minutes. Makes 21.
With cold weather I can’t seem to get enough soup. I have been known to have a bowl of soup for breakfast. Why not?
This soup is one I have been making for a long time. While the recipe calls for either smoked pork hocks or smoked turkey this would be a great place to use that ham bone leftover from the holidays. You know, the one you popped in the freezer to use later.
The combination of smoky flavor, pinto beans, barley and green beans works so well together. This is one of those soups that tastes even better the next day. It freezes well, too.
Bean and Barley Soup
8 oz. dry pinto beans, rinsed
1 T. oil
1 onion, chopped
2 cloves garlic, minced
2 carrots chopped fine
2 ribs celery, chopped fine
1 lb. Spare ribs or 1 lb. turkey drumstick or thigh
1 lb. ham hock or 1 lb. smoked turkey drumstick or wing
1 qt. chicken stock
2 qts. Vegetable stock or water
1 c. barley
½ lb. green beans, cut
salt and pepper to taste
1 T. parsley
Place beans in saucepan with water and boil 5 minutes. Set aside to
soak 1 hour. Drain. Meanwhile cook vegetables and garlic in oil in large
kettle. Add meats and stocks and bring to a boil. Stir in pinto beans.
Cover and simmer on top of the stove for 1 hour. Or, if pan is ovenproof
place in 350-degree oven and cook 1 hour. Stir in barley and beans and
cook 1 hour more. Remove from heat and remove meat. Remove any meat from
bones, shred and return to soup. Stir in parsley and adjust seasonings.
Serves 8-10.
I love the lemon flavor in these cupcakes. They are rich, without being too heavy, and full of zest. Winter is citrus season, and lemons are a natural choice for dessert this time of year.
Lemon zest in both the batter and the frosting, really makes them
special. Cupcakes are also such a nice, easy dessert. If you try these, I
am sure you will be pleased, as will your family and friends.
It makes a big batch, so you can freeze some for later.
Even though I normally frost these, you can also just combine
powdered sugar with a little lemon zest and dust them with it, instead
of the frosting.
Lemon and Sour Cream Cupcakes
1 cup butter, softened
2 cups sugar
3 eggs
2 teaspoons grated lemon peel
1 teaspoon vanilla extract
3½ cups all-purpose flour
1 teaspoon baking soda
½ teaspoon each baking powder and salt
2 cups sour cream
Frosting:
9 tablespoons butter, softened
6 ¾ cups confectioners’ sugar
6 tablespoons lemon juice
1 T. vanilla extract
¾ teaspoon grated lemon peel
3 tablespoon milk
In a mixing bowl, cream butter and sugar. Beat in eggs, one at a
time. Add lemon peel and vanilla; mix well. Combine dry ingredients; add
to creamed mixture alternately with sour cream (batter will be thick).
Fill 30 greased or paper-lined muffin cups with 1/4 cup of batter. Bake
at 350 degrees for 25-30 minutes or until a toothpick inserted near the
center comes out clean. Cool for 10 minutes; remove to wire racks to
cool completely. For frosting, cream butter and sugar in a small mixing
bowl. Add lemon juice, vanilla, lemon peel and milk; beat until smooth.
Frost cupcakes. Makes 30.
This recipe is inspired by a favorite dish at a local Thai restaurant. The recipe is pretty simple. Coconut milk and chicken stock are the base. The soup has a few veggies added and a healthy dash of lime juice and ginger. Then it is just a matter of adding some additional seasoning and the cooked chicken.
If you are starting with raw chicken, you could add it with the initial ingredients and just simmer long enough to cook the chicken. Small slices of chicken would cook in a few minutes. Since I had cooked chicken, I added it at the end. It was in the soup just long enough to warm it up. That way the chicken wouldn’t get tough from over cooking.
The soup is also meant to have a nice, citrus flavor from the lime juice. Adding the juice from three or four limes should be plenty, but all limes are not the same. If your limes are smallish, or not really juicy, feel free to add a little more.
For a soup thrown together so quickly, it really has a wonderful flavor. It is one of my favorite quick meals. So here is the recipe. Enjoy.
Coconut Ginger Soup
1 can, (13.5 oz.), coconut milk
2 c. chicken stock
1 can sliced water chestnuts, drained
1 jar bamboo shoots, drained
2 T. fresh grated ginger
Juice of 3-4 limes
Hot sauce to taste
3 T. fresh chopped cilantro- or parsley
3 T. chopped green onions
salt to taste
8 oz. cooked chicken, sliced in bite-sized pieces
Heat first 7 ingredients in a saucepan until heated through. Simmer about 5 minutes. Add cilantro and green onions and season to taste. My limes were pretty juicy. Feel free to add a little more lime juice, if you like. Add the chicken and simmer a few minutes longer. Serves 2-3.
This recipe is inspired by a favorite dish at a local Thai
restaurant. The recipe is pretty simple. Coconut milk and chicken stock
are the base. The soup has a few veggies added and a healthy dash of
lime juice and ginger. Then it is just a matter of adding some
additional seasoning and the cooked chicken.
If you are starting with raw chicken, you could add it with the initial ingredients and just simmer long enough to cook the chicken. Small slices of chicken would cook in a few minutes. Since I had cooked chicken, I added it at the end. It was in the soup just long enough to warm it up. That way the chicken wouldn’t get tough from over-cooking.
The soup is meant to have a nice, citrus flavor from the lime juice. Adding the juice from three or four limes should be plenty, but all limes are not the same. If your limes are smallish, or not really juicy, feel free to add a little more.
For a soup thrown together so quickly, it really has a wonderful
flavor. It is one of my favorite quick meals. So here is the recipe.
Enjoy.
Coconut Ginger Soup
1 can, (13.5 oz.), coconut milk
2 c. chicken stock
1 can sliced water chestnuts, drained
1 jar bamboo shoots, drained
2 T. fresh grated ginger
Juice of 3-4 limes
Hot sauce to taste
3 T. fresh chopped cilantro- or parsley
3 T. chopped green onions
salt to taste
8 oz. cooked chicken, sliced in bite-sized pieces
Heat first 7 ingredients in a saucepan until heated through. Simmer
about 5 minutes. Add cilantro and green onions and season to taste. My
limes were pretty juicy. Feel free to add a little more lime juice, if
you like. Add the chicken and simmer a few minutes longer. Serves 2-3.
This might not be what comes to mind when you think fried rice. I love fried rice from the local Chinese restaurant, but I like this recipe so much better.
For starters, it is made with brown rice, which I really prefer. It also has a lot more veggies in it than more traditional fried rice. The additional veggies add a lot of flavor and texture and also makes it a pretty dish. It also doesn’t use all that much oil for frying.
I make it often, swapping out veggies based on what I have, and what is in season. This is the version we made in class last night. Everyone really loved it.
Be sure to use cold rice. I always cook the rice the day before, or earlier in the day. It fries up better that way.
Fried Brown Rice with Vegetables
3 T. oil
1 c. thinly sliced carrots
1 onion, sliced thin
1 clove minced garlic
1 large sweet pepper, seeded and sliced thin
1 c. thin sliced zucchini
1 c. sliced mushrooms
1 T. water, optional
2 c. green beans, sliced or pea pods, washed and trimmed
1 c. cold cooked brown rice
4 T. soy sauce
chopped green onion, optional
Place wok over high heat. Add oil when wok is hot. Add carrots and
stir-fry 1 minute. Add onion, garlic and pepper and stir-fry 1 minute
more. Add zucchini, mushrooms and beans or peas, stir-frying until
vegetables are tender crisp, about 2-3 minutes more, adding water if
needed. If needed, add extra oil as well. Add rice and stir-fry until
just heated through. Add soy sauce and top with onions if you like.
Serves 6.
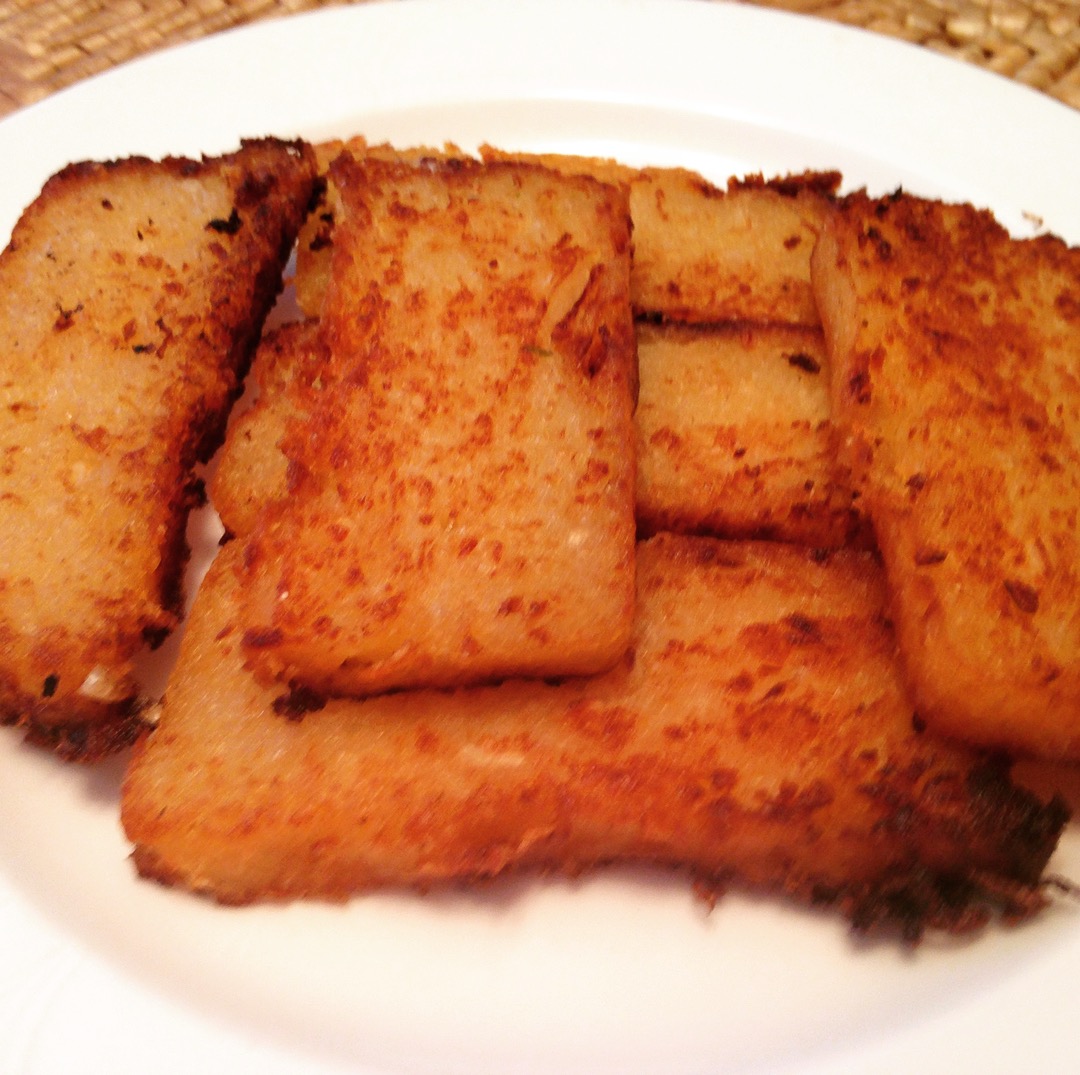
If you are planning a party for Chinese New Year, you might want to make turnip cakes.
I first had turnip cakes at a local Asian restaurant. I loved them,
and was intrigued at how to make them. They were little squares, lightly
crisped on the outside, smooth and creamy in the middle.
When I first heard turnip cake- I was thinking of the purple and
white turnips I knew. That is not what these turnip cakes are made from.
It helped a lot when I realized the “turnip” cake was actually made
from Daikon radish. Daikon radishes are also called Chinese turnips.
They are really big, white radishes. They are available at Asian grocery
stores and other grocery stores. Now that I knew the ingredient I
needed, I had to find a recipe.
I searched the internet and found a lot of different variations for how to make them.
The first recipe I tried was more like a potato pancake. Shredded
radish paired with eggs and bread crumbs. They were good, but not what I
had at the restaurant. The turnip cake I had enjoyed was smooth and
sort of starchy. Plus, it was a neat square shape.
I found several recipes that included the steaming step. This enabled
the cakes to be set up with a starch, cooled and sliced before the
final frying step. This was what I wanted!!
The most promising recipe included rice flour- but I was out of rice
flour, so I improvised with cornstarch and a little wheat flour. It
worked really well.
Many recipes included shrimp or Chinese sausage and sometimes green onions. I decided, this time, to make them vegetarian. That worked well, but you certainly could add meat or shrimp to yours.
I shredded the daikon pretty fine, but you could still discern the
radish in the final dish. I liked that a lot. I did not grate them as
some recipes suggested.
So here is my version of turnip cakes. They sound like a bit of work,
but it really is worth the time. I also like that all the prep can be
done a day or two ahead of time, then just slice and fry when you want
them.
Turnip Cakes
1 large Daikon radish- about 1¼ lbs., give or take
1 c. water
½ c. minced onion
1 t. salt
½ t. white pepper
½ c. cornstarch
2 T. flour
Oil for frying
Oyster sauce for dipping, optional
Peel and shred radish. I used a fine shredding blade. Squeeze out
some of the liquid from the radish. Place shredded radish in bowl with
the water and onion and steam in microwave for 4-5 minutes- you can also
place radish and onion in saucepan with water and simmer 4-5 minutes.
Set aside to cool. Combine the radish mixture with the cornstarch,
flour salt and pepper. Oil an 8×4-inch loaf pan. Place the radish
mixture in the prepared pan and steam for 50 minutes.* I placed plastic
wrap over the pan to prevent water from dripping into the pan. Remove
pan from steamer and cool down for at least 30 minutes. . At this point
you can finish preparing the turnip cakes- or place in fridge until
ready to make them. When ready to fry the turnip cakes, remove from the
pan and cut into slices- about ¾ -inch thick. Heat oil in a skillet over
medium high heat. Cook cakes in oil on both sides until golden brown
and crisp. Drain on paper towels. Serve with oyster sauce- or whatever
dipping sauce you prefer. Makes about 10.
* To steam the mixture- I just used a large stock pot with a cooling
rack in it. I brought about 2 inches of water to a boil, placed the pan
on the rack and covered the pan. You could also steam in the oven with a
roasting pan, with an inch of boiling water in it and covered with
foil.
These are one of my favorite cookies. They are incredibly tender and crumbly. They make a great dessert for Chinese New Year.
The original recipe called for shortening. I used coconut oil instead, and was very happy with the results. You can use half butter, half coconut oil, if you prefer.
Here is the recipe.
Almond Cookies
2 c. flour
1 c. coconut oil- you can use half coconut oil, half
butter
1 t. salt
¾ c. sugar, plus
extra for topping the cookies
1 t. almond or vanilla extract
½ c. almonds
Place flour in medium bowl. Cut in coconut oil until mixture
looks like coarse crumbs. Add the remaining ingredients, except the almonds and
work with your hands until mixture holds together. Heat oven to 375. Form dough
into small balls- about an inch. Press tops of cookies in sugar and place on
ungreased baking sheet. Press an almond into the center of each cookie. Bake
until cookies are a little golden around the edges, 8-10 minutes. Cool a few
minutes before removing from the cookie sheet to finish cooling on a rack.
Makes about 3 dozen cookies.
I was lucky enough to get a couple of bunches of Swiss chard recently. Thanks, Dale. Swiss chard tastes like beet greens. I love chard. I steamed some of the greens and served them with salt and a drizzle of vinegar.
I still had more chard and decided to make little dumplings, or gnudi, with it. When done right, gnudi are tender and delicate. Kind of like gnocchi, but made without the potatoes.
I served mine tossed in butter and topped with fresh grated Parmesan cheese. If you are trying to get your family to eat more greens- try making these. You could also use spinach or other greens in place of the chard, if you prefer. When using greens like kale or collards, cook the greens a few minutes longer to be sure they will be tender.
Swiss Chard Gnudi
1 lb. Swiss chard, stem ends trimmed
1 c. whole milk ricotta
½ c. grated Parmesan cheese plus extra for sprinkling
¼ c. dried minced onion
1 egg
½ t. coarse salt
¼ t. fresh ground pepper
1/8 t. ground nutmeg
¾ c. flour, plus extra for rolling
Butter
Grated Parmesan cheese
Cut chard leaves from each side of center stem. Cook chard leaves in
large pot of boiling salted water until tender, about 3 minutes. Drain;
cool. Squeeze chard leaves until very dry; place in processor. Using
on/off turns, finely chop chard. Add ricotta, ½ cup Parmesan, onion,
egg, coarse salt, pepper, and nutmeg; process to blend. Transfer mixture
to medium bowl. Add ¾ cup flour; stir to blend. Cover and refrigerate
dough overnight.
Line rimmed baking sheet with parchment paper. Spoon some flour onto
large plate. Working in batches, drop heaping teaspoonfuls dumpling
dough (size of small walnuts) onto plate with flour to form about 36.
Using floured hands, gently shape each into 1 1/2-inch-long,
1/2-inch-thick oval. Tap off excess flour; transfer to prepared baking
sheet. They can be made 2 hours ahead. Cover and chill. Bring large wide
pot of salted water to boil. Slide dumplings into pot; cook until they
float to the top, about 4-5 minutes. They are very tender so remove from
water gently. Toss in butter and sprinkle with cheese. Serves 4.